
Pattern Reviews, Sewing Hacks, Tips & Free Patterns
The Sewing Blog

DIY Floor Cushion: Stuff Fabric Scraps Inside
Sew your own floor pillow, they are great for game rooms, kids rooms, or even the pets. Sew one and use fabric scraps as the stuffing. These are fun and easy. Floor poufs are the coolest scrap busting projects!

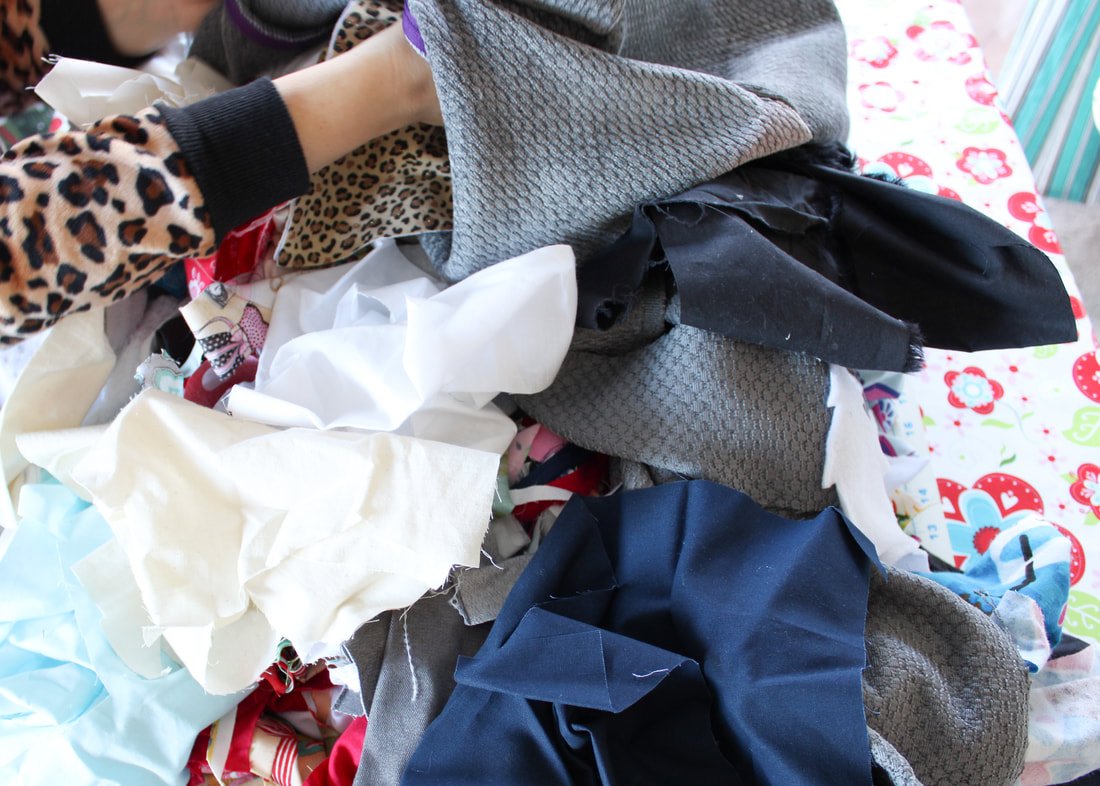
Are you a fabric scrap saver? Do you have dreams of using them up for something? Yes, of course you are. Maybe you don't save them all but, you do save pieces big enough to use for something special. My rule is if its big enough to use for a pocket, it gets saved.
I've discovered the best fabric-busting project of all time. It uses all your fabric scraps up. Okay, it doesn't technically "use" them but, it does put them to use. You're going to sew a simple floor cushion and store all your scraps inside!
You'll want to plow through that list of sewing projects so you can cut into fabric and have more scraps to fill the floor cushion. Whew! Trust me, I'm speaking from experience. ;)
Cozy Meets Functional

The floor cushion itself is not a good scrap buster. You might need to buy fabric to make it. But, it'll free up space in your sewing area, I promise.
I was lucky enough to have leftover grey chenille from my pop-up trailer makeover, so I used that. You'll want to use an upholstery-weight fabric or something similar. This cushion is going to take a beating.
If you have upholstery thread, you can use it here. If you don't, good ole polyester thread works fine. This whole project takes 2hrs give or take. It's a quick sew and gives a huge reward!

My son uses it as a foot rest while he plays videogames.
If you're still on the fence about making one, think ottoman, pet bed, kid's seat, etc.
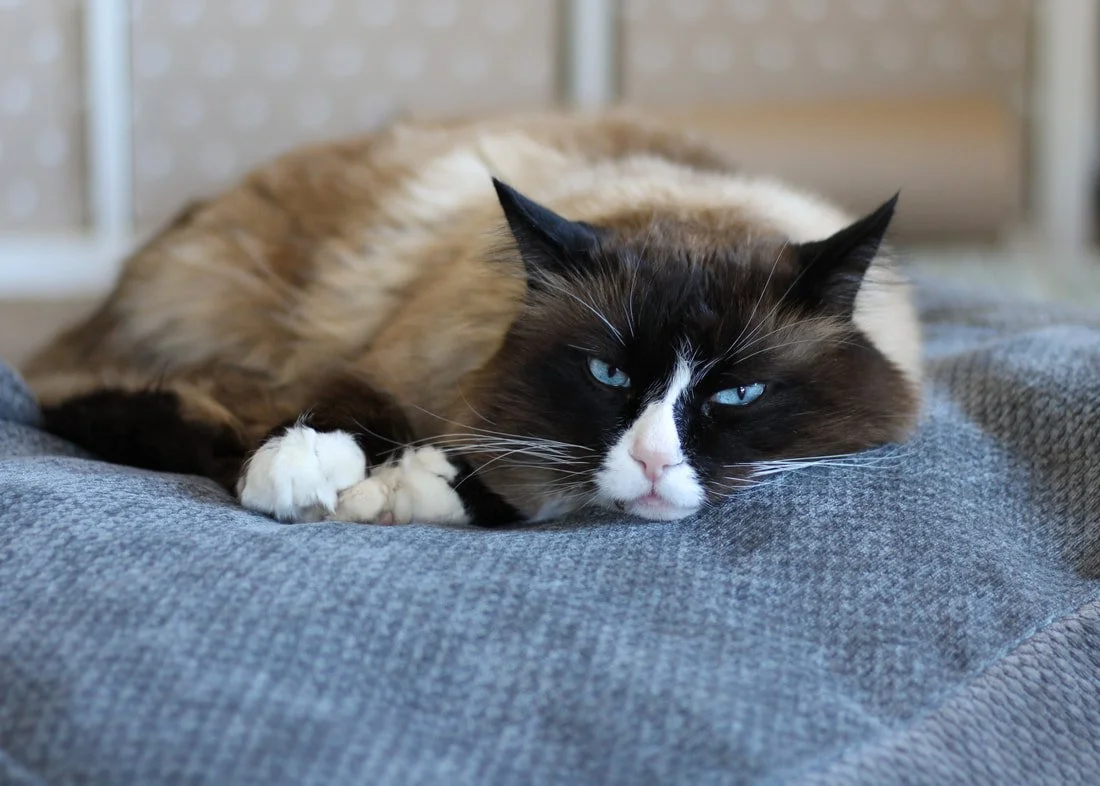
My cat claims it as his bed when my son isn't using it for his feet. It gets carried from room to room and makes a great coffee table game chair as well. I'm surprised it hasn't been involved in a pillow fight yet.

All these scraps are going inside the poof.
Supply List:
2.5 yards upholstery fabric or similar weight fabric (you'll have a little bit left over)
Thread
Clips or pins
14" Zipper
That huge pile of fabric scraps
Sewing machine

Wash your fabric if you want. I didn't. When I need to wash it in the future, it'll shrink a little and be fine.
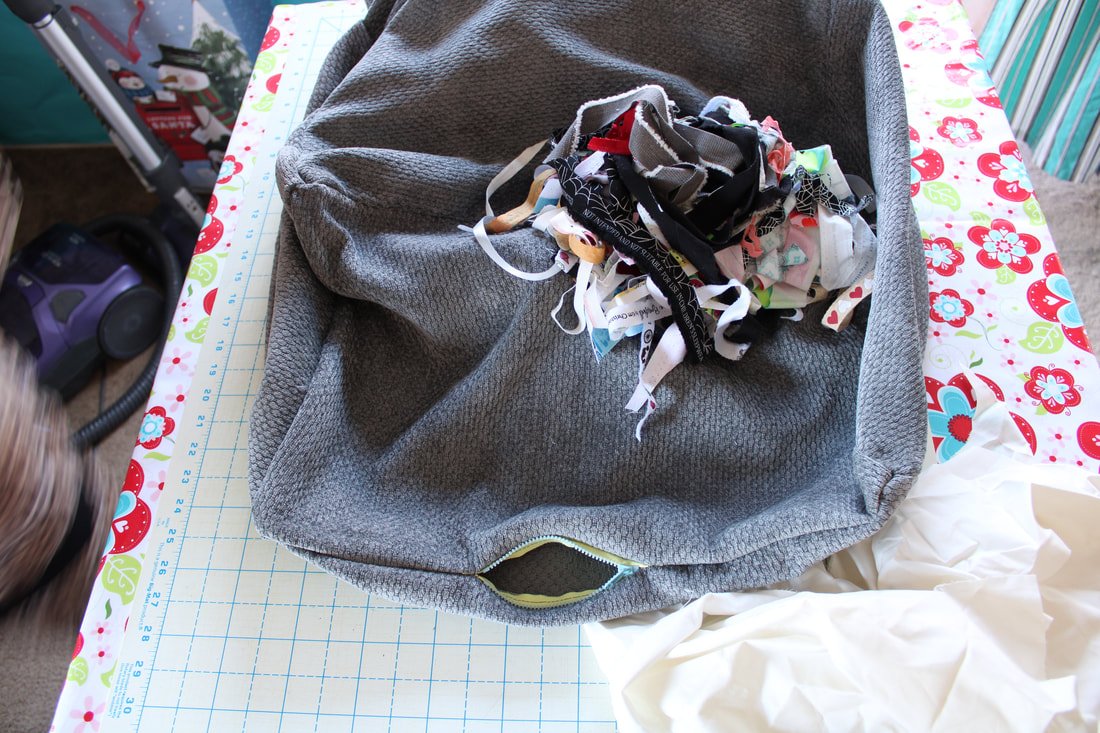
You're going to sew a large cube and fill it with your fabric scraps. Hooray!
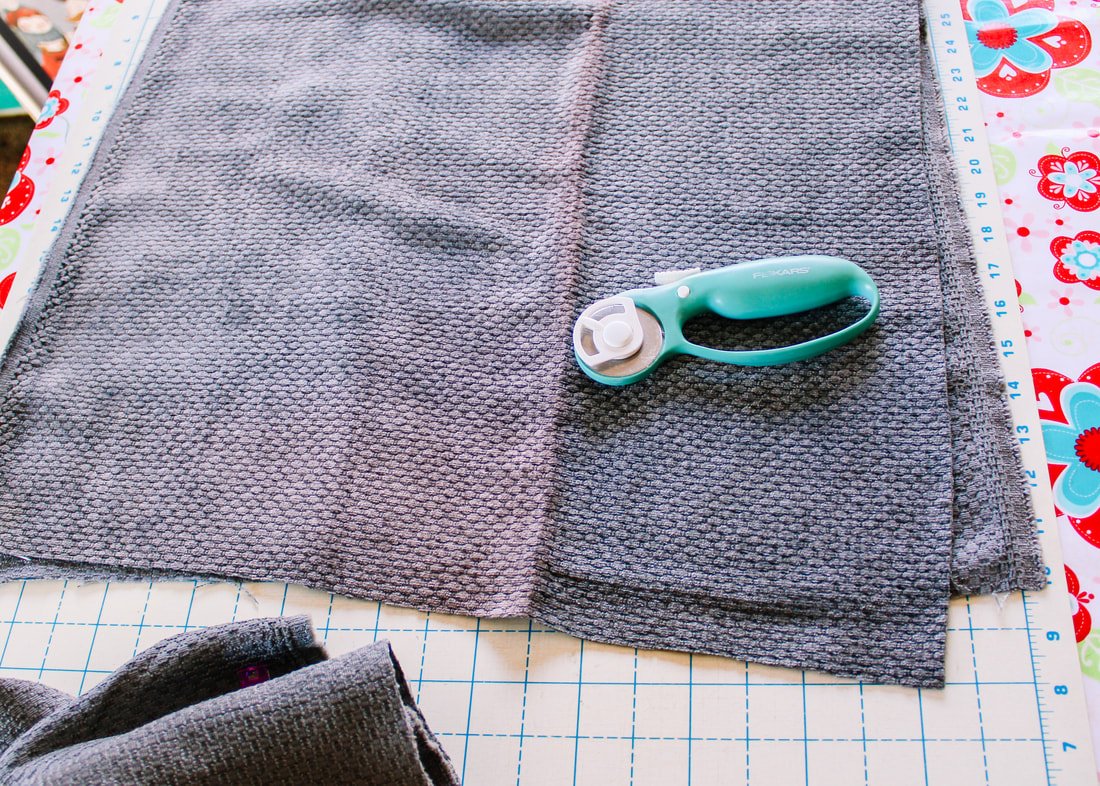
1. Cut 2, 21" squares. Cut 4 rectangles measuring 15.5" by 21". Serge or zigzag over the raw edges. Upholstery fabric loves to fray.

2. Clip or pin the rectangles together along the short sides, right sides together. You're making a loop. Sew up the short sides using 1/2" seam allowances, backstitching at the beginning and ends.
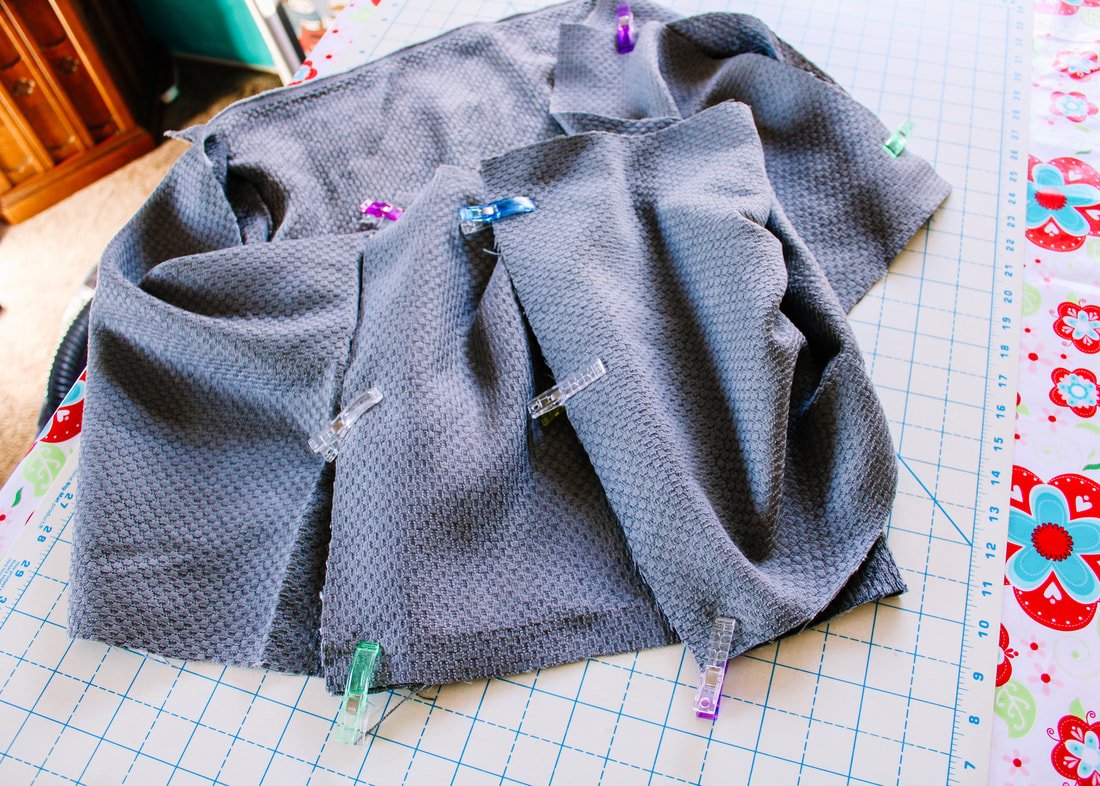
3. Lay one square right side up on your table. Clip one side of the loop you just made from the rectangles, onto the square, RST. It's easiest to clip the corners of the square to the side seams first. Then, ease the side seams in. Your upholstery fabric might have some stretch in it but, you tell it who's boss!
If you don't want to insert a zipper, sew along the edge using 1/2" seam allowance.

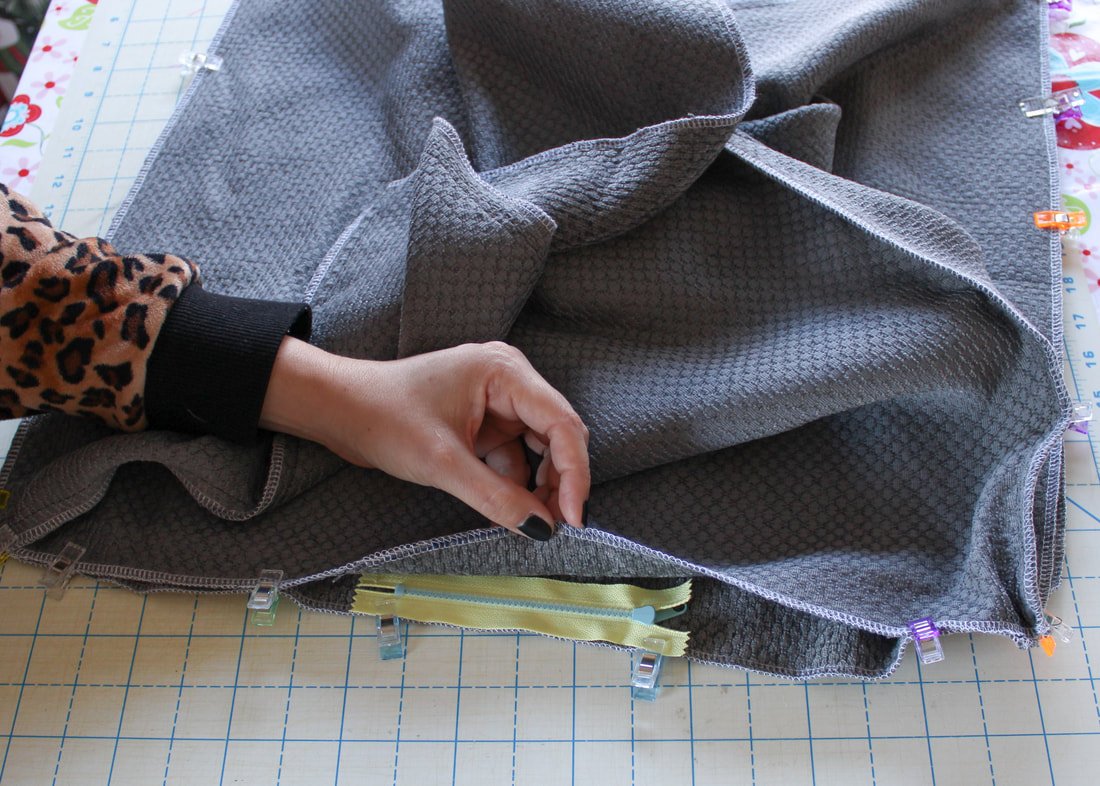
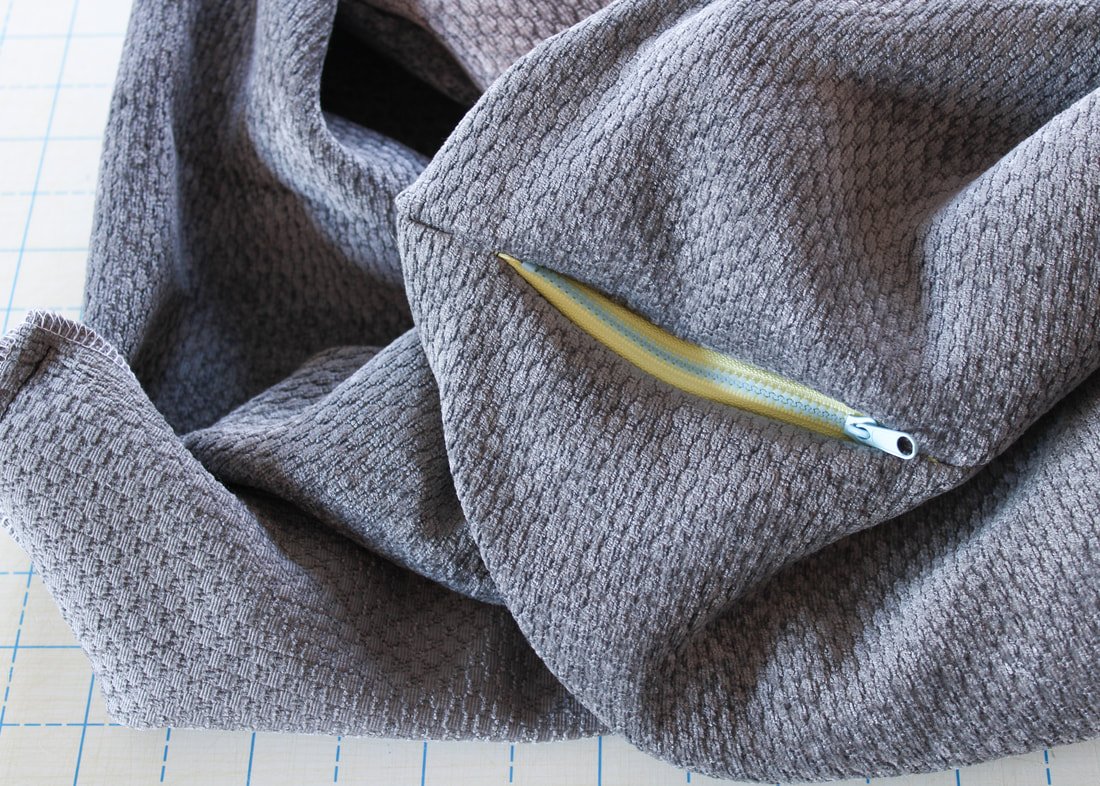
4. Here's where you'll insert your zipper if you want one. This is a little different than inserting a zipper into a bag so, bear with me.
Clip/pin one side of the zipper to a rectangle edge. Sew the zipper with a zipper foot.
Open the zipper and clip the zipper tape to the square bottom edge. Sew using the zipper foot. You might have to sew one side of the zipper tape facing down which feels awkward but is totally fine.
Switch back to your regular sewing foot to sew around the whole square. Start at one end of the zipper and end at the other end of the zipper. Open and close the zipper to make sure it's lined up, if it isn't smooth, unpick one side and resew it.
*It's easier to sew with the flat piece down and move the rectangles out of the way as you sew.

To get the seam and zipper area to match up nicely, sew an extra 1/8" inside the zipper seam allowance when you get to the zipper.
It's a little trick that's used when inserting invisible zippers.
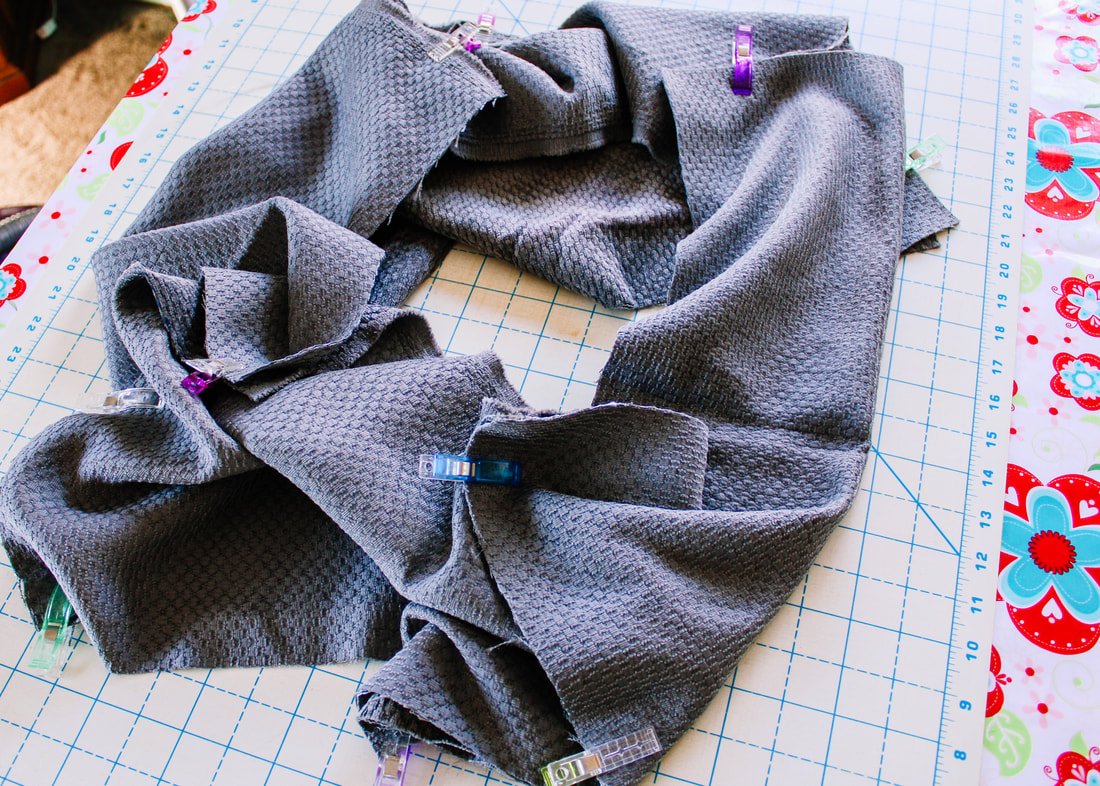
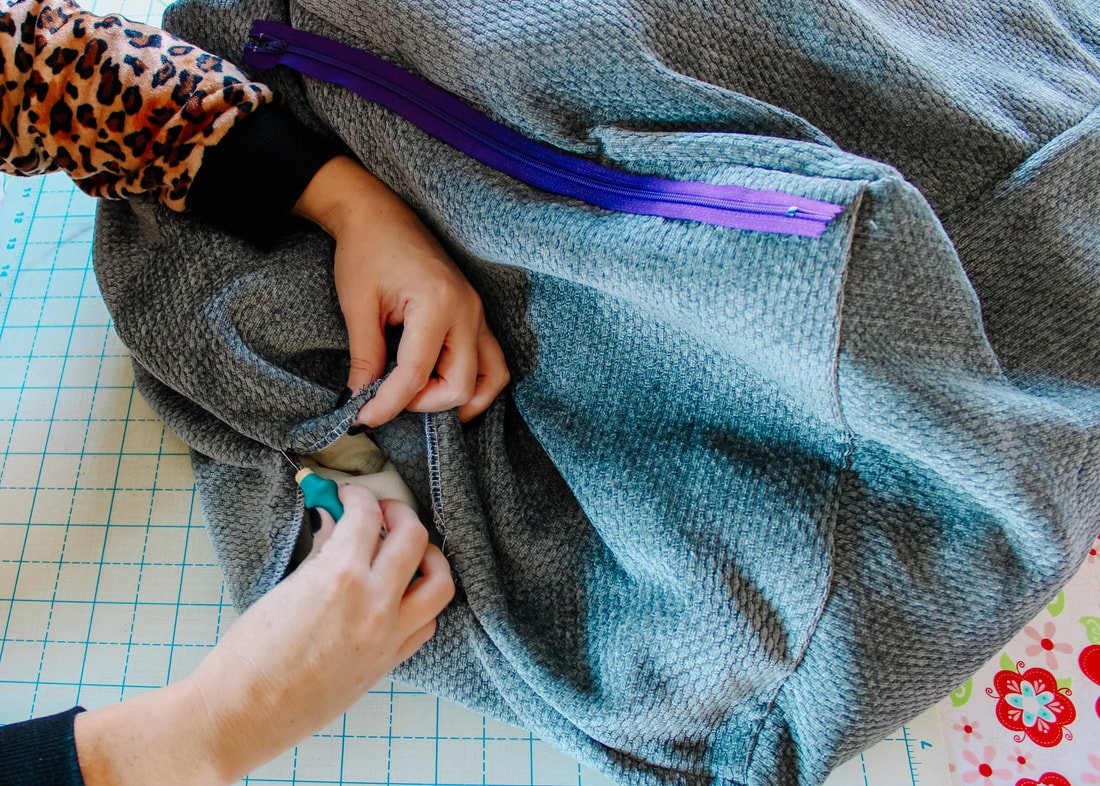
5. Now that the hardest part is over, it's time to sew the top square on. Clip the top the same way you did with the bottom square. Start with the corners first, then clip the sides. Sew all around using a 1/2" seam allowance.
This might look tricky but, take your time. Go slow and make sure you're only sewing over the 2 layers.

Sew around the top.
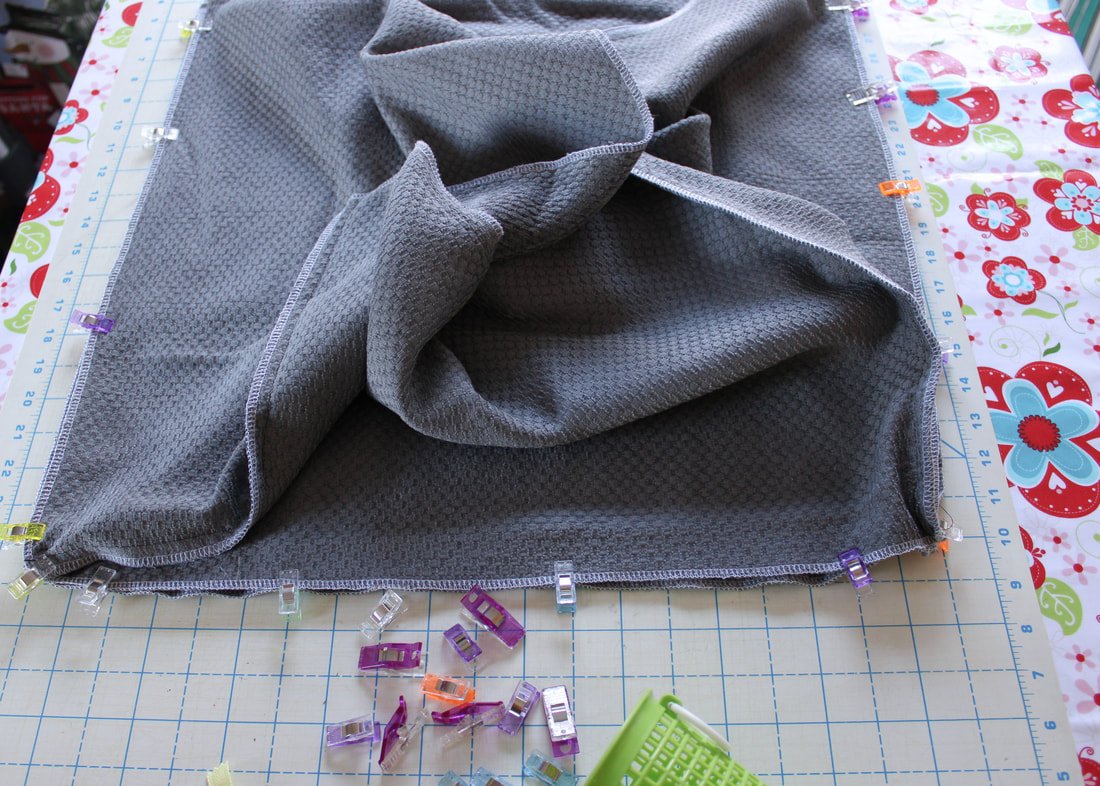
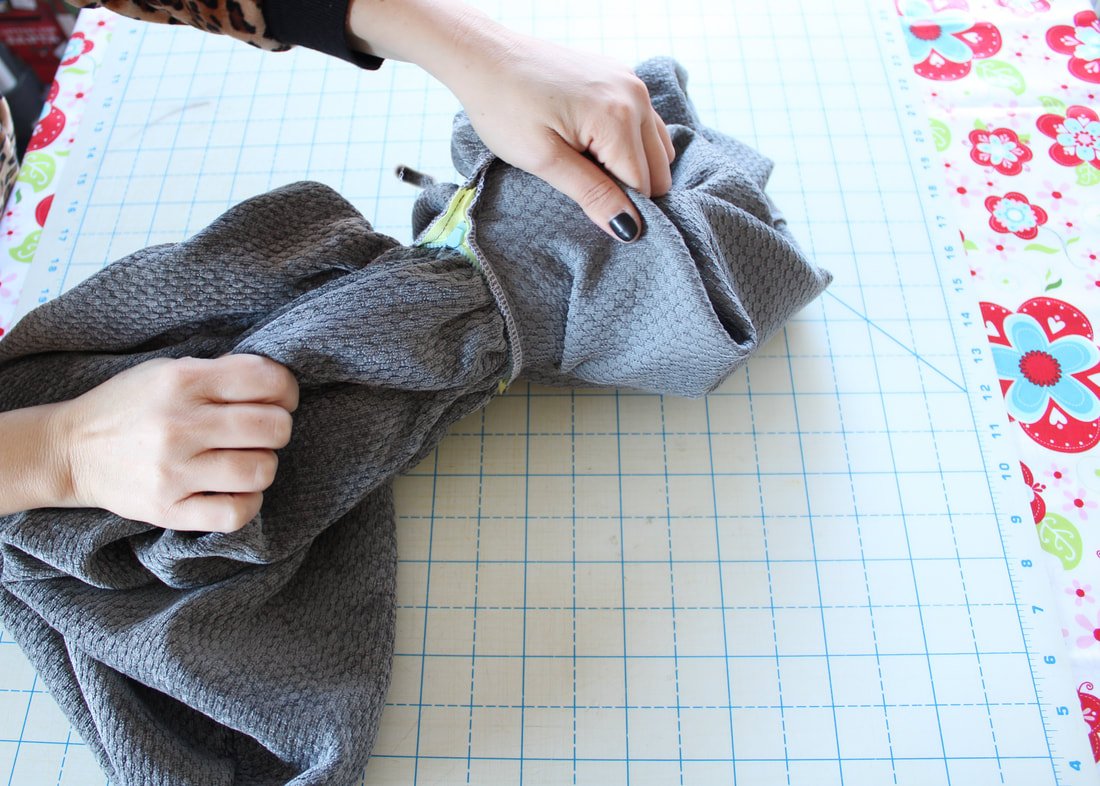
6. Turn the cushion right side out and pop out the corners. You don't have to worry about trimming the corners unless you want to. I left them alone. Press the seams open as well as you can.

Pull it through the opened zipper. At first, I used this tiny 4” zipper. Ha! It was too small. I had to rip it out and use the purple one.
Ta-da! You've made a floor cushion, bean bag, floor pouf, or whatever you want to call it. You made one!
7. Stuff it with all those fabric scraps inside. It's very therapeutic. If it feels empty still, toss some extra yardage inside if you'd like. I had yards of fleece, minky, and faux fur from my baby gift making days and that really helped to fluff it up.
You can even fill it with those random pieces of interfacing you're probably saving. ;)
All that's left to do is use it. Who gets to use it first? The kids, your kitty, or you?
Read Below for Extra Tips:
Use a long enough zipper to get your hand in and out. Originally, I used a tiny 6" zipper thinking I'd never need the scraps again. Haha!! It was quickly ripped out and replaced with a longer 14" one. It's fun and easy to add more scraps. And, if you need a pocket or other scrap-sized piece of fabric in the future, you can look through them easily. Dump everything out onto a table and sift through them all.
If you have random pieces of heavy-weight fabrics, use them to make the cushion. Use a different piece for each side, top, and bottom. It'll give it an eclectic and lively look. Faux fur would be fun too!
I used the sun faded piece for the bottom.
You can make a set if you have buckets and buckets of scraps lying around. Oh, a set would be great for a kid’s room or game room as well.
Now I'm off to tackle that sewing to-do list. I need more scraps!!

It’s waiting for more scraps.
So, are you ready to put all those scraps to use? Well, store them in a fun way at least. If you do, tag me on Instagram @sewingtothemoon so I can see them all.
Happy stuffing!
Annette

How to Organize Sewing Patterns
How to organize your sewing space. Store all of your sewing patterns in an easy way so you can find everything quickly.

Do you get the organizing bug after the holidays? I know I do. Remember Kon Mari? Yep, my closet and dresser clothes are still organized and folded with her method. It's been a couple of years and I need to revisit my dresser. But we'll save that for another day. Today I want to share with you how I organize my patterns.

I have quite a few patterns for sewing although, not nearly as many as other sewists, I know. I have friends who have bins upon bins of sewing patterns.
In my stash, I have PDF ones, traced-off ones, patterns that have been adjusted and re-adjusted again, and of course regular pattern envelopes. I keep all of my patterns intermingled. However, they get separated by category. I'm not completely crazy. Ha!
Start with your PDF Patterns
Here's what you'll need:
Box of envelopes
Marker and washi tape
Clips (optional)
Boxes or bins to fit the patterns inside

The Process
Go to your local office supply store and grab a box of 6x9 envelopes. They had white and manilla colors to choose from when I went. The box was about $15. It may cost more or less depending on how many are in the box. White seemed to be more expensive but, I liked the clean look of white so that's what I bought. You could order online too, I'm sure.
Grab all the PDF patterns you have. If they aren't printed and are still living in the eternal bliss of your computer, don't print them off. Save that for another day.
Fold each pattern into a 5 x 8 size. Include every piece to that pattern in the folding process. I used a wonder clip to keep all of the pieces together and folded up. And, then I stuck them in a big pile, as you can see above. I chose to fold first, then stuff. But, you can tackle it however you'd like.
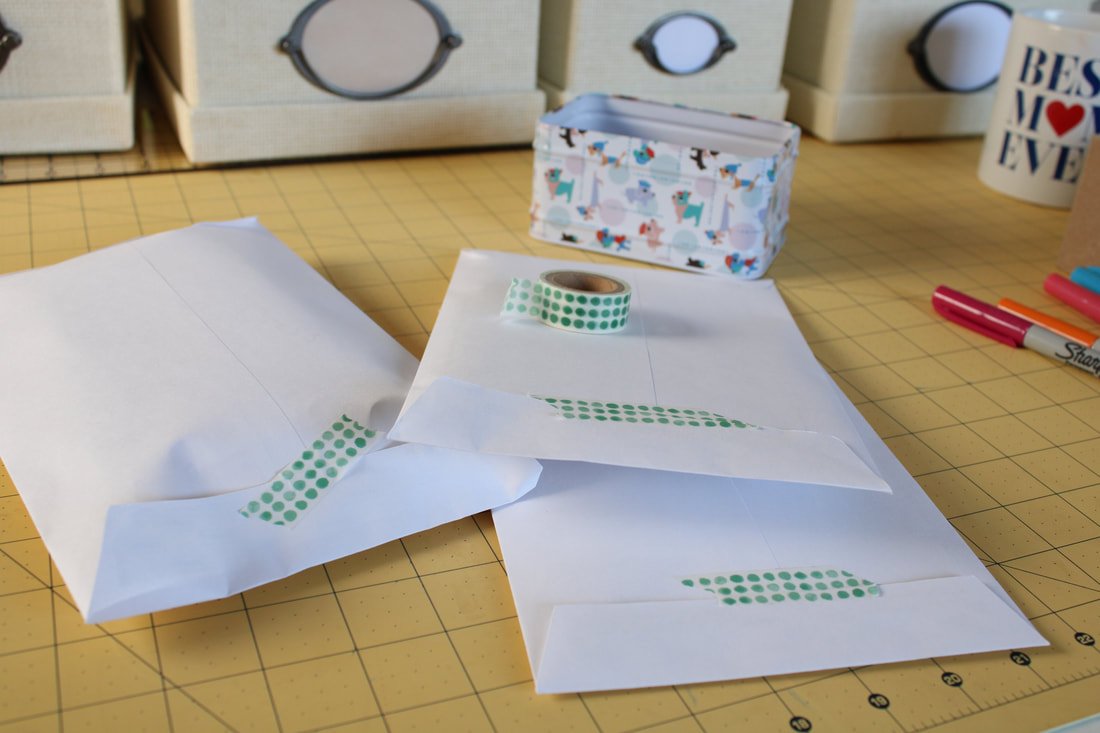
Grab a pattern from the pile. Write that pattern number, brand, size, etc. on the front of the envelope.
Then, stuff the folded pattern pieces inside the envelope. I used a piece of washi tape to close the envelope. There were a few patterns that needed a few pieces of tape. ;)
Repeat until all the PDF's are in envelopes.
I had a bunch of cute boxes with lids that I purchased years ago from IKEA. They kept crafty items organized inside them. 2 years ago, I took out the built-in shelves and redid our bonus room. The boxes were no longer needed. But, I didn't want to throw them away because I knew I'd use them eventually.
Fast forward to eventually.
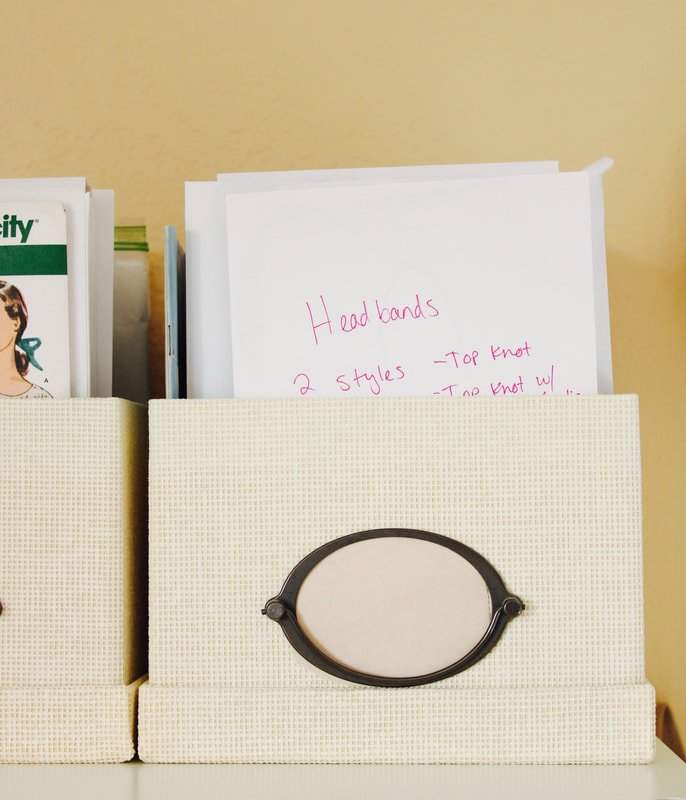
They were the perfect size for my patterns!! I tucked the lids under the boxes and my envelopes fit inside. If you have a few shoeboxes lying around that are empty, cover them with pretty paper, spray paint, or wrapping paper. Your envelopes will fit perfectly inside

Pattern Envelopes
Now that your PDF's are neatly organized, stick your other pattern envelopes inside the boxes too. I chose to organize mine by category.

My patterns used to live in a huge bin (the blue box) and I couldn't easily find what I was looking for.
Just an FYI, the organization day got uglier before it got pretty. Sorta like most organizing, right? LOL
I ended up using 4 boxes. I stuck all the tops in one box. Dresses and rompers are in another box. Bottoms, skirts, and pants in one box. And, everything else went inside the last box. I put the boxes on top of my Kallax shelf and can now see them all the time. If you'd like to organize all your sewing fabric next, read this post.
It's been so easy to find exactly what I'm looking for. I will add more pattern envelopes as I print off or create new patterns.
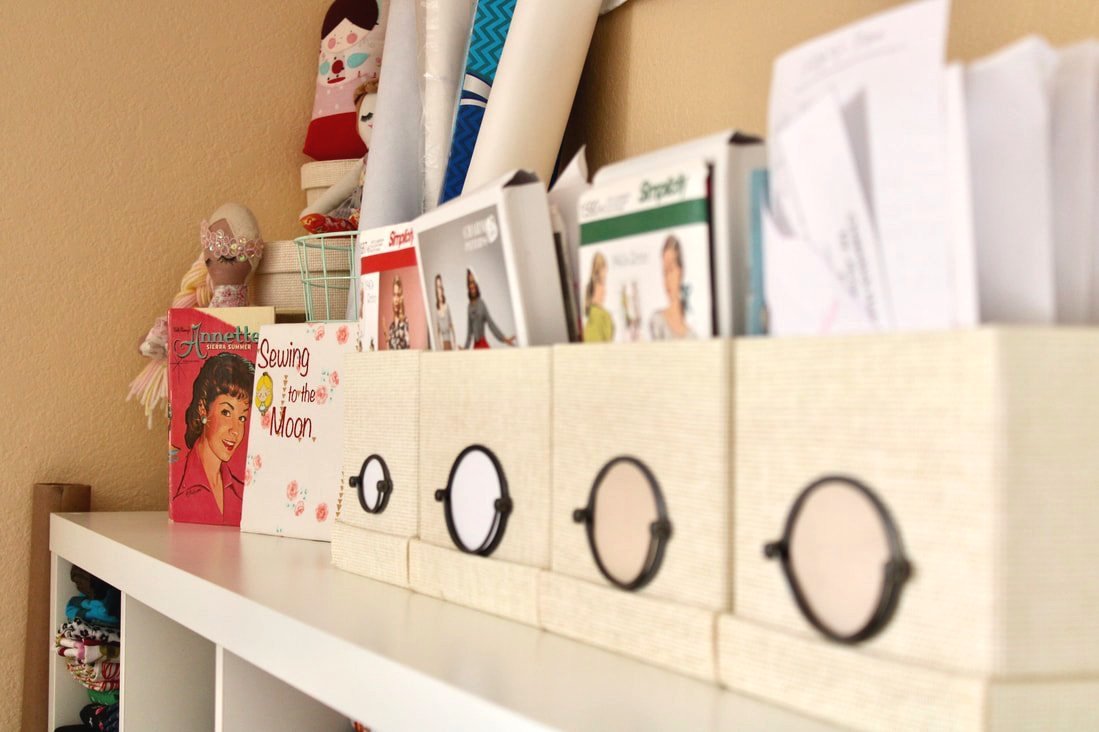

Sewing space
I recently moved my Kallax shelf because my fabric started fading in spots! YIKES!!!! So, this is a photo of where it is now and the pattern boxes on top.
So, are you off to organize your patterns? Please tag me if you do any sewing organization. I love seeing sewing rooms/corners and all the pretty things inside them. Share this post with anyone you know who needs a little motivation too. Thanks in advance!!
Happy organizing,
Annette