
Pattern Reviews, Sewing Hacks, Tips & Free Patterns
The Sewing Blog

How to Sew an Ironing Board Cover
Want to spruce up your sewing space? Make your own ironing board cover. Pick out cute fabric that matches your aesthetic. This is an easy, beginner-friendly sewing project that will take less than one hour. Make laundry and ironing fun again, with a personalized ironing board.

Recover Your Ironing Board in About an Hour
Spruce up your dingy ironing board, it's simple and quick. There's one thing almost every sewist says, "I only iron when I sew." That rings true for me 95% of the time. I'm not a big fan of wrinkles so, I do iron the occasional laundry basket of clothes. However, my ironing board lives in my sewing space. Unless we have people over, it hangs out in sewing land.
There's nothing fun about pressing open seams on a musty crusty ironing board, am I right? I've bought countless pads for my board over the years. They've worked fine enough until they flatten and get ugly. It was time to make my own cover.
After going down the rabbit hole that is Google, I discovered people using felt blankets on their boards or Insul-Bright. You're going to use both for your new cover! No more wimpy covers that leave board indents on your project or, dare I say, laundry.
Your new board will be thick and lofty, oh and it'll look cute too. Yay for pretty things. :D
Are you ready to re-cover your ironing board? Let's do this.

Supply List:
2 yards of pretty cotton fabric, you may end up with some leftover
2 1/2 yards of elastic, 1/2" wide at least
1 wool blanket (buy it new, thrifted, from a military surplus store, or an old one in the closet)
2 yards Insul-Bright
Thread
Sewing Machine
Pins or clips
Iron and ironing board, of course
Ironing boards come in all shapes and sizes. 2 yards for the fabrics should be more than enough. Measure your board length to be sure, don't forget you'll need extra for the seam allowances.
This whole project takes about an hour. You'll be pressing those seams open on a pretty new cover in no time.

Let’s Get Started
Start by removing your old cover and after you've washed it, stuff it inside this floor pillow. ;)
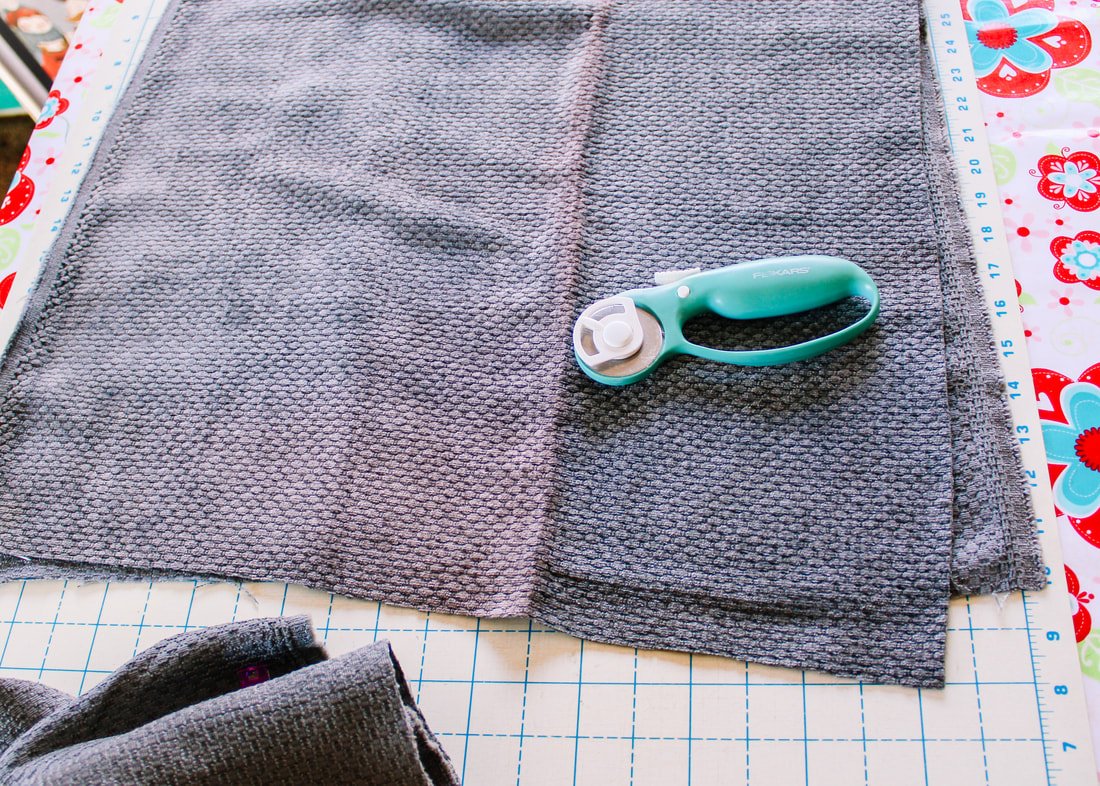
Use the thin foam piece as a cutting guide for the wool and Insul-Bright layers. If you don't have one, just eyeball it. This is an easy project, and it's all about winging it here.
Cut 2 layers from your wool blanket
Cut 1 layer of Insul-Bright batting
I cut the wool and Insul-Bright pieces one inch larger around. Set aside.
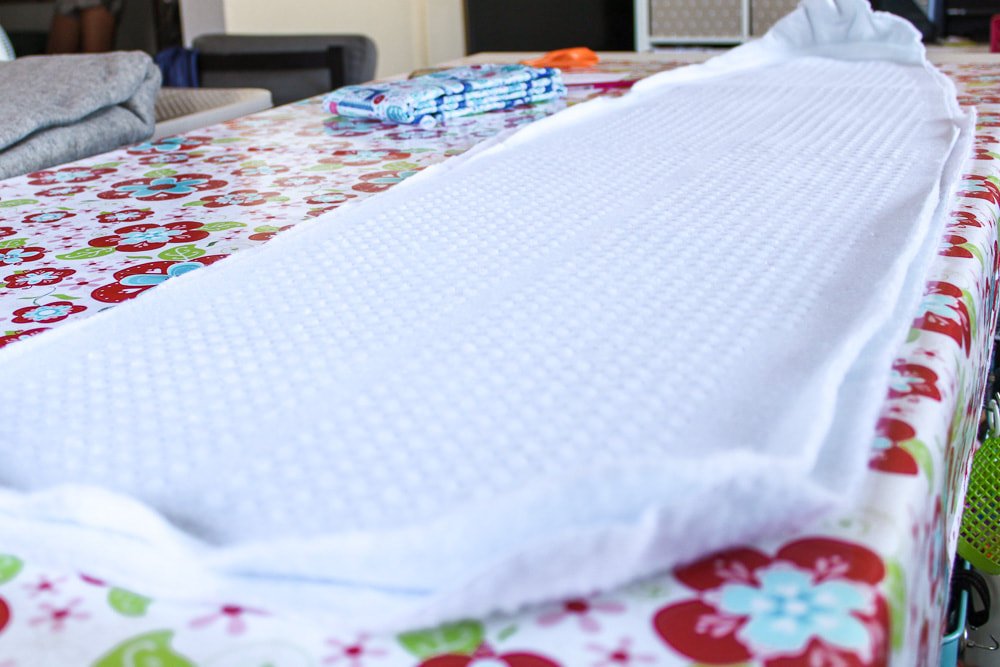
Place the 2 wool layers onto the board, then the Insul-Bright layer on top. Iron over the layers to smooth them out. Look at those wrinkles. Yikes!

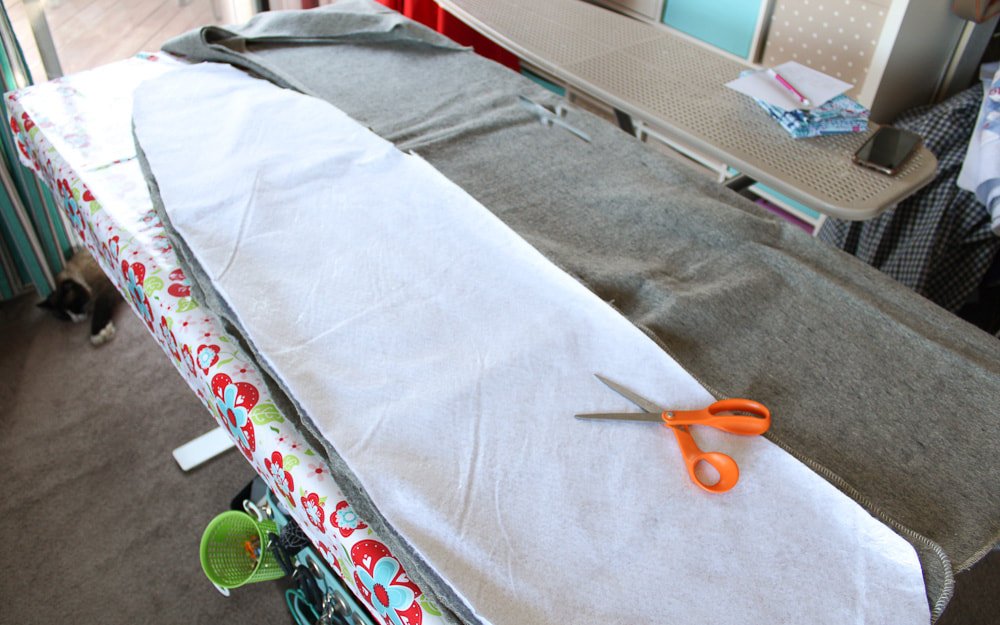
Drape your cotton fabric over the board. You'll want it to hang 4" all around. Give everything a good press, sliding your iron back and forth over all the layers.

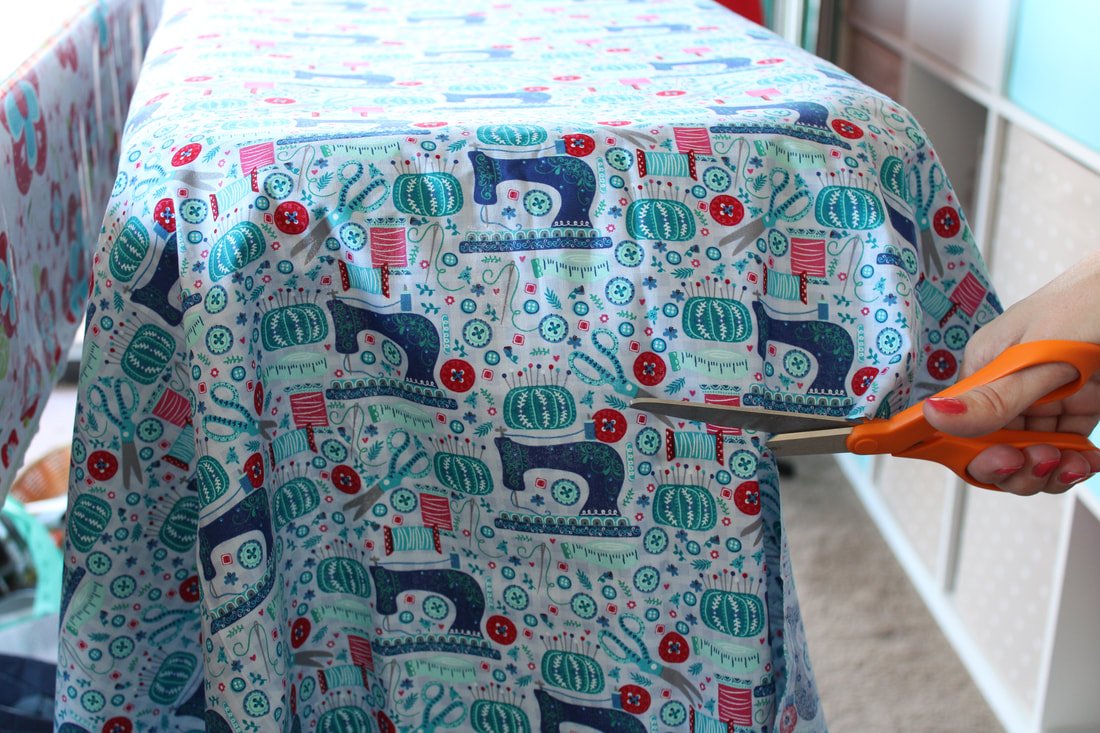
Cut your fabric, it doesn't have to be perfect but, make sure your edges are smooth and not jagged. I'm speaking from experience. ;)
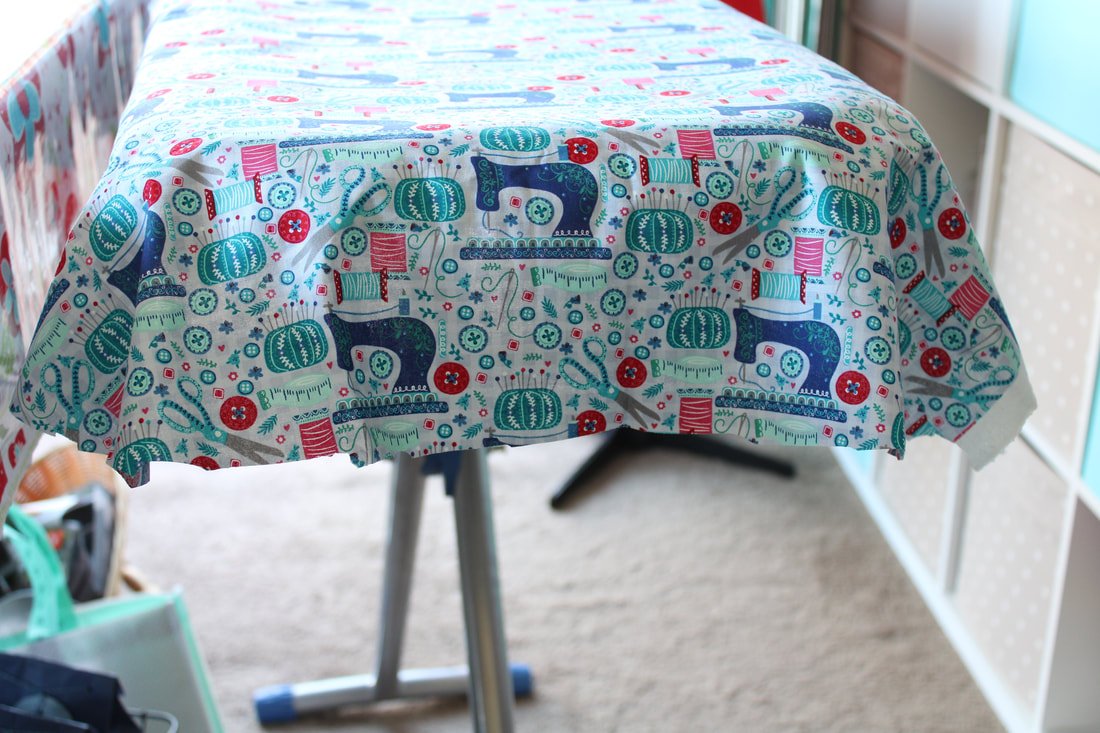
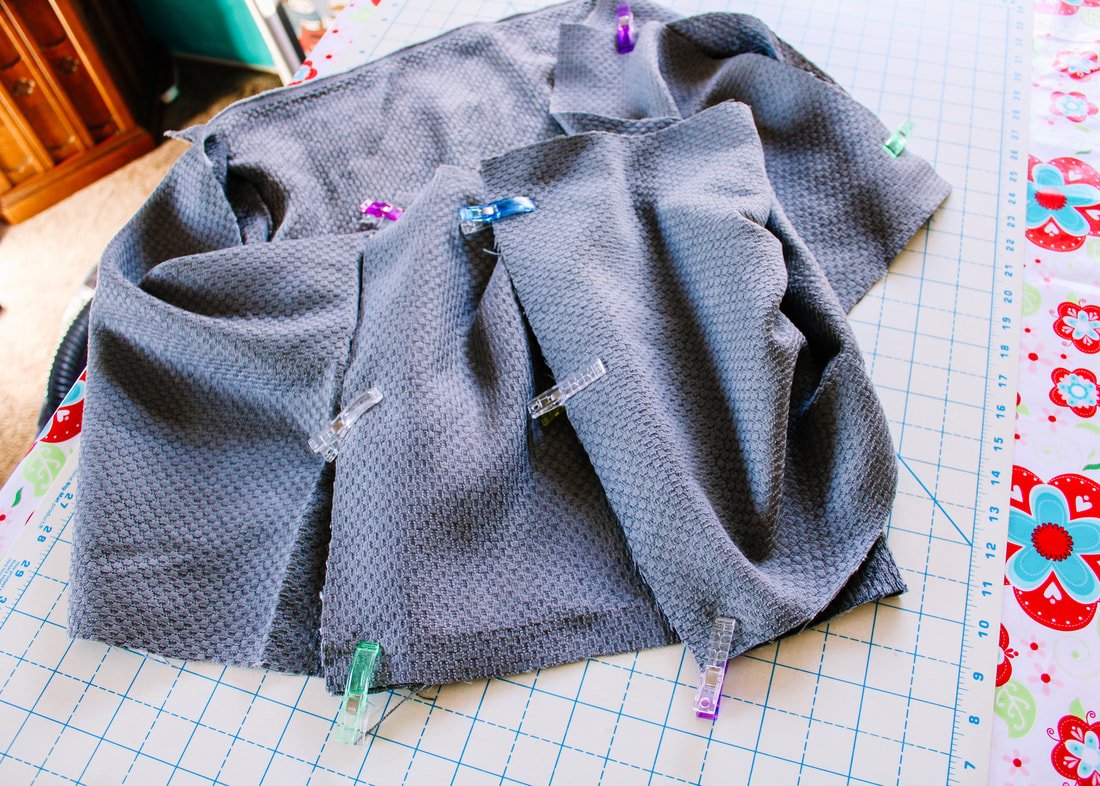
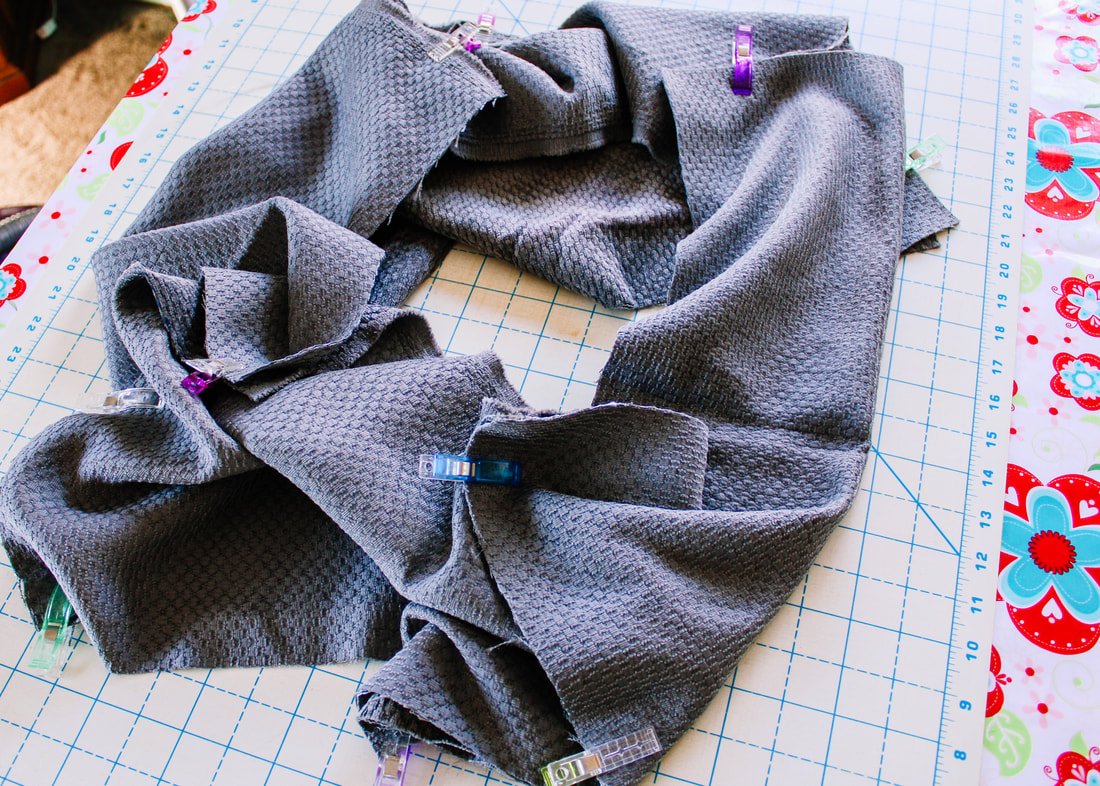
Fold it in half and even out the shape.

Fold the fabric corners onto themselves to create curves. Pin. Do the same thing for the nose of the board as well. Then, pin the long edges 1/2" under.

You could pin the whole cover under 1/2" or not. I found pinning helped but, it's up to you.
Sewing Time
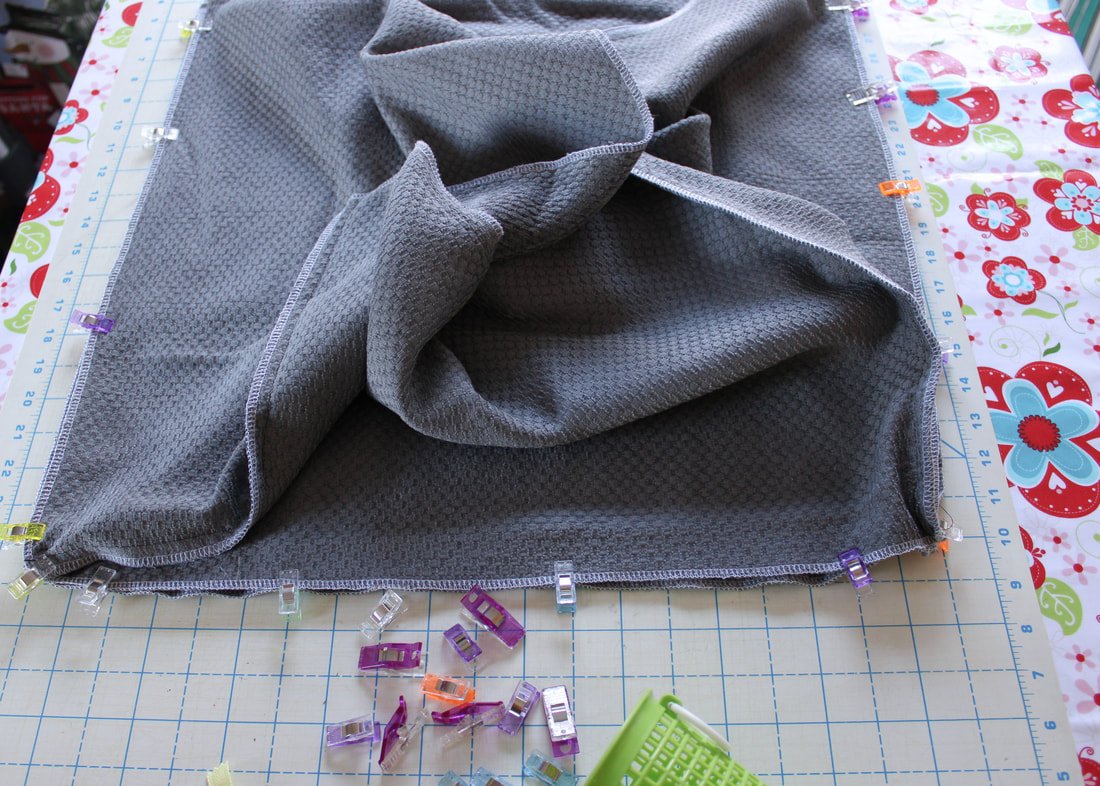
Take your fabric cover to the machine. You're going to sew with a 1/2" seam allowance. Use a 2.5 or 3mm stitch length. It doesn't have to be perfect, the seam will get covered.

Sew using 1/2” seam allowance.
Now, grab your elastic. You're going to sew a zigzag stitch over the seam you just sewed with the elastic on top.
Pull the elastic taught with one hand while gently pulling the fabric behind the machine with the other hand. Use a zigzag stitch and sew. You want to pull the elastic tight enough so it will make the cover fit nicely and snug over your board.

Sew the elastic on with a Zigzag stitch. Place the elastic over your raw seam edge and sew, pulling the elastic as you go.

The zigzag stitching isn’t perfect, but nobody will see it except you. The elastic covers the raw edge of the folded seam.
You will have something that looks like mine up above. If not, grab that seam ripper, grab a cup of tea, and start ripping.
If your fabric doesn't fit snugly enough, clip a piece of elastic and attach it on the underside along a long edge. Clip. Then, pull it toward the other side to get a snug fit. Clip or pin. Take it to the machine and zigzag over both ends. You may have to slide it on and off the board a few times to get a perfect fit.
My old cover came with elastic straps that fit like this, except they had a button. That's where I got the idea. I added two elastic strips under the cover. One at the nose and one at the bum. ;)
Yay!! You just made a cute ironing board cover and it will work much better than any store-bought one.

Add a crosswise piece of elastic to tighten the fit. This will sag over time due to the steam. Add a new piece every year or two.

Maybe I'll like doing laundry again with my new, pretty ironing board cover. Nah, probably not!
I've wanted to recover my ironing board for a while, and I'm so happy I finally did it. With the multiple layers, everything presses nicely and quickly too.
Are you excited to make your ironing board cover? Or is it something you'd rather not make? I'm curious, so tell me in the comments below if it's something you're excited to make.
Thanks for hanging out with me today. Now go sew something fun. :D
Happy ironing,
Annette
Looking for something else? Click through the posts below.
Have a ton of fabric scraps? Want to use them up? Sew a floor cushion.
Are you new to sewing and want to jump right in? Read this Budget-Friendly sewing post here.
Is your machine not working properly? It might need a quick cleaning session, find out how here.
Do you love vintage style and want to incorporate it into your everyday wardrobe? Grab this easy free pattern for a vintage headscarf.
Do you have chickens? Yes! Well, you need an egg apron. Grab the free pattern and tutorial here.

DIY Floor Cushion: Stuff Fabric Scraps Inside
Sew your own floor pillow, they are great for game rooms, kids rooms, or even the pets. Sew one and use fabric scraps as the stuffing. These are fun and easy. Floor poufs are the coolest scrap busting projects!

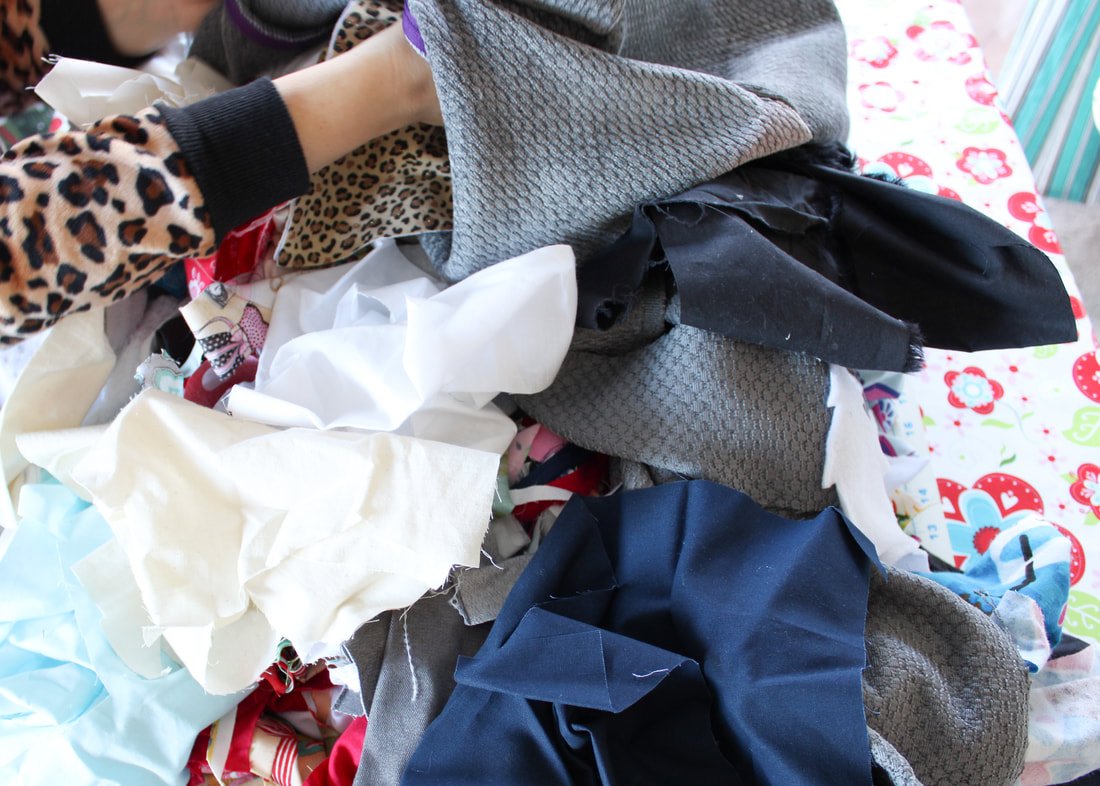
Are you a fabric scrap saver? Do you have dreams of using them up for something? Yes, of course you are. Maybe you don't save them all but, you do save pieces big enough to use for something special. My rule is if its big enough to use for a pocket, it gets saved.
I've discovered the best fabric-busting project of all time. It uses all your fabric scraps up. Okay, it doesn't technically "use" them but, it does put them to use. You're going to sew a simple floor cushion and store all your scraps inside!
You'll want to plow through that list of sewing projects so you can cut into fabric and have more scraps to fill the floor cushion. Whew! Trust me, I'm speaking from experience. ;)
Cozy Meets Functional

The floor cushion itself is not a good scrap buster. You might need to buy fabric to make it. But, it'll free up space in your sewing area, I promise.
I was lucky enough to have leftover grey chenille from my pop-up trailer makeover, so I used that. You'll want to use an upholstery-weight fabric or something similar. This cushion is going to take a beating.
If you have upholstery thread, you can use it here. If you don't, good ole polyester thread works fine. This whole project takes 2hrs give or take. It's a quick sew and gives a huge reward!

My son uses it as a foot rest while he plays videogames.
If you're still on the fence about making one, think ottoman, pet bed, kid's seat, etc.
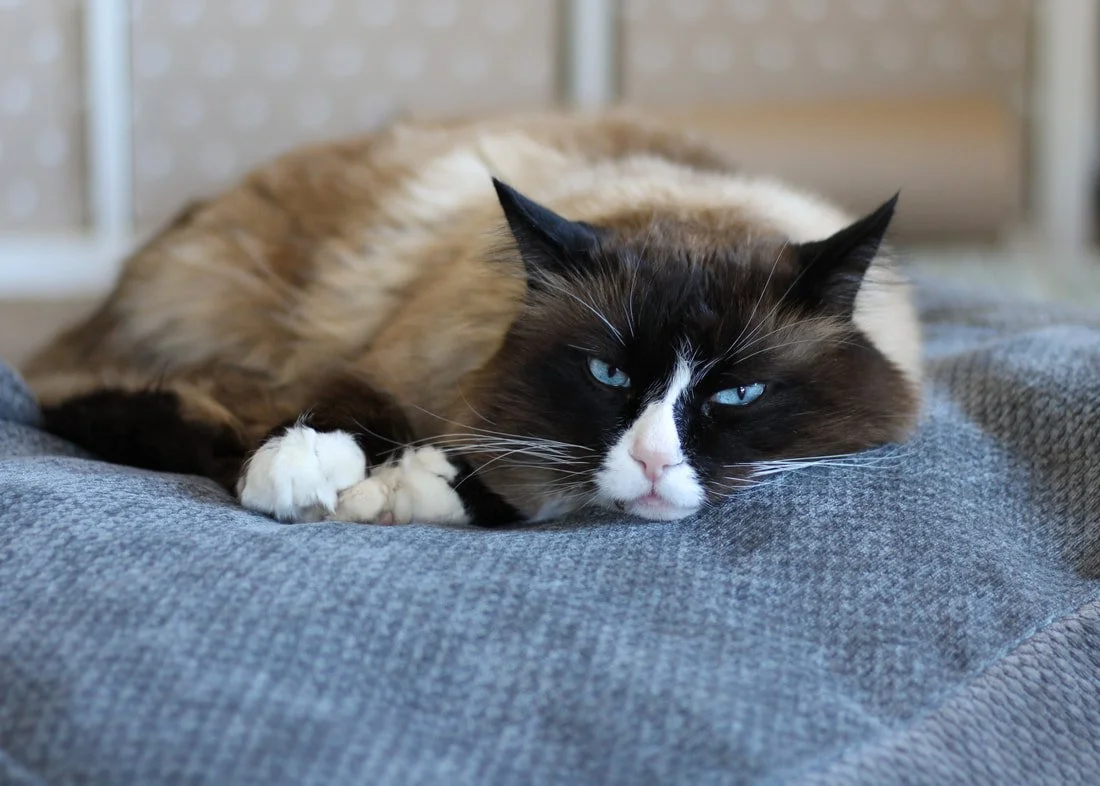
My cat claims it as his bed when my son isn't using it for his feet. It gets carried from room to room and makes a great coffee table game chair as well. I'm surprised it hasn't been involved in a pillow fight yet.

All these scraps are going inside the poof.
Supply List:
2.5 yards upholstery fabric or similar weight fabric (you'll have a little bit left over)
Thread
Clips or pins
14" Zipper
That huge pile of fabric scraps
Sewing machine

Wash your fabric if you want. I didn't. When I need to wash it in the future, it'll shrink a little and be fine.
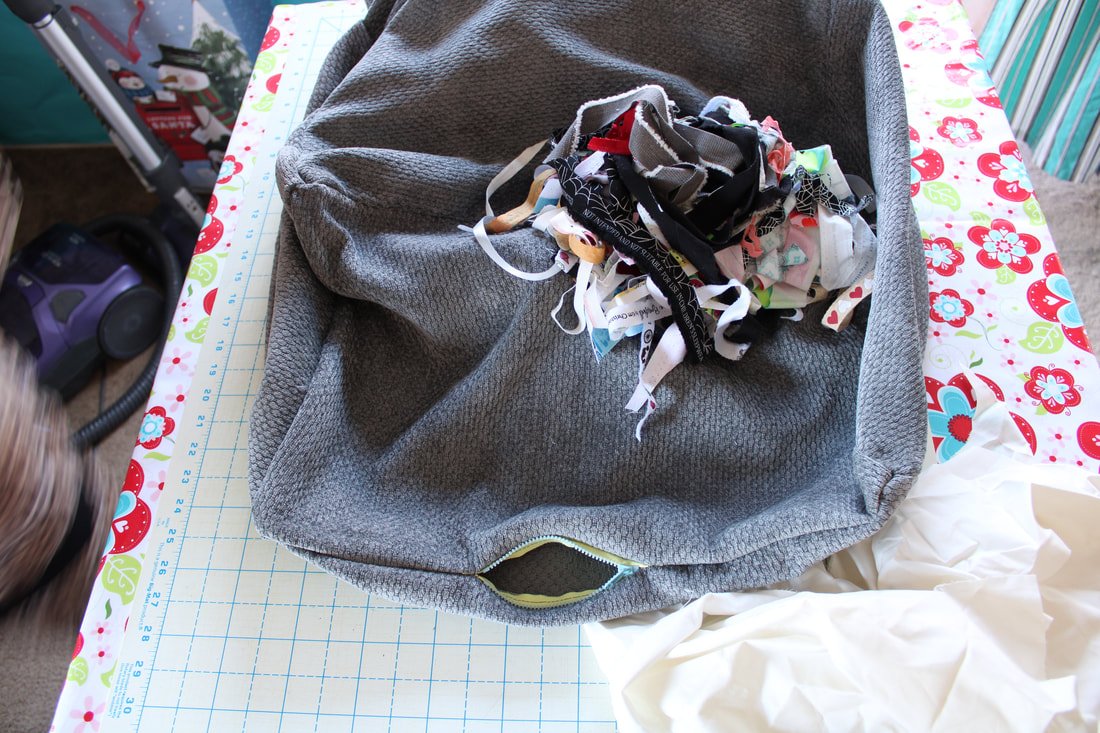
You're going to sew a large cube and fill it with your fabric scraps. Hooray!
1. Cut 2, 21" squares. Cut 4 rectangles measuring 15.5" by 21". Serge or zigzag over the raw edges. Upholstery fabric loves to fray.

2. Clip or pin the rectangles together along the short sides, right sides together. You're making a loop. Sew up the short sides using 1/2" seam allowances, backstitching at the beginning and ends.
3. Lay one square right side up on your table. Clip one side of the loop you just made from the rectangles, onto the square, RST. It's easiest to clip the corners of the square to the side seams first. Then, ease the side seams in. Your upholstery fabric might have some stretch in it but, you tell it who's boss!
If you don't want to insert a zipper, sew along the edge using 1/2" seam allowance.

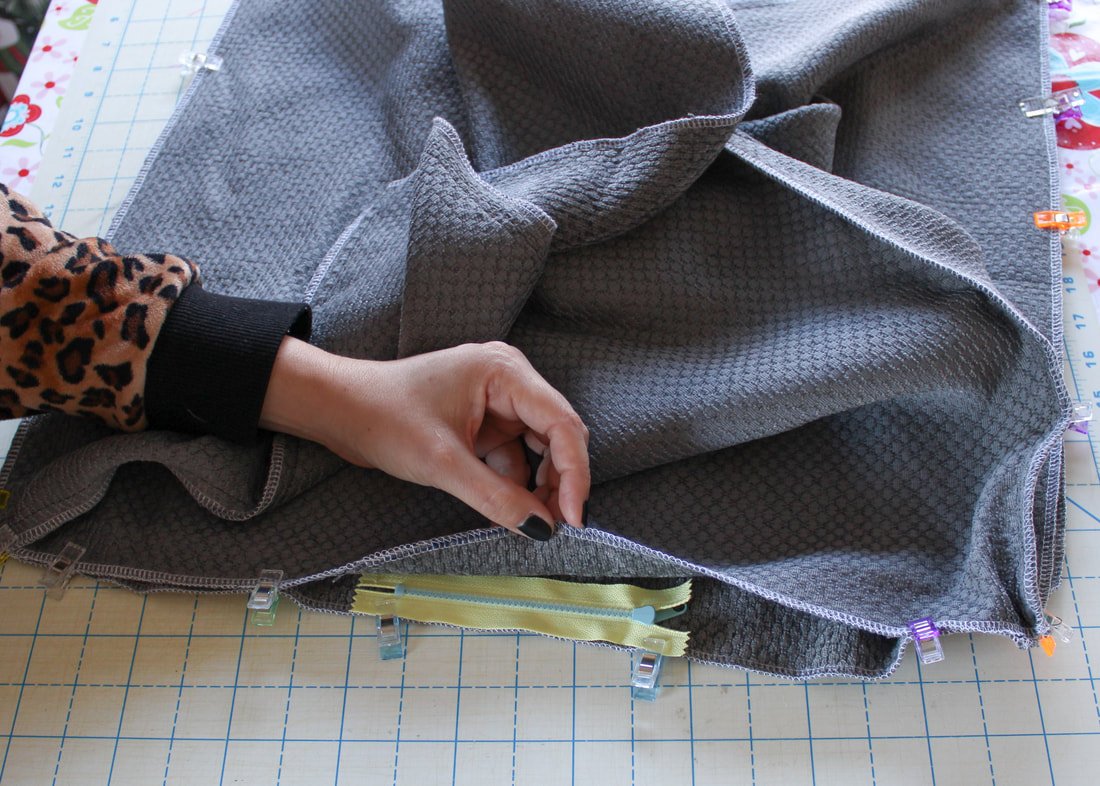
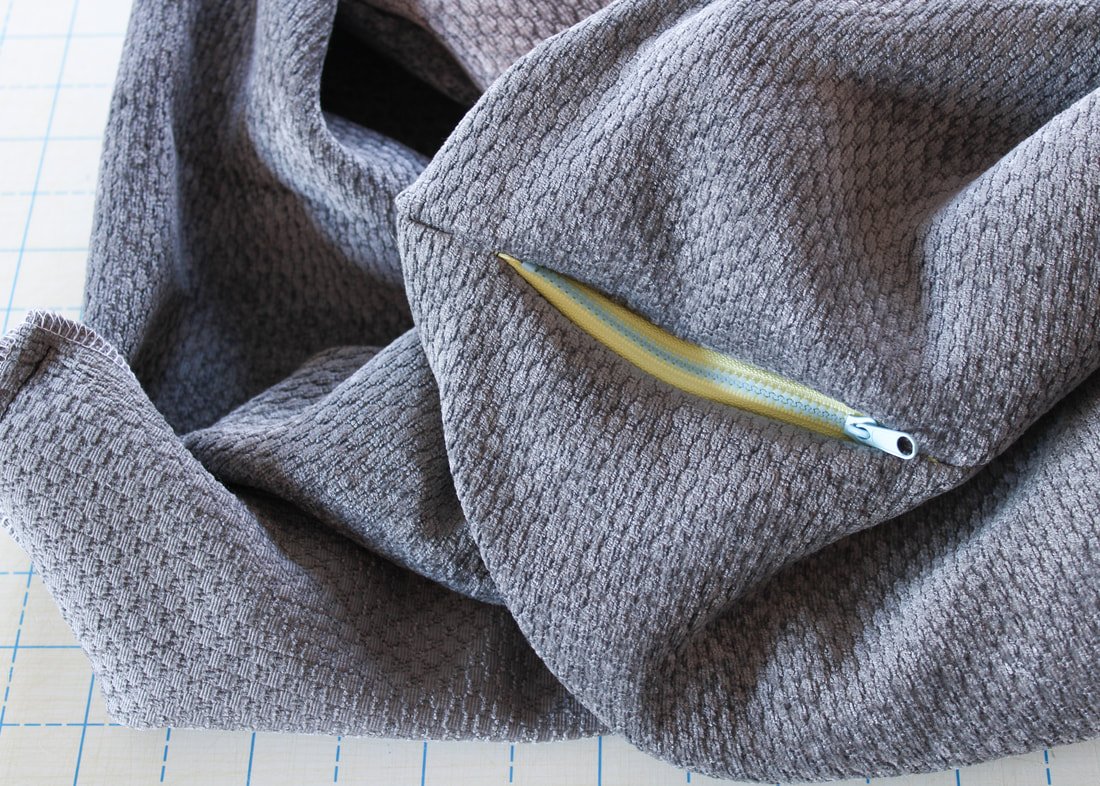
4. Here's where you'll insert your zipper if you want one. This is a little different than inserting a zipper into a bag so, bear with me.
Clip/pin one side of the zipper to a rectangle edge. Sew the zipper with a zipper foot.
Open the zipper and clip the zipper tape to the square bottom edge. Sew using the zipper foot. You might have to sew one side of the zipper tape facing down which feels awkward but is totally fine.
Switch back to your regular sewing foot to sew around the whole square. Start at one end of the zipper and end at the other end of the zipper. Open and close the zipper to make sure it's lined up, if it isn't smooth, unpick one side and resew it.
*It's easier to sew with the flat piece down and move the rectangles out of the way as you sew.

To get the seam and zipper area to match up nicely, sew an extra 1/8" inside the zipper seam allowance when you get to the zipper.
It's a little trick that's used when inserting invisible zippers.
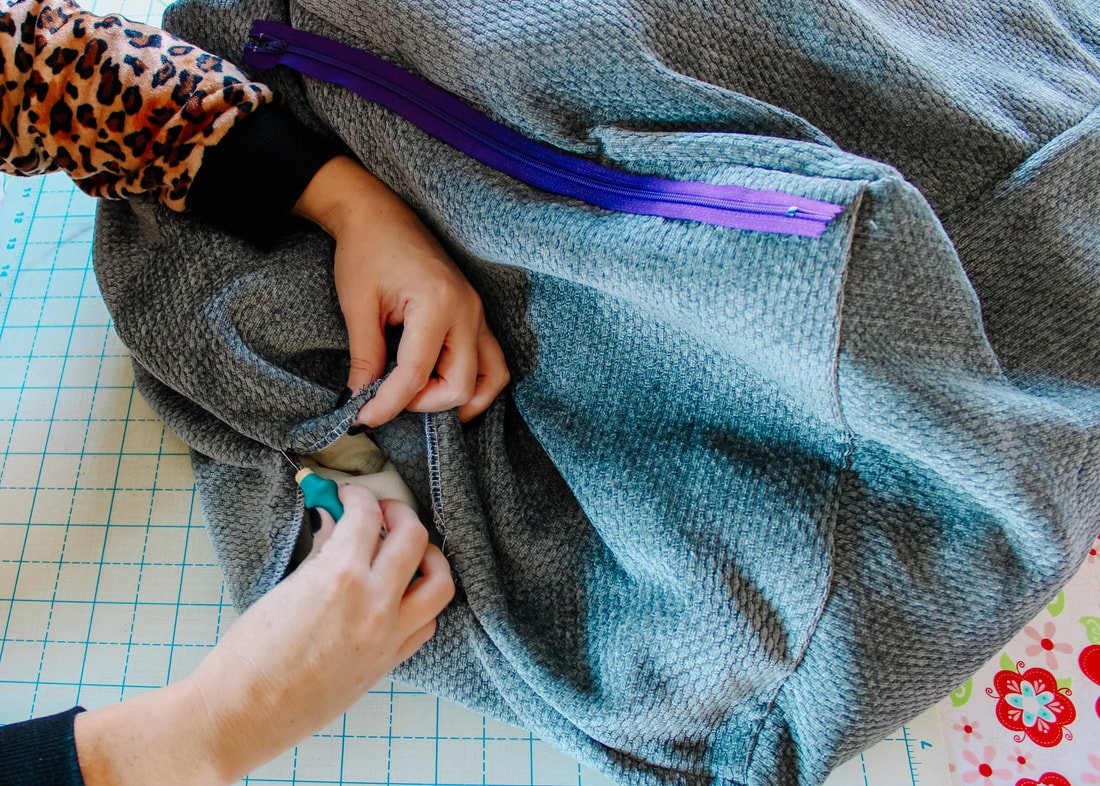
5. Now that the hardest part is over, it's time to sew the top square on. Clip the top the same way you did with the bottom square. Start with the corners first, then clip the sides. Sew all around using a 1/2" seam allowance.
This might look tricky but, take your time. Go slow and make sure you're only sewing over the 2 layers.

Sew around the top.
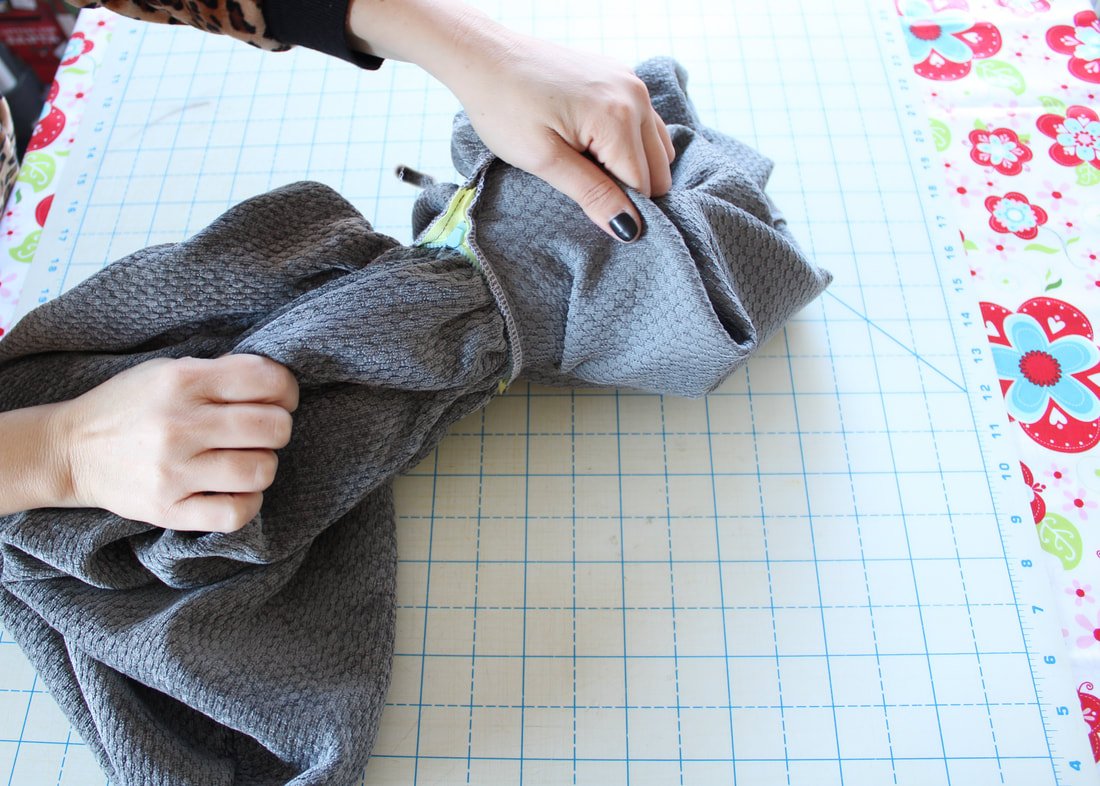
6. Turn the cushion right side out and pop out the corners. You don't have to worry about trimming the corners unless you want to. I left them alone. Press the seams open as well as you can.

Pull it through the opened zipper. At first, I used this tiny 4” zipper. Ha! It was too small. I had to rip it out and use the purple one.
Ta-da! You've made a floor cushion, bean bag, floor pouf, or whatever you want to call it. You made one!
7. Stuff it with all those fabric scraps inside. It's very therapeutic. If it feels empty still, toss some extra yardage inside if you'd like. I had yards of fleece, minky, and faux fur from my baby gift making days and that really helped to fluff it up.
You can even fill it with those random pieces of interfacing you're probably saving. ;)
All that's left to do is use it. Who gets to use it first? The kids, your kitty, or you?
Read Below for Extra Tips:
Use a long enough zipper to get your hand in and out. Originally, I used a tiny 6" zipper thinking I'd never need the scraps again. Haha!! It was quickly ripped out and replaced with a longer 14" one. It's fun and easy to add more scraps. And, if you need a pocket or other scrap-sized piece of fabric in the future, you can look through them easily. Dump everything out onto a table and sift through them all.
If you have random pieces of heavy-weight fabrics, use them to make the cushion. Use a different piece for each side, top, and bottom. It'll give it an eclectic and lively look. Faux fur would be fun too!
I used the sun faded piece for the bottom.
You can make a set if you have buckets and buckets of scraps lying around. Oh, a set would be great for a kid’s room or game room as well.
Now I'm off to tackle that sewing to-do list. I need more scraps!!

It’s waiting for more scraps.
So, are you ready to put all those scraps to use? Well, store them in a fun way at least. If you do, tag me on Instagram @sewingtothemoon so I can see them all.
Happy stuffing!
Annette

Simple Sewing Projects
Sew some simple projects. These make great gifts, stocking stuffers, or beginner sewing patterns. Beginner-friendly and great for teaching how to sew.
This list is chock full of simple sewing projects. Need to sew something that doesn't take a lot of fabric or pattern pieces? This is the list for you! I've compiled some sewing projects that are easy and great for beginners. These are great for scrap-busting and make wonderful gifts, too!

Projects to Sew:
Keychain
Headband
Zipper Bag
Apple Watchband Scrunchie
Fabric Basket
Pillow
Small Purse
Advent Calendar
Hair Scrunchie
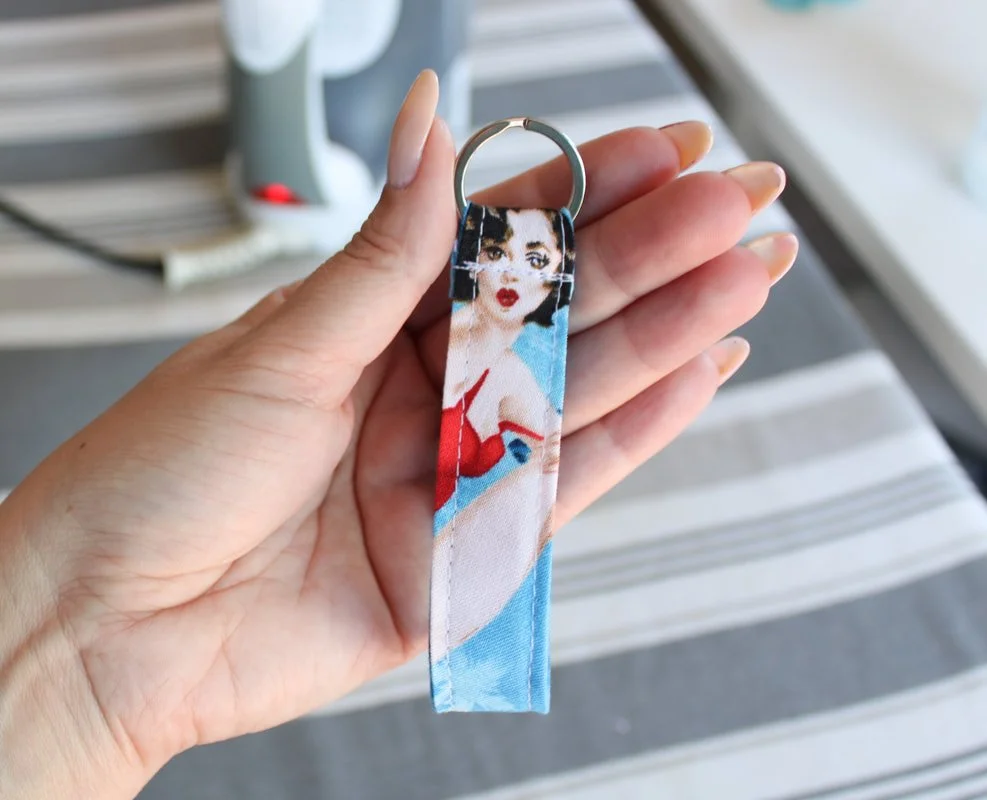
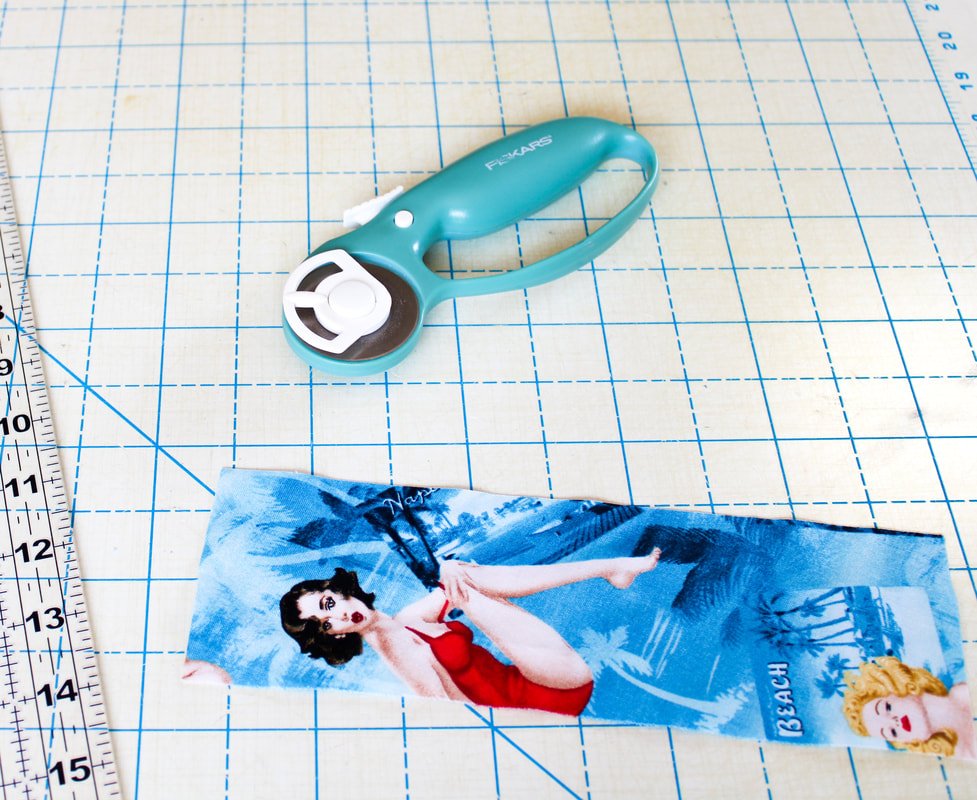
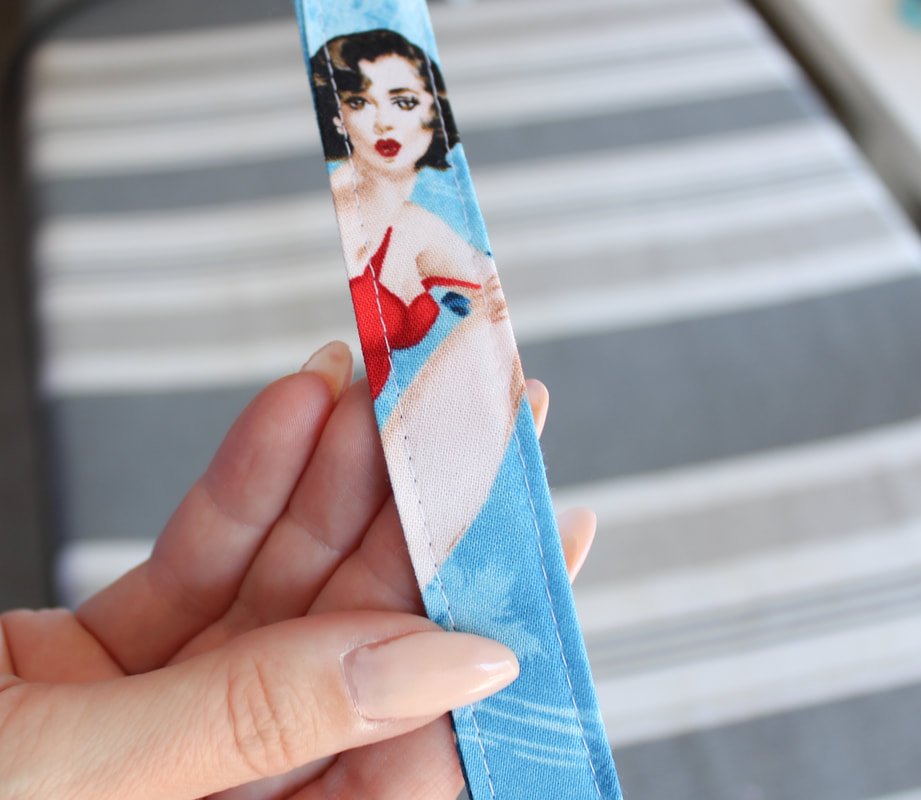
1. Keychain
We all need keychains for our keys or extra sets of keys. You can increase the length of this to make a wristlet or lanyard as well.
Supplies:
Fat Quarter or large strip of fabric
Lightweight interfacing
Matching thread
Metal key ring
Iron + ironing board
Sewing machine + notions
Cut a rectangular piece of fabric that measures 8" long by 4" wide. You can always cut this shorter if you'd like but, this is a good starting size for a pocket key fob..
Apply interfacing according to the manufacturer's instructions.
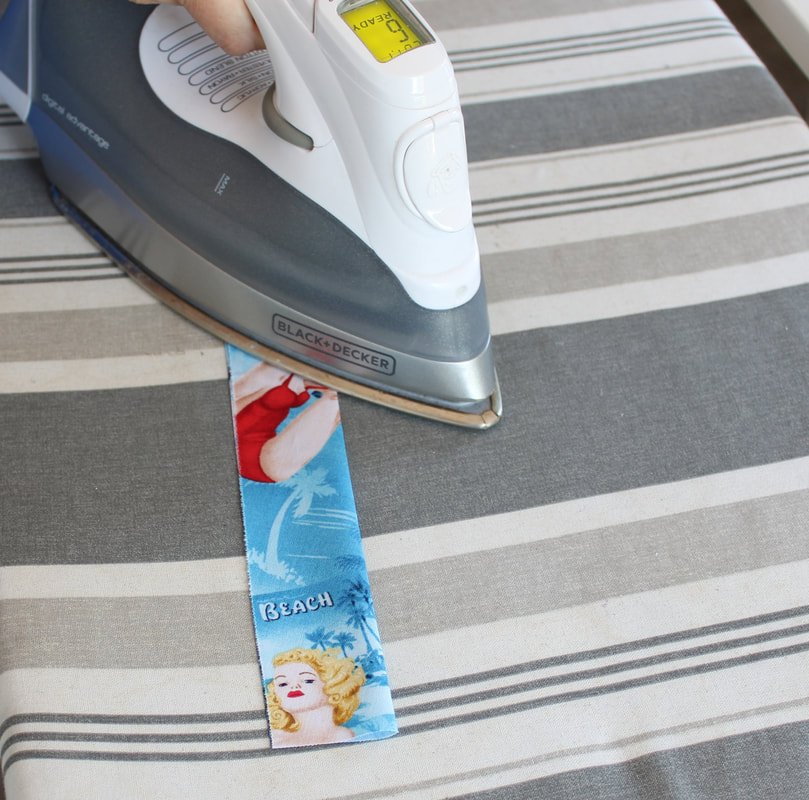
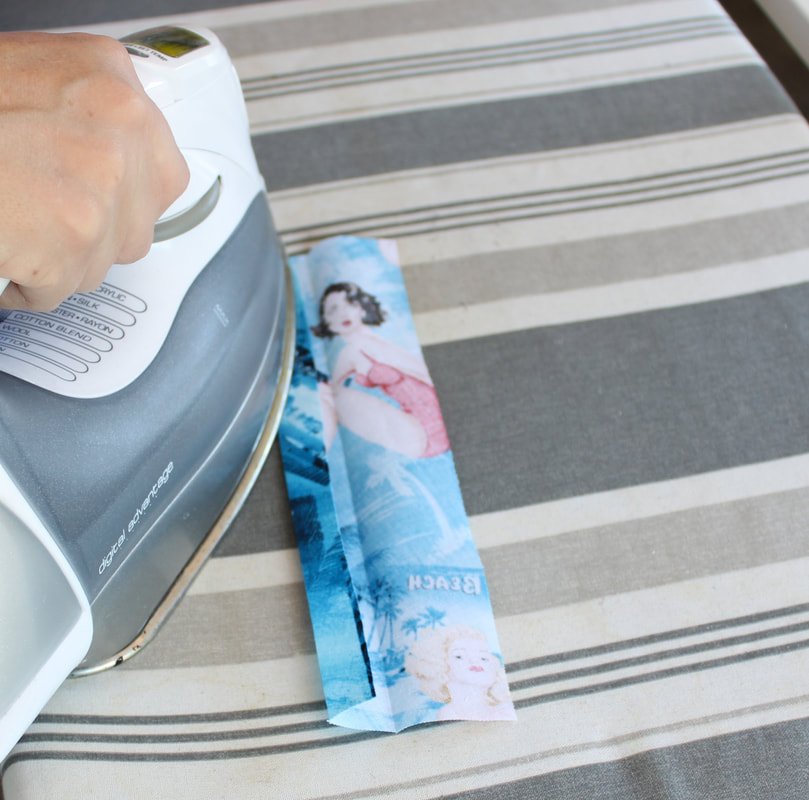
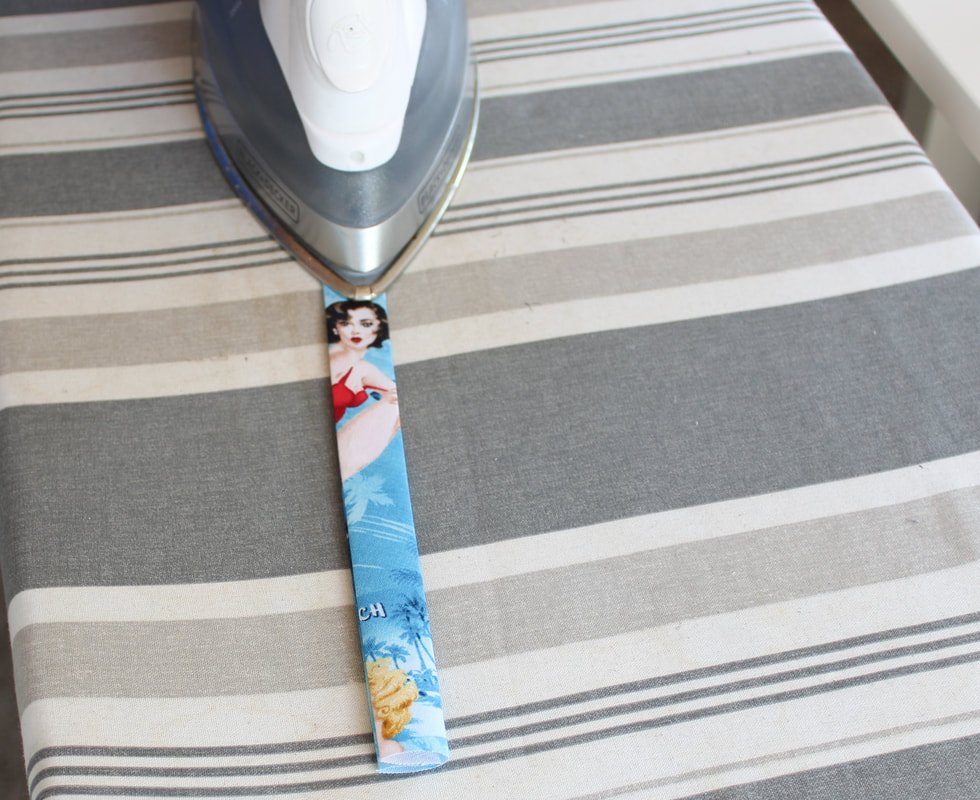
Fold the fabric in half, wrong sides together, lengthwise, and press.
Fold one long edge into the center crease you've previously made. Press.
Do the same with the other side. Press. Fold the edges in again and you should now have one long strip. Give it a good press once again.
Top stitch 1/8" using 3mm-3.5mm stitch length, from the folded edge starting from the top. Repeat on the other side, starting at the top. (This will help with any puckering that may occur).


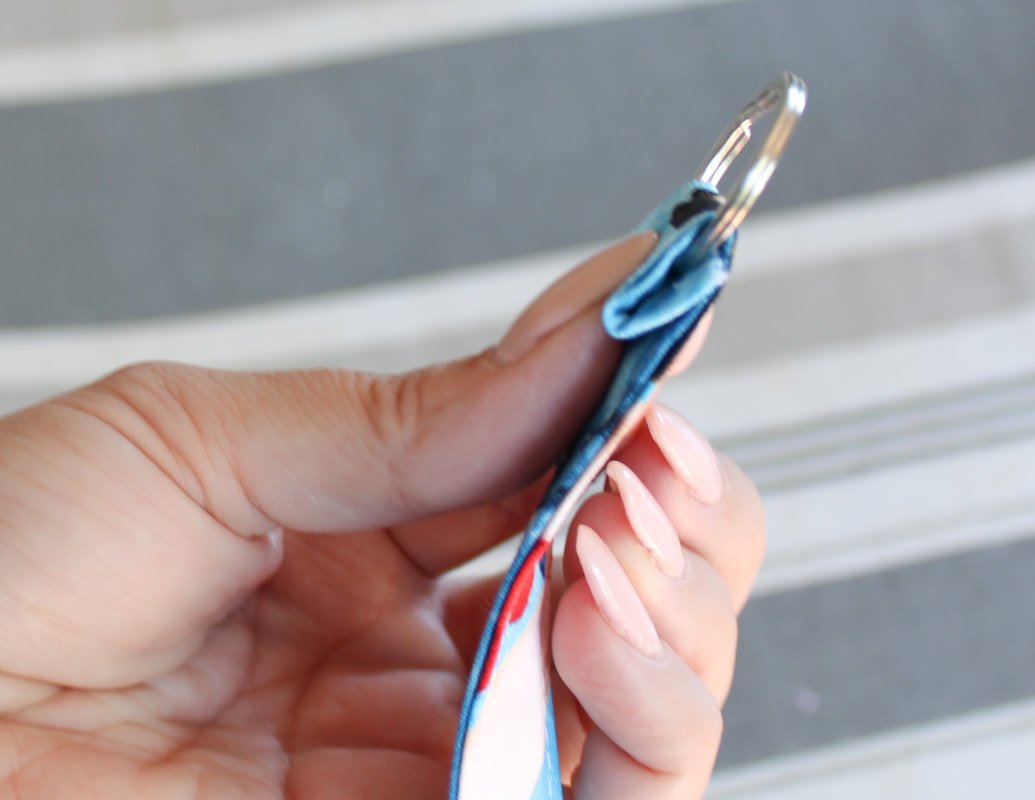
Grab the ring and slide it onto the fabric strip. Pick which side you want on the outside.

Fold one end over the ring about 1/2".

Add keys and go!
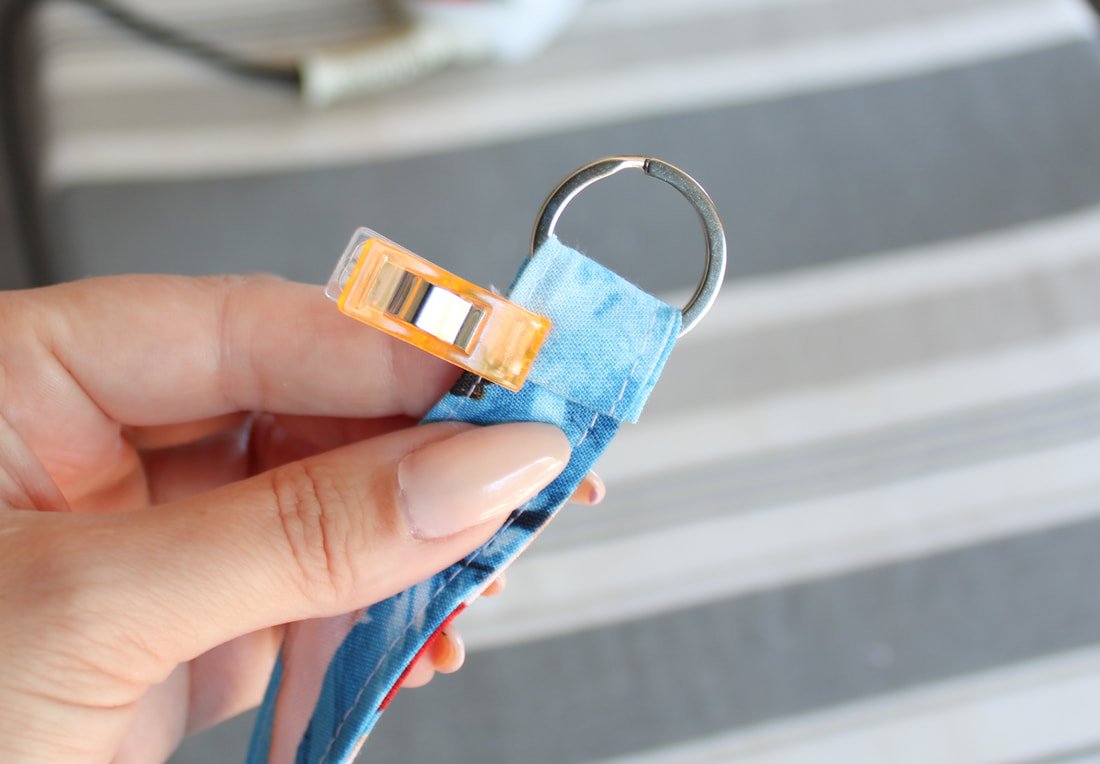
Bring the opposite edge up and under the folded edge. You'll hide the raw edge under the folded edge. Use a clip to keep them together.
Sew a few rows of stitching making sure to backstitch at the beginning and end. That's it! You're done!
Add your keys and show off your new keychain. Sew simple, right??
You can make this into a neck lanyard as well. Drape a measuring tape around the back of your neck and bring the end to the front to get your desired length. Add 2" for the folded edge.
You can also make this as a wristlet keychain.
2. Headband or Hair Scarf
Choose between a thin Rockabilly headband or a wide Pinup style headband to sew. Or, make them both. A gal needs options, right?
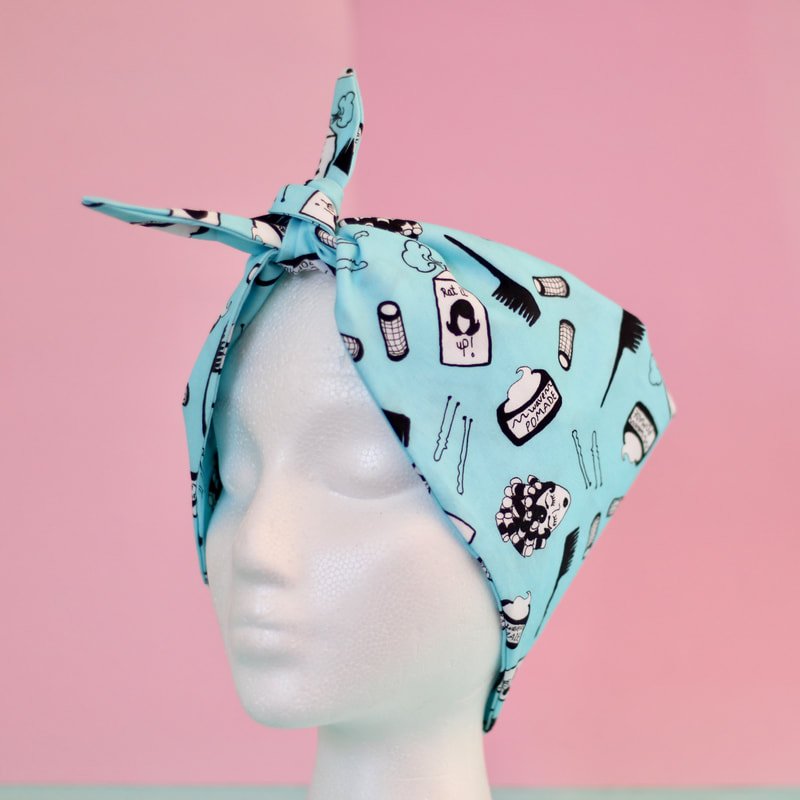
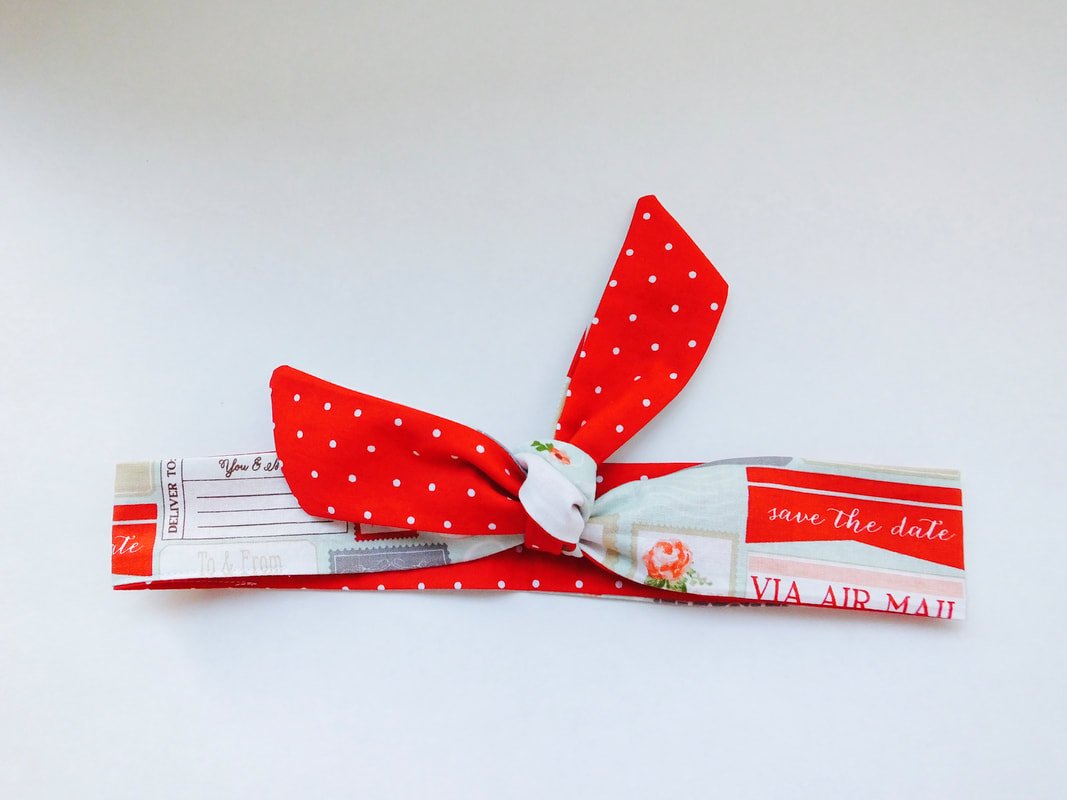
Click the link above to take you to a tutorial.
3. Zipper Pouch/ Makeup Bag
Follow this blog post for an easy zipper pouch. Increase the size and length to make it larger. These make great essential oil pouches, pencil cases, wet bags, etc.

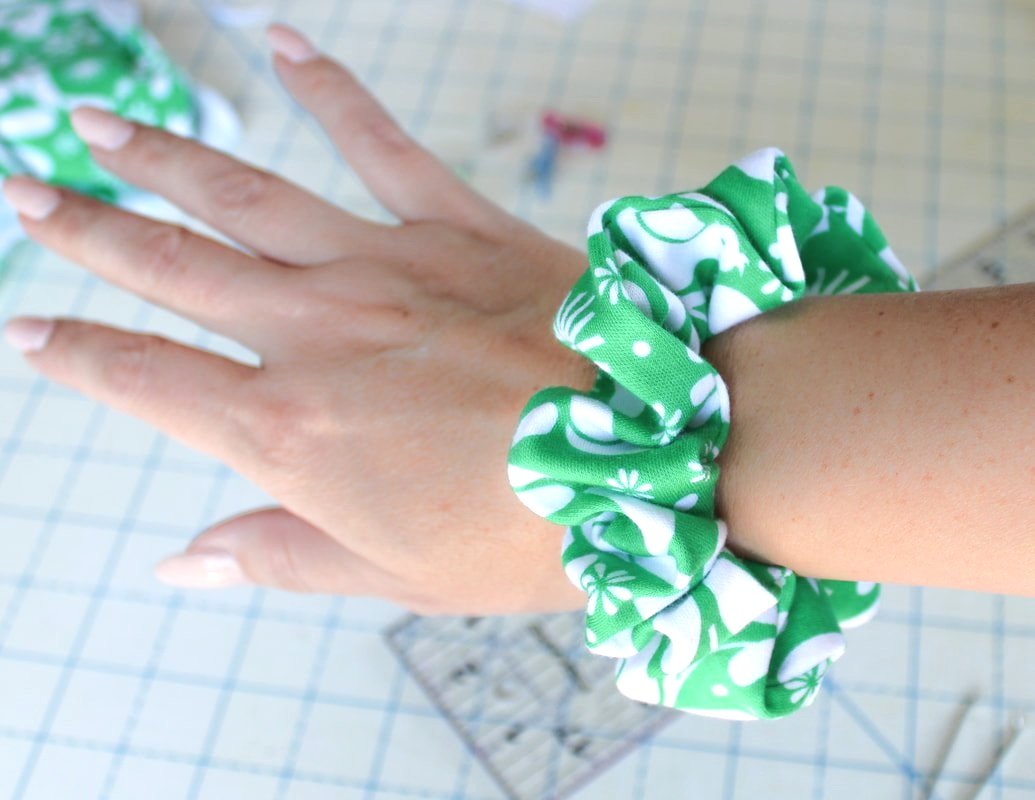
4. Apple Watchband Scrunchie

Click here for the blog post and directions to give your Apple Watch a little more personalization. You can find the watch magnets on Amazon. These are very easy to sew. Make one of these for yourself or as a gift along with a new Apple watch.
5. Storage Basket
We all have stuff. Too much stuff. And, all that stuff needs a home. Storage baskets and bins are perfect for small items that need some organization in their lives. You can customize these by increasing the size to accommodate larger items. Click here for a smaller size that's great for a beginner basket.


6. Pillows
Make a pillow for your bed or couch. Make some small pillows for kids to use too. Pillows are as easy as pie to sew. Follow this Blog post and make all the pillows your little heart desires.
These aren't great scrap busters because they do take larger pieces of fabric. However, you could use a different front and back piece to use up the scraps you have on hand.

7. Purse

Make a small or large handbag custom to your wants and needs. This tutorial will walk you along with a “choose your own adventure” style bag.
8. Advent Calendar

Countdown to Christmas
Get a head start on holiday sewing with this easy tutorial for making an Advent Calendar. It's a good scrap buster to use up those holiday fabric pieces. You could alter this to make a Birthday countdown calendar or countdown for a wedding, other holiday, etc. It will take a large piece of fabric for the front and back main panels but, you can use scraps for the smaller pieces.
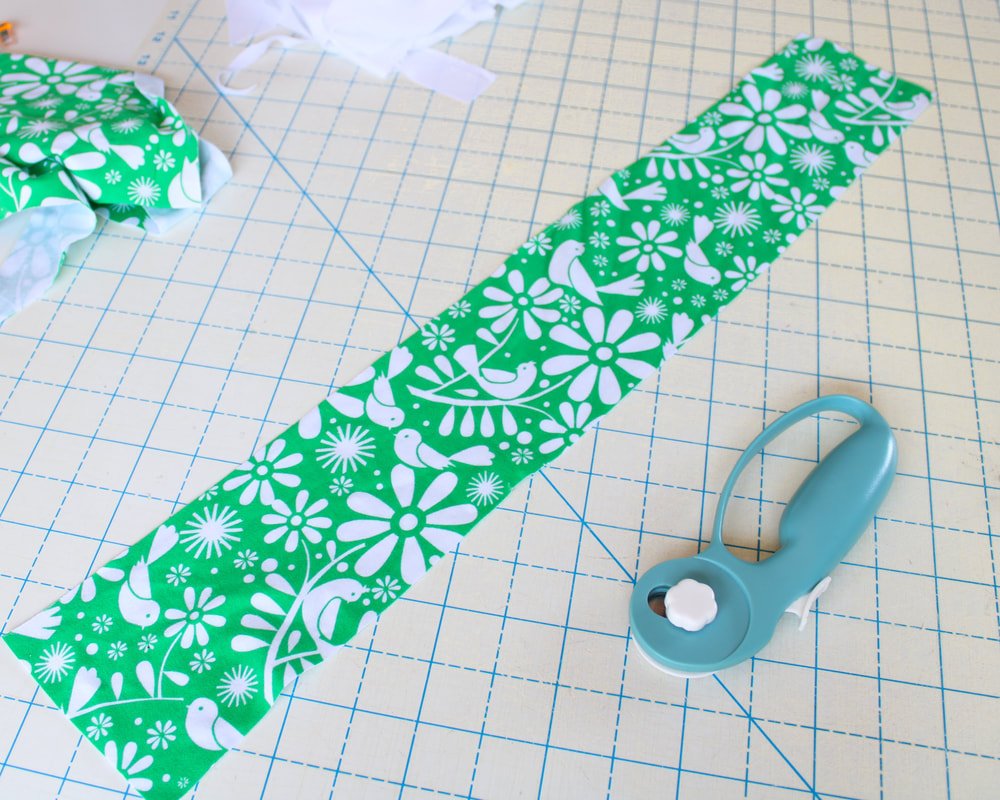
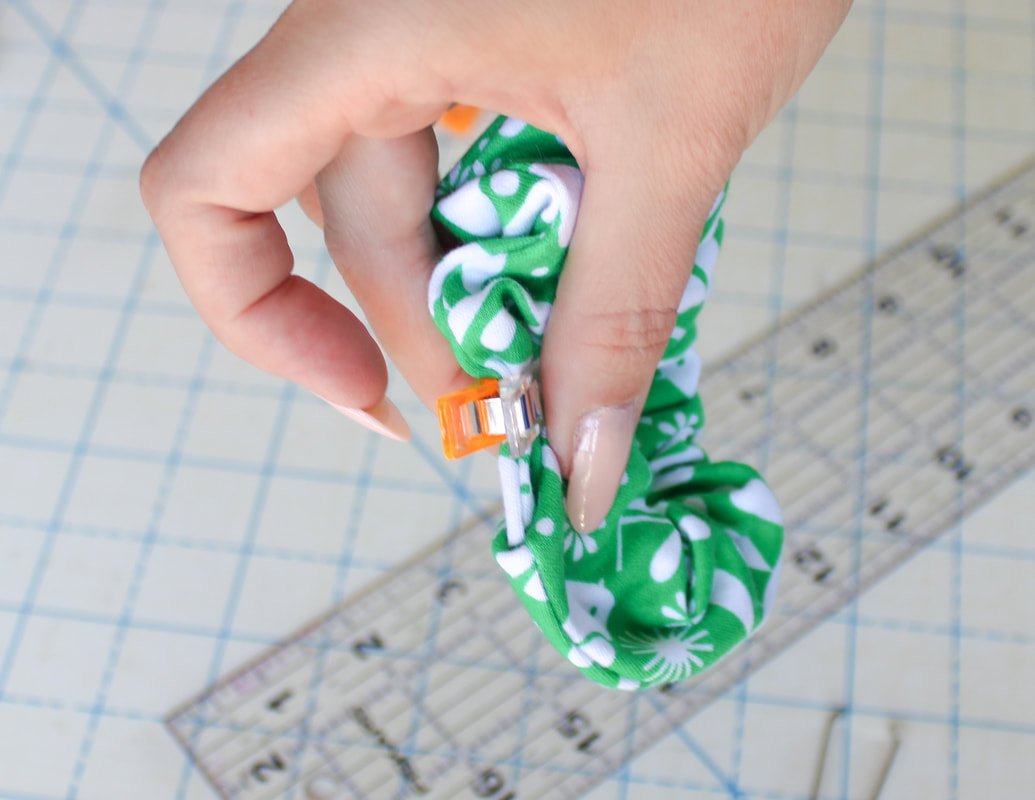
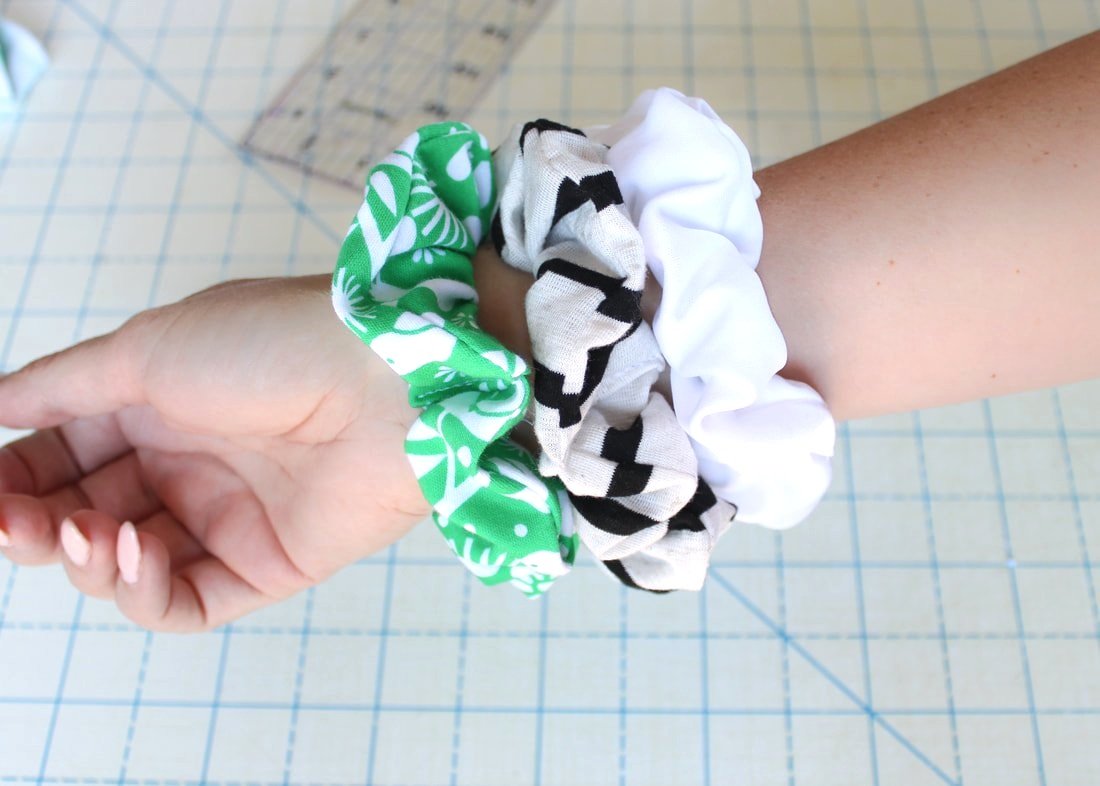
9. Hair Scrunchie
Is it scrunchie or scrunchy? My daughter even calls them a "scrunch". Either way, we all love them! They are comfortable to wear and claim to be healthier for your hair than rubber bands alone. A handmade scrunchie will accessorize your outfit and put a smile on your head. Not really, but just go with it. ;) They also keep the hair off your neck while sleeping, cleaning, or sewing. ;)
As with most things that are mentioned above, you can increase/decrease the length and width of the fabric strip to make these larger and fluffier or shorter and thinner.
*I personally like this exact size. I've made a few in different lengths and widths for my daughters but, they love the fluffier size too.

Fabric for the scrunchies.
Supplies
1/4" elastic
Fabric measuring at least 23" long
Sewing machine + notions
Safety pin
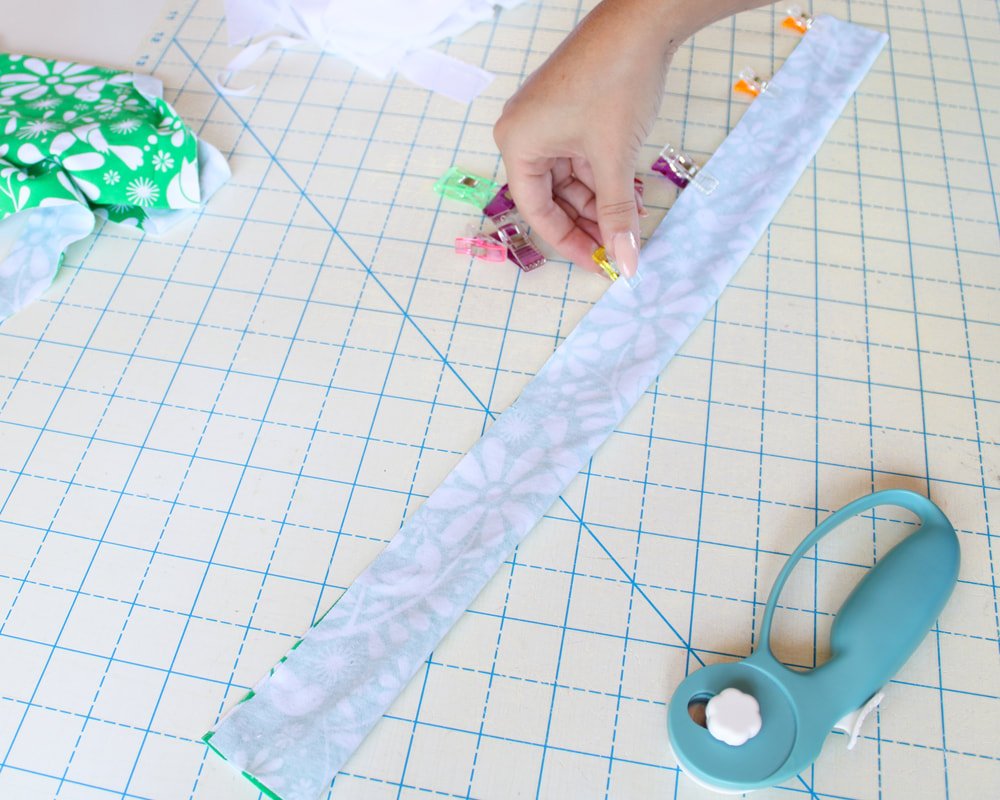
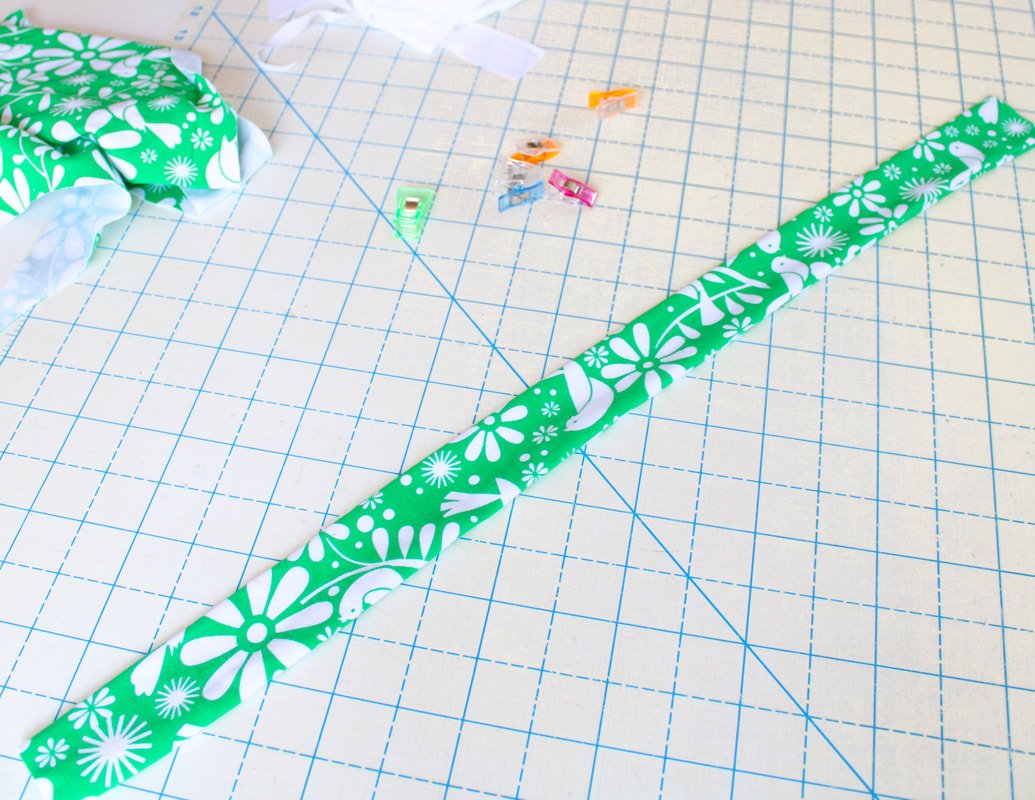
Cut a fabric strip measuring 4" by 23". You can use satin, cotton, viscose, rayon, or anything that is lightweight and has a drape. You wouldn't want to use canvas or something that is thick and stiff. You're basically creating a ruffle, so it needs to be able to... ruffle. :)
Fold the long strip in half, like a hot dog bun, RST (right sides together). Sew a seam down the long edge using a 1/4" seam allowance. Backstitch at the beginning and end. You now have a long skinny tube.
Turn the tube right side out using a turning tool or safety pin.
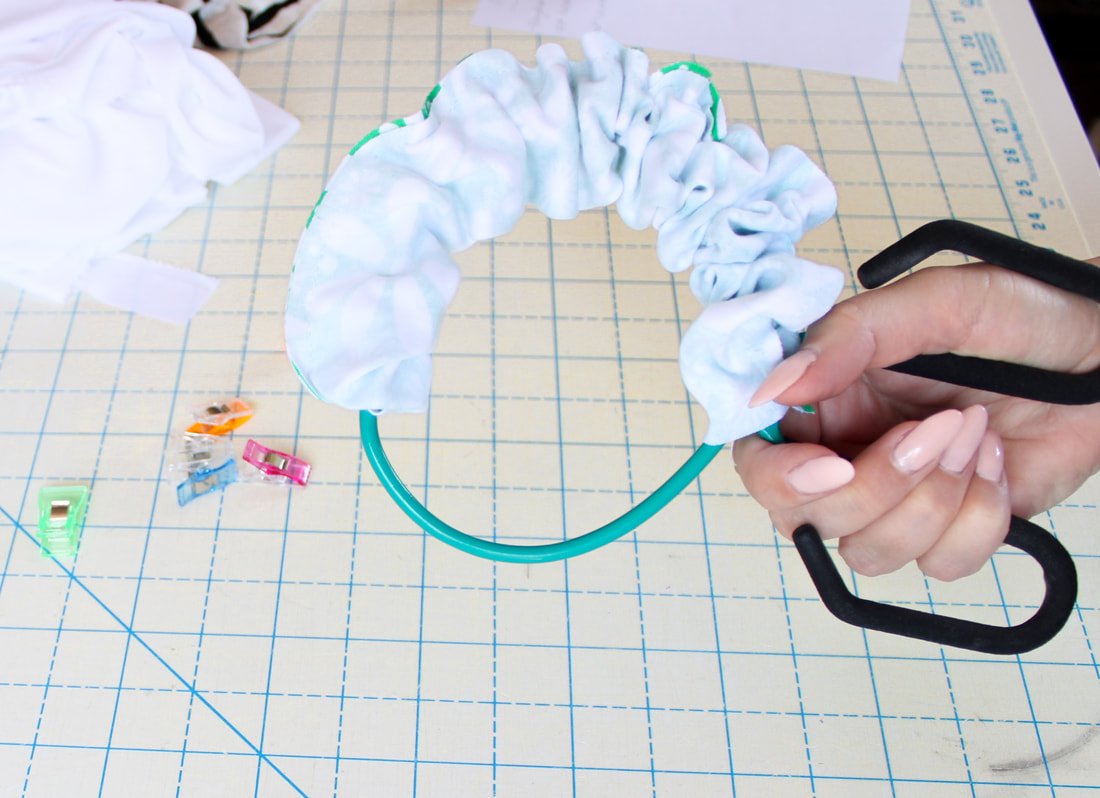
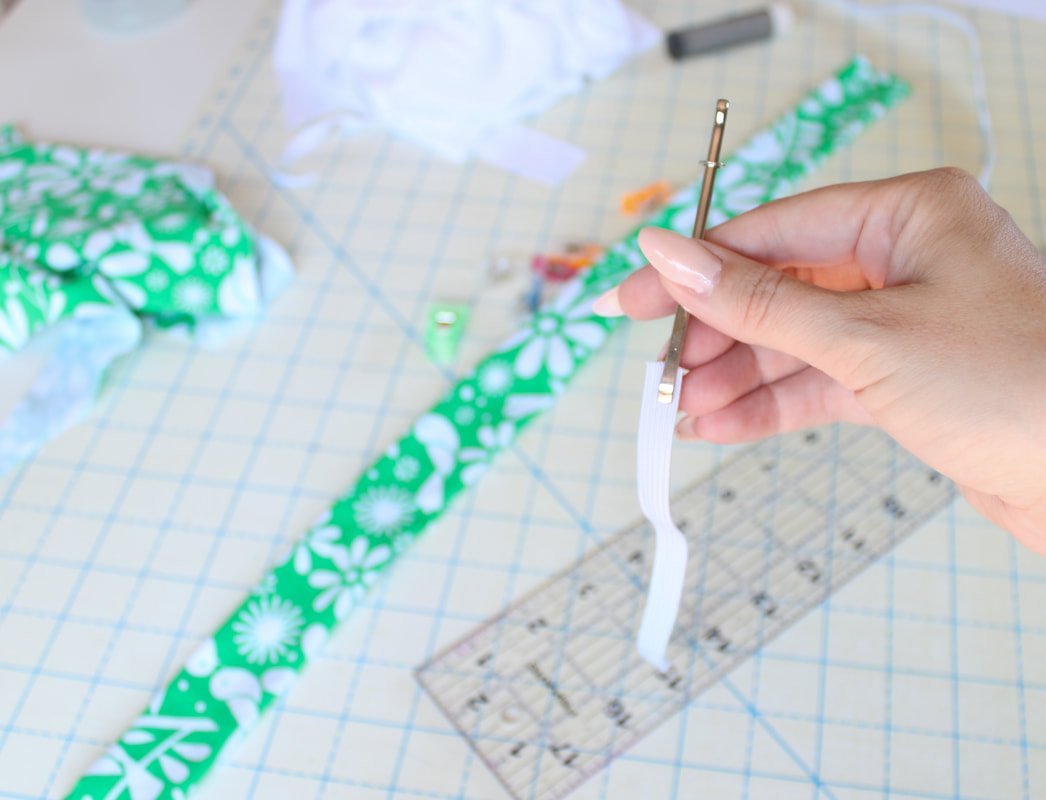
Cut your elastic piece 6-7" long. Feed the elastic through the tube using the safety pin.
Tie a simple knot in the elastic or sew the ends together by overlapping them.
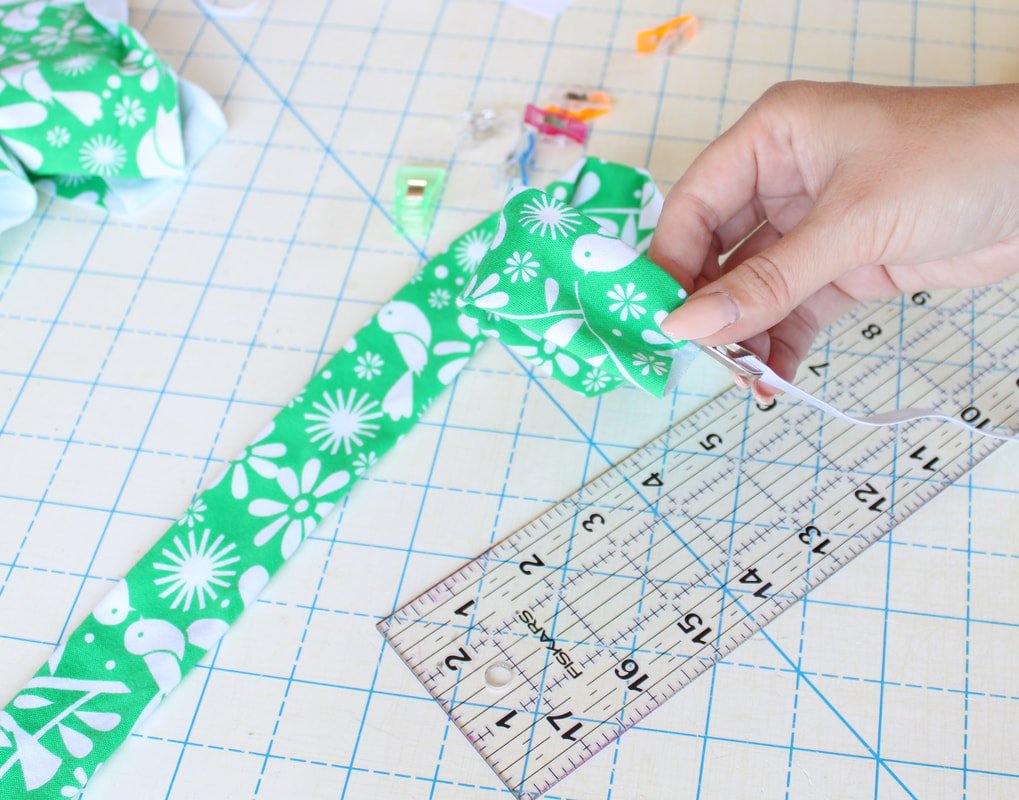
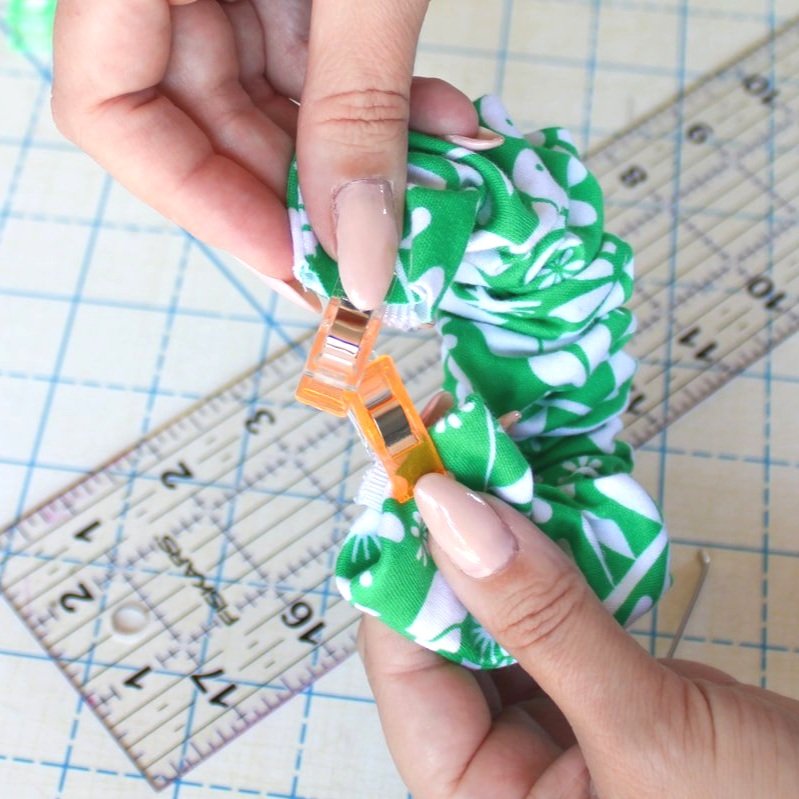
Fold one short end under. Tuck the other end inside the folded end and clip or pin.
Topstitch the opening closed with a 2.5mm or 3mm stitch. Make sure to backstitch.


Cut elastic 6-8” long depending on how thick your hair is.


Sew 2 rows of stitching across elastic ends. You could also tie in a knot too, but you’ll need a longer piece of elastic.
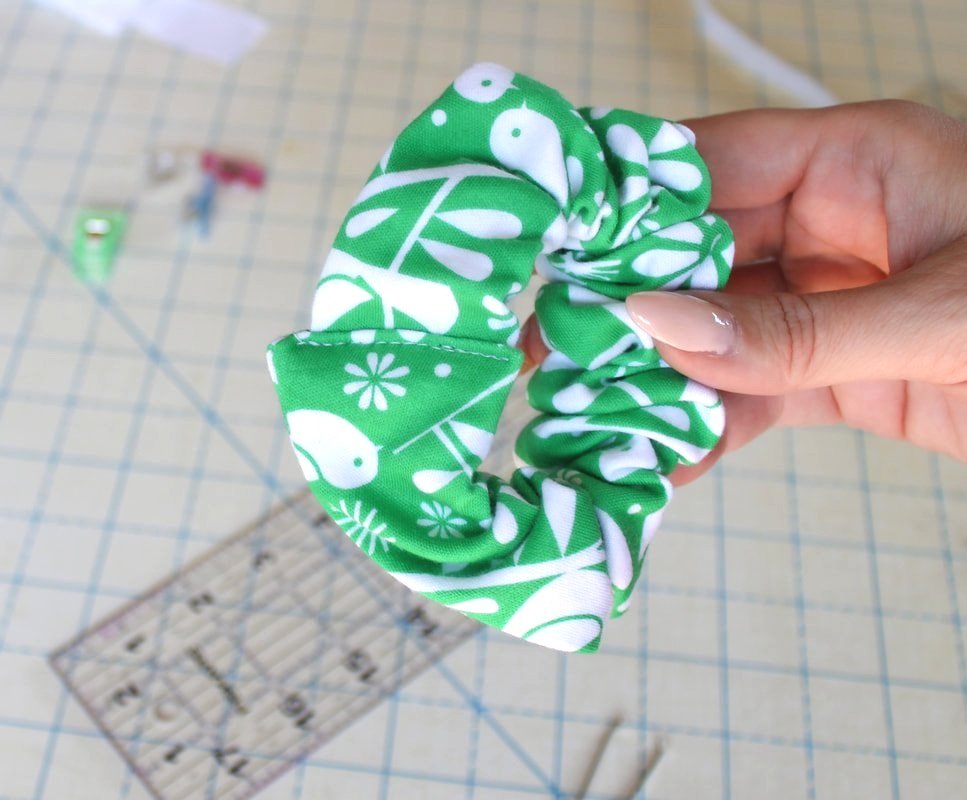
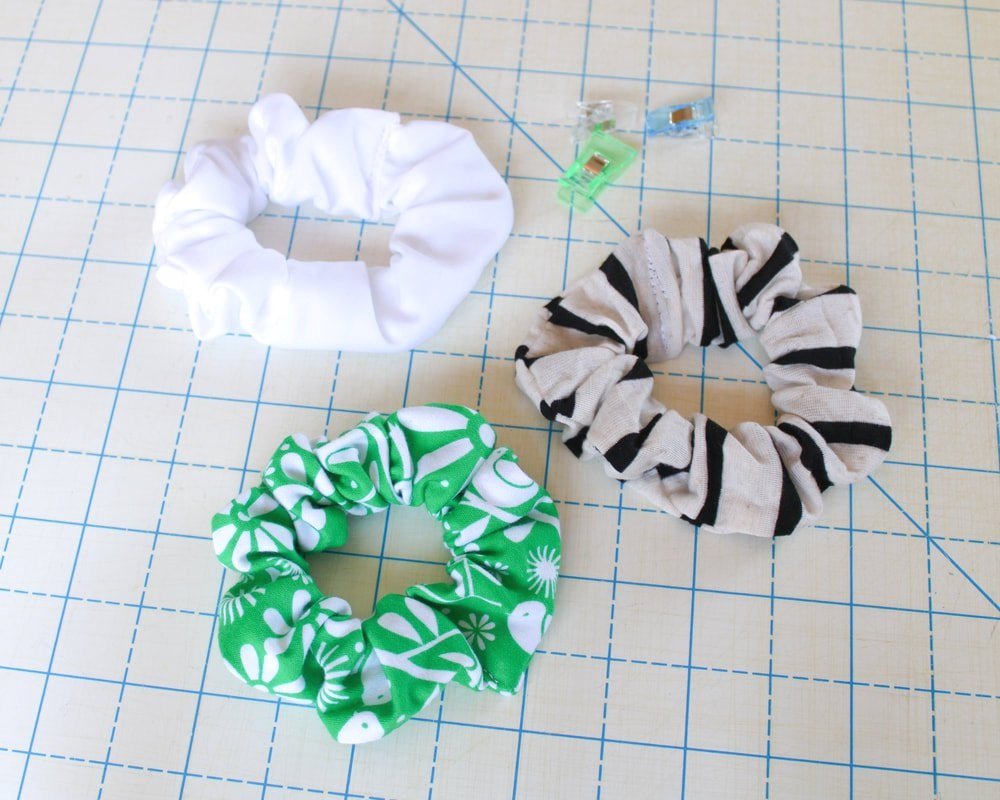

Hooray! Now you can make tons for yourself or as gifts for everyone you know. Yay for hair scrunchies!! The 80s and 90s knew what they were doing.
I hope you've enjoyed these Simple Sewing projects. Share this post with your other sewing friends. These are all pretty easy which makes them great beginner sewing projects.
Thanks for hanging out today. If you make one of these Simple Sewing projects, tag me on Instagram, @sewingtothemoon I'd love to see what you create.
Happy Sewing!
Annette