
Pattern Reviews, Sewing Hacks, Tips & Free Patterns
The Sewing Blog

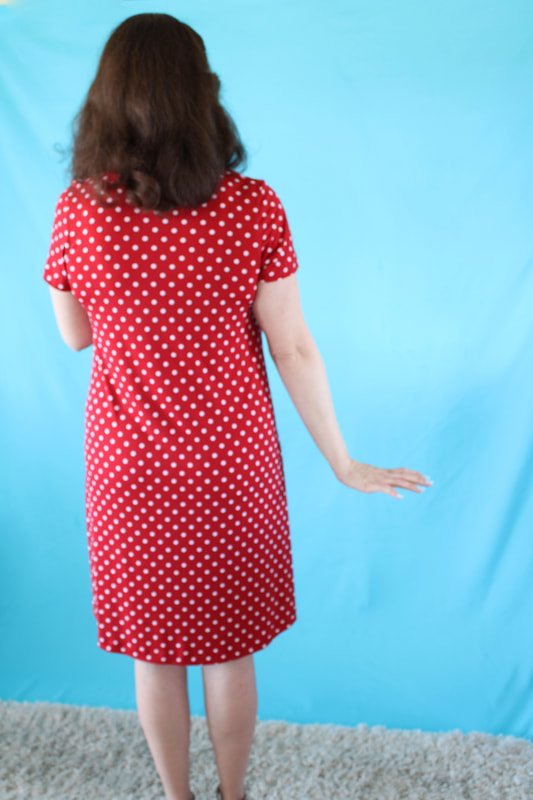
Laundry Day Dress
Laundry day dress by love notions pattern review. The dress is perfect for beginner sewists and can be made into a pinup style with added accessories.

This dress is perfect for lounging around the house or doing laundry. It's the Laundry Day Tee dress. Simple to sew and comfy for a laid-back Sunday.
Are you ready for Spring? I've been playing (cleaning) in the yard lately. We planted 5 new rose bushes, hydrangeas, and various berry bushes. Ahh, it feels so good to be outdoors after the long winter we've had. The daytime temps in my corner of Southern California are rising and the weather got me thinking about all the outfits and bags I plan to make for summer.
Cue the Laundry day tee dress by Love Notions. The dress comes in a great size range XS-5X. Yay! I snatched up the pattern for $5. What a steal!! I had never heard of this pattern company until I went to the Arizona Sewcial. Boy, I was excited when I went to their website. Give me all the knit patterns. I bought the Sabrina Slims pants pattern as well. Stay tuned for that review.
This post isn't a sewing tutorial so much as it's more of a pattern review. So, here ya go.
PROS
This pattern can be made in many variations. I loved the dress version most. I have a few lightweight dresses I constantly reach for during summer. Flouncy and bouncy without zippers or waistbands to contend with. They keep me happy and comfy during the humid months. So, I knew I wanted to make an easy knit dress for Summer.
The pattern lets you choose from long sleeves, 3/4 sleeves, short sleeves, or a tank style. You can make a top or dress, long, short, tunic whatever you fancy. Oh, and it has an optional cowl neckline too. Whew! So many options.
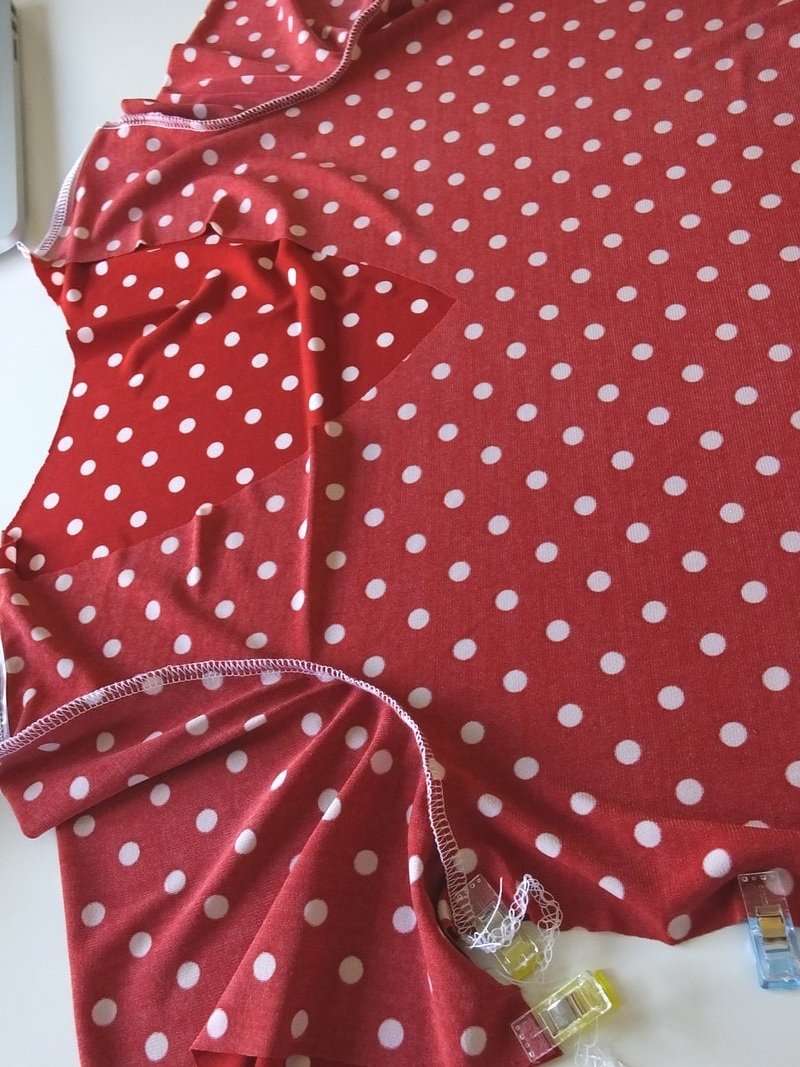
I chose the dress length, short sleeves, and the V-neckline.
The pattern calls for stretch knit fabric and was a quick project on the serger. Cut to finish took 2 hours, minus the V-neck insertion of doom.
CONS
In choosing the V-neck, I was surprised as to how confusing that whole ordeal was. I've made a handful of V-neck tops and they've been easy as pie. This one was not. Maybe it was a combo of the fabric and my sewing brain, but I won't follow that insertion again. I had to make it twice and it still isn't centered into the V. Ugh
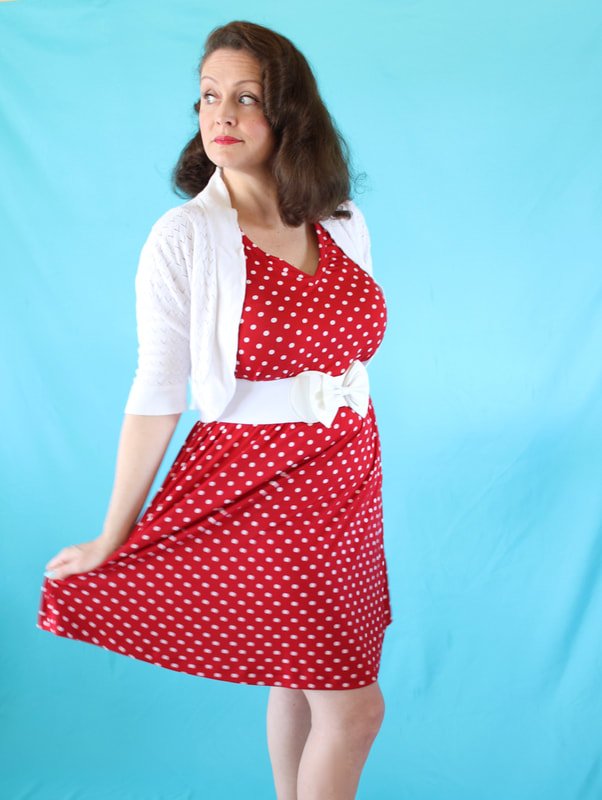
I printed and cut the full bust front piece. I usually do an FBA on all my dresses and tops, so I thought this was a neat option. However, in trying the dress on, it looked frumpy. Maternity-like if you will. My husband and 2 older kids said it looked frumpy too and I didn't like how I looked in the dress. Frumpy is a four-letter word to me. Ha!
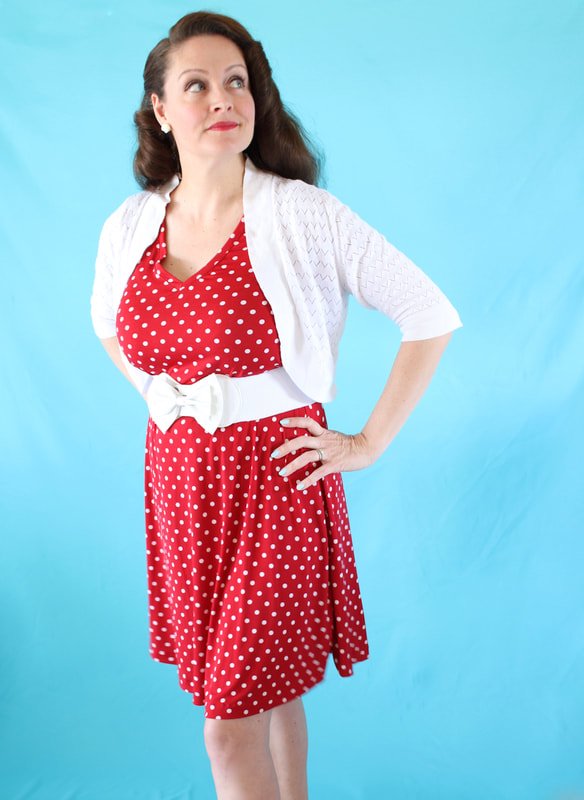
So, I added a cinch belt, a cute sweater, matching flats, and jewelry to turn the dress into a casual pinup look. Yay! Almost similar to the Popover dress I made. Almost.
I want to print out the regular front piece and see how that fits. I think it might fit a tad better. And, I want to size down next time as well.
Frumpiness aside, it's comfortable and easy to throw on. I see a few of these becoming Summer wardrobe staples. Heck, I might make a nightgown too, with some added length.

This pattern is perfect for beginners.
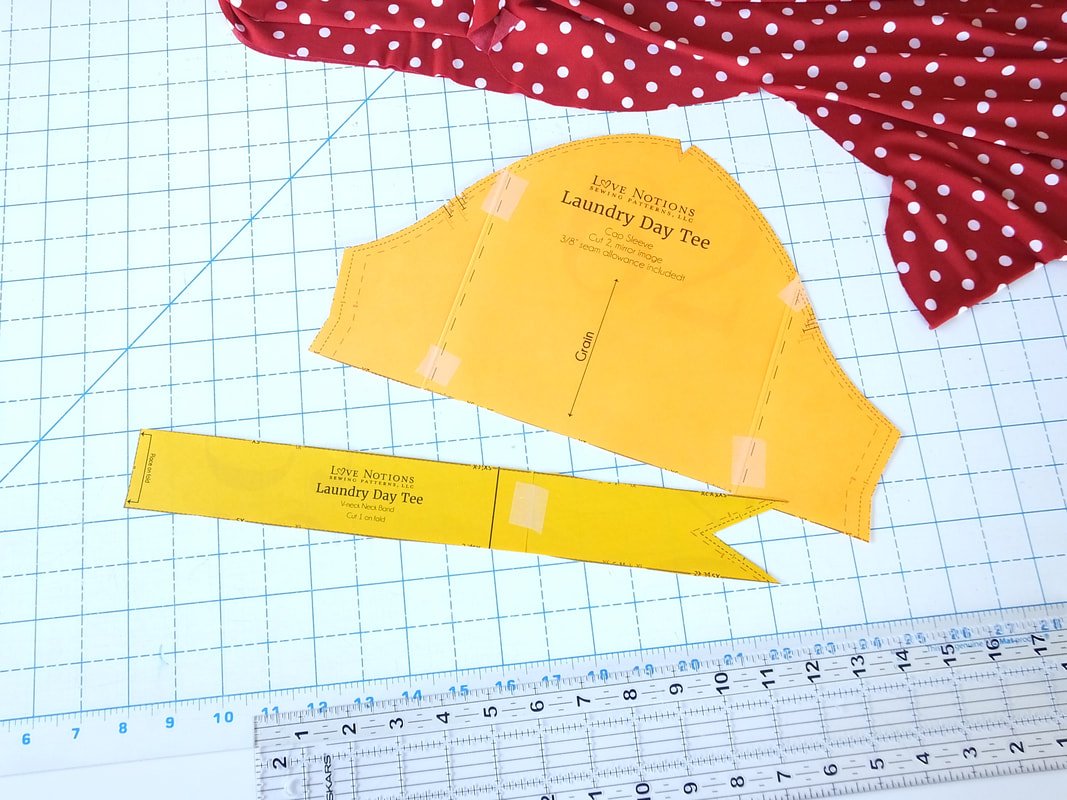
Print, cut, and tape the PDF pieces together. It has very few pieces; one front and one back, a neckline piece, and sleeves or armband facings if you choose the tank version. Oh and that cowl piece too.

SEWING STEPS
Sew the shoulder seams, making sure to use clear elastic to support those seams.
Attach the sleeves, easy enough making sure to match the notches.
2 notches for the back, 1 notch for the front of the armscye.
Attach the neckline, hem the sleeves, and bottom hem and you're done. So easy!!
So what do you think? Have you ever wanted to make a T-shirt dress?

As always, thanks for hanging out. Please share this post and blog with your friends and family and follow me on Instagram @sewingtothemoon.
Leave a comment below if you plan on making this pattern or have already made it.
XO,
Annette

Playful Butterick B6354 Bustier
How to sew plastic boning into a bustier. Butterick 6354 sewing pattern. Sew a quick form-fitting pinup style top.

Happy March!! Hope you are staying safe and healthy, and have enough toilet paper! Ha! Never thought I'd say that. Whew, what a world we live in right now. This month has not gone as planned for anyone, I'm sure. We were supposed to leave for a family cruise, but that was cancelled along with school, life, and everything else.
When life gives you lemons, get the peeler and enjoy the process.
I'm enjoying the time with my kids instead of having to drop off and pickup from school. We even have enough toilet paper. We luckily bought ours before the crazy hit the fan. LOL
I worked on this Butterick top all week and after trial and error, I finally got the sizing correct and finished it. For the cruise. That was cancelled. :/
I wanted to spend more time on the boning portion of this pattern for you guys. Do you search for tutorials before you make something new? It's nice to get a feel for things before getting your head in the game, right? I didn't see any in depth tutorials on how to insert boning. I wanted to spend time on the boning portion with this post. The pattern is pretty easy and straight forward otherwise.

This was the FBA that I ended up not needing. Ha!
Pattern time
1 yard of fabric + lining.
7" Separating zipper
Thread
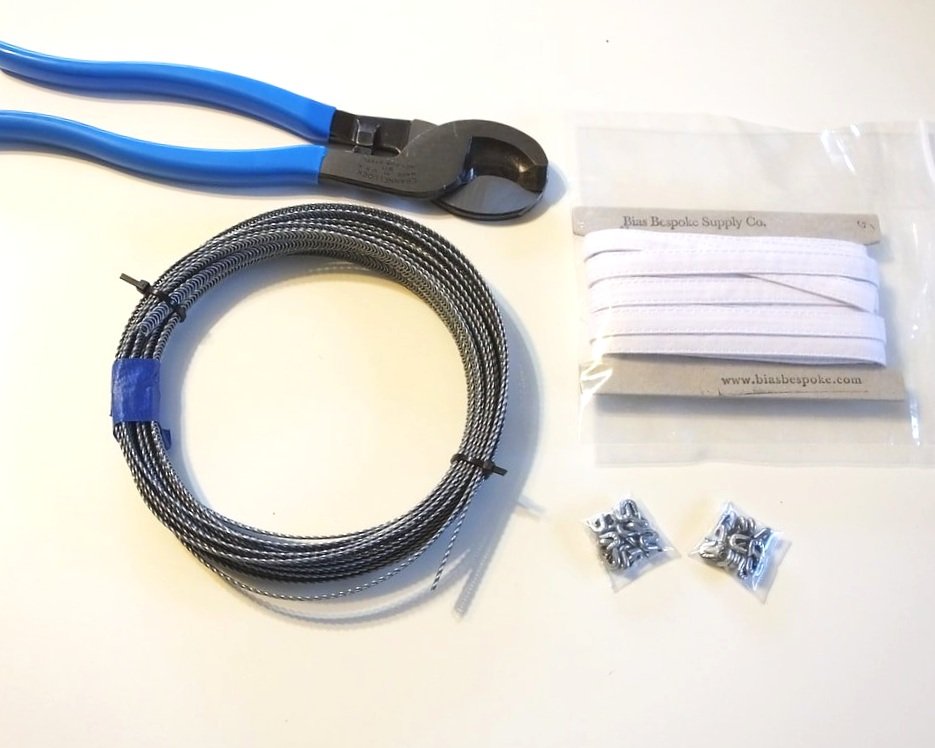
2 1/5" yards of boning. I opted for plastic this time because this top will be used during warmer weather and I didn't want the bulk of the stainless steel boning. I grabbed 2 packs from my local craft shop. Each package only has 2 yards.
2 Buttons
All your sewing notions and machine
Scissors for cutting plastic boning that aren't your fabric ones.
Buttonhole foot
Zipper foot
Hand-sewing needle and thread
According to the pattern envelope, I needed a size 14. I also made an FBA (full bust adjustment) after my first muslin seemed snug. Well, it ended up being huuuge. No, I couldn't just take in a little at the side seams. This was big enough to fit the movie snacks, popcorn, sodas, and my kids!! Face-palm!
But at this point, I accepted the challenge. Game on!
"It's not sewing unless you use your seam ripper." - Me.
I unpicked the bodice, lining, and boning casings. I then re-cut to a size 14 minus the FBA. Sewed it up and it was still big. I could fit the snacks only, this time.
So, I unpicked it again and cut a size 12, no FBA. Size 12 fit well enough. I might try a size 10 next time.
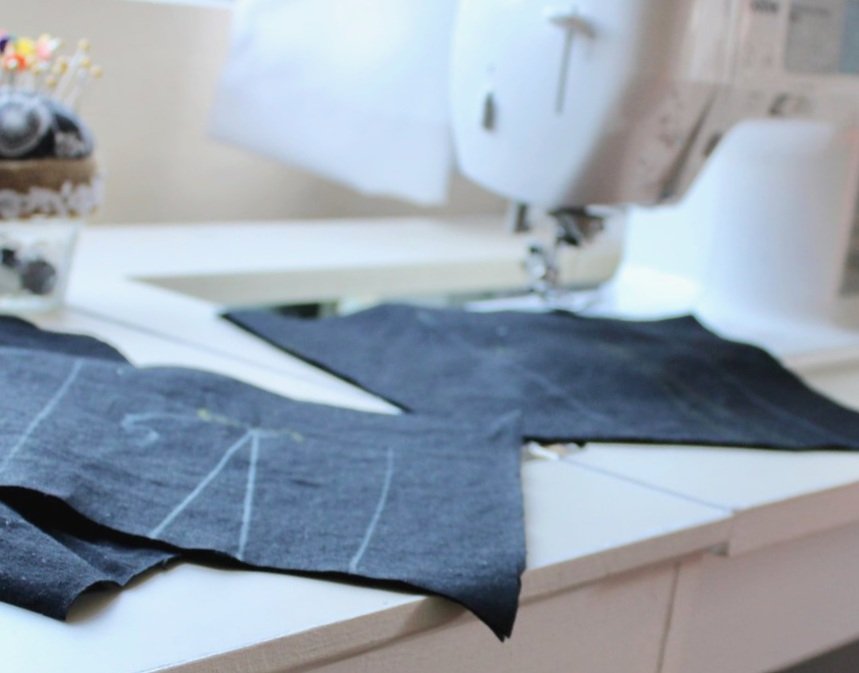
After you decide which size you're going with, trace your pattern off. Grade between sizes if needed.
Transfer all the markings onto your pieces, especially the lining pieces. You'll need accurate placement lines to position your boning.
Sew your darts on all the pieces.
Pattern instructions always have you make one thing at a time, but I sew all the darts on the outer and lining at the same time. It makes more sense in my head to do it this way, but you do whatever feels comfortable for you.
After the darts are sewn, place the 2 front pieces together, RST (right sides together) matching notches and dart seams. Sew from the waist up.
Then, grab the front band pieces. Sew together and fold in half, if you haven't already.
You're going to attach this piece to the bodice you just sewed.
TIPS
I cut into the band’s raw edge after it was folded to make the sewing process easier. It helped me. You can do this if you want or not. I clipped into the raw edge 1/4".
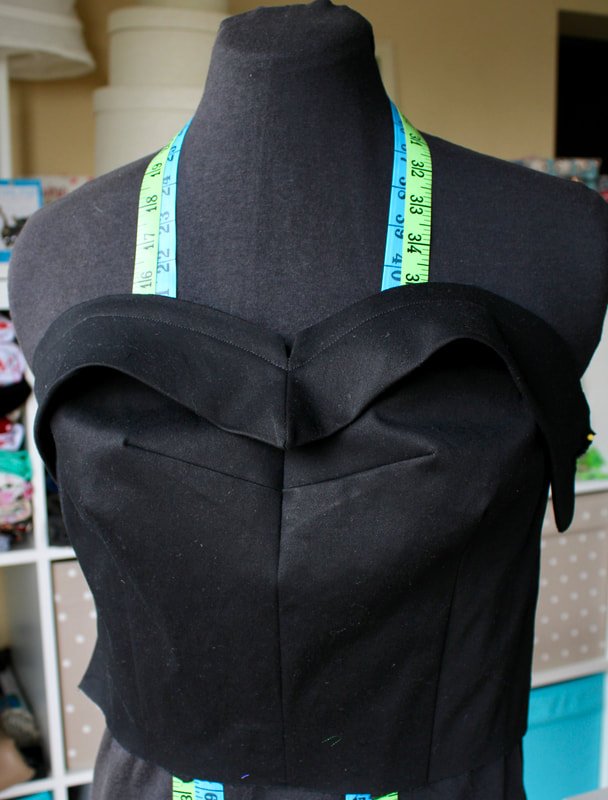
After I sewed the band on, I stitched in the ditch of the center seam to keep it from flopping around. I didn't like the look until I did the top stitching. You can see the photo below, I didn't stitch it down at this point. It was sloppy looking. The first photo was after I stitched it down. See the difference?
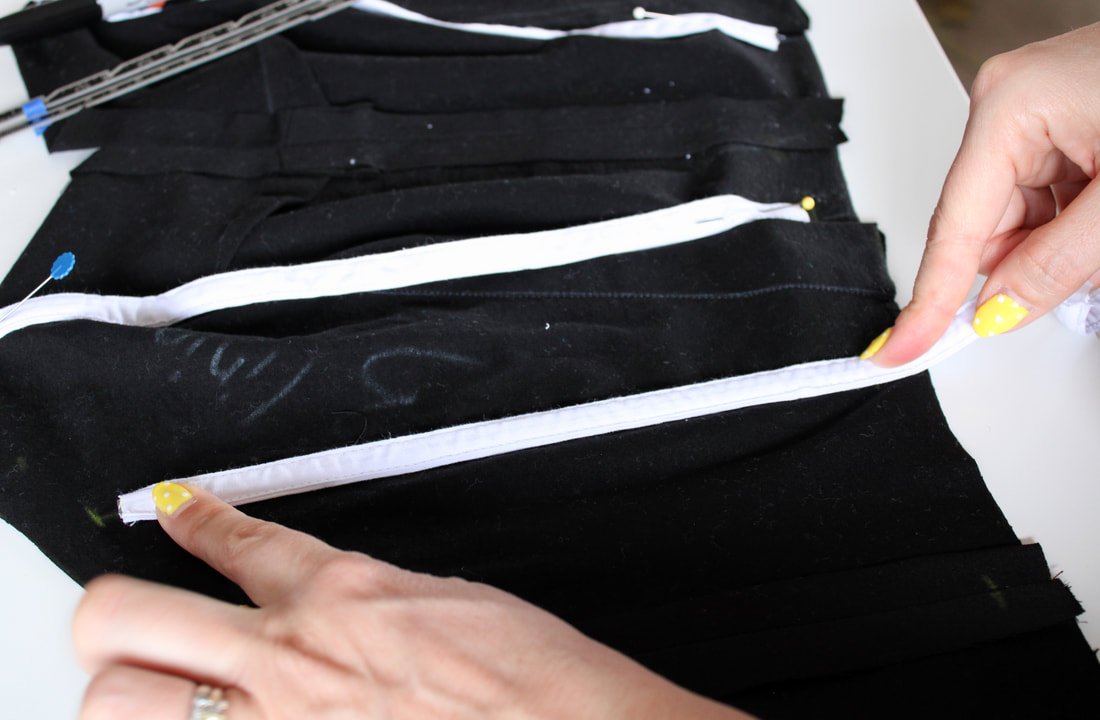
Insert your separating zipper. WOW! This was my first time using a separated zipper and boy was it easy. You're making a lapped zip, so be sure to press one seam 1/2" and the other 5/8". The left side laps over the right side, hiding the zipper in true vintage fashion. Follow the pattern directions for the insertion.
Sew the side pieces onto the bodice, matching notches. Sew from the waist up. Easy peasy.
Your top should look like the photo below.
Now onto the lining part with the boning. Take a deep breath, you go this!
You want to measure and cut the strips of boning/ casing before you sew it in.
If you're having a difficult time with the boning being curled, steam the strips using your iron. Use the cotton setting with plenty of steam, and make sure the plastic is covered with the casing or a cloth. You don't want to melt the plastic. Wiggle the piece up and down, similar to how you would with a false eyelash. They should lie flat.
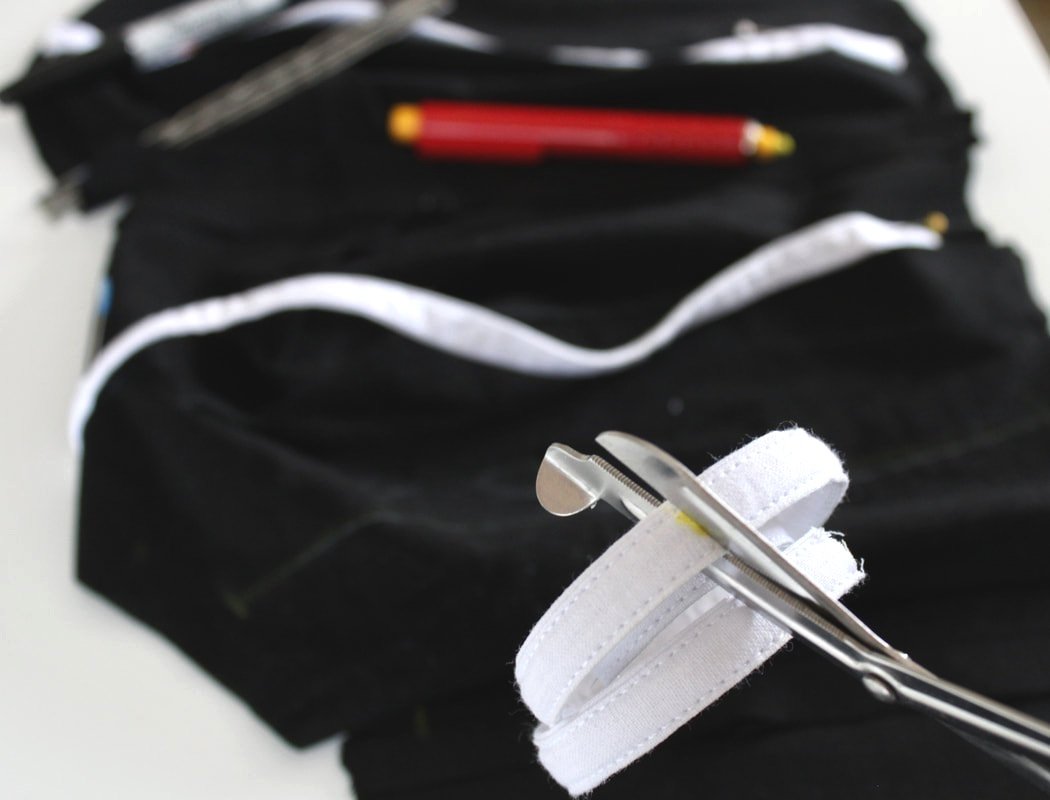
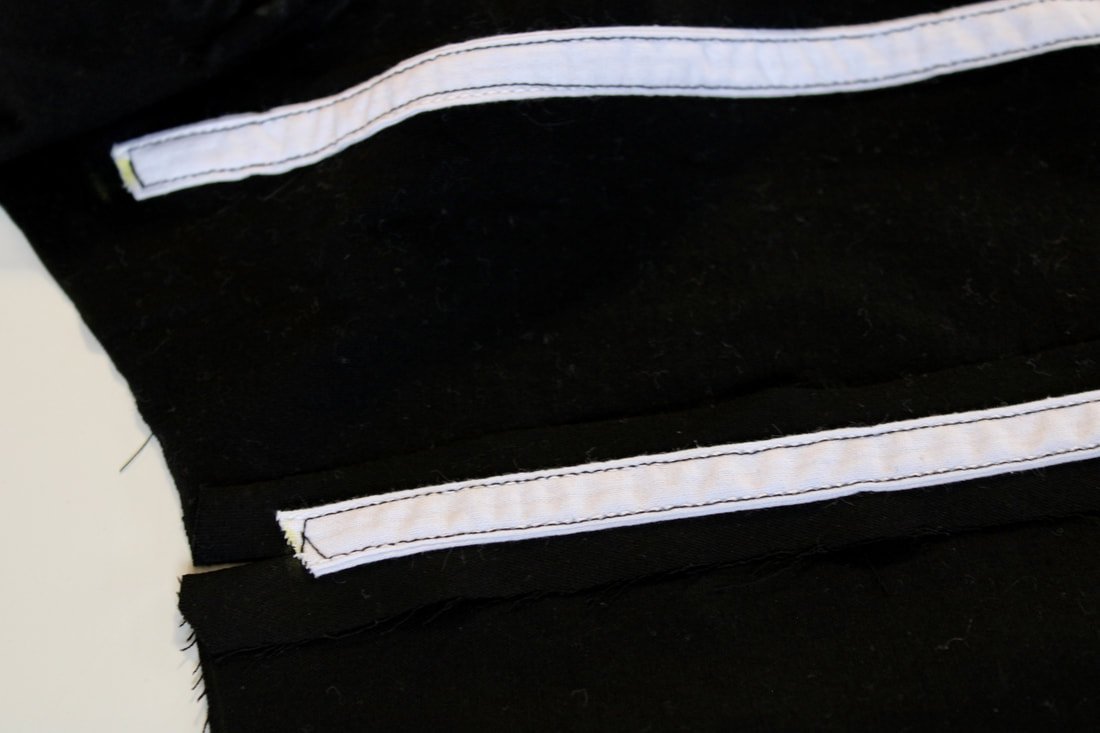
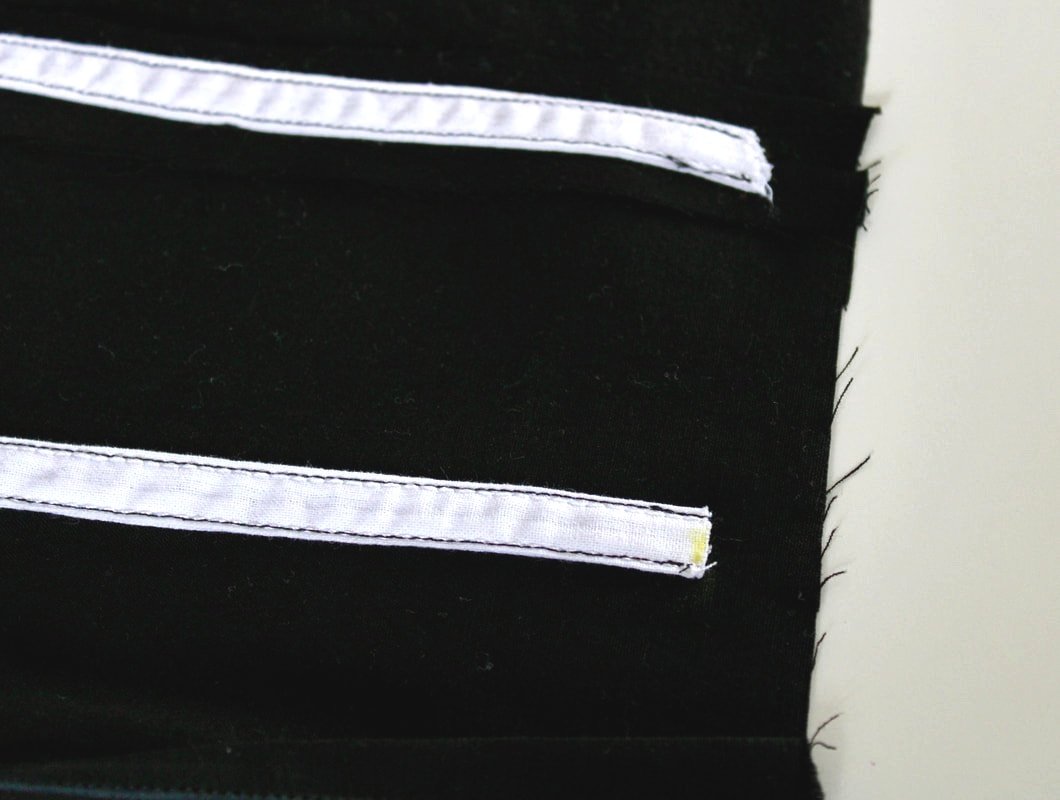
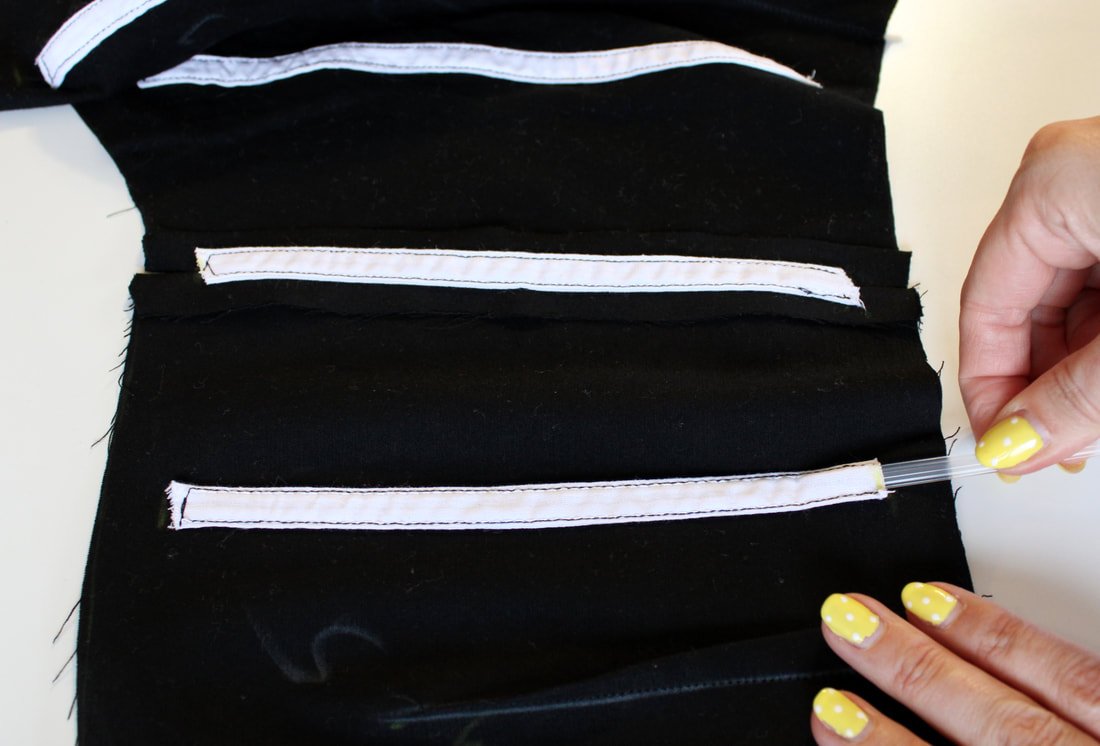
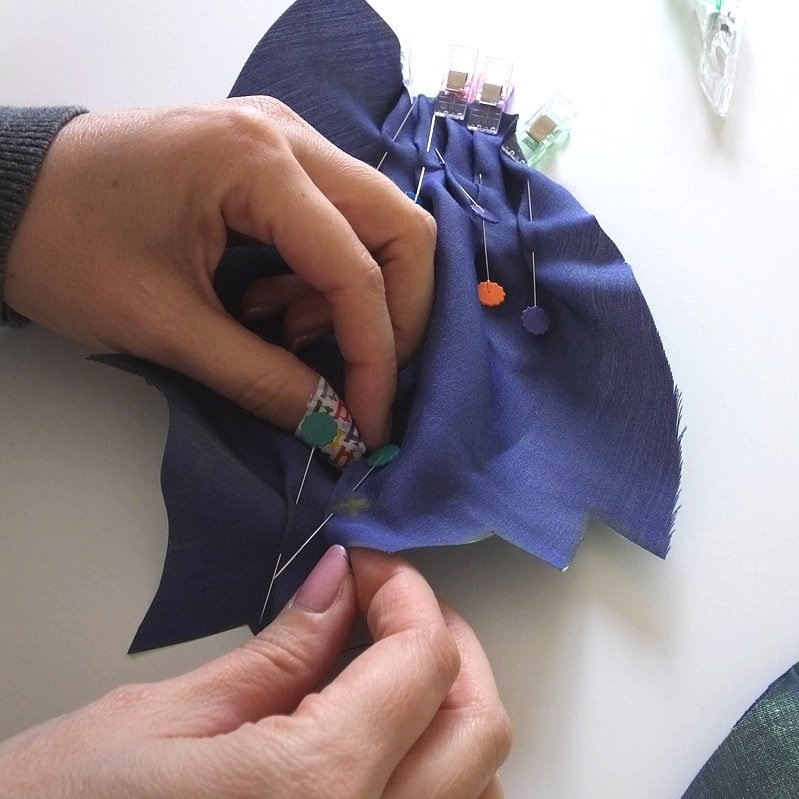
Sew the casing strips onto the bodice lining, leaving a 5/8" seam allowance between the casing end and the fabric edge.
Pin in place to keep them in order. Start on the top, backstitch, and sew down one line. Backstitch. Then, sew on the other side. Backstitch and sew the top short edge and pivot back to go down the long edge on the left side. So you're making a backward 7.
You need to leave the bottom open to insert the boning piece. Follow along the stitching line, it doesn't have to be 100% perfect, just try to sew a straight line.
Preparing your plastic boning.
You don't want sharp edges that will poke you, or worse poke through your new garment.
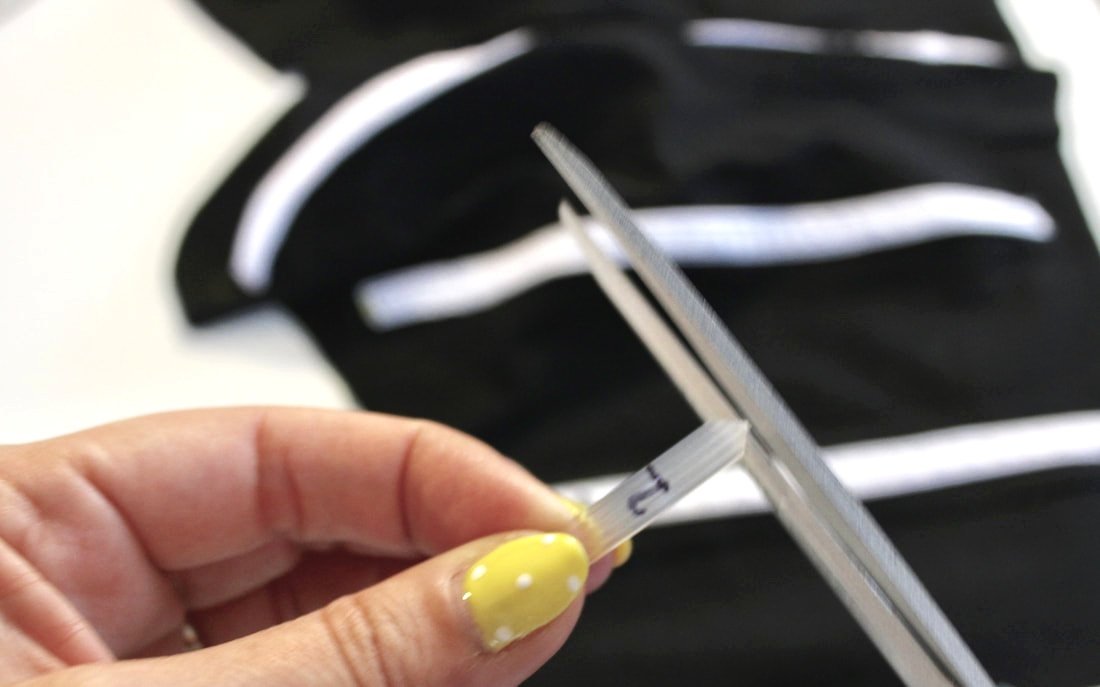
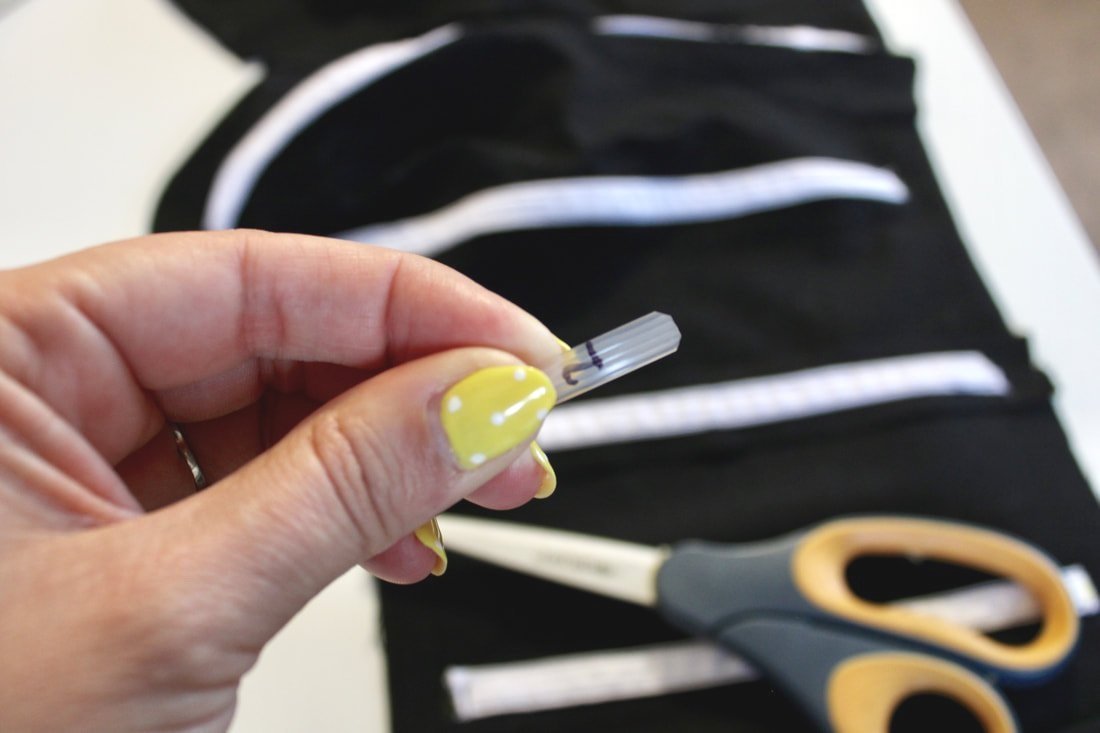
Trim the plastic boning with a pair of scissors, not your fabric scissors.
Bonus tip: use a permanent marker to number your boning pieces. Start from the left or right. This number system kept me from going insane. ;) Slightly...
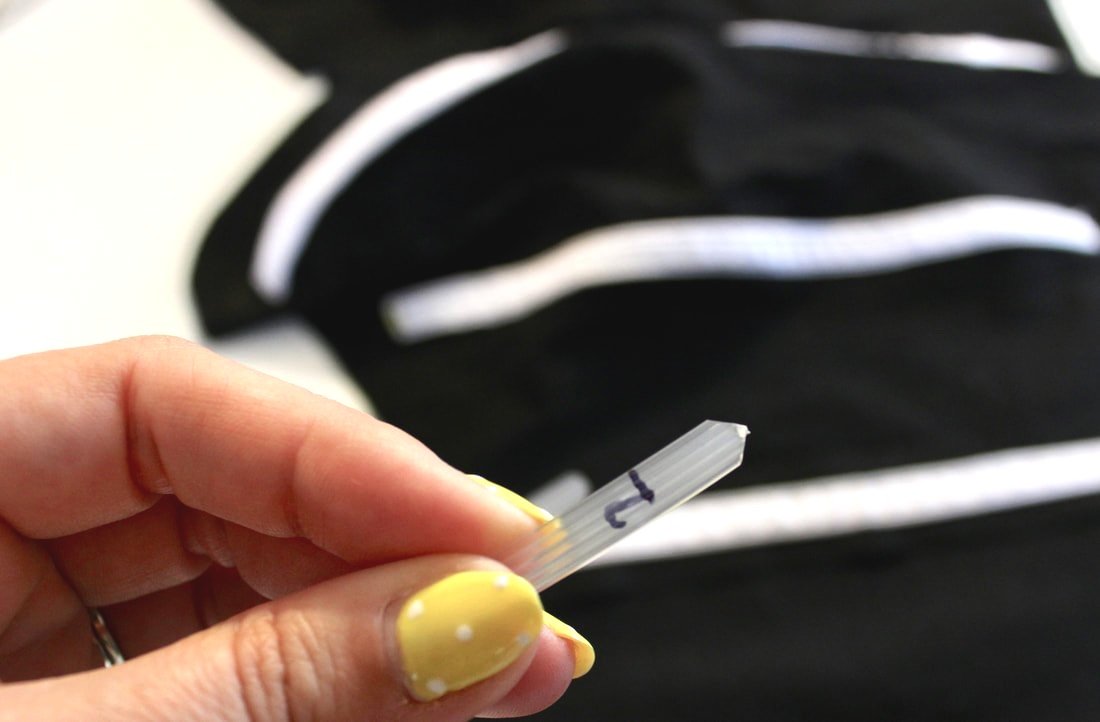
If your boning is rounded still, steam the strips, and they flatten out nicely.

After all the boning is inserted, stitch the open ends closed. The pattern doesn't say to do this, but it's an extra precaution.
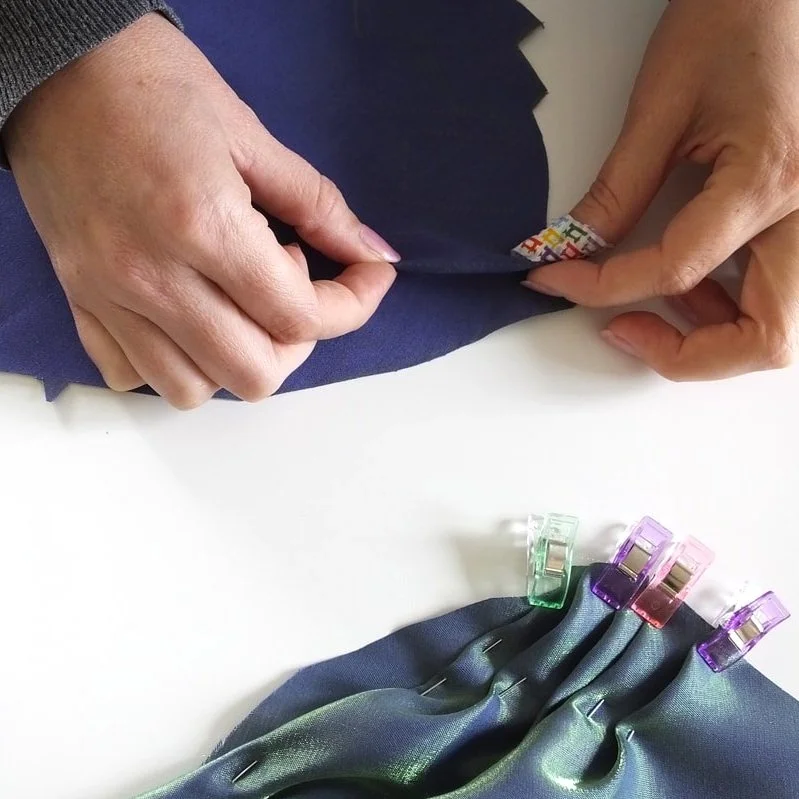
Match the bodice and the lining RST and sew across the top and across the bottom. Leave the sides open for turning out. Hand stitch the lining to the zipper tape.
Sew the neck strap and mark the spots for the button holes.
Try the top on and see if you need to move the markings to fit your body.
Check your manual for instructions on buttonholes if you need a refresher.

Match the button holes on the strap to the pattern piece.
Place the buttonhole markings and make them using your buttonhole foot.
Hand-sew or machine-sew the buttons into place, and you're done! Yay!!

Front View

Back View
I've started making one in zombie pinup fabric. Yes, I will wear it year-round. My inner goth gal can't resist. ;) I made a gathered skirt with the zombie pinup fabric, so I'll wear them together. Give me matchy-matchy any day!
I have a few other high-waisted pants I plan on wearing the black one with.
Have you made this top? Is it in your pattern stash? I say make it! It was really easy after I got the sizing figured out.
Share in the comments below if you plan to make this or another piece from the pattern. I made the bolero to match with this dress. The bolero is super duper easy!
As always, thanks for hanging out with me. Keep your seam ripper sharp and your bobbins full!
XO,
Annette

Butterick Dress Pattern B5882
Sew a fun and fancy dress with some vintage style. Butterick 5882 dress pattern created by Gertie.

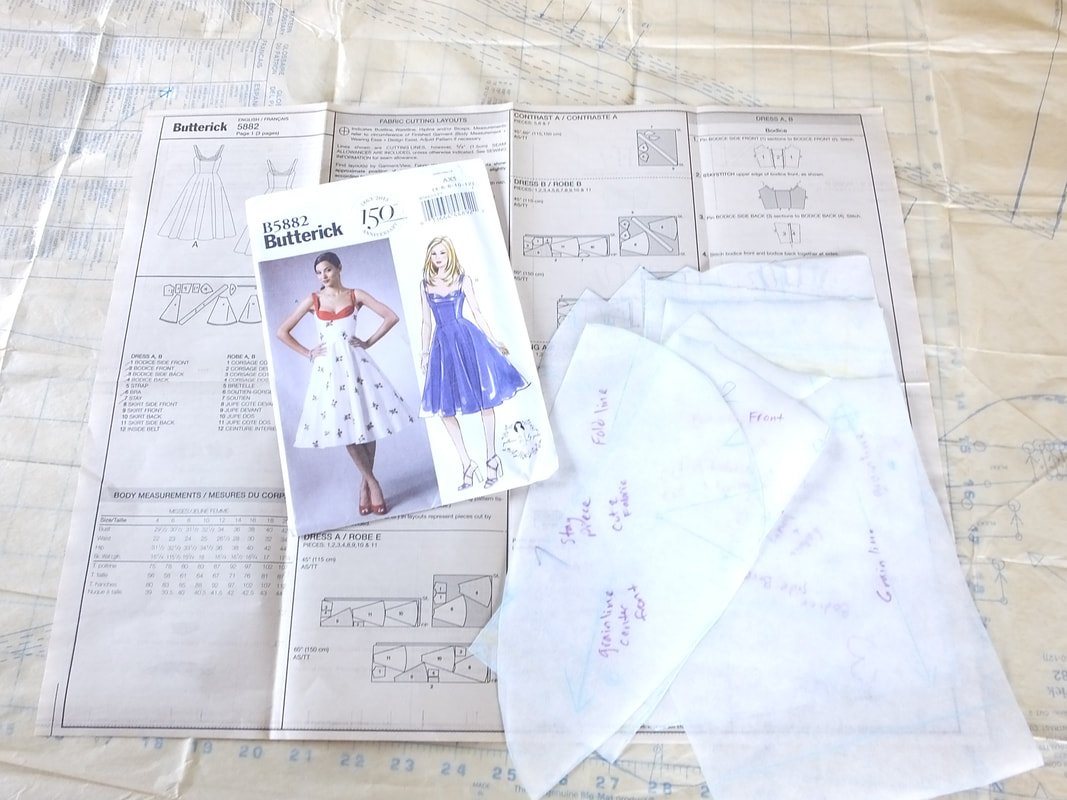
Butterick B5882 dress pattern
I had this fancy-looking fabric lying around and used it for the Butterick 5882 dress pattern. It turned out well enough but, next time, I'll make some adjustments.
My family and I are going on a cruise this spring and I needed a fancy dress. I wanted to make my own dress. Cue the Butterick pattern that I've had in my pattern arsenal for a while. I had yards and yards of fabric left over from a Halloween project.
I decided to make the B5882 dress because I had nothing to lose. My fabric wasn't anything I had an attachment to so, I just dove in! I did make a bodice muslin first because I almost always have to do an FBA. But, no FBA was needed this time. Shock and awe!
Let's get sewing.
Supply List:
Sewing machine and all that jazz
14" zipper
Boning
Interfacing
Fabric and lining
Patience
Grosgrain ribbon
Hook and eye set
Matching threads
Butterick Pattern B5882
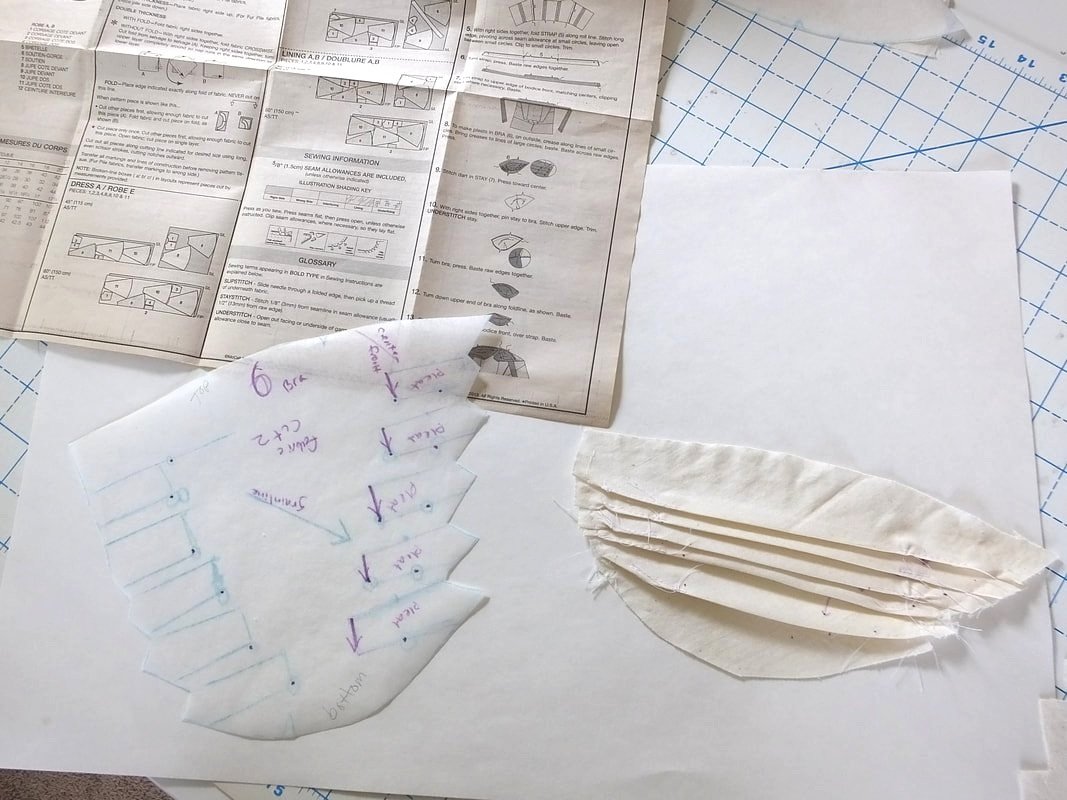
I made the muslin, tried it on, and it fit! Hooray! Next was the cutting of the fashion fabric and lining. I went in head first and full of confidence.

The muslin fit pretty well. I suggest making a muslin for this dress. If not only for the fit, but how the shelf bodice will go together.

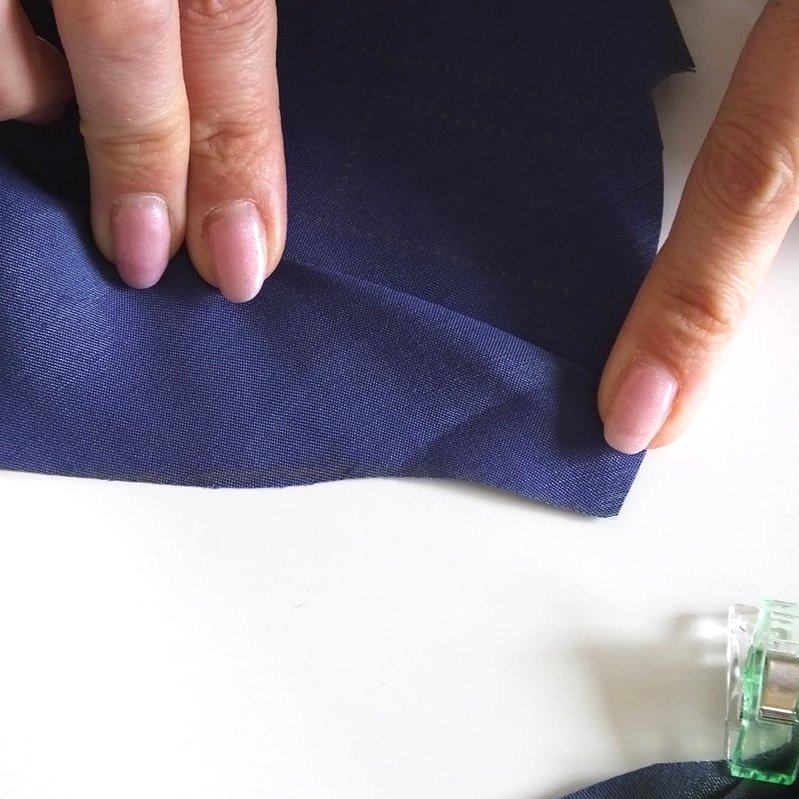
That whole folding thing was super simple with muslin fabric. Not so much with Taffeta. It was fiddly and didn't press how I expected. So, in the end, I went with however the fabric behaved and called it a day. You'll notice in my photos at the end that the strap still doesn't lay flat.
Make sure you stitch and pivot at the exact dots for the strap. It'll cause issues down the road if you don't. *I learned my lesson.

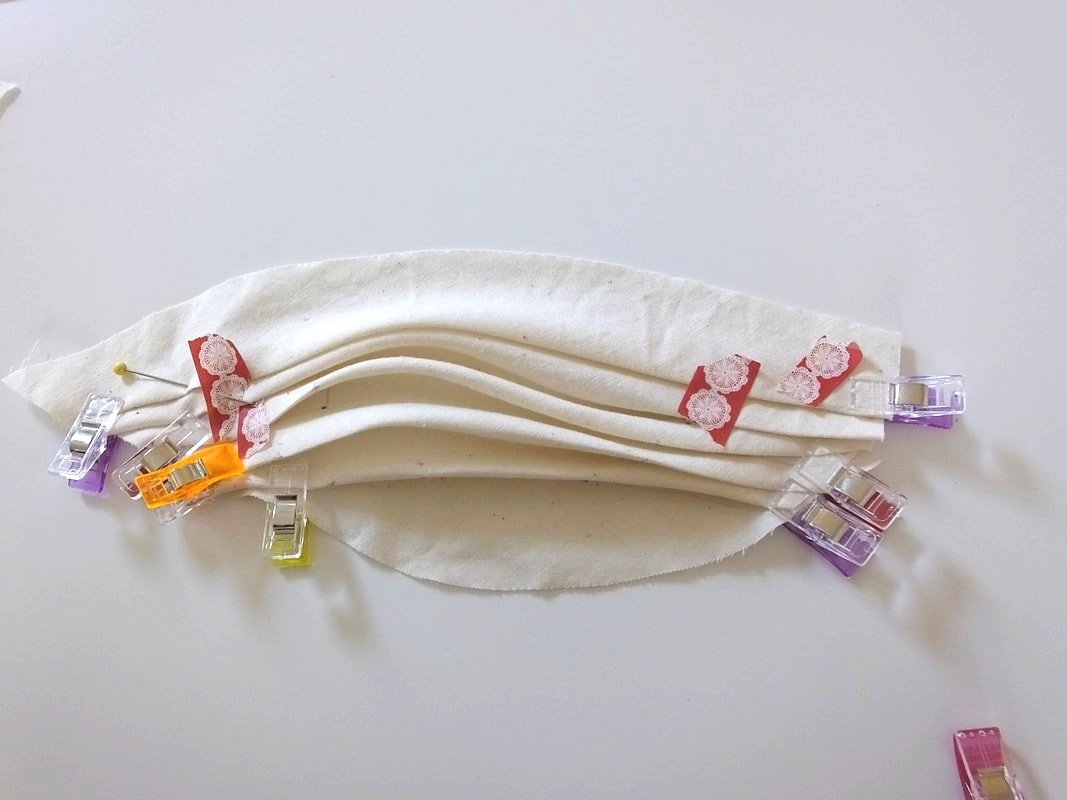
Press the pleats in place using a tailors ham. It helps to shape the pleats.

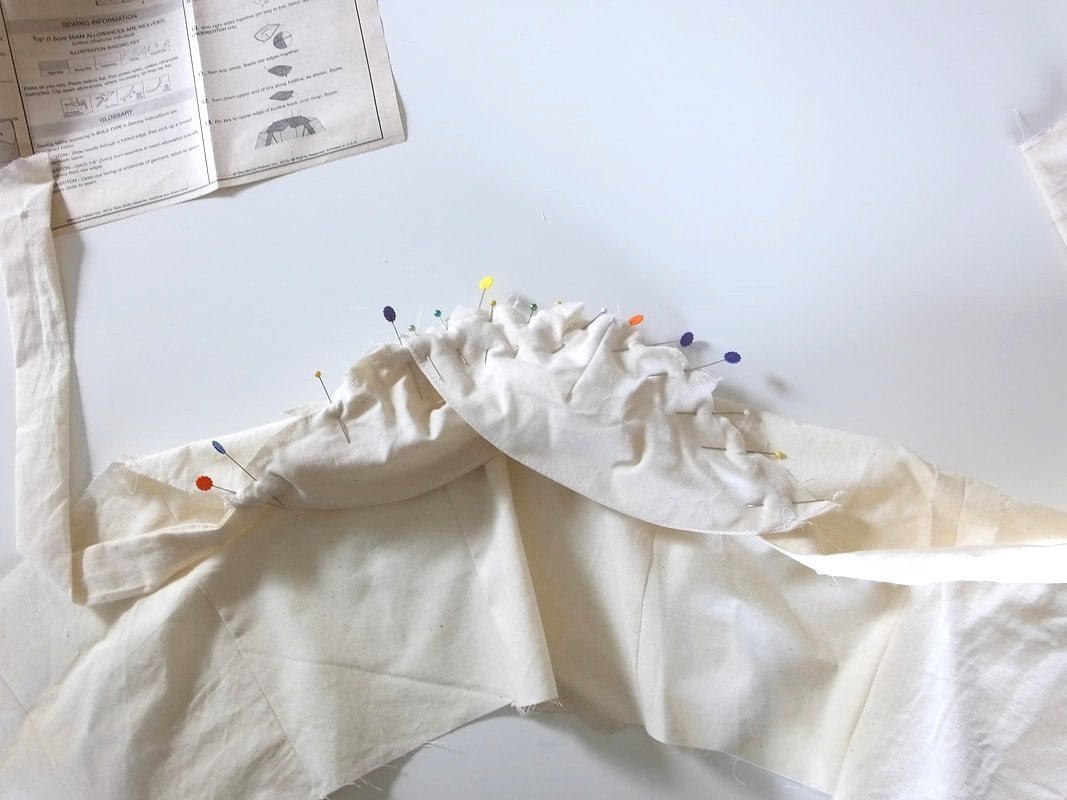
Sew one cup at a time. This part was pretty easy. Go slowly and follow the curve.
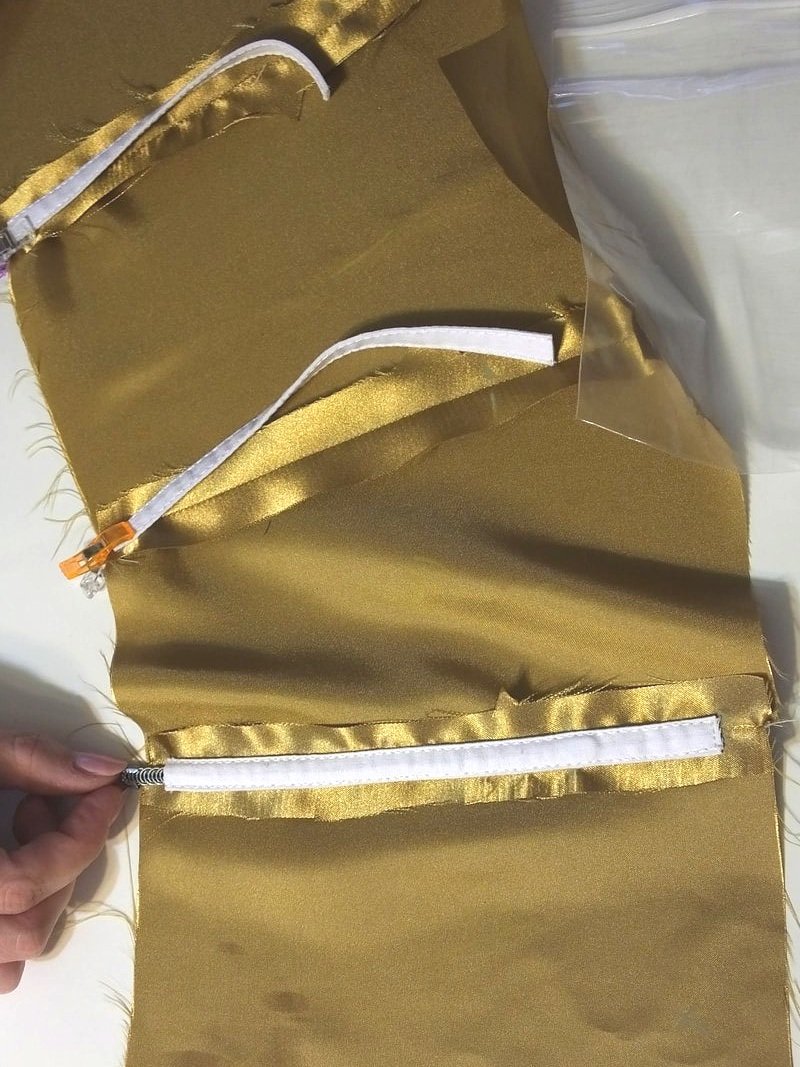
Boning Time
I had never used boning before, but have made my own bras. In the future, I want to dabble in corsetry for myself. I own a few corsets and love them. I love how they squish everything into place and keep it there. I didn't buy the pre-cased plastic boning as the pattern recommended. Instead, I ordered yardage of spiral steel boning from Etsy. I also ordered boning casing, and the little metal caps that go on the ends so you don't get poked. I was intimidated, but it ended up being pretty darn easy!
Excuse the lighting, I did the boning part at night. No pun intended ;)
Zipper time!
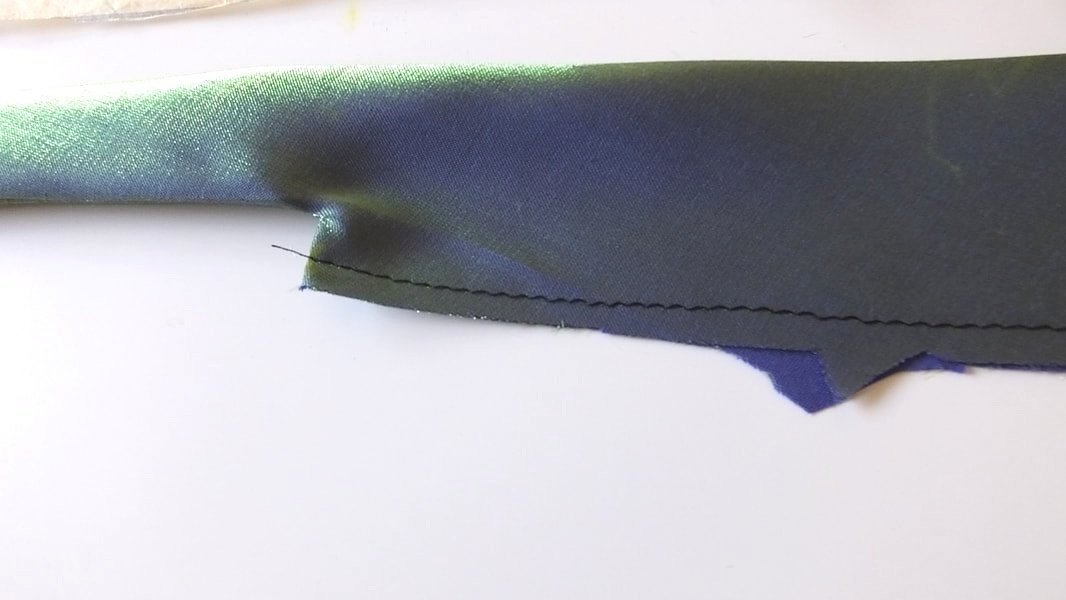
Grab that zipper and foot. The pattern calls for a lapped zipper which is similar to a regular zip, but the measurements are changed up a little bit.
You want the left seam to be smaller than the right seam so the fabric folds over and conceals the zipper. I always love a lapped zipper because they're easy and a nod to vintage style.

Make sure to use a zipper foot.
The left side is sewn right at the zipper teeth. The right side will have more fabric so that when the zipper is closed, the teeth are hidden.
See how the fabric is folded over when I stitch the left side for the lapped zipper.
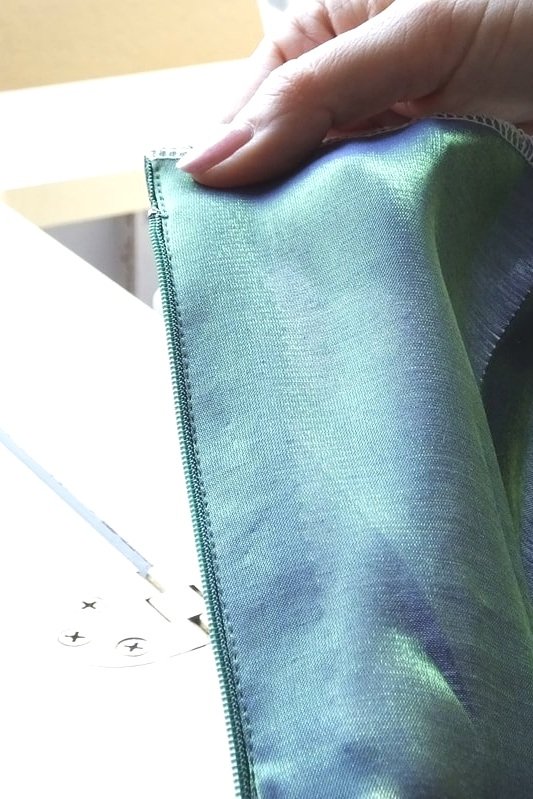
The left side of the fabric is folded over. This is the lapped zipper and my favorite type of zipper.
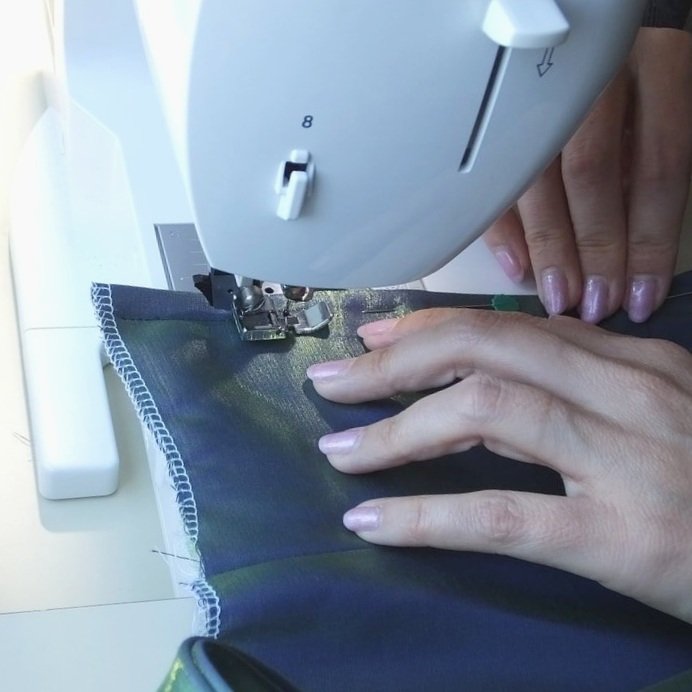
I didn't take any more photos after the zipper. All that was left to do was the skirt. Follow the directions and match the notches. Hand sew the lining to the zipper and hand stitch the bodice lining to the skirt lining.
Let the dress hang for 24 hours. Sew the hem by sewing a 1/4" seam line around both the lining and dress. Fold up the edge and press. Then, fold it up again and stitch. You'll have 3 layers. You're basically creating a narrow hem.
I added the waist stay last- I completely forgot about it until I saw the ribbon I had cut, and draped over my sewing cart. Haha!!
I tacked the ribbon at the waist with a few stitches where the boning seams were. Sewed on the hook and eye and it was done! Time to take all the pretty pictures.

Ta-da! Dress is finished. Ignore my face. LOL
If you've made this dress or do make it, please tag me! I want to see your fabric choice and version. This dress taught me some new things and I really enjoyed making it. Aside from the pesky folding of those cups, it was fairly easy. Don't be intimidated by the boning like I was.
As always, thanks for reading and hanging out.
Happy Stitching,
Annette
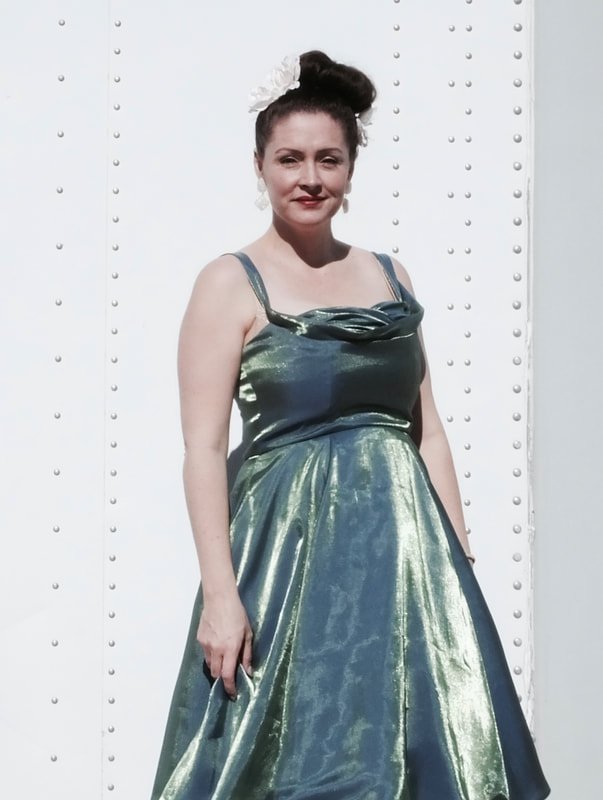
I'm going to hand-sew a few hidden stitches to keep the neckline strap down. It likes to pop up.
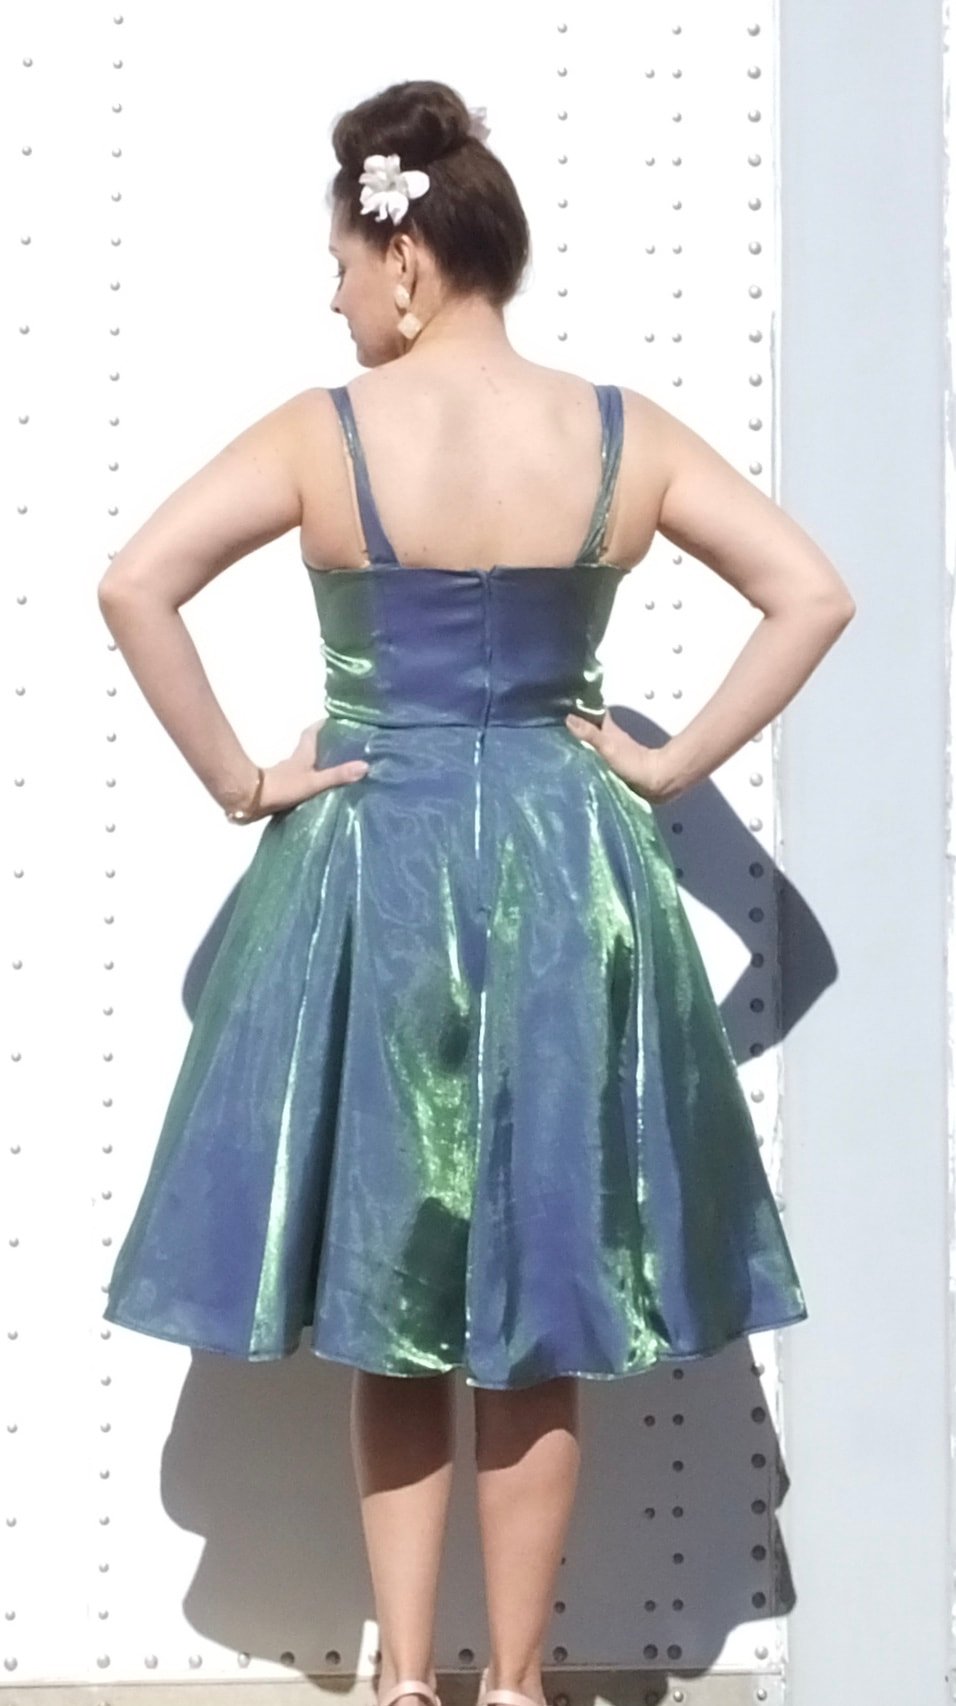
This is the back view. It's a form fitting dress but, it's comfortable.
Wanted to show the gold lining. The whole dress reminds me of Mardi Gras. If I ever go, I'll be sure to pack this beauty. :D
