
Pattern Reviews, Sewing Hacks, Tips & Free Patterns
The Sewing Blog

Charm Patterns Rita Blouse
The Rita Blouse by Charm Patterns is my favorite top to sew. It uses about 1 yard of fabric and is easy to sew. It’s comfortable to wear and is full of vintage style.

Hope your week has gone swimmingly! This vintage-style blouse pattern is made by the queen of vintage sewing herself, Gertie. Her books, patterns, blog, and Patreon are all things made for the retro-loving sewist! If you don't know who she is, click here. You'll fall in love instantly, I promise.
Real quick, here's a little back story. I learned how to sew right after my oldest son was born. Baby blankets, curtains, pillows, I made all the things. I took a group class upstairs in a small vacuum and sewing shop. I was the only one who showed up, so I was lucky enough to receive a one-on-one class from the sweetest lady. Fast forward a few years and I was making bags, more pillows, PJs, and Halloween costumes for my kids. You know, regular mom sewing stuff.
While channel surfing, I stumbled upon our local PBS station and saw some sewing shows! I DVR'd them all!! I would wake up early Saturday morning and watch as many as I could until my kids woke up. Super sewing nerd alert! LOL!! Nancy Zieman was amongst a few others I got to know through television. Then, one day this gal with pink hair had a short segment. I can't remember what she made, but I was in love. She was young, had pink hair, and sewed!!?? Whaaatt!??
Got out my laptop and Googled her name and found she had a blog and youtube channel. I soon realized that I could sew things for myself. Making things for my kids and gifts for friends and family was all I ever did. Gretchen Hirsch a.k.a. Gertie opened my eyes and my spirit. The rest is history.
All of her books, and a lot of her fabric and patterns adorn my shelves. Saying I LOVE her, is an understatement. Not in a creepy stalker way though, I promise.
As parents and adults, we sometimes lose ourselves. We get caught up in day-to-day life and just join everyone else in robot mode. Once I started making things for myself, I enjoyed life and found myself again. If you feel like you're in a funk, I encourage you to find someone whom you find inspiration from. Hopefully, it radiates beauty and positivity like she does, for me.
So, without further ado, here's the step-by-step process of making her Rita Blouse. Click that link to take you to her website to grab this pattern.

Materials:
Pattern paper for transferring the pattern (optional)
Ruler, scissors or rotary cutter, pattern weights, pencil /pen, iron
Sewing machine and all that jazz
Cute fabric and matching thread
Invisible zipper and invisible zipper foot
Lightweight stabilizer
A trusty seam ripper, just in case
Instructions
Open up the pattern envelope. Lightly iron the pattern to get out the wrinkles with a dry iron on a low setting.
Decide which size you're going to cut based on your measurements. The envelope put me at a size 10, but I chose to make a size 8 using the DD cup. It fit perfectly! This top is supposed to have a vintage fit, so I took a gamble. It's meant to fit closer to the body.

Choose your size(s) on the pattern based on your measurements.
Cut out the pattern or transfer it to pattern paper. You can trace it onto freezer paper. Freezer paper is an easy and frugal option. Win-win! Big box and grocery stores carry it.

Follow the pattern instructions for laying out your fabric on the grain. I had some Gertie fabric in my stash, so I used her pretty strawberry print for my Rita blouse.
UPDATE: I used the rest of the fabric I had for my 1940s shorts.

Time to cut out the pieces. Use your rotary cutter or scissors. Mark each piece with chalk or an air/water soluble marker. This blouse has quite a few pieces, it helps to mark them with their number.
*Also make sure you mirror the pieces so you don't end up with left-sided pieces only. Face-palm! :/

Pin the fabric pieces to the pattern pieces until you get going. This keeps everything separate and organized.

Finish the edges however you prefer. Serge or use a zigzag stitch. You can also use pinking shears. Gertie says to sew from the bottom to the top.
Time to assemble it all together.
Follow her pattern instructions and double-check that you’re matching each piece correctly. It went smoother than anticipated.
Be sure to match the notches, these pieces are cut with a curve, and you don't want to have to get out the seam ripper.
Onward!

Stitch the front to the back at the right side seam, right sides together. Again, starting from the bottom and sewing upwards to avoid distortion.
Press those lovely seams open. Don't skip this step. Pressing is what takes your garment from looking homemade to handmade. There's a difference. ;) Your iron is your friend when sewing.

Your lower portion should look something like above. I left my seam allowances untrimmed. If I gain a few, I can easily let out the side seams and still wear the blouse.

Sew the gathering stitches.
Now it's time to make the gathers for the bust pieces.
Increase the stitch length to 5. Then, sew 2 rows of parallel stitching, making sure to leave long thread tails. Pull the bobbin thread and make the gathers even. Go slowly.
Sew the gathers between the dots. You'll do this for both the front and back bodice pieces. Here's an easy way to remember which is which: one line of gathers on the back. Two rows of gathers on the front because, well, you have 2... you know. ;)

Right sides together, sew both upper bodice pieces on the right side seam. Leave the left seam untouched.


It's starting to look like a shirt! Yaaay!
Stitch the top bodice piece to the lower bodice piece. Use all the pins if you need to.
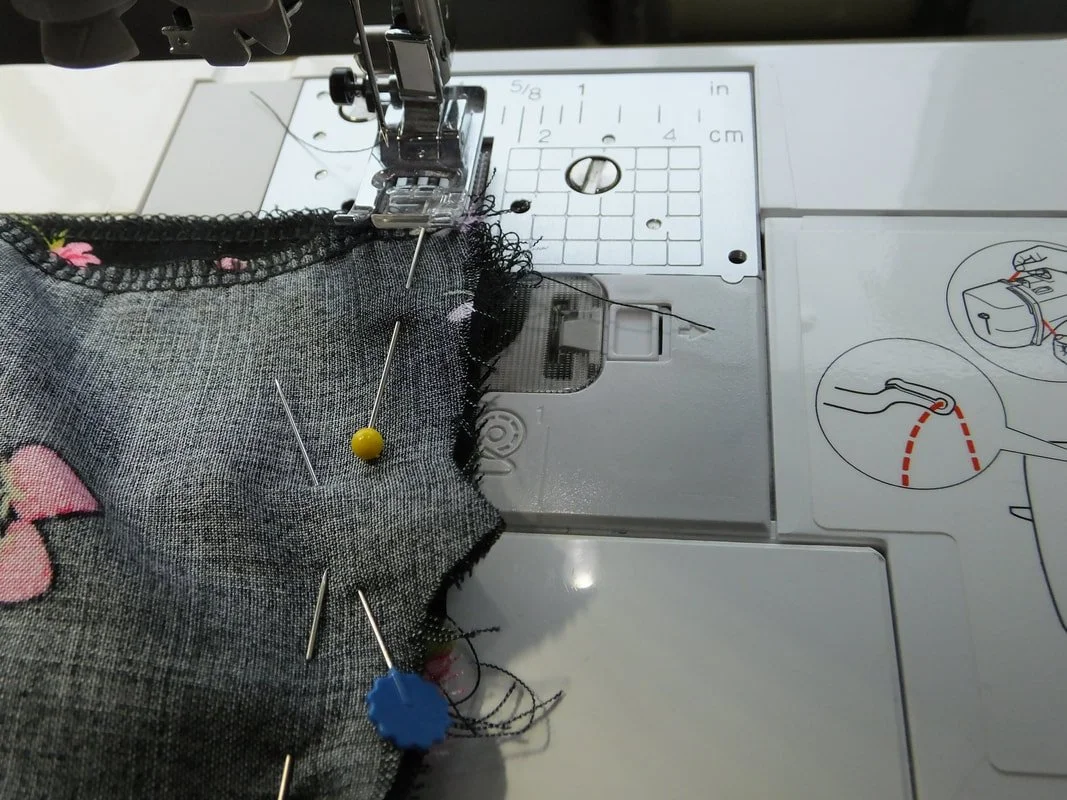
Zipper time! It's like hammer time, but less fun. And no fancy gold pants here.
Cut and fuse a strip of stabilizer where the pattern piece is marked. This will help stabilize the zipper.

Add fusible to the seam where the zipper is going to go in.
I don't pin, I just hold it and unroll the zip as it gets fed under the foot. This takes both hands.
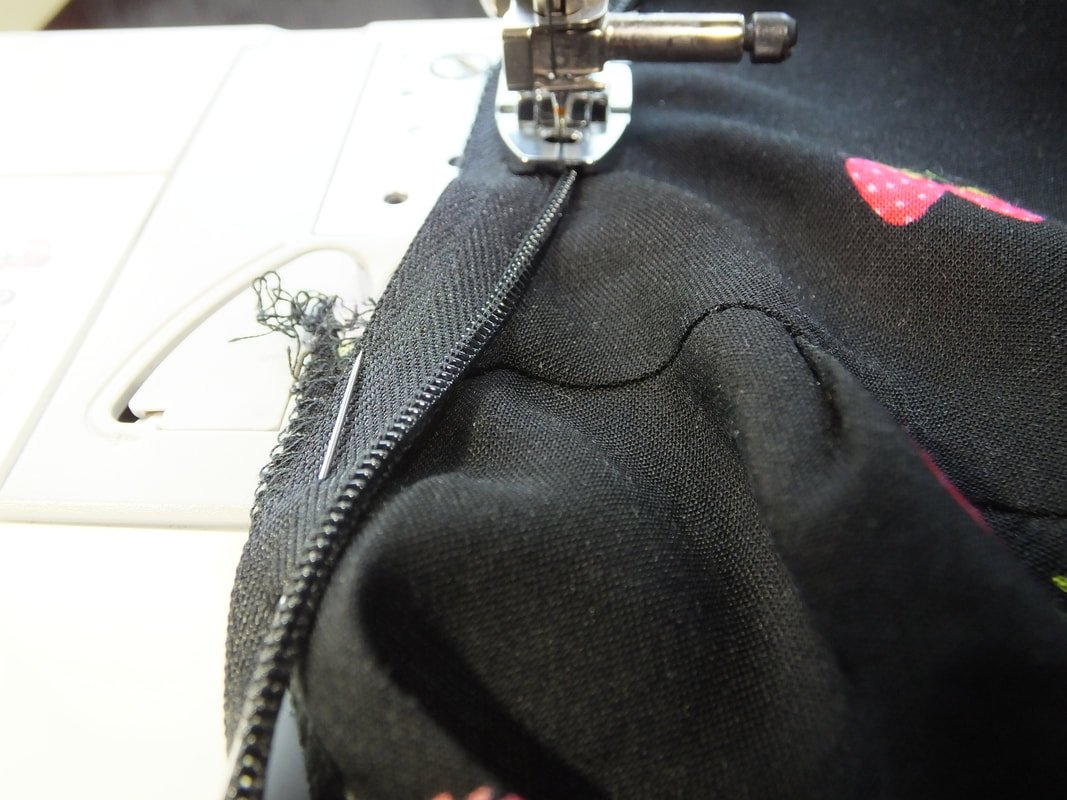
Gertie has a fabulous tutorial on her youtube channel for sewing these suckers. Other YouTubers have videos as well. Once you understand how it works, you’ll fall in love. I like how the zipper disappears into the seam.
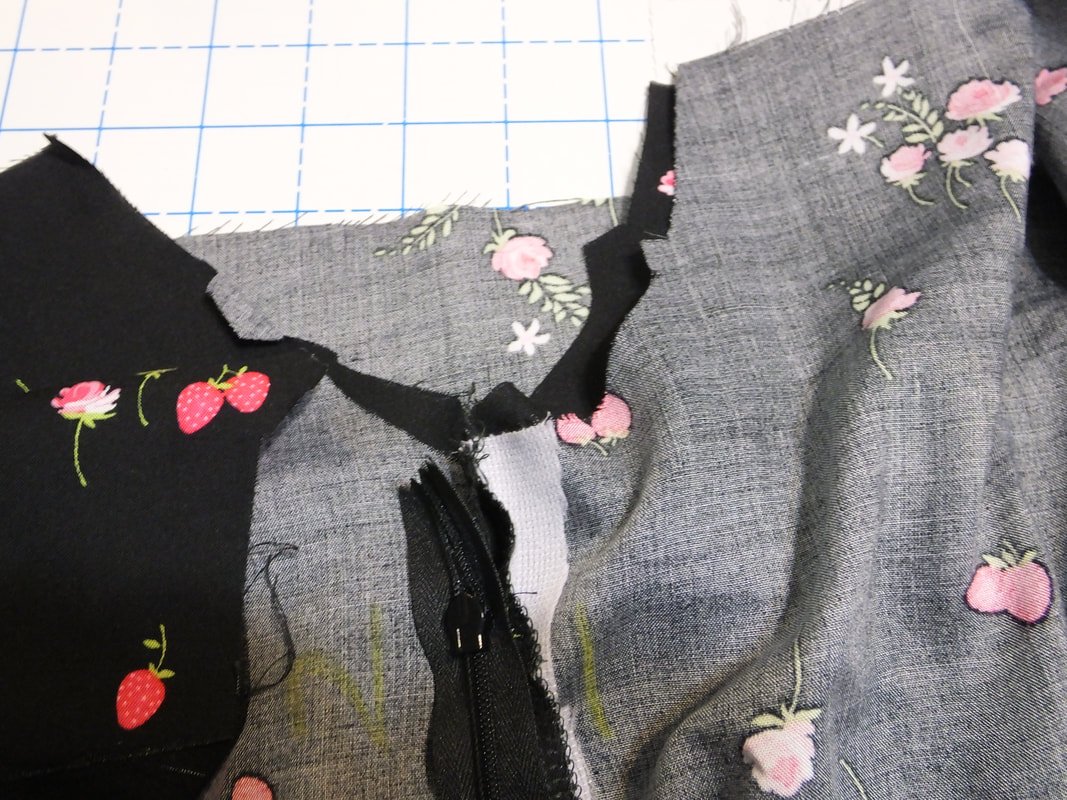
Invisible zippers go in backwards and this one goes in upside down as well because it zips from the waist, up.
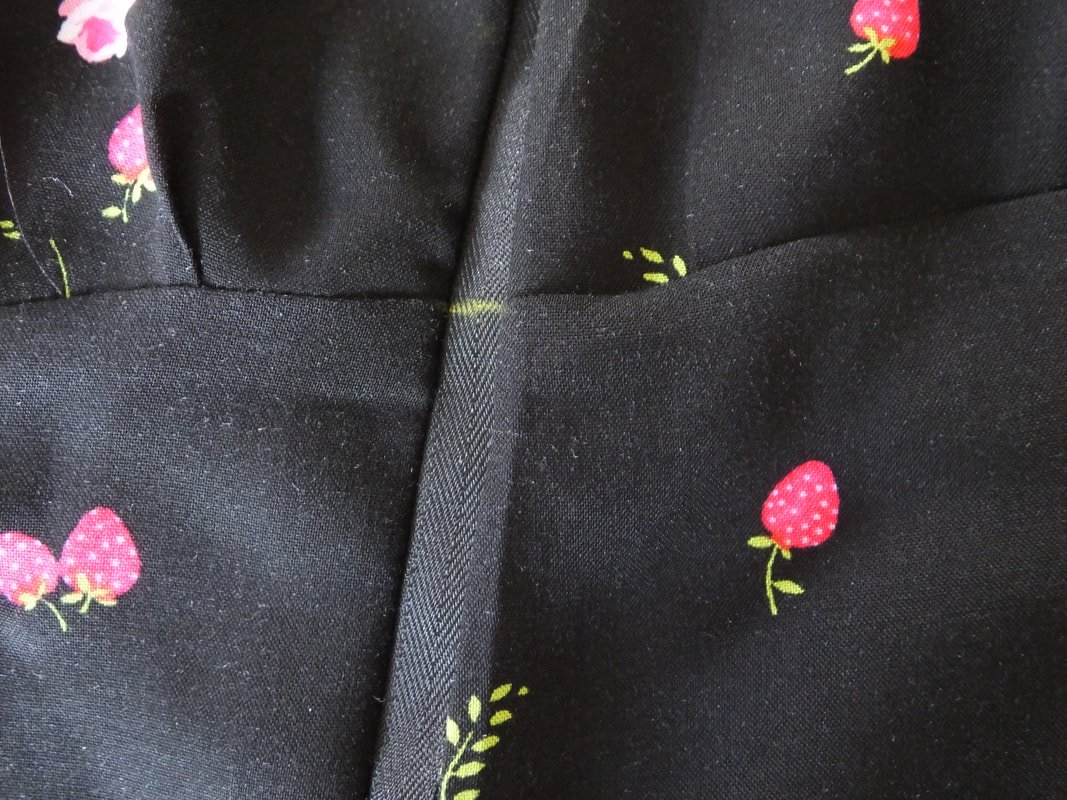
After the zipper is successfully in and you haven't set the shirt on fire. You'll need to finish sewing up the left side seam. Gertie recommends that you leave a thin gap and do not sew straight up to the zip seam. This is the only way I don't get puckers. Seems silly and bizarre, but it's genius and works like magical fairy dust! Cue blissful music. Yay for no puckers!! That's puckers, with a P.
Time to get those sleeves put together. This is easy peasy. Sew up the short ends, right sides together. Press the seam open.

Set the sleeves into the blouse matching the seams and notches, right sides together.
Stitch and trim seam allowances. Press the seam down. Make sure you pay attention to this. I sewed my sleeves on inside out first... Yeah, I'm special.
We have sleeves! Yaaay!! Give yourself a pat on the back, you did it! It's all downhill from here.
I think the most difficult part of this shirt is cutting out the correct pieces. Sounds silly, but I often forget to cut mirror pieces.

Make the casing, it’s easiest to fold and press, fold, and press. And, clip as you go.
Make casings in the neckline and sleeves for your elastic. Watch out for seams when inserting the elastic via a safety pin, they tend to get thick. The pattern instructions have the elastic length measurements for the size you're sewing. However, the length was not long enough for me. I don't like tight armholes. I ended up ripping out the elastic and using a much longer length. I advise you to insert it, uncut and try it on first. You can add length or take away at this point. Just a heads up...

Use a safety pin to run the elastic through the casing.

ZigZag stitch over the elastic ends.
After you have put the elastic through both arms and the neckline, try the blouse on. Adjust the elastic according to your own comfort level. I needed less in the neckline and more in the arms from what the pattern suggested. Once you've found your desired length, sew the elastic ends together with a zigzag stitch. Sew the casing closed.
All that's left to do now is the hem. Go outside and do a cartwheel if you want! Or, just finish that hem and carry on with life like it's no big deal because you just made a top!

This is my 90s pose. Doesn't it take ya back? LOL
Thanks for hanging out today! And thanks if you made it all the way to the end. This was a long one.
Did you find this blouse easy to make? Are you going to make 5 in every color? Yeah, me too!!
Hopefully, I covered everything in this post, but if you have questions, ask in the comments and I'll respond quickly. Check out Gertie, she’s the best.
XO,
Annette

Why I sew
Everyone has to start somewhere. I started making my own clothing a few years into my sewing journey. Here’s why…
Everyone has their own personal style. Whether you wear sweats or sequins, we all need to feel comfortable in our own skin. When I turned 30, I decided to change my look. I wanted to wear things that made me happy and feel good, rather than feel and look just like a mom. I wanted to wear pinup and vintage-inspired things with a splash of rockabilly. Everything was too pricey in the stores and online. My husband asked me why I didn't simply sew my own stuff. Talk about an "ah-ha" moment. LOL
The next chance I got, I drove to the nearest fabric store ( we all know the one, that rhymes with Conan). I grabbed a few patterns and a cart full of fabric. I started with skirts because, well, they're pretty simple. I was soon sewing my own tops and bottoms.
I had only ever sewn for my kids and home decor stuff. I never thought about sewing for myself. #momming #momlife There was a little trial and error in picking fabrics and patterns, but I got there eventually.
Oh hey, it’s me!
Let me tell you though, it's an amazing feeling when I walk out wearing something I've made! Sometimes things don't turn out, but when they do, It's the greatest feeling! The best compliment is “Where did you buy that?” And it usually gets paired with “Thanks, I made it!”
I hope you’re able to benefit from what I’ve learned, here.
I love teaching others to sew. Welcome, and I hope you stick around.

Sewing Gadgets and Notions
Scissors, thread, and buttons. Oh my!

Are you new to sewing and need to know where to start? Or are you looking for more items to up your sewing game? This list is for you.
Below is a compilation of sewing notions that are necessary and some that are nice to have. You don't need to break the bank when you're just starting out. You will need a sewing machine of course, but there is a large handful of other items you're going to want as well.
These are the tools you need to sew all the magical things. Cue sparkly unicorn music.

The almighty seam ripper is a tool I reach for constantly. Sad, but true. So, get yourself an affordable one that you love. You'll be using it a lot. While you’re at it, grab 2.
“You’re not sewing until you use the seam ripper”
Sewing Machine
There are so many options to choose from when searching for a sewing machine. Some of my friends bought the $99 Singer on a Black Friday deal. You can find used ones on sites like OfferUp. I wouldn't go that route unless you have experience or a friend/ family member who can check the machine out for you. They might be missing parts or are broken. A trip to the shop costs upwards of $100. Big box stores, Amazon, and other online stores sell sewing machines.
I prefer Brother machines. I've had lots of luck with the ones I've purchased, and you get a lot of bang for your buck. Most have automatic threaders, speed control, a drop-in bobbin, and thread cutters. They cost a little bit more than the black Friday deal Singer machines, but you get a few more bells and whistles. They’re totally worth it!
A Serger is used for finishing seams and sewing knit fabrics. You do not need this at the beginning. If you find that you love sewing, then this could be a future purchase option. The zigzag stitch on any sewing machine works for knits and most machines have a zigzag stitch.

These are some of the tools you'll want to invest in. Some items are fun extras while others are a necessity.

Scissors, pins, clips, seam gauge, thread, bobbins, and more! They are. numbered from the top and go clockwise.
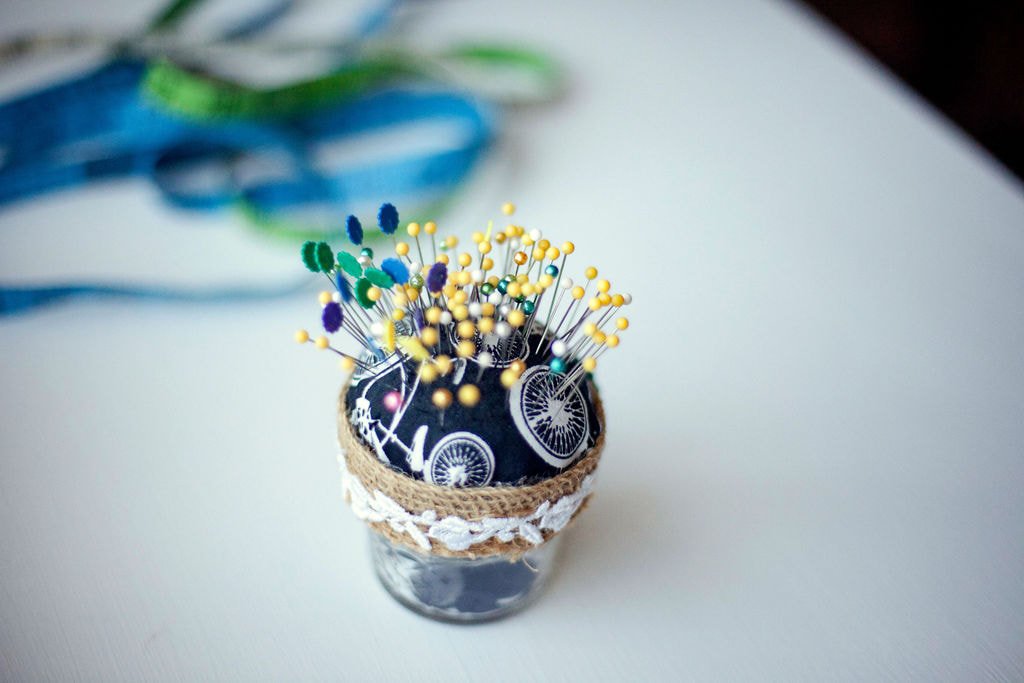
Pin cushion
You can make one by cutting a piece of fabric and closing the open end with a rubber band. Fill it with flaxseed or rice and it'll work for years. You can also buy the classic tomato at your local craft store too.
Pencil, chalk marker, and air-soluble pen
You’ll need something to write with on paper and draw patterns with. I prefer a pencil so I can erase the marks easily. You will also need something to write on fabric with. Air-soluble pens have ink that disappears after awhile or with heat. Chalk markers are my fave. Always reliable, they don't dry out, and a little water washes the markings away. Win-win!
Rotary cutter and mat
These fall into the "nice to have" category. Quilters use them, but sewists do too. The rotary cutter gives a straight cut line and works hand in hand with a ruler. It's a pizza cutter for fabric. The self-healing mat goes under the fabric, and the rotary cutter cuts through the fabric. You do not need one of these, but they make life wonderful.
Clear grid ruler
This is another "nice to have" item. I'm not a quilter, but I use clear rulers for everything. They are wide, long, and have grid lines. Great for making squares or rectangles. Think skirts, bags, wallets, scarves, pillows, curtains, kids pants, etc. You can get one at the craft store, or in the office section at big box stores.
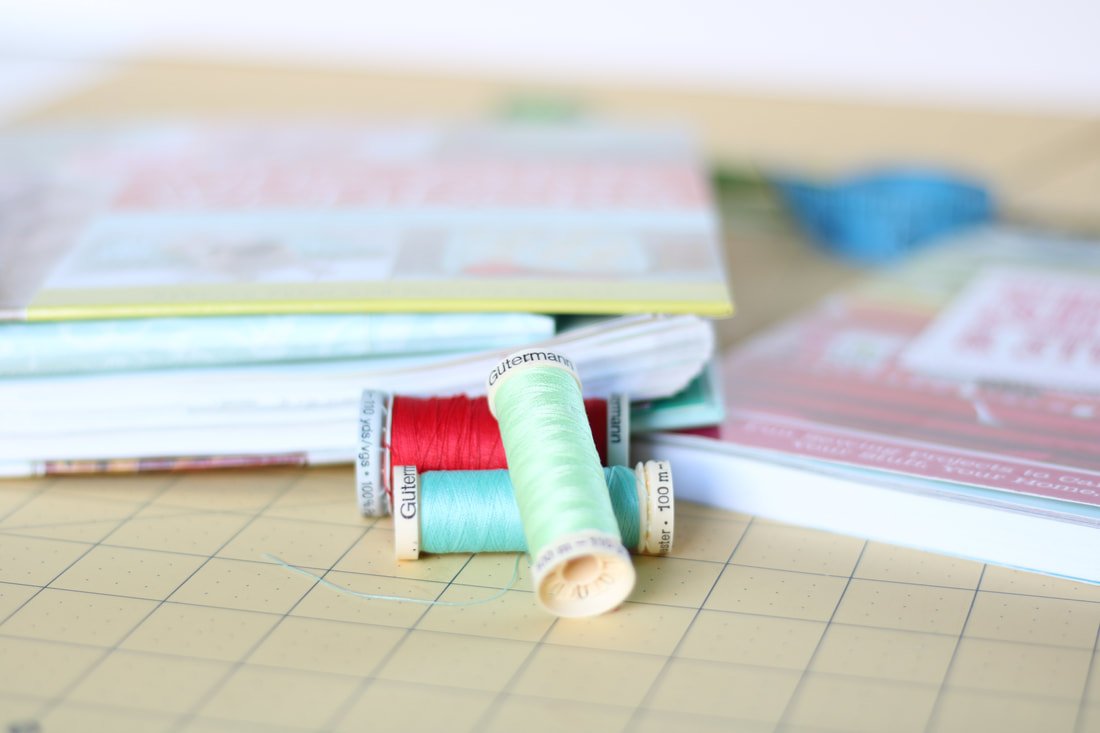
Thread
There are tons of colors to choose from. Is there really a difference in thread? Yes. You can sew most things with polyester thread. Cotton thread is often used for quilting, and silk thread is used for specialty items. If you plan on making a bowl cozy, for instance, you'll need cotton thread. Polyester will burn and melt in the microwave. Purchase larger spools in black and white and smaller-sized spools in colors you love.
Pinking shears
These are old-school, seam finishing shears. Think back to when you were a kid and you had those fancy scissors that cut paper with a scalloped edge. These do that but in a zigzag pattern. You can find these at the craft store. They cut the fabric in a way that keeps the raw edges from fraying.
Seam gauge
This fancy little ruler isn't a necessity at all. Many garment sewists love a seam gauge because it helps create a perfect hem. It has a fancy little blue slider that stays in place when you measure. Nice to have, but not needed in the beginning.
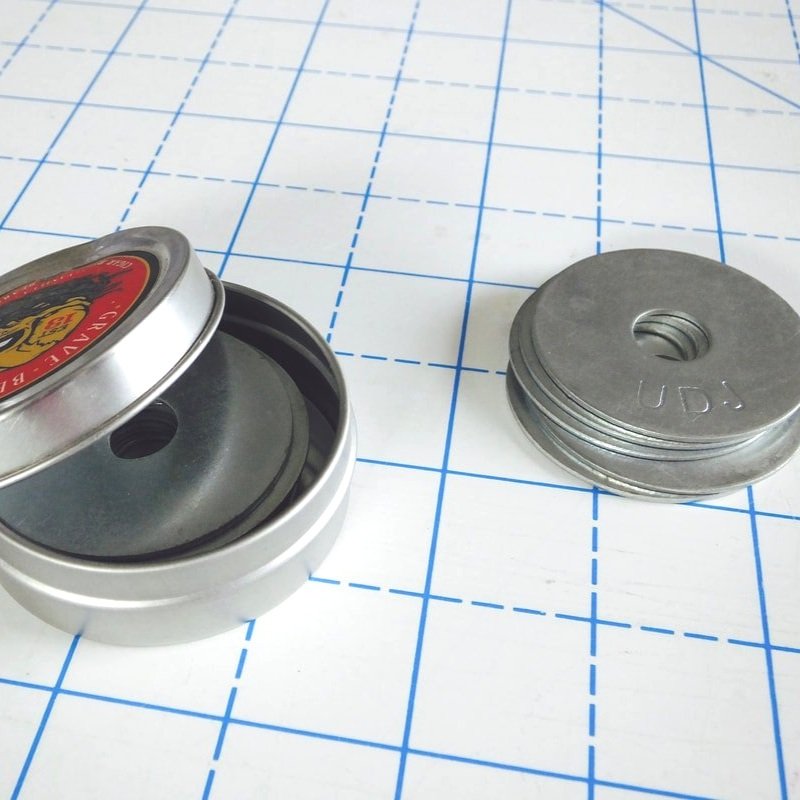
Bobbins
This is the small spool that holds the thread under the needle. Some are clear plastic, and some are metal. They come in different sizes too. Your machine comes with one or two. Check your manual for sizing info and learn how to wind your bobbin. You will use the same thread on top and bottom. It’s a good idea to have a few extras on hand.
Chopsticks
No, not the song you learned to play on the piano as a kid. This is for turning tubes and poking out corners. They sell point turners at craft stores, but I love my chopsticks. A pencil works too. Think of anything with a blunt end. Do not use your scissors to poke out a corner, you will cut through the fabric. I know these things, because I've done these things. LOL! Get yourself a chopstick.
Scissors
My favorite notion. Gimme all the scissors. You want a pair ONLY for fabric. Mark them, draw on them, tie a ribbon around the handle, attach them to your soul, and do whatever you need to, to protect these beauties. Do not use them to cut paper, ever. Buy a separate pair for cutting paper. Paper dulls scissors faster than anything. A small pair for clipping threads and making notches is nice but, not a necessity. Again, find all these at the craft store or big box store in the craft section.
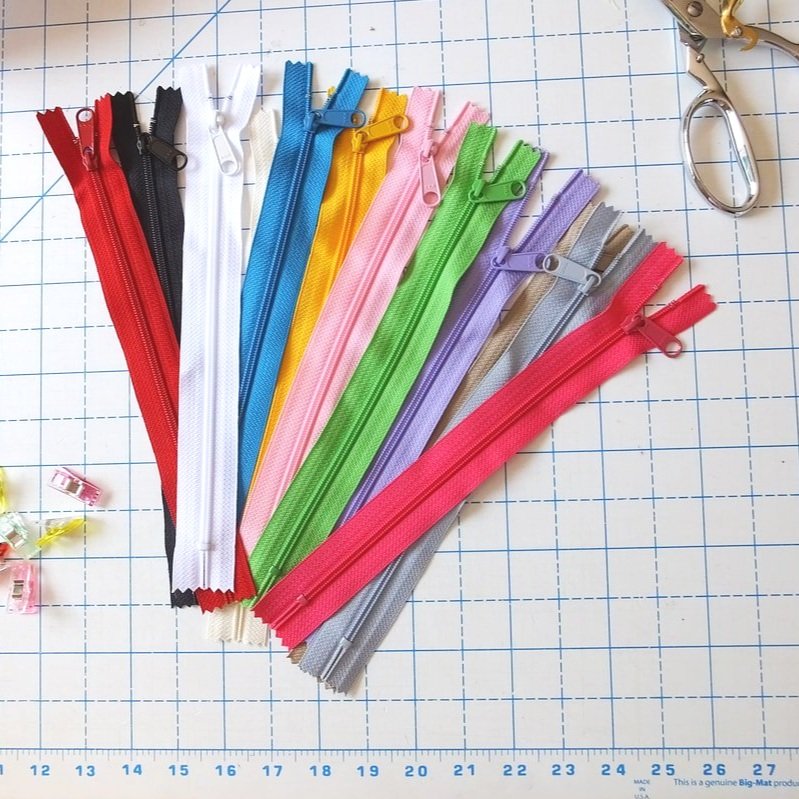
Pins and clips
Pins are a necessity for keeping fabric pieces together. There are multiple types of pins. Match your pins with your fabric. You can also use clips. They sell cute little ones or you can use binder clips. They all do the same job. These bad boys are great for holding slippery fabric such as minky or multiple layers that pins can't poke through. Fabrics like oilcloth, leather, and vinyl can't be pinned because pins leave permanent holes.
Other Items
These are other items you'll need. Sewing magical things is fun and having all of the gadgets and gismos will make things come together easier.
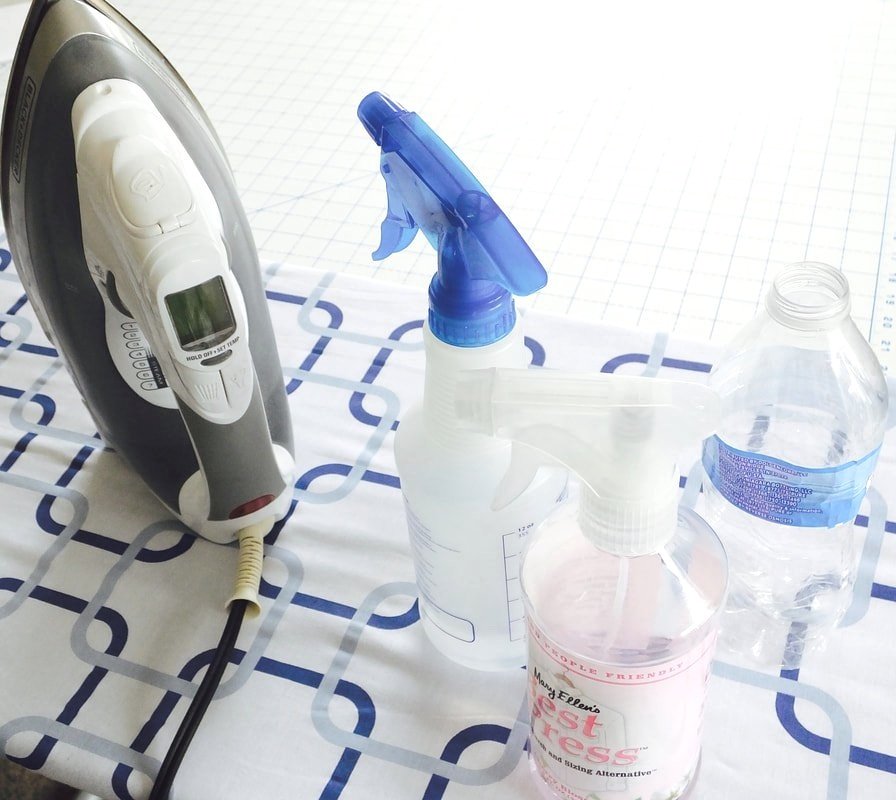
Iron, ironing board, and spray bottle of water. A separate spray bottle is nice and works better than the sprayer on your iron. The spray nozzle on the iron is small and doesn't spray as much water as you might need.
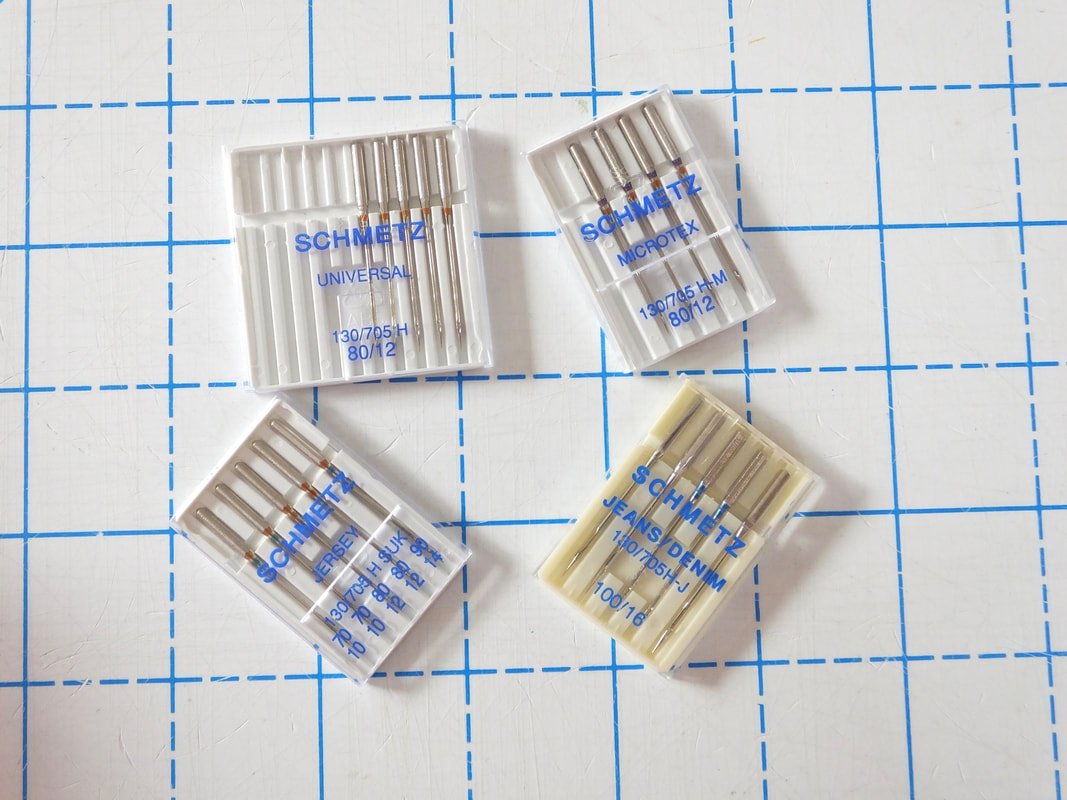
Needles for your machine. Match the needle with your fabric and thread. If you're sewing denim, you'll need a denim needle. Using topstitch thread, you’ll need a topstitch needle. Sewing stretchy knit fabric? Yes, you definitely want a stretch needle. The eyes are of different shapes and sizes and are made specifically for thread and fabric.
Pattern weights. These do just what the name implies. Large washers from the hardware store are easy and inexpensive. You can use your phone, scissors, the tape dispenser, a bowl, anything you can find really. You can use what you have on hand. They keep your paper pattern lying flat over your fabric while you trace and cut.

The Fabric
Don't forget the Best part of sewing!! The fabric. All the fabric. The glorious, beautiful, colorful, soft fabric that brings joy to the world. The fabric store is where you can spend hours looking through everything. It's an adult candy store and you have to touch everything. It’s an unwritten law. ;)
Oh, and there are so many different types of fabric. Quilting cotton is fun and bright. There are so many novelty prints to choose from. Some of the fabrics pictured are quilting cotton. They make great bags, pillows, and headscarves, but aren't great for garments. They are usually 100% cotton and have zero stretch. You can make gathered skirts with them though. Woohoo!!
The green and white polka dot is poplin and can be used as a garment fabric because it has stretch. It'll make a fun St. Patrick’s Day shirt.
The black tiny floral fabric is rayon challis and is a garment fabric. The navy blue with white is linen and was made into a dress.
What are some of your favorite sewing gadgets? Did I miss any? Please share in the comments below.
XO,
Annette