Sewing the Ginger Jeans

Ginger Jeans! I made a pair and love them. These were fun to sew and I learned a few things along the way.
Living in comfy clothes seems to be the new norm. Cozy pants especially. Fleece-lined leggings, flowy lounge pants, soft cotton harem pants, and PJ's of course. Gimme all the couch surfing pants.
Jeans don't really fit into the cozy pants category but, I'm going to talk about them anyway. Jeans are something I rarely reach for when I get dressed in the morning (afternoon?). If I do wear jeans, I reach for my Calvin Klein high-waisted skinny jeans. They fit my body like a leather glove. So, when my friend told me about the January Jeans sew-along, I jumped on board!

The Jeans Fitting Journey
This post is a little different than my usual pattern posts. Hundreds, if not more, Ginger Jeans tutorials already exist. So, I wanted to do something different. I'm taking you through my jeans-fitting journey. Beware though, it's gonna get ugly before it gets pretty.
The January Jeans sew along was hosted by some lovely ladies in the UK, on Instagram. They set up a Slack app group for all of us to post and share photos to. We had live Zoom calls every Monday and then we were put into smaller Zoom groups. It was a whole jeans journey. We helped each other with fit issues and got feedback on our own jeans.
If you've ever wanted to dabble in jeans sewing, you really need to get the fit correct. Here we go!
Materials Needed
First, you need a pattern. I chose Closet Core's Ginger Jeans pattern in View B. It's a skinny leg, high waist pattern. My favorite style of jeans. But, you might want a low rise, wide-leg style. Scour the interwebs for a pattern that fits your specific taste.
2-3 yards of Denim (check what % of stretch you'll need too)
Cotton fabric for pocket linings
Interfacing
A jeans zipper (*it needs to be a metal jeans zipper so the pull will lay flat against the pants/ your body)
Denim thread, regular thread, topstitch thread (optional)
Jeans needles
Fabric for a muslin (preferably denim)
Jeans button
Rivets (optional)
Awl and hammer for inserting buttons and rivets
Rulers, a chalk marker, scissors or rotary cutter, etc.
Sewing machine
Patience and time
Serger for finished seams (optional)

Make a Muslin
Jeans sewing is an easy process. I've made a few pairs of “jeans” from Gertie's book, Gertie Sews Vintage Casual. However, this was my first time making a zipper fly and I was a little bit intimidated. Sewing your muslin fabric is a great way to practice a new skill or technique. It wasn't hard at all!
I really do recommend sewing a muslin first. It's a trial run. You can rip out seams, cut fabric to make space for your hips and legs, and practice topstitching. Use it as your "scratch piece of paper." Through my first muslin (that I made with 0% stretch fabric), I found that the so-called high waist wasn't high enough for me. My first adjustment would be to add length to the rise.
The first muslin fit, almost. I cut out a straight size 12. I like to cut one size that is the closest to my measurements and go from there.
The jeans were snug around my bum and tummy area. An easy adjustment would be to grade up to a size 14 or 16 in the waist area. However, I knew I was going to add height to the tummy area.
Here’s what I did:
Added 1.5" to the length of the rise, to create an authentic high-waist pair of jeans.
Full tummy adjustment. This adds room for those of us with mom bellies or bloaty bellies -that's a very technical term. ;)
Took out length in the legs but, not more than an inch. I'm short but, I have long legs. Thanks to weird genetics!
Low bum adjustment. Although, I didn't end up needing this in the end.
Second Muslin
Yes, if your first muslin was a total bust, do a second one. You could easily unpick seams and go from there. However, I was changing the pattern, so I needed a second muslin. The second would be a wearable muslin pair of jeans. I grabbed some clearance denim, made my adjustments to the pattern paper, cut the new fabric, then sewed the second pair with the adjustments.
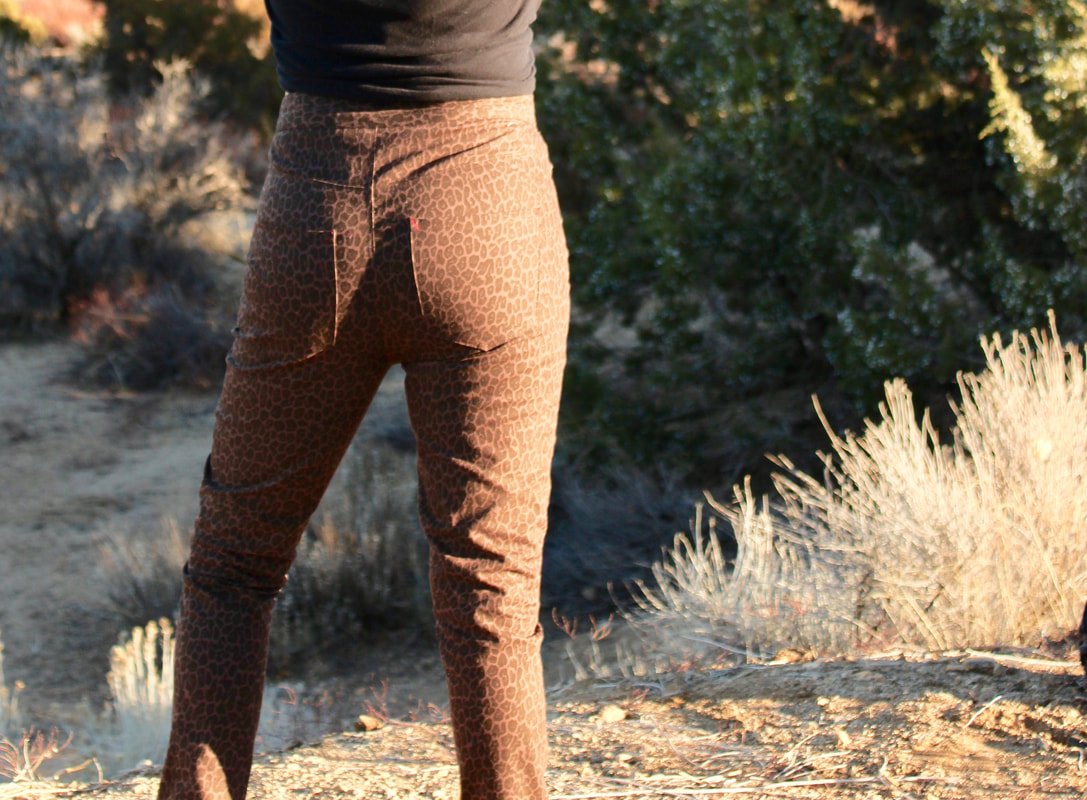
And WOW! What a difference from the first muslin. I loved the waist height. I loved what the full tummy adjustment did for me. I did not love the low bum adjustment because it added excess fabric in my rear and in the back of my thighs. You can see all the bulk in the photos below. This pair was cut in a size 12 just like my first muslin. You can see how my pattern adjustments really changed the fit.
Leg Twist Hack
I had a serious leg twist issue with one leg. I followed the cutting directions to a T, too. I cut on the single layer and alternated each leg just like the pattern recommended. Ugh!
I unpicked the inseam and side seams and sewed them back up. No more annoying twisty leg. So, if you do have this issue, I recommend unpicking the seams. Sew the inseam by starting at the cuff of one leg and go up. Backstitch at the crotch seam. Then, sew the other leg by starting at the cuff and sew up to the crotch. This may or may not be the correct way but, it fixed my issue.
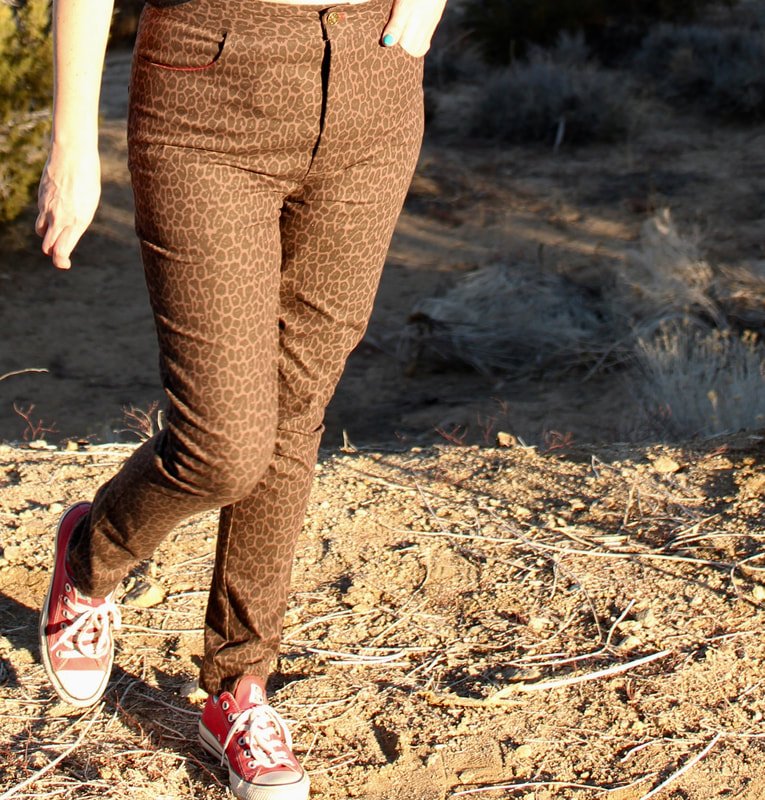
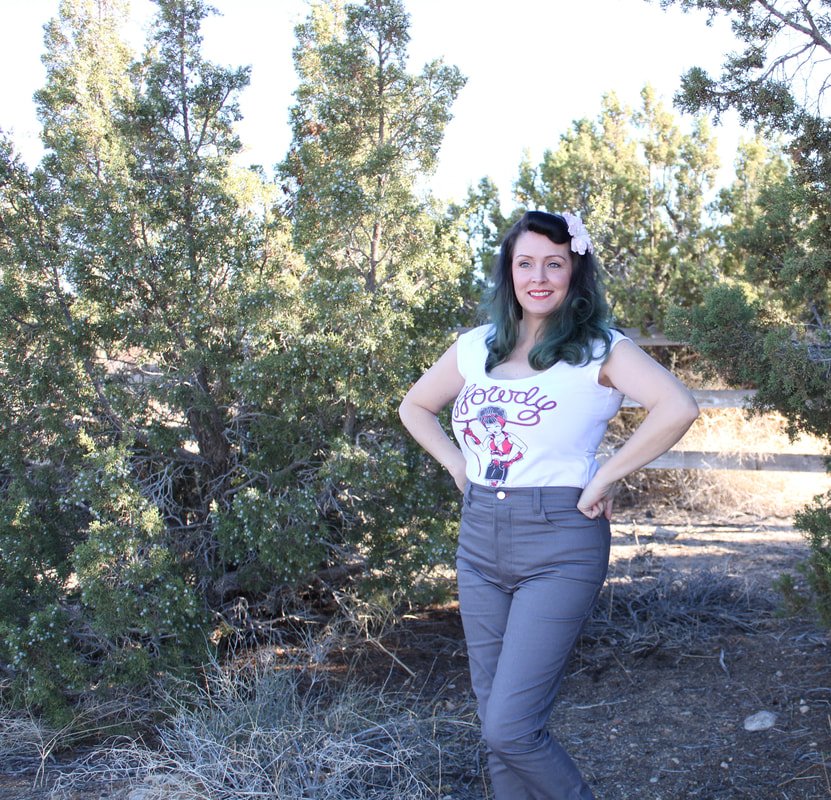
Photos below are of my wearable muslin pair of Ginger Jeans. I've worn these around a few times and they fit well enough. The denim only has 1% stretch while the pattern calls for a 2%. They are a little stiffer than I'd like but, no seams have popped open when I bend over. Yet! LOL
I actually like the fit of these better than my final pair. Shhh, don’t tell anyone.
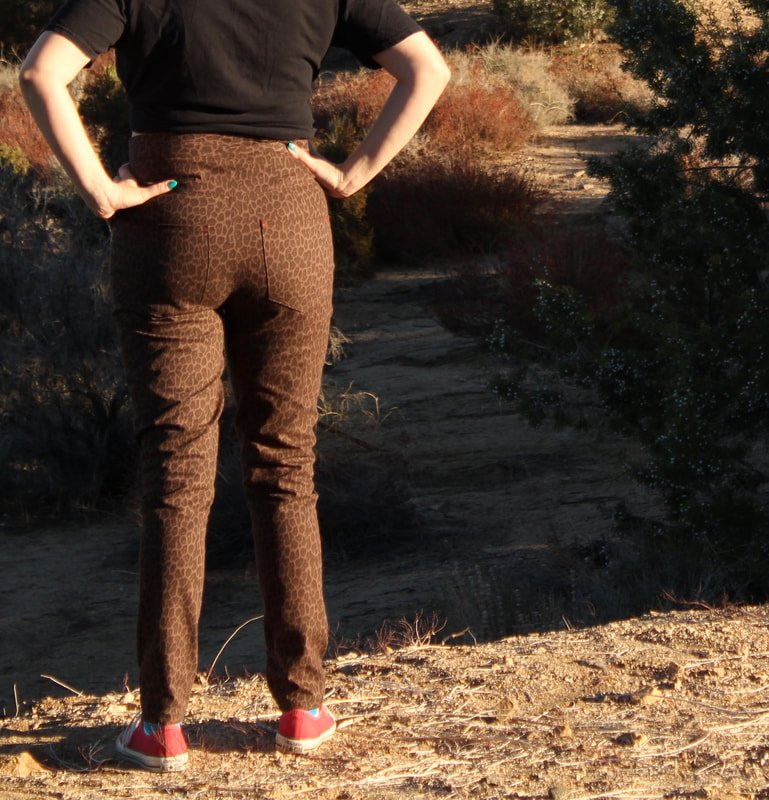

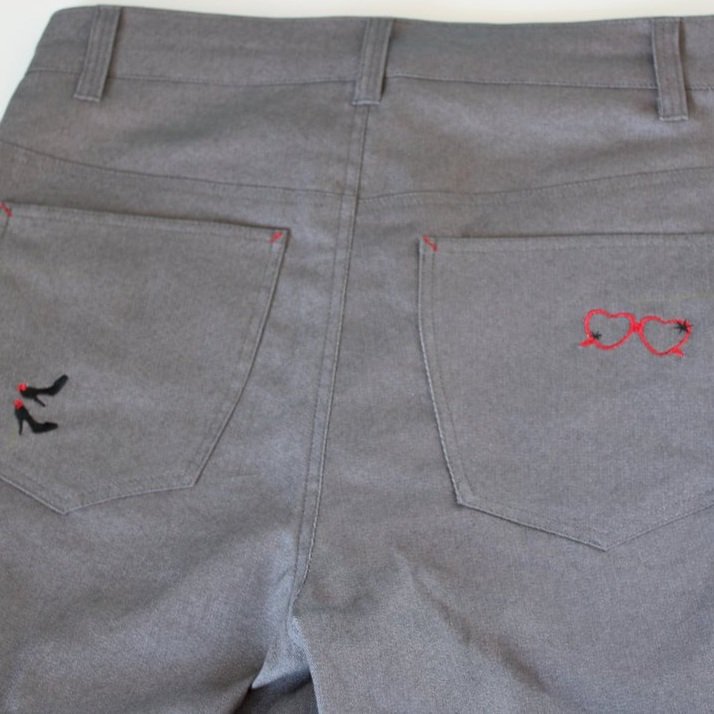
One back pocket is lower than the other but it didn't bother me enough to re-do it. Shhh, it'll be our little secret. ;-)
There is extra fabric and bagginess on the back thighs because of the low bum adjustment. It wasn't needed. I guess I have a high bum. Who knew? Hahaha!! And again, it didn't bother me enough to rip open the seams and fix it. This pair was supposed to fall into the "good enough" category. And they do just that.
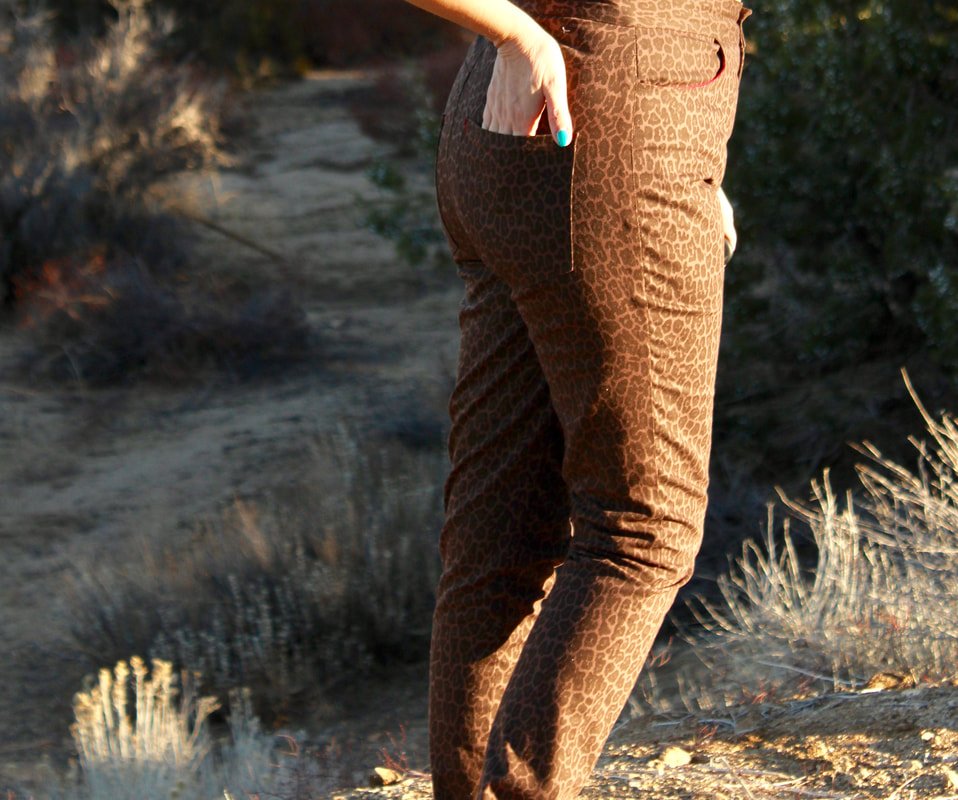
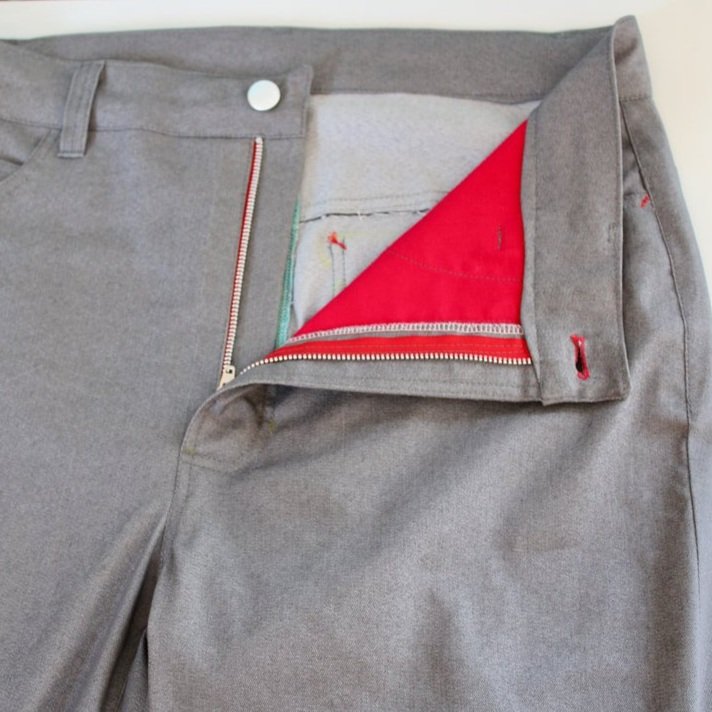
Red cotton fabric was used for the pockets, you can see it peaking out a bit. I also did red bar tacks in place of rivets.
Whew, I hope you're still with me. Now, it's time for the final pair!
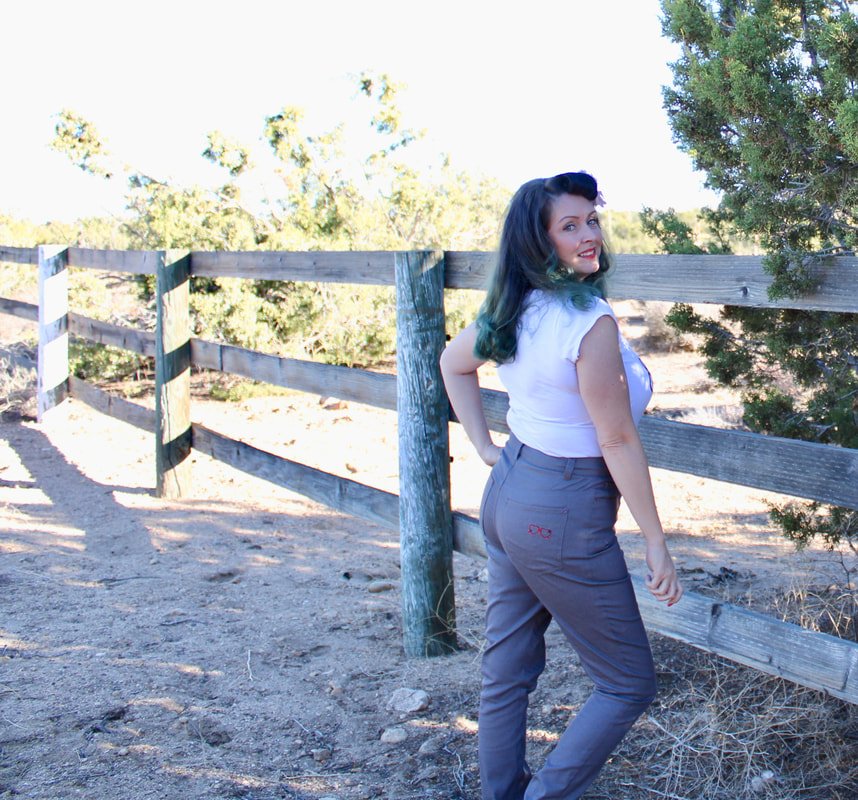
Final Pair of Ginger Jeans
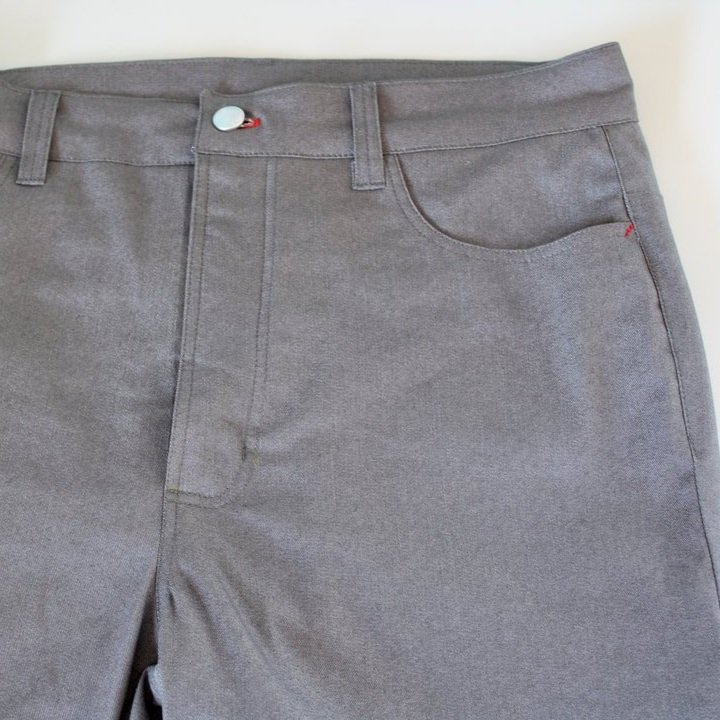
I chose dark grey denim for my final pair of Ginger jeans. I love a red accent too so, I used red topstitching in place of rivets and made red pockets again.
For the final pair, I did the adjustments that seemed to work best for my body.
Full tummy adjustment
Added 1.5" to the rise to create an authentic high waist
Shortened my leg length by 1 inch
Placed the pockets higher to accommodate the rise adjustment
I love the fit so much! My bottom half isn't very curvy due to my apple-shaped figure. Therefore, these jeans fit so much better than any RTW pair I've ever owned. They fit my legs and waist perfectly. I'm truly happy with the fit.
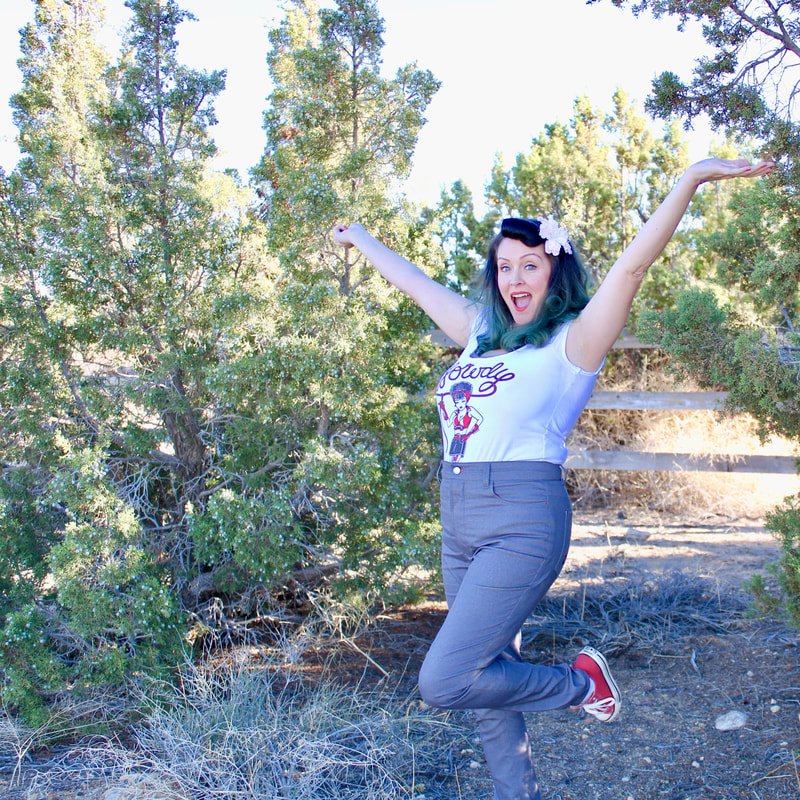

I’m pretty excited about my new jeans!!

Pastel Denim
This pastel peachy denim will make a perfect pair of Spring jeans. I might even roll the hem up and wear them with flats. A flowy white top and large straw hat too, yes, please!
I love the 3D stitching on this denim. It's not something I've ever seen. I'm not sure if I'll do a white or pastel yellow contrasting thead.
Now that you followed me through my fitting fun, are you going to make your own jeans? I really do encourage you to make a pair. I've made pants before but they didn't have all the stitching detail. These taught me more about fitting your own body and how perfecting the fit really does make all the difference.
If you're still on the fence about jeans making, maybe these trousers are more your speed. They're wide-legged and flattering on everyone.
Or, would you rather stick to an easier project? Sew up a little something here, here, or here.
Either way, go sew something! You deserve it! :D
Happy jean sewing,
Annette