
Pattern Reviews, Sewing Hacks, Tips & Free Patterns
The Sewing Blog

How to Sew Simplicity 8244 Cheongsam
How to sew a cheongsam. Simplicity sewing pattern 8244, sew along. This dress was a labor of love and turned out beautifully.

Have you ever been scared to sew something? Too nervous to start because you didn't know where to start? Let me share a little story with you. Grab a cup of tea, this is a long one. And, this is also the dress that made me start a sewing blog.

Simplicity 8244, a 1950s style dress pattern. Fabric was from JoAnn.
I picked up the Simplicity pattern and beautiful floral fabric with a vacation in mind. My husband and I were going away for a few days. I wanted to make something pretty and different.
When I sew something for myself, I like to look at other people's versions. It’s how I pump myself up. LOL
I searched the interwebs to find any and every tutorial, on how to sew up Simplicity's #8244 pattern. I didn't find what I was hoping for. I found a few pattern reviews and photos, but no tutorials or step-by-step instructions. I messaged a gal asking a few questions, but she didn't have the answers I needed either.
Hesitantly, I traced the pattern onto my paper (here's a list of my go-to sewing tools) and transferred the markings. I always need to do a FBA (full bust adjustment). How was I supposed to make one with this asymmetrical dress? After staring at the pattern for what felt like days, I shut down. I rolled up my traced-off paper and set it aside. For one year, exactly.
Not sure what lit a fire under me, but I decided to pull that rolled-up pattern out of hiding and give it another go!
I made a muslin using some old Halloween costume fabric on hand.
I sewed up the muslin, making sure to include the darts, side, and back seams, and any other important areas. I did not attach the collar or zipper. It's a muslin, so it was for the fit purpose only. I HIGHLY recommend making a muslin for this pattern. You may find that you need a few simple adjustments.
I found that my bust fit pretty well. *I did use my high bust measurement. I have a 5-inch difference between my high bust and regular bust. FBA to the rescue.
I made the short waist adjustment- because I have no torso. Ha!! Thanks, Mom. ;)
I also did a forward-sloping shoulder adjustment as well. Bad posture FTW!
Nothing else was needed. I transferred those measurements back to the pattern piece and traced out my pieces onto the pretty fabric.
Gather everything you need:
Fabric
Pattern
Interfacing, matching thread, needles
Frog Closures or buttons
Piping. I opted out, but you may want to add the piping detail
Sewing machine, etc.
All your favorite pattern tracing and cutting tools
Patience and a good night’s sleep
Now that the fitting info is out of the way, let's dive in and make this beautiful traditional Chinese dress. I did a little research on the dress, thanks wikipedia. If you want to find out some more information and the dress history, click that link. Youtube has some amazing videos on how the dresses are made as well. I love the internet.

Trace out the pattern onto your favorite paper. Don't forget to transfer every marking, there's a lot with this pattern.

I didn’t have a table big enough, so I traced it off on the floor. Ouch, my poor knees.
This was a lot of dress, make sure you have a large space to lay out the pattern. I chose to do this on the floor. Cue the angry sewing Gods. >: )
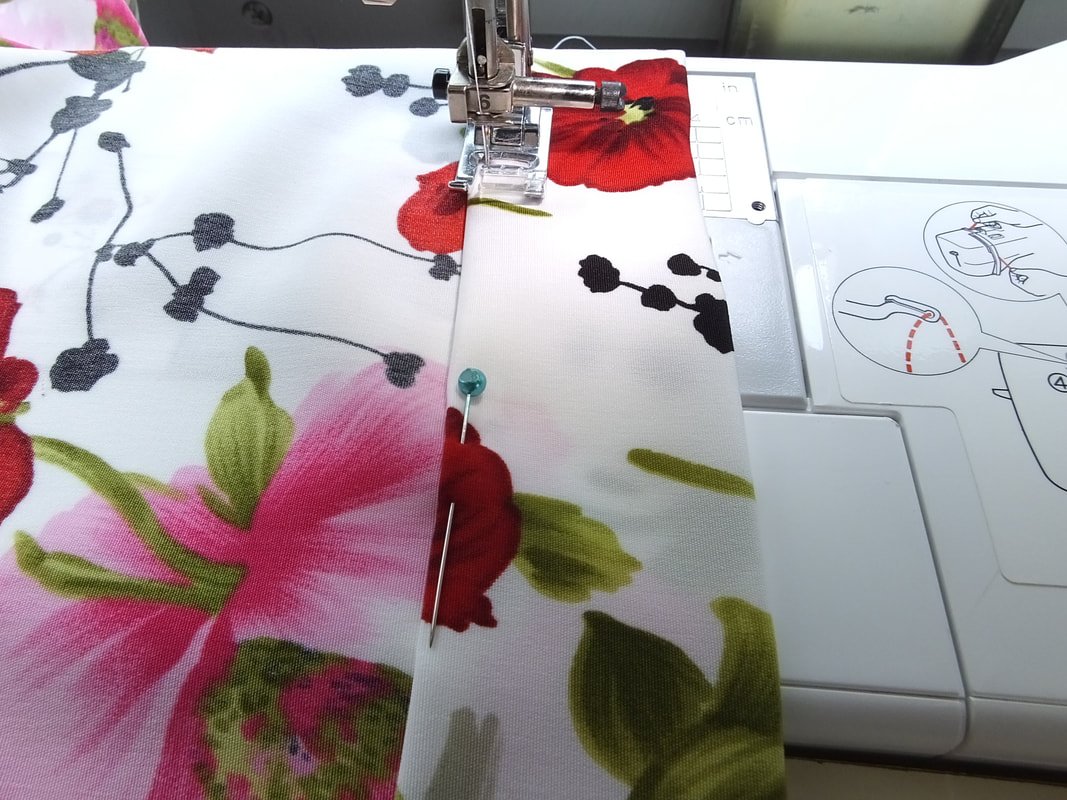
Once everything is cut out, and your marks, darts, and hemlines are transferred. Cut out the fabric. **Pay close attention to the pattern layout on the tissue paper. You don't want anything backward or inside out. This is very important. you'll see why later.

Sew the fisheye darts.
Sew your fisheye and bust dart first. Fisheye darts are pinched in the middle and sewn up. Knot by hand. Go back to the middle and sew down to the opposite end. Knot by hand. Press the waist darts towards the center. I love this style of dart, they are so flattering. A tad tricky for your first time, but once you get the hang of them, you’ll love them.

Match up shoulder seams and back center seam. Stitch. Press open.

So far, so good. Right? Moving right along. It should look more like a dress at this point.
Facings
Now for the fun part. The facings. All the armhole and neck facings. So many facings. And collar pieces. Wheee!! Keep them separated by attaching your pattern pieces to them with a clip or pin. It will make you scream less. I promise.

Attach all the facing pieces together following the pattern directions. I used the picture on the pattern to make sure I got it right. It looks wonky, but it works. If you didn't iron the interfacing on earlier, do it before you sew the interfacing snake. That’s what it is, it’s a facing snake. LOL

Attach the facings together at the seams, be sure to match the notches. This is very important for the facing to lay correctly and flat. Sew the seams together, and it should resemble a funky snake. Now you're going to attach the facing snake to the dress. Matching notches again, and following the curves and angles.

Side note- The pattern has you do a hem on the facing, but I wished I would have just serged the edge. It creates a little more bulk than I like. It doesn't bother me enough to rip it out though. #lazysewis
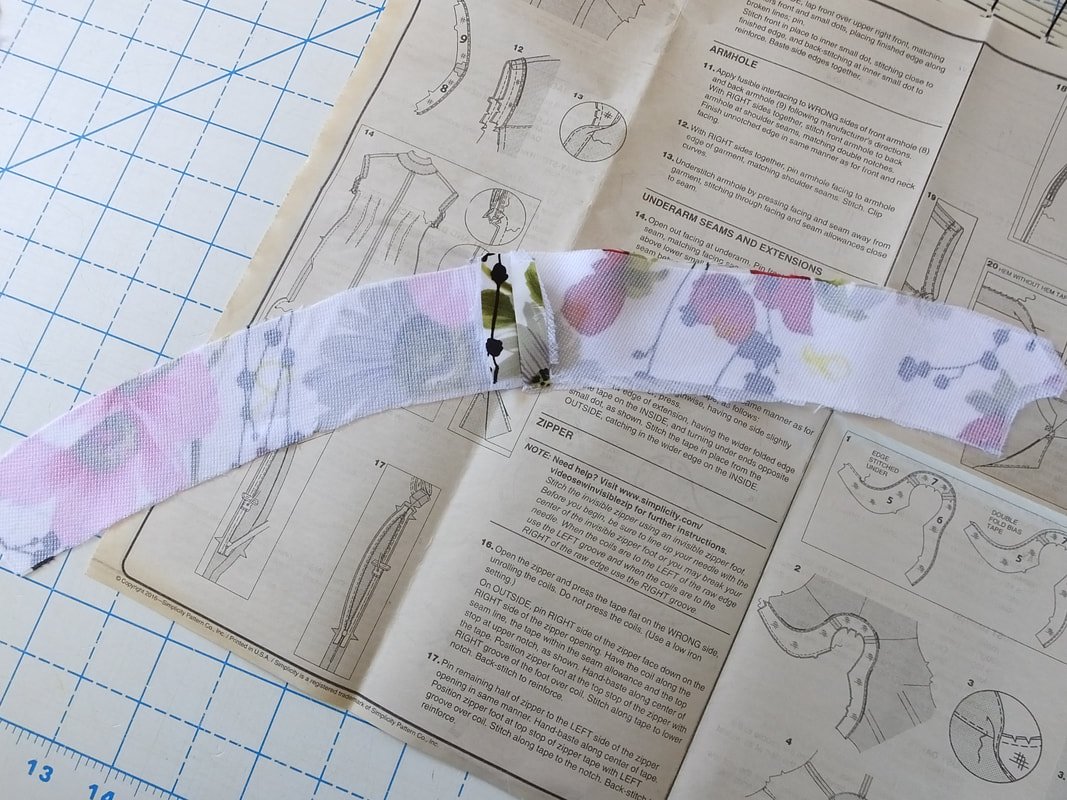
I didn't take a photo, but you make the collar before applying the facing snake. The collar is sandwiched in between the dress and facing snake. It has basting stitches to hold the 2 layers together.

See the collar sandwiched in there? If you opt out of the collar, pay no attention to this picture.
Sew the three layers together. Understitch the collar and facing area.
As long as the facings and collar went in well, it should look something like the photo. If you opted for the pretty piping detail, that would have gotten sewn in between the facing and dress seams as well.

The front of the Cheongsam is looking pretty good so far.
This dress was a labor of love. I sewed a little each day, without rushing. I definitely took the slow sewing approach to this one. And, if you need to take a break, take it. If not... forge on!
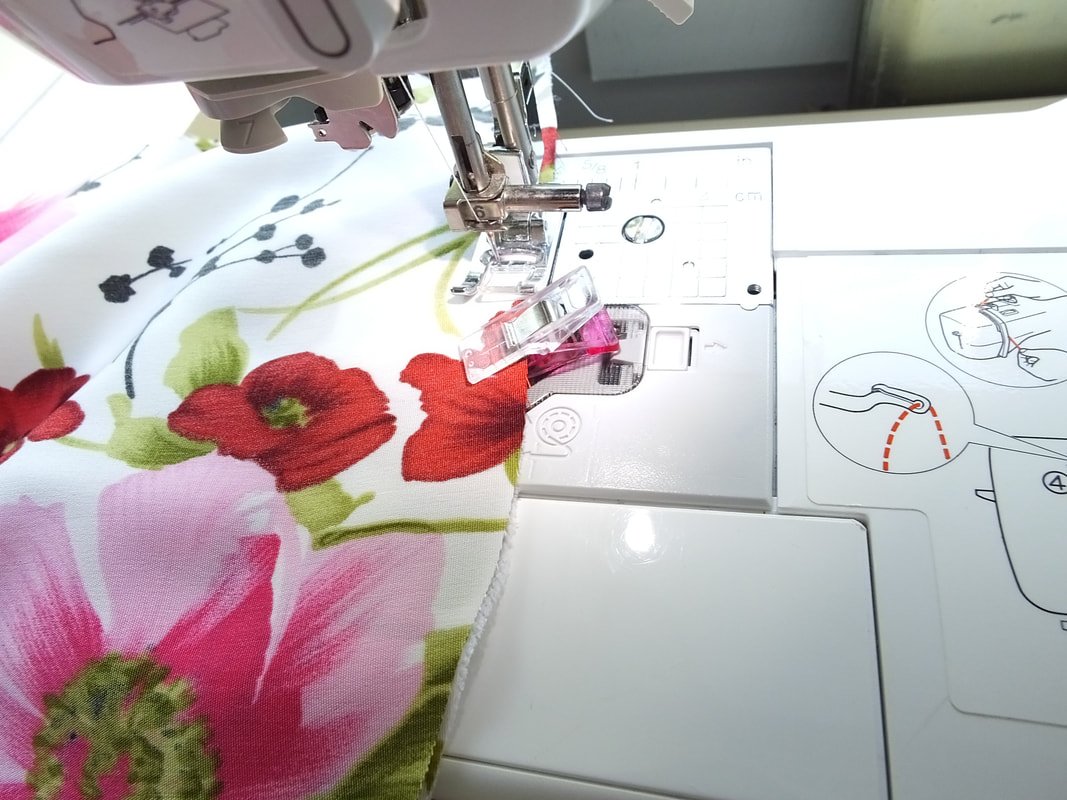
Next up, stitch the 2" small area to enclose the flap part. Those are the technical terms in case you're wondering. I think they have you do this to ensure nothing is accidentally seen, skin-wise.

Sew this small area around the flap part.
Armhole facing time. Apply your interfacing if you haven't done so already. Finish the edge as you did with the neck facing. I serged the edge instead of an actual hem. I learned after making the front facing. Attach to the armhole matching notches and follow the curve.
This is where the pattern placement messed me up. Well, where I messed up. I had to cut out so many armhole facing pieces. I kept doing it backward. Ugh. I turned the machines off, unplugged the iron, and walked away. I returned the next morning with a clear head. Sometimes that’s the only thing you can do.
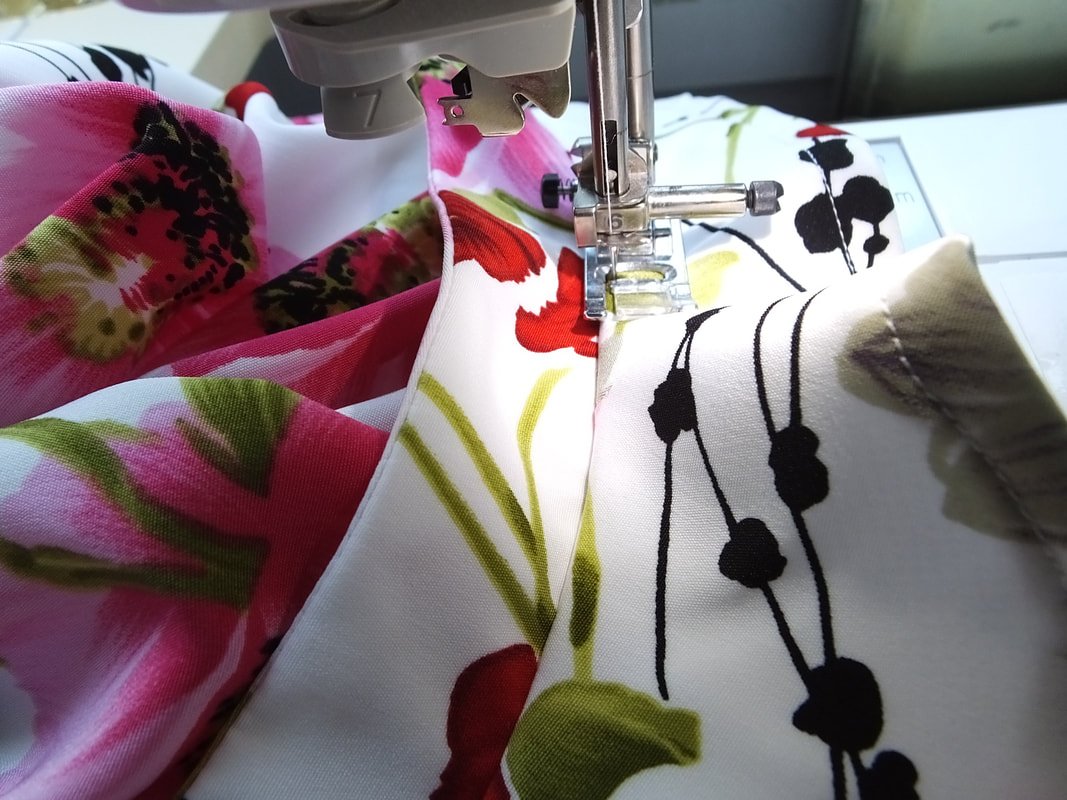
After the facings are sewn to the armholes, the instructions have you start the vent openings.Oh boy, I was so confused at this part. I read the instructions over and over and over. I've never made a vent before, so I went to ye old YouTube.
Below is a video of how to create a vent by Professor Pincushion. She has fantastic videos on almost everything, so check out her YouTube channel and website out.

I followed the video and made both vents with the snip at the backside of the dress.

You can see the stitching line on the outside if you look closely.
After that was all sorted, I was a happy lady. Whew! Thank you Professor Pincushion; you saved the day.
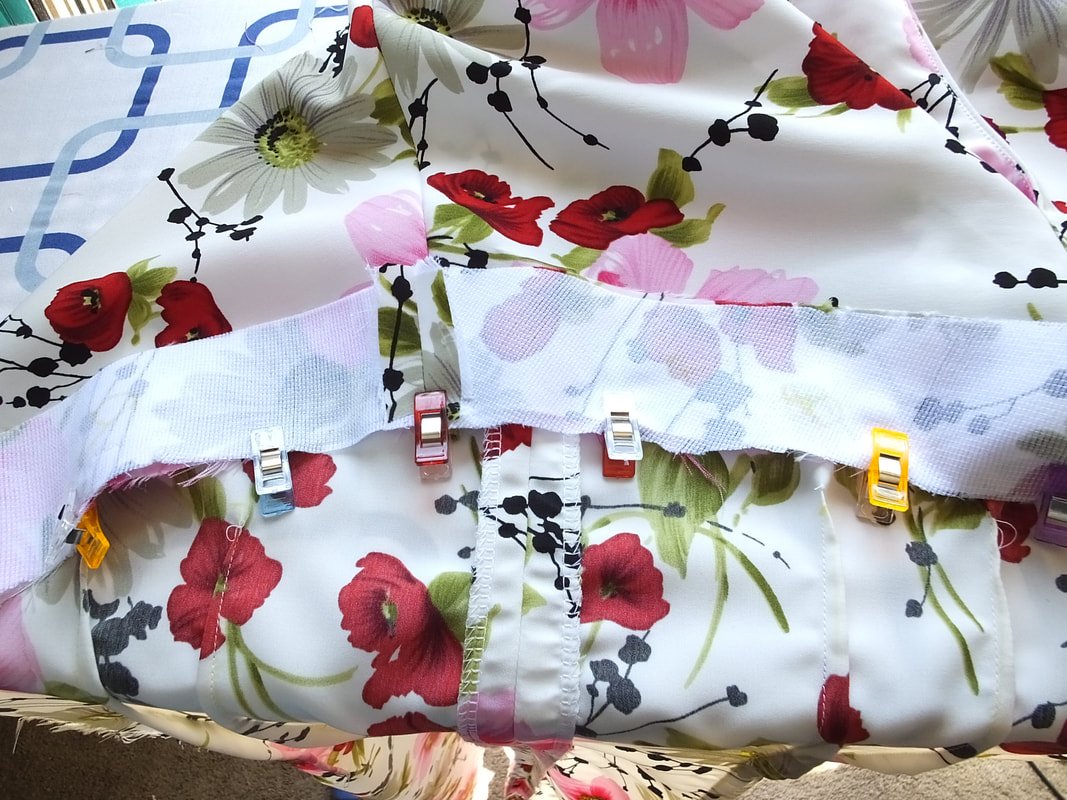
I put in the side zipper. You can insert the zipper before or after the vent. It doesn't really matter. But, you do need an invisible zipper foot.

It makes a pretty zipper that hides secretly in your side seam.

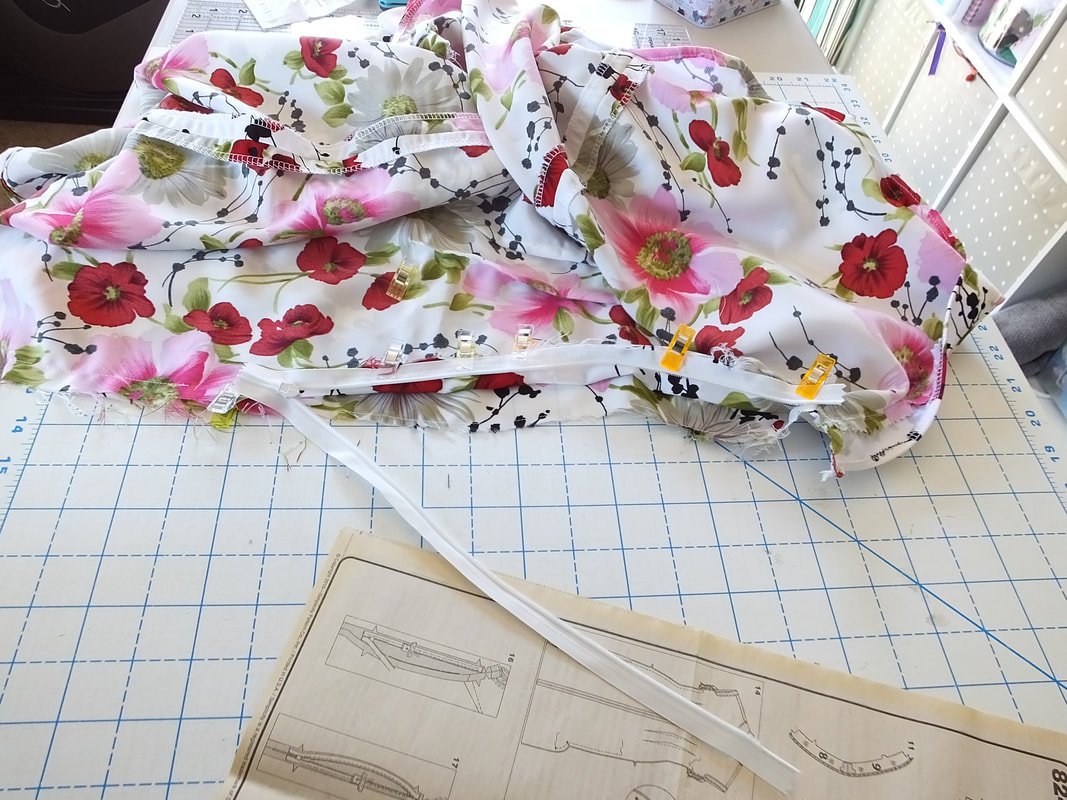
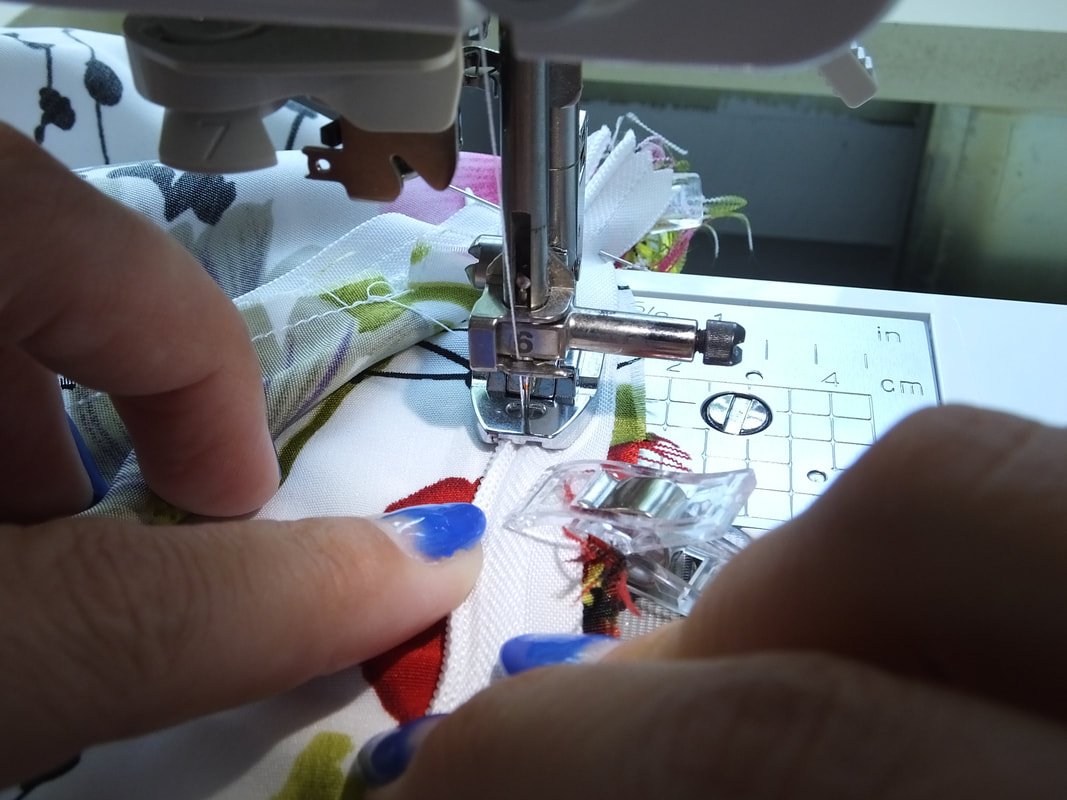
Grab your invisible zipper and invisible zipper foot. I like using clips for this. Attach it backward, and if you use the correct foot, it'll be a breeze. The foot is designed to grab and push the zipper teeth away from the fabric. The teeth then refold back to make a beautiful seamless zipper.
Sew up the left side first.
After you sew up the left side, backstitch and go to the sewing table.
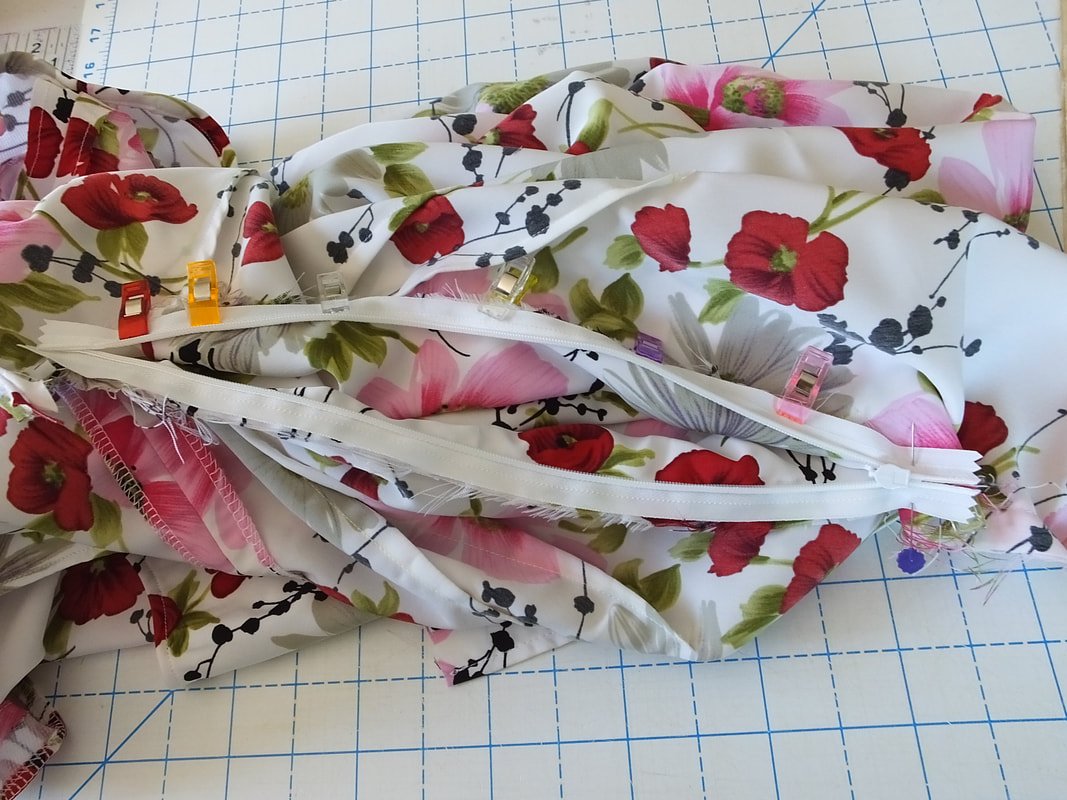
Pin or clip the right side of the zipper tape to the seam fabric. It looks like this when half sewn. See how it's backward. You have to flip your sewing brain inside out to do these zippers.
Sew the other side down. Hold the tape and work with the machine while I slowly sew the zipper.

Inserting an invisible zipper is easy once you think of it as going in, backward.
Wow, all that is left to do is the bottom hem. The pattern suggests a 2" hem. So, that's what I did. I serged the raw edge, then turned it under, and under again. The pattern calls for hand stitching, but at this point, I had enough of this dress. So, I tossed that sucker on my machine. I usually don’t hand-sew anything unless I absolutely have to.
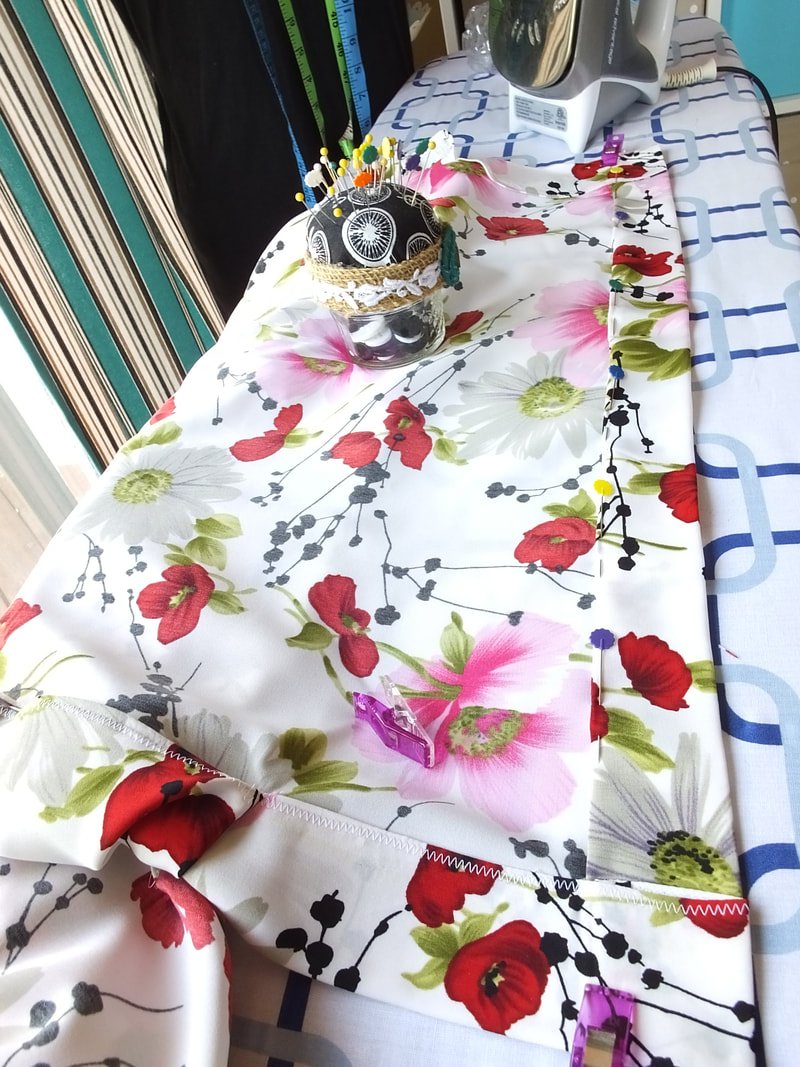
Sewing the hem.

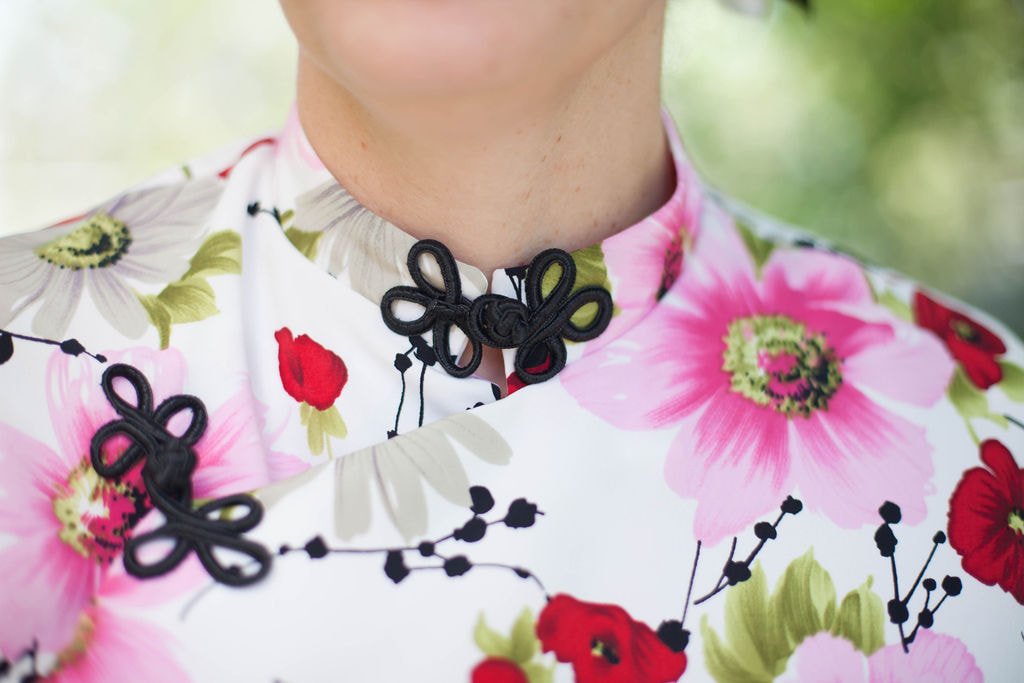
A little behind-the-scenes shot. Phew! Glad the dress is done. Oh wait, I need to sew on the frog closures by hand. Cue a tear and a Netflix show. LOL.

Use a clip to hold the collar together. Pin each side of the frogs to the dress exactly where you want them. Thread that hand needle and get to work. I should have used some interfacing behind where I sewed. Ugh. Stitch them both by following the pattern instructions. It looked like one was at the corner of the front bodice flap and another at the collar. That's where I put mine. Once these beauties are on, you should be done! Hooray!!!
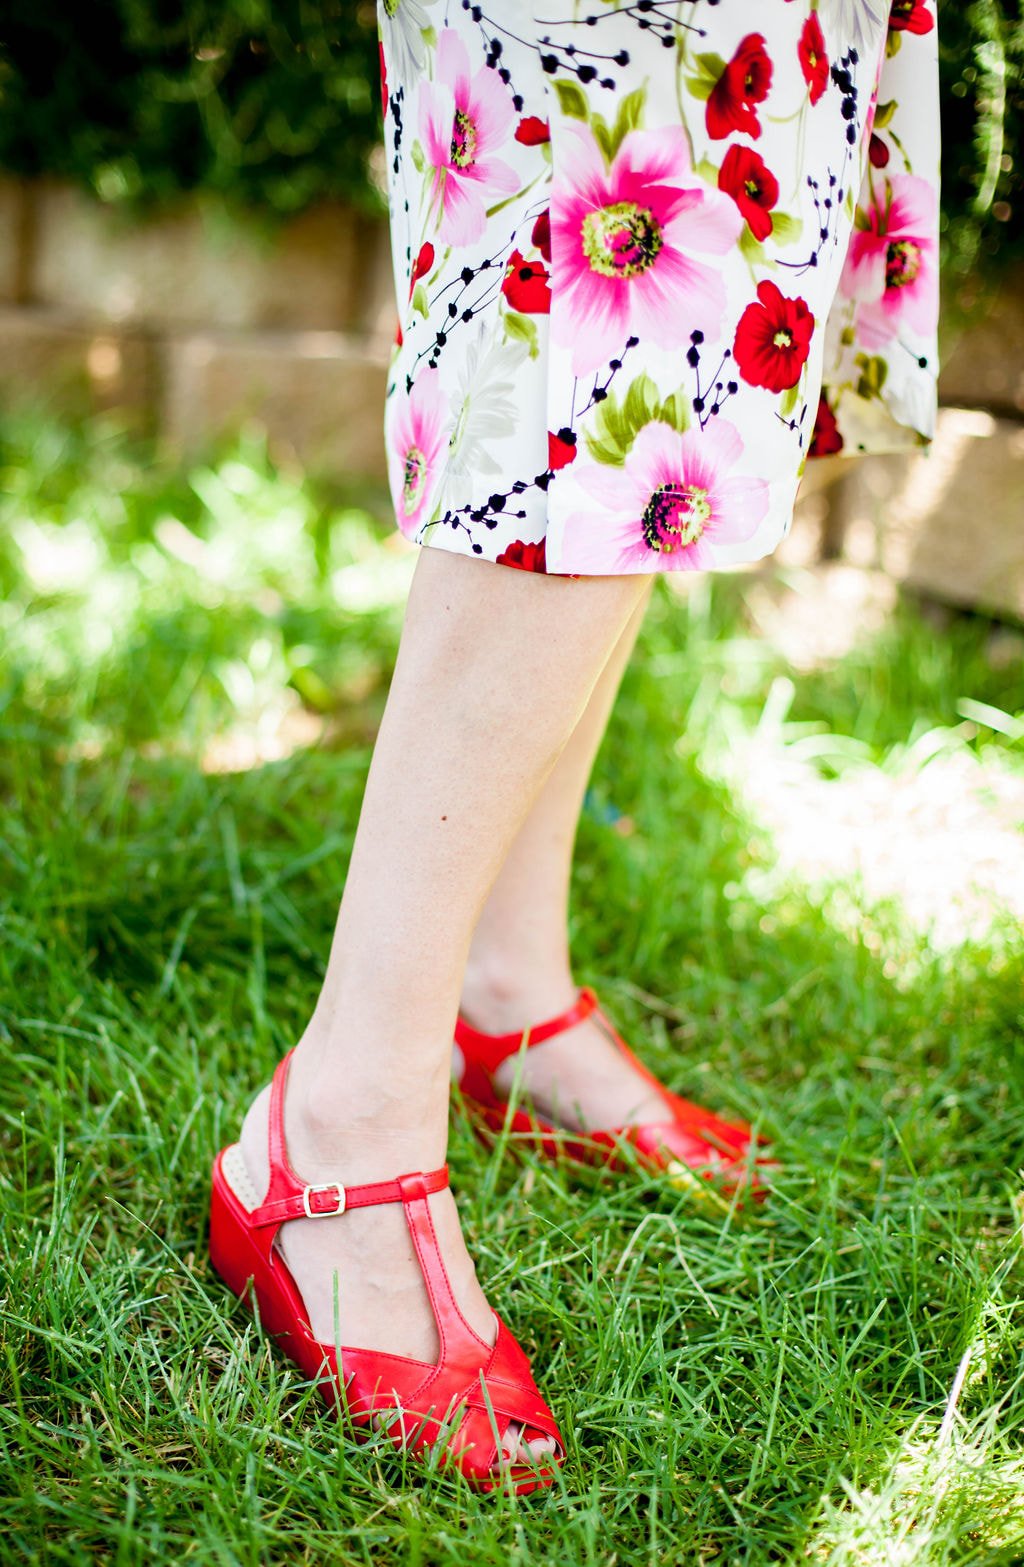
Overall, I love this dress. The fit is amazing. It's form-fitting but loose. Does that even make sense? I like the length too. I'm glad I decided to just dive in, after a year of it staring at me... from the corner of the floor. I don't like labeling sewists as beginners, advanced, etc. But, I think this dress would be best for someone who has a few garments under their belt already. It was time-consuming, and the pattern layout was tricky. Just take your time, and you'll be a vintage goddess in no time.
The only thing now is where I'm going to wear it. Hmm...
Photos below are all by Erica Lancaster


Well, that’s it. I hope you make this dress if you’ve been on the fence for a while. If so, tag me on Instagram @sewingtothemoon. I want to see your version. I love this dress and can't wait to wear it everywhere, once I figure out where to wear it.
Happy sewing,
Annette

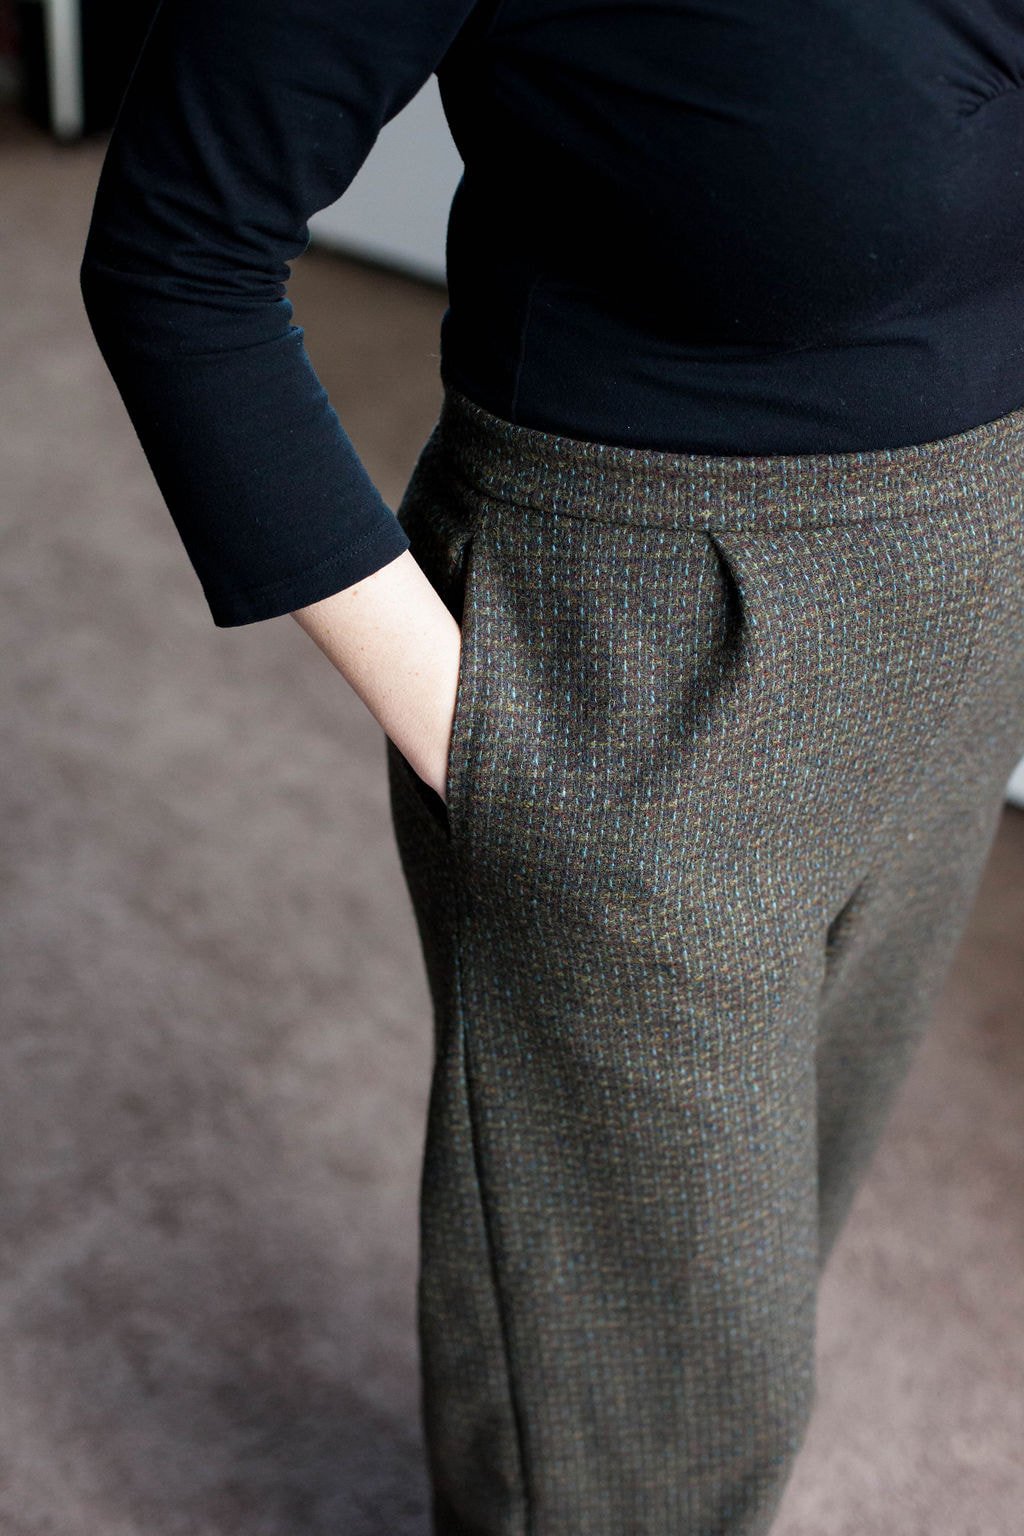
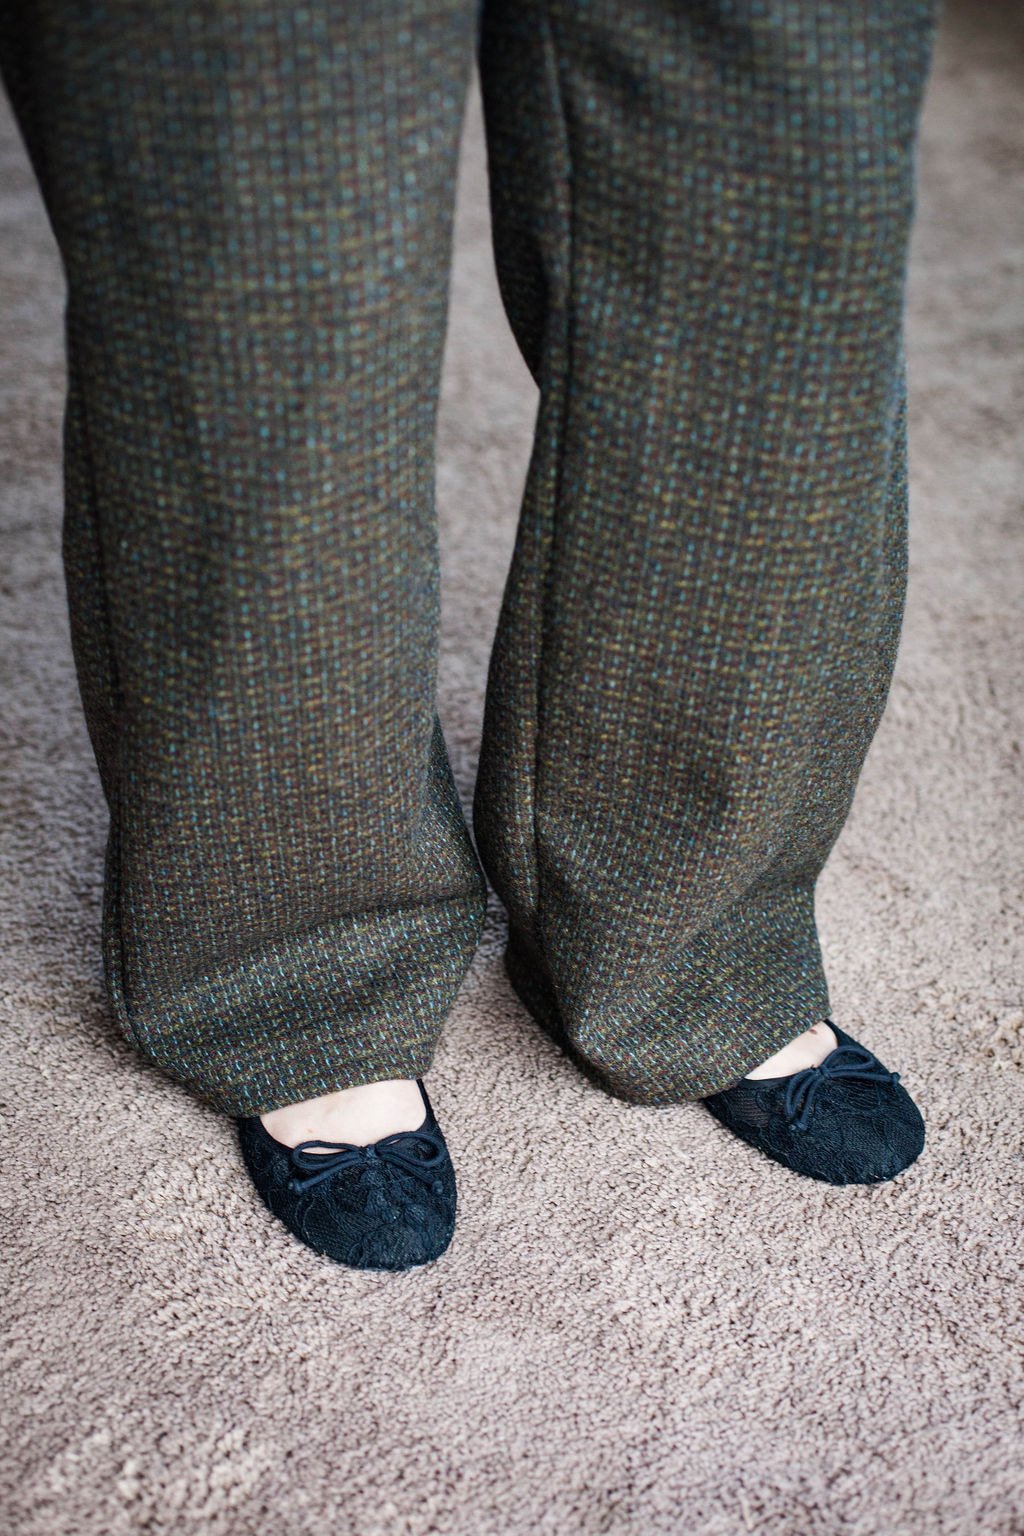
Simplicity 8243 Pants
Easy pants pattern with a 1940s style. Make a pair to fit your body.
Hope the weather is treating you well. In southern California, we've been lucky enough to enjoy warmer days and cooler evenings lately. As I type this, I'm listening to the birds sing and the leaves flutter on my Mulberry tree. The 3 tier pond in my backyard is bubbling away. This is what heaven sounds like to me-peaceful and serene. I live in southern California, but am not in Los Angeles. I'm far from it, actually. We live on a quiet little dirt road. I don't hear cars drive by. No basketballs are bouncing in a nearby driveway. I do however hear the occasional dirt bike ride up and down the hills.
I love where I live. I'm feeling extra thankful today for the beautiful things and landscape that surround me. I am also thankful you’re here and reading this.
Without further ado, grab a cup of coffee or tea, and let me walk you through Simplicity's pants pattern 8243 a.k.a. my favorite pair of pants.

photo by Erica Lancaster
This pattern was easy to cut. Easy to sew. I had zero fit issues as well. How often does that happen, you ask? Um... never! But, a tiny disclaimer, I don’t have hips or a booty. So, pants are easy to sew, for me. Tops are a whole other story though.
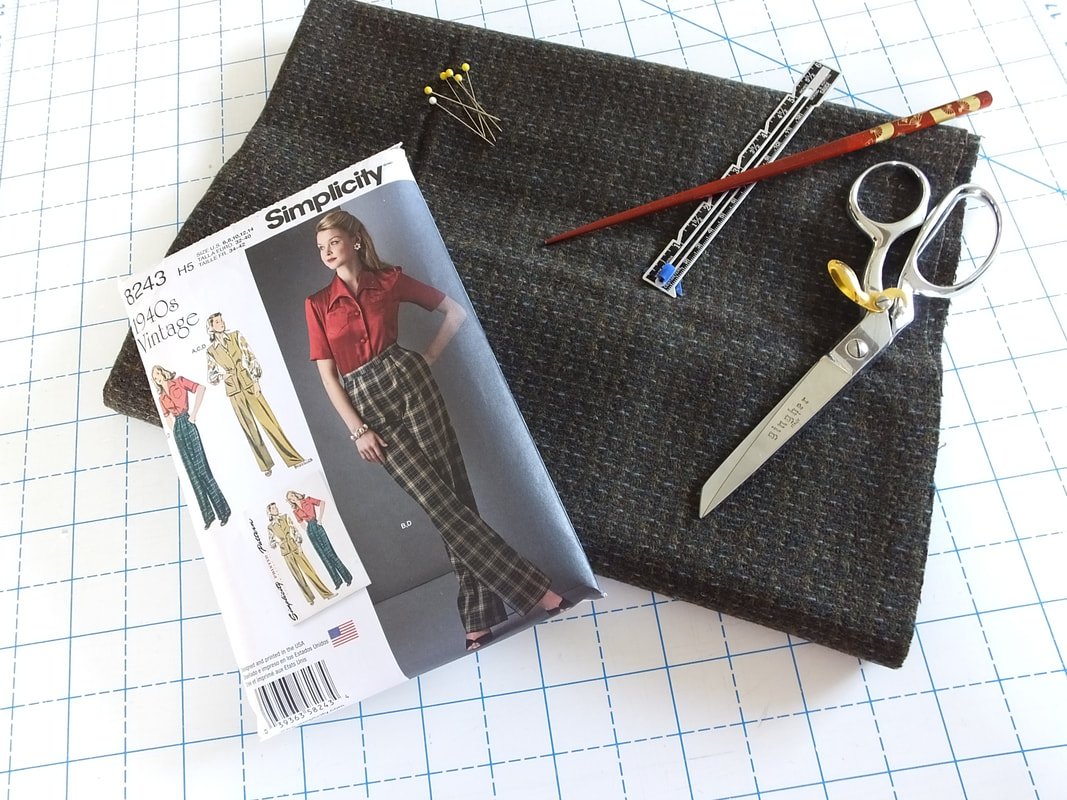
I bought the pattern on sale a few years ago, and it's been in my stash along with this fabulous tweed fabric. I made this pair of pants at the end of winter but, was able to squeeze a few wears out of them before summer hit. I live in the high desert, and our weather can be finicky.
These pants are wide-legged and high-waisted. They are perfect for any 1940's fashion-loving gal. The pattern Simplicity 8243 has a shirt pattern I have not tried yet.
I did not prewash the fabric first because tweed is made with wool fibers. I planned on dry-cleaning these after a few wears. One thing I did not think about before I made them was the fact that they are made with tweed which can be itchy. The fibers don't bother me at all, luckily. Although next time I sew with tweed, I'll make a lining. Eeep!!
This post isn't a step-by-step tutorial, but more of a simple guideline. I didn't take photos every step of the way, but hopefully, there are enough photos to inspire you to make a pair.
Gather your sewing tools and let's get started.
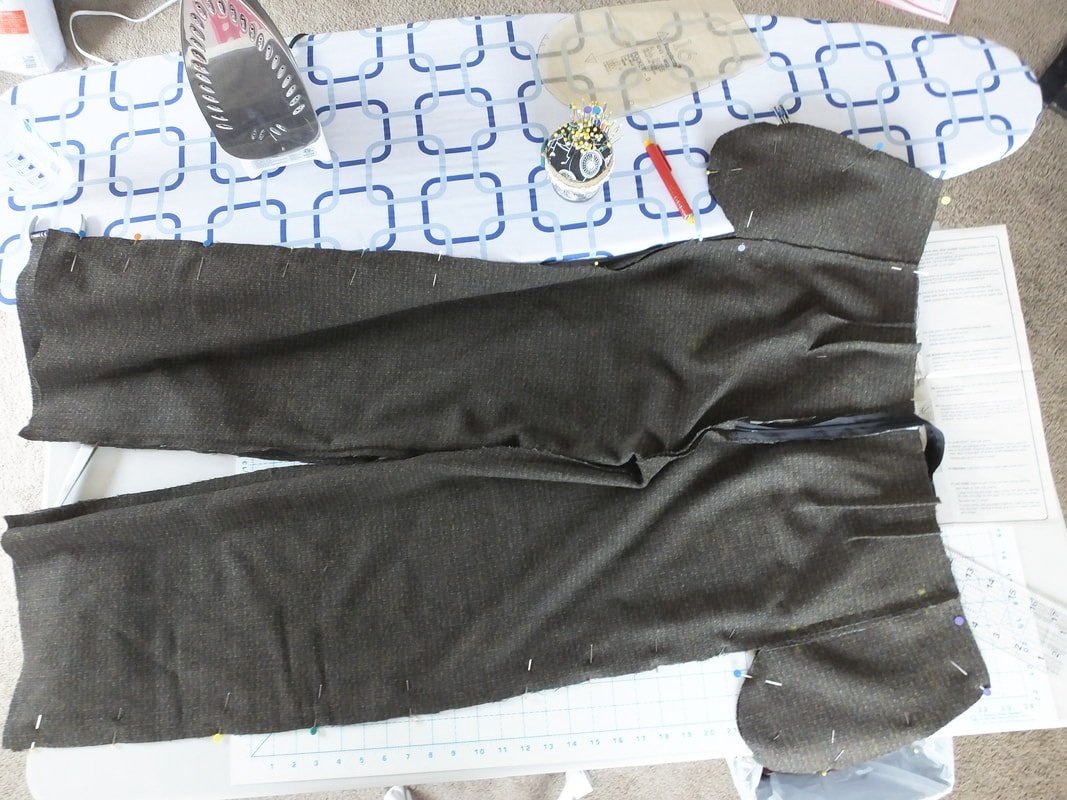
Cut out the pattern pieces according to your measurements. For pants, I always stick with the waist measurement. I don't have hips, so that's not an issue.
I stabilize anything that will need interfacing at this point as well.
Sew the darts on both front and back pieces.
Sew your stay stitching along the top.
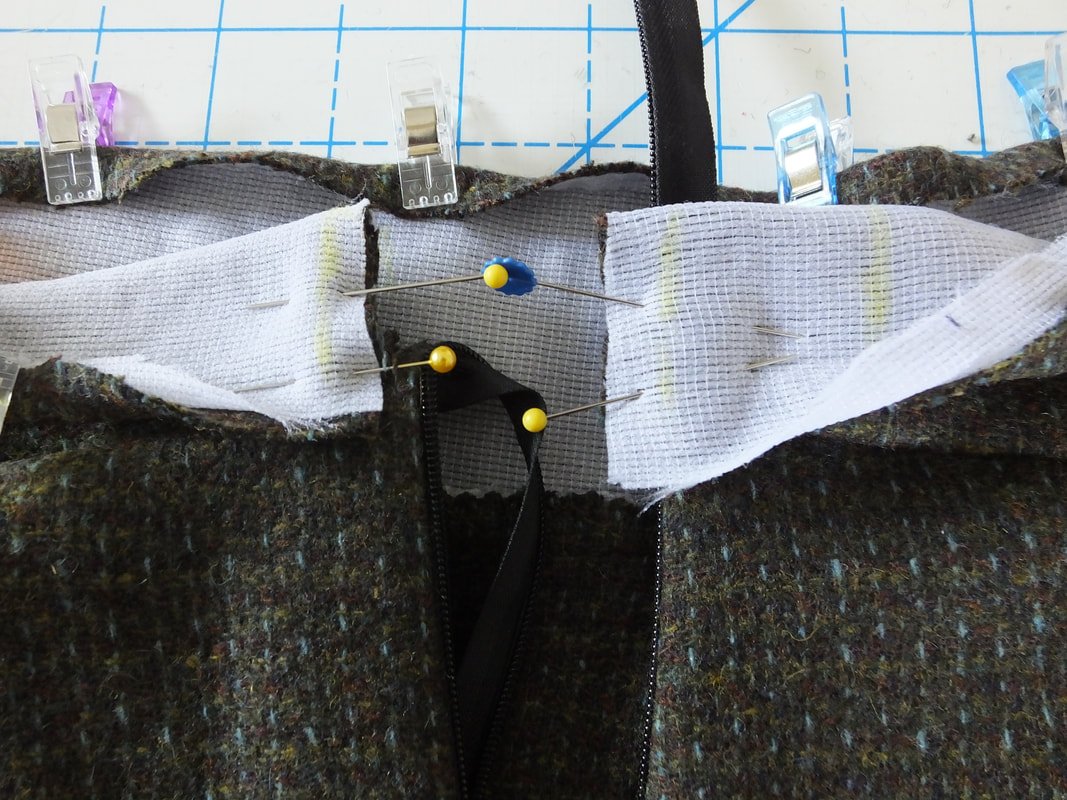
Now, apply your invisible zipper. This always feels wonky to me. I use my chalk pen to mark the zipper tape. When I sew the other side, I match my markings and I get a seamless invisible zip every. Single. Time. #sewinghack

Invisible zipper set up

Mark your zipper tape with chalk

Pins will be your best friend with all zippers. I pull mine out at the last minute. It also helps to line the zipper up with the edge of the fabric.

Your invisible zipper shouldn't show at all. If it does show, take a sip of tea, eat a cookie, rip it out, and try it again. Pay no attention to my stay stitching that is uneven. LOL

Once your zipper is in, it's time to sew up the crotch seam. You're going to sew the inseam area first. Again, pins are your friend here.

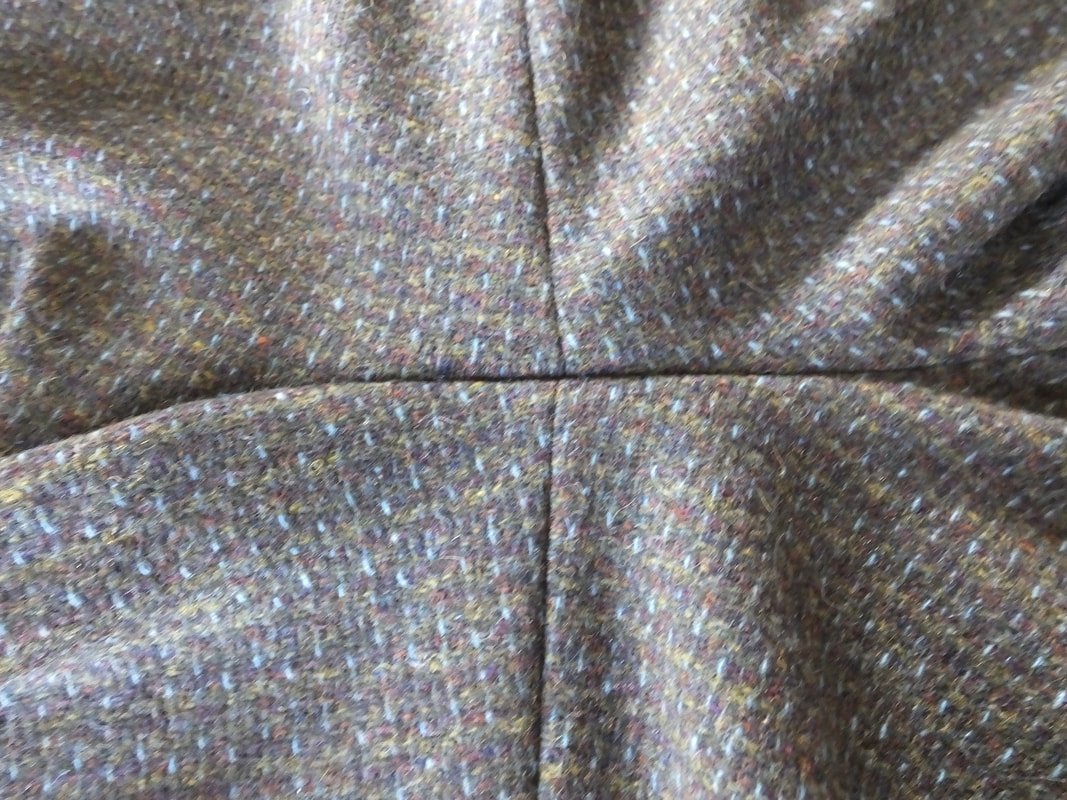
After you sew up the front and back inseam, trim your seam allowances. I used pinky shears for this pair. They have a nostalgic feel, so I didn't serge them. I also trimmed the crotch seam to create less bulk.

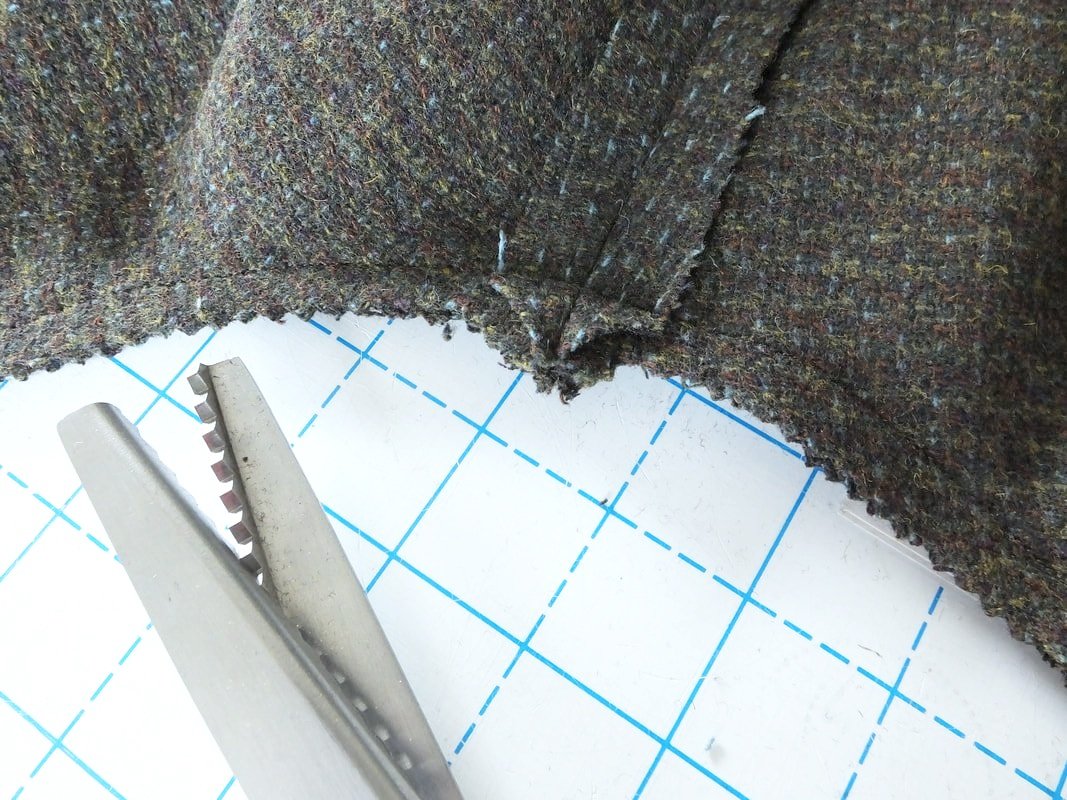
The pattern has you sew the outer seams and pockets in one swoop. I started following the instructions but then went rogue. I like to clip the inside corner of my pockets to allow them to move freely inside the pant leg.
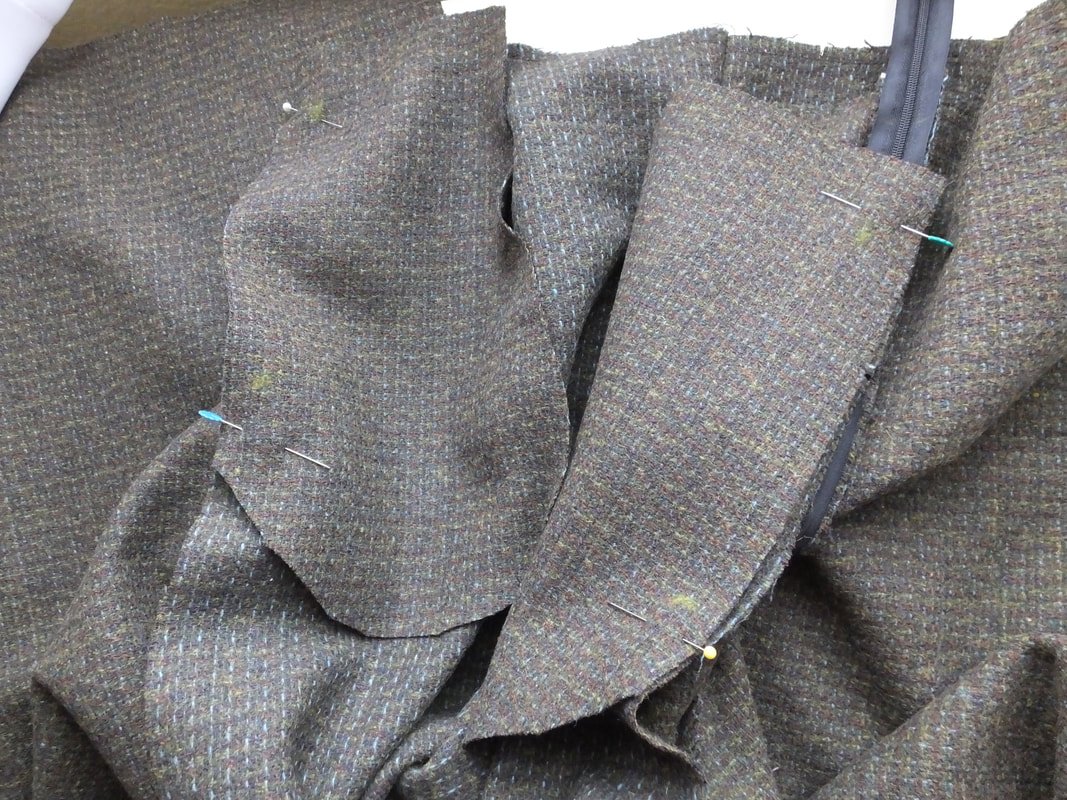
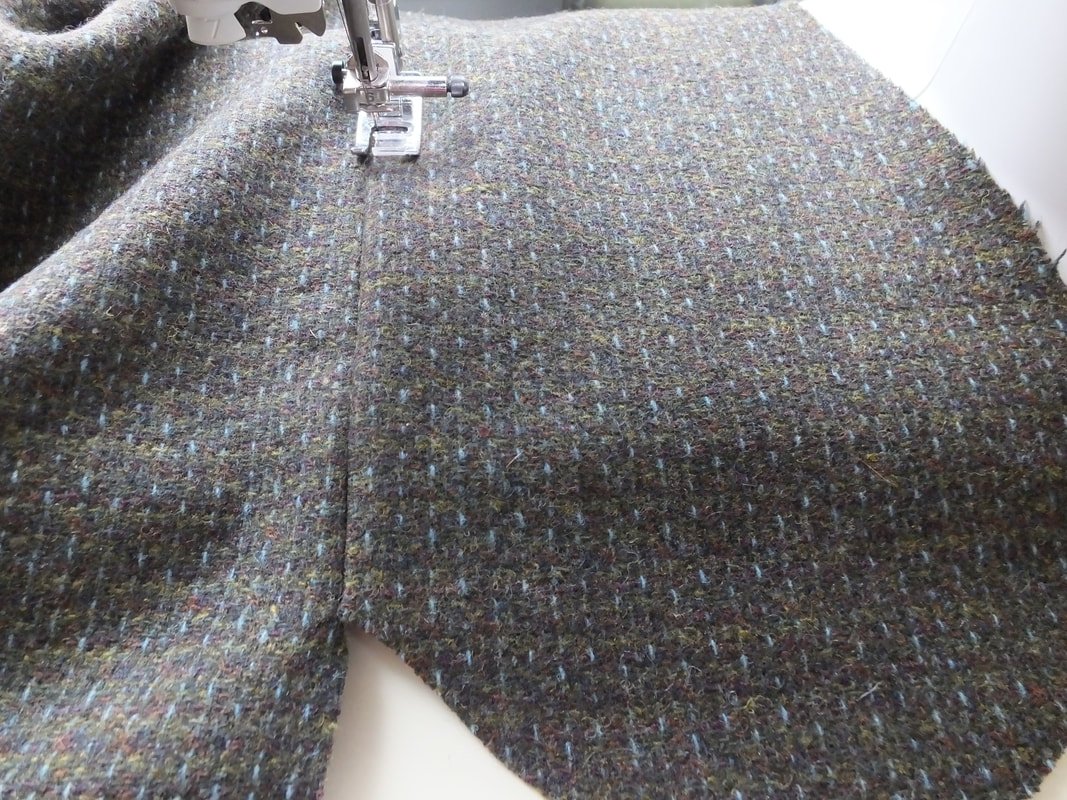
Time for pockets. Follow the pattern instructions, or, if you have your own way of doing pockets, choose that route. I did my own method. The instructions were a bit confusing for me.
After the side seams are sewn up, it's time for the waistband. We're almost done! Woohoo!!
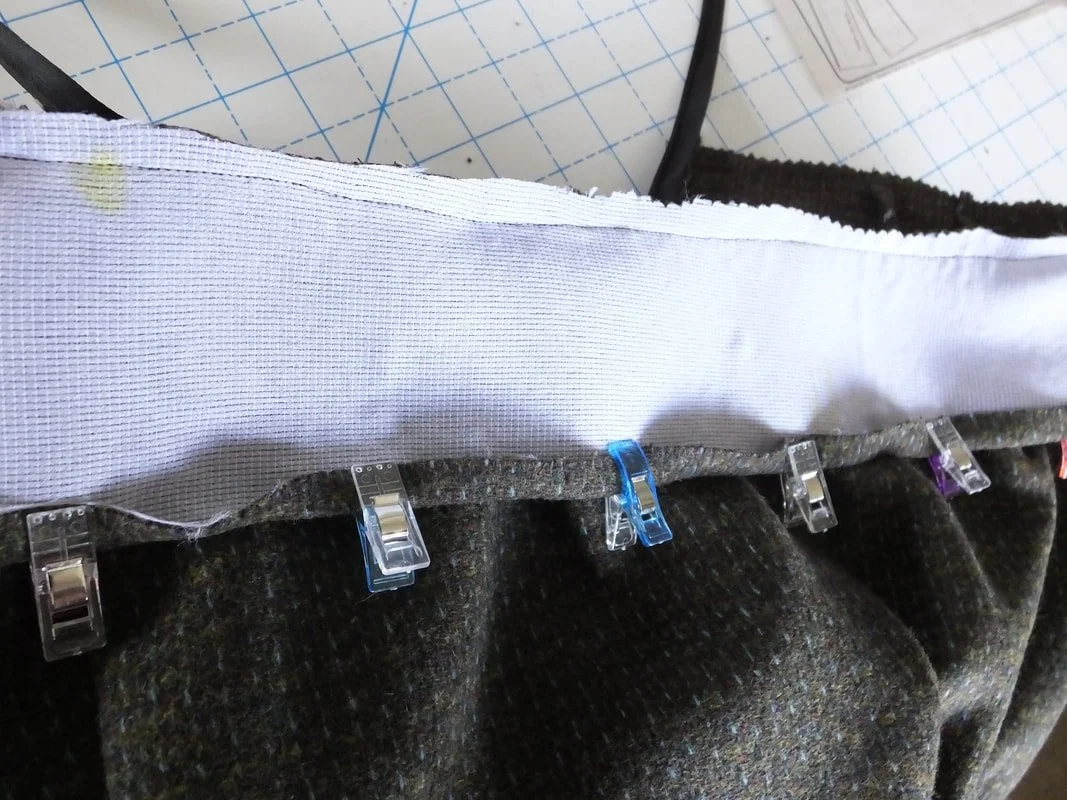
Attach your waistband and then fold the seam allowance under. I used clips because tweed doesn't really hold a crisp edge.
I marked with chalk where I needed to fold over the waistband seam. Attach the waistband to enclose the raw edge.
Try the pants on and mark where you want your hem to be. I had my husband help with this part. My worst fear is having uneven hemmed pant legs. Ahhh, the horror!!
Give it a once-over press, and then apply the hook and eye. I cut the waistband a tad short but was still able to finagle it. The hook and eye worked beautifully. I hand-sewed that portion while I sat in the car waiting for after-school pickup.
I wanted to wear these pants to a birthday party that same night. It was a cold night and the wool tweed kept my legs warm.
Oh, the sewing life. Am I right?
Overall, the pattern was easy to make. The tweed I chose has multicolored fibers. They are brown or green depending on the light. So, I did find it difficult to find a matching top. I love the fit and love how easy they were to make. I can’t wait to make a few more pairs.
Have you made these pants? Is the pattern in your stash or on your list to purchase? I definitely recommend sewing these for a quick project. I see more pairs of these in my future.

Photos of me are by Erica Lancaster
Thanks for hanging out and following along. Leave a comment below if you love these. Sign up for my newsletter to stay updated on my posts as well.
Hugs,
Annette