
Pattern Reviews, Sewing Hacks, Tips & Free Patterns
The Sewing Blog

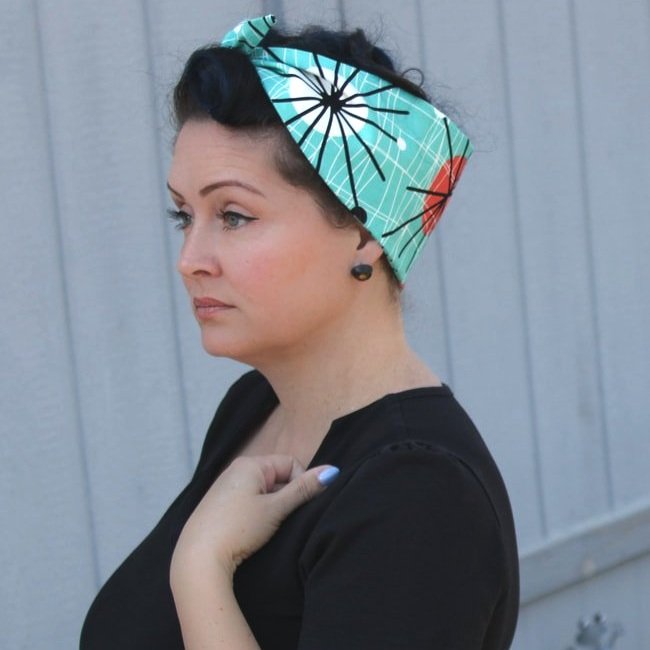
Easy Vintage Hair Scarf Sewing Pattern
Sew a quick and easy 1950s rockabilly hair scarf. Vintage style pinup scarf to elevate your style. Beginner-friendly sewing pattern to wear at your next car show.

Do you love the vintage pinup look but don't know where to start? Grab some pedal pushers, a black fitted top, and this sewing pattern! You're about to get your vintage style on.
This pattern is the straw that broke the camel's back- in a good way.
I have quite a few patterns I want to share, but I lack the technical know-how to get them to you. This is the pattern that made me search the interwebs, far and wide on how to create a PDF. And, here it is! Finally, a downloadable pattern that was made just for you!
This wide hair scarf is made for good hair days, bad hair days, and for curly-haired gals, too! I see you (I am a curly girl). Toss your hair up in a messy bun, and you'll be cute as a button when you wear this retro-inspired hair-scarf. This isn't a lifesaver, but it's definitely a hair saver. Ha!
If this thicker style headband isn't your cup of tea, I have a post on a narrower one, over here. It can be worn with your hair up or down. You can tie it around your neck, or wrist, or use it as a purse accent when tied in a bow. The size is completely customizable too, lengthen or shorten it to your desired size
Okay, let’s get started on the Wide Hair Scarf Pattern.
*UPDATE: I have given 1500+ free patterns, and to help pay for my website, I’ve added the pattern to my Etsy shop. It’s the same cost as a coffee. If you still want to sew it and can’t afford a coffee, send me an email. ;) I’m not heartless.
What You'll Need:
1/2 yard of cotton fabric
Sewing machine
Matching or contrasting thread
Chopstick or other turning tool
A smile, because you're making something cute :)
Let's get sewing!
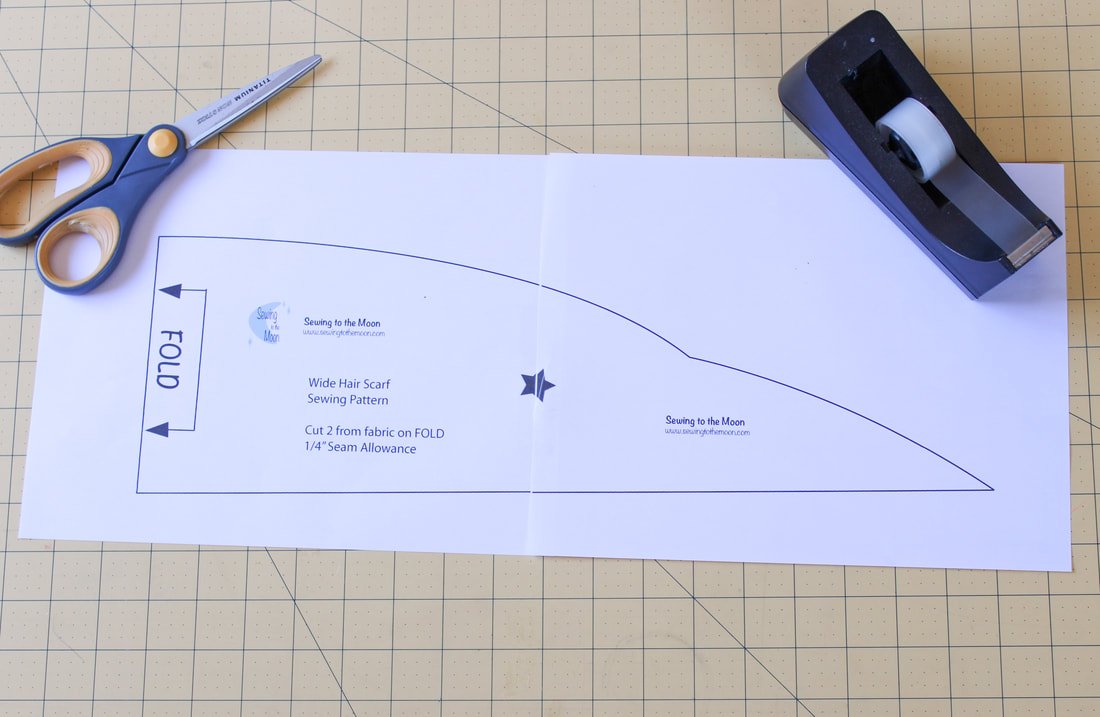
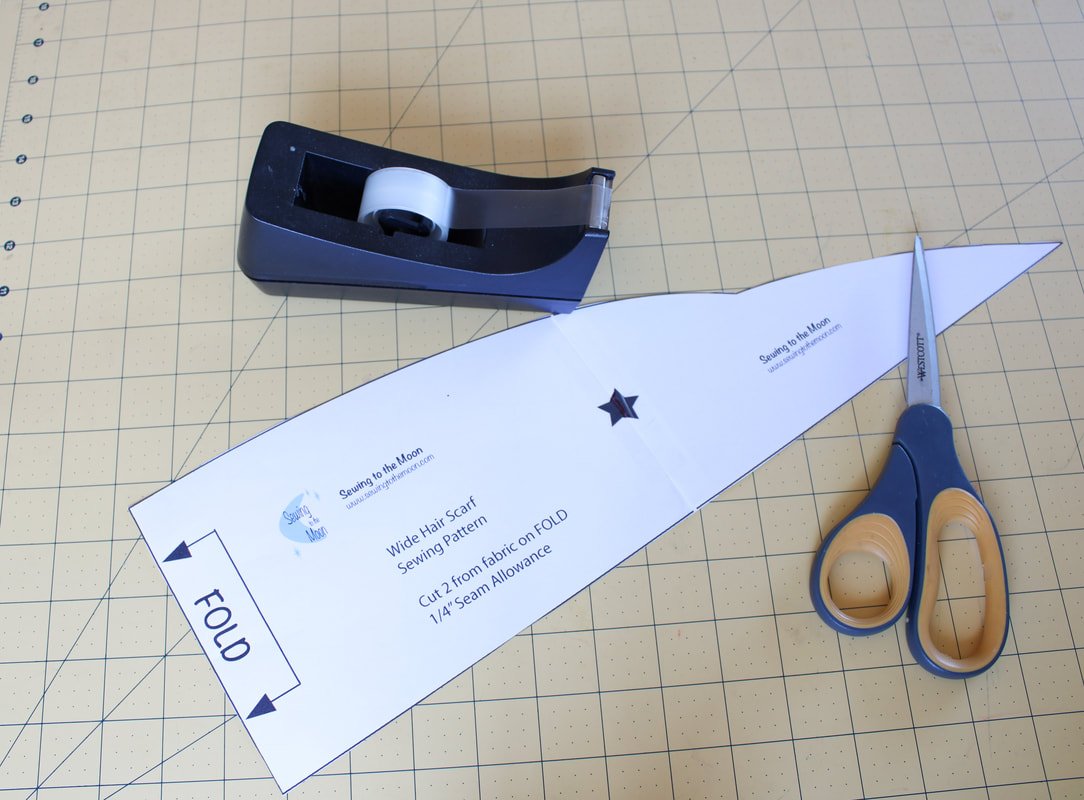
Download the PDF pattern, print it out (*do not scale or resize), and tape it together.
This will now be your pattern piece. Make sure to match up the star points.
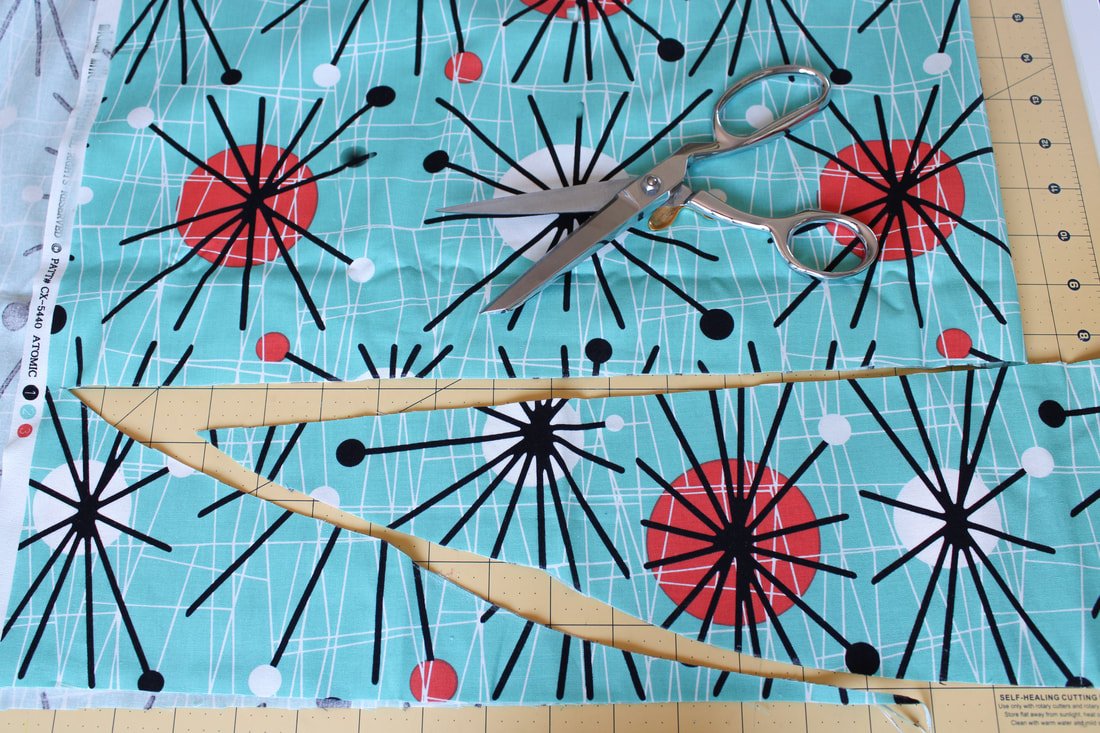
Cut out the pattern along the lines and set it aside. It will resemble a plague mask. Haha ;)
*The pattern will print out on 2 horizontal pages. They are made to overlap a bit to create the pattern. Match the star and you'll be good to go. No scaling or anything is necessary. If you'd like to trim off a thin sliver of paper to match the star up perfectly, you can. That's what I did.
Like I said above, I’m brand new to PDF pattern making.

PDF Stuff
You might have to trim a thin slice of paper for the star to fit perfectly.
Cut along the line.
Once it’s cut, it’ll resemble a plague mask.

Fabric Stuff
Next, wash, dry, and iron your fabric if you haven't already. This is totally optional.
What fabric(s) did you choose? Did you go with a solid color or a fun novelty print?
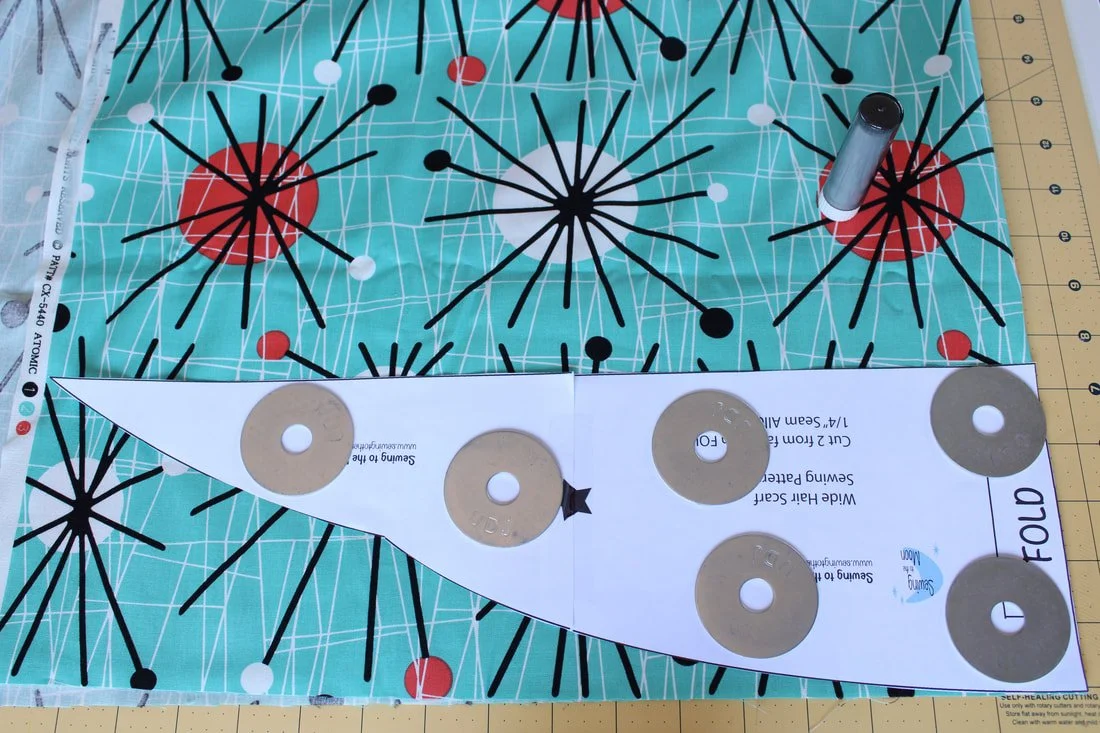
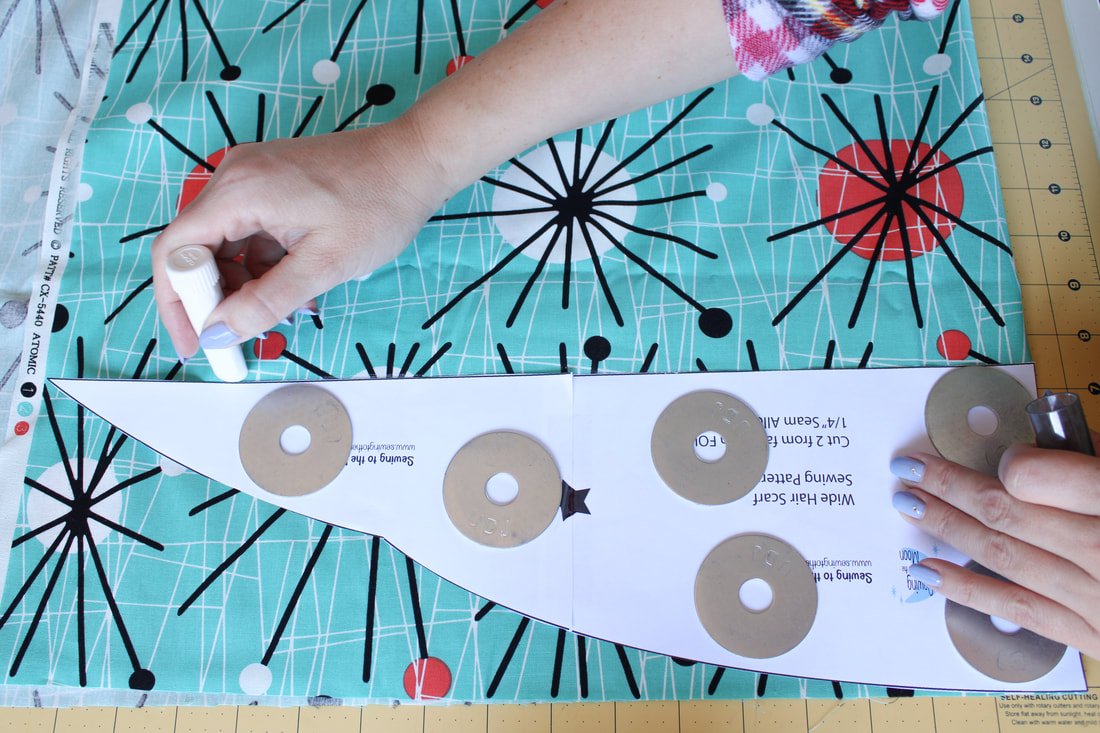
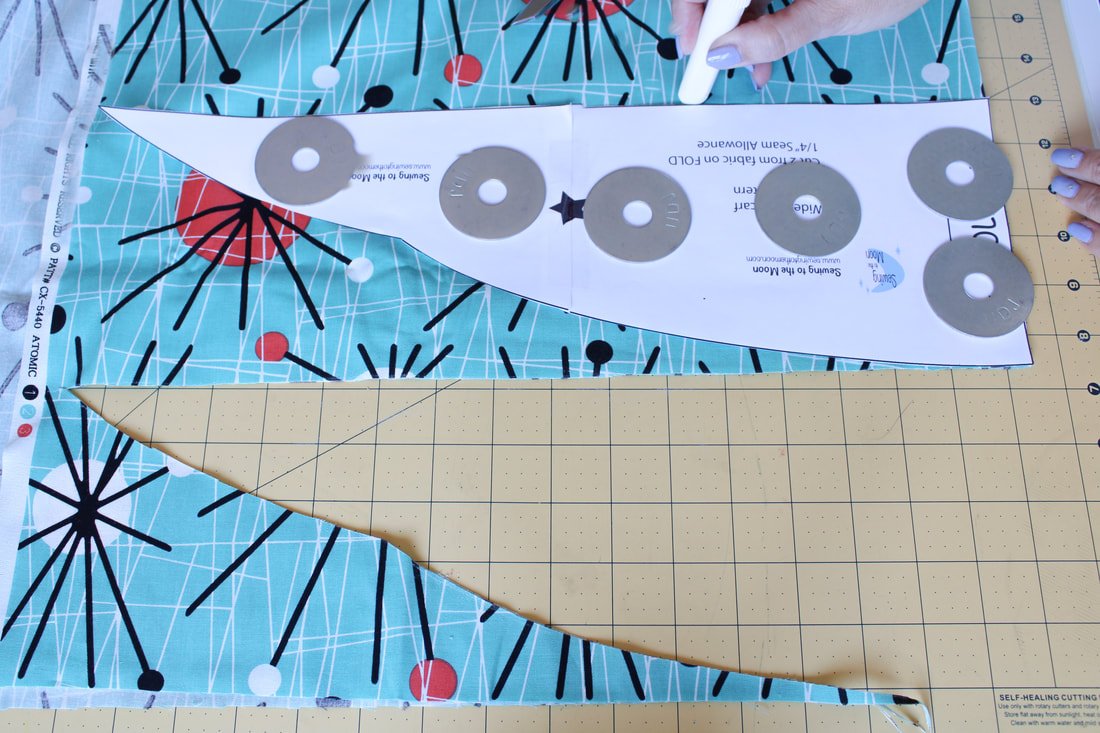
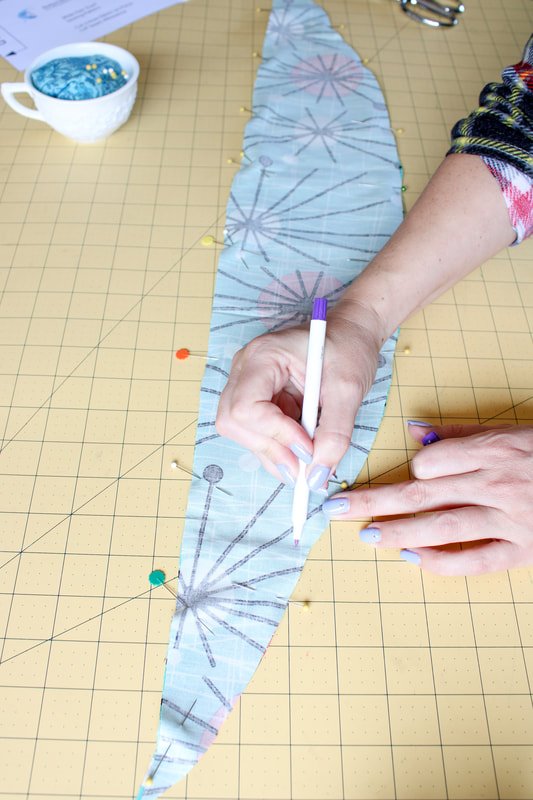
Use pattern weights to hold the pattern down. Trace around, then cut it out.
Grab your scarf pattern piece and lay it on top of your folded fabric. Line up the folded edge of the fabric with the pattern side that says FOLD. You can do this with RST or WST; it won't make a difference for this pattern.
Use pattern weights to hold the piece down while you trace out the shape. Use an air-soluble pen or a chalk pen to trace. Cut along the lines.
Repeat the steps for the other side. You are tracing an outer and inner piece of fabric for your hair scarf. Cut.
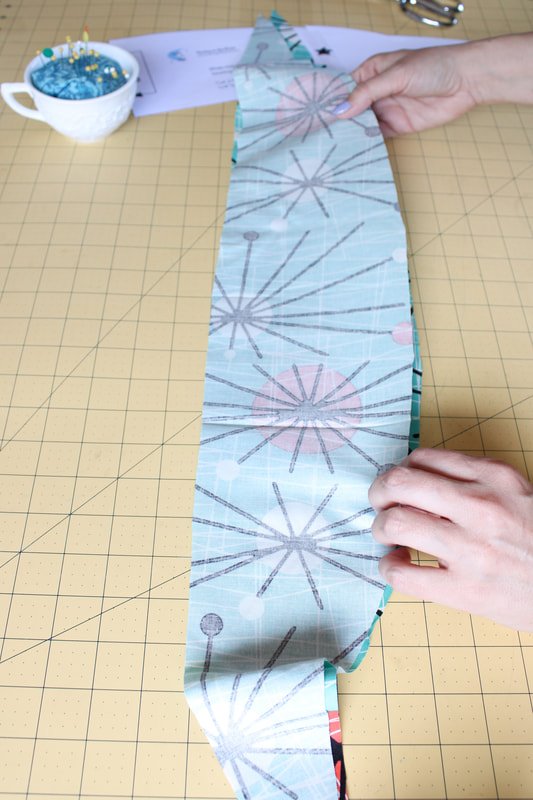
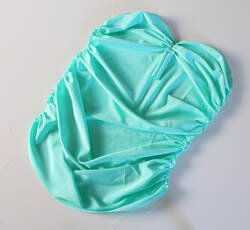
You should now have 2 pieces of fabric cut out.

Weird plague mask fabric pieces.
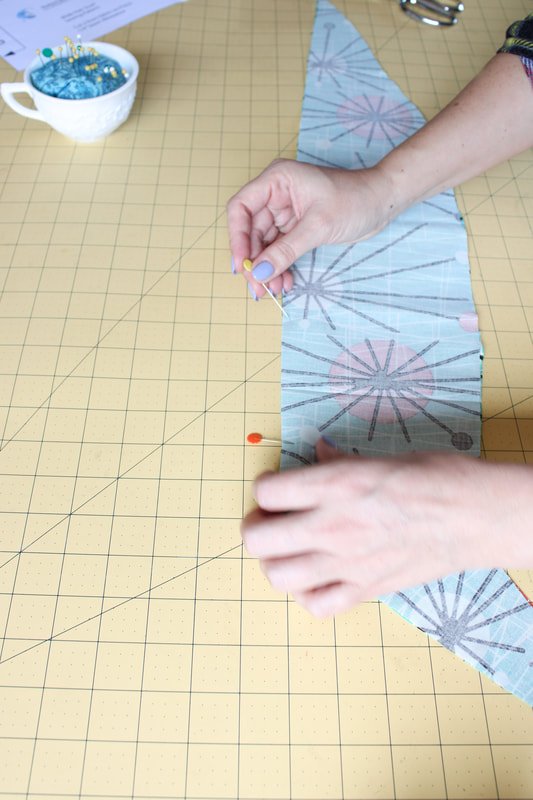
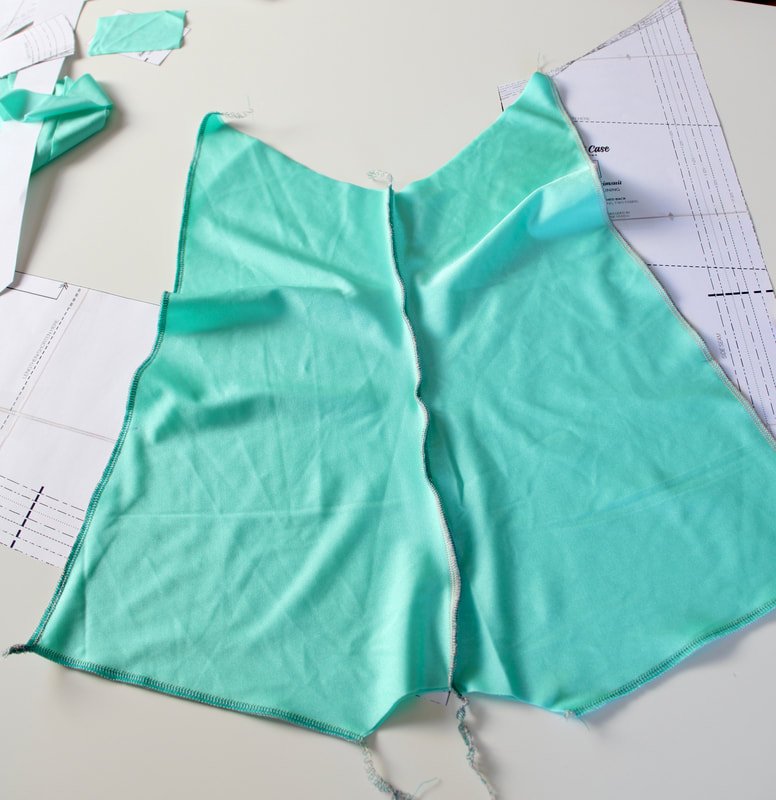
Now take the pieces and place them right sides together. Use pins or clips to hold them together.
Mark a 3" gap where the pattern piece indicates. This area will not be sewn so, you can turn the scarf out afterward.
I took an air soluble pen to mark the pivot point on the scarf. This isn't necessary, but it helped. The pivot point is where the scarf gets narrower.
Time to sew! Use a 2.5 or 3mm stitch length.
Seam allowance is 1/4"
Go slow, this gets tricky at the pointy ends
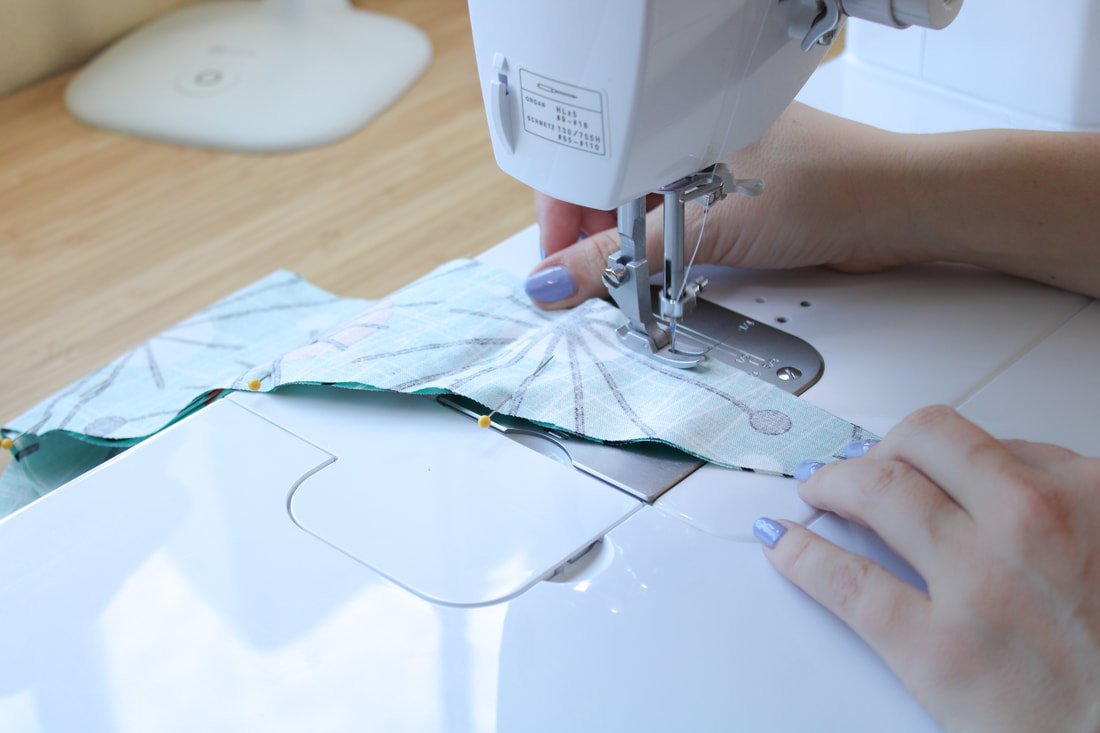
When you get to the pointy corners, leave the needle down, lift the pressure foot, and turn your fabric. If it's not quite at 1/4" mark, go back and hand crank a stitch or two. Continue sewing all the way around until you come to the 3-inch gap. Backstitch.
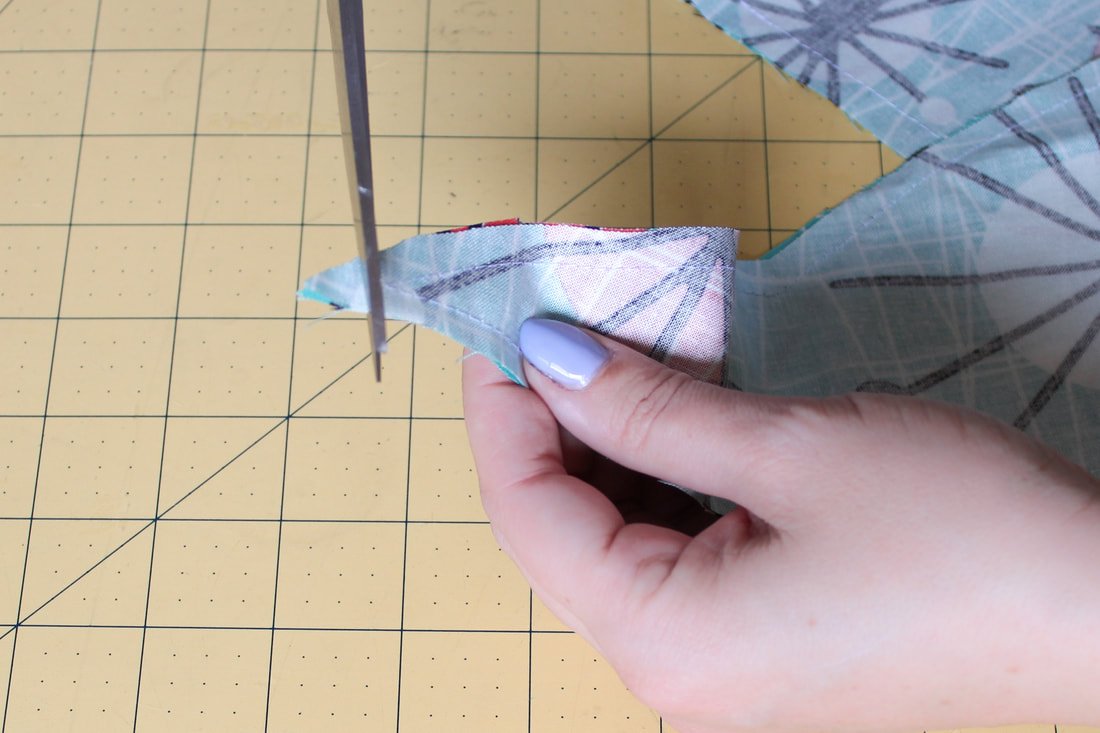
Clip your corners, carefully!

Time to turn the scarf out. Grab a chopstick or any other turning tool.
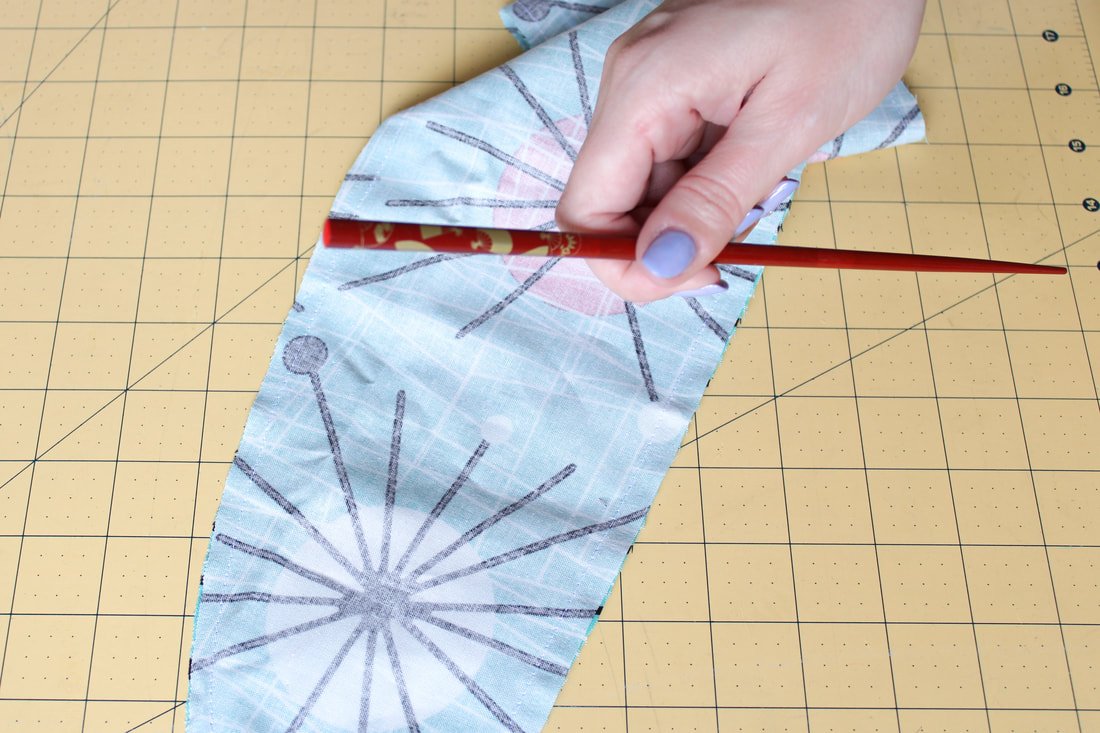
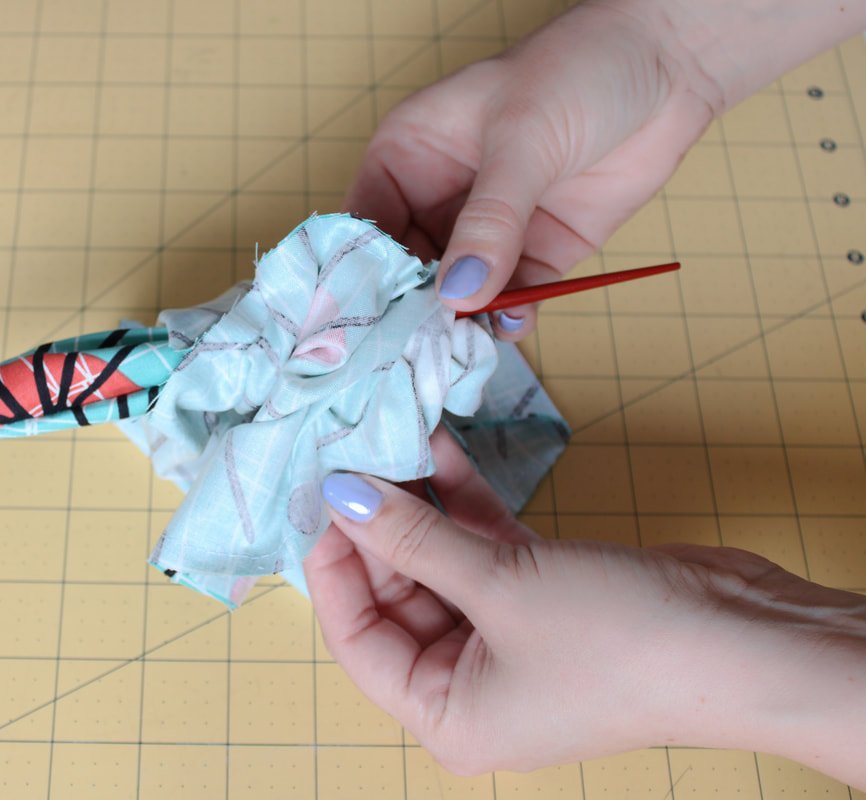
If you're using a chopstick or pencil, poke the blunt end into the pointed fabric corner. Slowly pull the fabric down around the chopstick until you can easily push it through to the gap opening. Repeat for the other side.
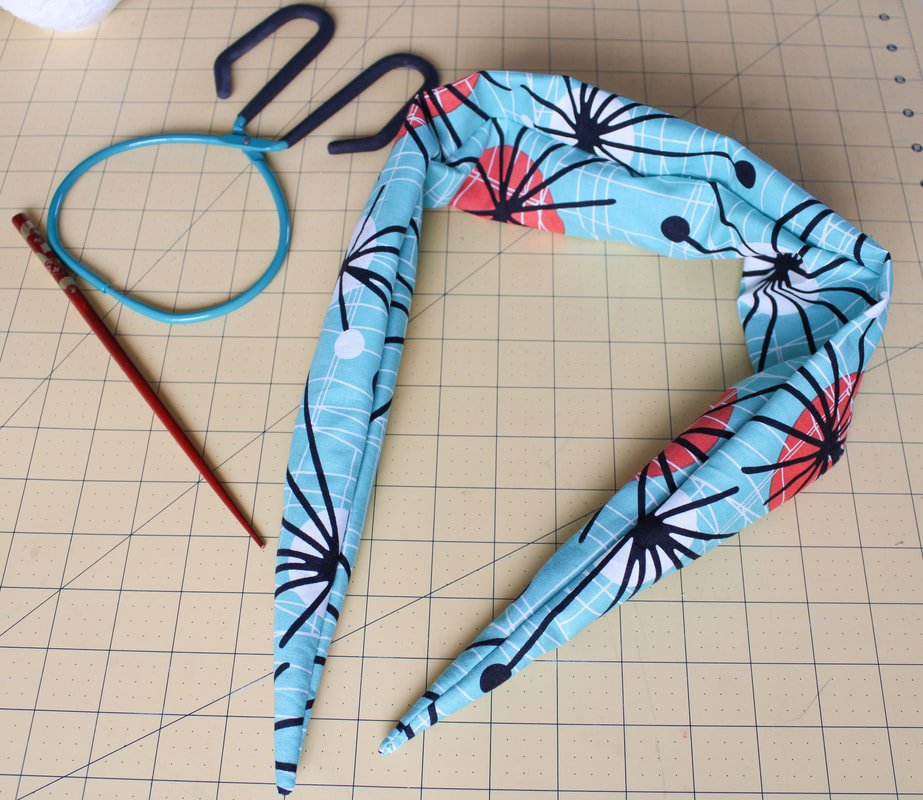
It should look like the last photo above, once it's turned out! Huzzah! The rest is downhill from here.
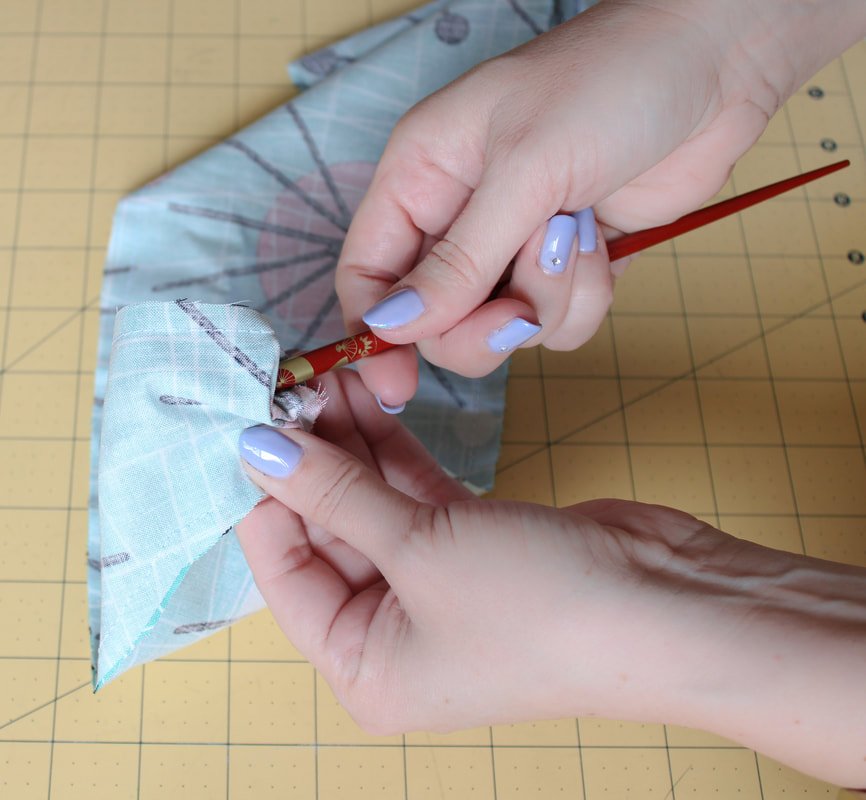
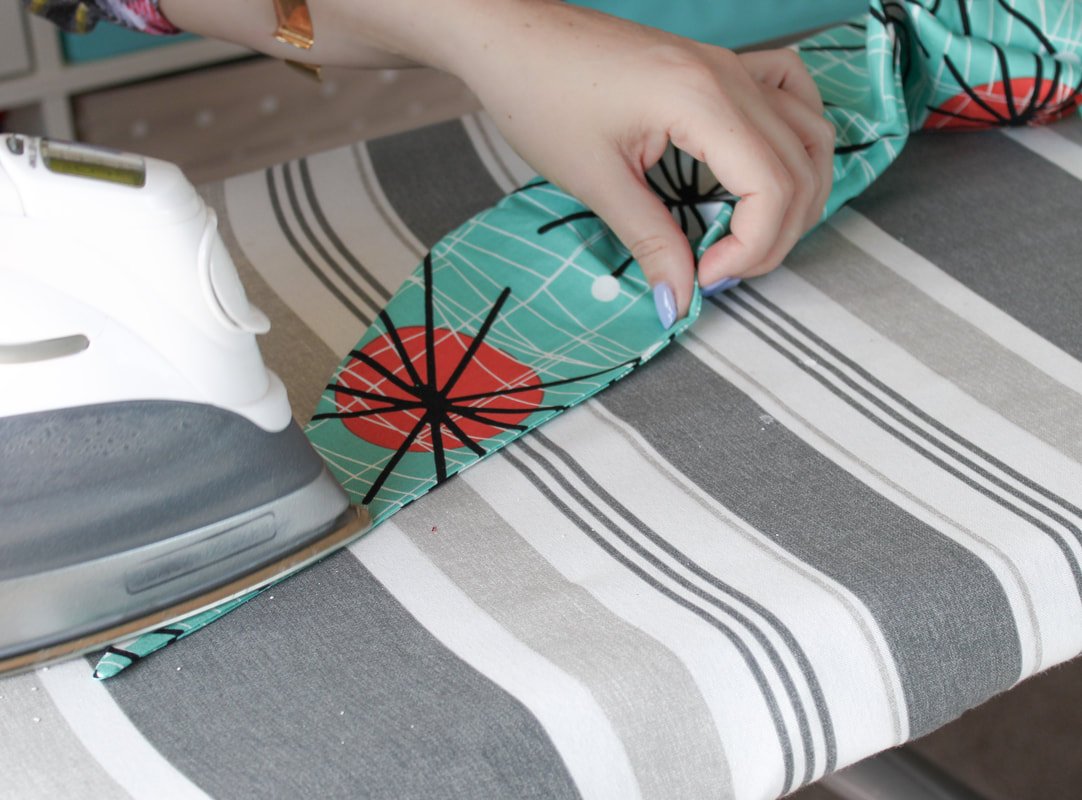
Iron time!
Roll the seam out. Using your fingernail helps this process. You can also take the chopstick and slide it under the seams while pushing the seam out and open as well. It'll take some finagling, but it's well worth it in the end. This is the hardest part of making this 1950s vintage-style hair scarf.
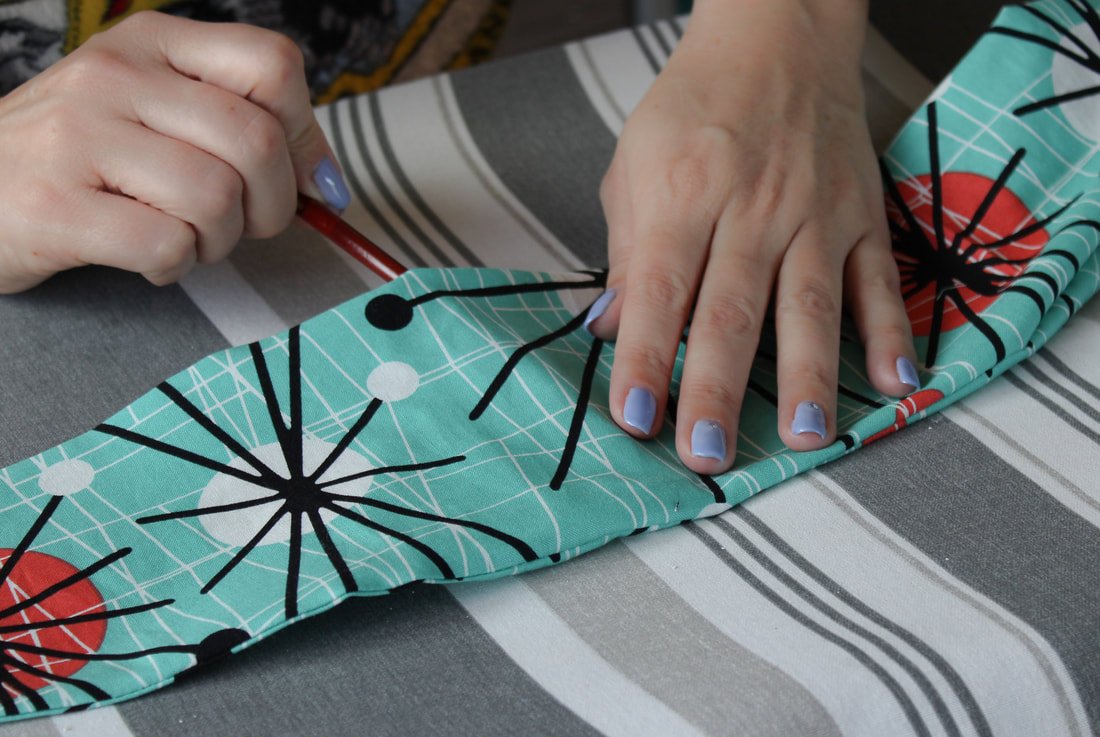
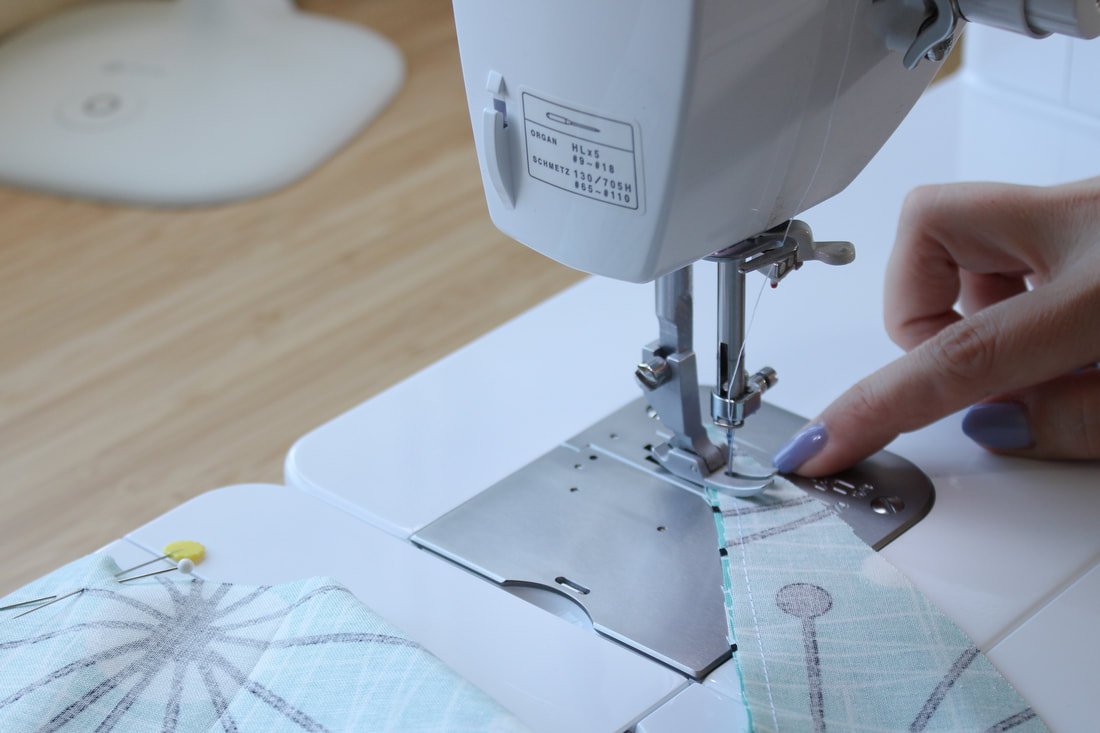
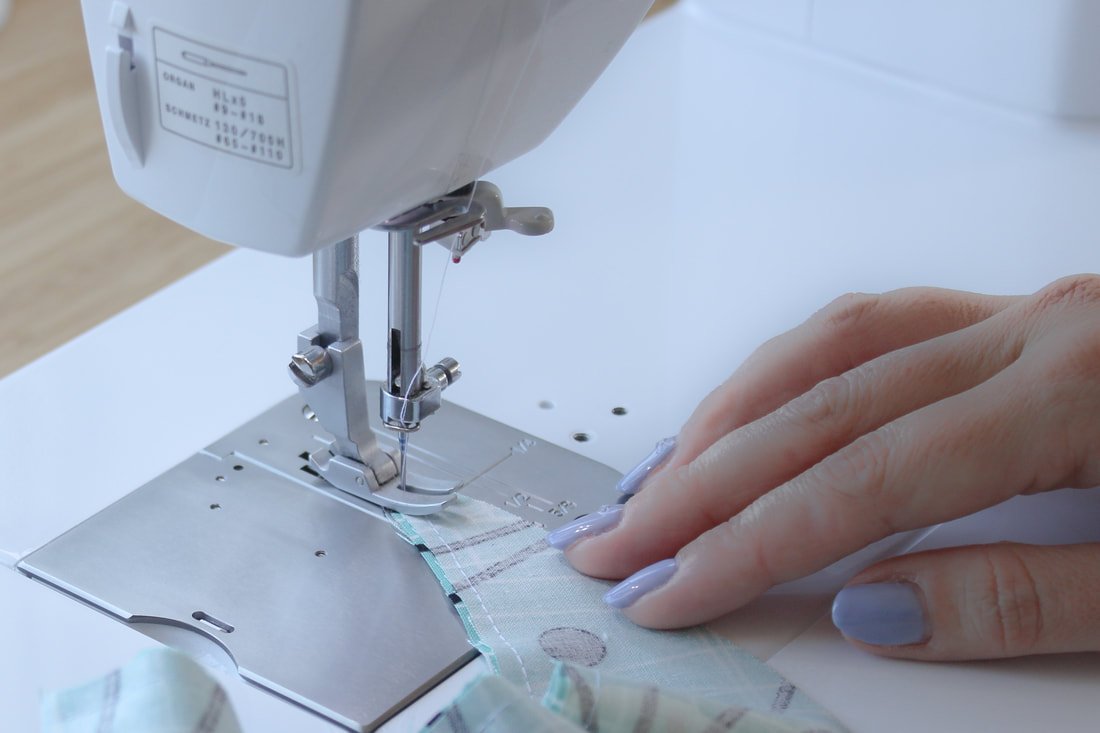
Back to the sewing machine to topstitch the gap closed.
Topstitch 1/8" from the edge, backstitching at the beginning and end. If you'd like to topstitch around the whole hairscarf, you can.
Clip any loose threads.
Press the scarf again. And, you're done!

Topstitch the opening closed.

Clip those little threads.

Ta-da! It’s finished and ready to be worn.
To wear the scarf:
Place the wide part at the back of your head just covering your hairline. The curved side will frame your face.
Pull the pointy ends upwards, covering the tops of your ears, and tie in a knot on top of your head.
This is perfect for messy hair days and curly-haired girls too.
To create a cute car show look, pin large curls on top of your head, tie this scarf up, and wear it with a pretty dress.
If you're going for a 40s style, you can pair the scarf with wide-legged trousers and a boxy button-up top. This hair scarf is for anyone looking for a quick and easy retro hairstyle!


So, what do you think of the pattern? It was easy, right? Do you plan on making as many as you can for the summer? I wear my hair up most summer days and this thicker style is what I've been yearning for! Easy & cute hair... yes, please!!!
If you make one or ten, please tag me on Instagram. I want to see them aallll! Use the hashtag #sewingtothemoonScarf
Let me know in the comments below if you've made this or plan to. I seriously can't tell you how overly excited this whole process made me. :D
Thanks for all the love and support on social media and on here! Sewing people are the best people.
Happy sewing,
Annette


Sewing the Bombshell Swimsuit
Sew a 1950s style bombshell swimsuit. It’s easier than you’d think. Closet Core sewing pattern Bombshell swimsuit is beginner-friendly. Let the inner pinup out with this bathing suit.

Love vintage bathing suits but, not the authentic vintage price-tag? Grab this pattern and some swimwear fabric to create a OOAK vintage swimsuit just for you. It's not technically vintage but, it is vintage style which is the next best thing. Amiright?
We've spent plenty of time in our backyard this summer. Sprinklers, popsicles, and slip n slides, takin' it back old school style.
This month started with me participating in the #BRAugust challenge, hosted by Ying from Tailor Made Shop. She has a website, a blog, and an Etsy shop. I purchased bra making kits from her in the past. She is a sewist who creates and sells beautiful things for the lingerie sewing world. Yay for bra making!! Although, for the challenge, I did not make a bra. I opted to make a swimsuit. I've never made a swimsuit and I needed a new challenge.
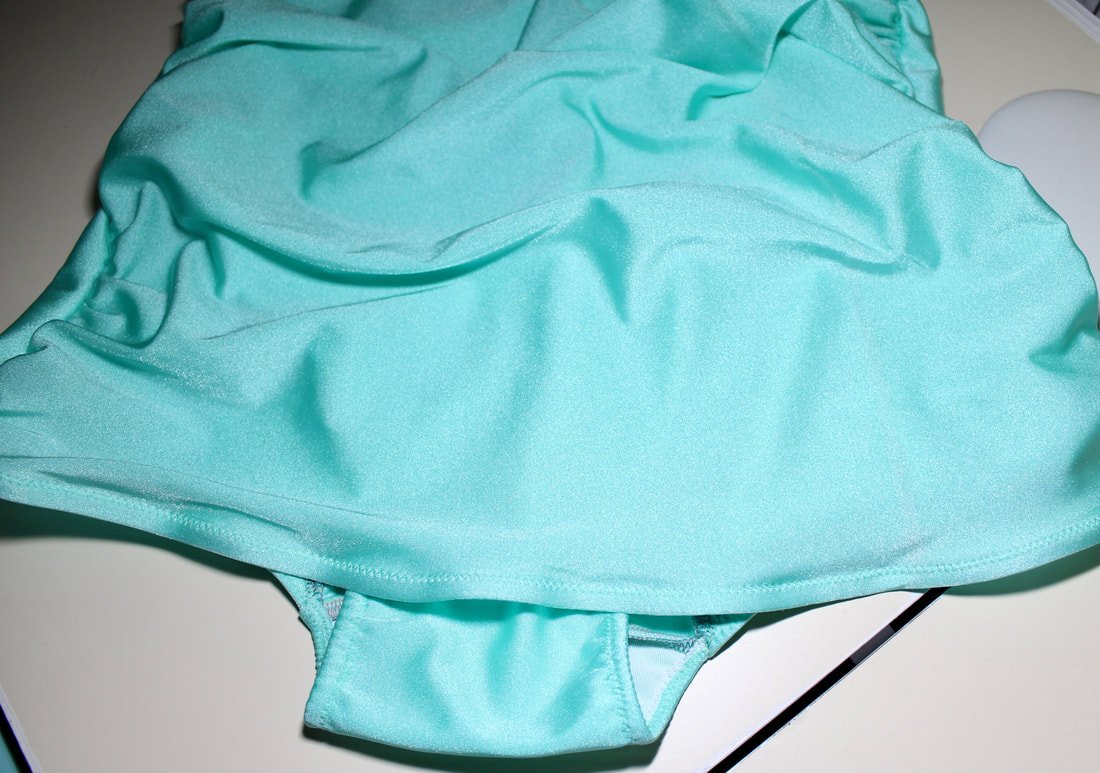
PDF pattern online. The swimsuit comes in a PDF only. I love the style and have several RTW swimsuits that look the same as View A. I had some mint green lycra and knew I wanted to use it for my new swimsuit. Minty green 50's Bombshell, yes, please!

Okay, so you know the PDF drill: print out the pattern, tape everything together like a madwoman, and cut, cut, cut. Decide on the size you want to cut out first. I went with a size 12 and I had just enough fabric. The measurements were spot on with my body, no need for grading. Yay!
IKEA was sold out of desk legs but, I purchased the tabletops anyway. So, my sewing space was a hot mess. Just ignore all of the scenery behind me in the photo.
Oh, do you see the top I'm wearing? You can read all about that here.
Follow along as I sew a 50s-style swimsuit.

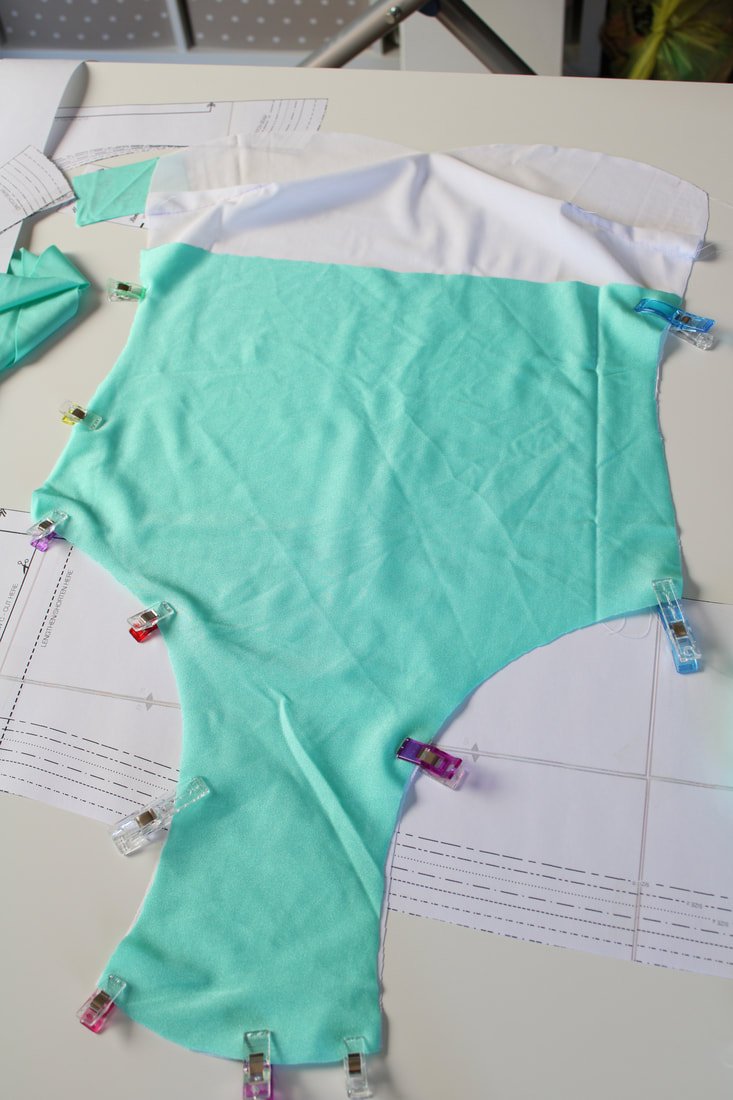
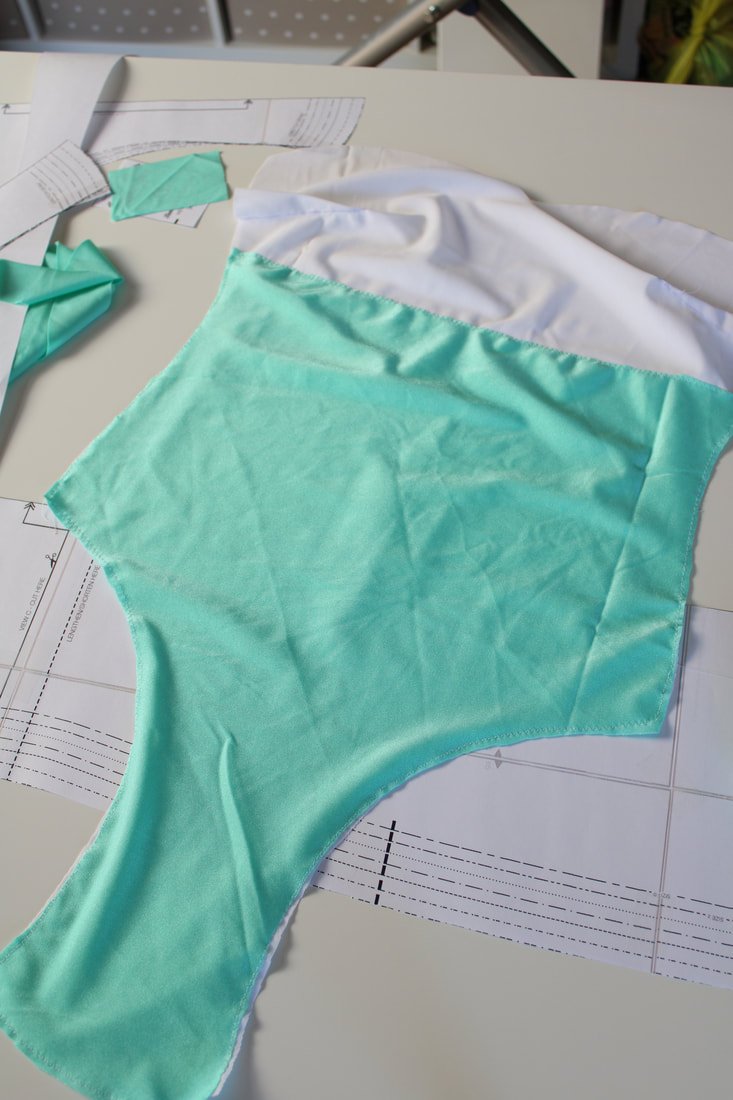
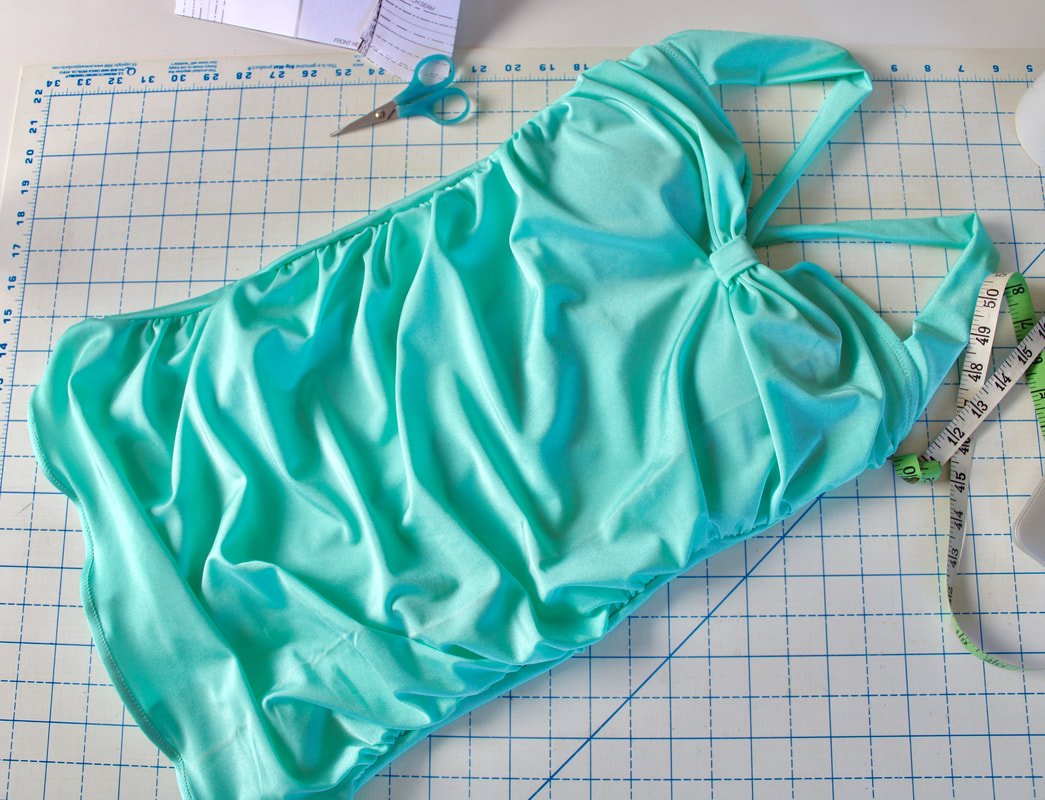
Layout your fabric and place your pattern pieces on top. Be sure to follow the distance of the greatest stretch arrows or DOGS. I cut some pieces with scissors but found the rotary cutter and mat were easier. The fabric is slippery, so choose your favorite method.
I only had one yard of 60" wide fabric so, I couldn't do the ruched backside. I had to make it work with the amount I had. #sewingwin
You'll have to ignore all the wrinkles in every picture. I didn't press them out and I apologize. I'm usually a stickler for getting out the wrinkles. If you squint, you might not be able to see the wrinkles.
Materials Needed
Stretch needles (Yes, you need these)
Polyester thread
Rubber or swimwear elastic- you cannot use regular cotton elastic. It will die in the salt and chlorine water.
Swimwear fabric which is a blend of lycra and spandex. I buy my knits online from Girlcharlee.com. They have a swimwear section coming soon.
Lining fabric (must be swimwear lining)
Set of foam cups (optional)
A sewing machine that can sew zigzag stitches
Serger (optional)
Rotary cutter and mat, scissors, measuring tape, ruler, and all your usual sewing notions
Water-soluble pen
Clips or ballpoint pins for pinning layers together
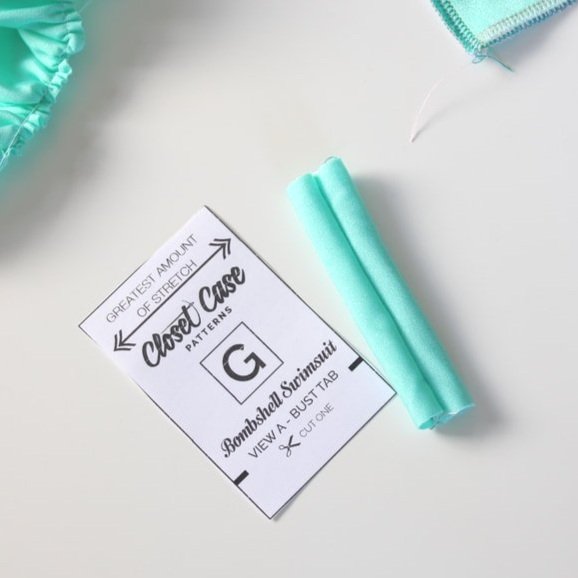
PDF pattern of the Bombshell bathing suit
Make sure you practice stitching on your serger and or sewing machine first. My differential feed was on, on my serger. Below is a picture of the serger settings I used. I have a Brother Lock 1143DW which I believe is similar to the 1034D. Even if you have this machine, test the stitch on a swatch piece first. Every machine is different. I mainly used my serger but did have to use the sewing machine to make gathering stitches, basting stitches, and to sew on the elastic.

These were my serger settings I used. I’m not a professional, so here’s a photo. LOL
Settings I used to make the Bombshell swimsuit with my serger.
First, you need to make gathering stitches along the sides for the ruching. I opted for the non-ruched backside because I was limited on fabric. You need to make gathering stitches for the front knot area later on. When you do attach the tie knot, make sure you sew it onto the right side of the bathing suit. I did it on the wrong side the first time around and had to unpick it. Face-palm.
Once the front piece and back pieces are sewn together, set them aside.
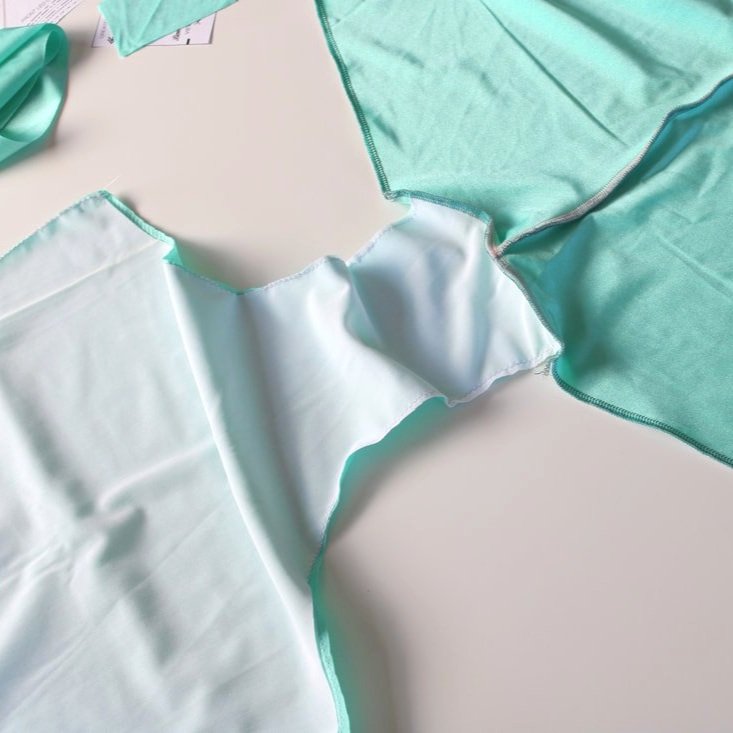
You will then sew the lining to the front crotch piece. It starts to look more like a swimsuit at this point. Then, sew the 2 crotch pieces together per the instructions.
Clip lining to the crotch piece. Baste. Then zigzag around the whole area.
So far, so good... I ordered rubber elastic and foam cups from Etsy shops and had to wait for those to arrive.
So, I decided to jump ahead and sew what I could until I needed those pieces. I made the straps, darts, and tie knot.
Elastic Time
You put the elastic in the legs partially so that they will be enclosed neatly and discreetly. The recommended zigzag stitch is on the pattern. I tried sewing elastic with my serger once and that was a mess and a half! So, back to my sewing machine for this part.

Measure the leg opening, this will be the length of elastic you cut.

Sew the elastic onto the lining close, but not on the edge for 3". Then, fold over and top stitch an inch or two. Leave the elastic dangling for now. Ignore the purple thread I had in my bobbin. Oops!
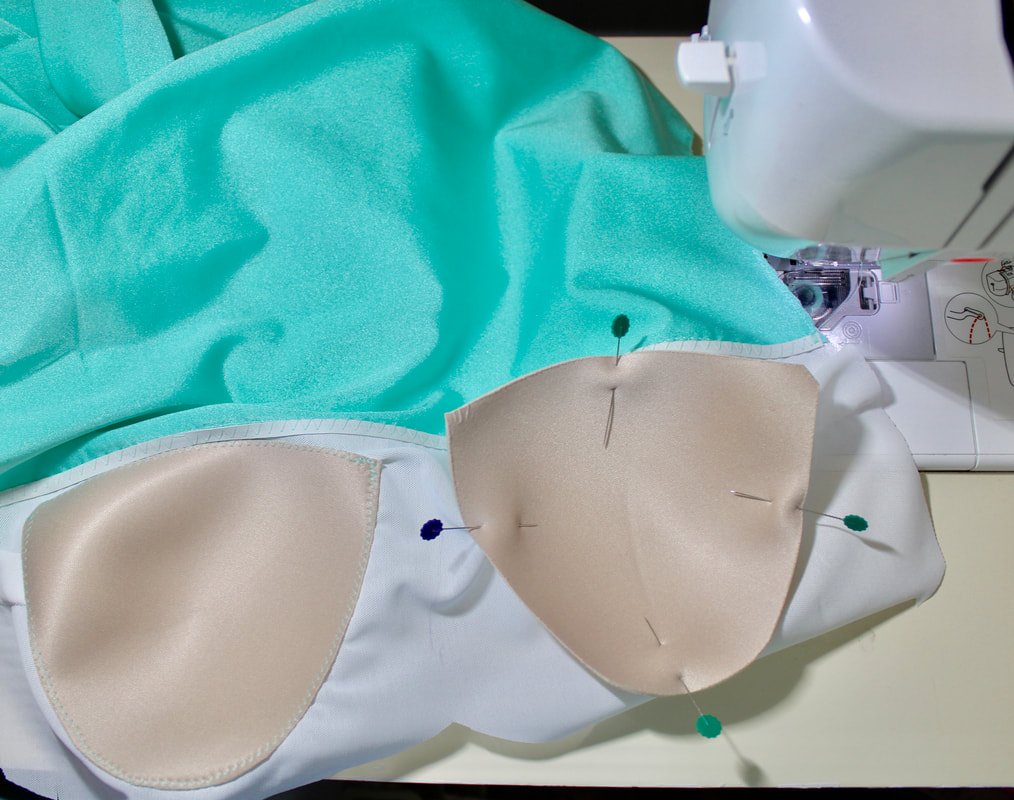
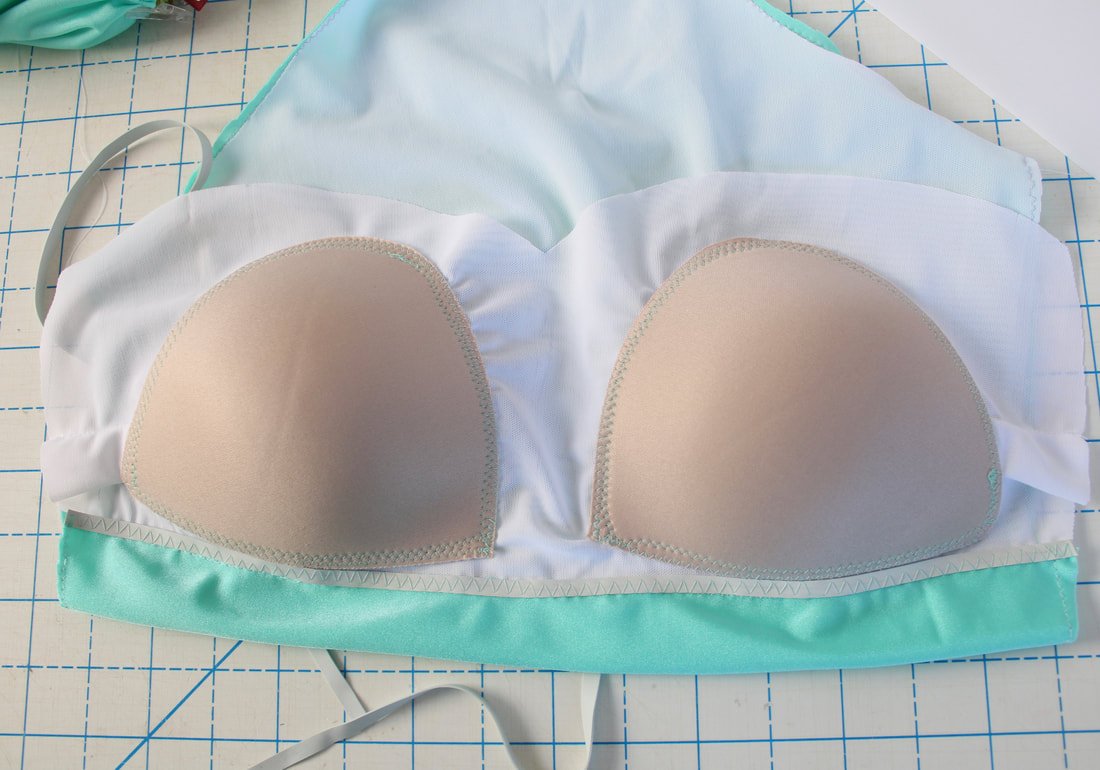
Sewing foam cups to your Swimwear
Here's where I went rogue:
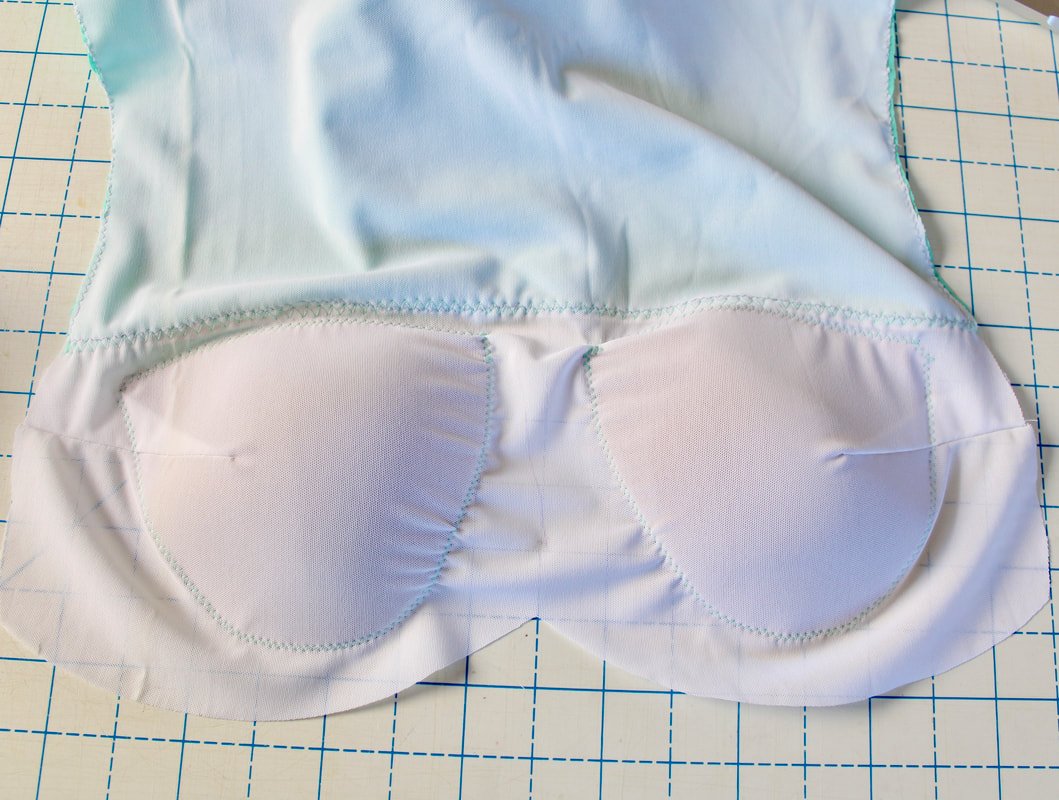
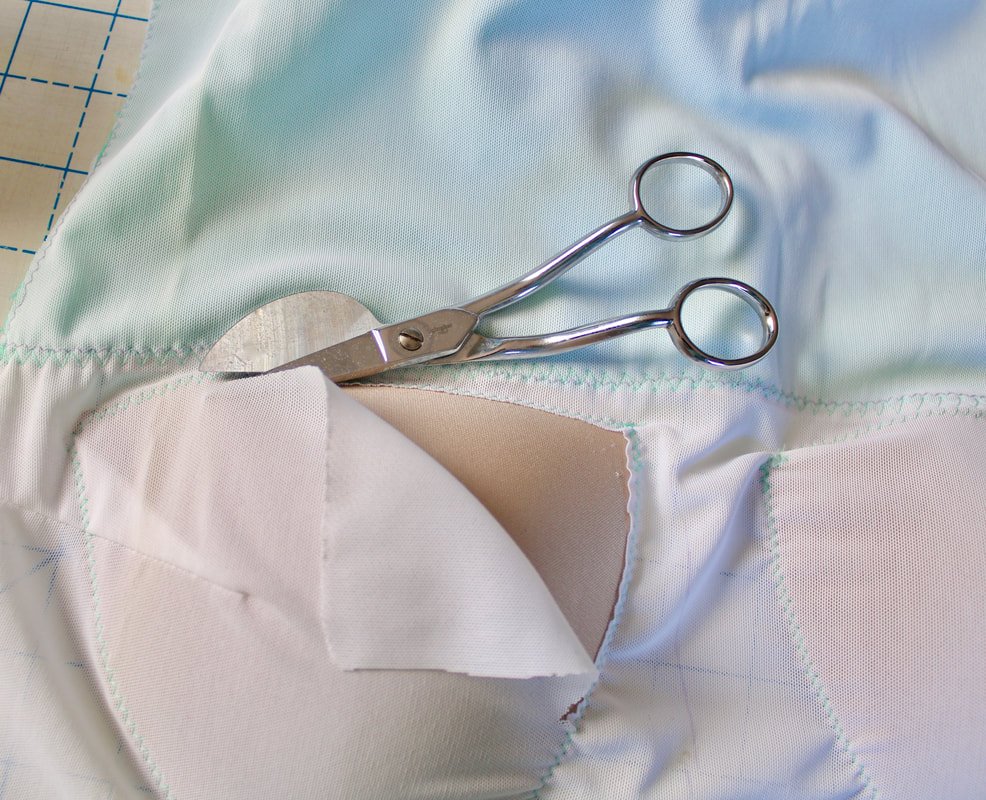
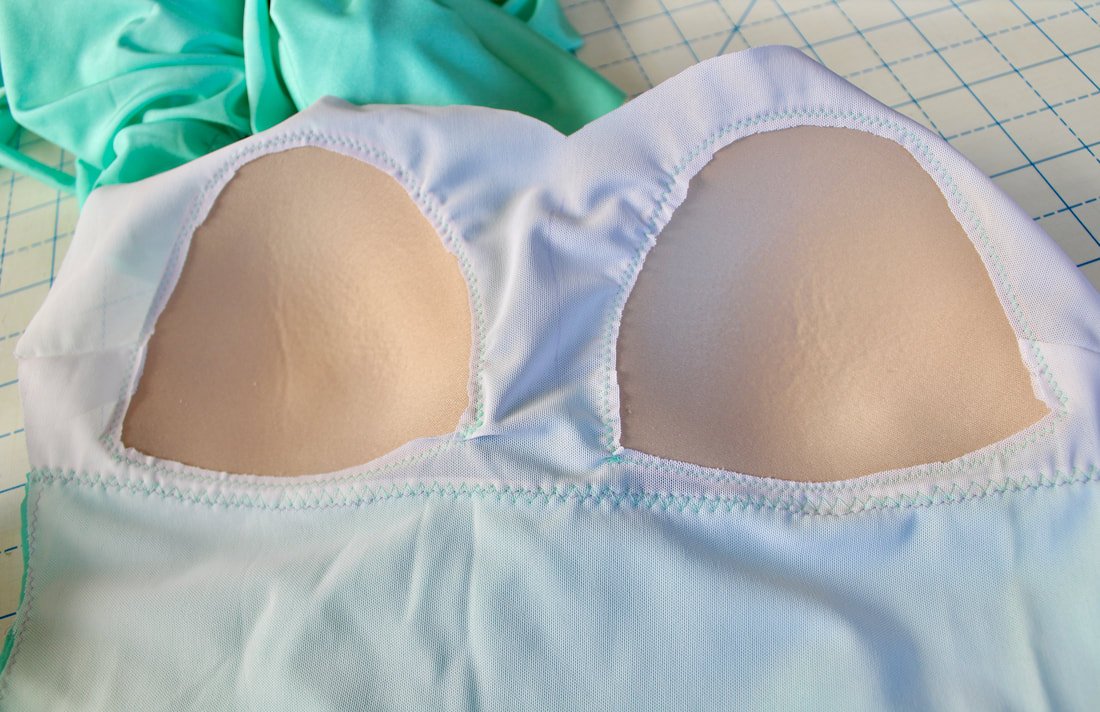
I attached a piece of elastic to form a shelf bra. Zigzag over the elastic the length of where you basted the lining to the front crotch piece.
I added the foam cups at this point. I am a little familiar with foam cups in other garments, so I did my own thing. Place them where you want them positioned on the lining and pin. Stitch them onto the lining following their circular or triangular shape, using a zigzag stitch.
Cutaway the excess fabric- you're supposed to do this so the fit is better. And then zigzag over the foam cups again. You don't need to do it a second time, but I wanted to be safe. Ha!

Elastic isn’t stretched as sewn. It’s a 1:1 ratio of elastic and the seam length.
Finishing it up
Onto the next portion of the swimsuit.
Sew the gathering stitches for the knot tie, on the front of the swimsuit. This is barfingly easy. ;-) No photo though, sorry.
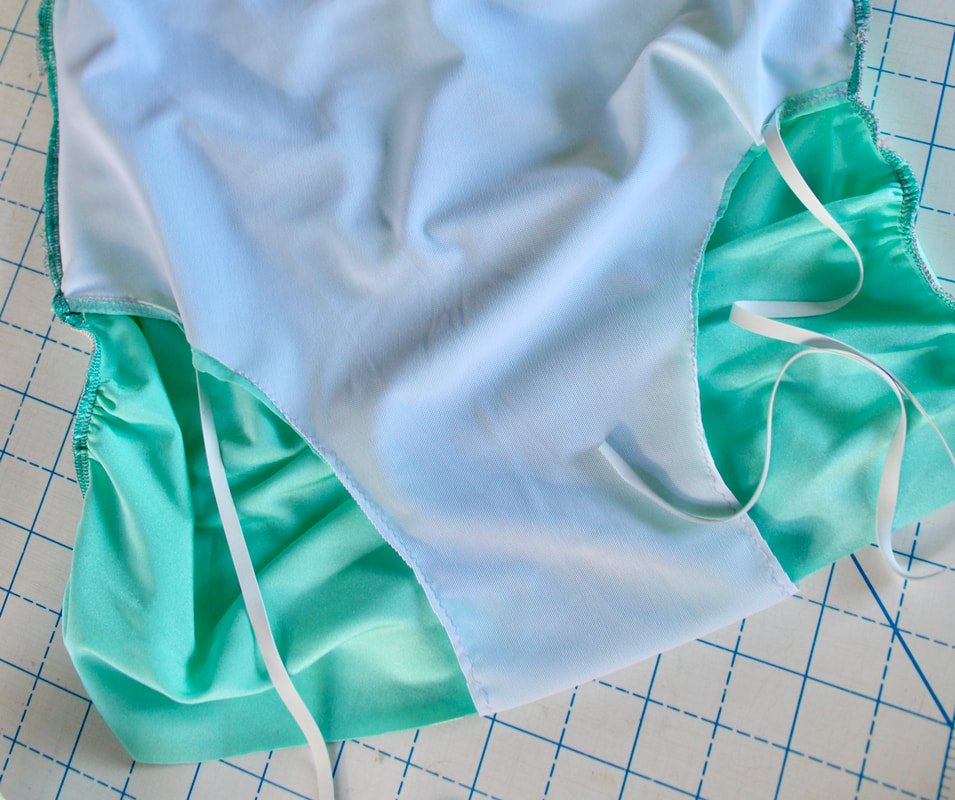
Use clips to attach the front to the back pieces matching the notches. I repositioned my clips, to clip the layers together. So many layahs (you gotta say it in a Boston accent).
After that, take the swimsuit and make a sandwich. The instructions are easy enough on the PDF. You stick the back and front together, then swoop the front lining piece up and over. Serge the side seams together. Now is the time to try it on. And, fingers crossed it fits!


Serge the sides together. Make sure to catch all the layers.
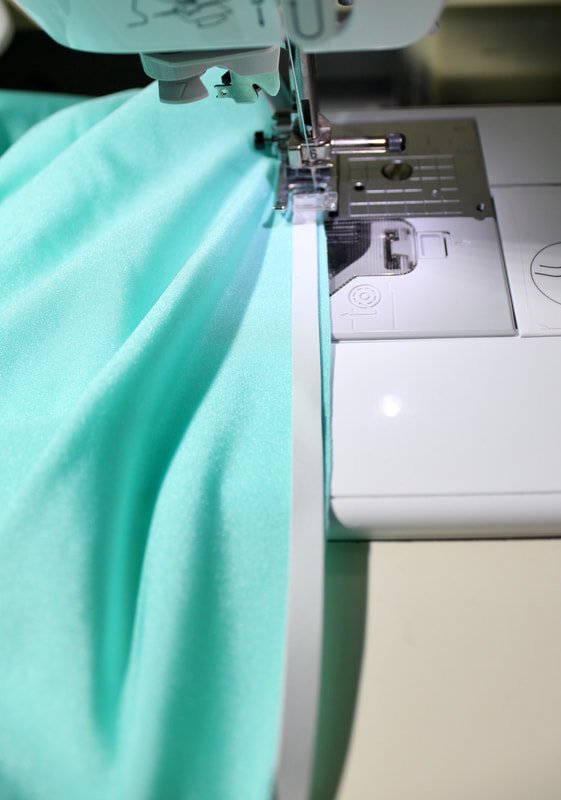
Next up, finishing the leg holes. Start at on area where the elastic is dangling and attach it to the edge. There's a math measurement to get the correct stretch on each side. Follow their instructions and you'll be golden.
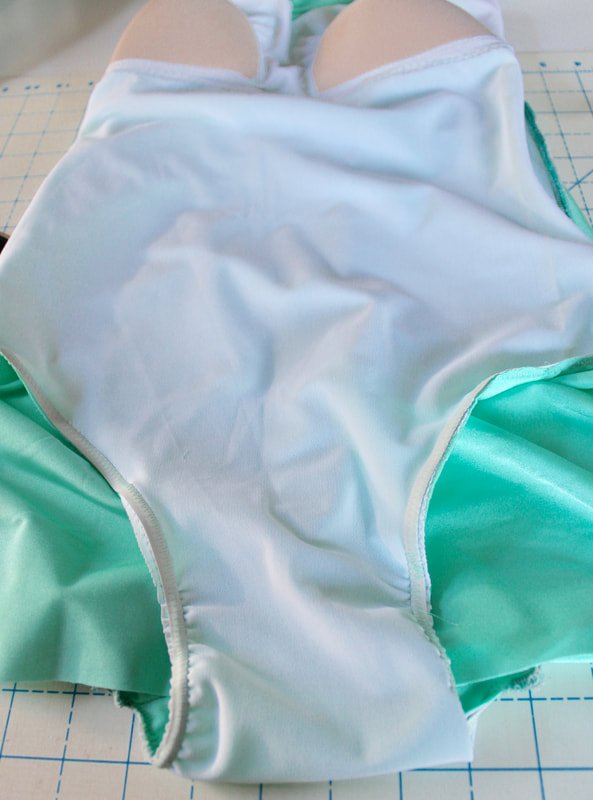
For the skirt, you will measure a piece of elastic the length from side seam to side seam. Zigzag this on without stretching the elastic. Sewing 1:1 ratio.

Remember 1:1 ratio for elastic.
Next, turn the elastic over and topstitch all around the leg openings and skirt to enclose everything. Start on one side seam and zigzag around the whole opening.
You're almost done!! Woohoo!!!!
Time to sew the sweetheart neckline.

Be sure to get both layers. You can see where I missed an area. Ha! You’re going to fold this over and sew elastic on like the leg holes.

Sew the knot down by stitching in the ditch.

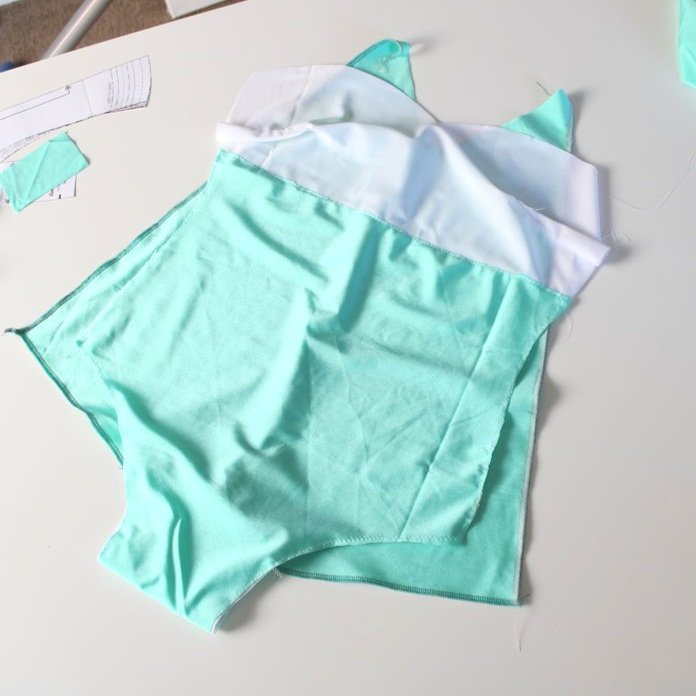
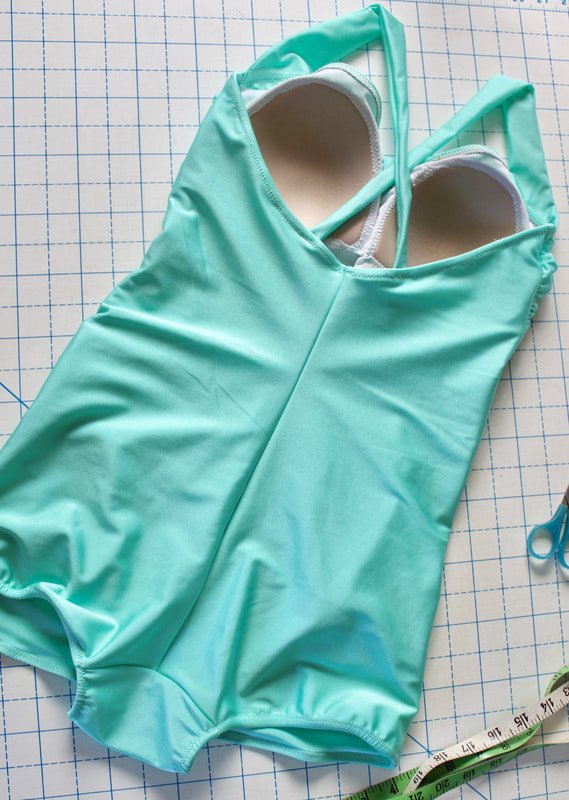
Your View A bombshell should look like this. It's 99% done. We just need to attach the straps. Can I get a Whoop, Whoop!?
Adding Straps
Grab your straps and get ready to zigzag them onto the swimsuit.
I tried my suit on and decided where exactly I wanted my straps to be positioned. Clipped them in place and stitched.
I added a second row of stitches just to be extra cautious. I am not part of the itty bitty... committee. ;-) We don't need any free shows.

Use a medium zigzag stitch.

I added a second row of stitching at the straps. This is completely optional.
Hooray! We're done. See how easy it was to make a swimsuit! I learned a lot along the way and you bet I'm going to make a few more. I have some fun fabrics picked out from a few different Etsy shops. I better get crackin' if I want to parade around in my backyard, in all of them.
I didn't do the halter top straps. I tried on my swimsuit and had my daughter help me mark where I wanted the straps to be attached at the back. I always wear halter strapped swimsuits and they kill my neck after a few hours. So, I was pretty stoked to be able to attach the straps in a criss-cross fashion on the back! Yay for comfort and holdability!!
Crisscross back straps are going to be so much more comfortable. I'm so excited!
Now I just need to find a pool to hang out in. 50's Bombshell style.
Are you going to make a swimsuit or have you ever thought about making one? I think this is right up there with bra-making. It's so fun and a lot easier than you'd think. And... gasp, it might even be cheaper!!
Let me know in the comments below what you think about swimsuit making.
XO,
Annette

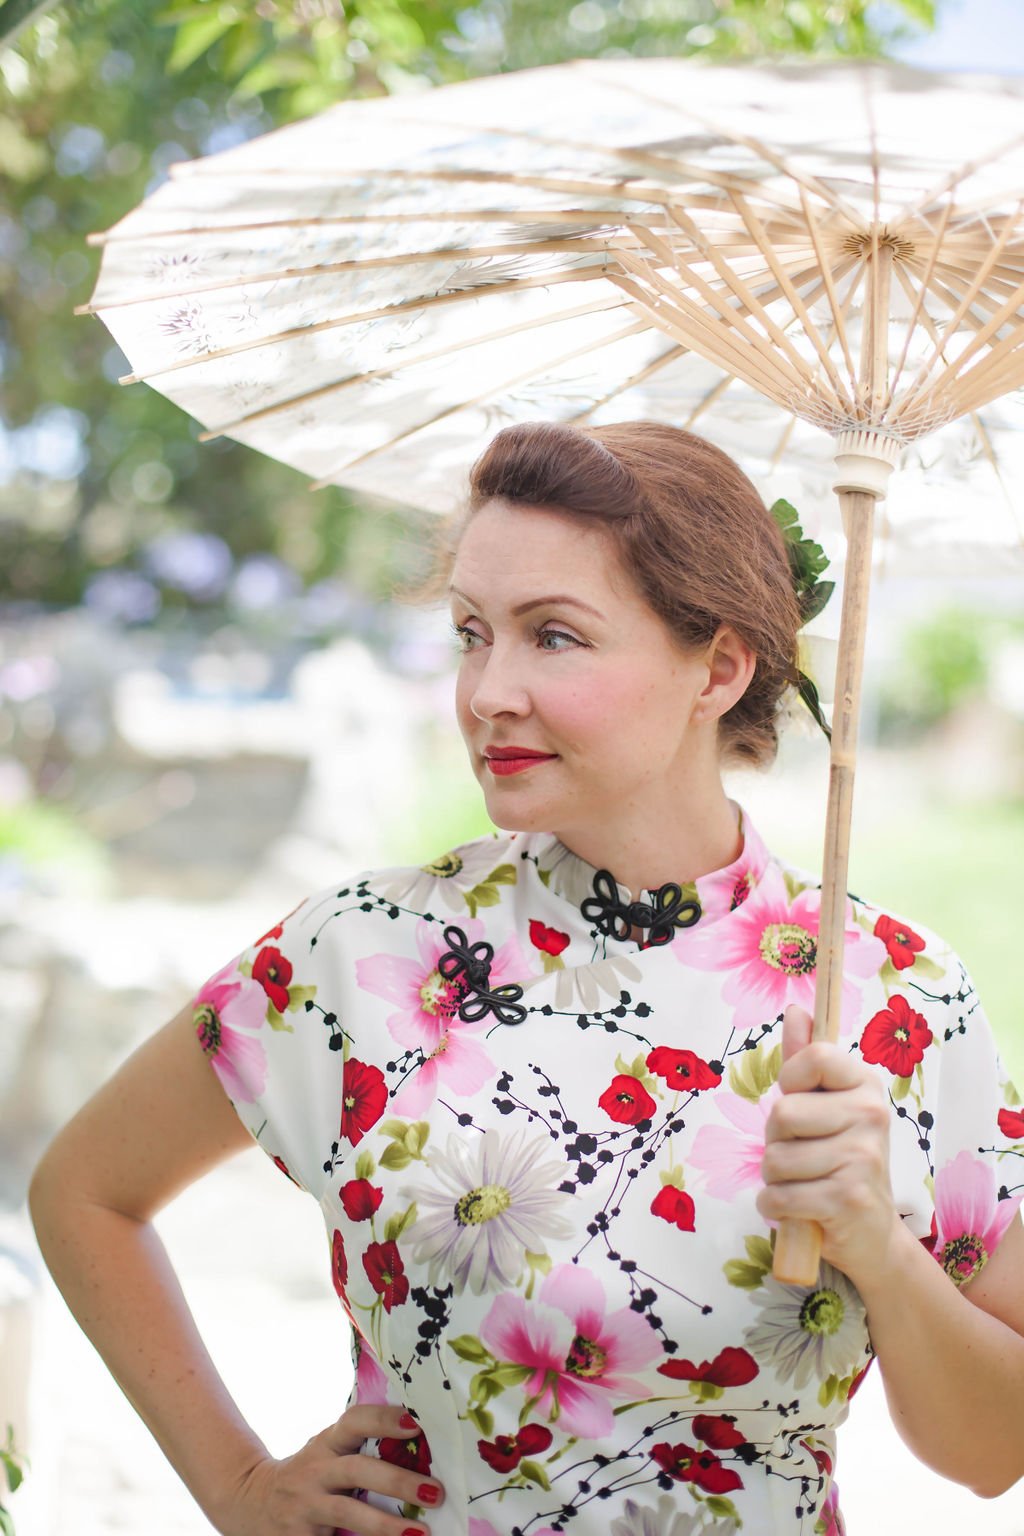
How to Sew Simplicity 8244 Cheongsam
How to sew a cheongsam. Simplicity sewing pattern 8244, sew along. This dress was a labor of love and turned out beautifully.

Have you ever been scared to sew something? Too nervous to start because you didn't know where to start? Let me share a little story with you. Grab a cup of tea, this is a long one. And, this is also the dress that made me start a sewing blog.

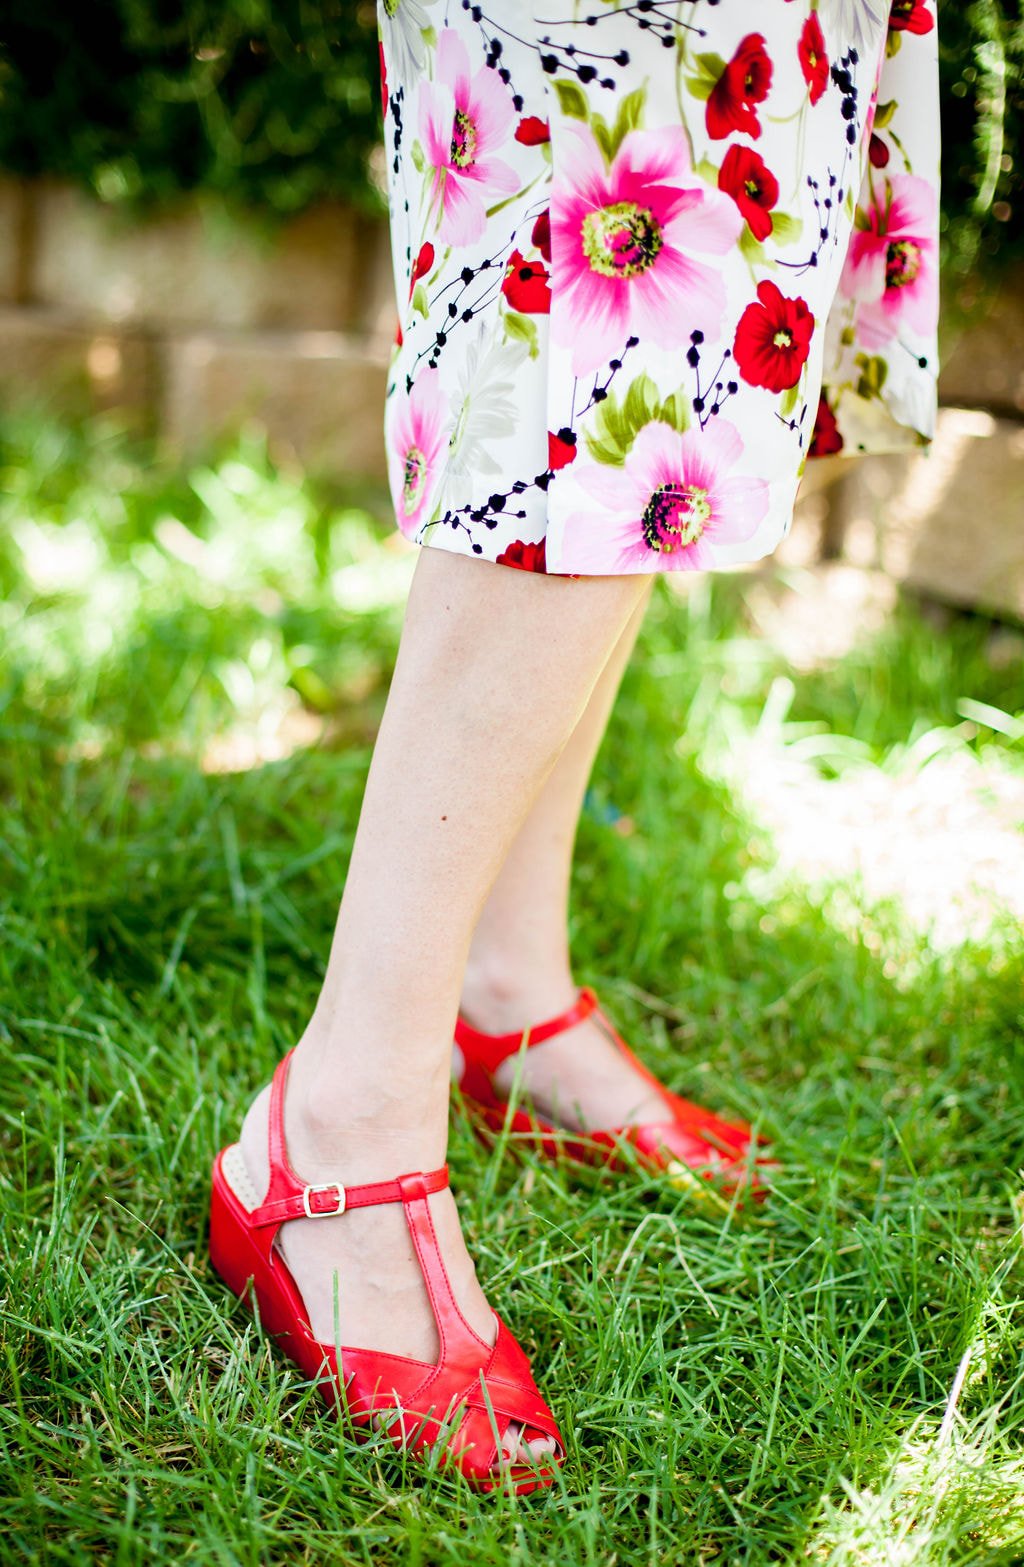
Simplicity 8244, a 1950s style dress pattern. Fabric was from JoAnn.
I picked up the Simplicity pattern and beautiful floral fabric with a vacation in mind. My husband and I were going away for a few days. I wanted to make something pretty and different.
When I sew something for myself, I like to look at other people's versions. It’s how I pump myself up. LOL
I searched the interwebs to find any and every tutorial, on how to sew up Simplicity's #8244 pattern. I didn't find what I was hoping for. I found a few pattern reviews and photos, but no tutorials or step-by-step instructions. I messaged a gal asking a few questions, but she didn't have the answers I needed either.
Hesitantly, I traced the pattern onto my paper (here's a list of my go-to sewing tools) and transferred the markings. I always need to do a FBA (full bust adjustment). How was I supposed to make one with this asymmetrical dress? After staring at the pattern for what felt like days, I shut down. I rolled up my traced-off paper and set it aside. For one year, exactly.
Not sure what lit a fire under me, but I decided to pull that rolled-up pattern out of hiding and give it another go!
I made a muslin using some old Halloween costume fabric on hand.
I sewed up the muslin, making sure to include the darts, side, and back seams, and any other important areas. I did not attach the collar or zipper. It's a muslin, so it was for the fit purpose only. I HIGHLY recommend making a muslin for this pattern. You may find that you need a few simple adjustments.
I found that my bust fit pretty well. *I did use my high bust measurement. I have a 5-inch difference between my high bust and regular bust. FBA to the rescue.
I made the short waist adjustment- because I have no torso. Ha!! Thanks, Mom. ;)
I also did a forward-sloping shoulder adjustment as well. Bad posture FTW!
Nothing else was needed. I transferred those measurements back to the pattern piece and traced out my pieces onto the pretty fabric.
Gather everything you need:
Fabric
Pattern
Interfacing, matching thread, needles
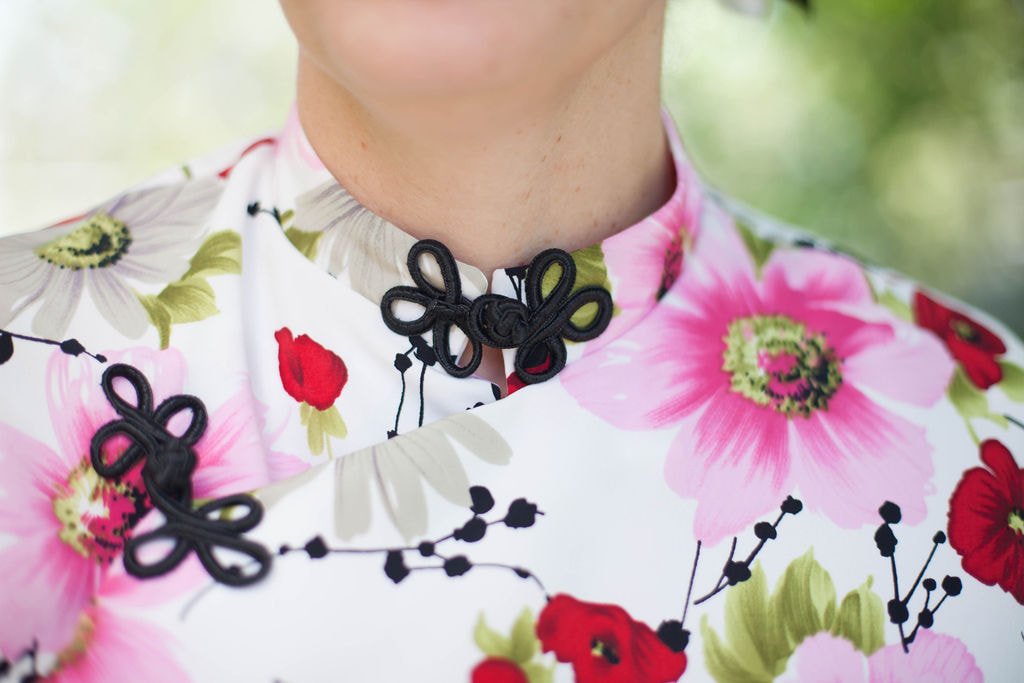
Frog Closures or buttons
Piping. I opted out, but you may want to add the piping detail
Sewing machine, etc.
All your favorite pattern tracing and cutting tools
Patience and a good night’s sleep
Now that the fitting info is out of the way, let's dive in and make this beautiful traditional Chinese dress. I did a little research on the dress, thanks wikipedia. If you want to find out some more information and the dress history, click that link. Youtube has some amazing videos on how the dresses are made as well. I love the internet.

Trace out the pattern onto your favorite paper. Don't forget to transfer every marking, there's a lot with this pattern.

I didn’t have a table big enough, so I traced it off on the floor. Ouch, my poor knees.
This was a lot of dress, make sure you have a large space to lay out the pattern. I chose to do this on the floor. Cue the angry sewing Gods. >: )
Once everything is cut out, and your marks, darts, and hemlines are transferred. Cut out the fabric. **Pay close attention to the pattern layout on the tissue paper. You don't want anything backward or inside out. This is very important. you'll see why later.

Sew the fisheye darts.
Sew your fisheye and bust dart first. Fisheye darts are pinched in the middle and sewn up. Knot by hand. Go back to the middle and sew down to the opposite end. Knot by hand. Press the waist darts towards the center. I love this style of dart, they are so flattering. A tad tricky for your first time, but once you get the hang of them, you’ll love them.

Match up shoulder seams and back center seam. Stitch. Press open.

So far, so good. Right? Moving right along. It should look more like a dress at this point.
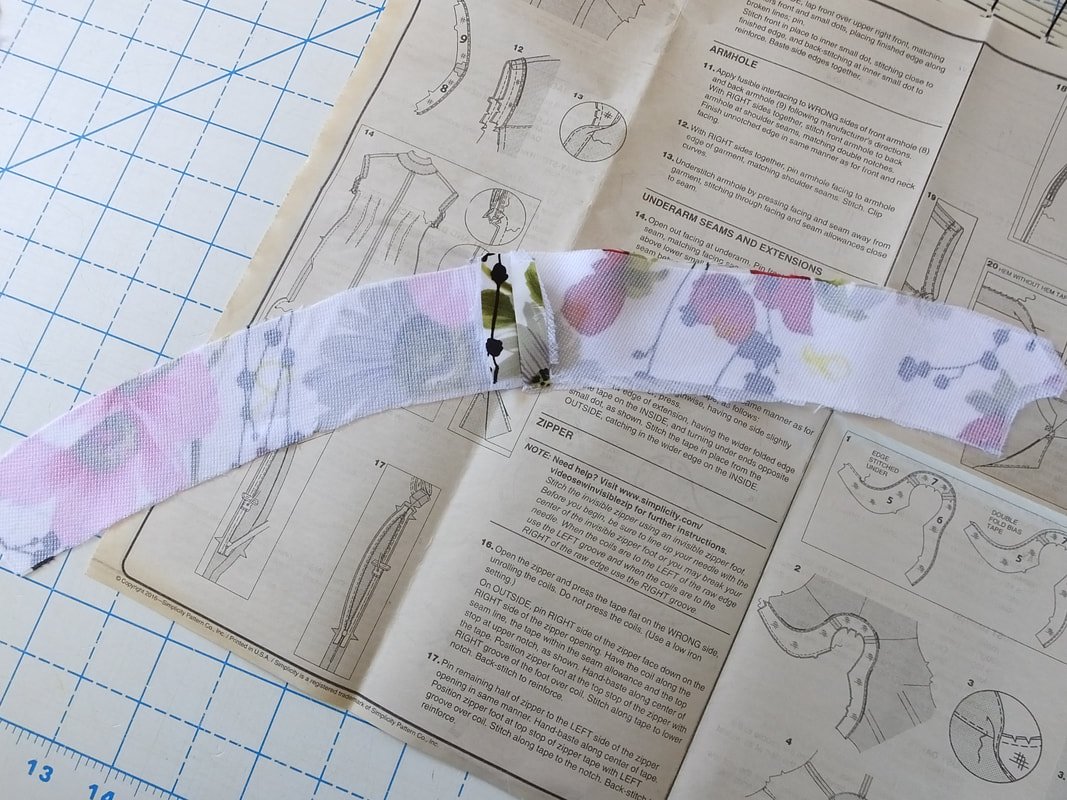
Facings
Now for the fun part. The facings. All the armhole and neck facings. So many facings. And collar pieces. Wheee!! Keep them separated by attaching your pattern pieces to them with a clip or pin. It will make you scream less. I promise.

Attach all the facing pieces together following the pattern directions. I used the picture on the pattern to make sure I got it right. It looks wonky, but it works. If you didn't iron the interfacing on earlier, do it before you sew the interfacing snake. That’s what it is, it’s a facing snake. LOL

Attach the facings together at the seams, be sure to match the notches. This is very important for the facing to lay correctly and flat. Sew the seams together, and it should resemble a funky snake. Now you're going to attach the facing snake to the dress. Matching notches again, and following the curves and angles.

Side note- The pattern has you do a hem on the facing, but I wished I would have just serged the edge. It creates a little more bulk than I like. It doesn't bother me enough to rip it out though. #lazysewis
I didn't take a photo, but you make the collar before applying the facing snake. The collar is sandwiched in between the dress and facing snake. It has basting stitches to hold the 2 layers together.

See the collar sandwiched in there? If you opt out of the collar, pay no attention to this picture.
Sew the three layers together. Understitch the collar and facing area.
As long as the facings and collar went in well, it should look something like the photo. If you opted for the pretty piping detail, that would have gotten sewn in between the facing and dress seams as well.

The front of the Cheongsam is looking pretty good so far.
This dress was a labor of love. I sewed a little each day, without rushing. I definitely took the slow sewing approach to this one. And, if you need to take a break, take it. If not... forge on!
Next up, stitch the 2" small area to enclose the flap part. Those are the technical terms in case you're wondering. I think they have you do this to ensure nothing is accidentally seen, skin-wise.

Sew this small area around the flap part.
Armhole facing time. Apply your interfacing if you haven't done so already. Finish the edge as you did with the neck facing. I serged the edge instead of an actual hem. I learned after making the front facing. Attach to the armhole matching notches and follow the curve.
This is where the pattern placement messed me up. Well, where I messed up. I had to cut out so many armhole facing pieces. I kept doing it backward. Ugh. I turned the machines off, unplugged the iron, and walked away. I returned the next morning with a clear head. Sometimes that’s the only thing you can do.
After the facings are sewn to the armholes, the instructions have you start the vent openings.Oh boy, I was so confused at this part. I read the instructions over and over and over. I've never made a vent before, so I went to ye old YouTube.
Below is a video of how to create a vent by Professor Pincushion. She has fantastic videos on almost everything, so check out her YouTube channel and website out.

I followed the video and made both vents with the snip at the backside of the dress.

You can see the stitching line on the outside if you look closely.
After that was all sorted, I was a happy lady. Whew! Thank you Professor Pincushion; you saved the day.
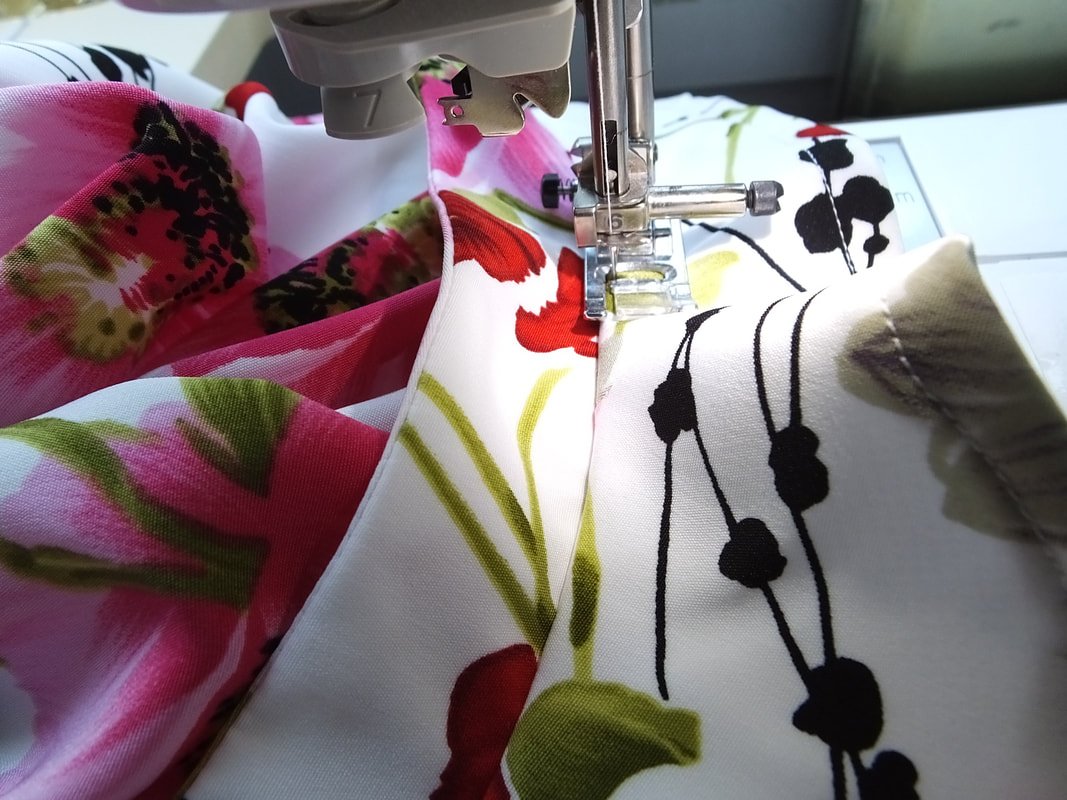
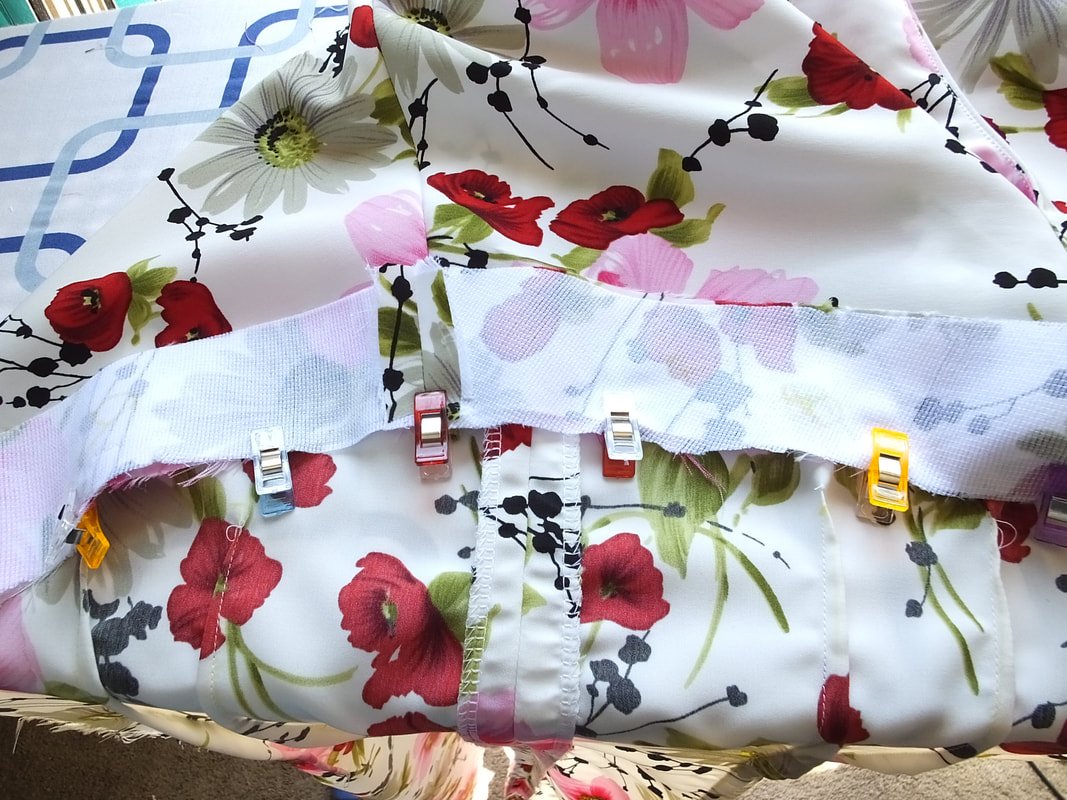
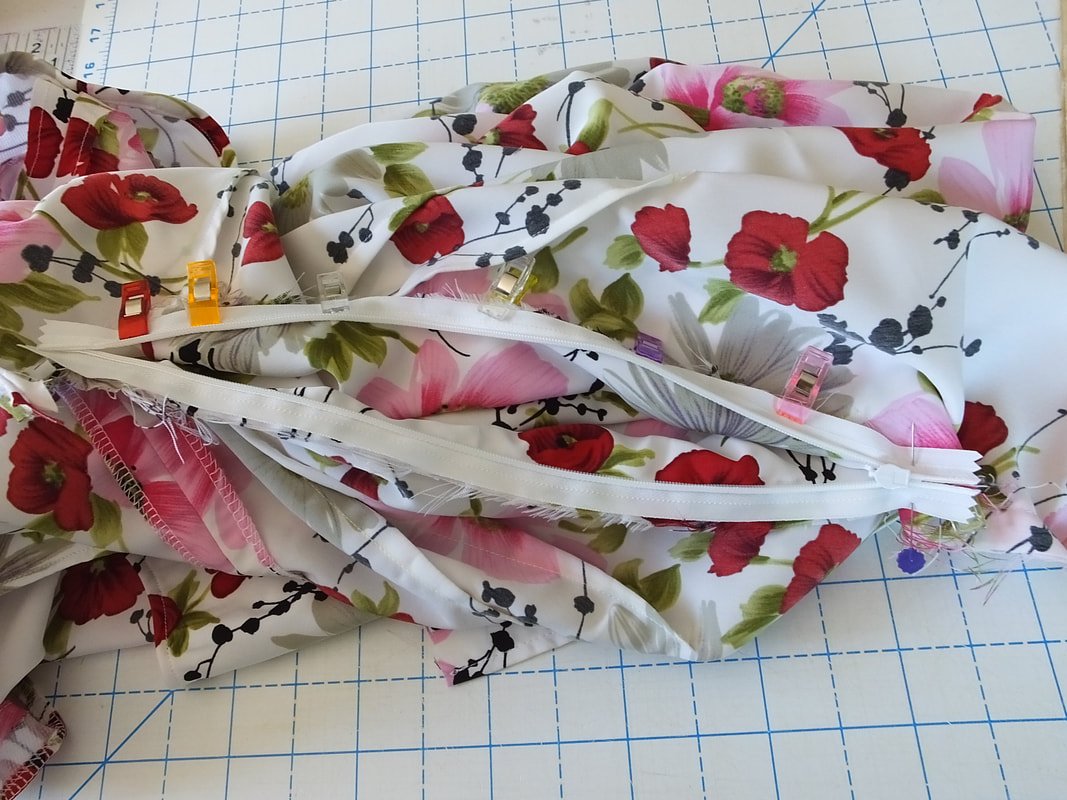
I put in the side zipper. You can insert the zipper before or after the vent. It doesn't really matter. But, you do need an invisible zipper foot.

It makes a pretty zipper that hides secretly in your side seam.

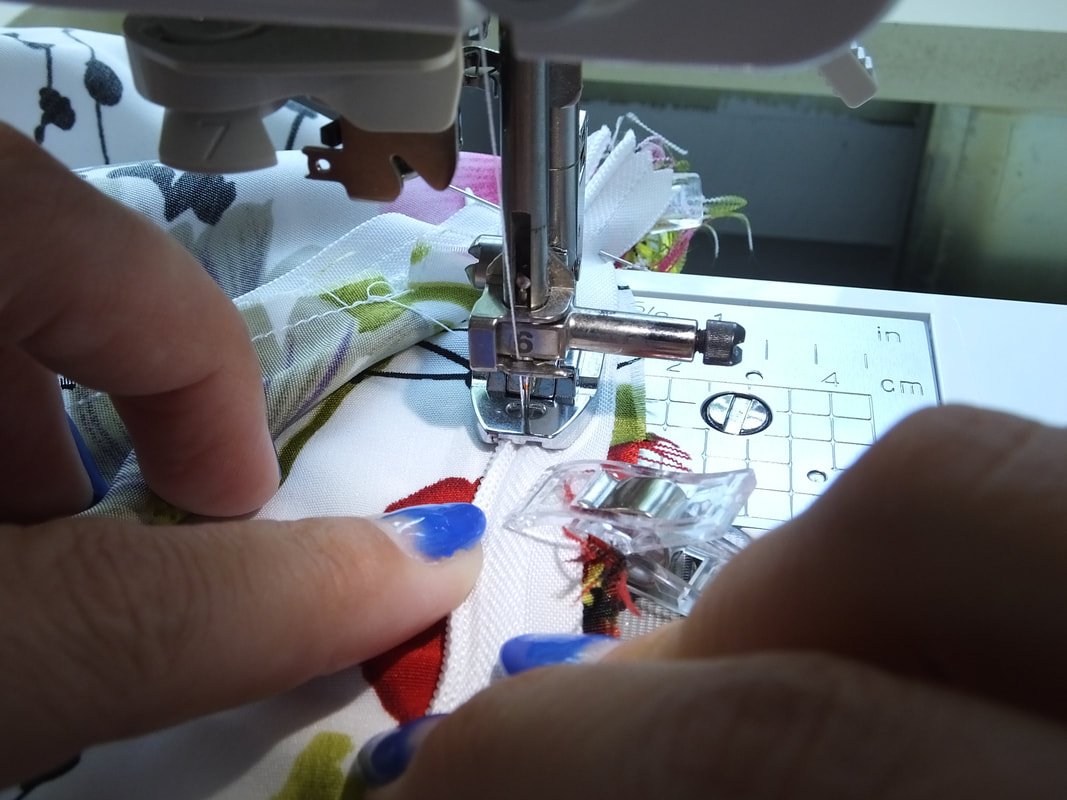
Grab your invisible zipper and invisible zipper foot. I like using clips for this. Attach it backward, and if you use the correct foot, it'll be a breeze. The foot is designed to grab and push the zipper teeth away from the fabric. The teeth then refold back to make a beautiful seamless zipper.
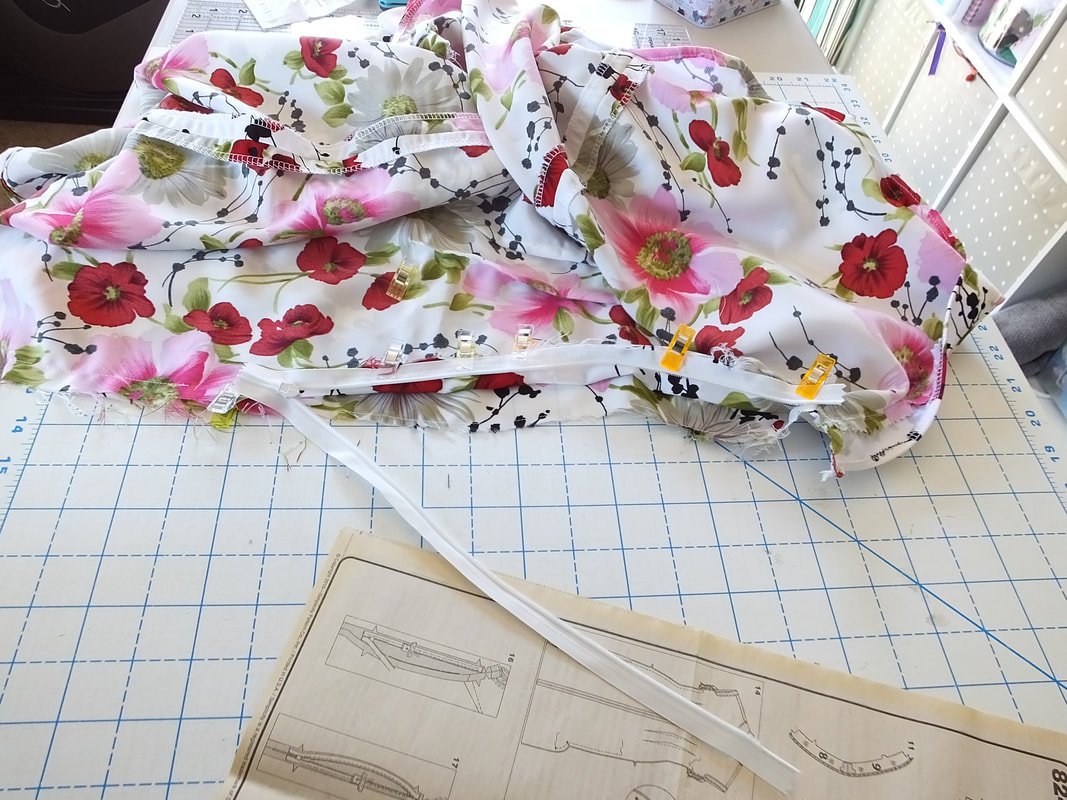
Sew up the left side first.
After you sew up the left side, backstitch and go to the sewing table.
Pin or clip the right side of the zipper tape to the seam fabric. It looks like this when half sewn. See how it's backward. You have to flip your sewing brain inside out to do these zippers.
Sew the other side down. Hold the tape and work with the machine while I slowly sew the zipper.

Inserting an invisible zipper is easy once you think of it as going in, backward.
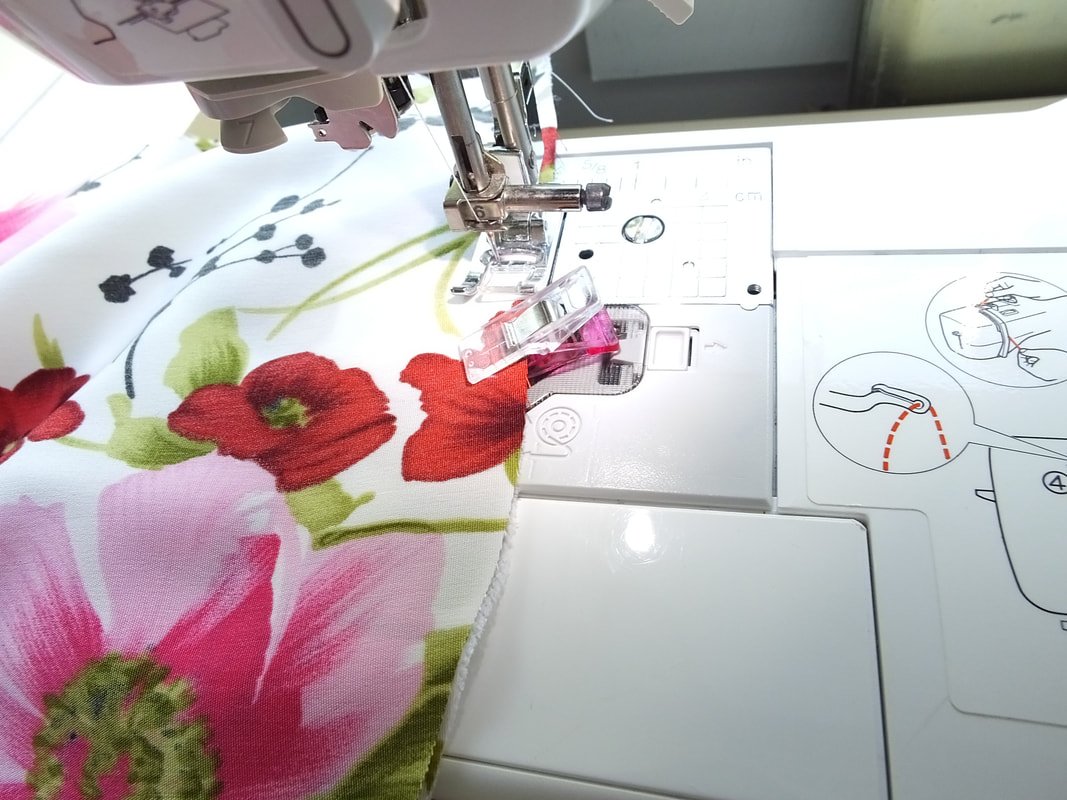
Wow, all that is left to do is the bottom hem. The pattern suggests a 2" hem. So, that's what I did. I serged the raw edge, then turned it under, and under again. The pattern calls for hand stitching, but at this point, I had enough of this dress. So, I tossed that sucker on my machine. I usually don’t hand-sew anything unless I absolutely have to.
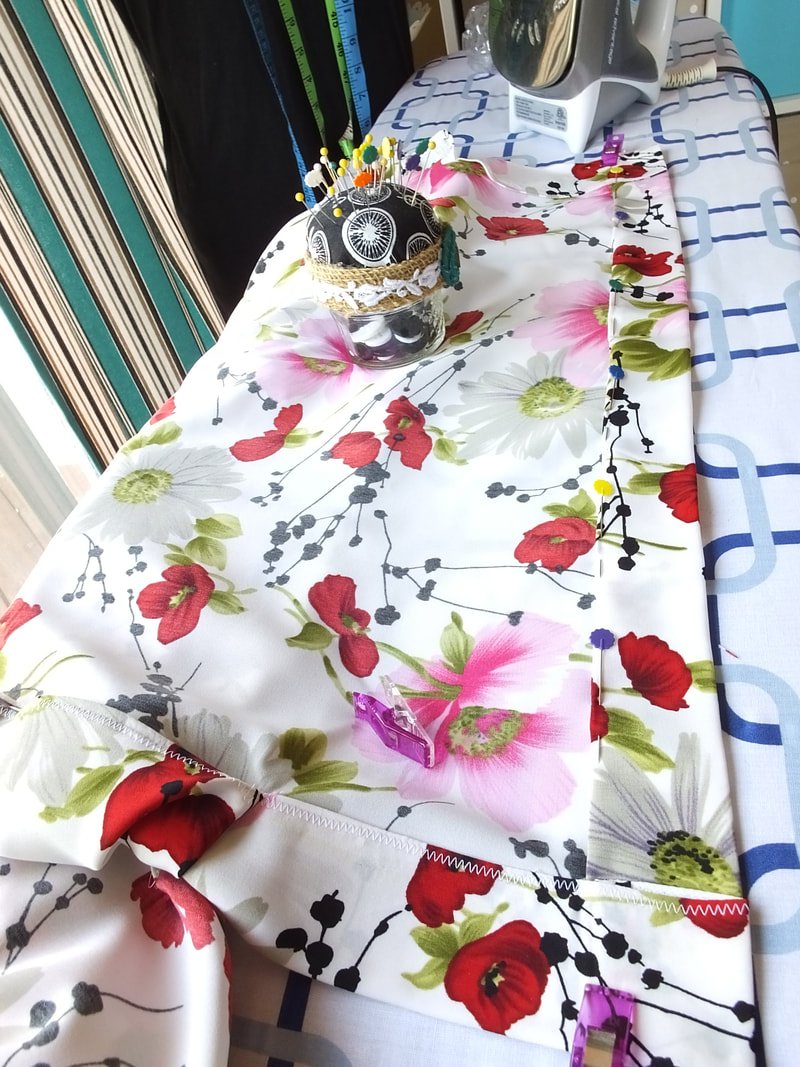
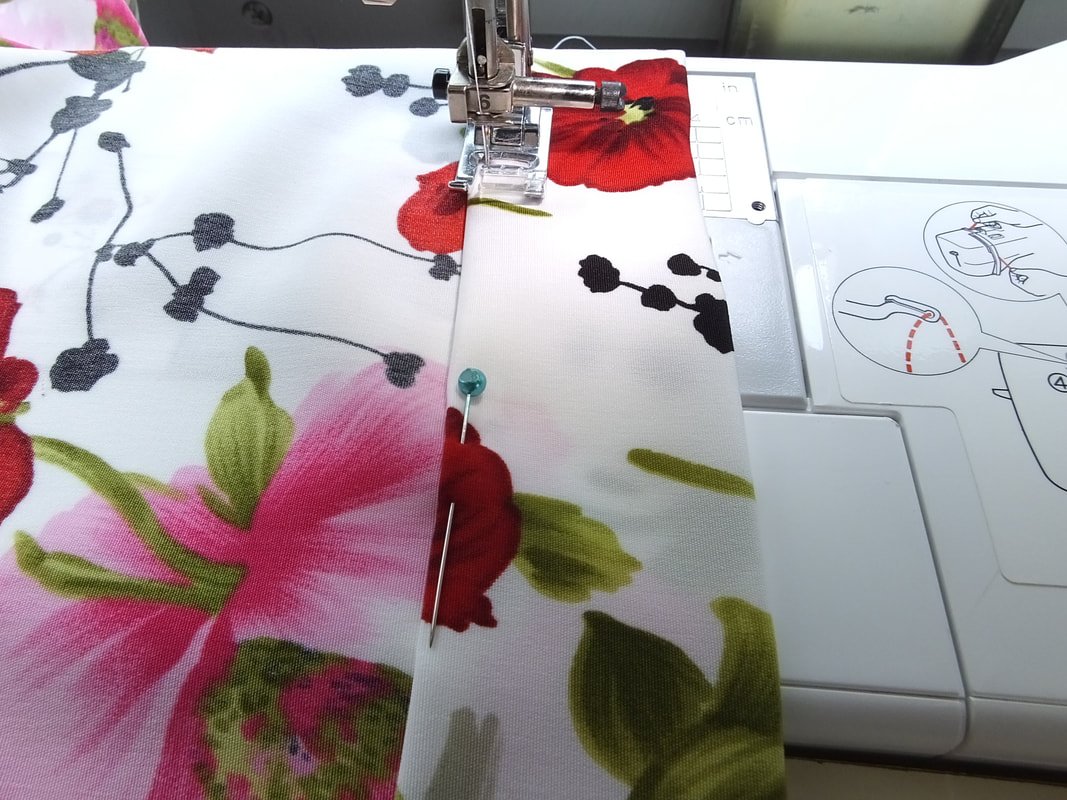
Sewing the hem.

A little behind-the-scenes shot. Phew! Glad the dress is done. Oh wait, I need to sew on the frog closures by hand. Cue a tear and a Netflix show. LOL.

Use a clip to hold the collar together. Pin each side of the frogs to the dress exactly where you want them. Thread that hand needle and get to work. I should have used some interfacing behind where I sewed. Ugh. Stitch them both by following the pattern instructions. It looked like one was at the corner of the front bodice flap and another at the collar. That's where I put mine. Once these beauties are on, you should be done! Hooray!!!
Overall, I love this dress. The fit is amazing. It's form-fitting but loose. Does that even make sense? I like the length too. I'm glad I decided to just dive in, after a year of it staring at me... from the corner of the floor. I don't like labeling sewists as beginners, advanced, etc. But, I think this dress would be best for someone who has a few garments under their belt already. It was time-consuming, and the pattern layout was tricky. Just take your time, and you'll be a vintage goddess in no time.
The only thing now is where I'm going to wear it. Hmm...
Photos below are all by Erica Lancaster


Well, that’s it. I hope you make this dress if you’ve been on the fence for a while. If so, tag me on Instagram @sewingtothemoon. I want to see your version. I love this dress and can't wait to wear it everywhere, once I figure out where to wear it.
Happy sewing,
Annette