
Pattern Reviews, Sewing Hacks, Tips & Free Patterns
The Sewing Blog

Valentine’s Gifts to Sew
Sew valentines, home decor, and gifts with these free sewing patterns. Table runners, pennant banners, gift card holders, fabric baskets, and other sewing ideas. DIY your holiday home this year with handmade gifts.

Love is in the air. I can feel it, and I can smell the chocolate. Now, I know Valentine's Day isn't for everyone. But it's for me! Is it for you, too? Pulling out the pink and red decorations is the highlight of my February. Or, sometimes late January. I love DIYing the next few holidays that are coming up too. I'm excited for Easter, St. Paddy's Day, and even the 4th of July.
Valentine's Day is all about hearts, hearts, hearts. But, you don't necessarily need heart themed fabric to sew Valentine's projects. You'll see some heart fabrics were used in these projects, but anything red or pink will do just fine. Sift through your stash and scrap bin to give those red and pink fabrics some new life.
If you have little ones, they can help with decorating the house and making their Valentine's gifts too. I wanted to share some quick and easy things that you can sew for Valentine's Day, that shouldn't take a whole day. A few of these were made in previous years, and some were made this year.
Let's get our love on!

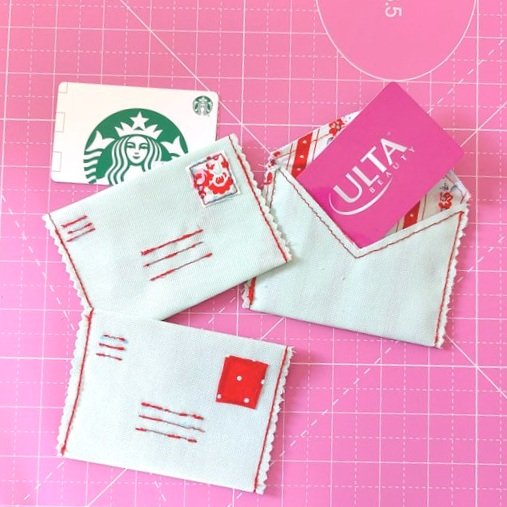
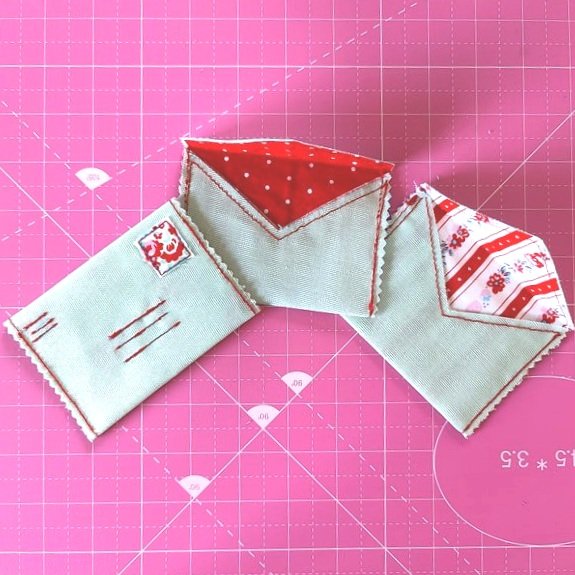
Gift Card Holder
Sew up some cute gift card holders for teachers, neighbors, or friends. We know everyone could use a little extra love these days. Grab a $10 coffee, fast food, or bookstore gift card and slip one inside.
If you have kids, stick a fro-yo, makeup store, online gaming, or other gift card inside.

The gift card holder isn't my pattern. It's by Anne at OrangeBettie.com, and I found it here. Print the free sewing pattern and follow her directions on how to make your own. I skipped the snaps because I was lazy. But, add the snaps or a button or not. Make it your own.
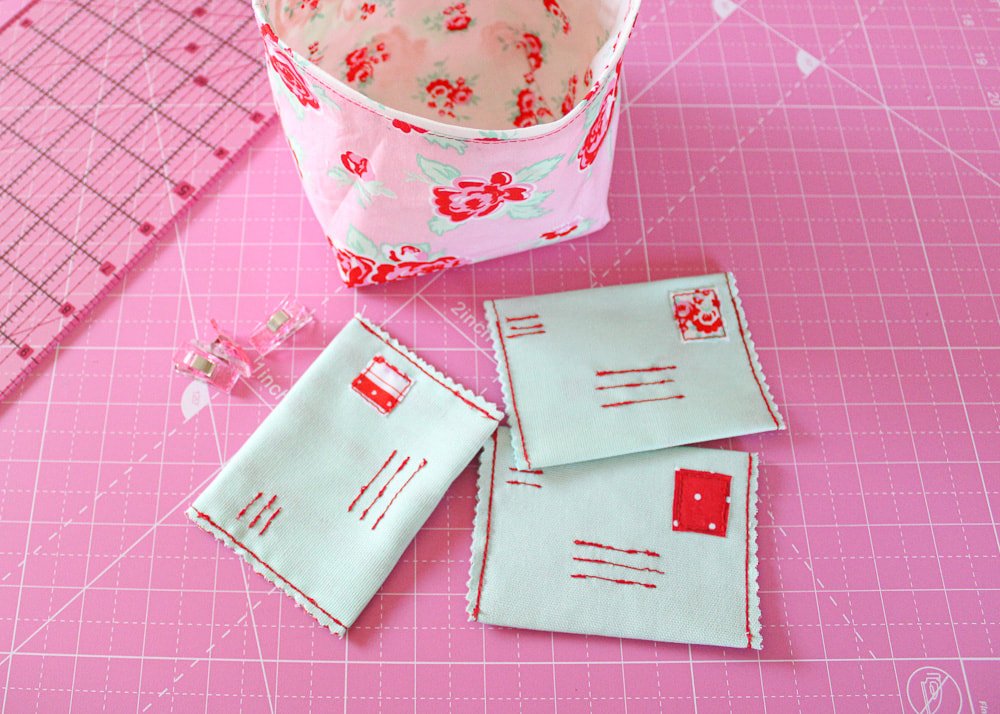
Easy Fabric Basket
Make a simple fabric basket as part of the gift. Fill it with candy, bath salts, a candle, toy cars, a small Lego set, some tiny dolls, a plant, or something else. These really make your gift extra special when paired with something.
This fabric basket is super simple. It doesn't require interfacing, only two layers of fabric. If you'd like something a little more stable, grab my tutorial here. But, if you just want a quick basket, keep reading.

Instructions:
The basket takes about 30 min from start to finish. Less if you're a speedy sewer. Gather your pink and red fabrics.
2 Fat Quarters of non-directional fabric
Ruler and air/water soluble marker
Thread and other sewing notions
Sewing machine
Cut your fabric into one long rectangle, the length, and width you want. I folded a piece of fabric I had in half and trued up the sides. Don't overthink this, it's supposed to be quick and easy. Read: last minute gift ;)
For example, I cut mine about 16" long by 9" wide.

Fold in half to make it squatty, then even up the edges with a rotary cutter, if needed. Cut your lining fabric the same size.

Mark your squares for the boxed corners.
Take your ruler and mark a square in the bottom corners. You can measure 1.5" by 1.5" or 2" by 2", etc. It's up to you. Play with different sizes if you're making a few of these.
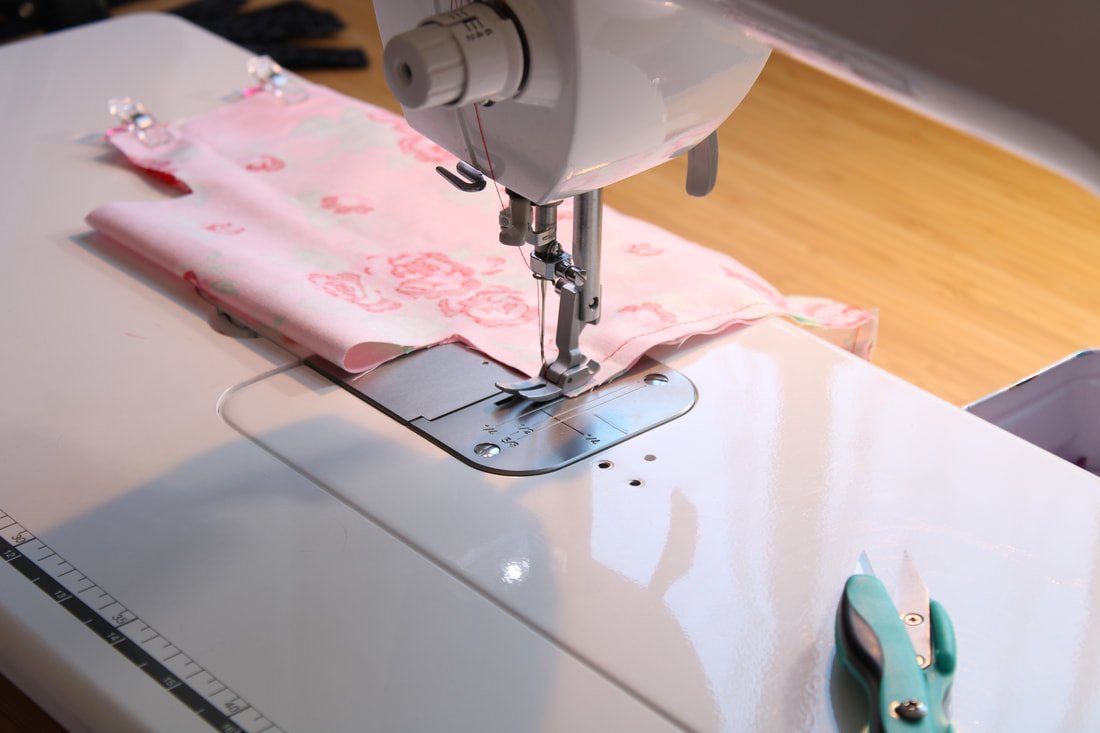
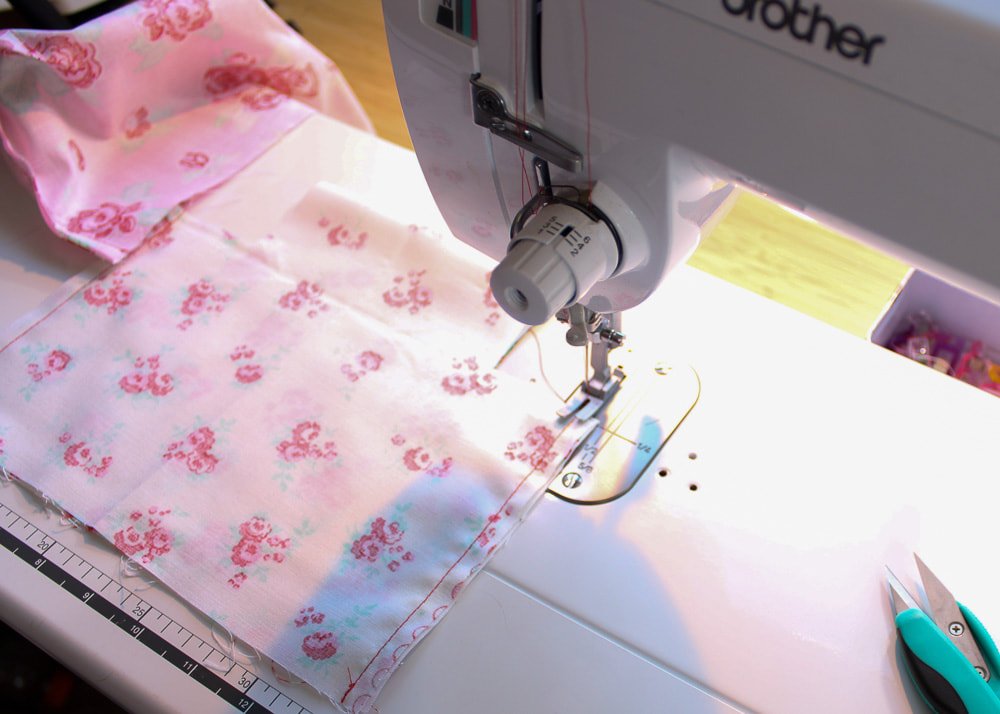
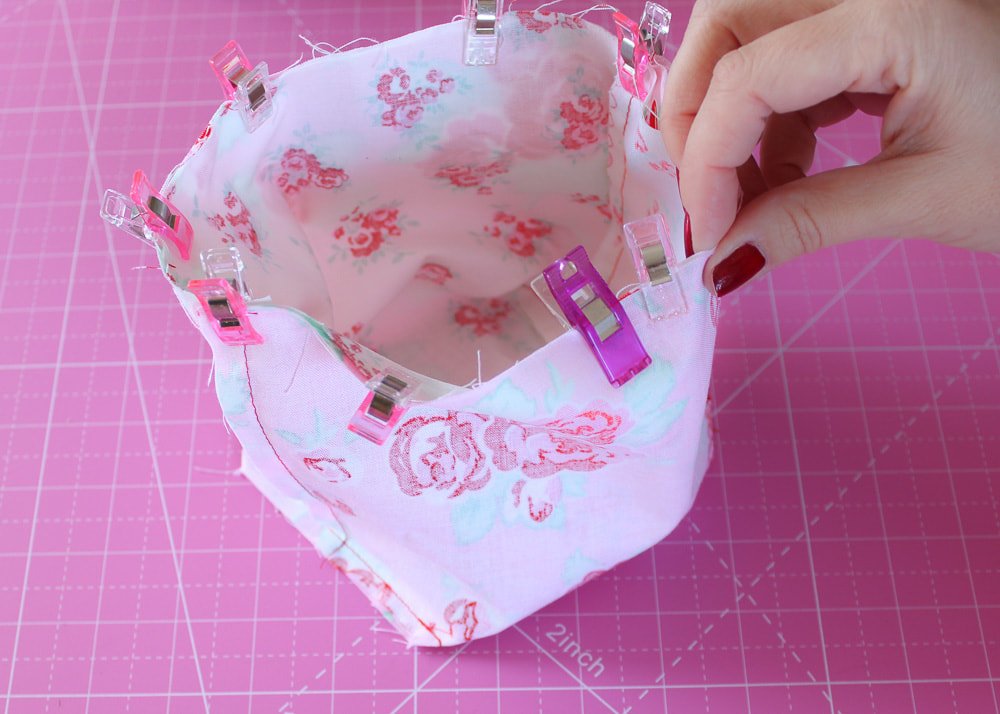
With right sides facing, pin or clip the open sides together (not pictured). Sew, making sure to backstitch at the beginning and end. I used a 1/4" seam allowance. You can use 1/2" if you'd like.
Open out the corners with your fingertips. Then, pinch back together so the seam matches the center of the bottom.
Pin or clip the edges together and sew, backstitching at the beginning and end. Do this for both corners.

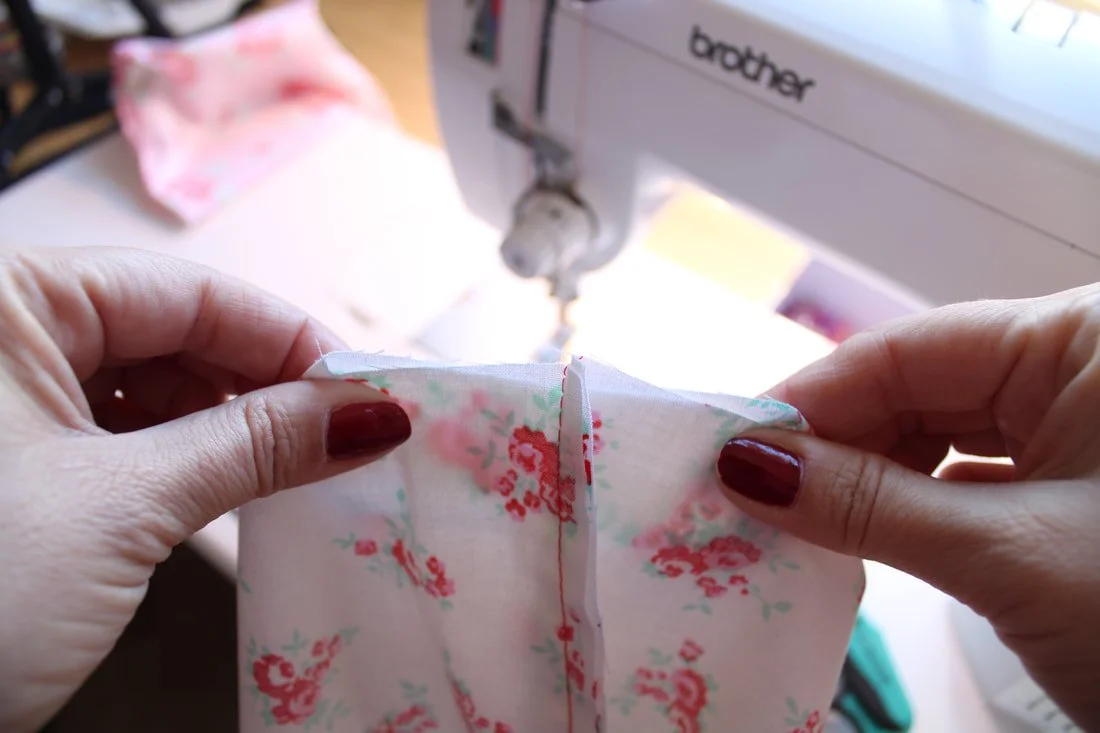
Sew the corner seams.

Your corner should look like this. This is the side view of the fabric basket. It forms an upside down T.
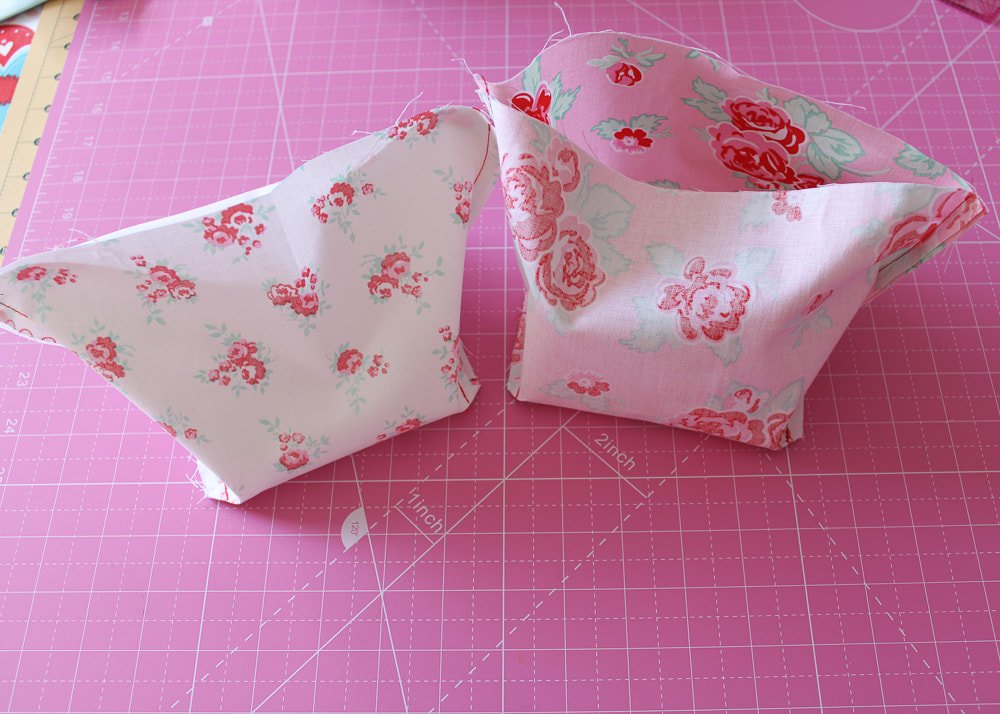
After it's sewn, it should look like the photo above. Do the same thing for the lining fabric.
Now take your lining and turn it right side out. You're going to stuff this inside the other fabric bucket. Pin or clip, matching seams. Make sure to leave a 2-3" gap for turning out. Sew.
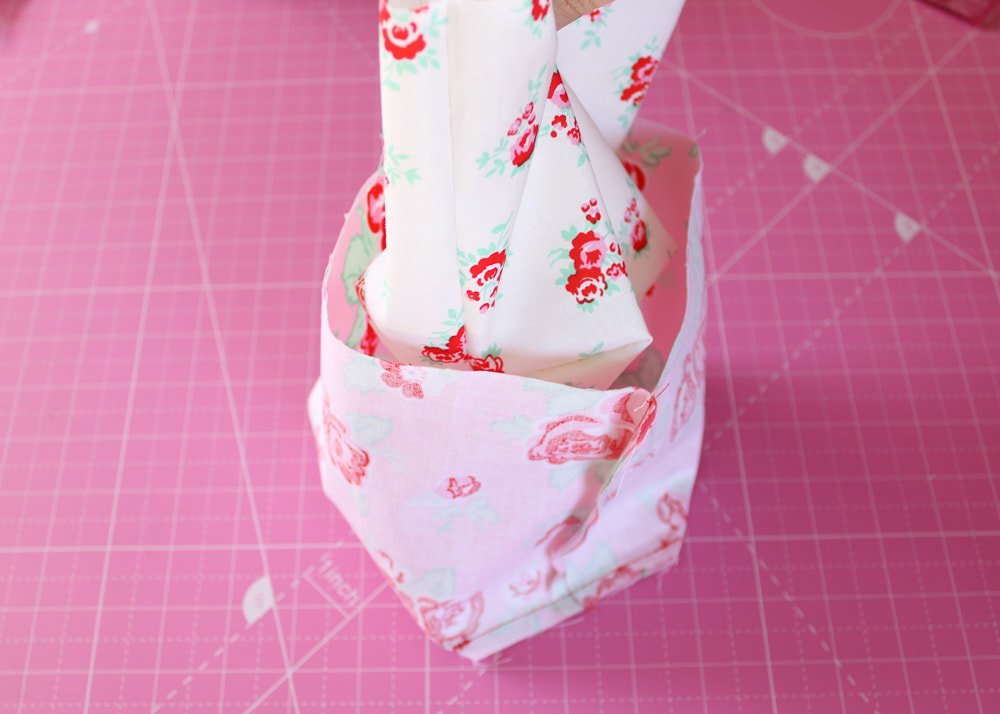
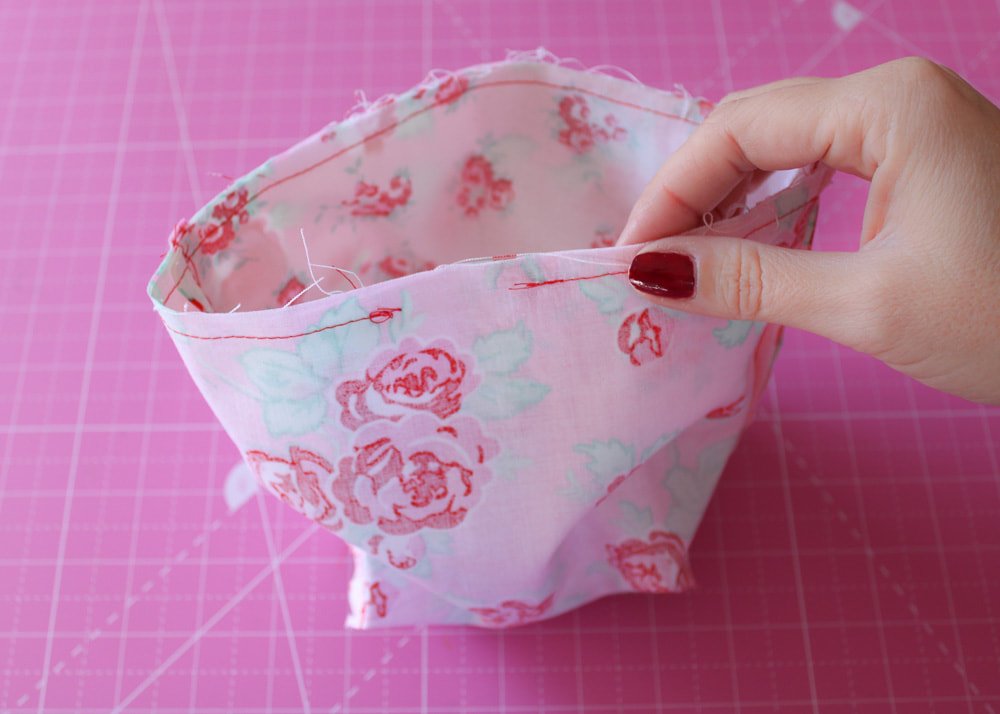
Now it's time to bag out the basket. Start pulling the fabric through the gap you left, gently. It takes a little patience if you have a smaller hole. Be careful not to tug, or you'll rip open a seam or worse, your fabric!

Once it's opened out, your fabric will look like a wrinkly hot mess-express. This is fine. Poke out the corners with a chopstick.

Stuff the lining inside the outer piece. I decided to use the pink fabric for my outer after completing my basket. To change it later on, I just have to flip the basket inside out. It's reversible!

Give it a nice good press. Topstitch around the top, closing your opening.
If you want to add something extra at this point, add a short loop for hanging. Grab a piece of ribbon or make one from a fabric scrap as I did. Pin in place, then sew.
Having a loop gives you more usage options for the fabric basket.

Add a ribbon or fabric loop for hanging. They work great as car trash bins, or makeup brush holders.

Basket Filler Ideas
Fill them with little gifts, candy, and small toys, and give them to teachers, a friend, or a child. I filled mine with fabric clips. Happy Valentine’s Day to me. Haha
I usually use interfacing for these, but for a quick gift, they are fine without it. Of course, you can make a few of these to decorate your house too. Place them on the coffee table, console table, kitchen counter, etc. Make them bigger or smaller. The sky is the limit!
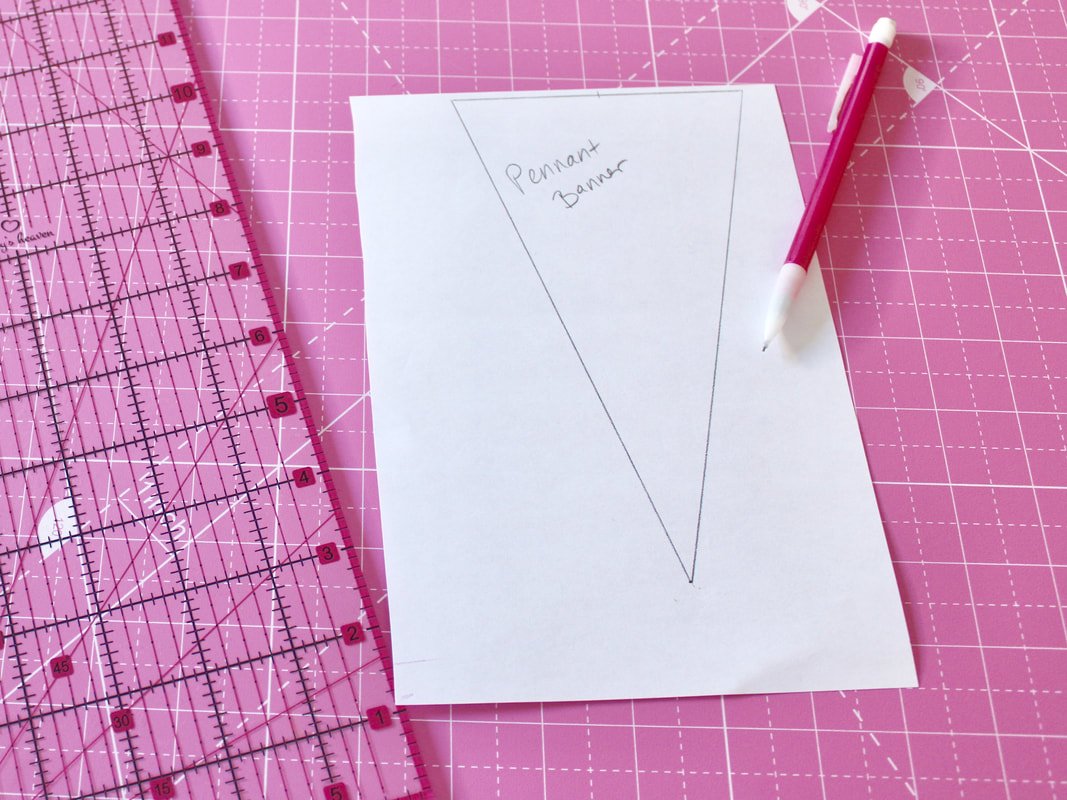
Pennant Banner

I made these years ago and still put them up every year. Pennant banners are my favorite type of decoration. They are simple yet make a big statement. You can make yours with two layers of fabric sewn and turned out, or a single layer one. Nobody will see the back if it's displayed on a wall or cabinet.
There are tons of free pennant banner templates online. Do a quick Pinterest search, and hundreds will come up.
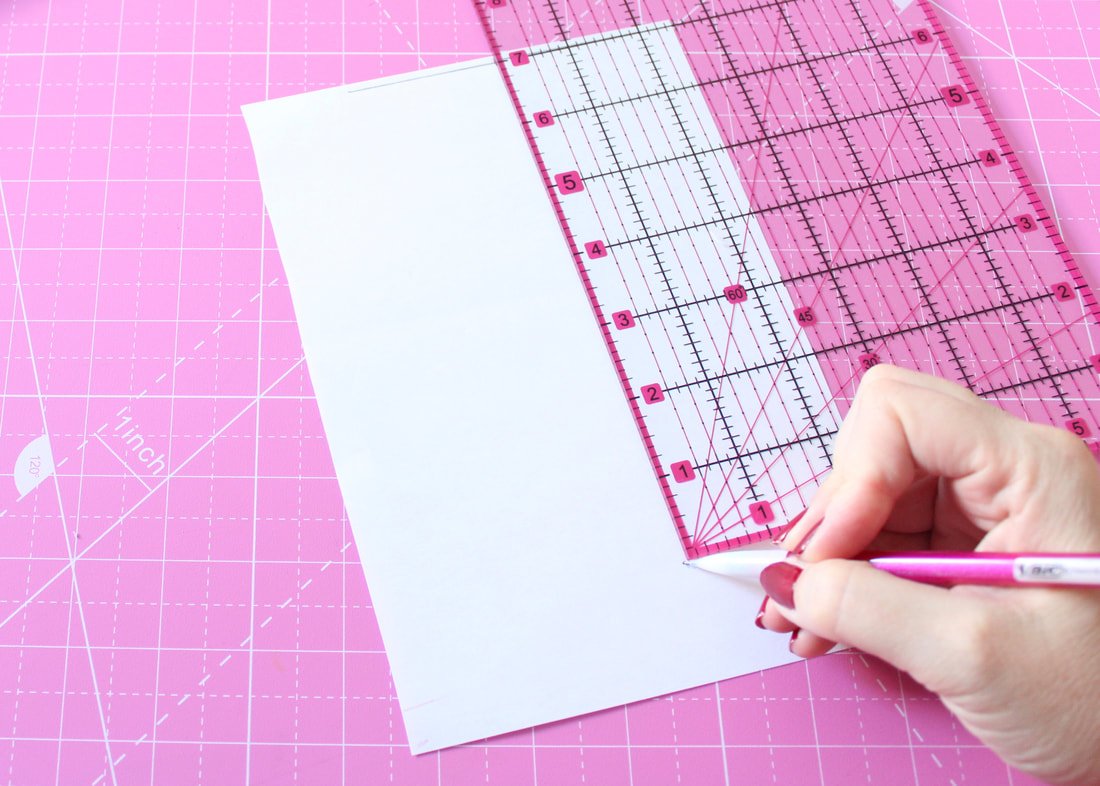
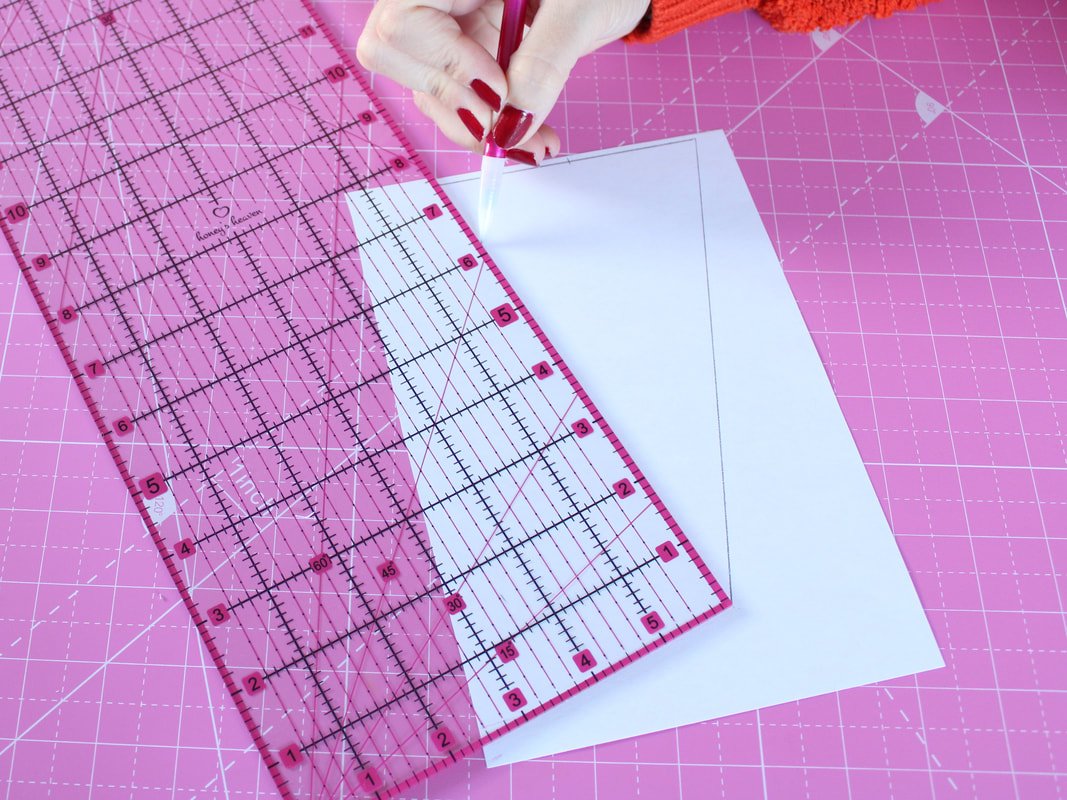
However, to make your own pennant, grab a ruler, some paper, and a pencil.
My triangle one is 5" wide at the top and 8" long. We'll use those measurements for this example.
Draw a 5" long line at the top of your paper.
Mark the 2.5" spot.
Draw an 8" line straight down from the 2.5" spot.
Connect the end of the long line to each end of the short line, forming a triangle.
That will be your template. It's easy, right?
Make an odd number of them. For some reason, an odd amount looks better than an even amount of pennants.
Use your own measurements to make it longer, wider, shorter, etc. Trace onto your fabric scraps. Sew a ribbon or bias binding on top to connect the pennants. Leave long tails at each end for tying onto something.

Ways to change up the look:
Pink the edges for a fun retro look
Leave the edges raw and let them fray a little bit. (They won't fray much because they are cut on the bias).
Sew different style fabrics together to make it reversible.
Sew multiple sizes on top of each other to create a layered look
Use embellishments, ribbons, tassels, etc.
Make one for every holiday.
Below is another one I made out of felt. I added buttons and other embellishments to add some pizazz.
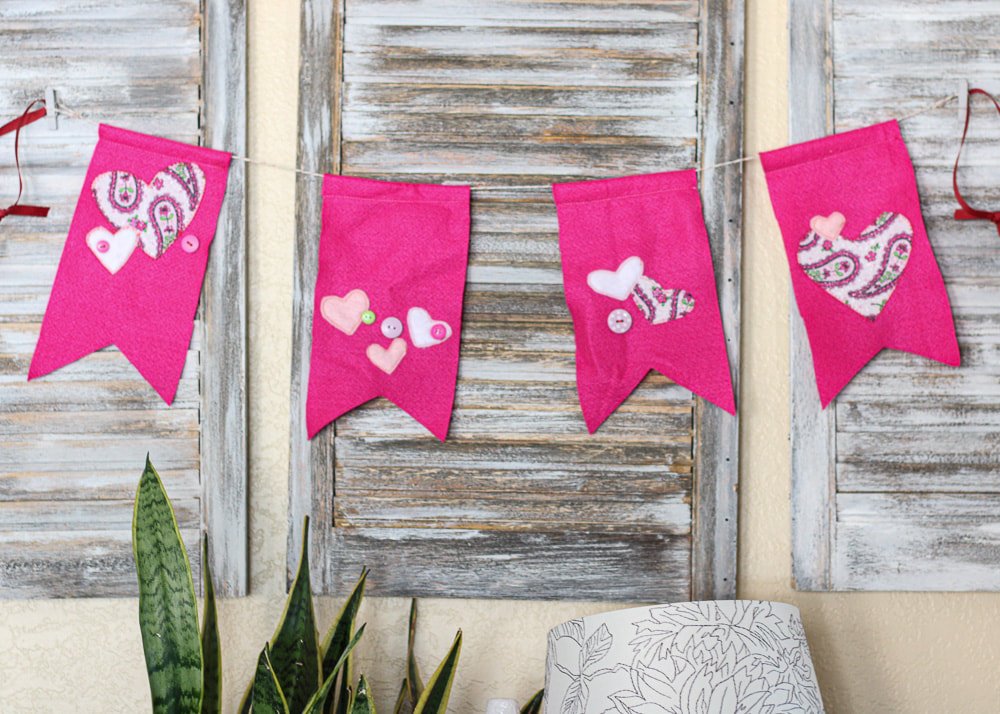
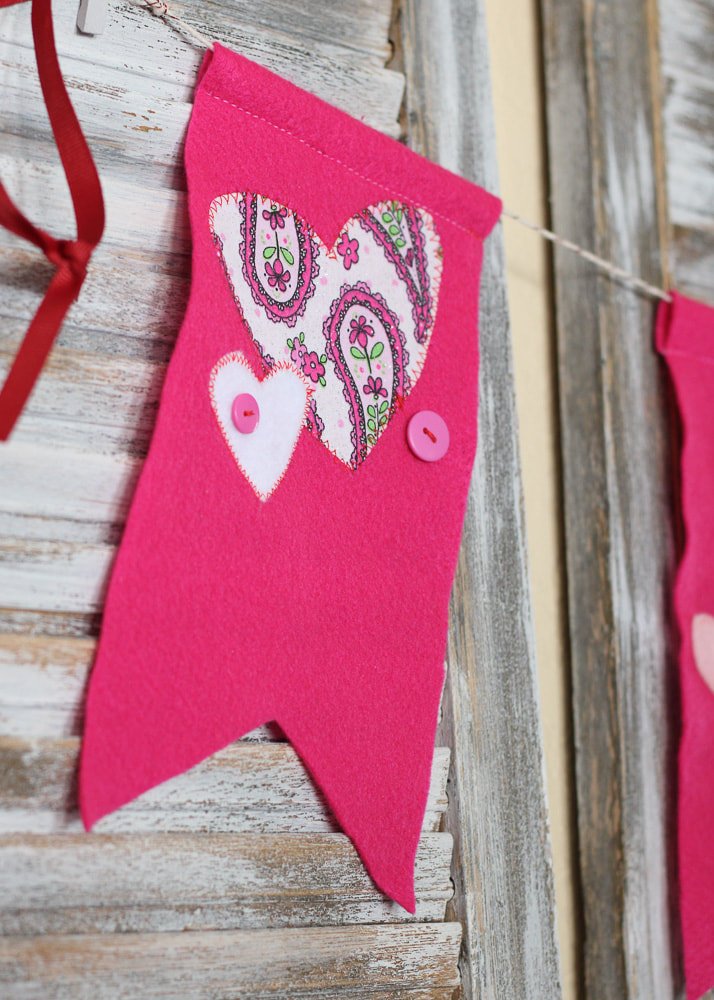
Table Runner

I made this simple table runner many moons ago. It's an easy strip quilt design that was pieced together using fabric scraps I had on hand. The whole thing took around 2-3 hours from start to finish.
I sewed the long edges together.
Used spray adhesive to temporarily attach the backing (ugly scrap fabric)
Stitched in the ditch along the seam lines.
Attached the binding by machine.
Wah-la! Quick and painless table runner.
Measure the table you want to add some Valentine's Day decor to and make it for that size. Table runners are usually a little bit shorter than the length of the table. I don't know the exact math, but Google probably does.
Easy peasy! It goes on my coffee or kitchen table, depending on my mood.

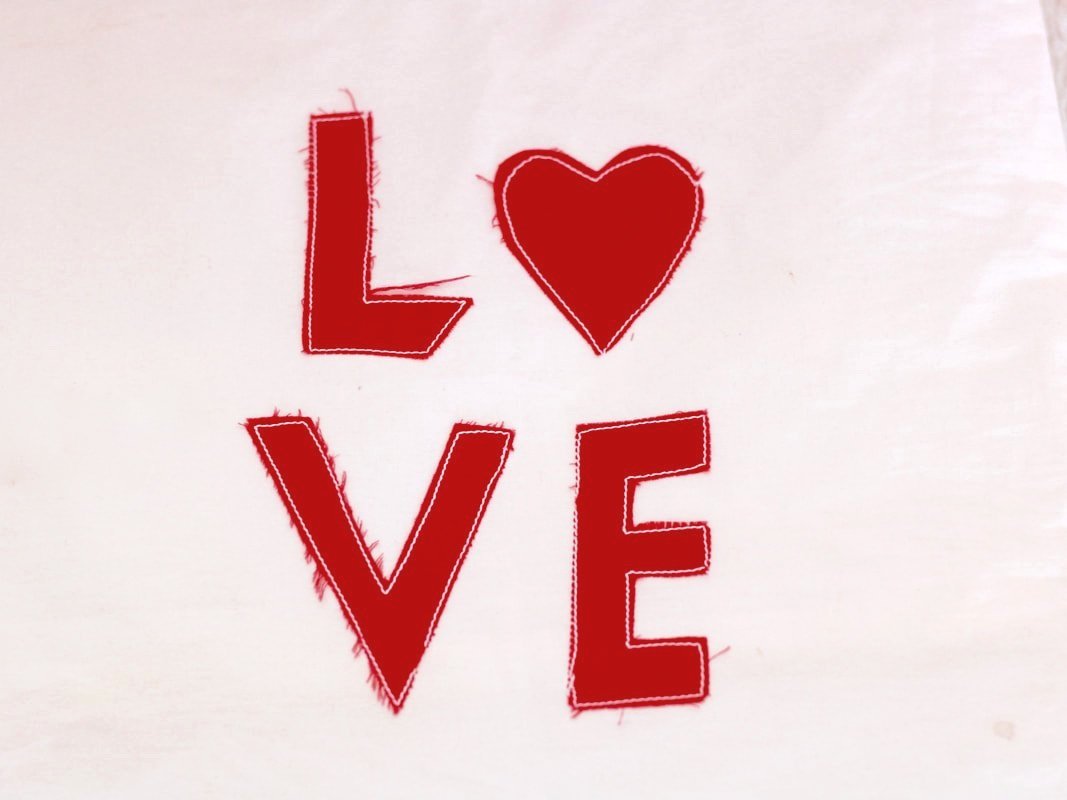
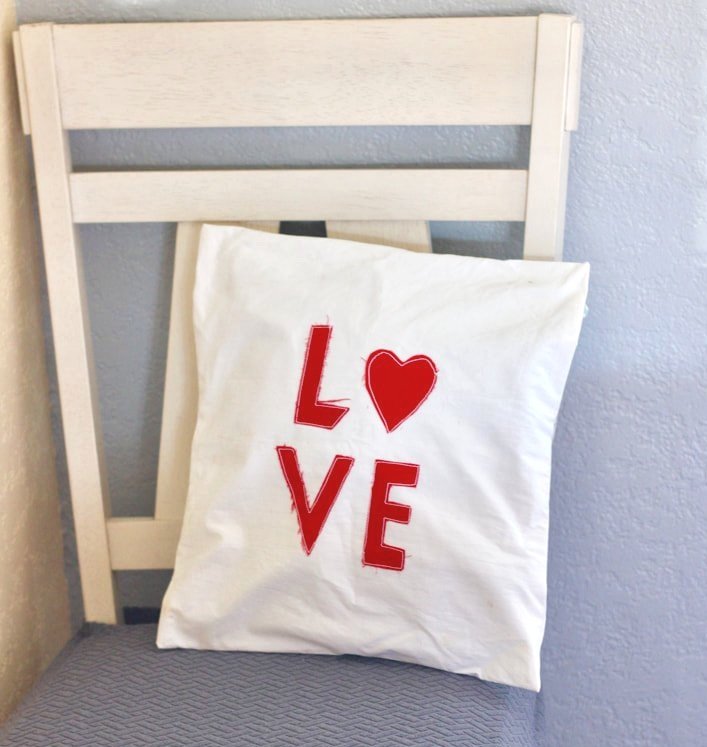
Pillow Cover
Last but not least is a pillow cover.
They are fun to make, and you can use different fabrics to cover your already existing throw pillows. Again, adding embellishments, embroidery, or other trims will make it extra fun.
Below, I cut out letters from fabric and sewed them on. Nothing fancy, but it was quick and easy. This pillow cover is over a decade old, and the style is a bit dated, but I still use it. As I was taking photos, I realized how worn the letters have become and my stitching is subpar. Sometimes, it's fun to go back and look at old sewing projects. It's nice to know my skills have improved over the years.
If you've never made a pillow cover and don't know where to start, head to this blog post. I share some Halloween pillows I made and how to use an invisible zipper.
I hope I've inspired you to decorate for Valentine's Day and create some handmade love-themed items. Remember, sewing for a holiday should be quick and painless. Take a shortcut here and there when you can. All in all, just have fun with it.
Happy St. Valentine's Day and Happy Sewing!
XOXO,
Annette

Simple Sewing Projects
Sew some simple projects. These make great gifts, stocking stuffers, or beginner sewing patterns. Beginner-friendly and great for teaching how to sew.
This list is chock full of simple sewing projects. Need to sew something that doesn't take a lot of fabric or pattern pieces? This is the list for you! I've compiled some sewing projects that are easy and great for beginners. These are great for scrap-busting and make wonderful gifts, too!

Projects to Sew:
Keychain
Headband
Zipper Bag
Apple Watchband Scrunchie
Fabric Basket
Pillow
Small Purse
Advent Calendar
Hair Scrunchie
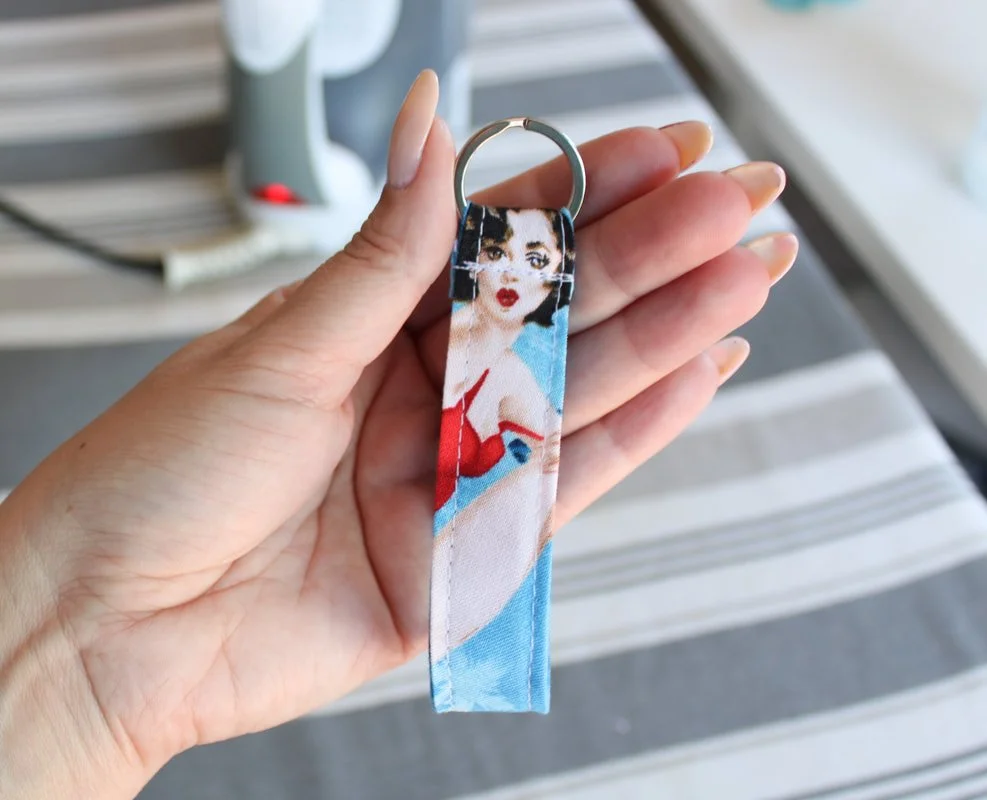
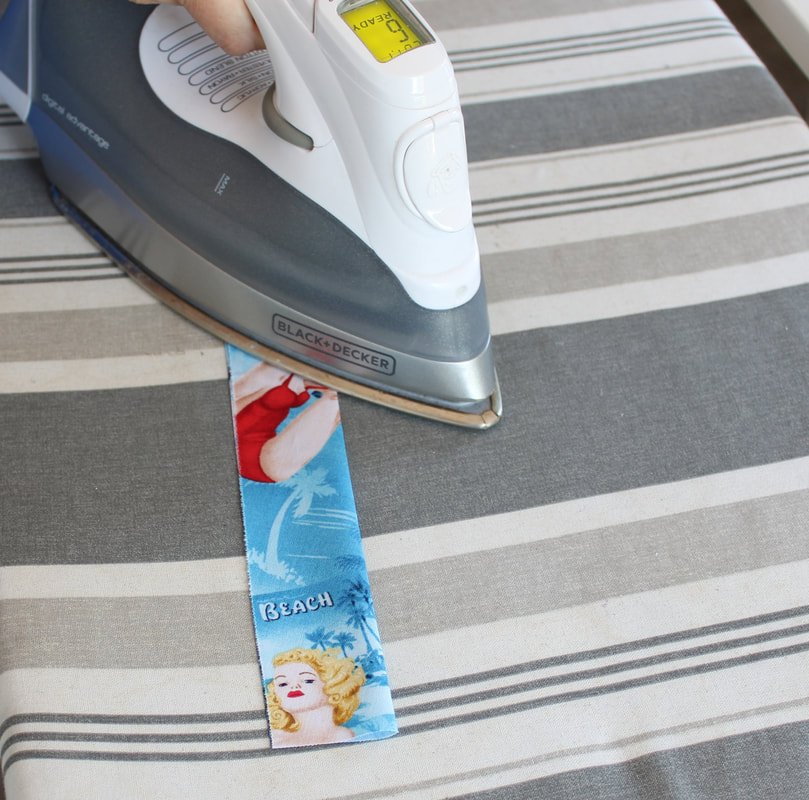
1. Keychain
We all need keychains for our keys or extra sets of keys. You can increase the length of this to make a wristlet or lanyard as well.
Supplies:
Fat Quarter or large strip of fabric
Lightweight interfacing
Matching thread
Metal key ring
Iron + ironing board
Sewing machine + notions
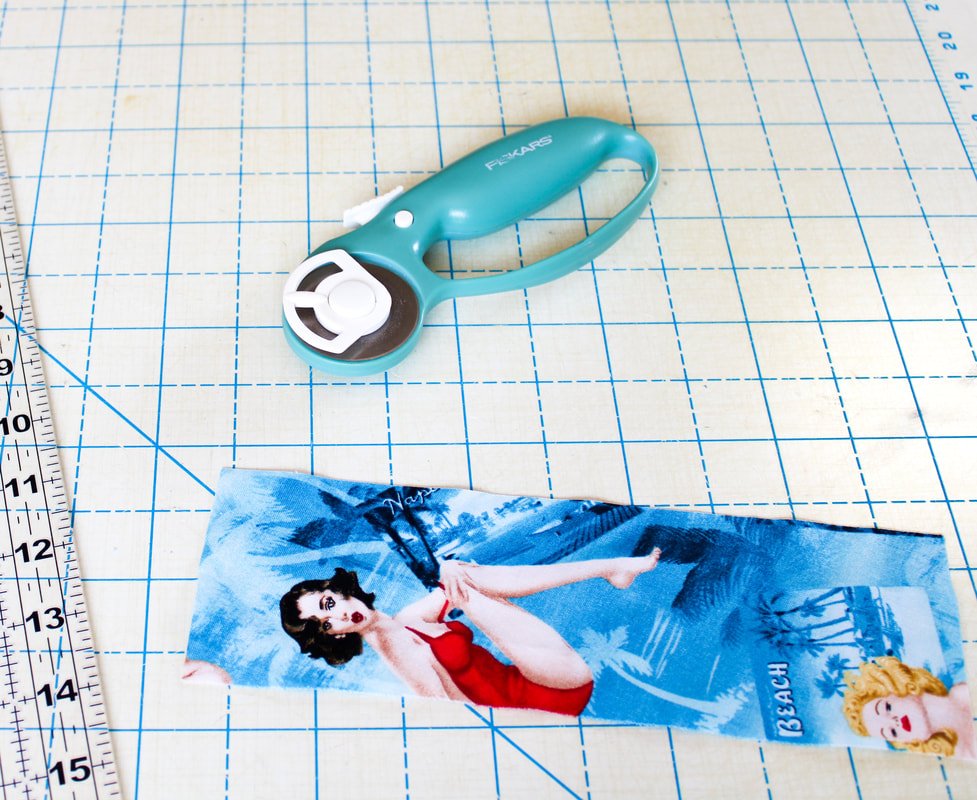
Cut a rectangular piece of fabric that measures 8" long by 4" wide. You can always cut this shorter if you'd like but, this is a good starting size for a pocket key fob..
Apply interfacing according to the manufacturer's instructions.
Fold the fabric in half, wrong sides together, lengthwise, and press.
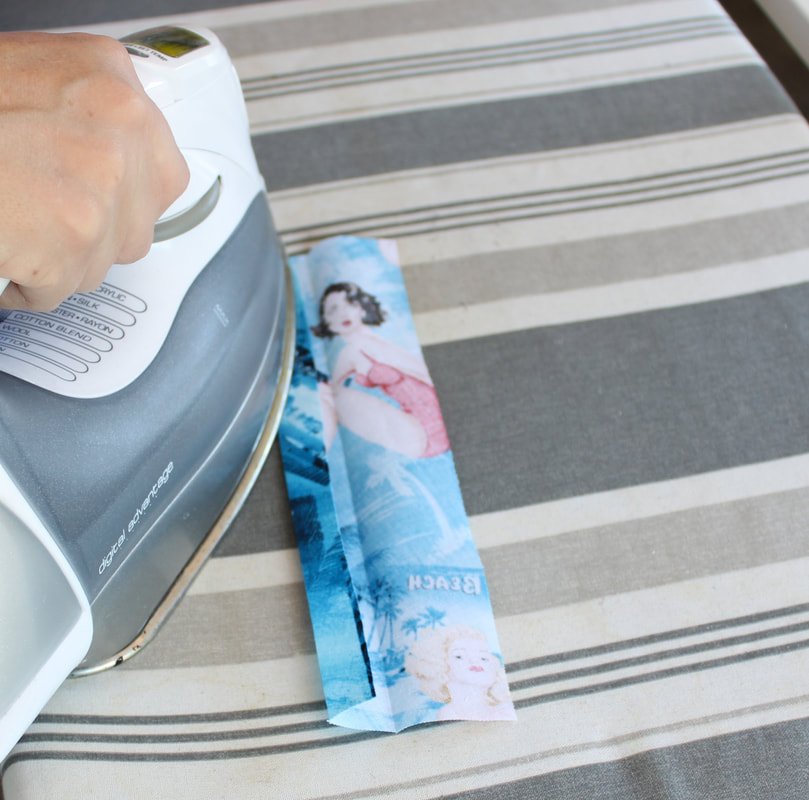
Fold one long edge into the center crease you've previously made. Press.
Do the same with the other side. Press. Fold the edges in again and you should now have one long strip. Give it a good press once again.
Top stitch 1/8" using 3mm-3.5mm stitch length, from the folded edge starting from the top. Repeat on the other side, starting at the top. (This will help with any puckering that may occur).

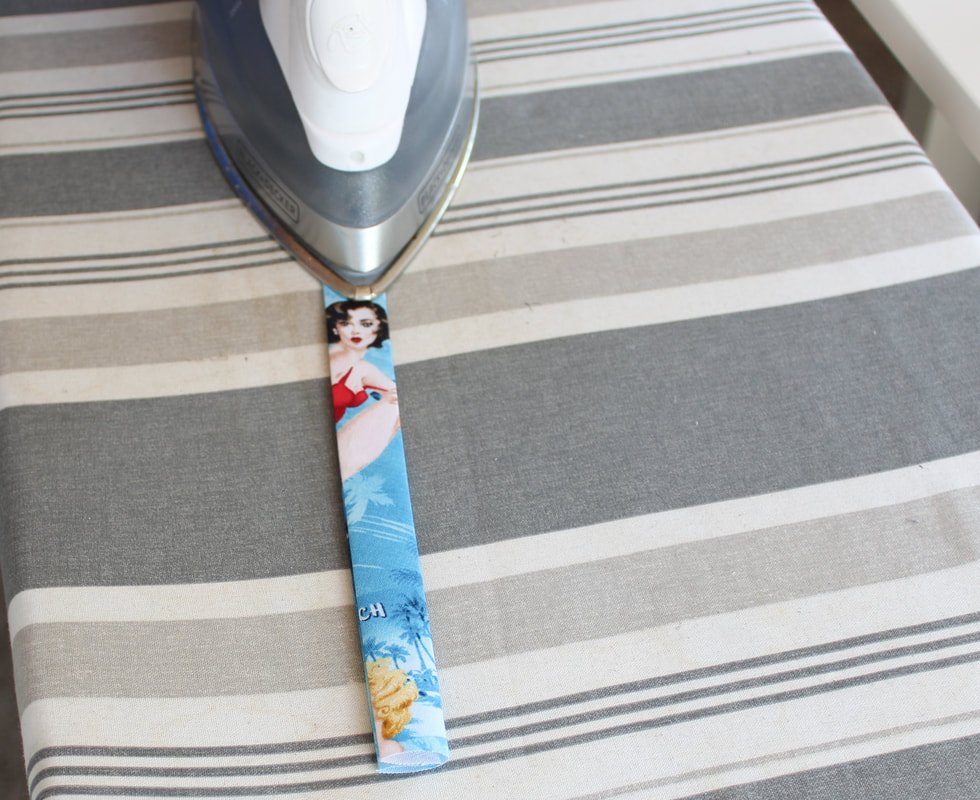

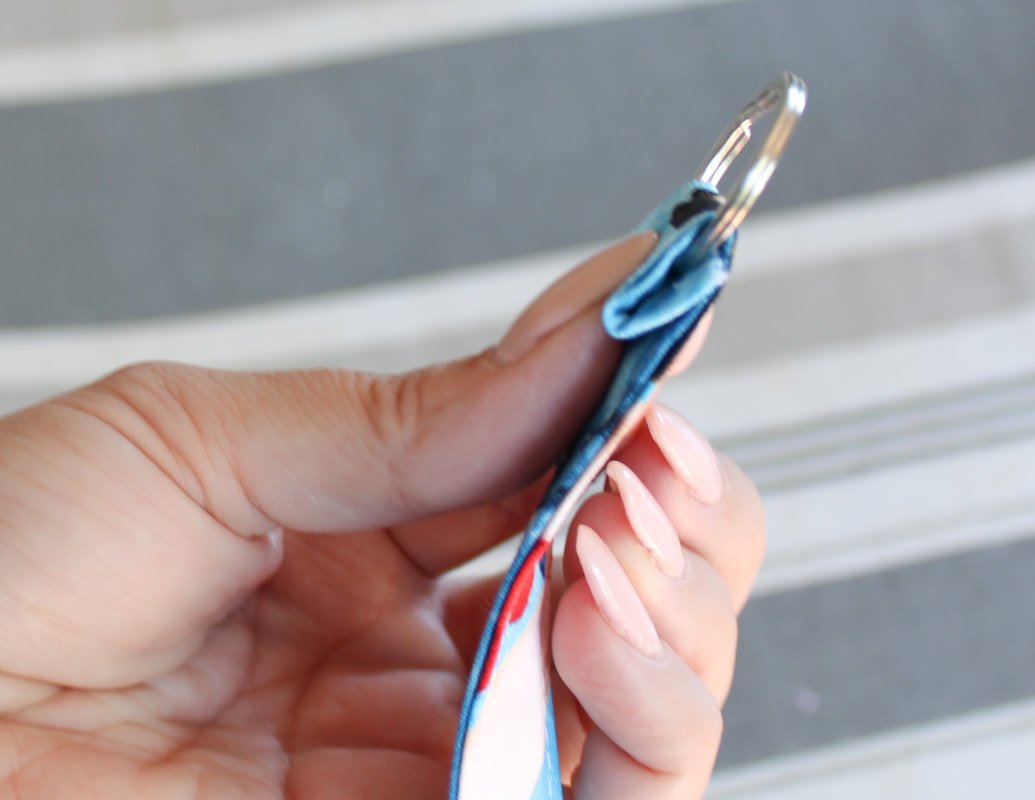
Grab the ring and slide it onto the fabric strip. Pick which side you want on the outside.

Fold one end over the ring about 1/2".

Add keys and go!
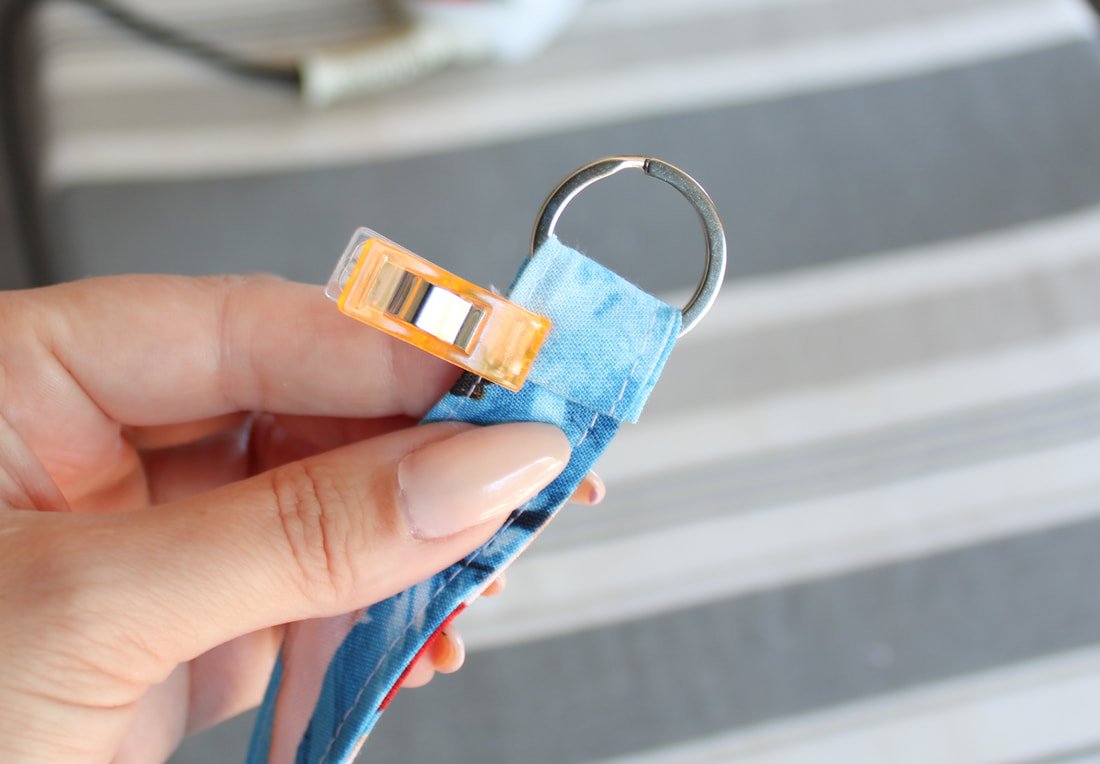
Bring the opposite edge up and under the folded edge. You'll hide the raw edge under the folded edge. Use a clip to keep them together.
Sew a few rows of stitching making sure to backstitch at the beginning and end. That's it! You're done!
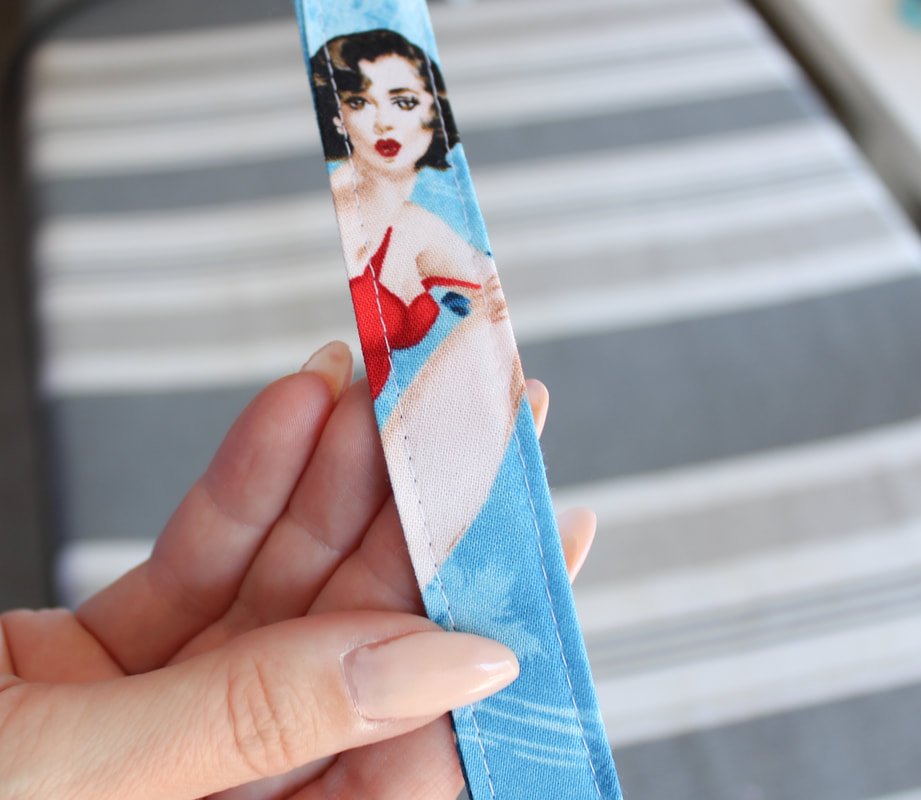
Add your keys and show off your new keychain. Sew simple, right??
You can make this into a neck lanyard as well. Drape a measuring tape around the back of your neck and bring the end to the front to get your desired length. Add 2" for the folded edge.
You can also make this as a wristlet keychain.
2. Headband or Hair Scarf
Choose between a thin Rockabilly headband or a wide Pinup style headband to sew. Or, make them both. A gal needs options, right?
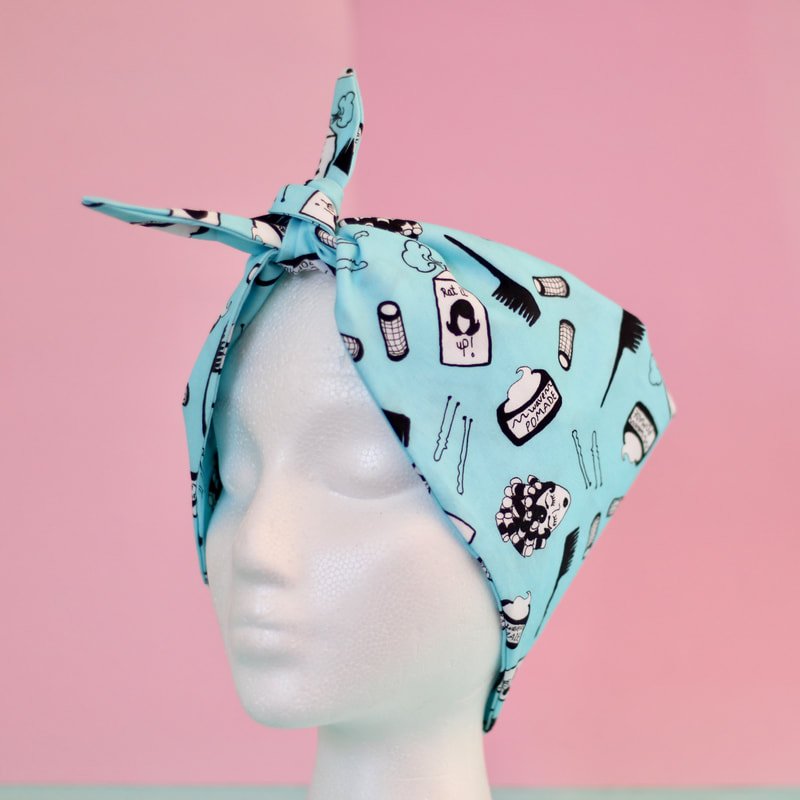
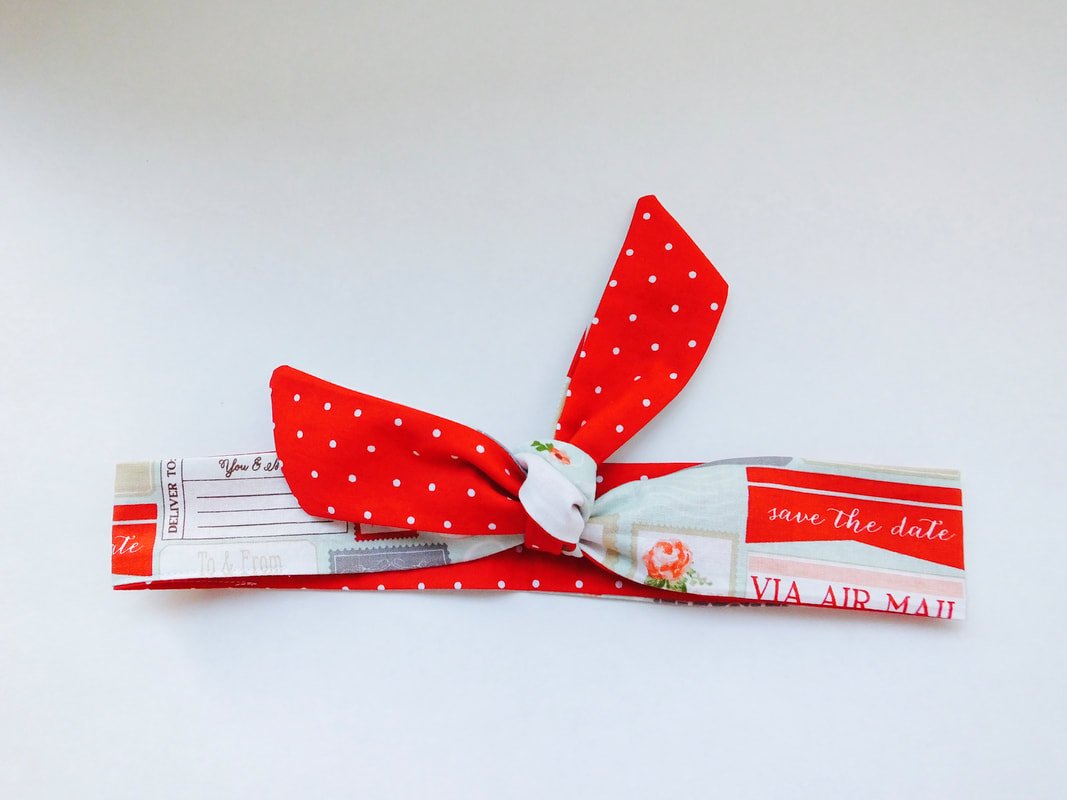
Click the link above to take you to a tutorial.
3. Zipper Pouch/ Makeup Bag
Follow this blog post for an easy zipper pouch. Increase the size and length to make it larger. These make great essential oil pouches, pencil cases, wet bags, etc.

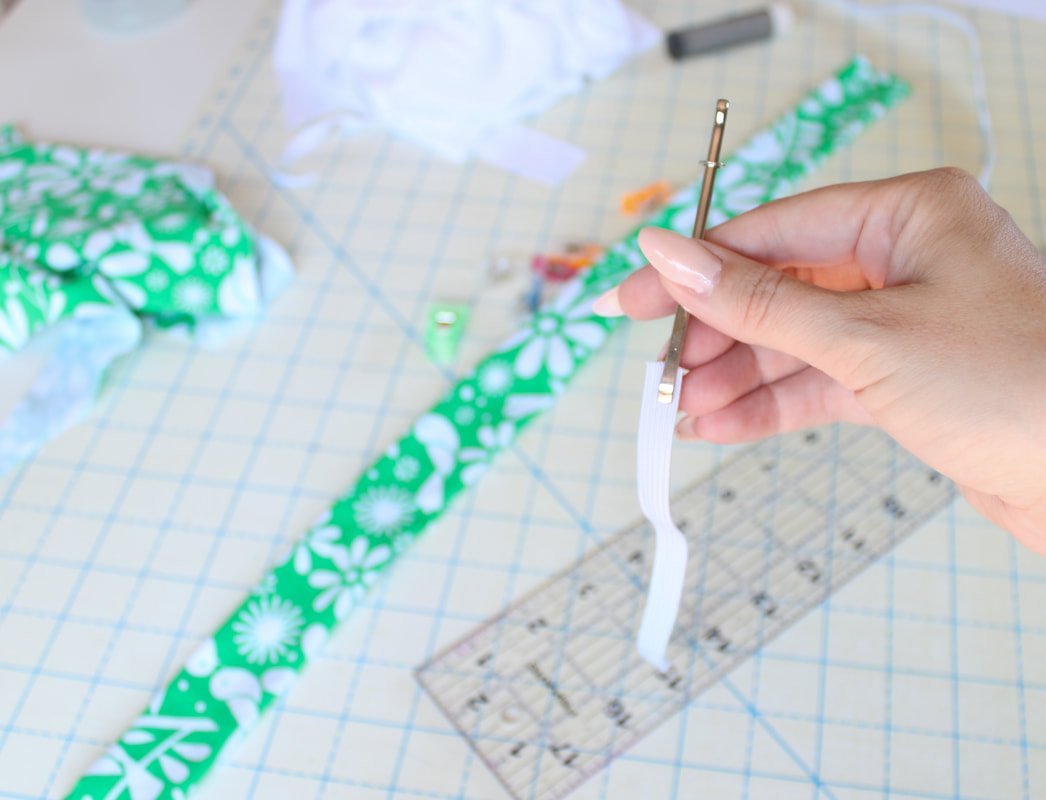
4. Apple Watchband Scrunchie

Click here for the blog post and directions to give your Apple Watch a little more personalization. You can find the watch magnets on Amazon. These are very easy to sew. Make one of these for yourself or as a gift along with a new Apple watch.
5. Storage Basket
We all have stuff. Too much stuff. And, all that stuff needs a home. Storage baskets and bins are perfect for small items that need some organization in their lives. You can customize these by increasing the size to accommodate larger items. Click here for a smaller size that's great for a beginner basket.


6. Pillows
Make a pillow for your bed or couch. Make some small pillows for kids to use too. Pillows are as easy as pie to sew. Follow this Blog post and make all the pillows your little heart desires.
These aren't great scrap busters because they do take larger pieces of fabric. However, you could use a different front and back piece to use up the scraps you have on hand.

7. Purse

Make a small or large handbag custom to your wants and needs. This tutorial will walk you along with a “choose your own adventure” style bag.
8. Advent Calendar

Countdown to Christmas
Get a head start on holiday sewing with this easy tutorial for making an Advent Calendar. It's a good scrap buster to use up those holiday fabric pieces. You could alter this to make a Birthday countdown calendar or countdown for a wedding, other holiday, etc. It will take a large piece of fabric for the front and back main panels but, you can use scraps for the smaller pieces.
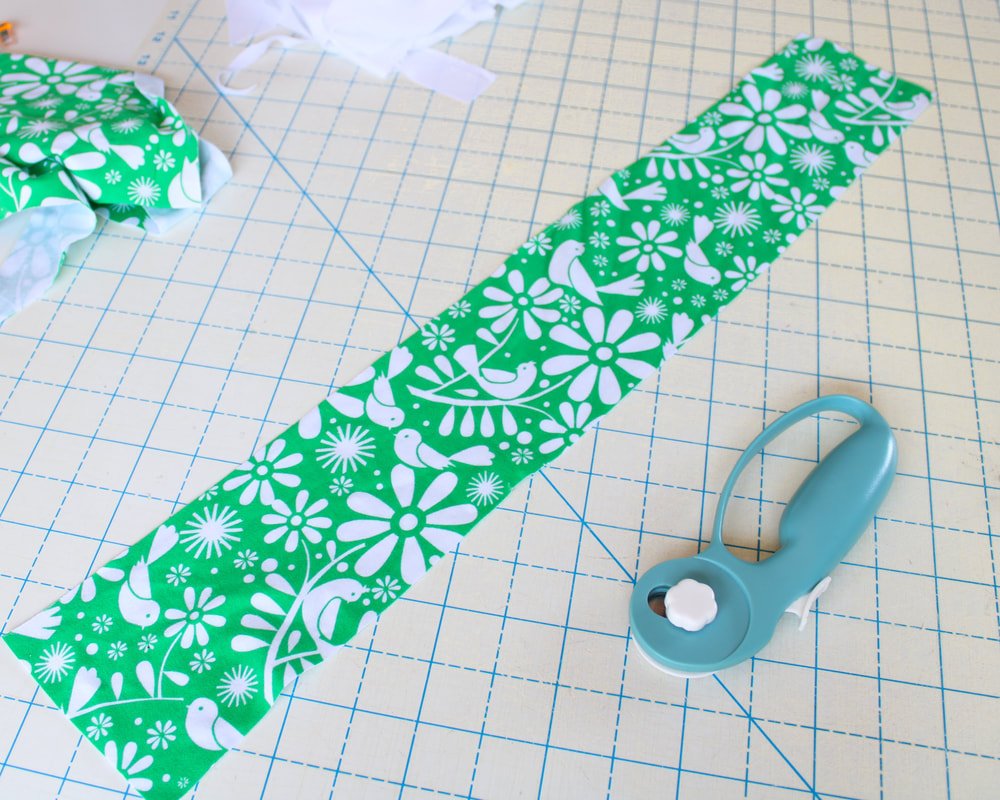
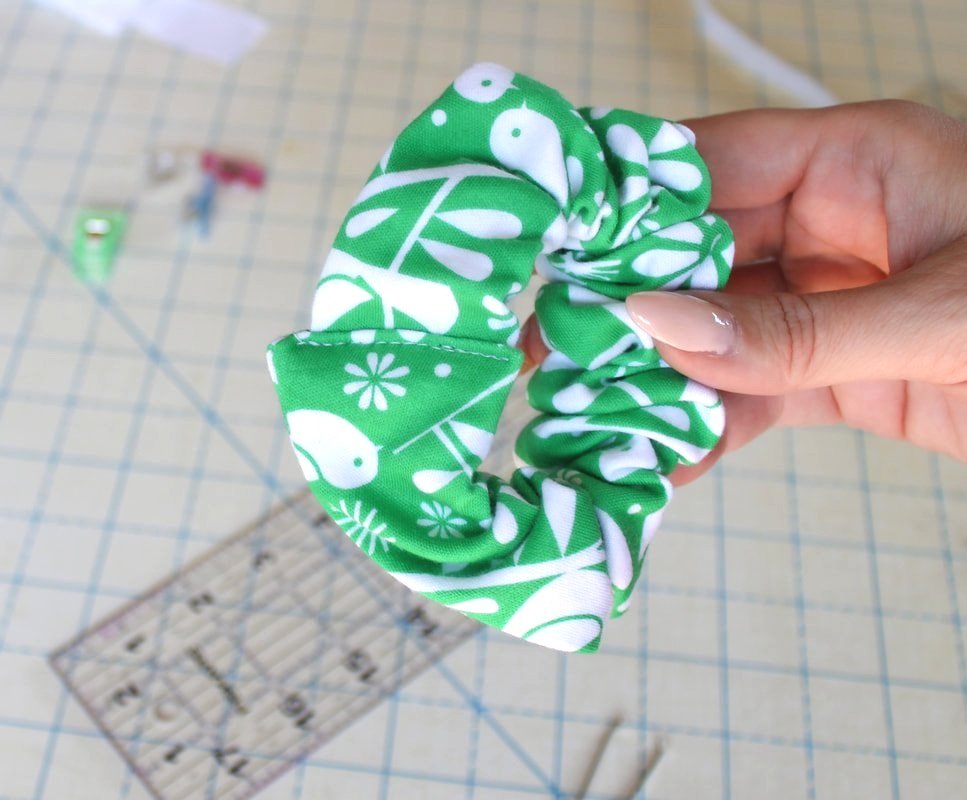
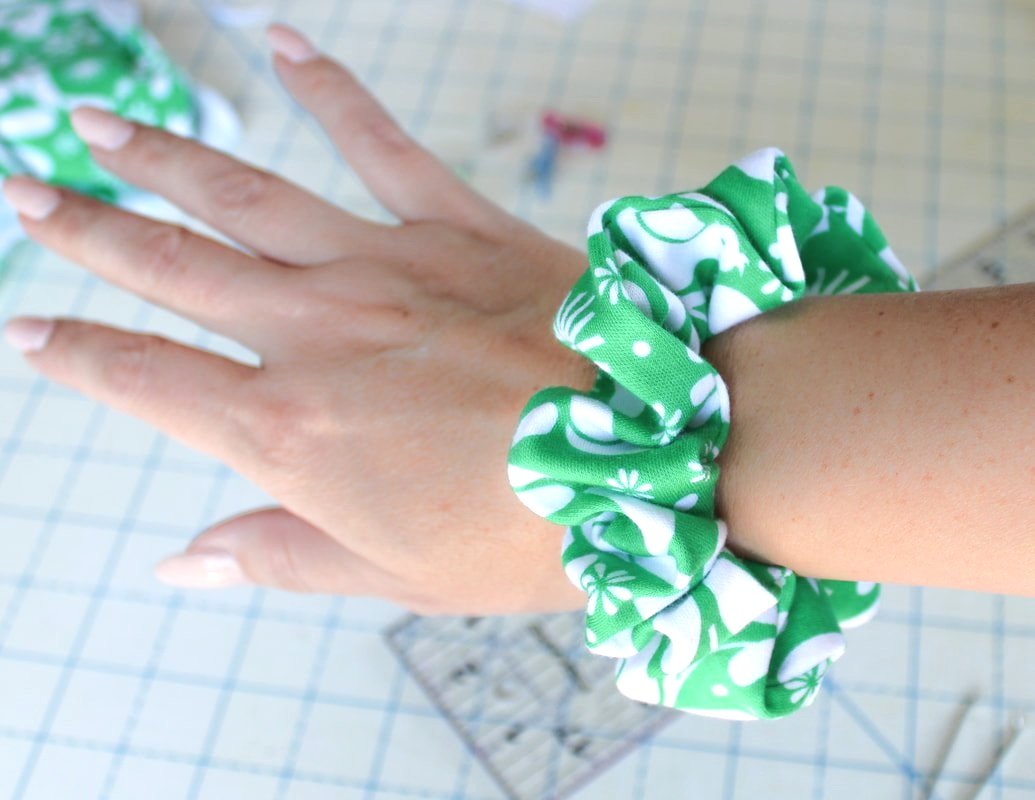
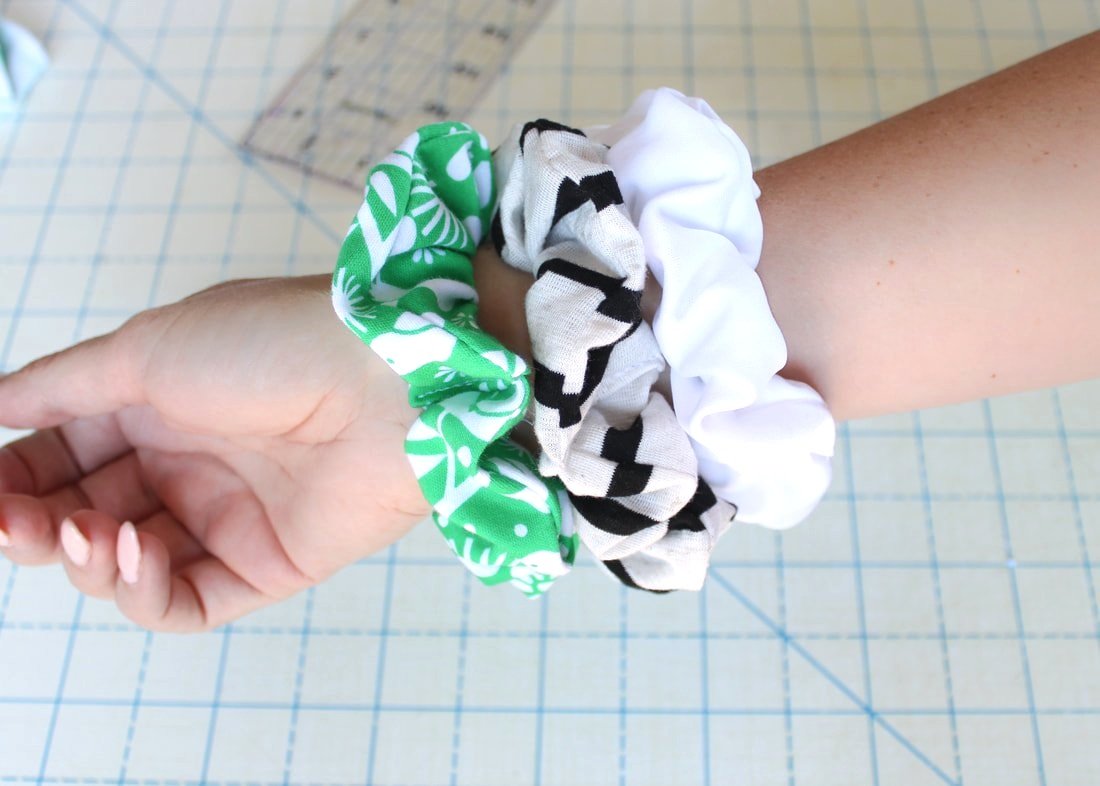
9. Hair Scrunchie
Is it scrunchie or scrunchy? My daughter even calls them a "scrunch". Either way, we all love them! They are comfortable to wear and claim to be healthier for your hair than rubber bands alone. A handmade scrunchie will accessorize your outfit and put a smile on your head. Not really, but just go with it. ;) They also keep the hair off your neck while sleeping, cleaning, or sewing. ;)
As with most things that are mentioned above, you can increase/decrease the length and width of the fabric strip to make these larger and fluffier or shorter and thinner.
*I personally like this exact size. I've made a few in different lengths and widths for my daughters but, they love the fluffier size too.

Fabric for the scrunchies.
Supplies
1/4" elastic
Fabric measuring at least 23" long
Sewing machine + notions
Safety pin
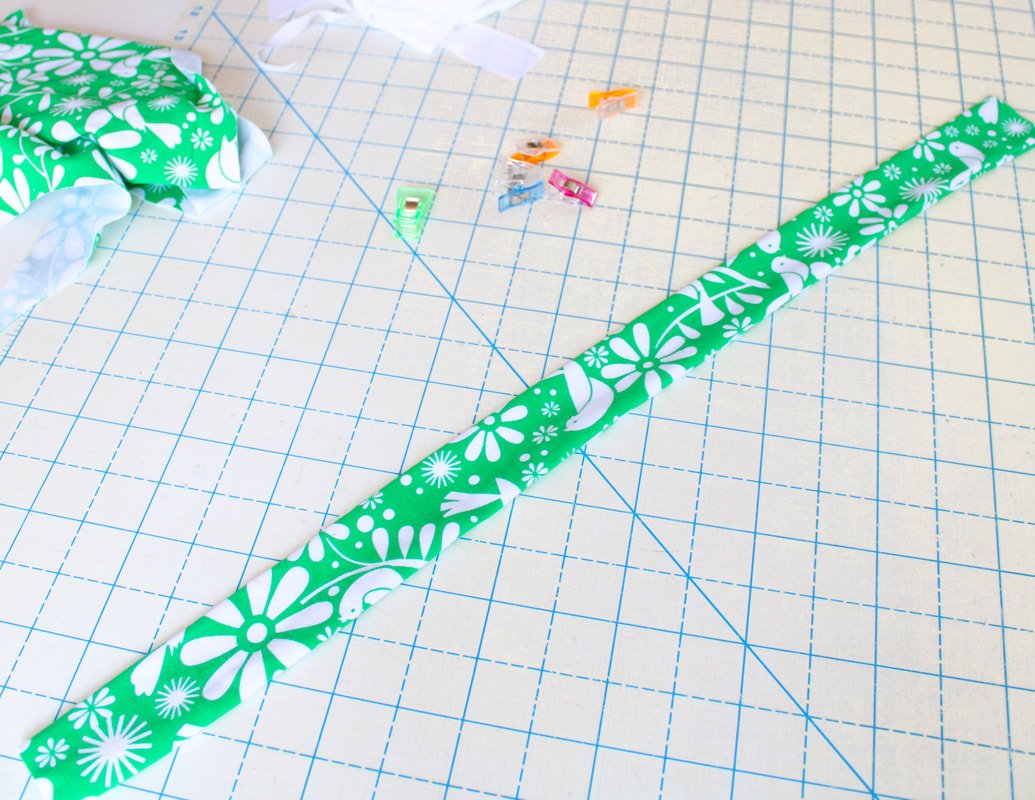
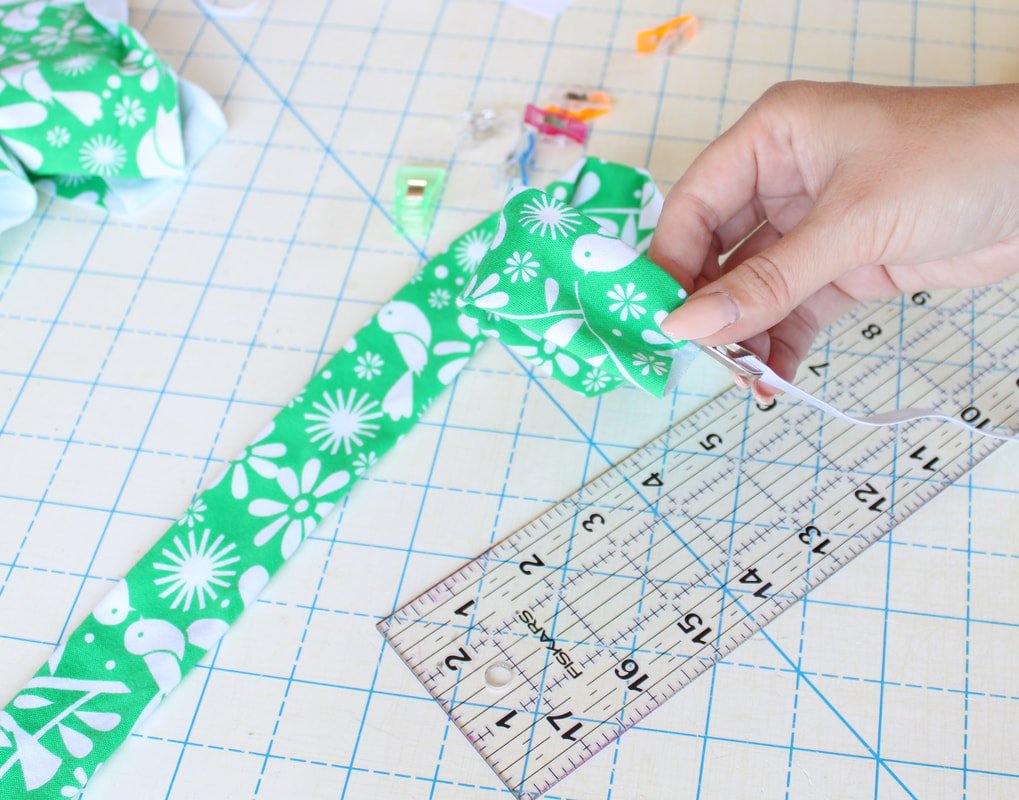
Cut a fabric strip measuring 4" by 23". You can use satin, cotton, viscose, rayon, or anything that is lightweight and has a drape. You wouldn't want to use canvas or something that is thick and stiff. You're basically creating a ruffle, so it needs to be able to... ruffle. :)
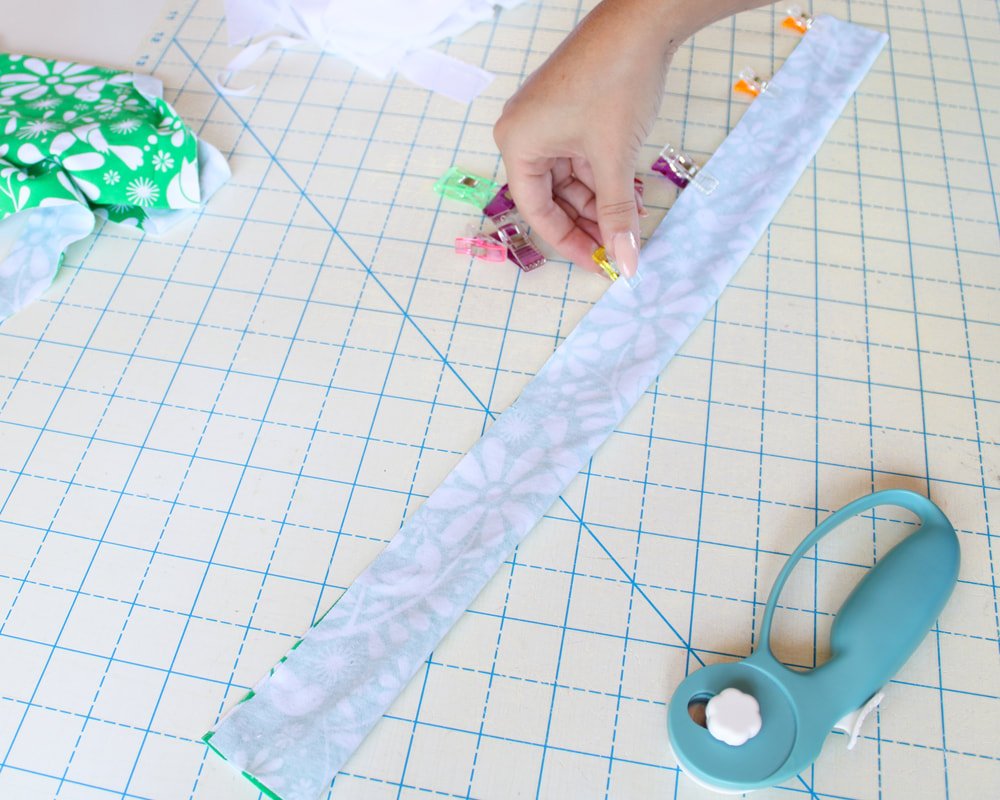
Fold the long strip in half, like a hot dog bun, RST (right sides together). Sew a seam down the long edge using a 1/4" seam allowance. Backstitch at the beginning and end. You now have a long skinny tube.
Turn the tube right side out using a turning tool or safety pin.
Cut your elastic piece 6-7" long. Feed the elastic through the tube using the safety pin.
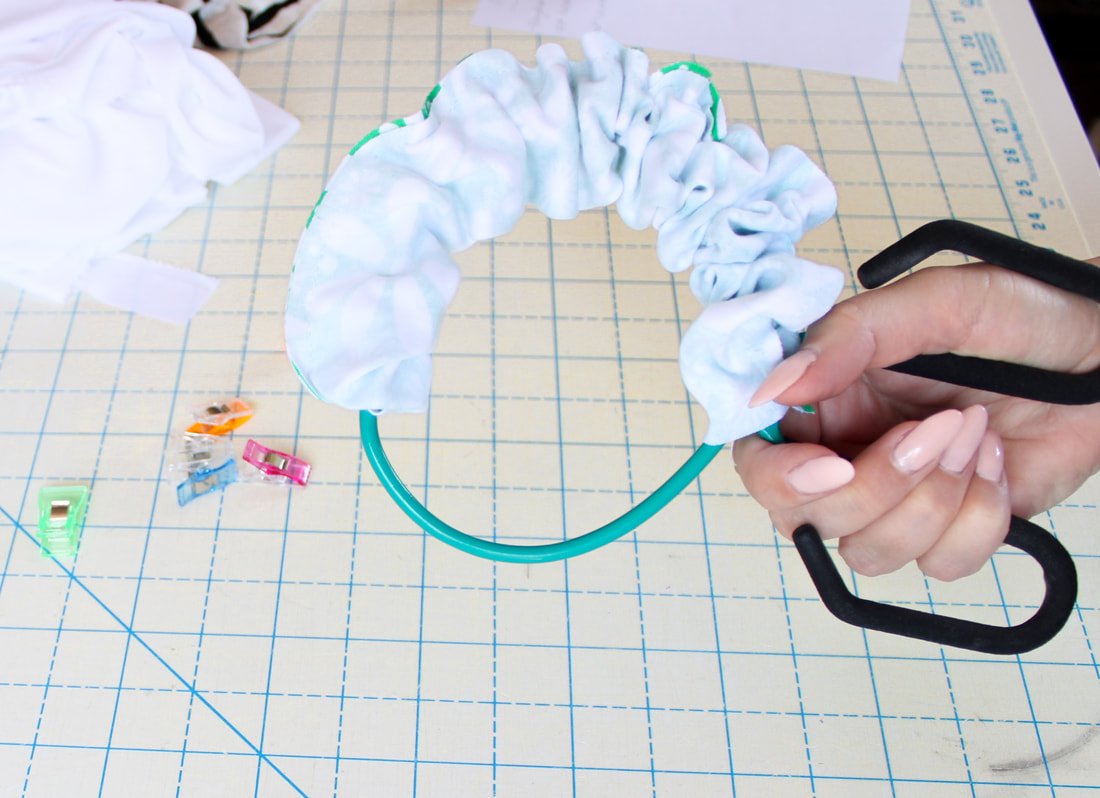
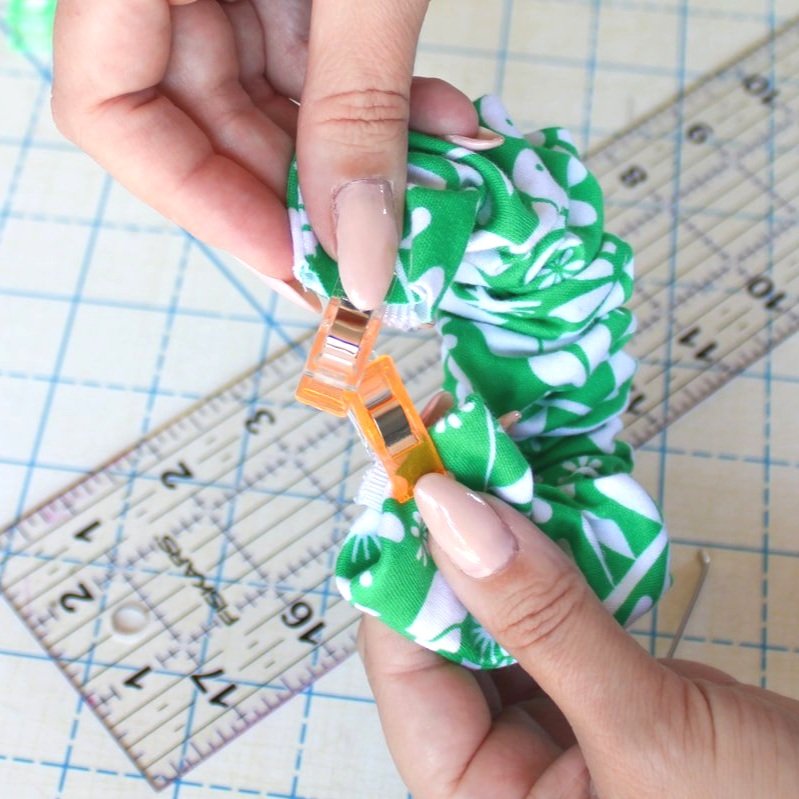
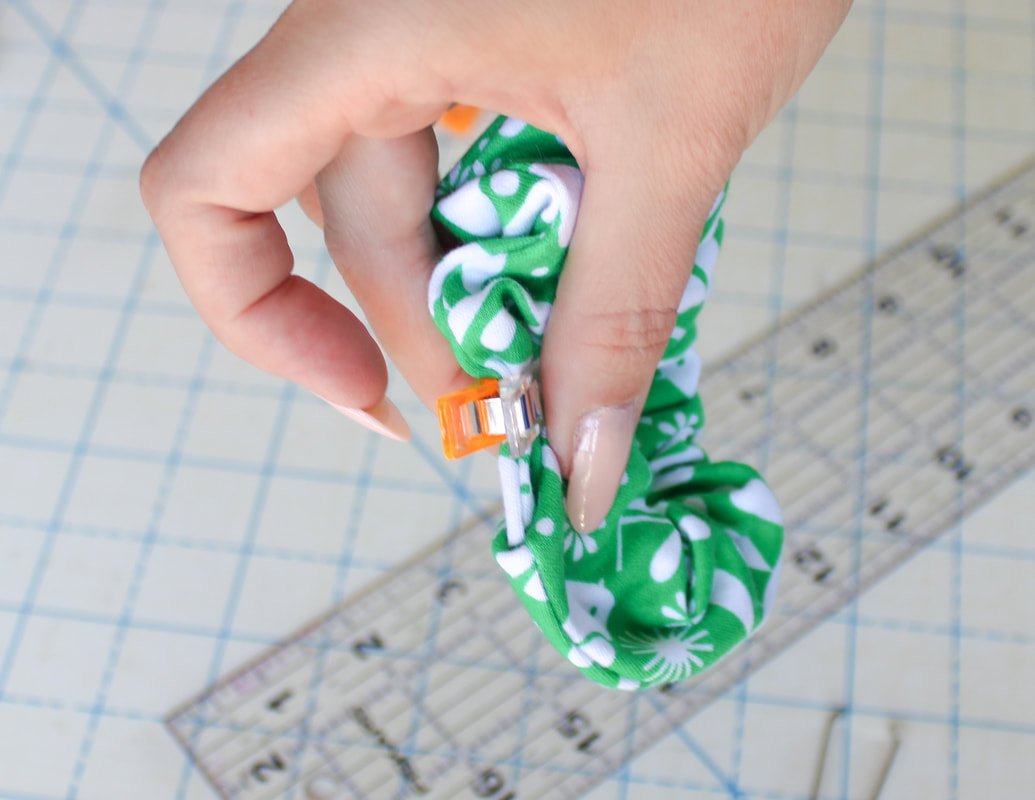
Tie a simple knot in the elastic or sew the ends together by overlapping them.
Fold one short end under. Tuck the other end inside the folded end and clip or pin.
Topstitch the opening closed with a 2.5mm or 3mm stitch. Make sure to backstitch.


Cut elastic 6-8” long depending on how thick your hair is.


Sew 2 rows of stitching across elastic ends. You could also tie in a knot too, but you’ll need a longer piece of elastic.

Hooray! Now you can make tons for yourself or as gifts for everyone you know. Yay for hair scrunchies!! The 80s and 90s knew what they were doing.
I hope you've enjoyed these Simple Sewing projects. Share this post with your other sewing friends. These are all pretty easy which makes them great beginner sewing projects.
Thanks for hanging out today. If you make one of these Simple Sewing projects, tag me on Instagram, @sewingtothemoon I'd love to see what you create.
Happy Sewing!
Annette

Sew a Circle-Shaped Bag
Sew a circle shape bag for fall or any other season. You could even turn this into a hip or sling bag. DIY bag making project.

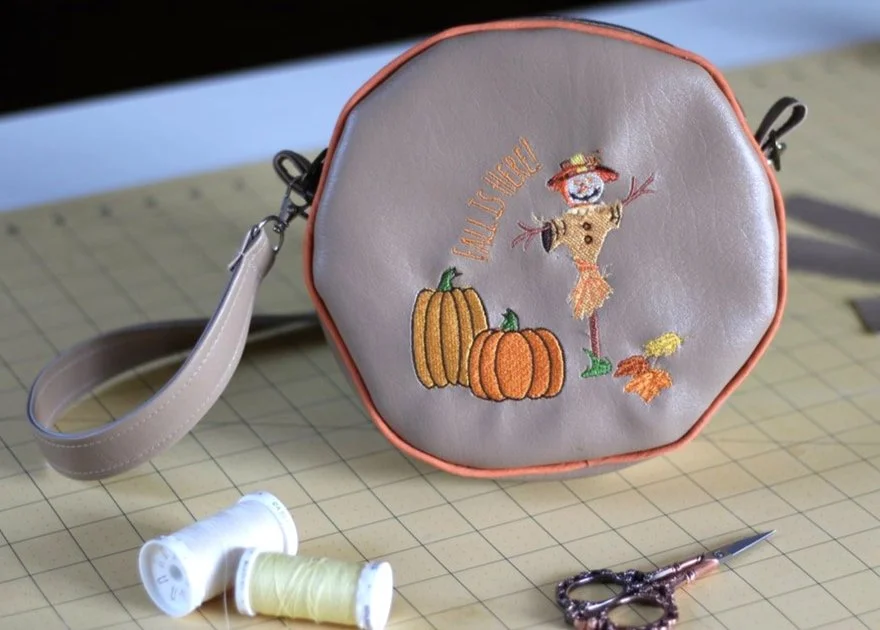
The air is crisp and the leaves are sprinkling the ground as I type. Apple picking season is among us. I tried to hold on to summer but, there's no escaping it. Fall is here. Yay! I am ready, bring on my favorite season.
My creative side has been lacking lately so, I wanted to try something new. Usually, I only share patterns that I love or have created myself. But, I wanted to shake things up around here. So, I'm sharing one of my sewing fails. Yes, a fail. A major sewing fail. Face-palm.
Here's the circle bag.

I wanted to try my hand at something new for the upcoming season. I saw a circle bag in a shop and knew I wanted to make one. I had light brown vinyl and planned on using it for a cute Autumnal bag. After scouring the interwebs for a free pattern, I settled on what I thought was a good one. Welp, the pattern was not great. I don't want to throw anyone under the bus so, I'm not saying where I got the pattern. But it was "meh" at best.
I knew from the beginning this was going to be an experiment. Yay for experiments! I created a fall-themed embroidery file to place on the front, just in case the purse turned out cute. I didn't want a boring brown circle bag.
The embroidery design has leaves, pumpkins, and a scarecrow. Fun! Although, the scarecrow was a little wonky.... don't look too close. ;)
Following the instructions, I gathered everything that was needed and cut out the pieces. I embroidered on the front circle only, that's the only area everyone will see. I used mismatched hardware for the strap (it's what I had on hand) and I used a brown zipper. Fall bag, here I come!

The seam ripper was using a lot. I horribly sewed a piece of fabric to cover the embroidery. Next time, I’ll just leave it alone.
Putting The Purse Together
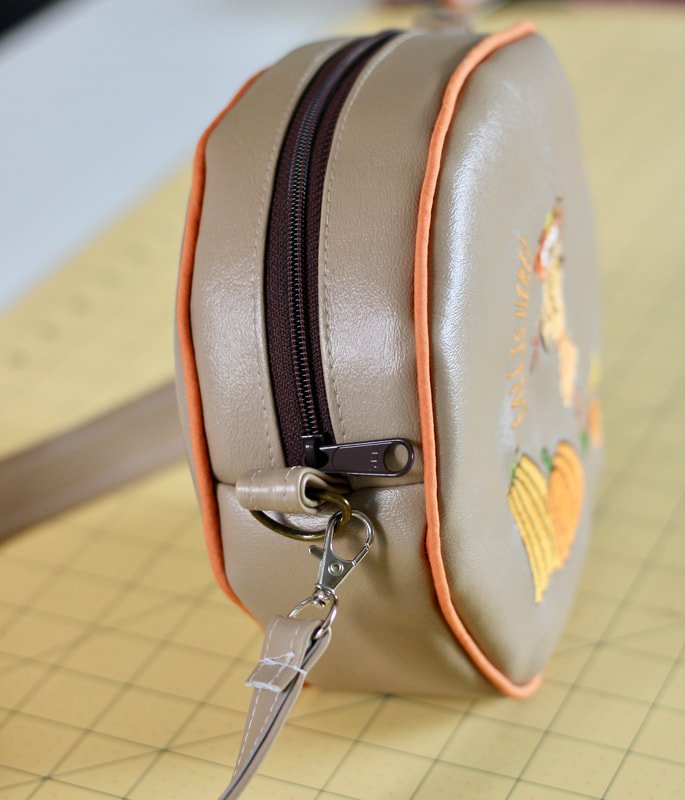
The pattern didn't call for a stabilizer, which I thought was odd. But, hey, I've never made a circle bag before so, I forged on.
You start with the zipper and long fabric strips that get sewn to the zipper tape. I didn't get a photo of this part.
Then, you take the bottom bag piece and sew it to the zipper at the short ends. This makes a long loop that connects at the zipper ends.
You're then going to take a circle piece and clip the heck out of it, to your piping. I just used pre-made piping from the craft store. You can find it next to the bias tape. The instructions didn't include piping but, long story short... you need piping in a circle bag. ;)

I used my zipper foot to sew closely around the perimeter of the bag. You have to work with the vinyl during this part. I found it easier to use tons of clips and pull as you go. I didn't use as many clips during the first round and it was more fiddly to work with.

Using the zipper foot helped to get closer to the piping.

Clip the edges.
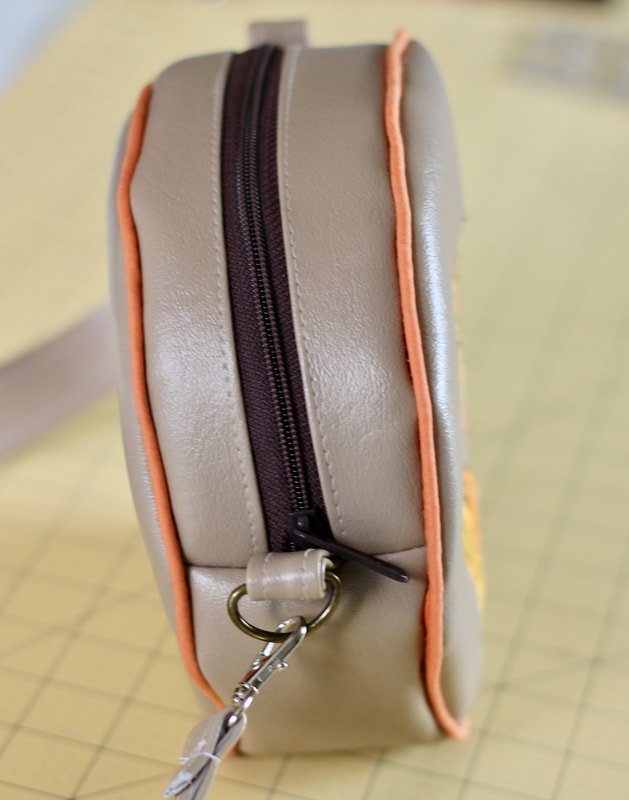
After both circles are sewn on, turn the bag out and cry. Ask yourself why it isn't round and perfect like the picture. Retrace your steps and check if you missed something. Nope. You did it all. You followed the directions perfectly. The bag just wants to be rude and un-round. Major face-palm moment.
Carry on to the long shoulder strap anyway. Attach the hardware and add the strap. This part is easy. And, you're done!
It was an easy bag to make, but so disheartening. Why isn't it a perfectly round shape? I think it's because this is a 2020 bag. That's the only logical explanation. This bag, along with all of 2020, stinks. LOL
So, what was learned from this experience?
Piping is your friend and foam interfacing should have been used. Vinyl and faux leather are stiff, but they benefit from something added.
I will use this bag throughout the Fall season because it's cute. It's not perfect by any means and I'm somewhat embarrassed to show it to you. But, as sewists, we know there are wins and sewing fails.
The circle bag has not defeated me though. I've accepted the challenge and will conquer this bag! Stay tuned for a pattern that will be free to you and will work! I'm creating and experimenting as you read this.
Have you ever made a circle bag? Was it amazing and round? Or whackadoo and rude like mine?
Please, share any tips, tricks, or fails in the comment section. We're all in this together! LOL
If you'd like a quick pattern that is a no-fail one, click here. You're welcome.
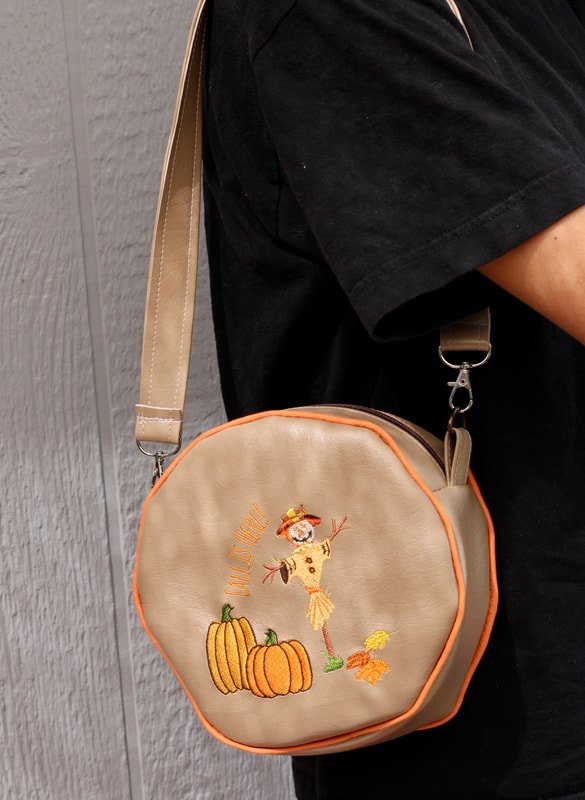
Ugly or not, I’ll still use the bag. Maybe.
Happy fall sewing ya’ll,
Annette