
Pattern Reviews, Sewing Hacks, Tips & Free Patterns
The Sewing Blog

How to Sew Velvet Fabric
How to sew velvet fabric using the Brother PQ1500SL sewing machine. A pin feed system is the best method to sew velvet fabric. Follow this tutorial on how to set up the machine and sew. A pin feed system isn’t hard or scary. It will help walk the delicate fabric through the feed dogs easily.

Have you always wanted to sew velvet but have been too nervous that you'd ruin the fabric? It's finicky with an iron, let alone a sewing machine right? Wrong. It's easier than you think to sew with. Imagine velvet capes, dresses, and pants!
In the past, velvet has always been a Halloween costume staple around this house. The serger would do all the work for those themed capes and dresses. However, this year, I wanted to dip my toe into something more, dare I say, scary!?
Gertie rolled out her Gardner top on her Patreon, so if you're not a member yet and love vintage fashion sewing, join now! I cannot keep up with all the content and patterns she gives us. No, I'm not sponsored, I just love everything she does for us.
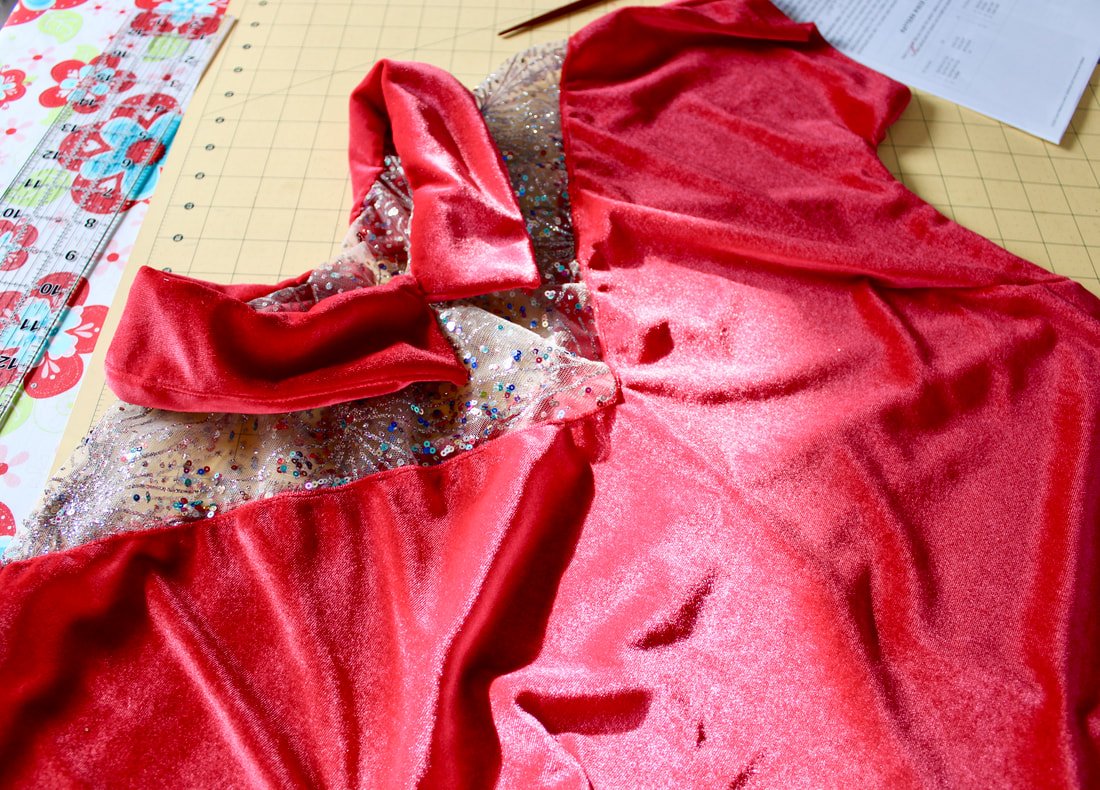
Anywho, back to the Gardner top. The pattern uses knit fabric for the bodice and collar, and sheer or lace for the cutout. I wanted to use some stretch velvet to bump it up a holiday notch. Sequin and velvet scream holiday festivities, so I picked red and green velvet with matching sheer fabrics.
But, before we get into sewing the fabric, let's get your machine set up.
Sewing Machine Tips

These part of my pin feed system. These accessories came with my machine.
I have a Brother PQ1500SL sewing machine. You can read all about it here.
It has a pin feed system that is made for sewing tricky fabrics like velvet. I'm going to show you how to get that set up. If you have a different machine with a pin feed system, refer to your manual to learn how to set yours up.
If you don't have a pin feed system, I suggest reading your manual, as well. But, in a pinch, lower your feed dogs and it might be okay to sew the velvet. I'm just sharing how to do it on my machine because the internet lacked what I was looking for.

See the pin sticking up near the feed dogs? That pin moves the velvet from underneath, similar to how the feed dogs work, but it is more gentle. No velvet will be harmed during sewing.
Use a stretch or sharp needle. This will gently pierce the fabric instead of tearing through it.

Turn the feed dogs to the red position. This lowers them almost fully and engages the pin feed mechanism at the same time.

Raise the presser foot to the red position. This keeps the velvet from being crushed while getting sewn together.

Now that the settings are changed, you have a brand new needle in, and the correct presser foot on, it's time to sew on some scrap fabric.
Grab some scraps of your velvet and practice sewing on them. Sew 2 and 3 layers together using different stitch lengths. I found 2.5mm worked best for my velvet. You might need a longer or shorter stitch length. When I increased the length, my stitches got wonky. Once you get the stitch length sorted out, you should be good to go.
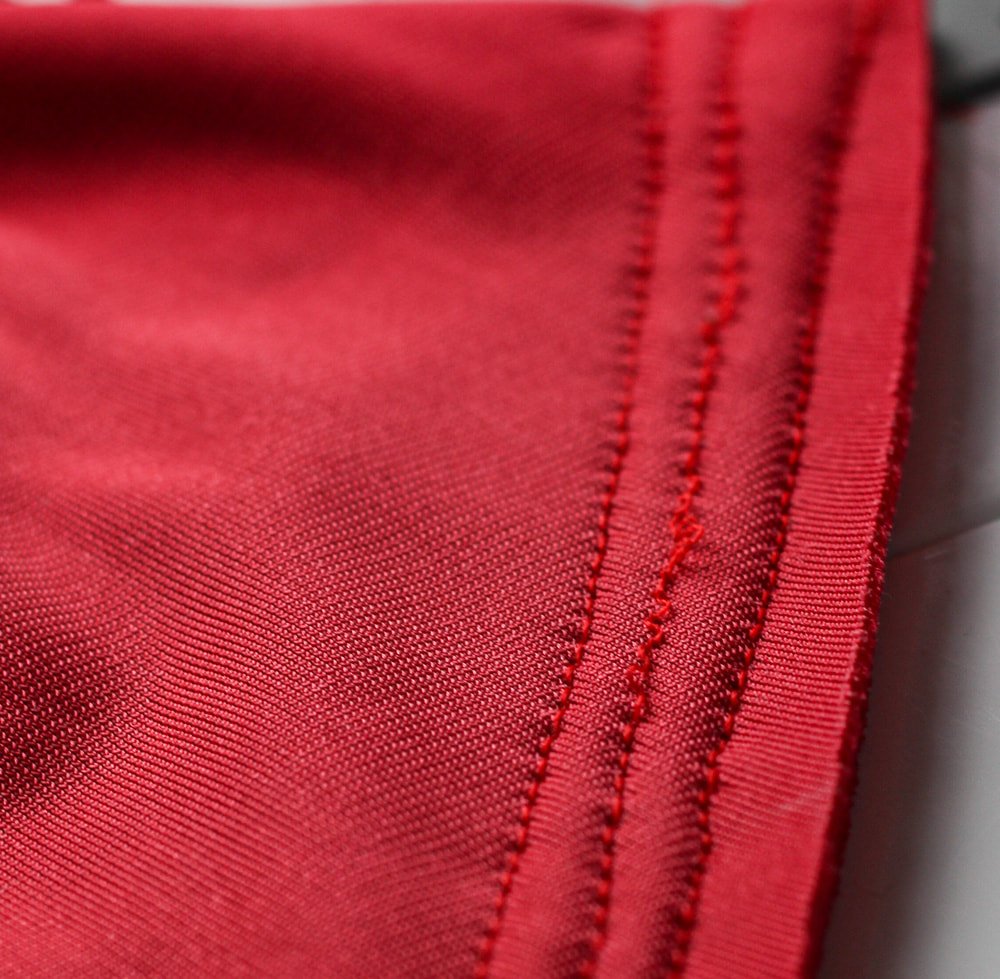
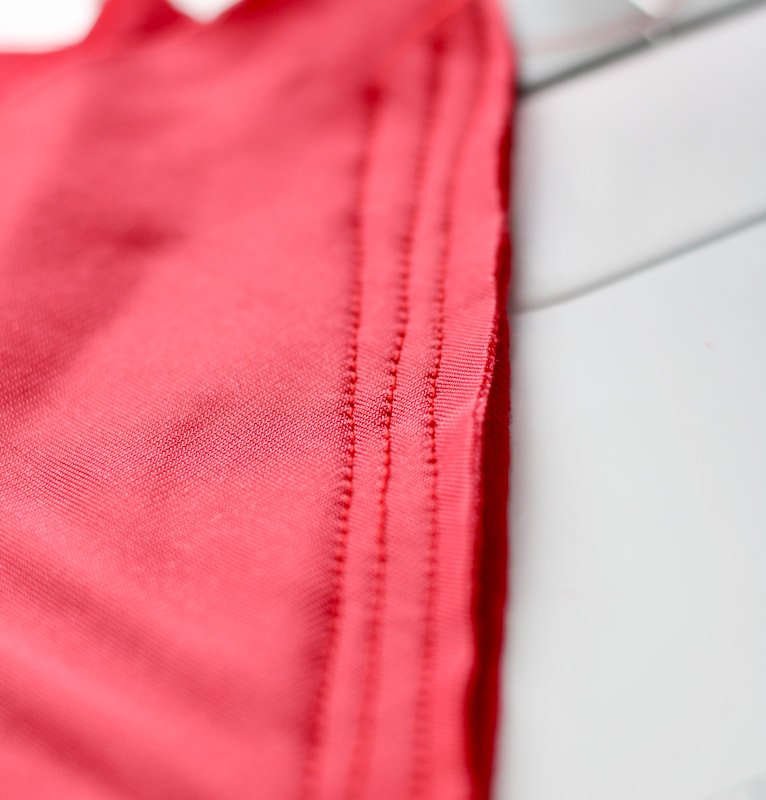
I sewed a few rows just to be sure the stitching was the correct length.
Extra Tips
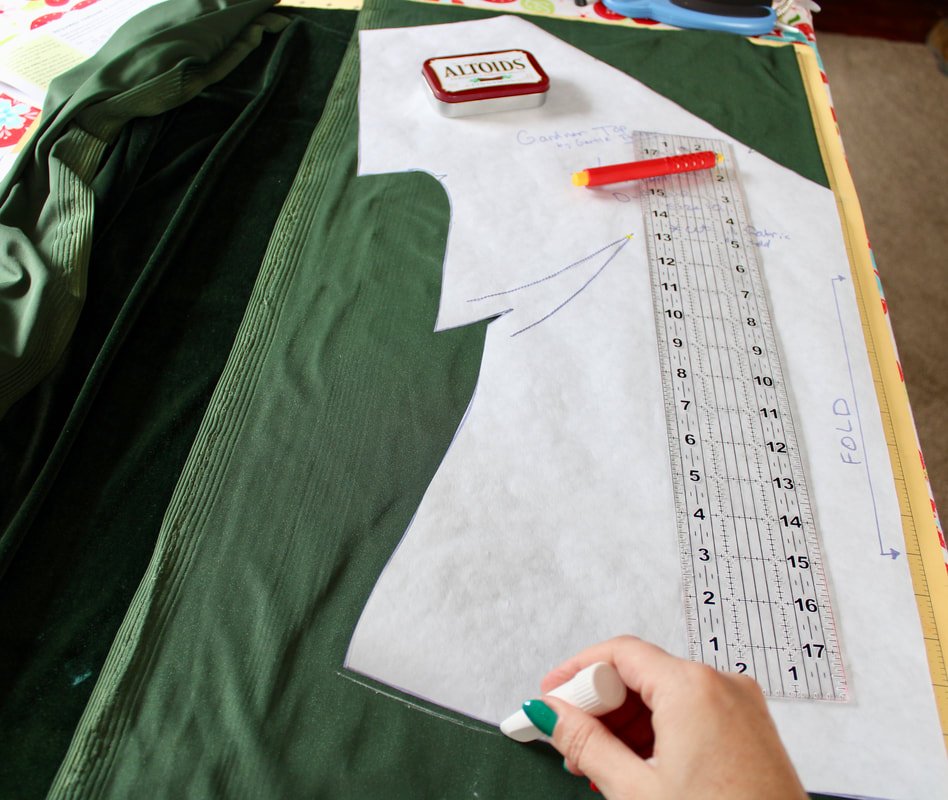
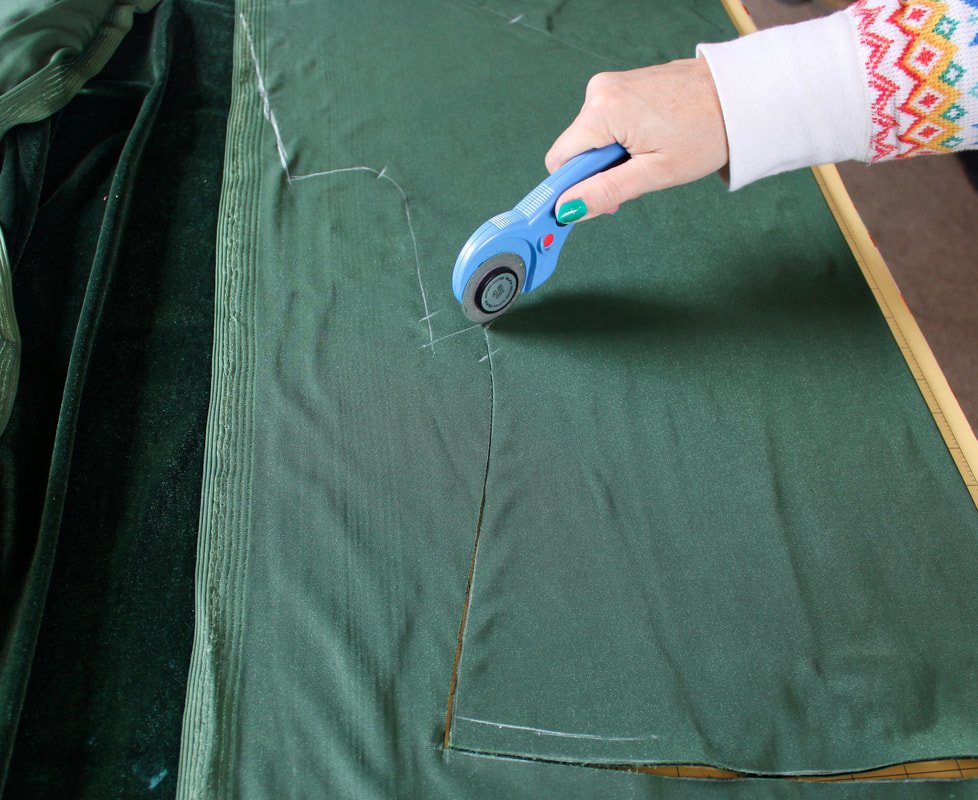
When cutting velvet, make sure the nap is going down. You can test this by running your hand up and down to find the smooth direction.
Use a rotary cutter when possible to cut out your pattern. You can use sharp scissors, but a rotary cutter and mat make it easy and painless. ;)
Trace and cut with the fuzzy side down. It's easier to mark the back of the fabric with a chalk pen.
Use a walking foot if you don't have a pin-feed foot system. It will keep the fabrics from shifting.
NEVER iron velvet. If the 80s taught us anything, it’s to never iron velvet. Haha
Velvet patterns require sew-in interfacings only. You can't use fusibles.
Your hems need to be zigzag stitched. Velvet has a natural stretch so, you want to avoid using a straight stitch for the hem.
Use a stretch, ballpoint, or microtex needle. I mentioned it above, but, thought it was worth mentioning again.
If you'd like to see the process for my Gardner tops, read that post, here. I finished them just in time for NYE. I wore the red one for New Year's Eve. The green one is perfect for wearing during fall through the chilly spring days.
Good luck sewing all of your upcoming velvet patterns. I hope these tips helped you out and made it look less intimidating.
Happy velveting,
Annette

Trying to decide what to ew next.

Hooded Princess Coat by Charm Patterns
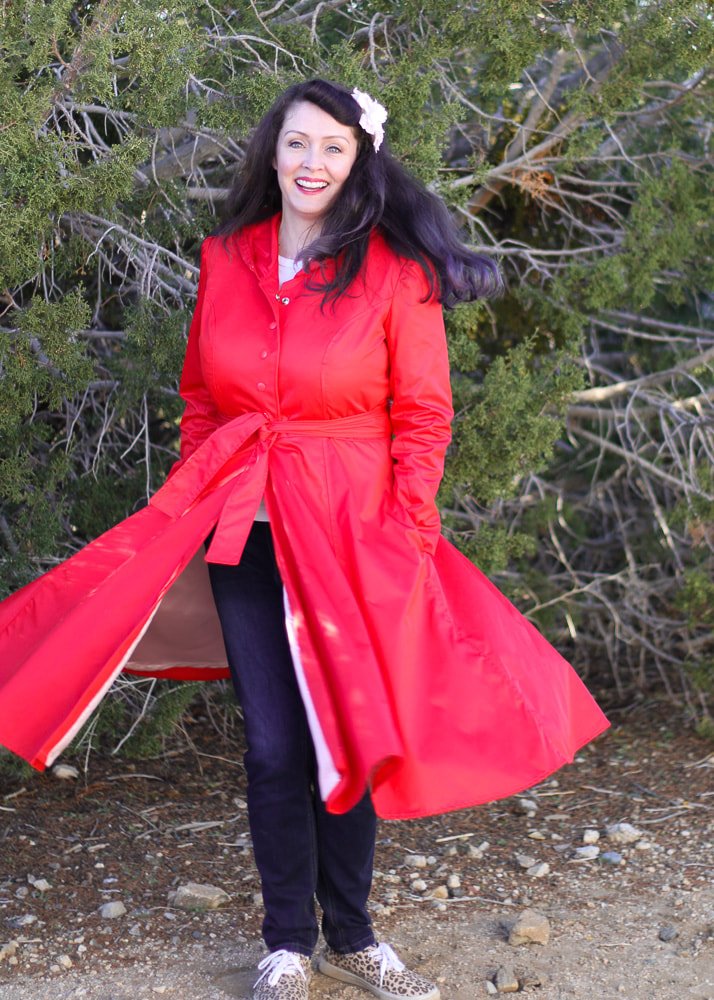
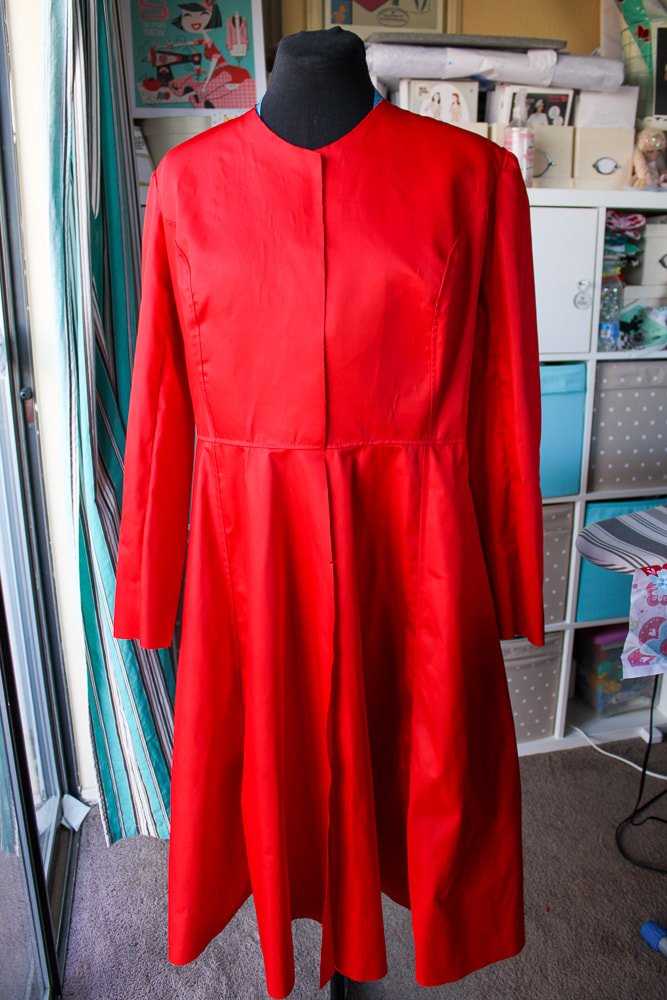
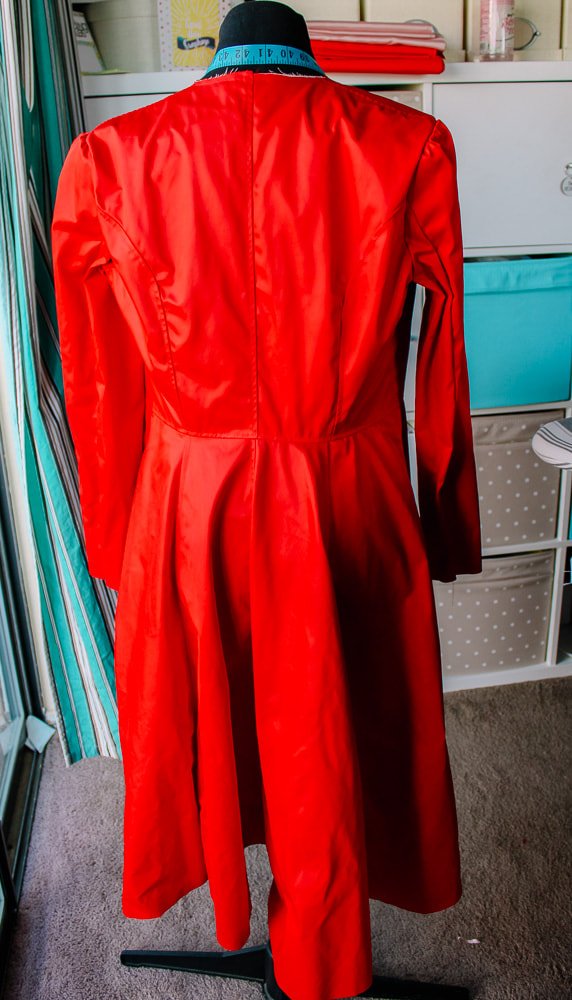
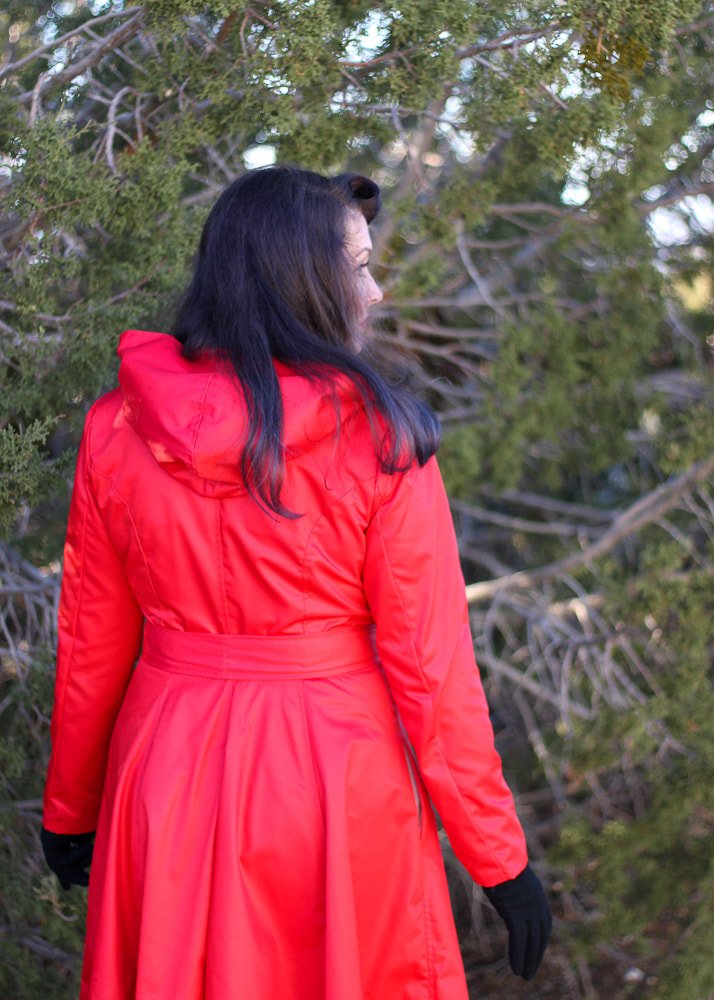
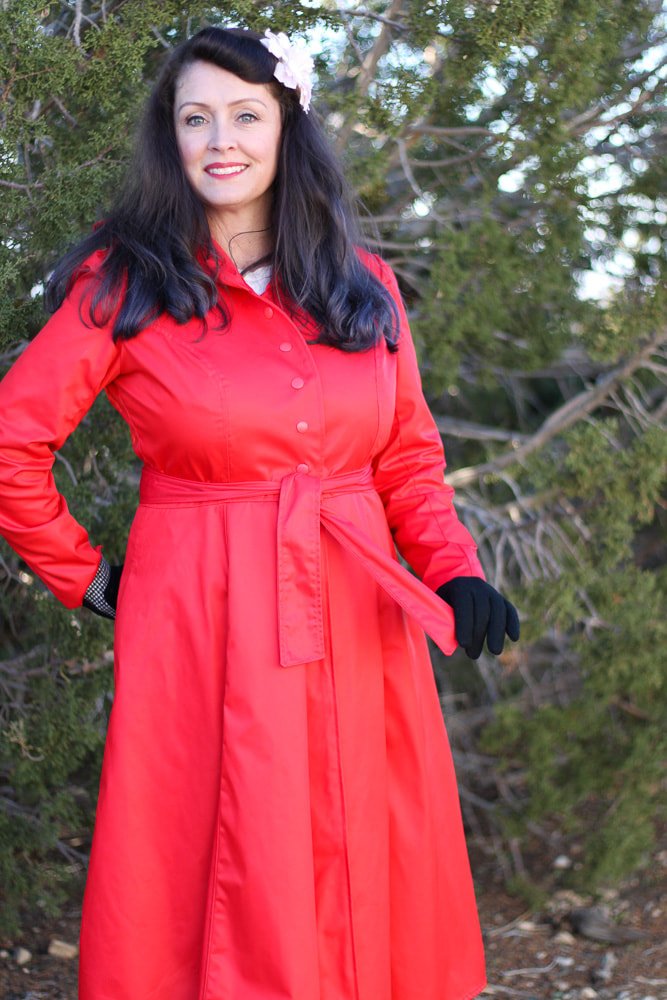
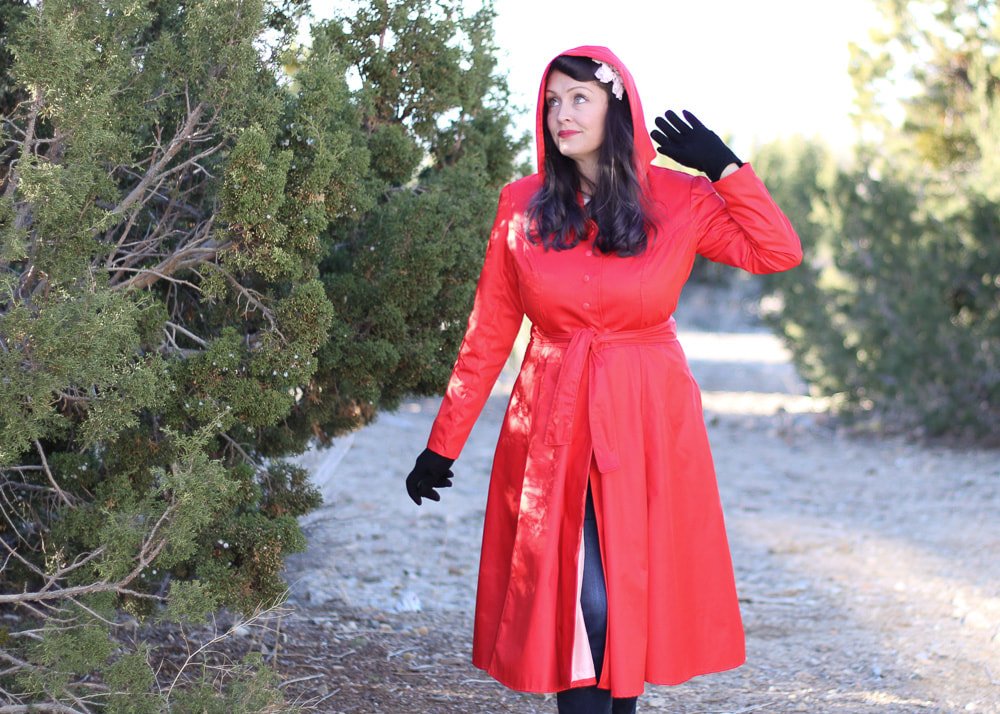
Gertie’s hooded princess coat sewing pattern review and tips. I love the pattern and it sews together beautifully. With rain resistant fabric and the added hood expansion, it makes the cutest vintage style raincoat. It’s a little red raincoat. Not beginner friendly, but a seasoned sewist won’t have any problem making one.

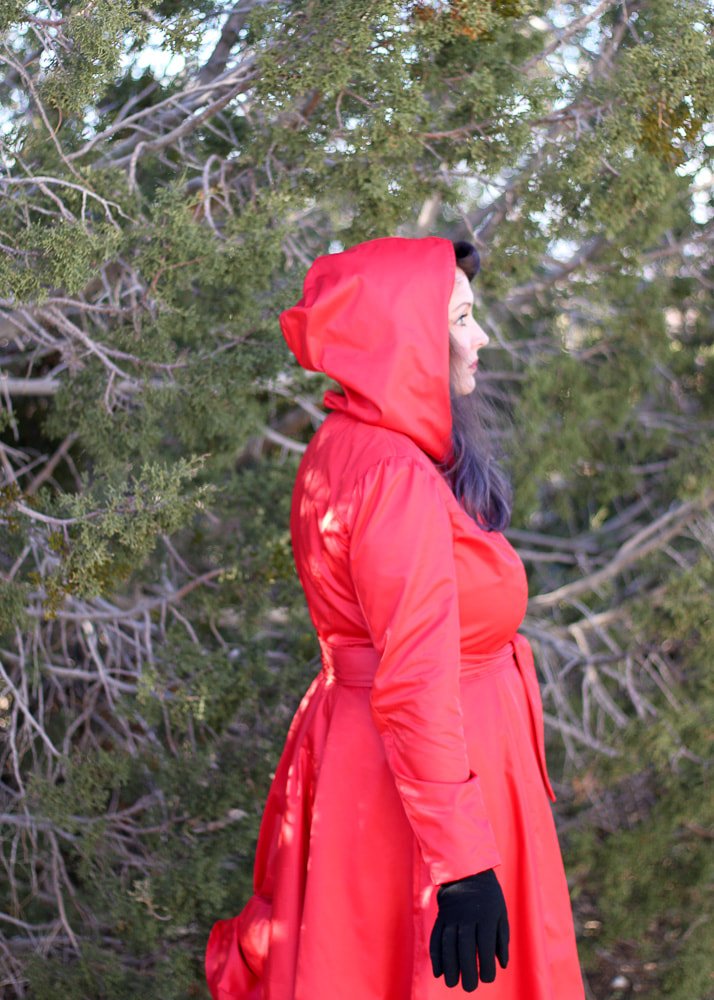
My Little Red Raincoat
This coat is a Patreon expansion pack of Gertie's Princess Coat sewing pattern. Sew your own raincoat to keep yourself dry and cute. It starts with the Princess coat, then you add the expansion pack for the hood.
Do you ever find yourself needing a garment, but you can't find one out there that suits your style? This is that garment. I have a few hooded coats but, they're wool or fleece. Not really a raincoat per se. And, I have two garment obsessions: coats and shoes. I need all the coats and I need all the shoes. Ha!
I think coats and jackets are the best accessories because they add warmth- especially if you're always cold. And, they add fabulousness to your outfit. Imagine yourself wearing a T-shirt, jeans, flats, and red lipstick. A normal little everyday outfit, right? Then, add a black velvet coat and your outfit gets a major upgrade!
That's what coats and jackets do for me. I guess they're my jewelry. So, when Gertie came out with her Princess Coat pattern, I had to grab it. A month later she rolled out her Patreon expansion pack to make a raincoat. I was sold! I needed a raincoat.
Fast forward 2 years and I still hadn't made my beloved raincoat. First of all, rainwear fabric was something I had zero clue about. And, second, I sew on a budget. I didn't have hundreds of dollars to drop on fabric for a coat I would wear maybe twice a year. Thanks, Southern California for never raining. Living in the desert, we don't get a lot of rain but, when it rains, it pours. Hello, flash floods. And, hello Little Red Raincoat.
“It never rains in Southern California”

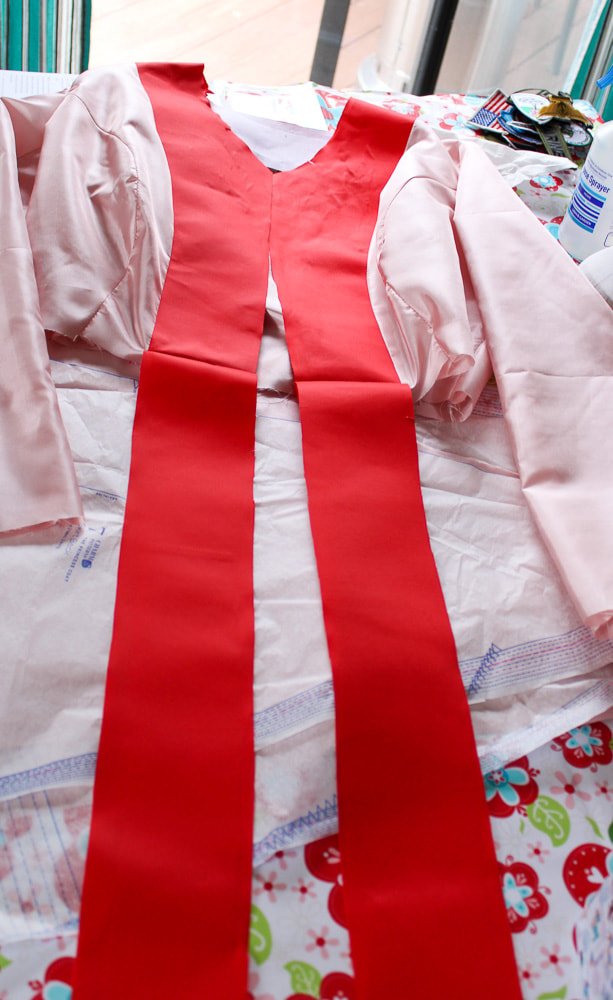
Tracing and cutting the outer fabric. The kitchen table was the best place for this. It’s a lot of yardage.
This post isn't a How-to because it's an expansion pattern for Patreon only. Gertie is gracious enough to spoil her Patrons with all her marvelous patterns. If you're interested in making a vintage-style raincoat, Grab the pattern here. Then, join her Patreon here. It's definitely worth it. We get a new pattern each month and honestly, it's too many for me to keep up with. But, I choose which patterns are "need to sew now" and which are in the "someday" category.
Anywho, I did have a few little areas I ran into trouble with so, I'll share my input on those. But, other than that, enjoy all the photos of my Little Red Raincoat. Yes, I named it. :D

No rain, but it was a frigid February day.
Why did I start sewing the raincoat after 2 years you ask? Well, remember this post on January Jeans? My sewing friend on Instagram was still talking with her jeans sewing group. They decided to do a #JacketJanuary. I was invited and thank goodness for those ladies! They welcomed me and I made new sewing friends. Yay!!
One gal finished her jacket on time and a few were waiting for the last touches by the end of January. We met every Monday for a fun Zoom call. the group kept me going and I was finally able to get my coat finished. It wasn't finished on time because I was undecided on whether to use buttons or snaps. In the end, I decided on snaps. Buttonholes and water don't go together so nicely
Snaps are usually easy but not this time. I put the first one in upside down. Cried (not really but, I wanted to). Then, put another one in wrong. Ha! I don't like snaps (anymore) or buttons. Face-Palm!
Isn’t my pink lining fun? My coat can double as a Valentines Day coat/outfit.
Let’s Talk Fabric
One of the ladies in the sewing group told me about trench coat fabric. We had a quick chat about that and I had an a-ha moment. It was mind-blowing, believe me. I ended up buying trench coat fabric and it was wallet friendly too. I found some beautiful red polyester twill from Mood Fabrics. They shipped quickly too. According to my measurements, I needed 8 yards. Well, technically I needed 7.5 but, when you order online, you can only order in whole amounts. Fun story, I ended up with almost 4 yards left over. So, now I have no clue what to do with all that leftover rain-resistant fabric. Ugh! I think camping table clothes and bench covers?
The fabric itself is nice. It was a dream to sew with but, it wrinkles very easily. When I'm running through a hurricane looking fabulous, I probably won't mind my wrinkled mess of a raincoat, though.
The lining is poly china silk I bought online from Wholesale Fabric Direct. It's a blush pink color and I ordered 8 yards of that as well because... well measuring. I have tons left over, over 4 yards. The leftover lining fabric didn't bother me because I can use it to line wool pants or anything else in the future. Plus, it only costs $2 a yard. LOL! No tears were shed over that. The rainwear fabric was a different story though. ;)

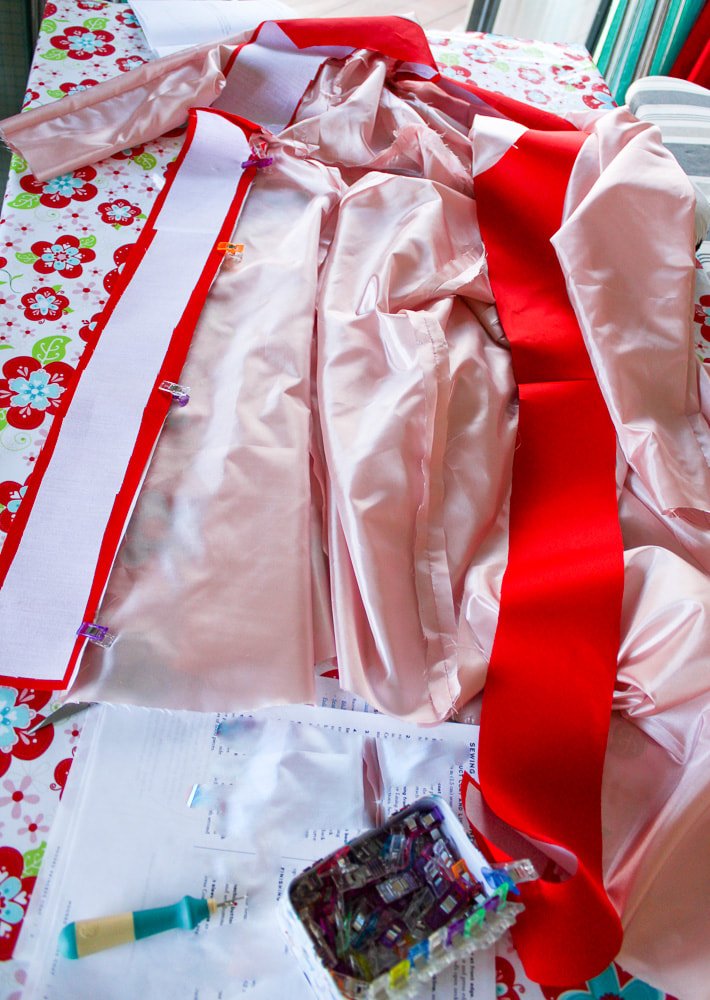
Tracing the lining pieces. Again, at the kitchen table.
Notions and Potions
No potions except coffee. Lots of coffee.
The thread and needles I used were simple and nothing fancy.
I bought 3 spools of all-purpose red polyester and 1 spool of all-purpose poly pink thread. I read other people’s comments about how much thread they used for the Princess Coat and I didn't want to run out. Well, I didn't even use a whole spool of the red. Ha! I always use red thread because it's the best color in the whole world, so no worries about that.
I sewed my outer coat with a regular 80/12 universal needle. It sewed through the rain-resistant fabric flawlessly. This fabric held onto the holes it was given so, I was cautious but, in the end, just went for it. Backstitching on every seam was fine, no issues there.
For the lining, I knew better. I used a Microtex needle to sew all the pretty pink seams. When it came to sewing the outer and lining together in a few spots, I used red thread and the universal needle. No issues, no skipped stitches, and no bird nests. Yay for nice, cooperative needles.
I used a tracing wheel and wax paper for the outer and lining pieces and cut everything with scissors. It was nice to open the leaves on my kitchen table and lay out the fabric and pattern pieces. My cutting table in my sewing space was not quite long enough for this project.

Adjustments
After making my muslin, I decided I wanted a little more room in the tailored sleeves. I used a 1/2" seam allowance instead of the recommended 5/8". I graded it up when I got to the armpit area. This kept me from having to make other adjustments in the armscye area.
I measured at a size 8 for the coat but graded down at the side seams, to a size 10 at the waist. I love that Gertie gives us different cup-size pieces. The fit was exceptional. I love sewing for my own body. Talk about body positivity. :D
I also adjusted the length as I cut out the skirt pieces. Instead of shortening the skirt length at the shorten lines, I simply cut the length at size 2. This was probably the incorrect way, but it worked for me. Sometimes I like shortcuts.
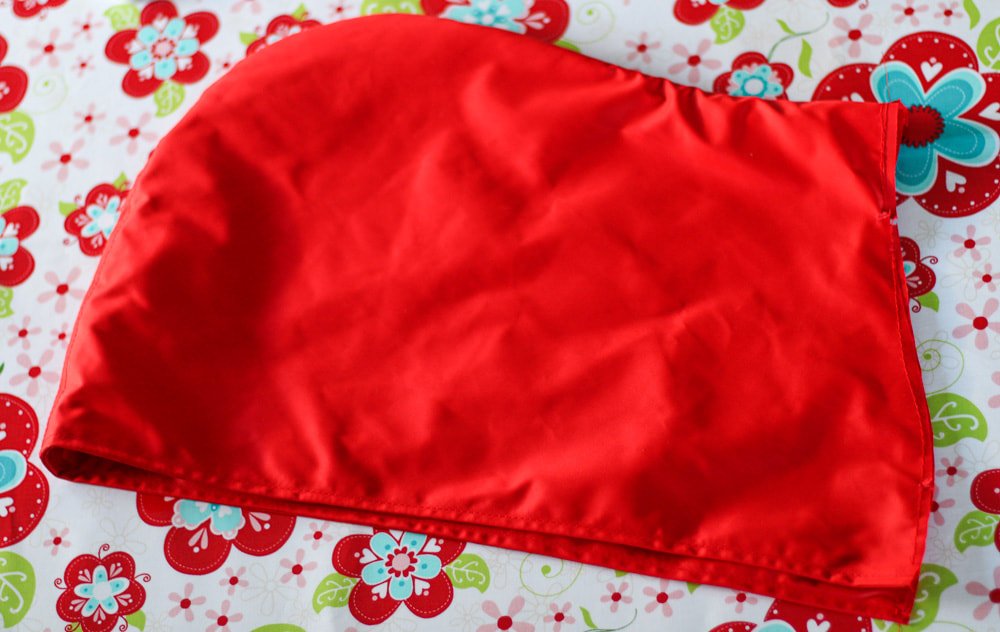
I added a hanging loop in the back. Cut a 2" wide by 4" long piece out of the outer fabric. Fold in half RS together and stitch with a 1/4" seam. Turn it inside out and baste it to the hood. A hanging loop for a raincoat is a must, right?
I topstitched all of my outer seams. I sewed the center back seams to the left and the other ones to the right or left, depending on each seam. I thought this would help with the rain seepage as well.

Pretty pink pockets.
Issues I Ran Into
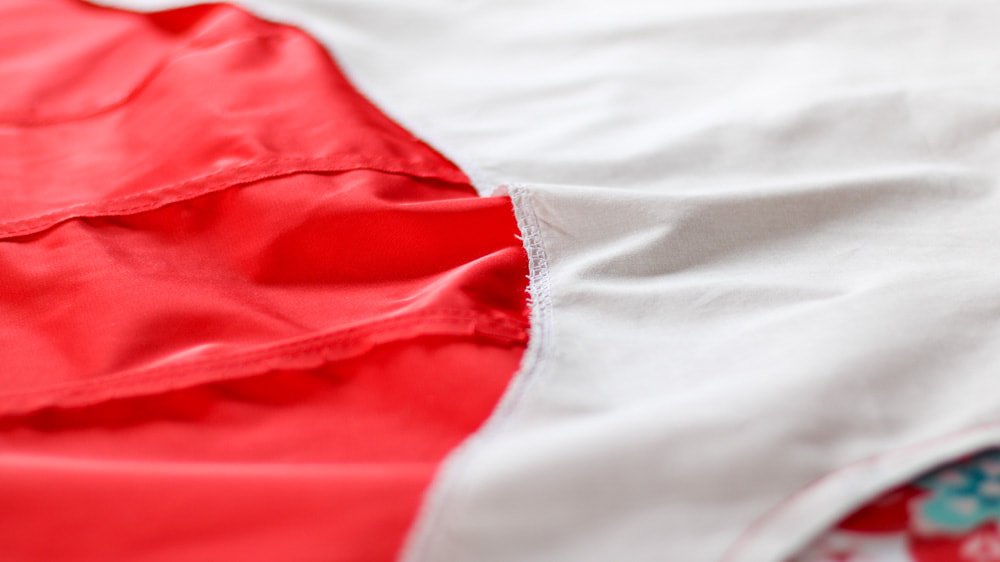
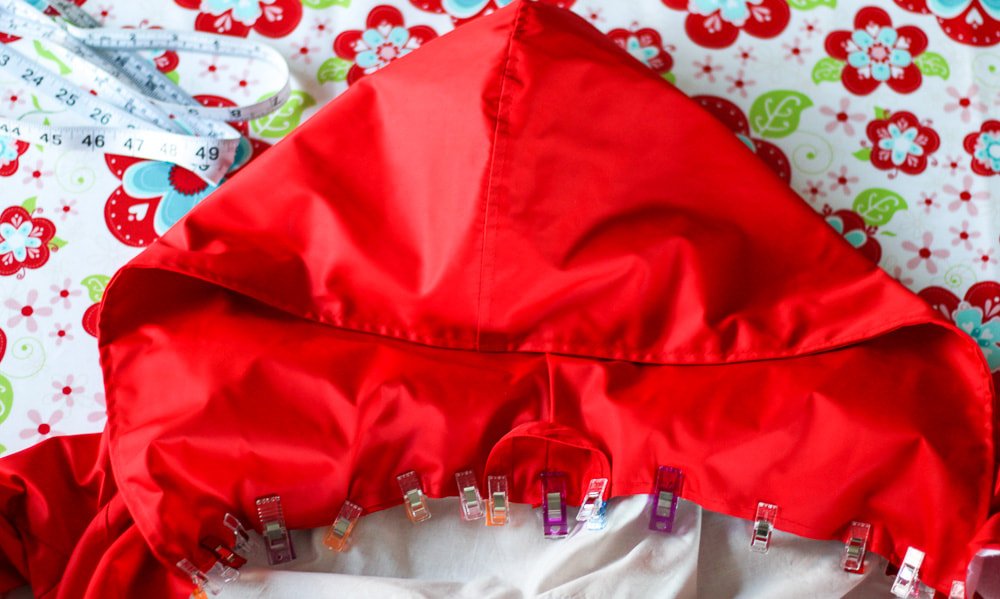
The Instructions were a little wonky in areas which isn't normal for Gertie. She's usually spot on. However, I did run into an issue with pattern piece #15, the skirt front facing. Her video says she skipped the hem facings, fine. But, she still had the front facing on her raincoat and it didn't say in the extension instructions how to add this. The booklet instructions were on page 44 but were different. So, I unpicked some of the waist area and attached it to the bodice lining unit, albeit the wrong way, but I got it done.
I had trouble figuring out how to add the neck facing because I hadn't had enough coffee or something. Below, is how it should look. The collar facing is cut with the outer fabric and sewn to the lining bodice at the back collar. It went on sorta upside down. Like I said, maybe I didn't have enough coffee.

Bodice lining.

Neck facing is clipped and ready to sew.

Neck facing and back bodice lining.
I used muslin for the back and serged the edges.
Hemmer Time
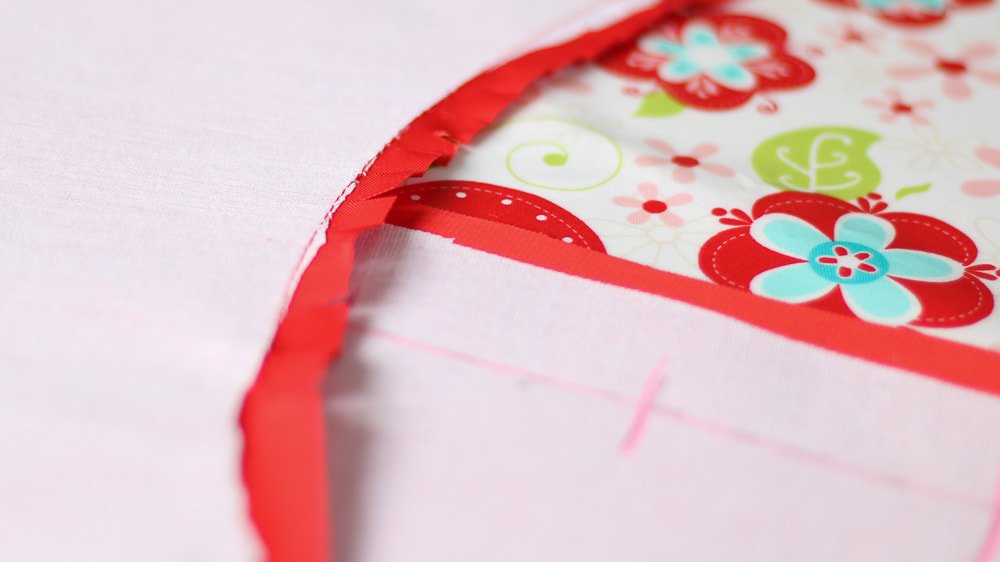
Okay, when it's time to hem, be sure to let your outer and inner hang for 24 hours before you hem them. Fabric cut on the bias is no joke. My outer didn't stretch out but, the lining did need a little trimming and evening up.
After hemming 4,000 yards of fabric and removing approximately 300 wonder clips, your hem will be done. Gertie preferred a narrow hem for the raincoat. The way she does it is nice too. Sew along the raw edge with a 1/4" seam allowance, flip it up and under, and sew again. Super easy. It is also nice for a circle skirt hem, you don't have to worry about any puckers. ;) I hemmed the outer and lining before I put them together. I liked hemming the outer and lining separately. Easy and no stress.
I went back and shortened the lining hem length another 1/2" inch. I didn't want to get caught with my lining hem showing. Could you imagine?! Gasp! If you read this before you make your coat, hem the lining 1" shorter to begin with.
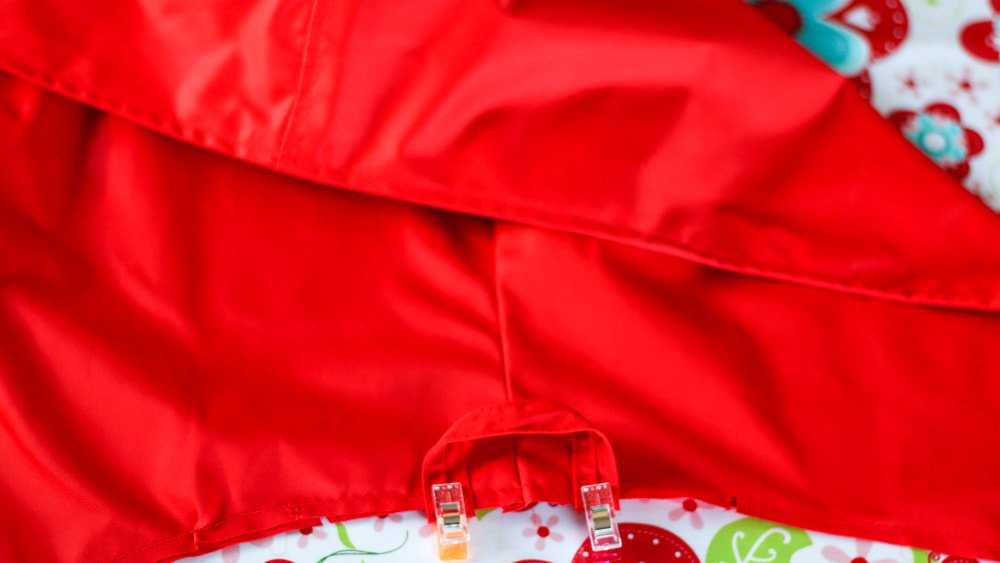
The sleeve hems were easy to do too. I didn't attach them as Gertie recommends. Hand sewing, no thanks, and on rainwear fabric especially. I prefer the bagged-out sleeve hem method. You take the sleeves and pull them inside out, fold over the lining cuff 1/2" or so, match seams up, and then sew. I didn't take photos but, here's a website that shows you how. It is my favorite way to sew sleeve cuffs and if you look at your RTW coats and jackets, they probably did it this way.

The pretty pink lining.
You can see ripples in the bodice in the photo below. The water-resistant fabric didn't take well to interfacing. I decided to leave it but, might rip it out later in life. We'll see.
I top stitched over all the seams in hopes to keep the rain out.
Let it hang for 24 hrs.

Ooh la la, I love my lining.
Final Thoughts
I'm so happy with how my Little Red Raincoat turned out. It was such a fun sewing project. Thank you to the #JacketJanuary sewing group, you ladies rock! I can't wait to sew up a few more jackets and coats using The Princess Coat pattern from Charm Patterns. Gertie, you really outdid yourself with this beautiful pattern, as usual. If a hooded coat scares you, don't let it. The hood was the easiest part. It's a nice roomy size so my vintage-style hairdos will fit inside without getting messed up. Yay for that!
She gives quite a few sleeve choices. I want to make a mustard yellow coat next. I need some fun tweed to make a cropped jacket with a dare I say, faux fur collar! Perhaps some light pink boiled wool with a black fur collar too. Hmm...
I have no clue what to do with almost 4 extra yards of red rainwear fabric. Any ideas? Share them in the comments below, please. I need ideas. LOL
Scroll down to see more photos of my glorious coat without rain.
Thanks for following along with my coat journey. Now, if you could all send some rain my way so I can try it out, that'd be great.
Happy sewing,
Annette

Gertie Sews Vintage Casual (patterns from her book)
Gertie sews vintage casual book sewing patterns, tutorials, and reviews. Let’s make some vintage casual outfits. This is her best book if you’re into tops and bottoms more than over-the-top fancy dresses.
Do you have a fabric designer or pattern maker you simply adore? Maybe you have a few.
Gretchen Hirsch aka Gertie is one of my favorites.
There are quite a few fabric designers I'm obsessed with! Almost stalker-status. ;) I love almost every piece they design. And I must own it all. Insert evil laugh! Haha
As you might know, my favorite pattern designer is Gertie. She is a one-woman show and encouraged me (through her blog, TV, and books) to start sewing things for myself. GASP! Moms can sew for themselves? Yes, yes we can.
I was watching a PBS sewing show and she popped up. I can't remember what she shared on the show. But, I couldn't get past the fact that she didn't look like a typical sewing lady. She was young and had a fun style. I was instantly hooked! I found her blog, bought her books, and started a new sewing journey for myself. I still sew for my kids and shop, but I LOVE making things for myself more.
Gertie has her own pattern company, along with fabrics designed by her. She also has patterns with Butterick and Simplicity. Charms Patterns, Simplicity, and, Butterick patterns. I love it all!

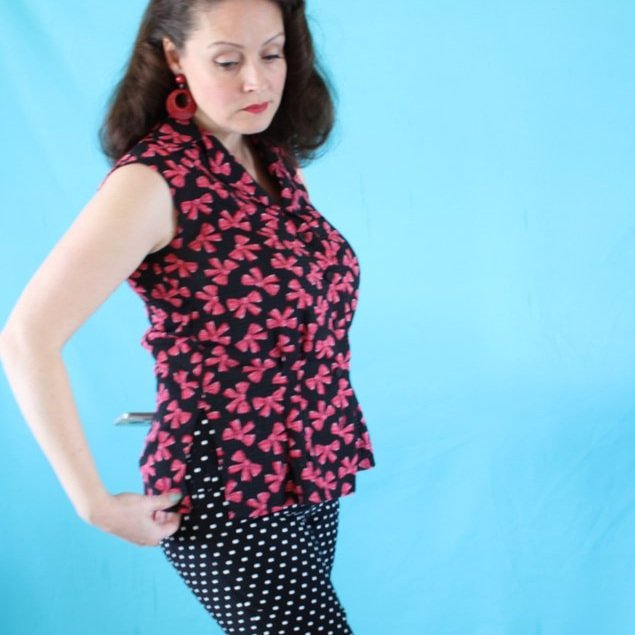
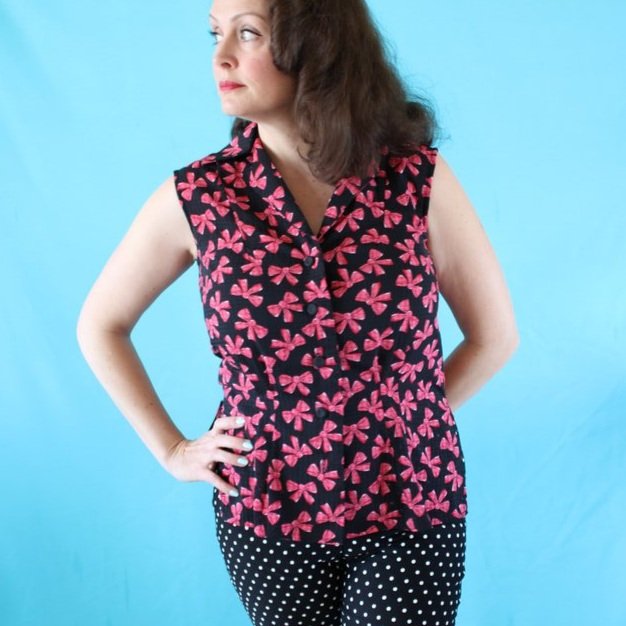
40s style Blouse from Gertie’s Book, Gertie Sews Vintage Casual.
40's Style Blouse
The top I'm wearing above is from the book, Gertie Sews Vintage Casual. It's the 40's-Style Blouse made using the Sleeveless Blouse variation, pg 134.
The fit is great in this top! Why haven't I made more? I don't know but, I need to.
It was an easy afternoon project. I made this top a few years ago. This was my first top with center buttons and a placket. As you can see, they should have been placed 1/2" closer to the edge.
Oh well. I still wear it all the time.
It's an easy style to wear over pants or tucked in. The darts are placed perfectly and make for a very flattering fit.
The fabric is semi-sheer in black with pink bows and was purchased from Joann Fabrics. It is from Gertie's fabric line.
Pattern changes
I increased the armscye area. I don't consider myself to have large arms, but her patterns are usually tight in my armpits, so I size up with sleeveless patterns.

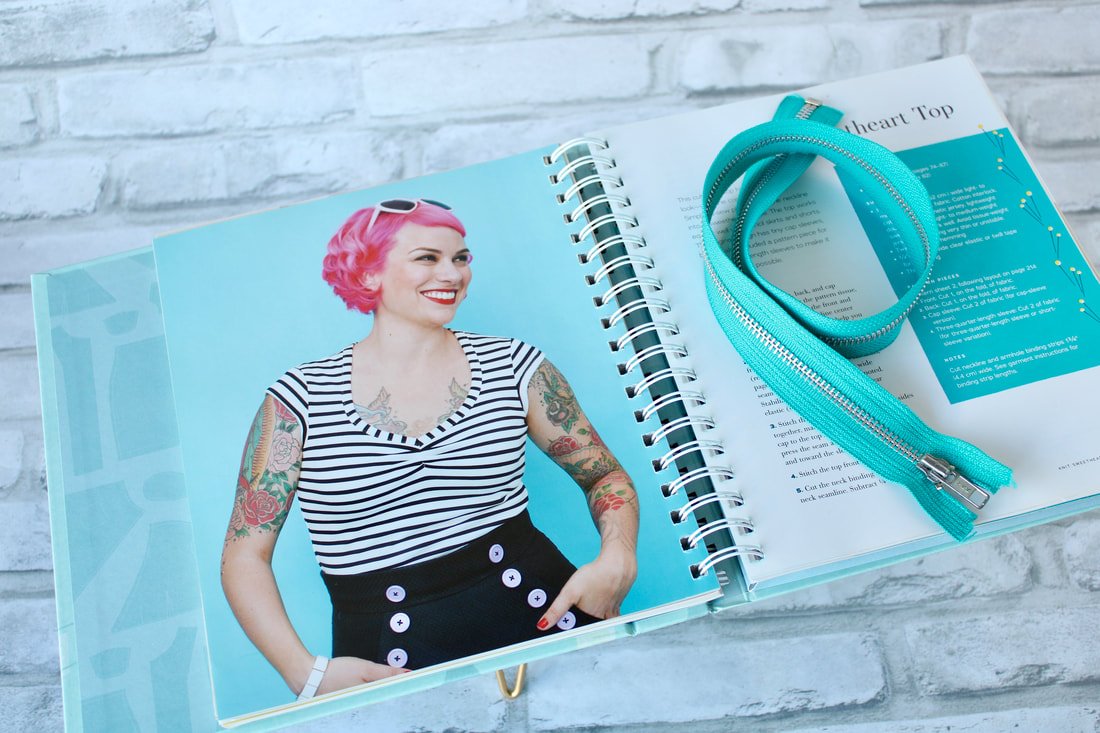
Knit sweetheart top
Next up is the Sweetheart Top, page 151.

I made 3 of these in different variations. I love how easy the pattern was to sew up, plus it's soft and cozy.
I love the sleeveless knit top however, it's tight in the armpits. I could go back and unpick the bias bindings and make the armscye bigger, or just live in pain. I choose pain! I should just make another one because I have more fabric. That sounds waaay easier than unpicking. Amiright?

Scoop neck sweater made with sweater knit fabric.

Another scoop neck, made with sweater knit that does not have a lot of stretch.
I cannot tell you enough how much I love this pattern. It's comfortable and easy to make. I made all 3 in an afternoon.
The Scoop Neck Sweater is a variation, on page 156.
I made the Scoop Neck Sweater in a black sweater knit with fun doo-doo balls all over it. The fabric I chose didn't have as much stretch in it, as it should have, but I made it work. ;) I wear the black sweater top a lot during winter.
The Puff Sleeve Sweater is another variation, on page 158.
I made this version in a tissue-weight leopard sweater knit. I ordered the fabric online and had other plans for it. But, it was too flimsy for what I bought it for, so it got stashed away. The thin knit worked pretty well for this pattern. I would want something with more stability next time, but it works and I wear it often. Win-win.
Cigarette Pants
Onto a pants pattern. These were easy to sew. But, I don't usually have fitting issues with pants. I have a short torso and narrow hips/ booty.
I made the Pedal Pusher variation, on page 166.
I made a muslin first, just to be safe. They are form-fitting and very flattering. They give me curves. Yay! The instructions were a little confusing when it came to the pockets, but I figured them out and forged onward.
I did end up splitting the crotch seam at one point while wearing them, AHHH!! Came home and stitched over that seam multiple times. Yikes! Nobody wants a popped seam, especially there!

Black and white polka dot pedal pushers, yes please!
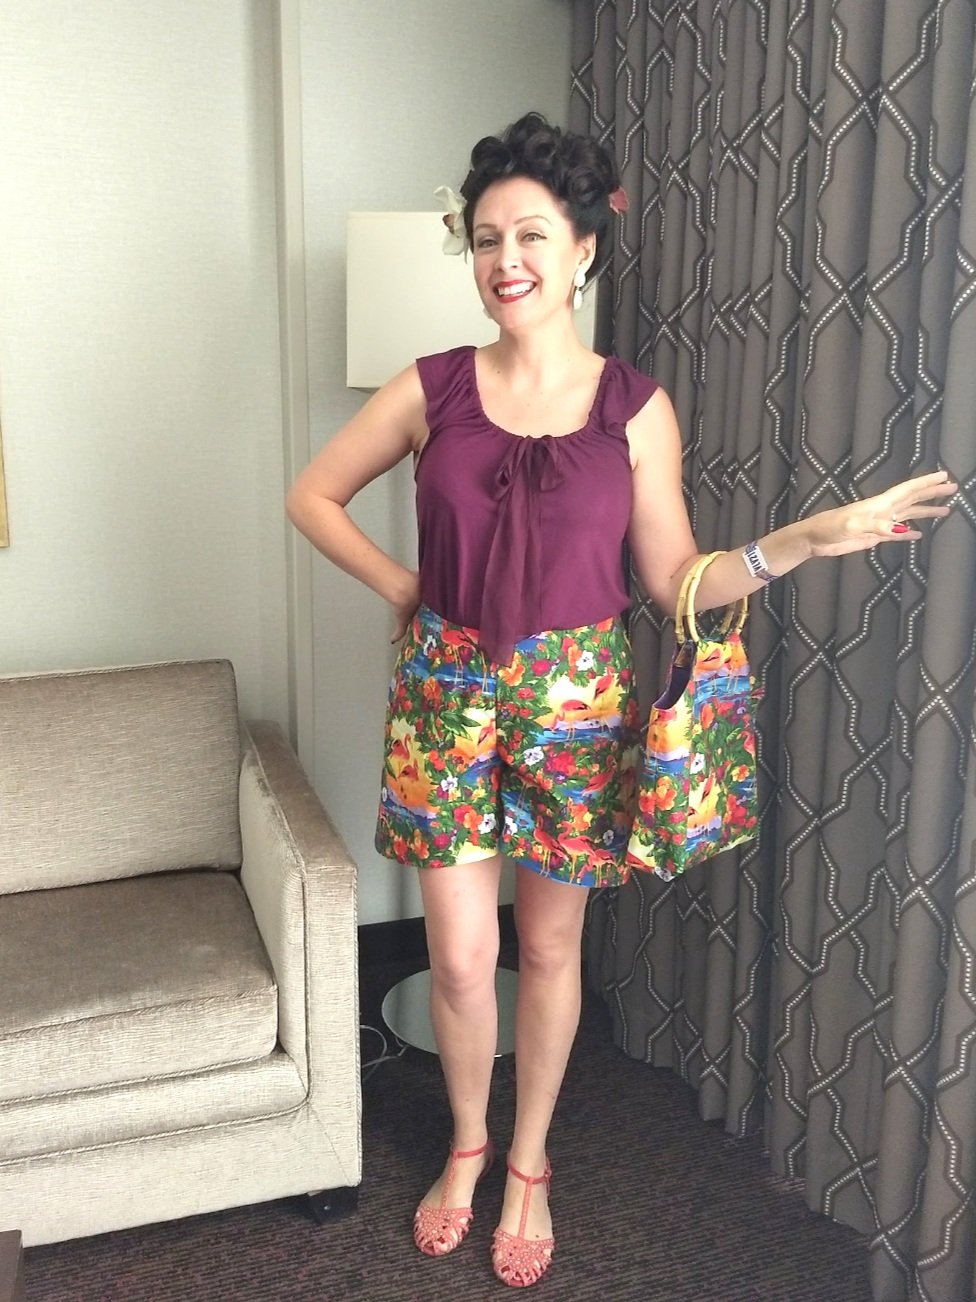
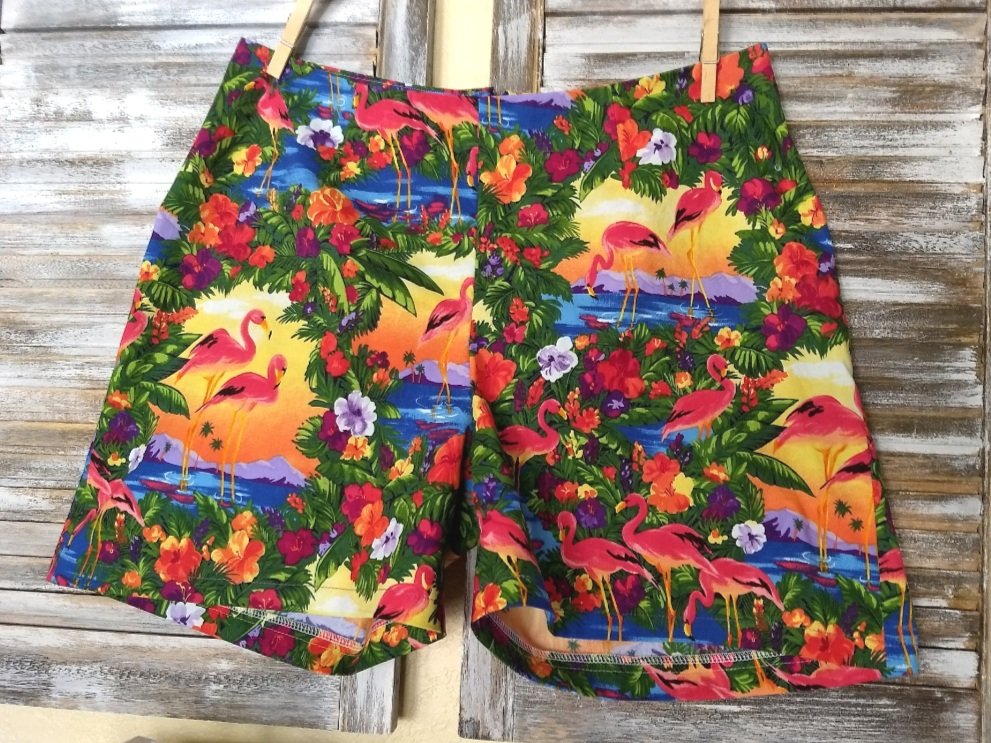
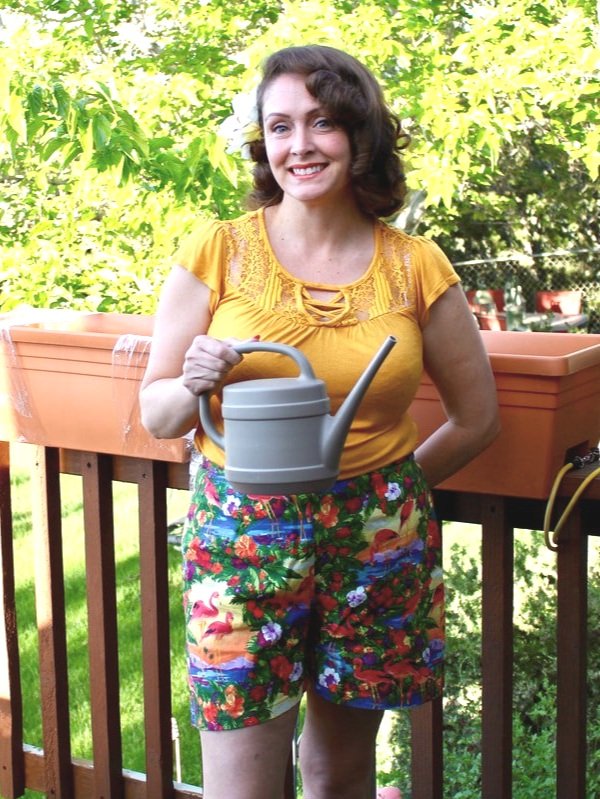
I also made the Flared Shorts Variation, on page 167. They are my favorite, can you tell?
I have a few pairs of these shorts and love the style and fit.
The flamingo pair has a tiki vibe and I didn't sew pockets in them. I regret that, of course. I made these to go on vacation, so I skipped the pockets. Don't skip the pockets. Haha
I made a red and white polka dot pair with pockets. I love these but don't reach for them as often. I usually pair the shorts with a black top and rock the Mickey Mouse look.
Well, that's it from this book. Do you have this book or any of her books? I reach for this book more than her others. I like a casual vintage style for every day.
Have you made any of these patterns? Or do you want to? Please share in the comments below.
XO,
Annette