
Pattern Reviews, Sewing Hacks, Tips & Free Patterns
The Sewing Blog

Sew a Circle-Shaped Bag
Sew a circle shape bag for fall or any other season. You could even turn this into a hip or sling bag. DIY bag making project.

The air is crisp and the leaves are sprinkling the ground as I type. Apple picking season is among us. I tried to hold on to summer but, there's no escaping it. Fall is here. Yay! I am ready, bring on my favorite season.
My creative side has been lacking lately so, I wanted to try something new. Usually, I only share patterns that I love or have created myself. But, I wanted to shake things up around here. So, I'm sharing one of my sewing fails. Yes, a fail. A major sewing fail. Face-palm.
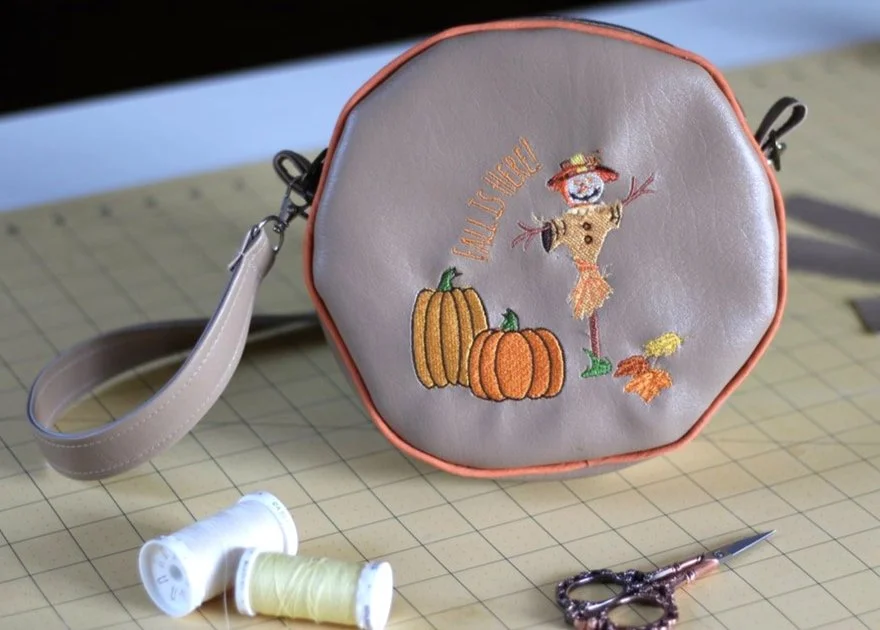
Here's the circle bag.

I wanted to try my hand at something new for the upcoming season. I saw a circle bag in a shop and knew I wanted to make one. I had light brown vinyl and planned on using it for a cute Autumnal bag. After scouring the interwebs for a free pattern, I settled on what I thought was a good one. Welp, the pattern was not great. I don't want to throw anyone under the bus so, I'm not saying where I got the pattern. But it was "meh" at best.
I knew from the beginning this was going to be an experiment. Yay for experiments! I created a fall-themed embroidery file to place on the front, just in case the purse turned out cute. I didn't want a boring brown circle bag.
The embroidery design has leaves, pumpkins, and a scarecrow. Fun! Although, the scarecrow was a little wonky.... don't look too close. ;)
Following the instructions, I gathered everything that was needed and cut out the pieces. I embroidered on the front circle only, that's the only area everyone will see. I used mismatched hardware for the strap (it's what I had on hand) and I used a brown zipper. Fall bag, here I come!

The seam ripper was using a lot. I horribly sewed a piece of fabric to cover the embroidery. Next time, I’ll just leave it alone.
Putting The Purse Together
The pattern didn't call for a stabilizer, which I thought was odd. But, hey, I've never made a circle bag before so, I forged on.
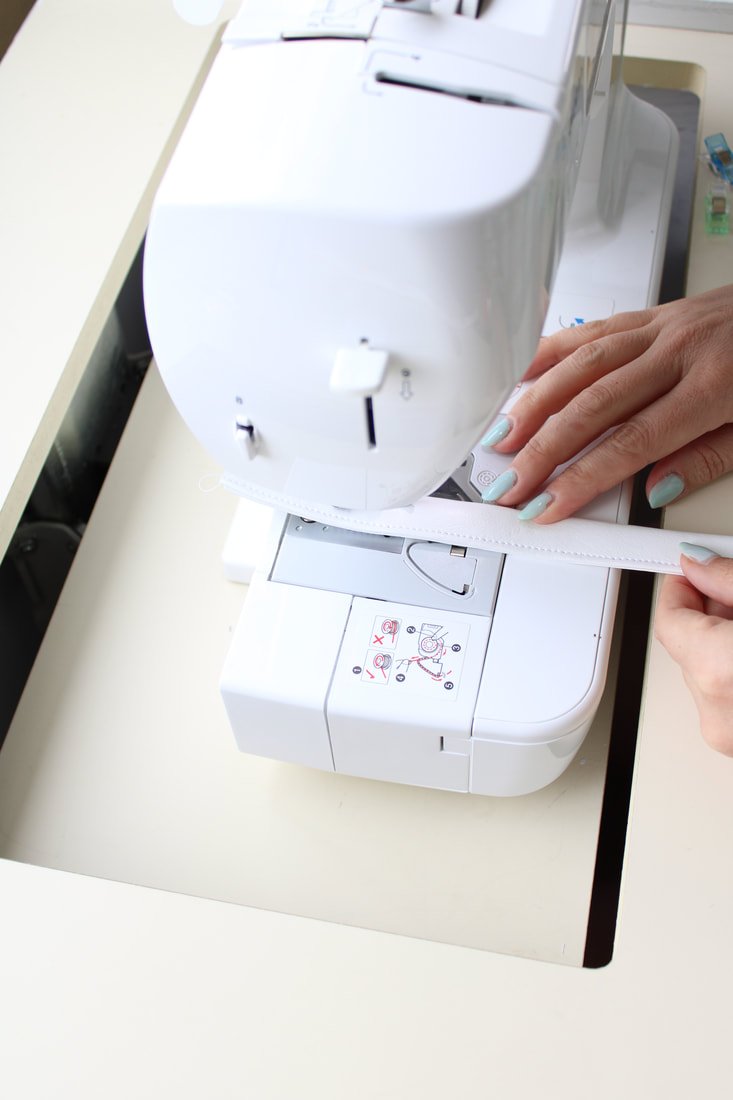
You start with the zipper and long fabric strips that get sewn to the zipper tape. I didn't get a photo of this part.
Then, you take the bottom bag piece and sew it to the zipper at the short ends. This makes a long loop that connects at the zipper ends.
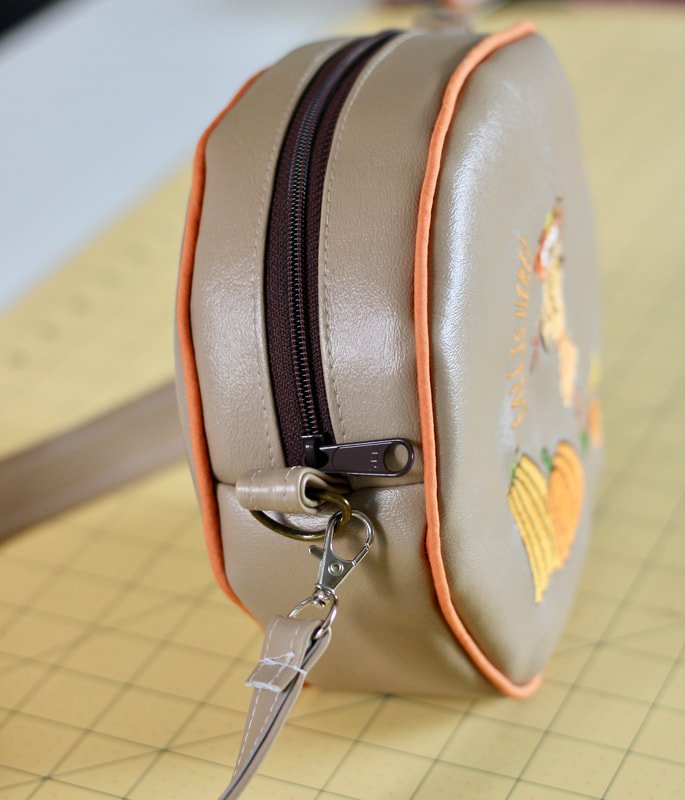
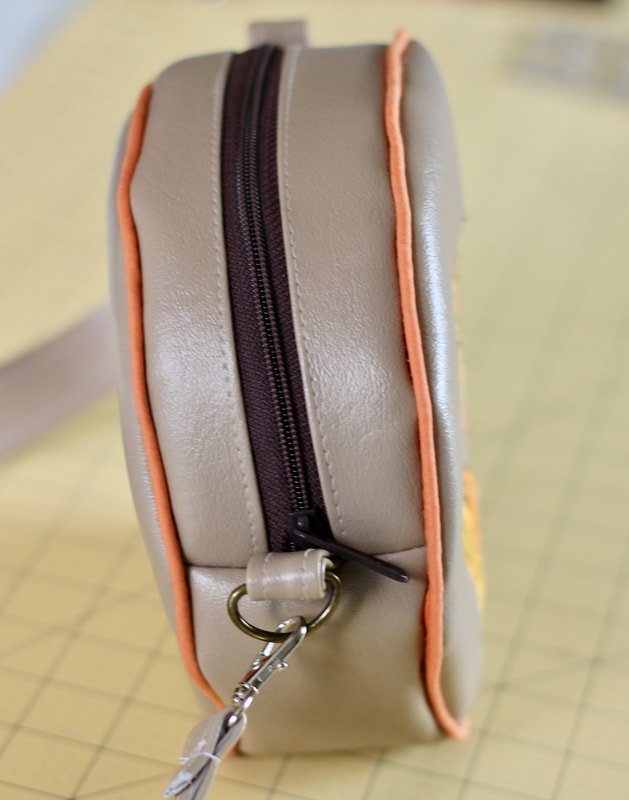
You're then going to take a circle piece and clip the heck out of it, to your piping. I just used pre-made piping from the craft store. You can find it next to the bias tape. The instructions didn't include piping but, long story short... you need piping in a circle bag. ;)

I used my zipper foot to sew closely around the perimeter of the bag. You have to work with the vinyl during this part. I found it easier to use tons of clips and pull as you go. I didn't use as many clips during the first round and it was more fiddly to work with.

Using the zipper foot helped to get closer to the piping.

Clip the edges.
After both circles are sewn on, turn the bag out and cry. Ask yourself why it isn't round and perfect like the picture. Retrace your steps and check if you missed something. Nope. You did it all. You followed the directions perfectly. The bag just wants to be rude and un-round. Major face-palm moment.
Carry on to the long shoulder strap anyway. Attach the hardware and add the strap. This part is easy. And, you're done!
It was an easy bag to make, but so disheartening. Why isn't it a perfectly round shape? I think it's because this is a 2020 bag. That's the only logical explanation. This bag, along with all of 2020, stinks. LOL
So, what was learned from this experience?
Piping is your friend and foam interfacing should have been used. Vinyl and faux leather are stiff, but they benefit from something added.
I will use this bag throughout the Fall season because it's cute. It's not perfect by any means and I'm somewhat embarrassed to show it to you. But, as sewists, we know there are wins and sewing fails.
The circle bag has not defeated me though. I've accepted the challenge and will conquer this bag! Stay tuned for a pattern that will be free to you and will work! I'm creating and experimenting as you read this.
Have you ever made a circle bag? Was it amazing and round? Or whackadoo and rude like mine?
Please, share any tips, tricks, or fails in the comment section. We're all in this together! LOL
If you'd like a quick pattern that is a no-fail one, click here. You're welcome.
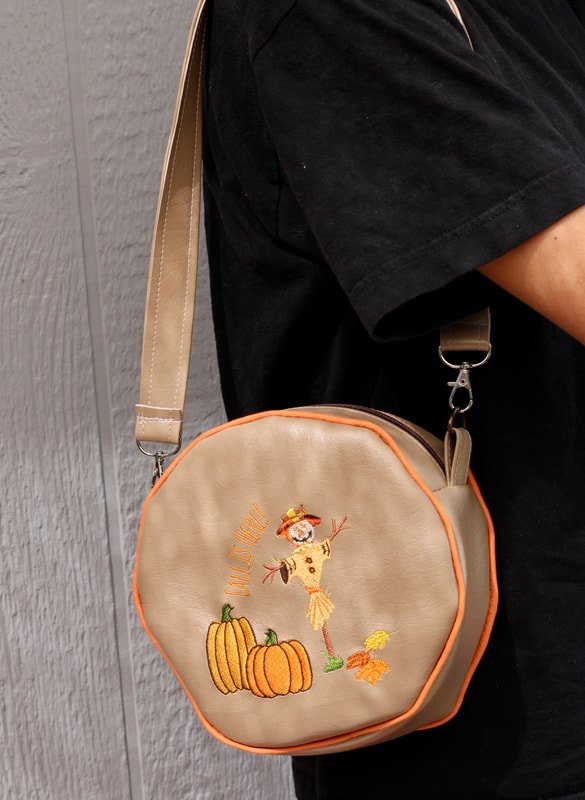
Ugly or not, I’ll still use the bag. Maybe.
Happy fall sewing ya’ll,
Annette

How to Sew a Custom Handbag
Sew a custom sized bag using your own dimensions. It’s sew easy!

I made this cute handbag as a fun little distraction during quarantine. I planned on using it sooner than later, but we all know how that turned out. Ha! Days turned into weeks and it's all a blur from there.
I had some marine vinyl leftover from another project and I came up with this little purse.
Want to make a cute little handbag for your next shopping trip?
Here's what you need:
1/2 yard of marine vinyl or other faux leather-type fabric
1/2 yard of cotton fabric for lining
Thread
Sewing machine and notions
Microtex needle
Scrap paper for making a pattern
Ruler and pencil
Interfacing if needed ( I didn't use any. Gasp, I know)
Purse feet (optional)

Cut 2 outer, 2 inner, 2 interfacing pieces.
Decide on your sizing
Start out by ironing any wrinkles in your lining fabric.
Grab some paper or cardstock, freezer paper is my go-to because it's inexpensive and wide.
Figure out how big you want your bag to be.
My pattern size is 9" tall x 14" wide.
Mark 2" square cutouts on the bottom of the pattern. Cut out the paper pattern.

Once your pattern is made and cut out, it's time to trace onto the fabric. Cut out 2 pieces of vinyl and 2 pieces of lining fabric. Iron on or sew in the interfacing to the lining.
Next, cut 2 strips of the marine vinyl 3" wide by 18" long. These will be your purse straps.
If you'd like to add a pocket, make that now. Decide on the size you want and cut a piece of fabric twice as long. You will fold the fabric in half RTS (right sides together) and sew all around leaving a 3" gap for turning out.

Press the pocket flat after you turn it out. I stuck my phone on top to figure out how wide I wanted my pocket widths to be. They aren't exactly the same width. Draw a line where you want the pockets to separate with chalk or a water-soluble pen.
Pin in place and stitch onto one lining piece. Sew in a "U" shape, do not sew the top you want it to stay open so your items can go inside. Reinforce the openings by backstitching a few times. Press.

Pin sides and bottoms together. Leaving tops open.
Using clips, clip the vinyl pieces, right sides together and pin the lining pieces RST. Sew the sides and bottoms using 1/2" seam allowance. Be sure to leave a 3" gap in the lining for turning out. Press the lining seams open. You shouldn't iron the vinyl, it may melt. Just finger-press those seams. Set both pieces aside.
Let's make the handles
Grab the 2 long strips of vinyl and all your clips. You do not want to use pins because they create permanent holes. Yikes!!
If you don't have fabric clips, use double-sided tape, chip clips, hair clips, your child’s teeth, or anything you think that will be strong enough.
Fold in half and carefully fold those sides into the middle. It takes some finagling, but you got this! Don't let the vinyl beat you. LOL!!
Clip along the end once you have it molded into place.
Sew the open edge first, then the folded edge.
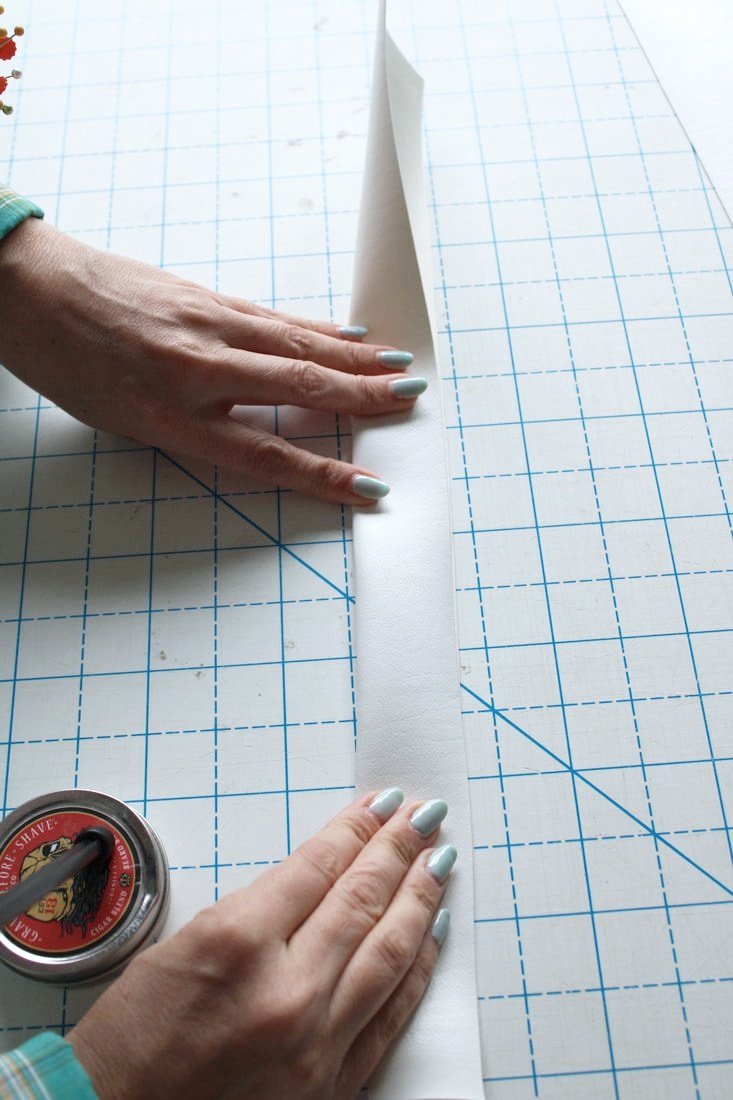
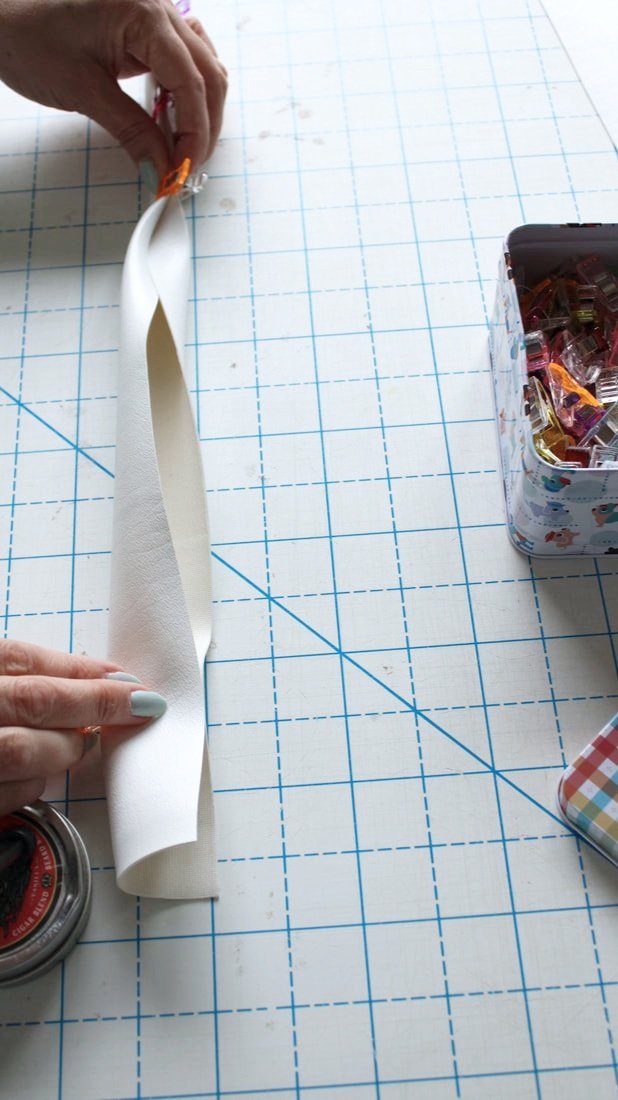
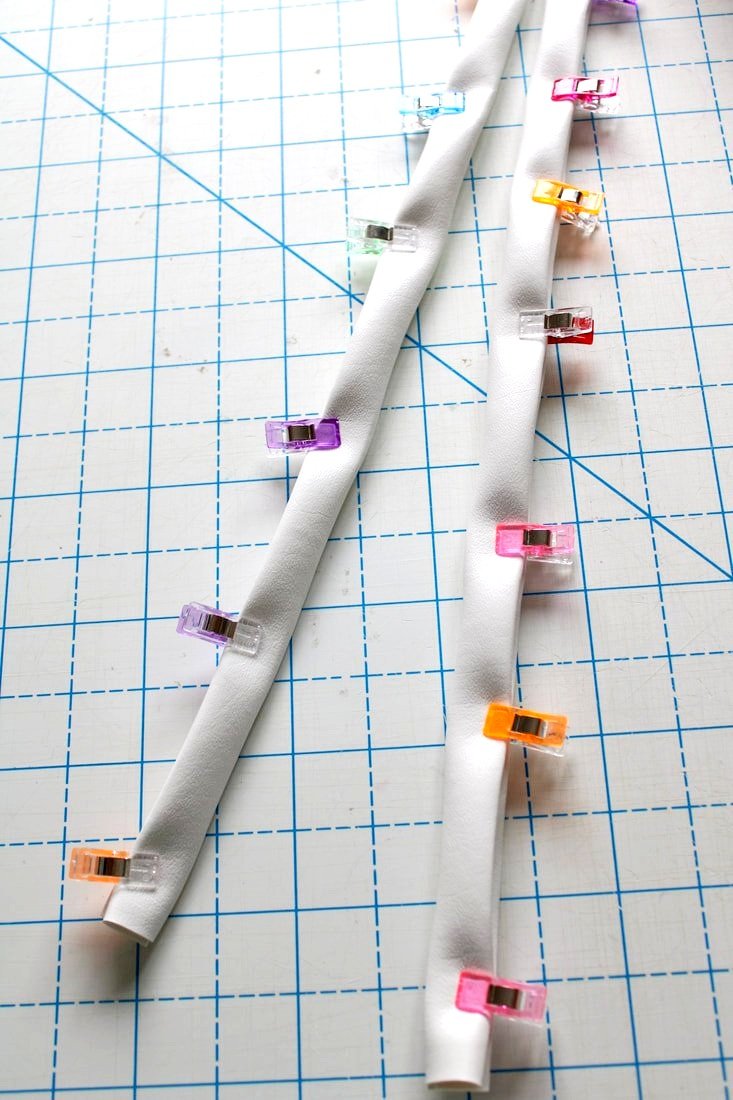
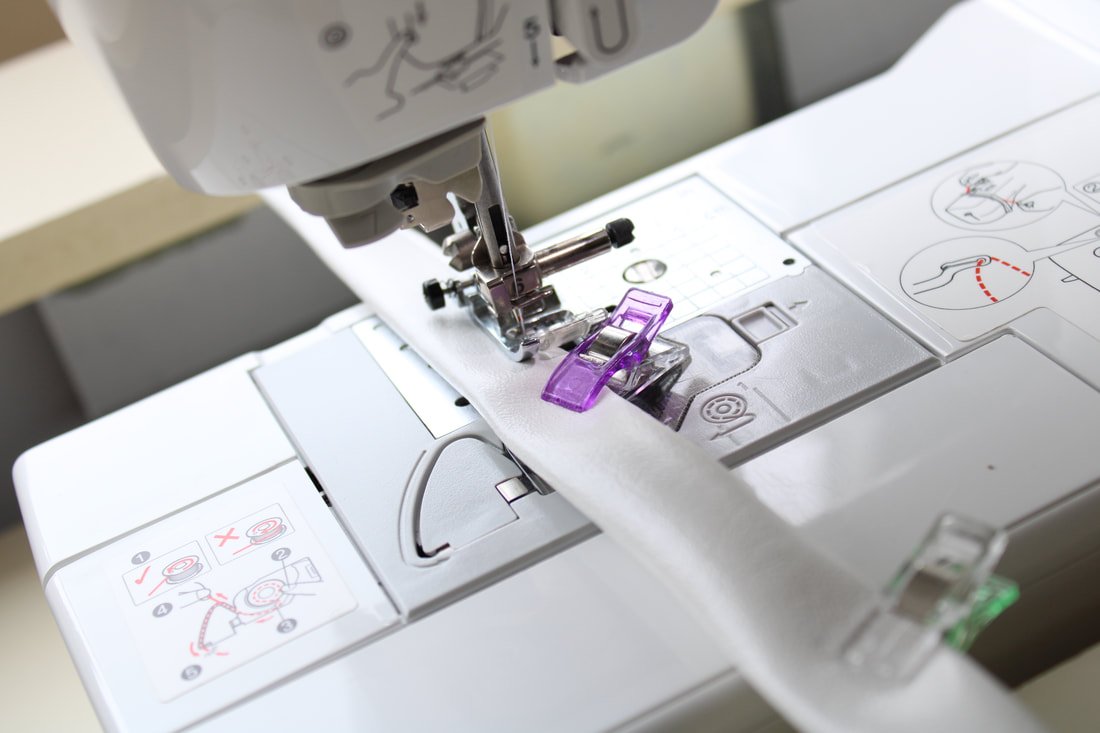

Scroll through the photos to see how to create your handles. I use this method for all of my purse handles.
Grab the purse's outer and inner pieces, you're going to box the corners before sewing everything together.
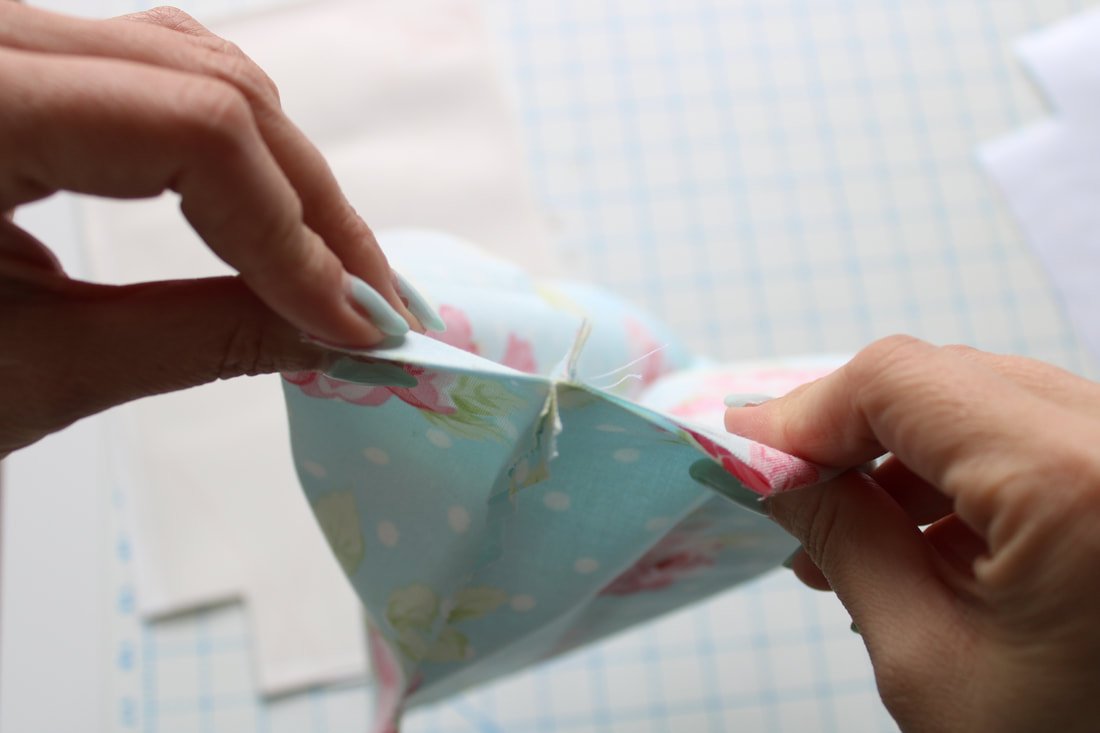
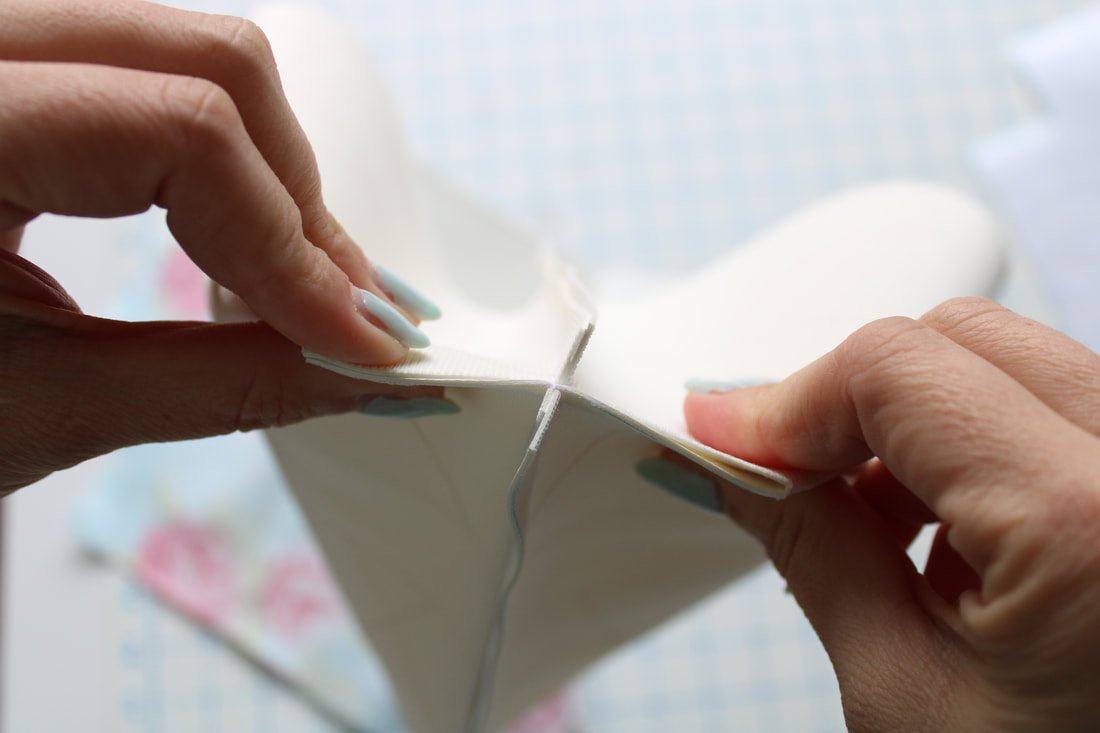
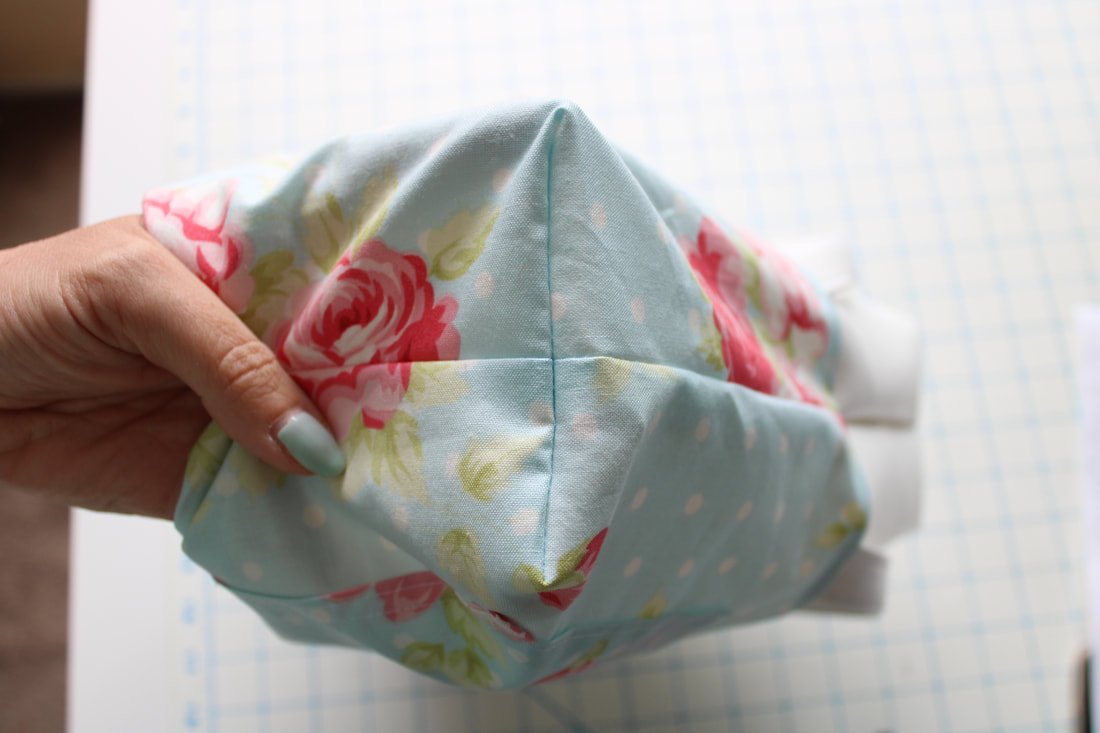

Boxing the corners is easy, pinch the seams together and sew 1/2" away from the edge. Do this with both lining and outer bag corners.
Your seams and corners should match nicely like the photos above. If they don't match perfectly, no biggie. You'll be the only one who knows and I'm not telling anyone. ;)
*If you have a set of purse feet lying around, you can add those following the feet instructions. I didn't have any, so I didn’t add feet to this purse. They do make a nice addition though. Next time.
Next, you're going to stitch the handles to the bag to keep them in place. Mark how far you want them from the edge. I positioned mine about 2" from the side seams. Make sure they are flipped the correct way and not twisted.
Base stitch them to the bag with a 1/4" seam. This is just to keep them from moving while you sew the bag pieces together.

After the handles are stitched in place, grab the lining piece. Keep the outer bag piece flipped inside out. Turn the lining inside out as well. Both pieces should be facing right sides together. This is important, check twice. ;) You should see the ugly sides of the fabric for both pieces.
Using clips, attach the lining to the outer matching the side seams.
Sew around the top with 1/2" seam.

After you sew the lining to the outer, reach inside and flip the bag out. This takes a little more patience because the vinyl doesn't want to give. Just tell it who's boss and that it'll be happier once it comes to the bright side. It works, I promise!!


Bagging Out
Find the lining hole.
Reach through the hole and pull the bag through the lining.
Pull. Yank, lightly. Pull some more to get the vinyl out.
After you pull out the lining, push it back in and make sure everything fits nicely. Poke out all the corners.
Look over the handbag and nothing is wonky, and there aren’t any seams with holes, pull the lining out and sew the opening closed. You can do this by hand or machine.

Sew the opening closed.
Stuff the lining back into the bag, topstitch around the whole top, and you're done! Yay!!

I decided to keep the lining showing for an added pop. However, the lining doesn't sit in the bag perfectly after doing this. If you decide you like this look, add 1" in length to your lining pieces. This was a spur-of-the-moment sewing project which are my favorite because I can experiment. I like the bag size for a day out. However, I would make it 2-3" deeper if I used it as an everyday purse.
Oh, and I also added a little tie to the bag as well. If you have enough extra fabric, you can make one too. The white vinyl was just too plain and boring for my taste.

Cut a strip about 14" long by 5" wide. Fold in half and cut the short ends at an angle, if you'd like. Stitch the open ends, leaving a 2" gap for turning.
Clip your corners, turn out, and press. Stitch the opening closed and tie it onto your bag handle. Now you have a cute accent piece on your purse.

Where are you going to strut your new bag first? The mailbox? The grocery store? The living room? The possibilities are endless. Haha!
Oh, quarantine...
I think I want to try making this bag again but with darker vinyl. The white is fine because it'll wipe clean. But, I'm thinking bright yellow or blue for summer would be fun. Let me know if you make this bag. Remember, you can alter the sizing to your liking- make it taller, wider, shorter, etc. Sewing is the best, isn't it?
Thanks for sticking around for this tutorial!
Virtual high fives and hugs,
Annette
