
Pattern Reviews, Sewing Hacks, Tips & Free Patterns
The Sewing Blog

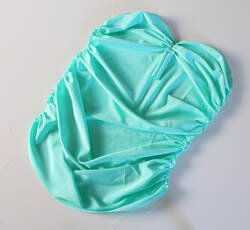
Sewing the Bombshell Swimsuit
Sew a 1950s style bombshell swimsuit. It’s easier than you’d think. Closet Core sewing pattern Bombshell swimsuit is beginner-friendly. Let the inner pinup out with this bathing suit.

Love vintage bathing suits but, not the authentic vintage price-tag? Grab this pattern and some swimwear fabric to create a OOAK vintage swimsuit just for you. It's not technically vintage but, it is vintage style which is the next best thing. Amiright?
We've spent plenty of time in our backyard this summer. Sprinklers, popsicles, and slip n slides, takin' it back old school style.
This month started with me participating in the #BRAugust challenge, hosted by Ying from Tailor Made Shop. She has a website, a blog, and an Etsy shop. I purchased bra making kits from her in the past. She is a sewist who creates and sells beautiful things for the lingerie sewing world. Yay for bra making!! Although, for the challenge, I did not make a bra. I opted to make a swimsuit. I've never made a swimsuit and I needed a new challenge.
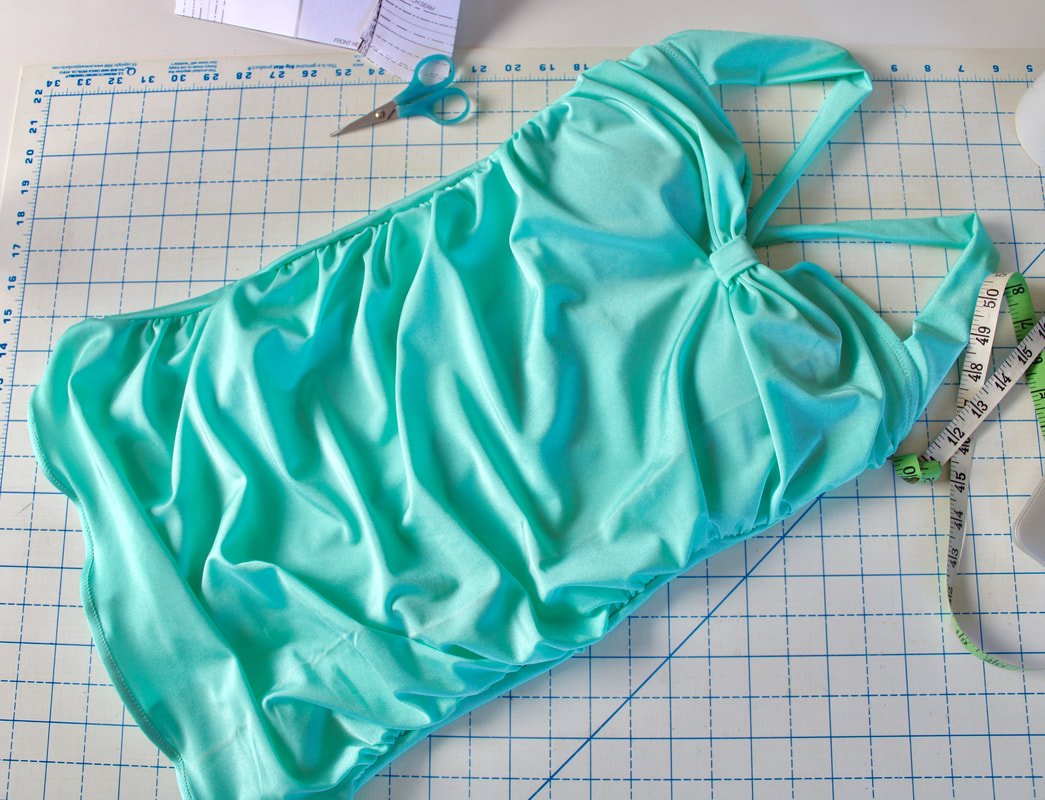
PDF pattern online. The swimsuit comes in a PDF only. I love the style and have several RTW swimsuits that look the same as View A. I had some mint green lycra and knew I wanted to use it for my new swimsuit. Minty green 50's Bombshell, yes, please!

Okay, so you know the PDF drill: print out the pattern, tape everything together like a madwoman, and cut, cut, cut. Decide on the size you want to cut out first. I went with a size 12 and I had just enough fabric. The measurements were spot on with my body, no need for grading. Yay!
IKEA was sold out of desk legs but, I purchased the tabletops anyway. So, my sewing space was a hot mess. Just ignore all of the scenery behind me in the photo.
Oh, do you see the top I'm wearing? You can read all about that here.
Follow along as I sew a 50s-style swimsuit.

Layout your fabric and place your pattern pieces on top. Be sure to follow the distance of the greatest stretch arrows or DOGS. I cut some pieces with scissors but found the rotary cutter and mat were easier. The fabric is slippery, so choose your favorite method.
I only had one yard of 60" wide fabric so, I couldn't do the ruched backside. I had to make it work with the amount I had. #sewingwin
You'll have to ignore all the wrinkles in every picture. I didn't press them out and I apologize. I'm usually a stickler for getting out the wrinkles. If you squint, you might not be able to see the wrinkles.
Materials Needed
Stretch needles (Yes, you need these)
Polyester thread
Rubber or swimwear elastic- you cannot use regular cotton elastic. It will die in the salt and chlorine water.
Swimwear fabric which is a blend of lycra and spandex. I buy my knits online from Girlcharlee.com. They have a swimwear section coming soon.
Lining fabric (must be swimwear lining)
Set of foam cups (optional)
A sewing machine that can sew zigzag stitches
Serger (optional)
Rotary cutter and mat, scissors, measuring tape, ruler, and all your usual sewing notions
Water-soluble pen
Clips or ballpoint pins for pinning layers together
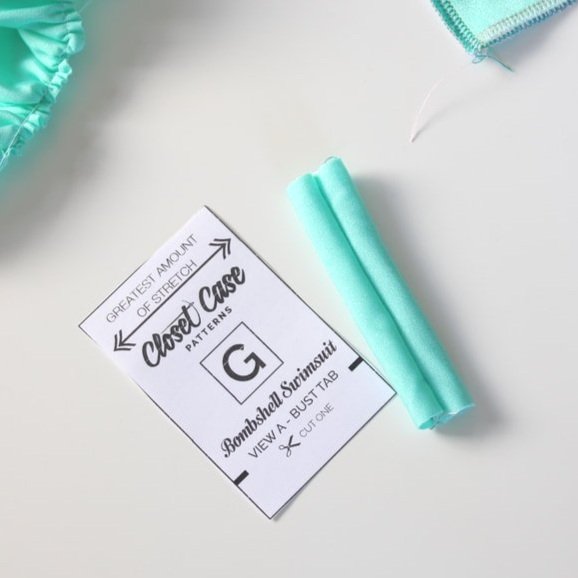
PDF pattern of the Bombshell bathing suit
Make sure you practice stitching on your serger and or sewing machine first. My differential feed was on, on my serger. Below is a picture of the serger settings I used. I have a Brother Lock 1143DW which I believe is similar to the 1034D. Even if you have this machine, test the stitch on a swatch piece first. Every machine is different. I mainly used my serger but did have to use the sewing machine to make gathering stitches, basting stitches, and to sew on the elastic.

These were my serger settings I used. I’m not a professional, so here’s a photo. LOL
Settings I used to make the Bombshell swimsuit with my serger.
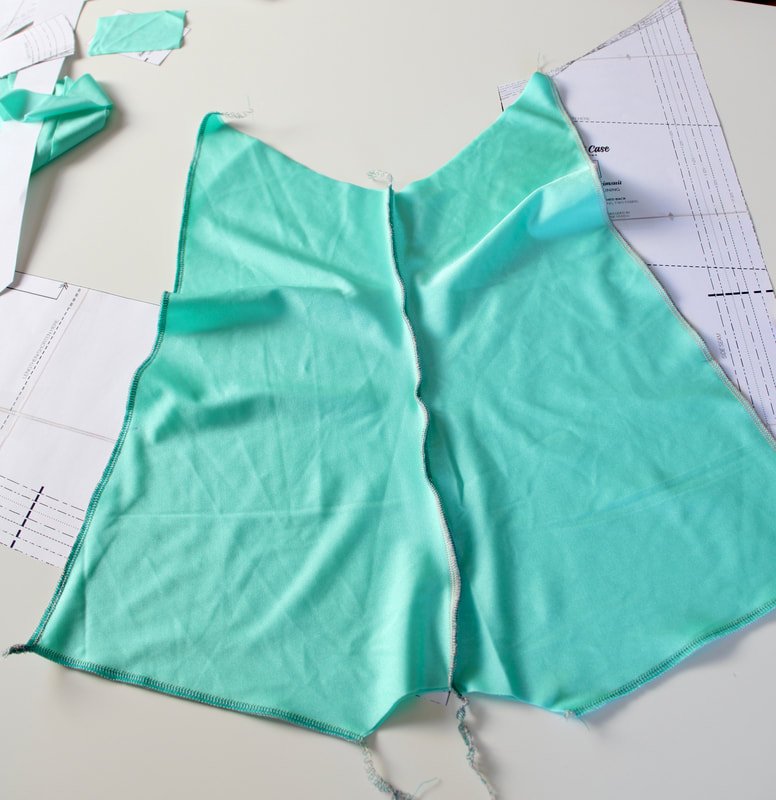
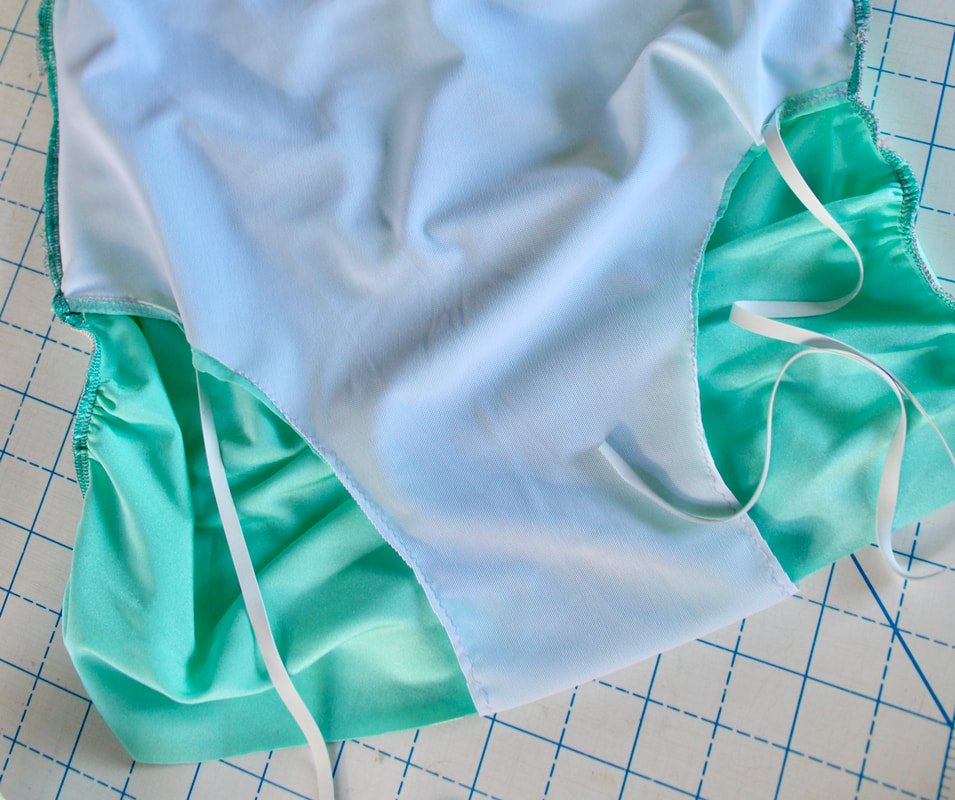
First, you need to make gathering stitches along the sides for the ruching. I opted for the non-ruched backside because I was limited on fabric. You need to make gathering stitches for the front knot area later on. When you do attach the tie knot, make sure you sew it onto the right side of the bathing suit. I did it on the wrong side the first time around and had to unpick it. Face-palm.
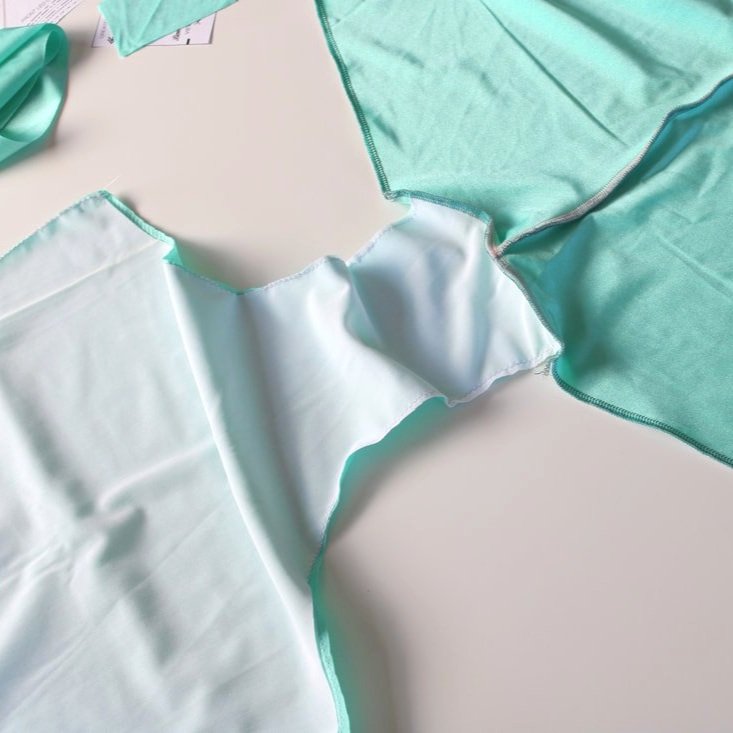
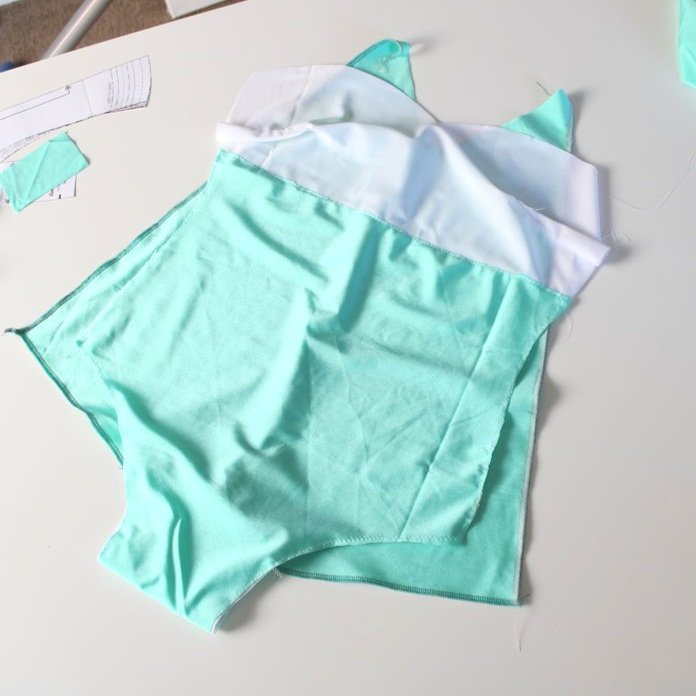
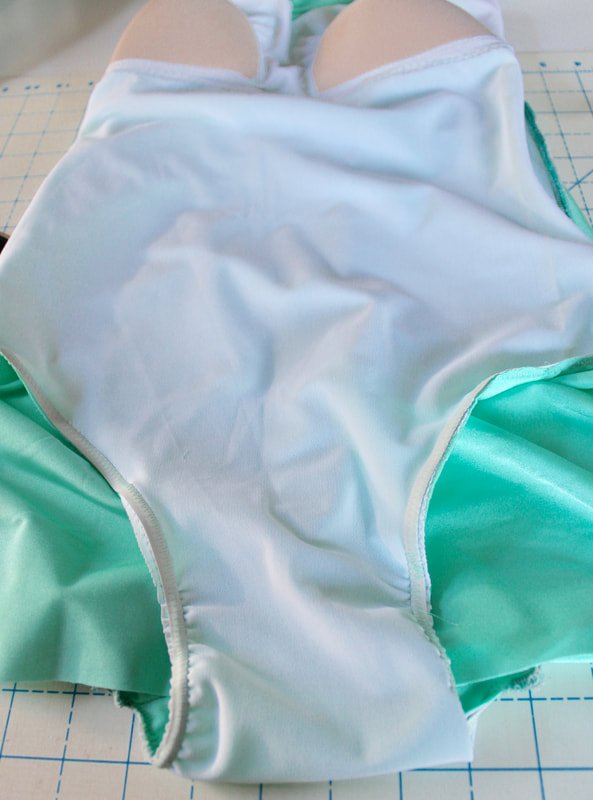
Once the front piece and back pieces are sewn together, set them aside.
You will then sew the lining to the front crotch piece. It starts to look more like a swimsuit at this point. Then, sew the 2 crotch pieces together per the instructions.
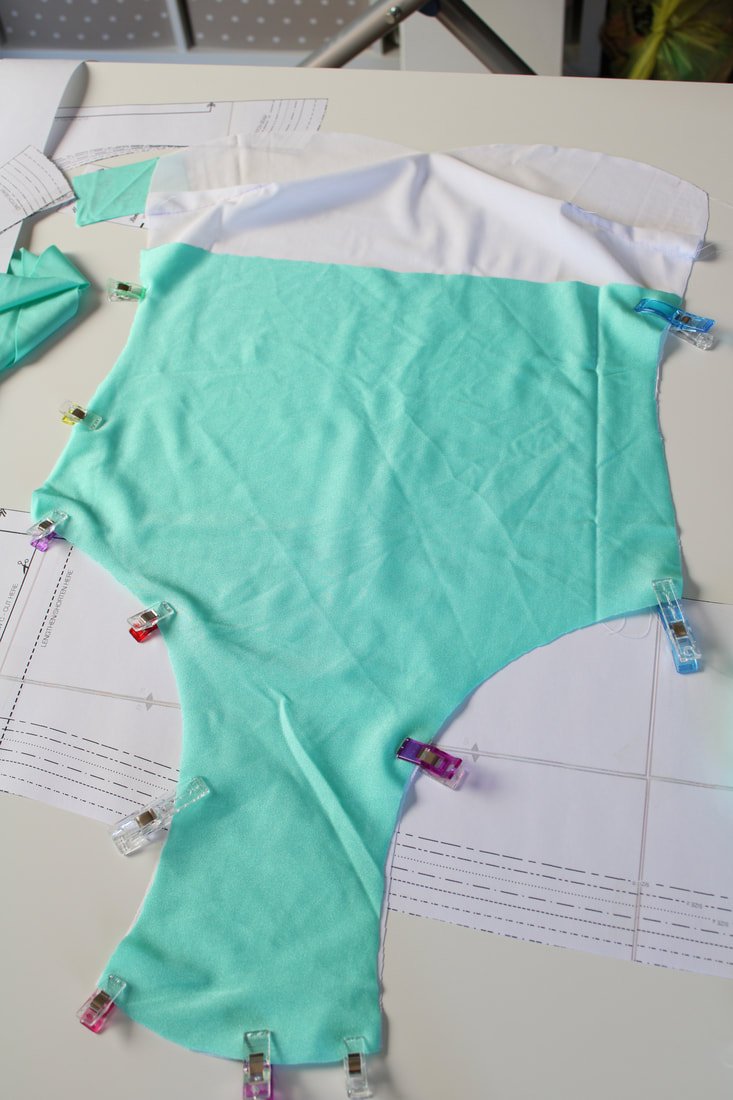
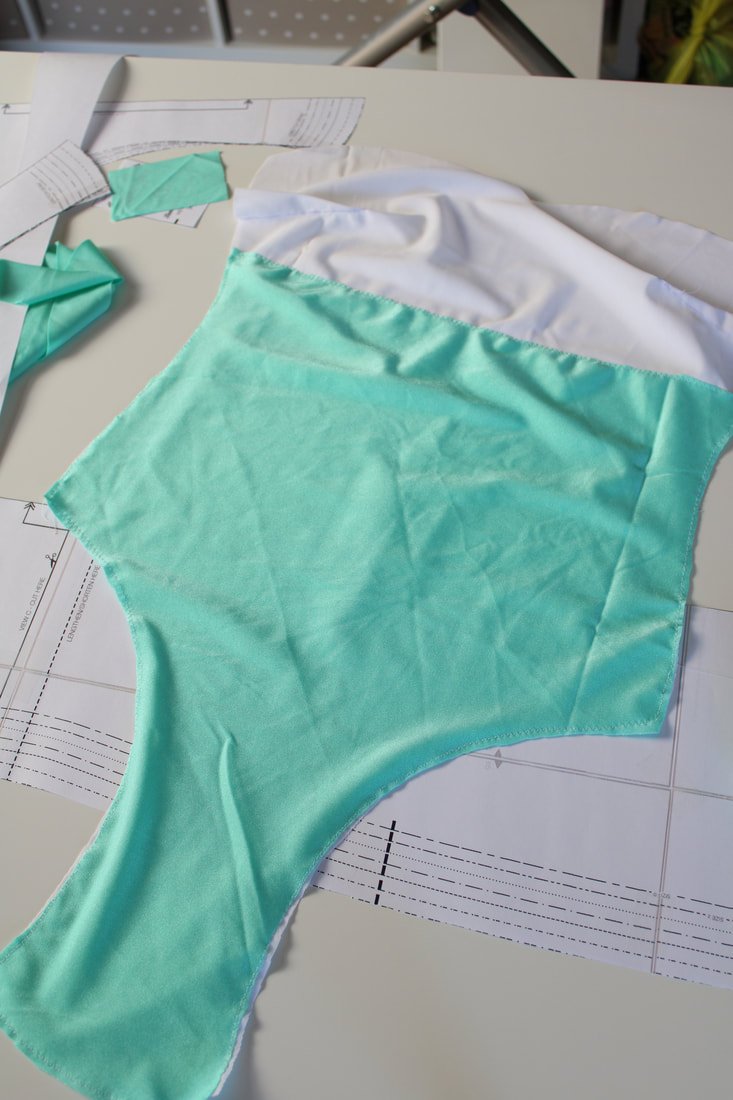
Clip lining to the crotch piece. Baste. Then zigzag around the whole area.
So far, so good... I ordered rubber elastic and foam cups from Etsy shops and had to wait for those to arrive.
So, I decided to jump ahead and sew what I could until I needed those pieces. I made the straps, darts, and tie knot.
Elastic Time
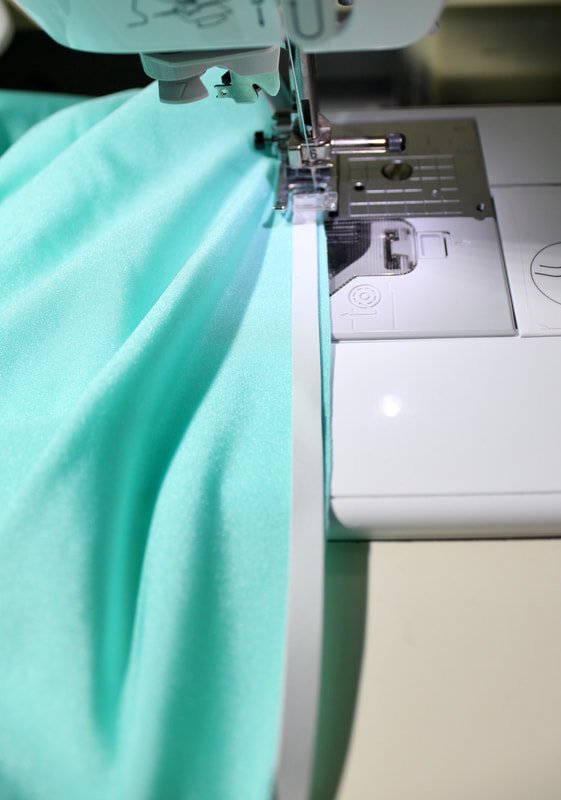
You put the elastic in the legs partially so that they will be enclosed neatly and discreetly. The recommended zigzag stitch is on the pattern. I tried sewing elastic with my serger once and that was a mess and a half! So, back to my sewing machine for this part.

Measure the leg opening, this will be the length of elastic you cut.

Sew the elastic onto the lining close, but not on the edge for 3". Then, fold over and top stitch an inch or two. Leave the elastic dangling for now. Ignore the purple thread I had in my bobbin. Oops!
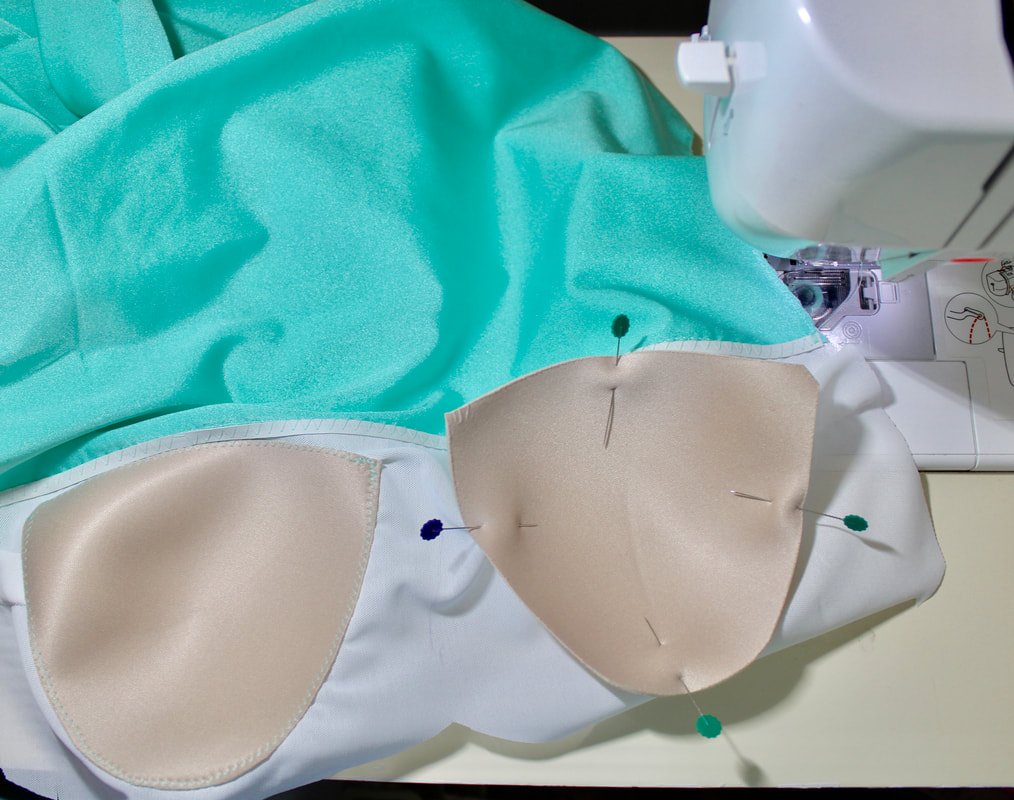
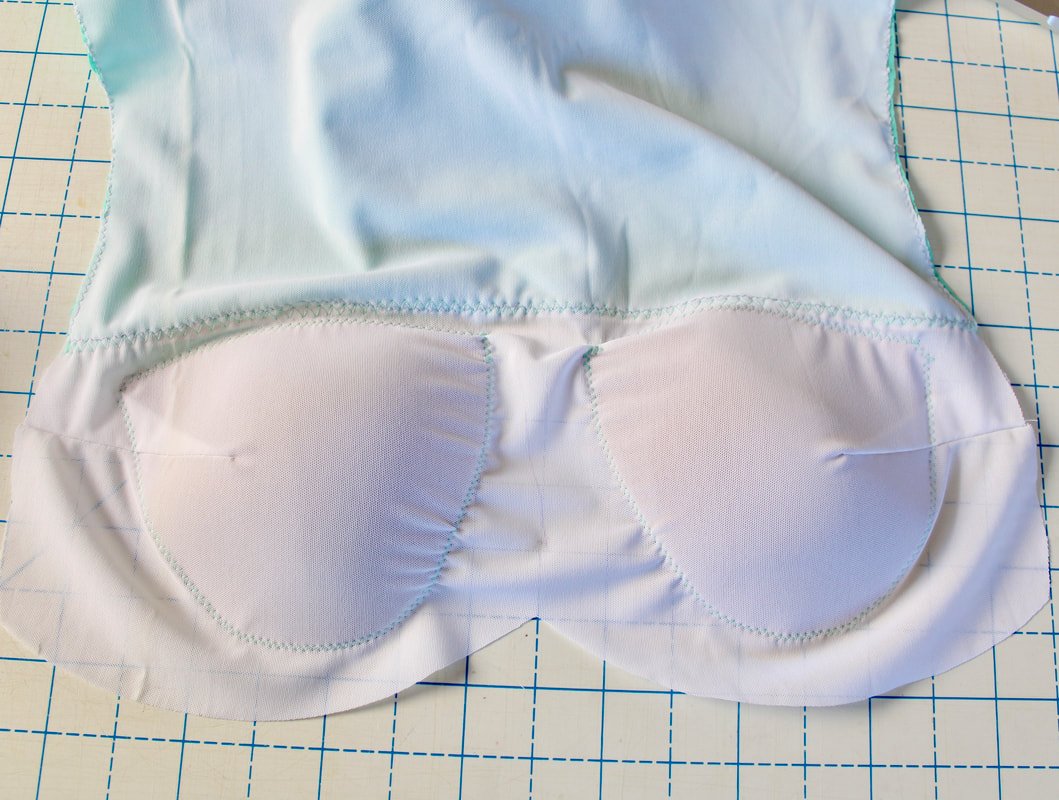
Sewing foam cups to your Swimwear
Here's where I went rogue:
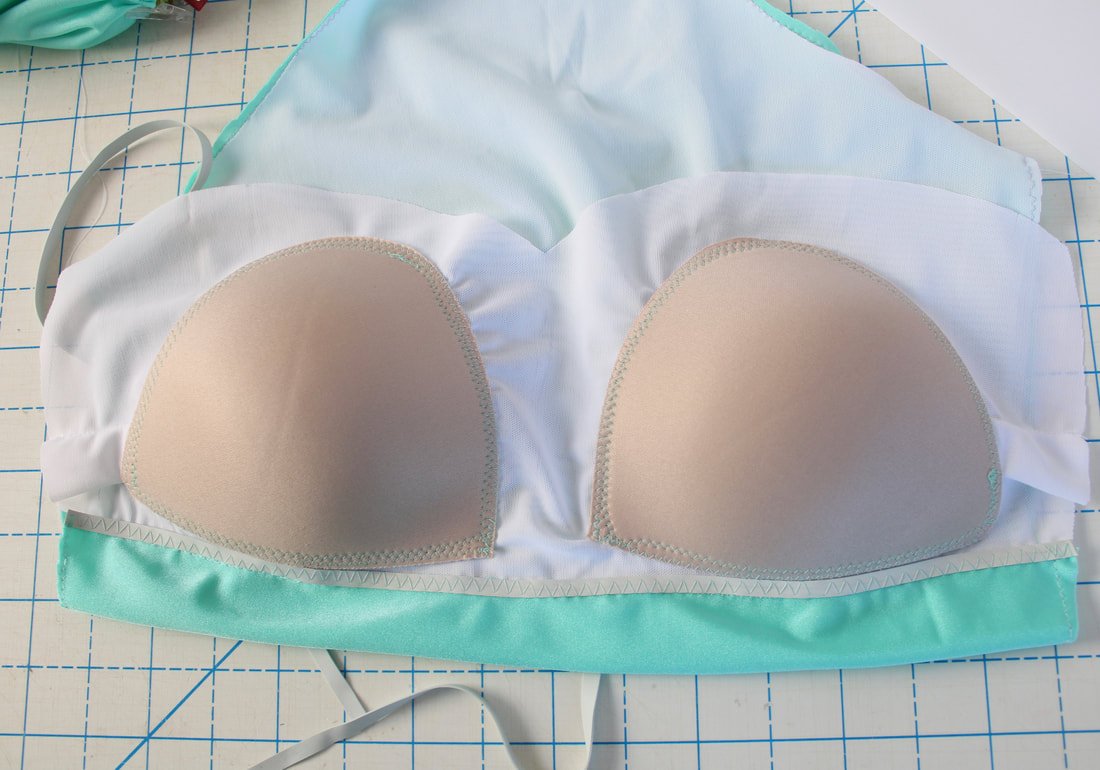
I attached a piece of elastic to form a shelf bra. Zigzag over the elastic the length of where you basted the lining to the front crotch piece.
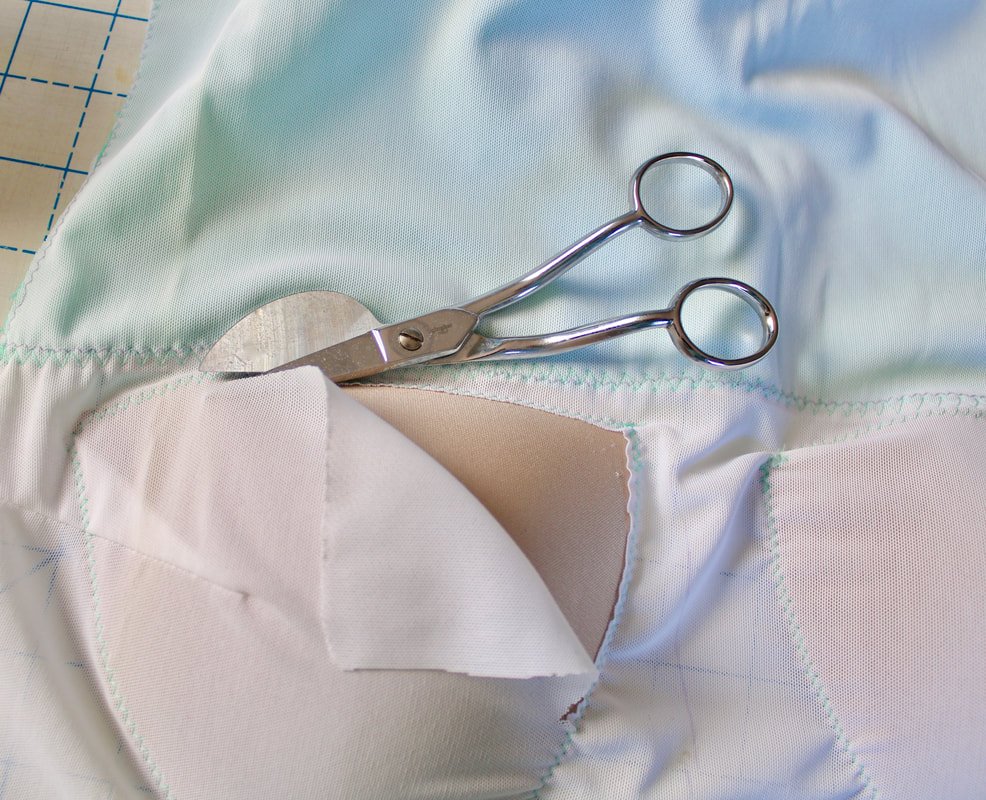
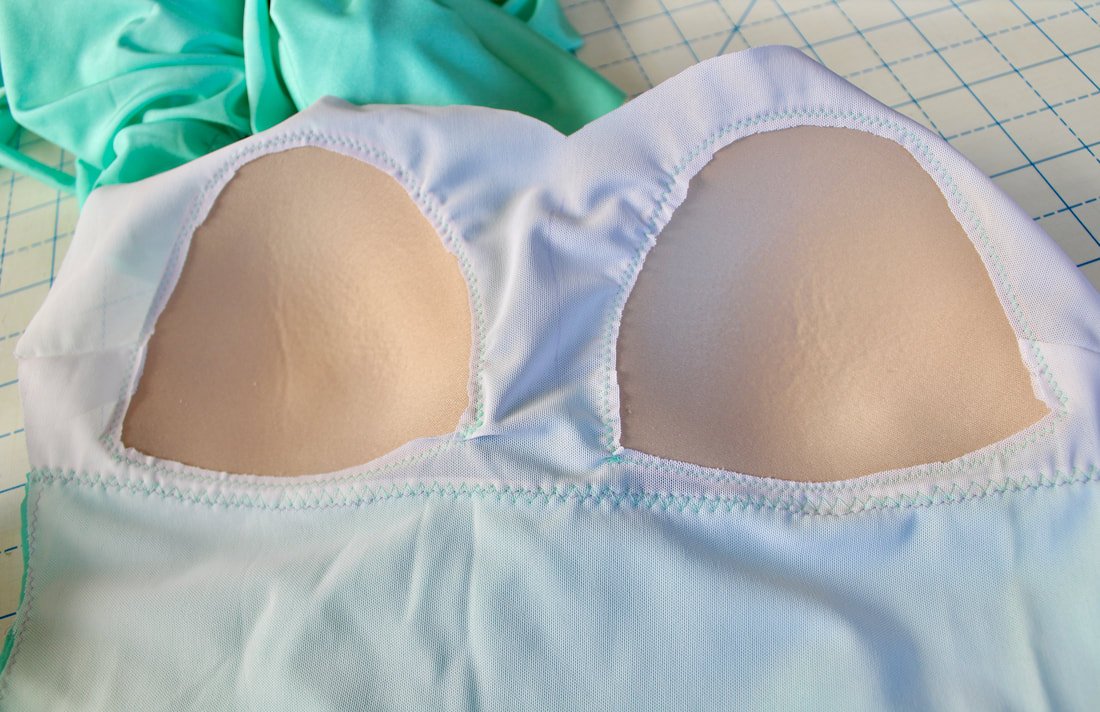
I added the foam cups at this point. I am a little familiar with foam cups in other garments, so I did my own thing. Place them where you want them positioned on the lining and pin. Stitch them onto the lining following their circular or triangular shape, using a zigzag stitch.
Cutaway the excess fabric- you're supposed to do this so the fit is better. And then zigzag over the foam cups again. You don't need to do it a second time, but I wanted to be safe. Ha!

Elastic isn’t stretched as sewn. It’s a 1:1 ratio of elastic and the seam length.
Finishing it up
Onto the next portion of the swimsuit.
Sew the gathering stitches for the knot tie, on the front of the swimsuit. This is barfingly easy. ;-) No photo though, sorry.
Use clips to attach the front to the back pieces matching the notches. I repositioned my clips, to clip the layers together. So many layahs (you gotta say it in a Boston accent).
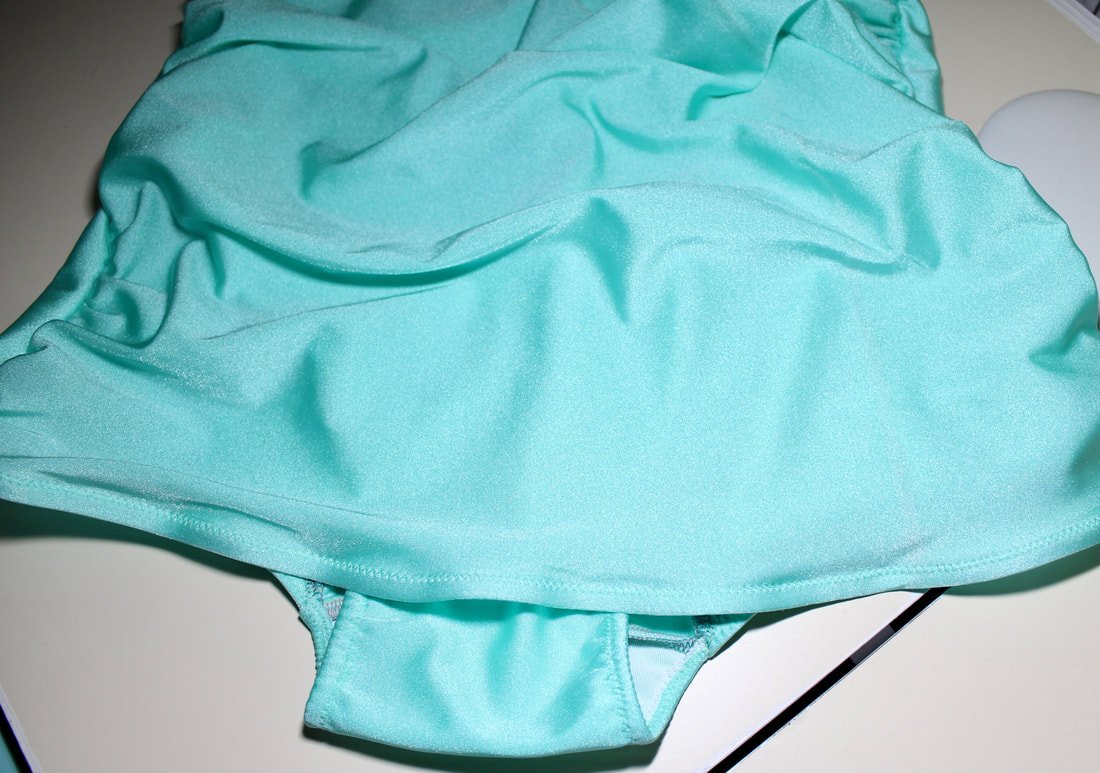
After that, take the swimsuit and make a sandwich. The instructions are easy enough on the PDF. You stick the back and front together, then swoop the front lining piece up and over. Serge the side seams together. Now is the time to try it on. And, fingers crossed it fits!


Serge the sides together. Make sure to catch all the layers.
Next up, finishing the leg holes. Start at on area where the elastic is dangling and attach it to the edge. There's a math measurement to get the correct stretch on each side. Follow their instructions and you'll be golden.
For the skirt, you will measure a piece of elastic the length from side seam to side seam. Zigzag this on without stretching the elastic. Sewing 1:1 ratio.

Remember 1:1 ratio for elastic.
Next, turn the elastic over and topstitch all around the leg openings and skirt to enclose everything. Start on one side seam and zigzag around the whole opening.
You're almost done!! Woohoo!!!!
Time to sew the sweetheart neckline.

Be sure to get both layers. You can see where I missed an area. Ha! You’re going to fold this over and sew elastic on like the leg holes.

Sew the knot down by stitching in the ditch.

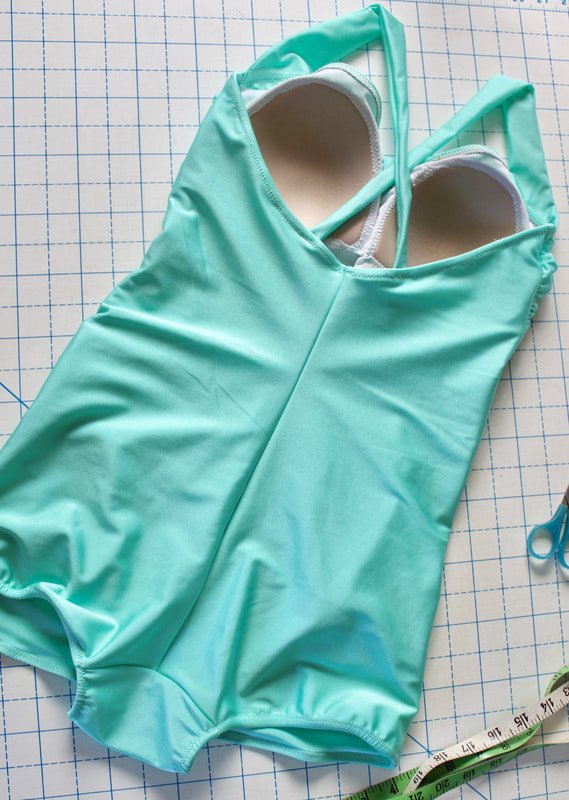
Your View A bombshell should look like this. It's 99% done. We just need to attach the straps. Can I get a Whoop, Whoop!?
Adding Straps
Grab your straps and get ready to zigzag them onto the swimsuit.
I tried my suit on and decided where exactly I wanted my straps to be positioned. Clipped them in place and stitched.
I added a second row of stitches just to be extra cautious. I am not part of the itty bitty... committee. ;-) We don't need any free shows.

Use a medium zigzag stitch.

I added a second row of stitching at the straps. This is completely optional.
Hooray! We're done. See how easy it was to make a swimsuit! I learned a lot along the way and you bet I'm going to make a few more. I have some fun fabrics picked out from a few different Etsy shops. I better get crackin' if I want to parade around in my backyard, in all of them.
I didn't do the halter top straps. I tried on my swimsuit and had my daughter help me mark where I wanted the straps to be attached at the back. I always wear halter strapped swimsuits and they kill my neck after a few hours. So, I was pretty stoked to be able to attach the straps in a criss-cross fashion on the back! Yay for comfort and holdability!!
Crisscross back straps are going to be so much more comfortable. I'm so excited!
Now I just need to find a pool to hang out in. 50's Bombshell style.
Are you going to make a swimsuit or have you ever thought about making one? I think this is right up there with bra-making. It's so fun and a lot easier than you'd think. And... gasp, it might even be cheaper!!
Let me know in the comments below what you think about swimsuit making.
XO,
Annette

Me Made May 2020
Me made May 2020. What are you wearing and making in 2020. Staying home required different me mades than the years in the past.
Can you believe it? It's May, again, already. The months seem to fly by quickly as I age.
You know the drill, #MeMadeMay is all about wearing something you made every day in May. Read my post I wrote from last year if you are wondering what the heck I'm talking about. You pledge to yourself and others to wear your me mades (handmade items). I played along last year and found that I didn't like it. Gasp! I know!

Gertie Popover Dress
I did not like how it made me feel about my handmade garments. And, not in the way, you might think.
I usually get excited when I wear anything I make. Hair flowers, a purse, dresses, jumpers, rompers or pants, even my bras! I love it when someone asks if I made it and I get to scream "YES!" with a huge smile. It's exciting for me to wear my stuff and show it off.
During 2019's #MeMadeMay, I didn't get excited while getting dressed. It was more of a "have to" feeling. Not gonna lie, I wear something I make almost every day. I always have a flower in my hair- that I've made. My purses are made by me too. Oh and the days I don't leave my house, do not count. LOL
I'm a rebel in a sense I don't like being told what to do. And, the May challenge wasn't fun for me, because I had to wear my garments. Make sense?

Now with everything that is happening, I've been living in cozy clothes almost every day. I like being comfortable when I'm slinging string a.k.a. sewing. I've been sewing every day, so cozy clothes it is!
I feel happier about the challenge this year though because we're all homebound. We don't leave our house unless it's a run to the post office or get groceries. In which, I put actual pants on. Haha
I plan on playing along this year and have a new perspective. I'll be more inclined to wear my fancy dresses just because I can. They might not be the best to sew masks in, but... I'll wear them. It's almost a challenge for me to get dressed in real clothes every day. Amiright? LOL

And heck, if I don't wear a garment I've made, there's always a Me Made mask.
So, will you be participating this year? What do you think about ME MADE MAY? Share your thoughts in the comments below. Be sure to follow me on social media as well.
Stay safe and sane,
Annette

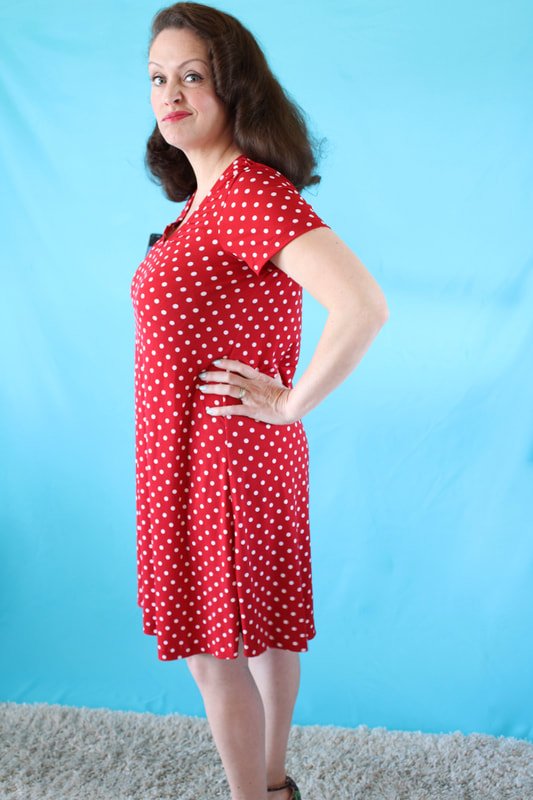
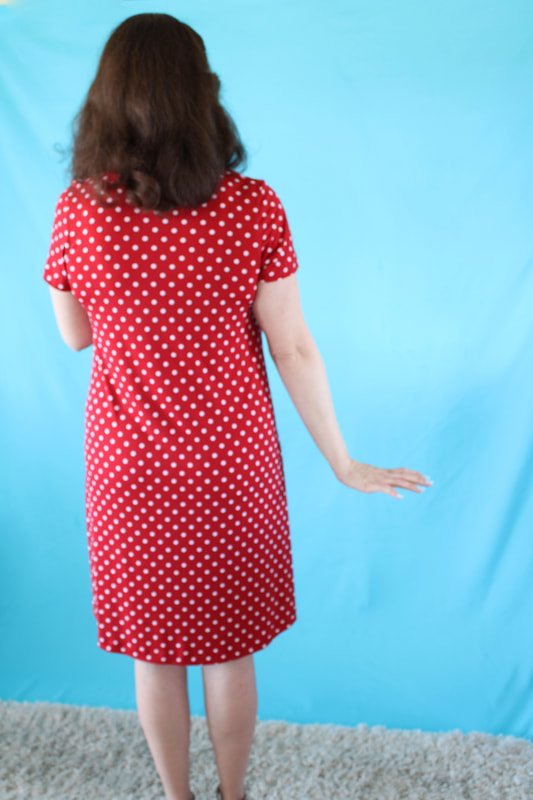
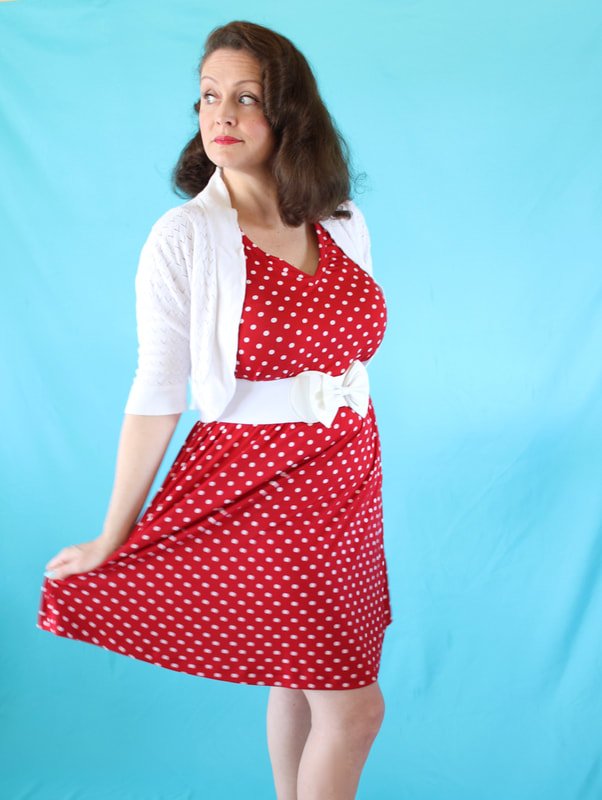
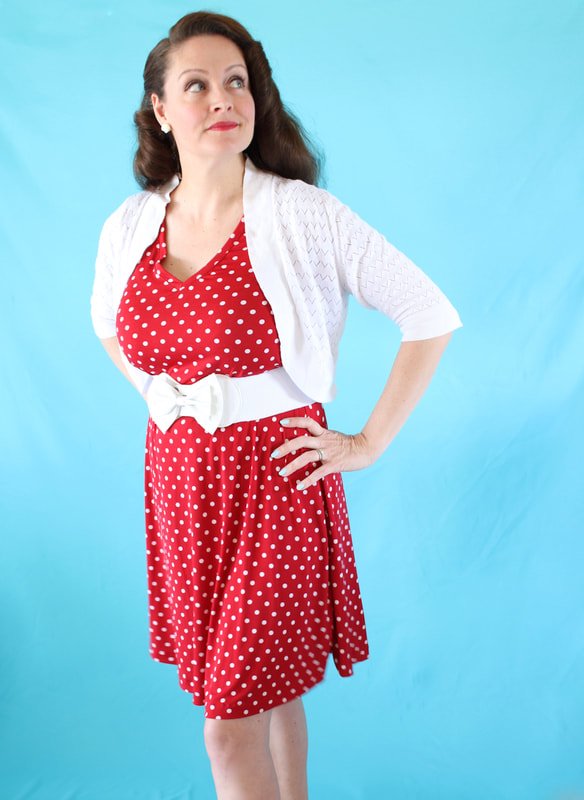
Laundry Day Dress
Laundry day dress by love notions pattern review. The dress is perfect for beginner sewists and can be made into a pinup style with added accessories.

This dress is perfect for lounging around the house or doing laundry. It's the Laundry Day Tee dress. Simple to sew and comfy for a laid-back Sunday.
Are you ready for Spring? I've been playing (cleaning) in the yard lately. We planted 5 new rose bushes, hydrangeas, and various berry bushes. Ahh, it feels so good to be outdoors after the long winter we've had. The daytime temps in my corner of Southern California are rising and the weather got me thinking about all the outfits and bags I plan to make for summer.
Cue the Laundry day tee dress by Love Notions. The dress comes in a great size range XS-5X. Yay! I snatched up the pattern for $5. What a steal!! I had never heard of this pattern company until I went to the Arizona Sewcial. Boy, I was excited when I went to their website. Give me all the knit patterns. I bought the Sabrina Slims pants pattern as well. Stay tuned for that review.
This post isn't a sewing tutorial so much as it's more of a pattern review. So, here ya go.
PROS
This pattern can be made in many variations. I loved the dress version most. I have a few lightweight dresses I constantly reach for during summer. Flouncy and bouncy without zippers or waistbands to contend with. They keep me happy and comfy during the humid months. So, I knew I wanted to make an easy knit dress for Summer.
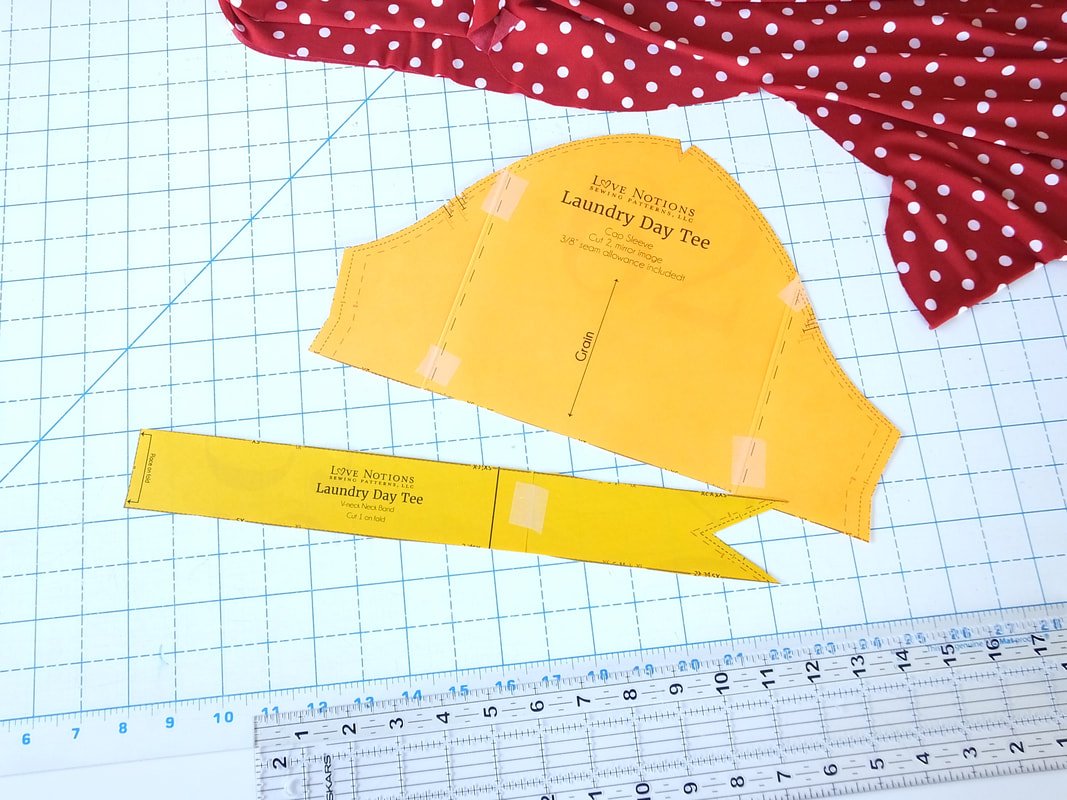
The pattern lets you choose from long sleeves, 3/4 sleeves, short sleeves, or a tank style. You can make a top or dress, long, short, tunic whatever you fancy. Oh, and it has an optional cowl neckline too. Whew! So many options.
I chose the dress length, short sleeves, and the V-neckline.
The pattern calls for stretch knit fabric and was a quick project on the serger. Cut to finish took 2 hours, minus the V-neck insertion of doom.
CONS
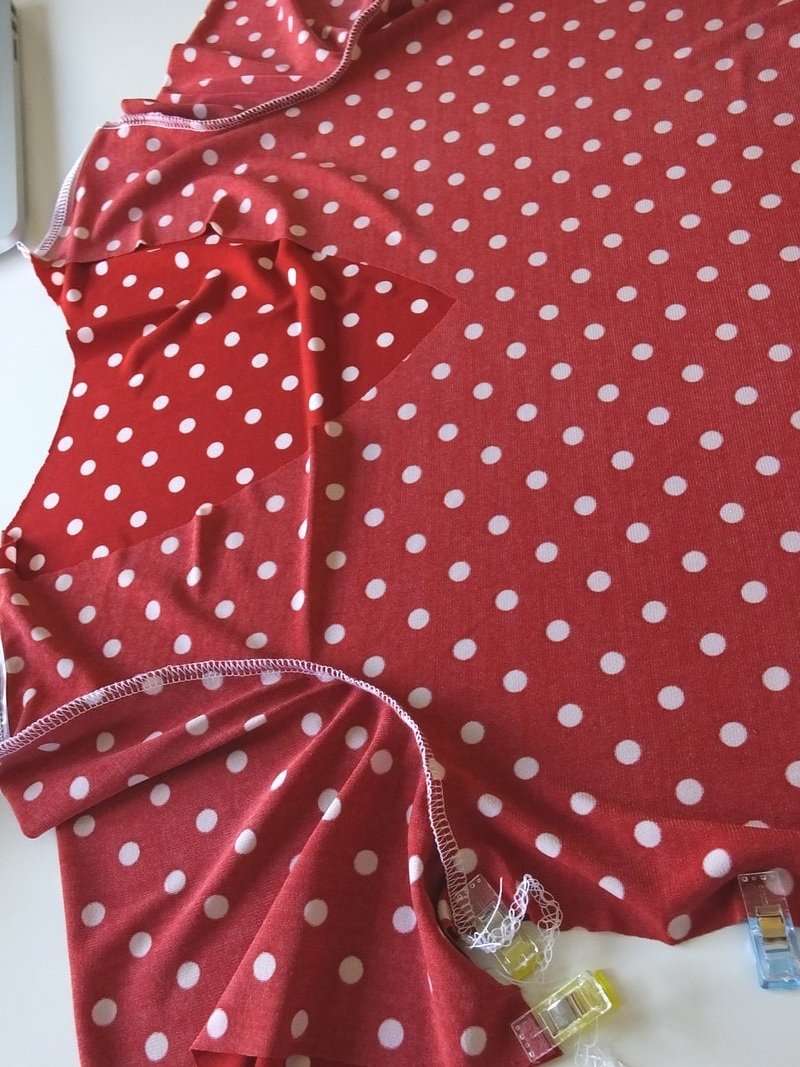
In choosing the V-neck, I was surprised as to how confusing that whole ordeal was. I've made a handful of V-neck tops and they've been easy as pie. This one was not. Maybe it was a combo of the fabric and my sewing brain, but I won't follow that insertion again. I had to make it twice and it still isn't centered into the V. Ugh
I printed and cut the full bust front piece. I usually do an FBA on all my dresses and tops, so I thought this was a neat option. However, in trying the dress on, it looked frumpy. Maternity-like if you will. My husband and 2 older kids said it looked frumpy too and I didn't like how I looked in the dress. Frumpy is a four-letter word to me. Ha!
So, I added a cinch belt, a cute sweater, matching flats, and jewelry to turn the dress into a casual pinup look. Yay! Almost similar to the Popover dress I made. Almost.
I want to print out the regular front piece and see how that fits. I think it might fit a tad better. And, I want to size down next time as well.
Frumpiness aside, it's comfortable and easy to throw on. I see a few of these becoming Summer wardrobe staples. Heck, I might make a nightgown too, with some added length.
This pattern is perfect for beginners.
Print, cut, and tape the PDF pieces together. It has very few pieces; one front and one back, a neckline piece, and sleeves or armband facings if you choose the tank version. Oh and that cowl piece too.

SEWING STEPS
Sew the shoulder seams, making sure to use clear elastic to support those seams.
Attach the sleeves, easy enough making sure to match the notches.
2 notches for the back, 1 notch for the front of the armscye.
Attach the neckline, hem the sleeves, and bottom hem and you're done. So easy!!
So what do you think? Have you ever wanted to make a T-shirt dress?

As always, thanks for hanging out. Please share this post and blog with your friends and family and follow me on Instagram @sewingtothemoon.
Leave a comment below if you plan on making this pattern or have already made it.
XO,
Annette