
Pattern Reviews, Sewing Hacks, Tips & Free Patterns
The Sewing Blog

How to Organize Sewing Patterns
How to organize your sewing space. Store all of your sewing patterns in an easy way so you can find everything quickly.

Do you get the organizing bug after the holidays? I know I do. Remember Kon Mari? Yep, my closet and dresser clothes are still organized and folded with her method. It's been a couple of years and I need to revisit my dresser. But we'll save that for another day. Today I want to share with you how I organize my patterns.

I have quite a few patterns for sewing although, not nearly as many as other sewists, I know. I have friends who have bins upon bins of sewing patterns.
In my stash, I have PDF ones, traced-off ones, patterns that have been adjusted and re-adjusted again, and of course regular pattern envelopes. I keep all of my patterns intermingled. However, they get separated by category. I'm not completely crazy. Ha!
Start with your PDF Patterns
Here's what you'll need:
Box of envelopes
Marker and washi tape
Clips (optional)
Boxes or bins to fit the patterns inside

The Process
Go to your local office supply store and grab a box of 6x9 envelopes. They had white and manilla colors to choose from when I went. The box was about $15. It may cost more or less depending on how many are in the box. White seemed to be more expensive but, I liked the clean look of white so that's what I bought. You could order online too, I'm sure.
Grab all the PDF patterns you have. If they aren't printed and are still living in the eternal bliss of your computer, don't print them off. Save that for another day.
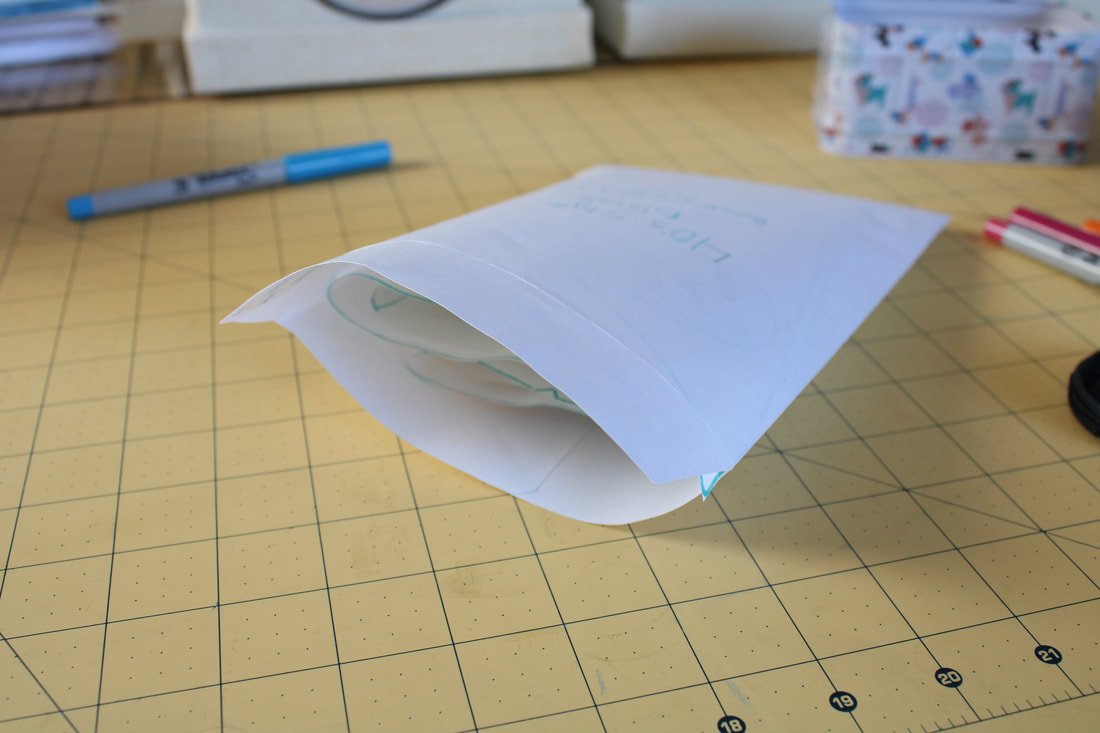
Fold each pattern into a 5 x 8 size. Include every piece to that pattern in the folding process. I used a wonder clip to keep all of the pieces together and folded up. And, then I stuck them in a big pile, as you can see above. I chose to fold first, then stuff. But, you can tackle it however you'd like.
Grab a pattern from the pile. Write that pattern number, brand, size, etc. on the front of the envelope.
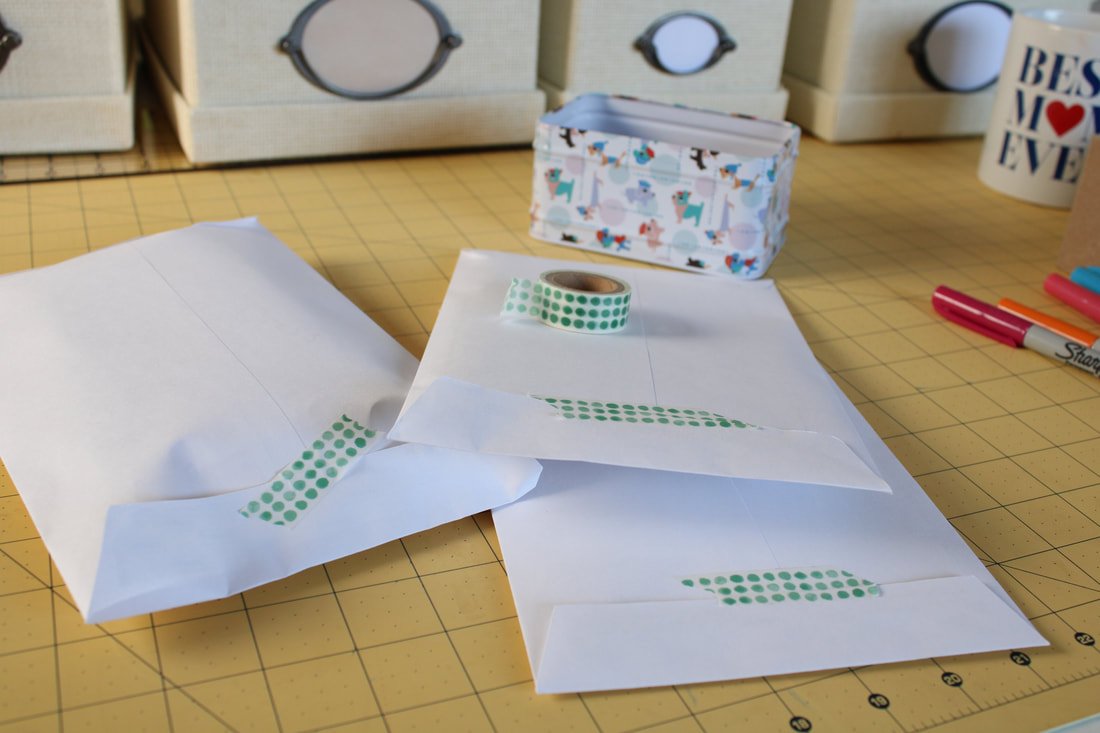
Then, stuff the folded pattern pieces inside the envelope. I used a piece of washi tape to close the envelope. There were a few patterns that needed a few pieces of tape. ;)
Repeat until all the PDF's are in envelopes.
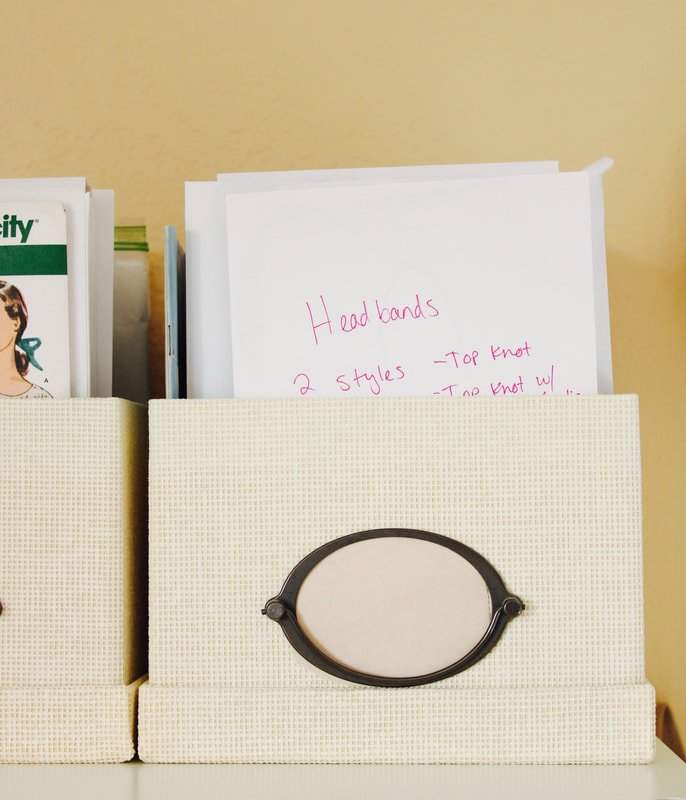
I had a bunch of cute boxes with lids that I purchased years ago from IKEA. They kept crafty items organized inside them. 2 years ago, I took out the built-in shelves and redid our bonus room. The boxes were no longer needed. But, I didn't want to throw them away because I knew I'd use them eventually.
Fast forward to eventually.
They were the perfect size for my patterns!! I tucked the lids under the boxes and my envelopes fit inside. If you have a few shoeboxes lying around that are empty, cover them with pretty paper, spray paint, or wrapping paper. Your envelopes will fit perfectly inside

Pattern Envelopes
Now that your PDF's are neatly organized, stick your other pattern envelopes inside the boxes too. I chose to organize mine by category.

My patterns used to live in a huge bin (the blue box) and I couldn't easily find what I was looking for.
Just an FYI, the organization day got uglier before it got pretty. Sorta like most organizing, right? LOL
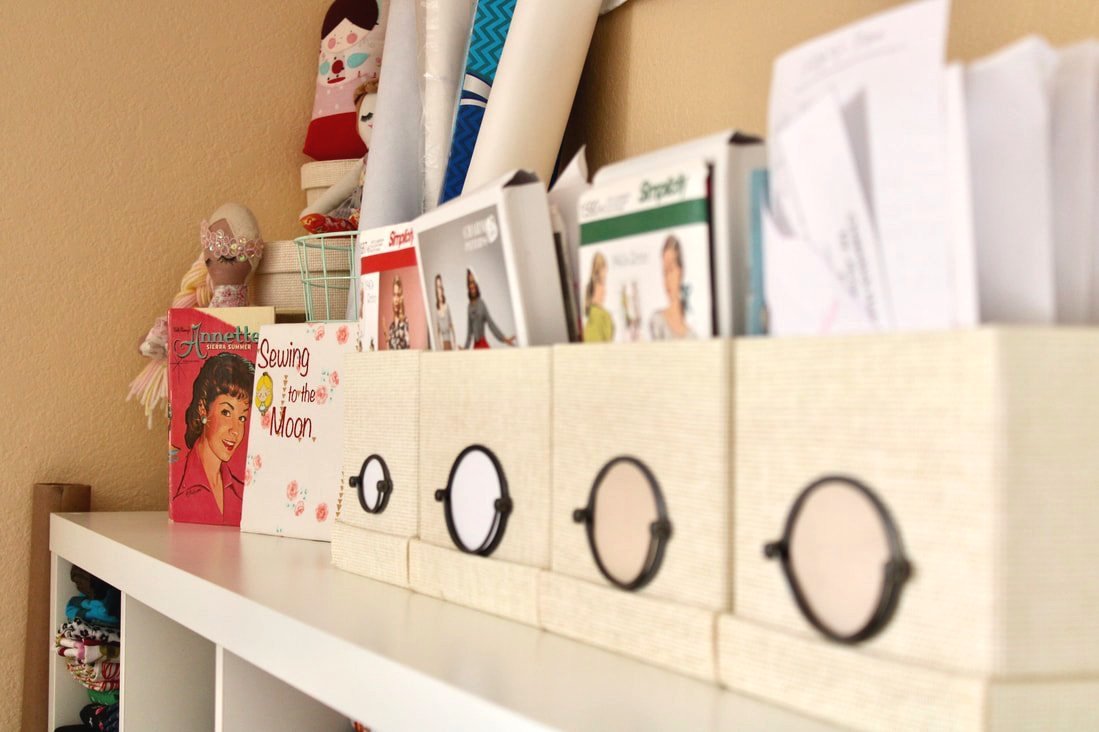
I ended up using 4 boxes. I stuck all the tops in one box. Dresses and rompers are in another box. Bottoms, skirts, and pants in one box. And, everything else went inside the last box. I put the boxes on top of my Kallax shelf and can now see them all the time. If you'd like to organize all your sewing fabric next, read this post.
It's been so easy to find exactly what I'm looking for. I will add more pattern envelopes as I print off or create new patterns.

Sewing space
I recently moved my Kallax shelf because my fabric started fading in spots! YIKES!!!! So, this is a photo of where it is now and the pattern boxes on top.
So, are you off to organize your patterns? Please tag me if you do any sewing organization. I love seeing sewing rooms/corners and all the pretty things inside them. Share this post with anyone you know who needs a little motivation too. Thanks in advance!!
Happy organizing,
Annette

Handmade Christmas Gifts in No Time
Sew some handmade gifts this Christmas. Your friends and family will love them and cherish everything you make.

The holidays are here and it's time to whip up those handmade gifts. Eeep! Hopefully, you started sewing for the holidays back in the summer but, if you're on team procrastinator, I got you. These are all quick sewing ideas and range from baby to grandpa.
Below you will find some tutorial links and free patterns. Although, I've created this list to get you brainstorming and ideas flowing. Less talking and more making.
Get ready, get set, sew!
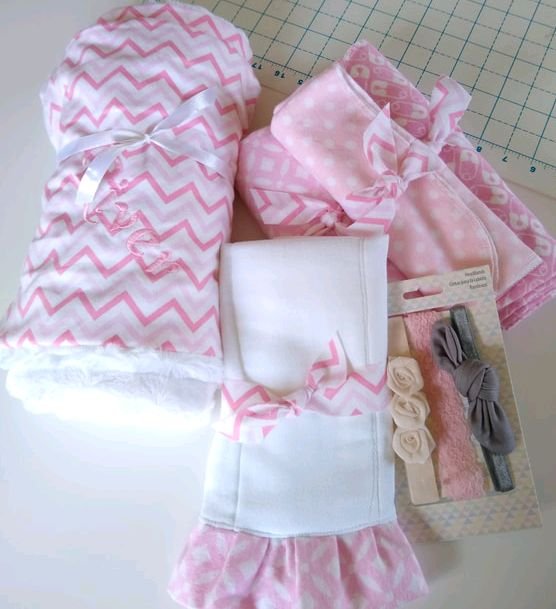
Baby Items
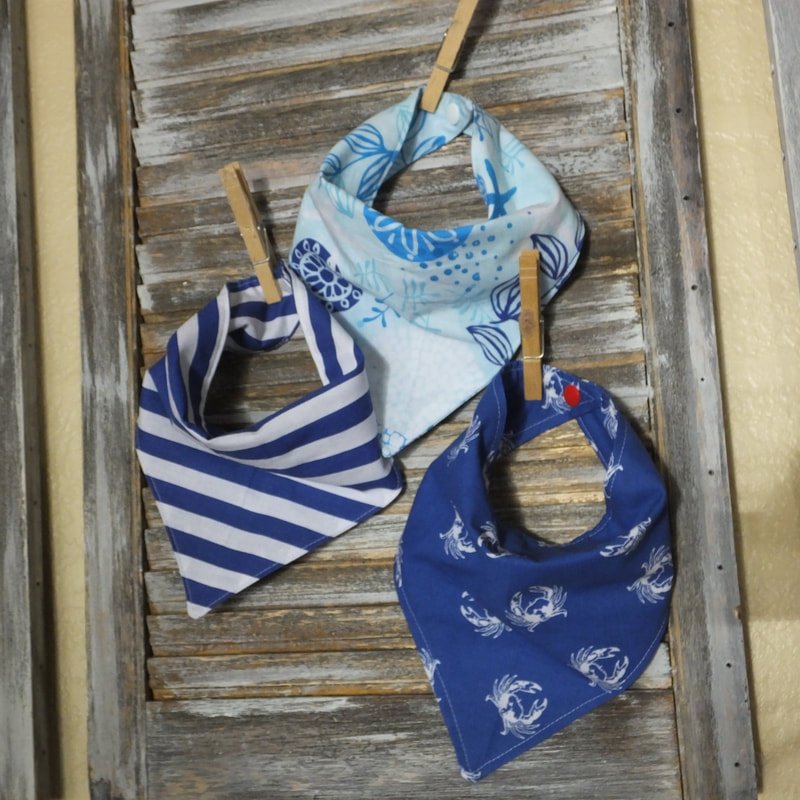
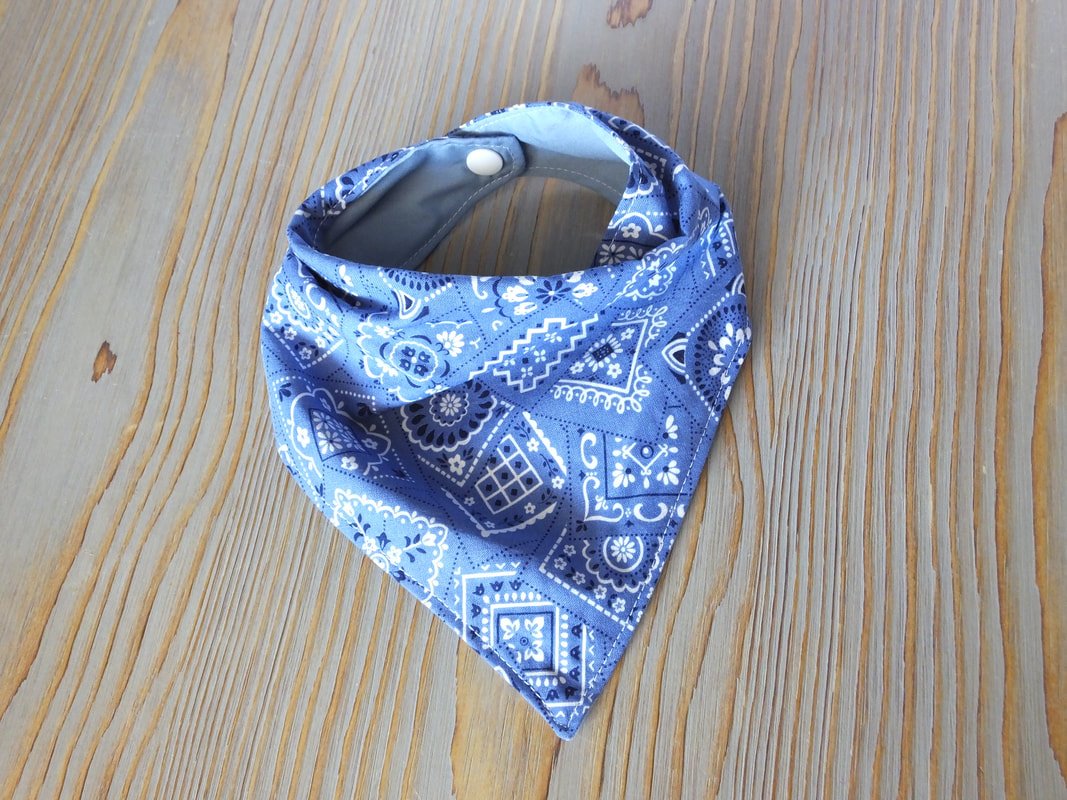
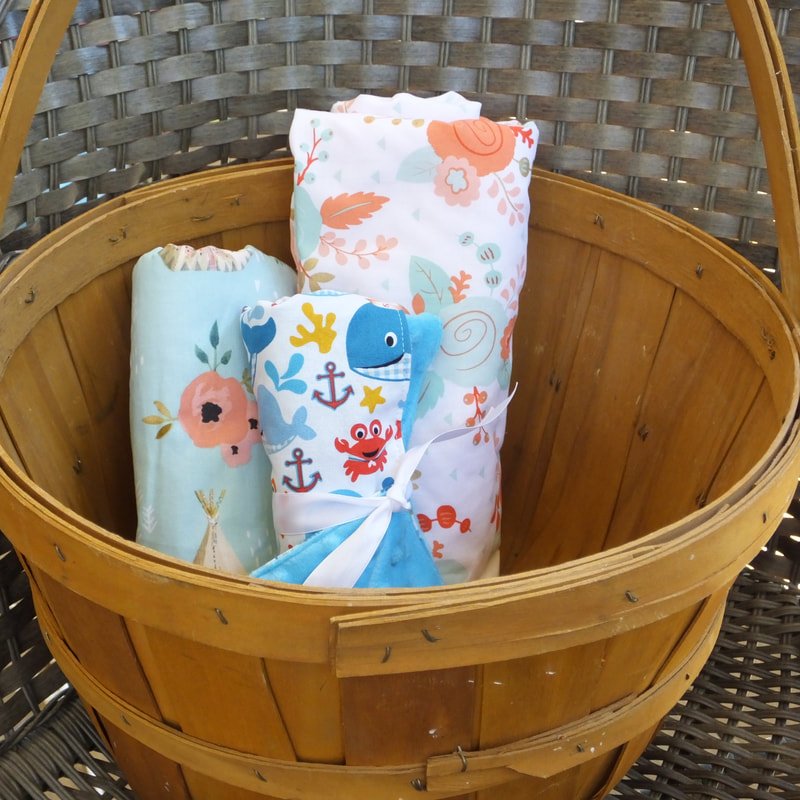
There's always someone who's having a baby. You can whip up a bib, burp cloth, and blanket in about 30 minutes. All you need is some fabric and a snap or velcro for the bib fastener. Read my baby items post here.
There are tons of free bib patterns you can find online. Or make a bandana-style bib.
Here's a super easy burp cloth tutorial. Hint: it's just a rectangle.
For an easy blanket, cut one square yard of flannel and one of cotton fabric. Sew them RST, leaving a gap for turning out. Topstitch the opening closed, and you're done. Sew easy!
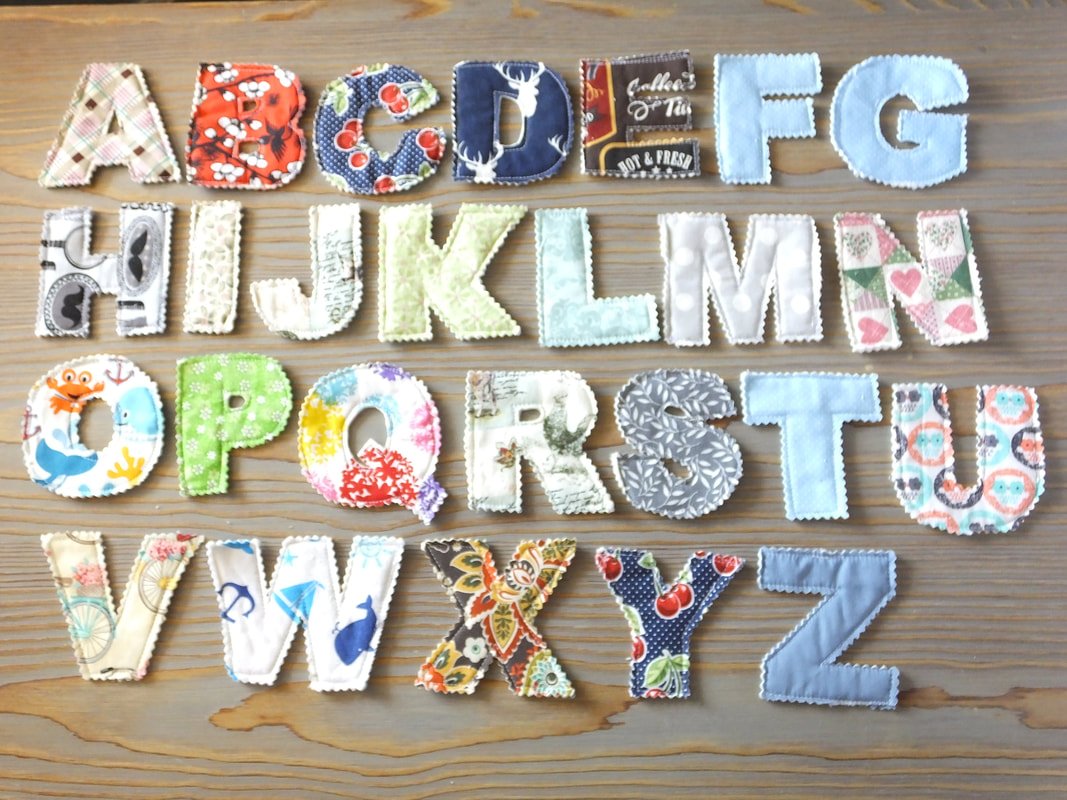
If you have more time, you can make a fabric alphabet set, baby outfit, fabric book, or sleeper bag. You could even add an easy-to-sew teether, pacifier clip, or mittens. Pinterest is your friend. LOL
Fabric letters are a fun gift idea too. Print out a boxy font A-Z and use as a template. 2 layers of fabric and add a layer of fleece in between to add some bulk. Sew around and cut with pinky shears.
Toiletry Bags
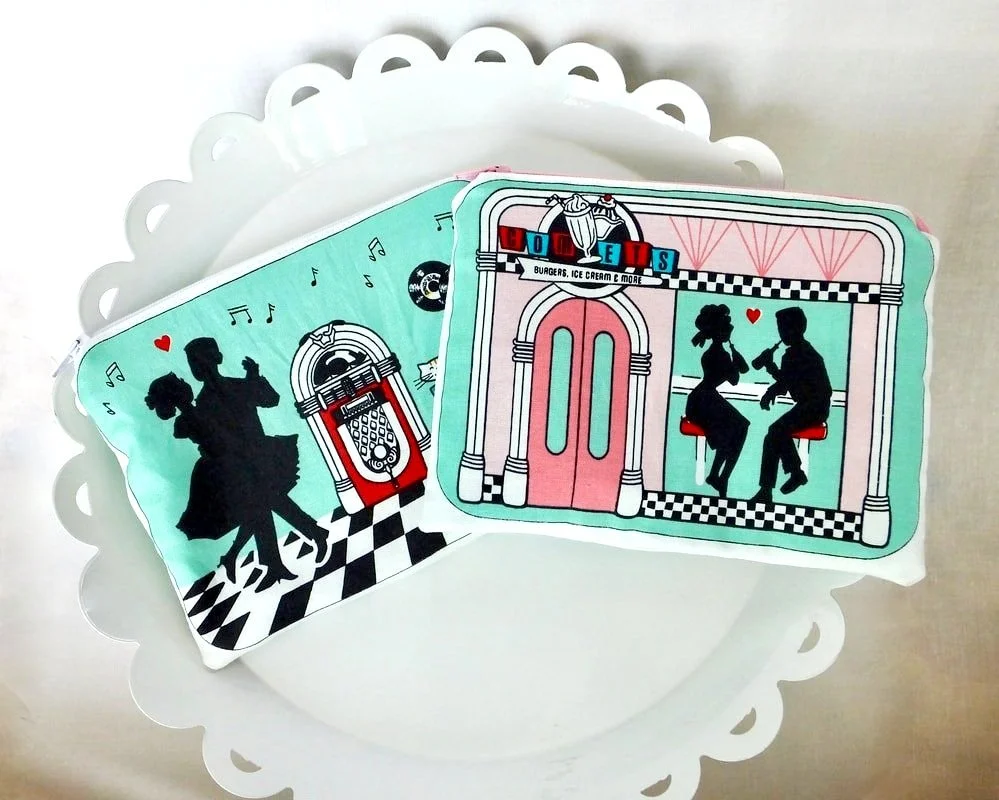
Do you have a zipper and some scrap fabric? Sew a zipper pouch in less than 30 minutes. Follow this tutorial for an easy refresher on zipper installation for a makeup bag. Make them as big or little as you want.
Teens love these. Little kids love these. Everyone needs a zip bag for something. They work great for tools too. I’ve sewn a few for my husband’s random things he wanted to protect from rolling around inside the toolbox.

Keychains
Sew a quick keychain following Melly Sews tutorial. Grab some lip balms, lotions, and hand creams to complete a gift set. This is perfect for the babysitter, pre-teen, teacher, or neighbor. Heck, even Dad uses lip balm.
All you need is a scrap of fabric and a metal keyring. If you have a pack of key rings, batch-sew a few of these for gifts. Lip balm holders for everyone!!
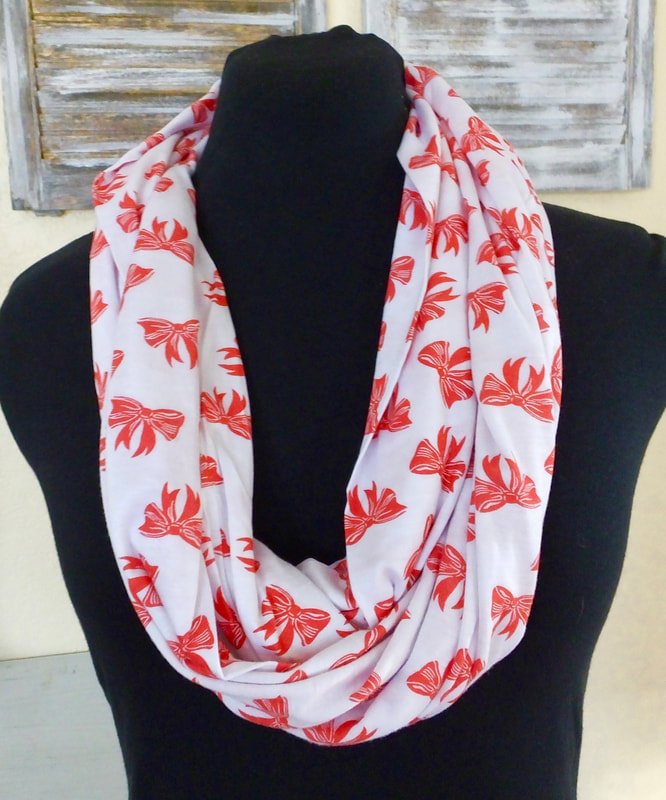
Infinity Scarf
Have a yard of 60" wide stretch knit fabric? You can make one with soft flannel or even crushed velvet for a luxurious scarf. They make great gifts for moms, aunts, teachers, etc. This length creates a single-loop scarf.
Cut the yard in half, lengthwise. You can make 2 scarves from one yard.
Grab one piece and fold RST. Sew the long side. Use a ballpoint needle, zigzag stitch, and 1/2" seam allowance.
Reach your arm through and grab the other end, keeping RST (right sides together) pull the ends together, matching seams.
Sew around the seams, leaving a 2"-3" opening for turning. Then, hand-stitch the opening closed. Wah-la!
Use for hand warmers, aches and pains, or freeze to use as an ice pack.
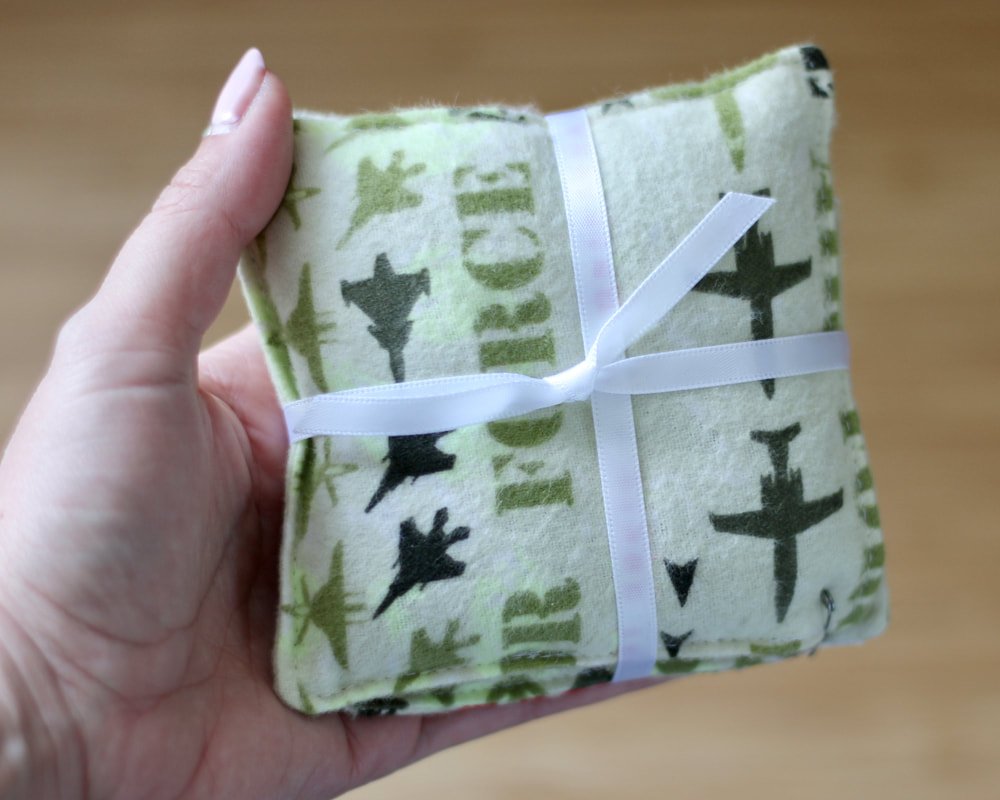
Rice Bags
Your family members all spend lots of time on laptops, phones, and other devices. Their sore muscles could use a little TLC. This is another scrap-busting gift idea. Yay!!
Cut squares or rectangle pieces from cotton fabric in any size you'd like. Add a 1/4" seam allowance.
Sew the pieces right sides together. **Use cotton thread if you plan on microwaving these.
Leave a 2" gap for turning out.
Fill with rice, flaxseed, or corn. Topstitch around the whole bag, watching out for kernels.
Store in the freezer and use on tired eyes. Microwave for 20-second increments until you've reached the desired temperature, for sore muscles. These make great hand warmers for chilly walks, too.

Aprons
Have a baker or chef in the family? Pick a pattern style from the links below. Pick an apron that matches his or her needs. Each highlighted link leads you to a different FREE pattern.
Aprons make nice gifts for little ones and adults. They are completely customizable. Add ruffles. Make the straps longer or shorter. Sew on some extra pockets.
Some Different Styles:
Make a simple rectangle style with pockets and make a tool apron for the person who fixes everything. The littlest mechanic would love one filled with plastic tools. Leather would work for a metal worker. Canvas can work for wood or other jobs.
Have a gardener in the family? They could use one as well. Aprons can be so diverse with a tweak here and there. A half apron works great for gardening. Make sure to add lots of pockets.
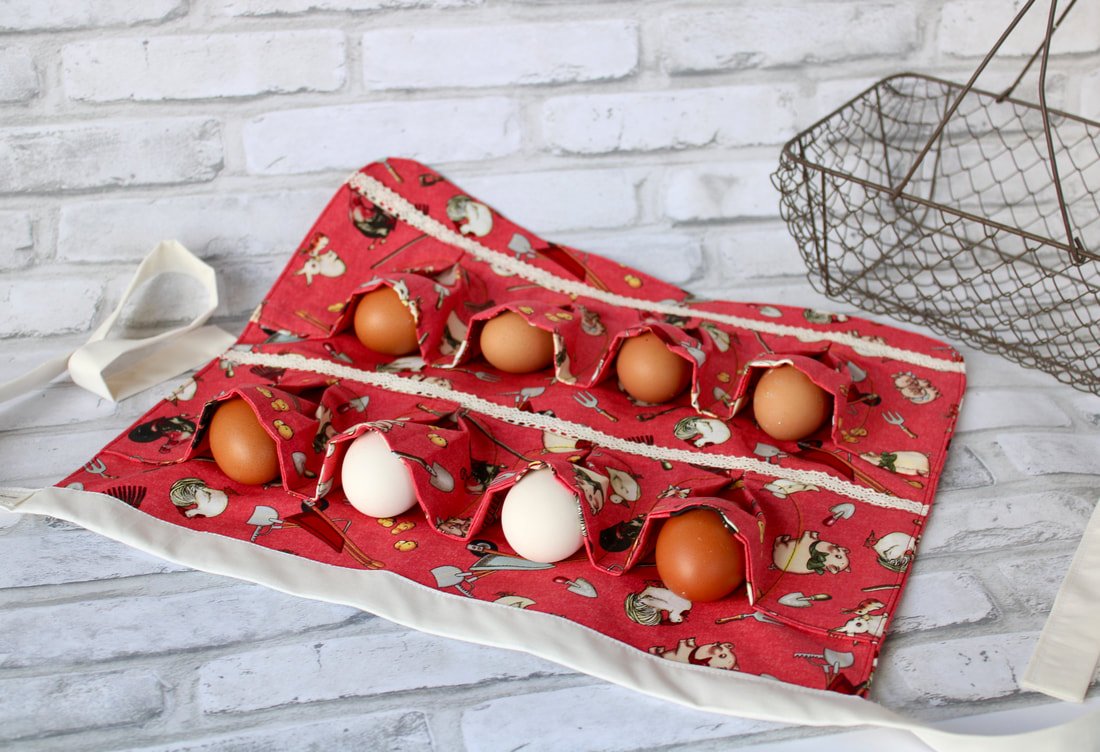
Egg Gathering aprons are a Godsend to folks with ducks or chickens.
Aprons usually take one yard or more of fabric so, this might require a trip to your local craft store. Oh darn! You need extra white thread anyway, make a fun trip out of it. ;)
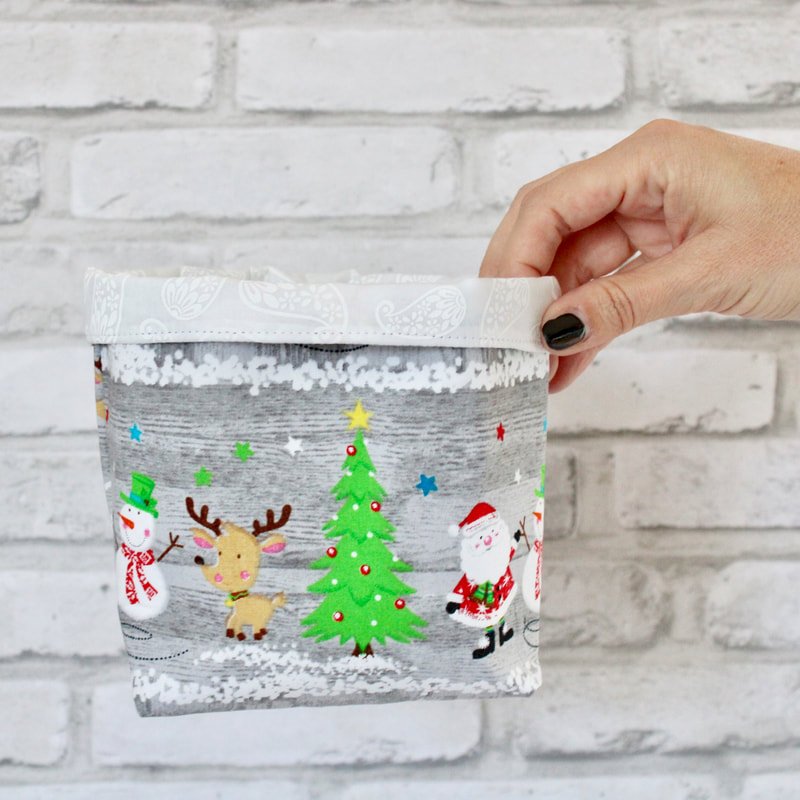
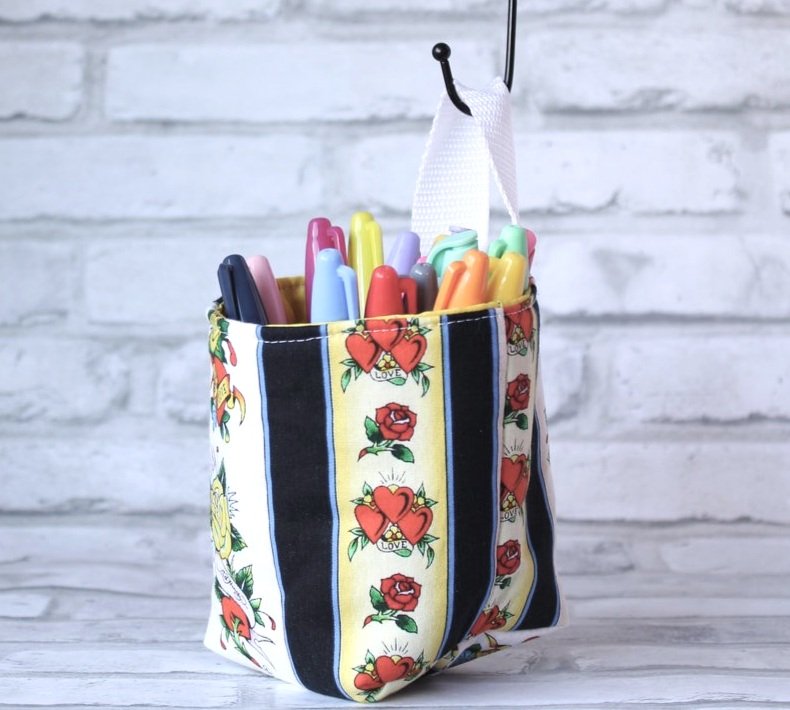
Home Decor Baskets
"A place for everything and everything in its place."
-Benjamin Franklin
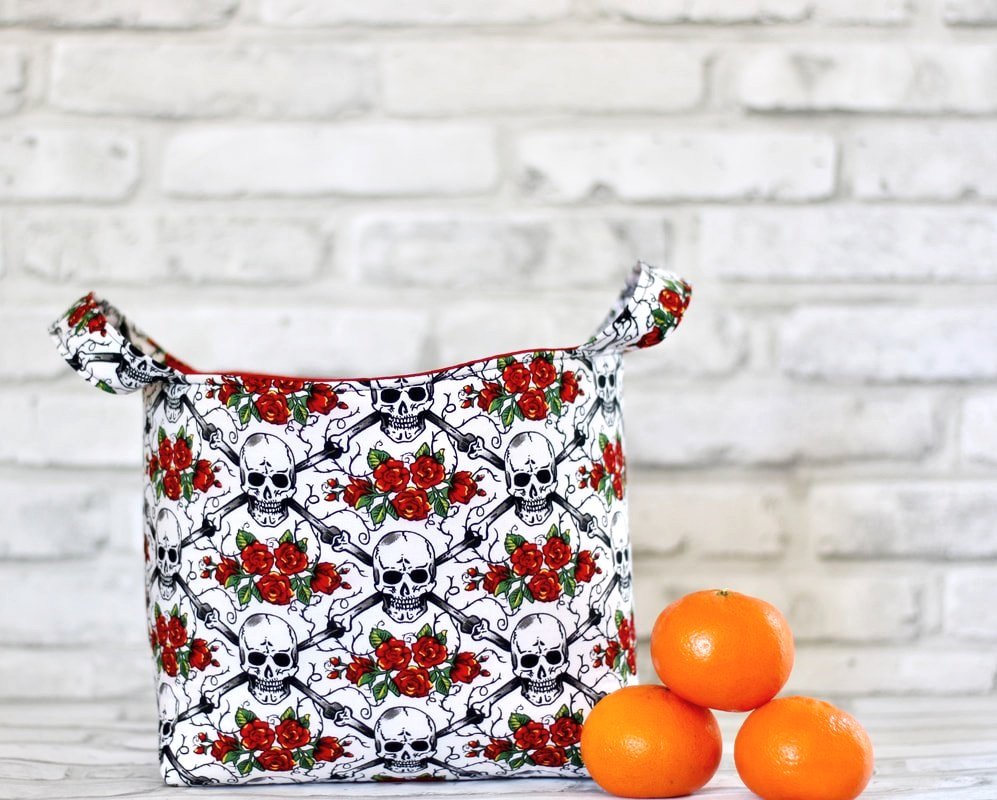
We all have stuff. Lots of stuff. And the stuff needs a home. Fabric baskets make great homes for stuff! They're easy to make and versatile in size.
Here's what you'll need:
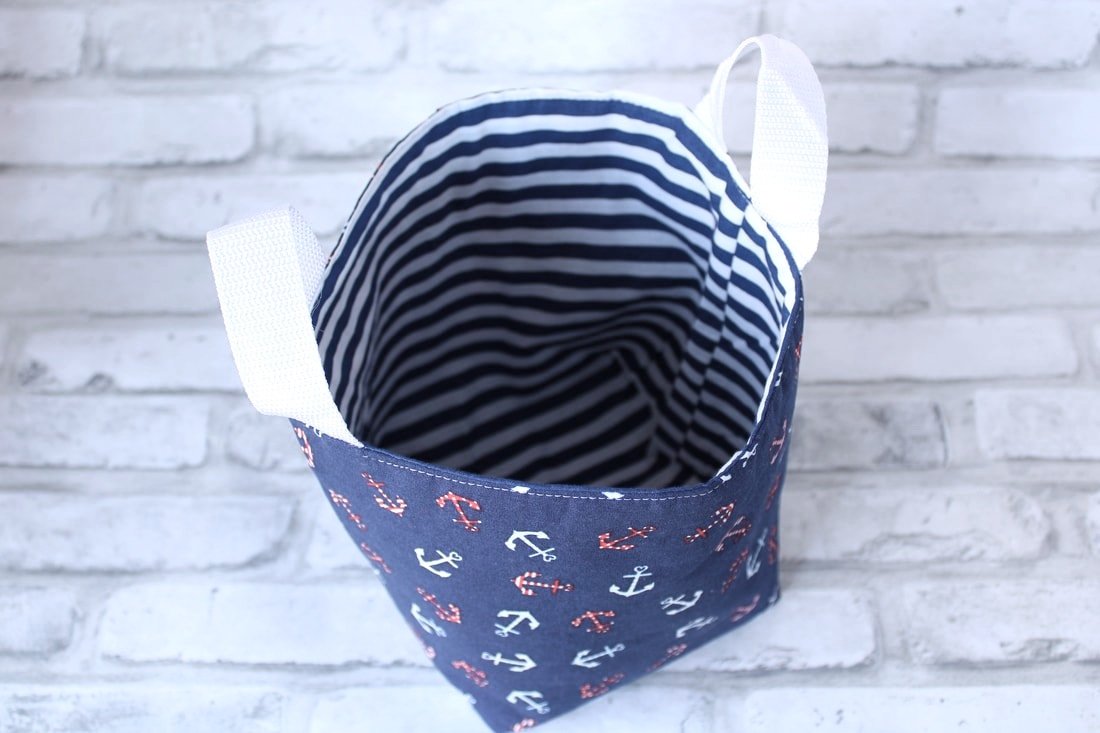
Fabric for the outside and fabric for the lining
Interfacing: I like fusible foam for bigger sizes, fusible fleece for smaller sizes and stiff interfacing works well enough for medium sizes if you don't have foam. *If you don't have interfacing but, have denim or canvas, use that as the lining. It acts as an interfacing. I've done this a few times in a pinch and loved the end result. It works in small to medium sizes. You could make a large blanket basket but, it won't stand up on its own. It will be floppy.
Decide on the size you need or just wing it. Use a template to make boxed corners or box them after the side seams are sewn.
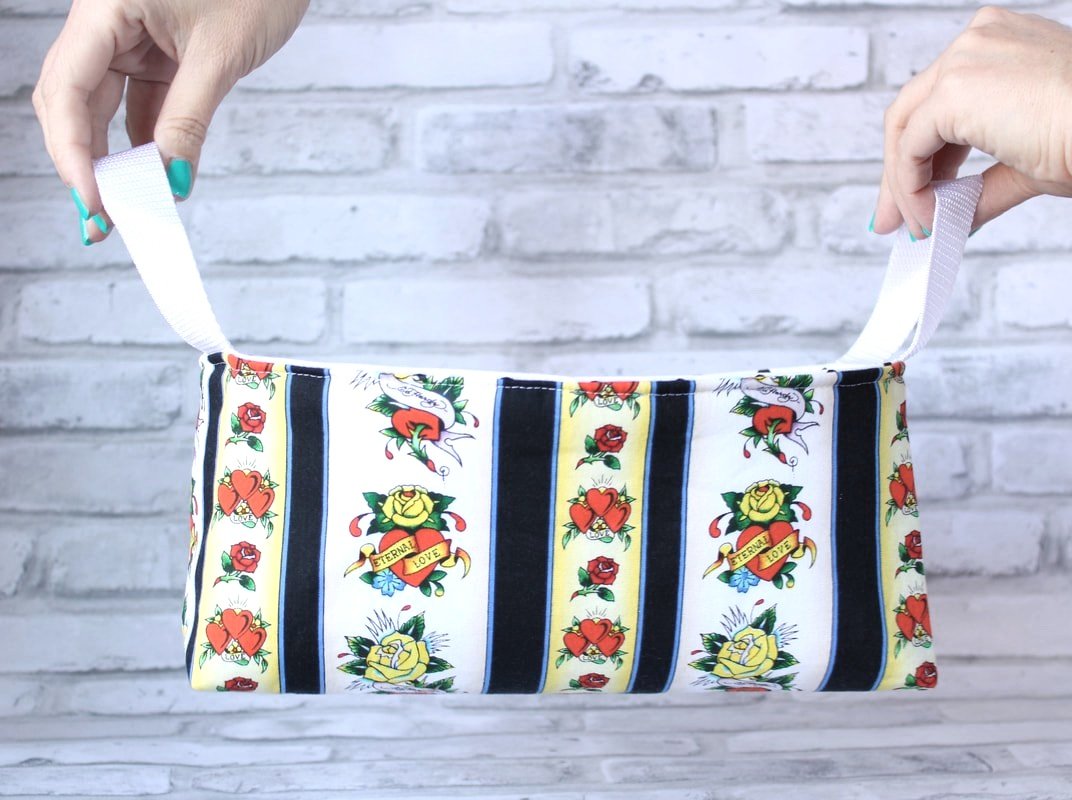
Add handles for carrying or a loop to hang the basket.
I don't have a particular pattern to share with you because I usually wing it on sizing. But, here is my favorite tutorial on assembly.
These are great for small toys, stuffed animals, kitchen and pantry items, craft rooms, makeup, bathroom counter organization, and keeping socks organized inside dresser drawers. The sky is the limit!
More Ideas
These things shouldn't take more than 30-45 minutes to make. You're not going for a blue ribbon here. You're going for Handmade in a Hurry!
Box bag for Dad's toiletries
PJ pants for kids are easy
Kitchen towels
Cloth napkins (set of 4 or 6)
Table runner
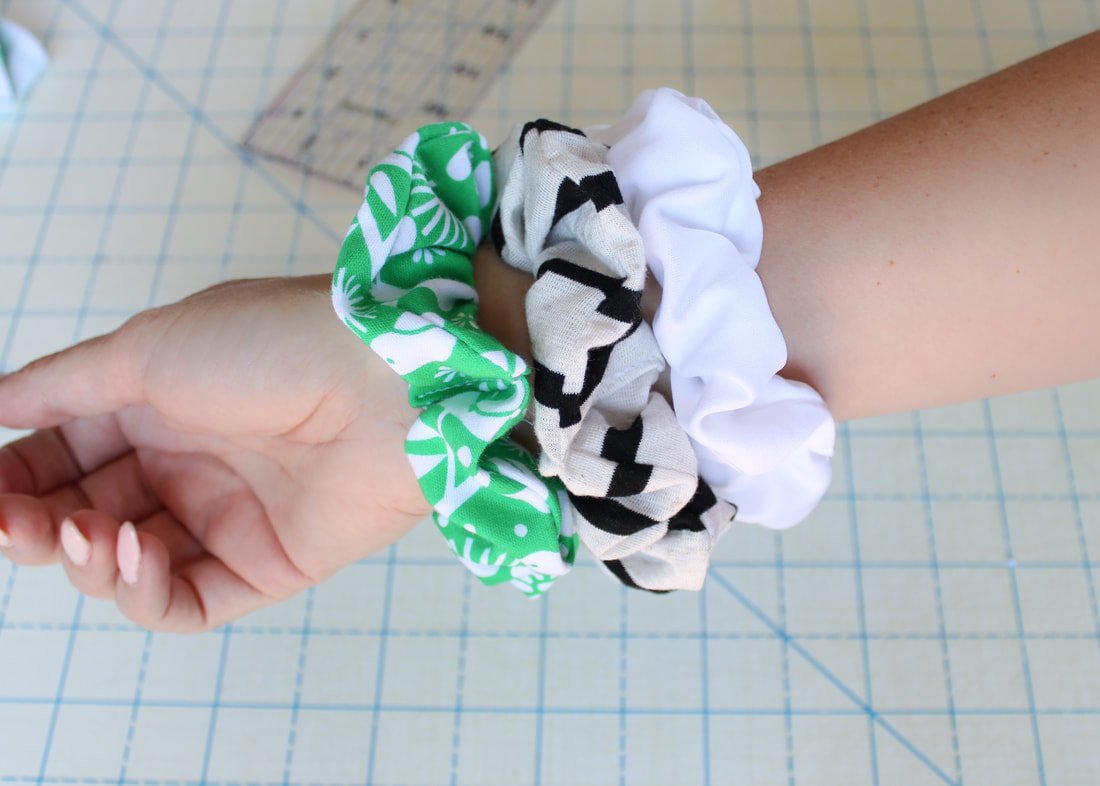
Hair Scrunchies
Apple watchband scrunchie
Eye mask
Head scarf ( follow my tutorial)
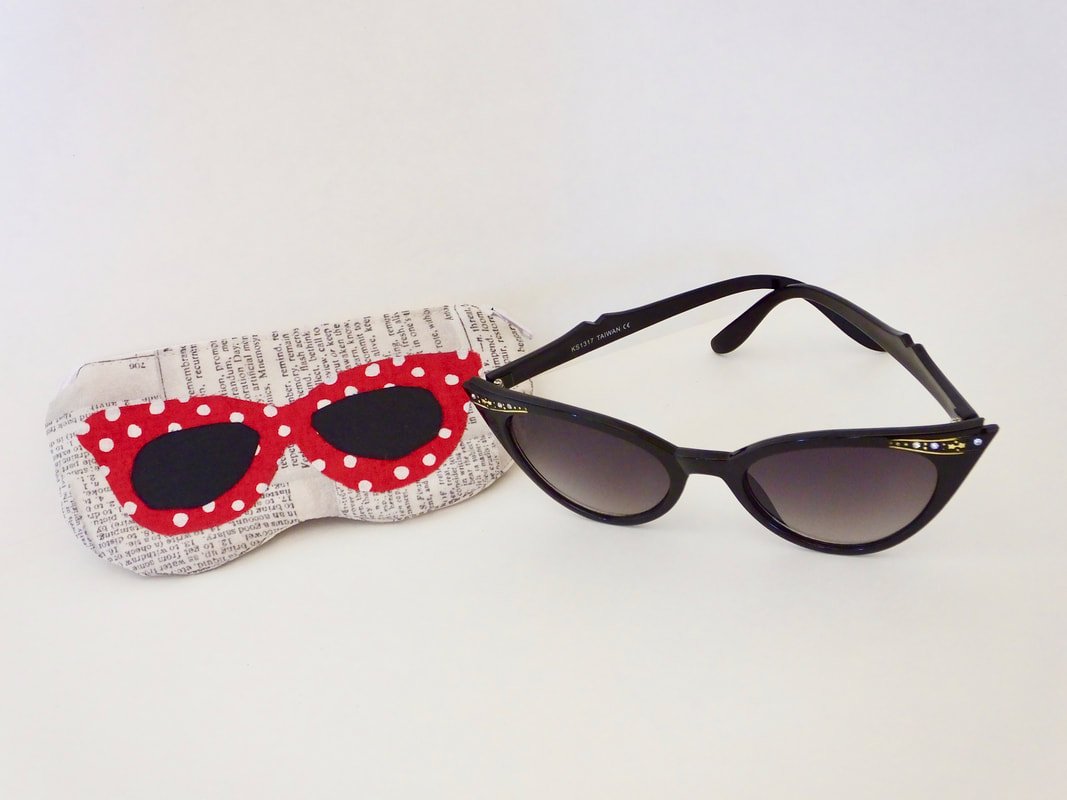
Glasses Case
Gifts for pets
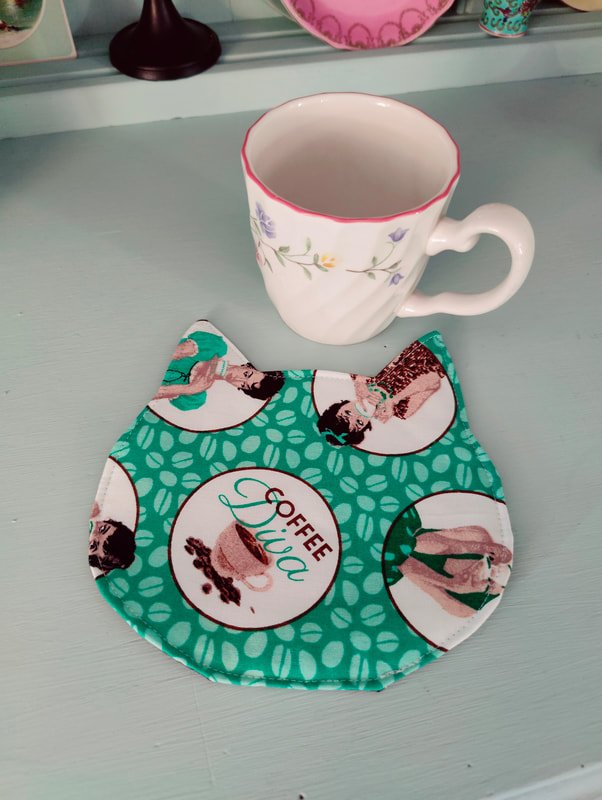
Mug rugs or a set of coasters
Stuffed animals or pillow animals


This is a Bonbon Pet by Dana, I made using her pattern.
Embroidery Machine Gifts
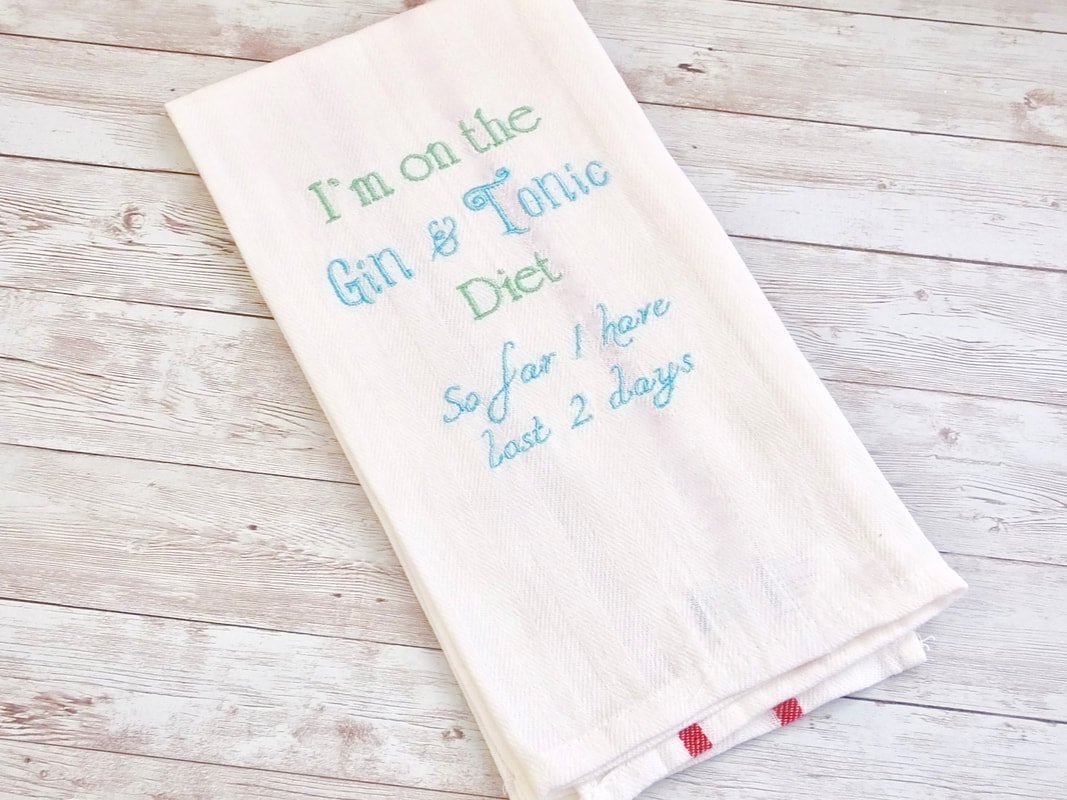
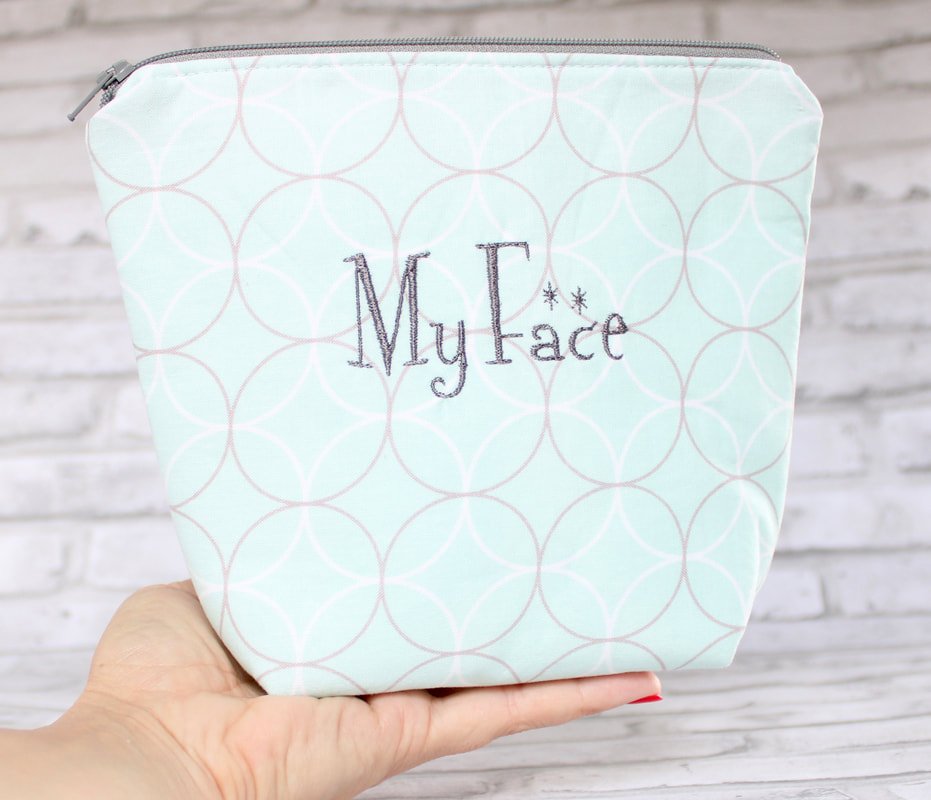
If you have an embroidery machine, you can buy towels, shirts, bags, etc., and personalize them. It's handmade in a hurry! I usually keep a few tea towels or makeup bags lying around to create a quick gift. People love personalized items. And, having your name on something is always fun.
Here are a few ideas:
Tea towels with funny sayings, bible quotes, holiday designs, family last name, etc.
Purchase large makeup bags and embroider the recipient's name or makeup designs on the front.
Personalize luggage tags. Or, the actual luggage.
Bathroom towels with funny sayings or monograms.
Purchase an inexpensive blanket and embroider the family name on it.
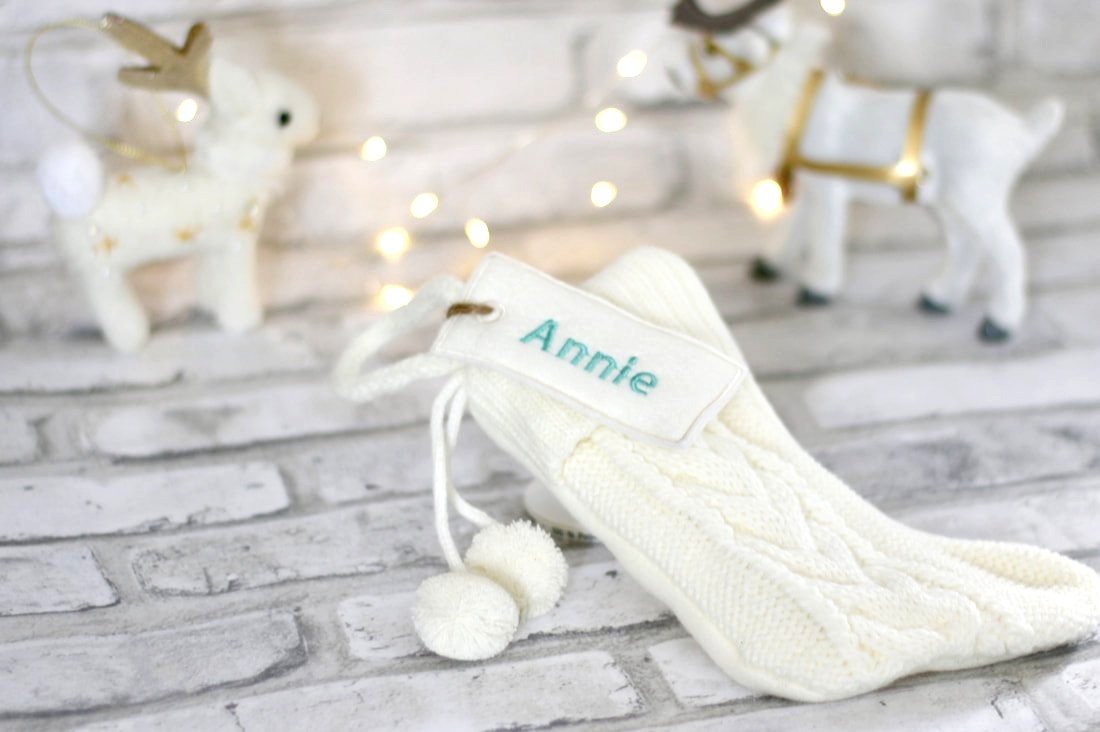
Buy stockings and add names to them.
Buy small stockings and create a name file to add to the mini stocking. We are doing this for our homeschool teacher this year.
Pillows are easy as well. Buy a pillow cover and embroider a design on it.
Toilet paper! Yes, you can embroider a funny design on a roll of toilet paper. It's easy and makes a great gift for the joker in the family.
The possibilities are endless here. I like to set up my embroidery machine to stitch out a design while I'm busy sewing other things. I'll usually make a Saturday out of gift making- a few days before Christmas. Ha! As I said, I'm team procrastinator. Face-palm!
The trick to sewing quickly is to not overthink it. Just cut and sew. Put on happy music or a fun podcast, and you'll whip out handmade gifts in no time. Make sure to eat something! Food gives you energy. ;)
Are you going to make some of these gift ideas? Share in the comments what you plan on making or other ideas that aren't on the list. We all need quick sewing gifts we can make.
Happy Holidays,
Annette

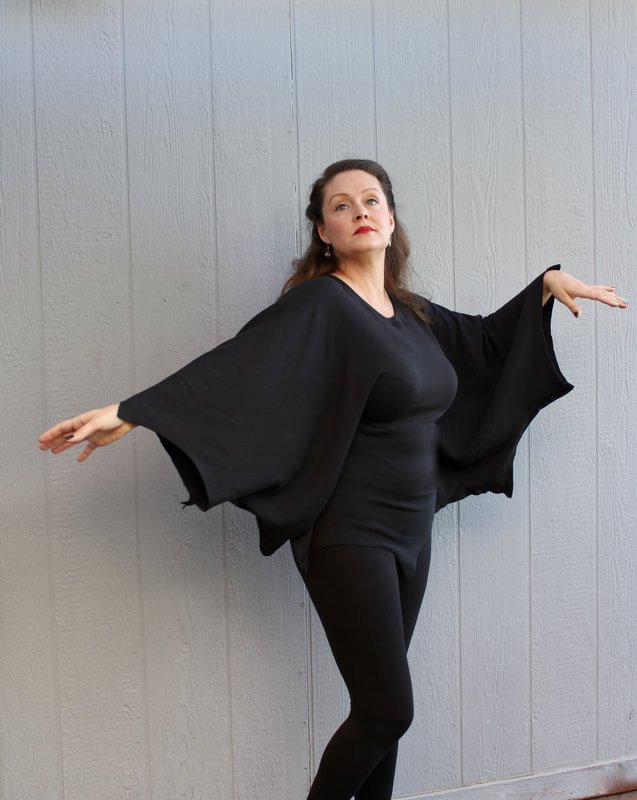
Bat Wing Top
Sew a Bat wing top for adults or kids. Free DIY Halloween costume. This makes such a cute and easy costume. Add ears and you’ll go batty too!
Halloween is almost here! Do you know what that means? Halloween project time. Whether you plan on sewing costumes, home decor, spooky gifts, or something else, it's time to dust off the sewing machine.
It's finally October, which is Halloween month. We start decorating around mid-September and my whole house is transformed into a "haunted mansion". Halloween is my most favorite holiday ever!! After Thanksgiving of course, because... mashed potatoes and pumpkin pie. Yum!
This is a fun top that you can make in a jiffy. You can wear it at home or around town, to the office, or trick or treating with your little ones. I recently made it and had to share it! It's too dang cute to keep it a secret.

Quick, grab the FREE Gone Batty top from Patterns for Pirates here. Then, click here for the sewing tutorial. It's the cutest!! Talk about a last-minute costume that's appropriate for work and/or school. You can wear it as an everyday top as well. It comes in one size that fits most, so no fussy fitting issues to worry about. All the wins with this one! Yes, please!!
I've had a long history of bats through caving experiences and I've grown to love them most of all. Bats are my favorite Halloween creature. When I saw this pattern last year (why did I wait so long??) I had to have it. Umm... a shirt with bat wings, yes, please! Bonus, you could even sew white topstitching thread to make it a spiderweb instead, if you wanted. Ooh maybe that'll be next year's project.
Supply List
P4P Gone Batty PDF pattern
1 5/8 yard of Knit fabric
Sewing machine with zigzag stitch
Sewing supplies and notions
Halloween music playing in the background (this is a must)
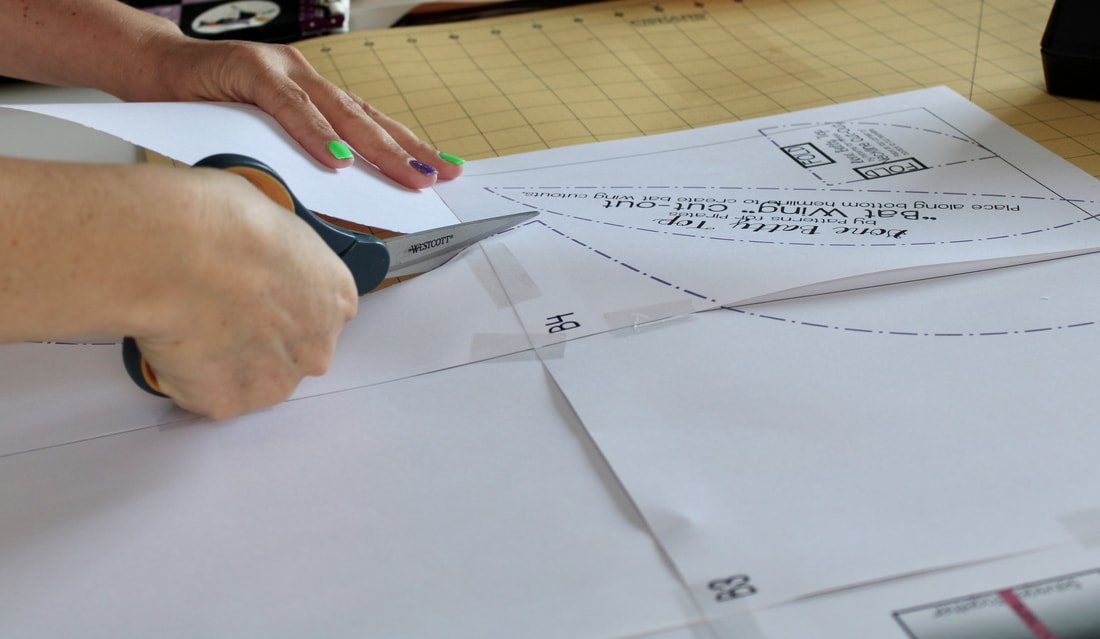
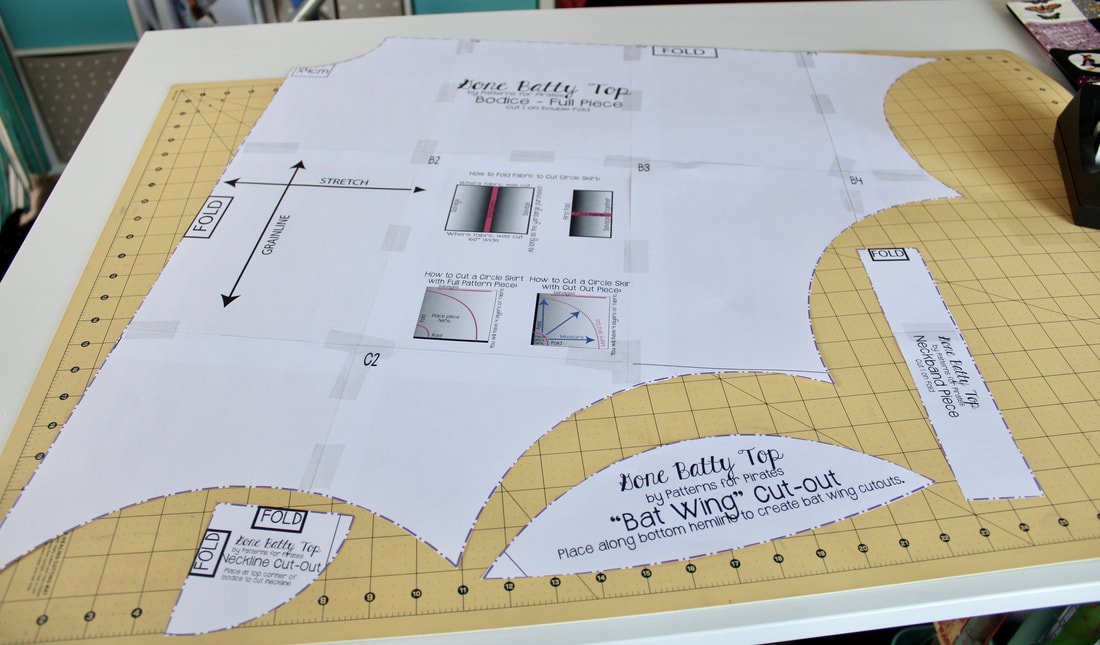
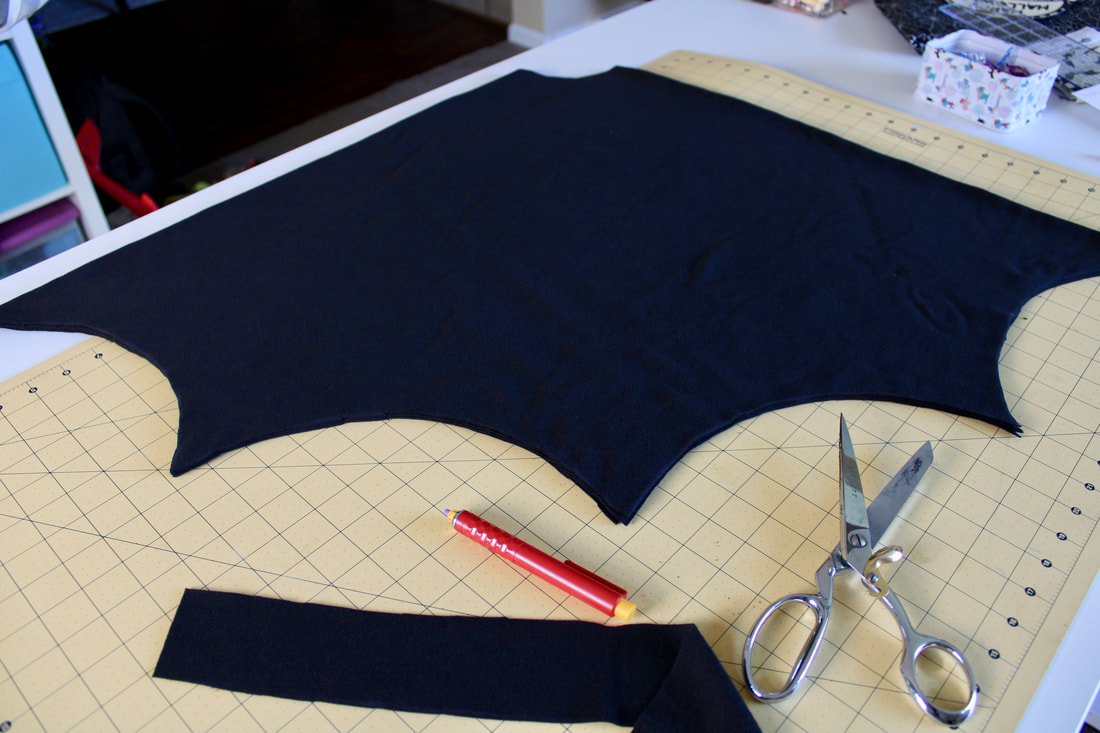
Put your PDF pattern pages together matching the letters at the ends. Tape the pages together and then cut out the pattern shape. Make sure your knit fabric is washed. Knit shrinks. Toss it in the wash on a quick wash setting and warm water. Dry your fabric on a warm setting too. Get all the shrinkage out of the way first.
The top is cut out like a circle skirt. You fold your fabric in half and then, in half again. You can use the whole pattern or use the cut-out shapes to make the "wings" along the hem. Sounds simple, right? It is!

I did the full size PDF. It taped together nicely. No issues.
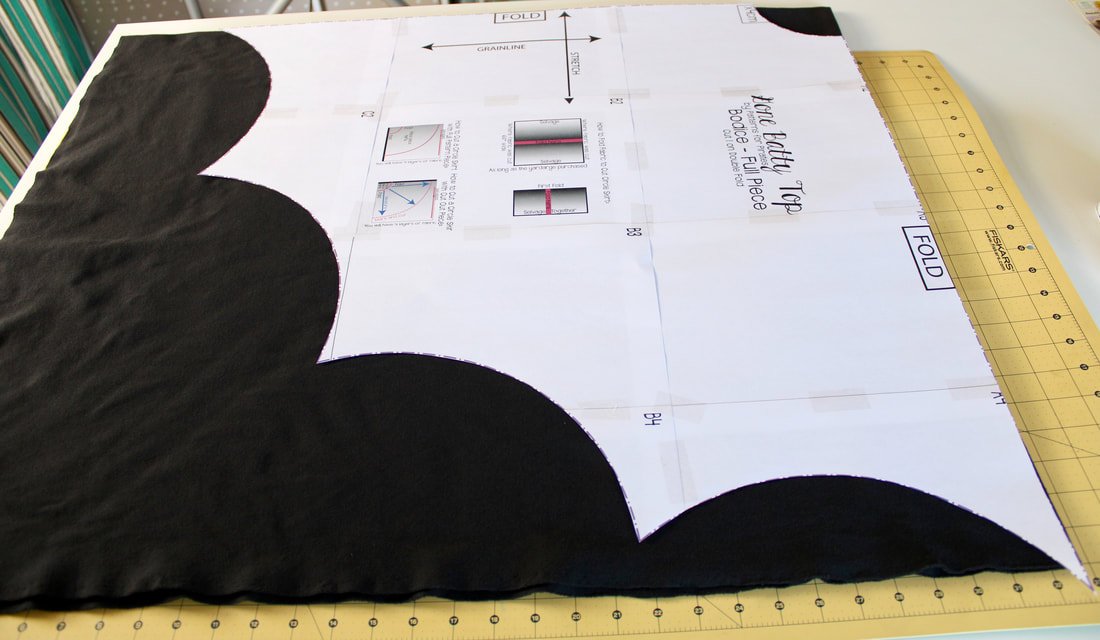
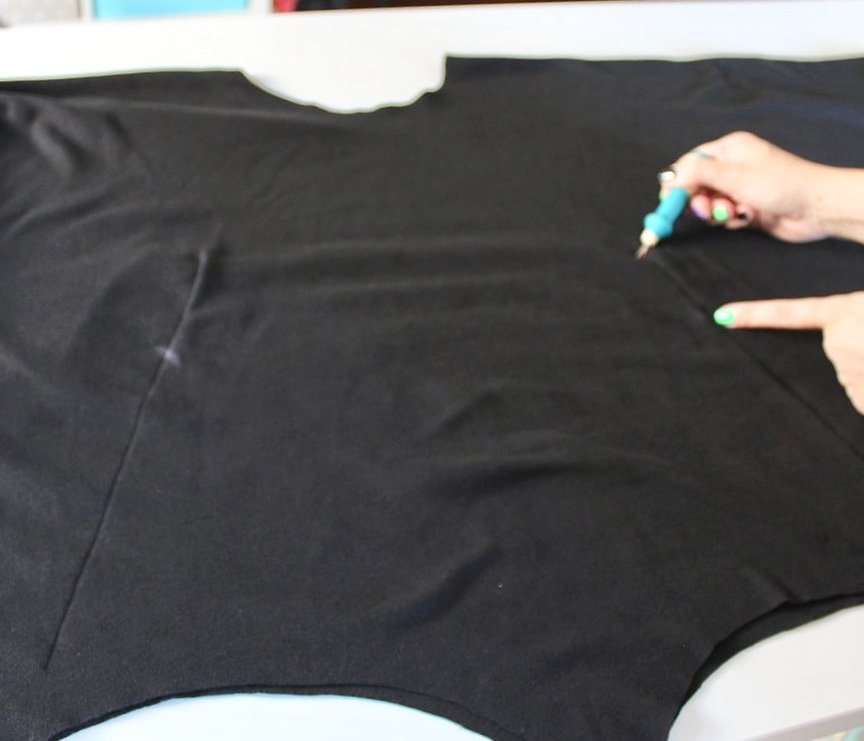
So, I ran into a teeny-weeny problem. The knit I bought was 60" wide. Well, after I washed it, it shrank about 2". In the above photo on the left, you can see the pattern runs off the fabric. I traced that scallop to the end of the fabric. See... ya gotta make sure you wash your knit. It shrinks like crazy.

Time to Sew
The pattern instructions have you take your high hip measurement and divide it by 4. I got 9". You find the center line and draw a line out to the side from that.
Then, you make an angled line 12" up from that line. There weren't any exact measurement points for these, so you eyeball it.
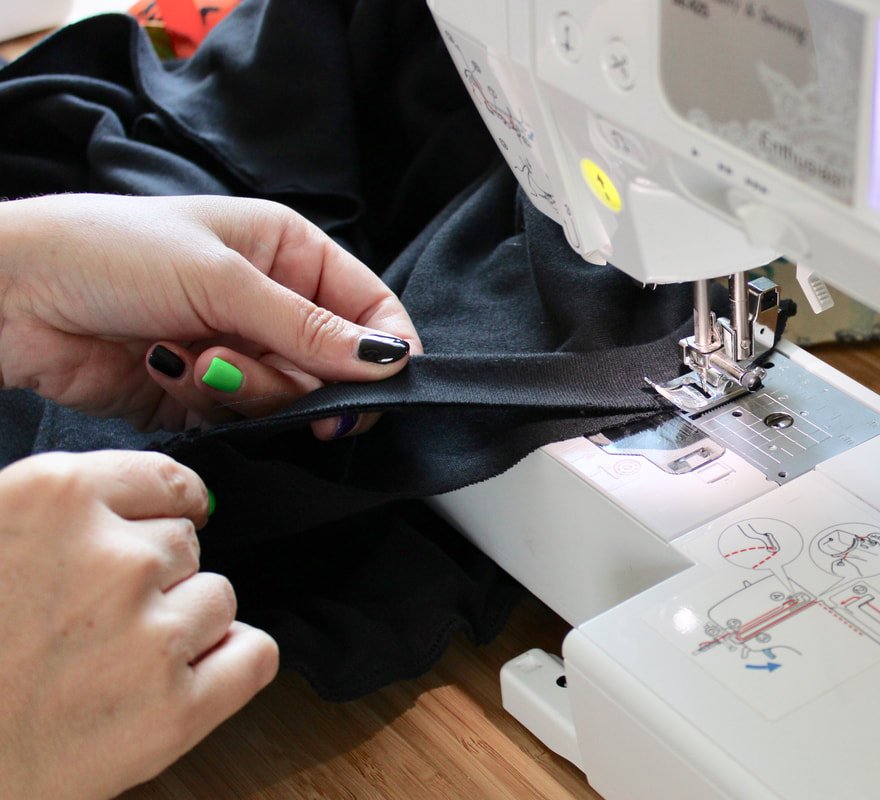
Now, this is where I urge you to use a chalk marker and baste where your stitch lines are supposed to be. I found out the hard way, the top would not fit me according to these loose measurements. I was blessed in the bust department and couldn't get the top over my body. LOL! After unpicking black thread on knit fabric for 30+ minutes, I wanted to share this little piece of advice with you.
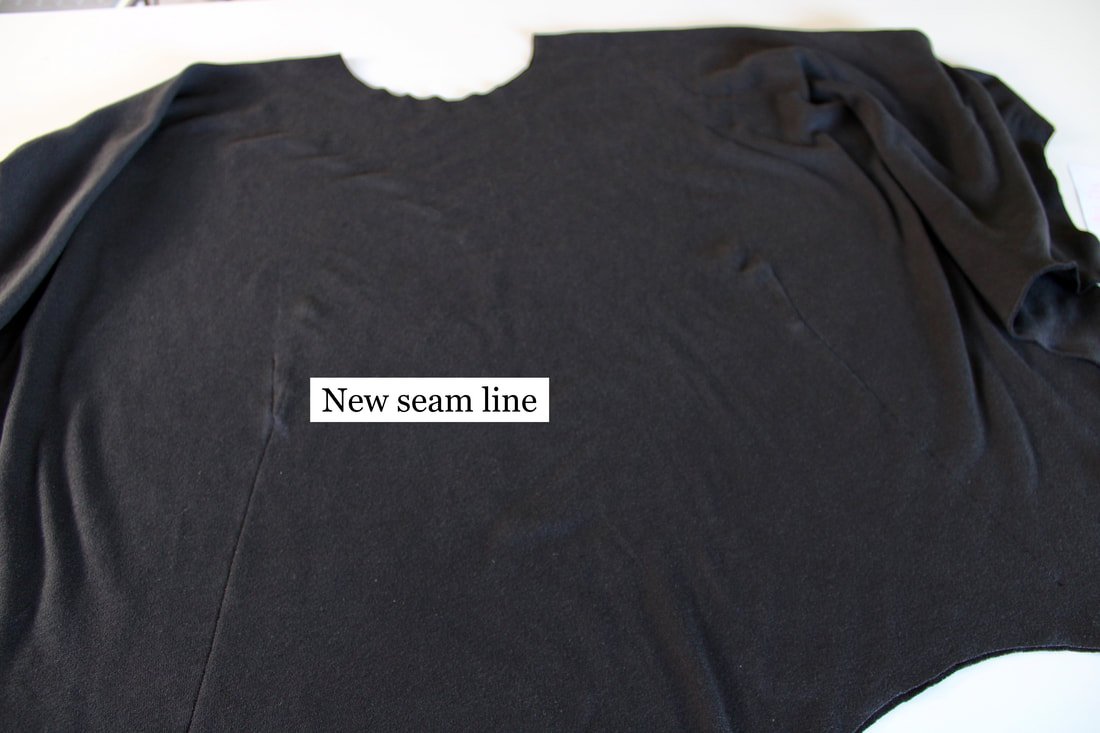
Sorry about the blurry photo, but this is how much I had to unpick. I re-drew the line and tapered it out about 1 inch. This gave me 4 extra inches total and ended up fitting perfectly.
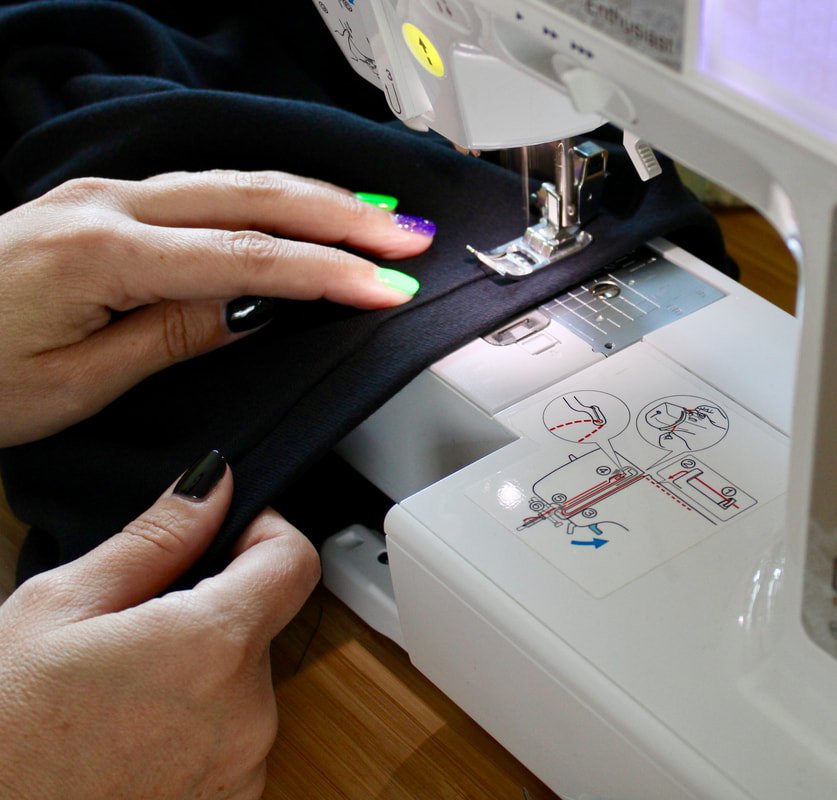
You can see the slightly angled-out seam. This is the side seam and I needed more room than the instructions gave.
The instructions have you use the stretch stitch, which is the one that looks like a lightning bolt.
I urge you to baste your side seams first. That stretch stitch is a pain in the butt to unpick. Especially when using the same color thread on knit fabric.
Save your eyeballs, please!
After you've tried it on and it fits correctly in all the right places, go back and use the stretch stitch to sew your side seams.
Then, sew the rest according to the directions. I used the stretch stitch for this too.
Onto the neckband:
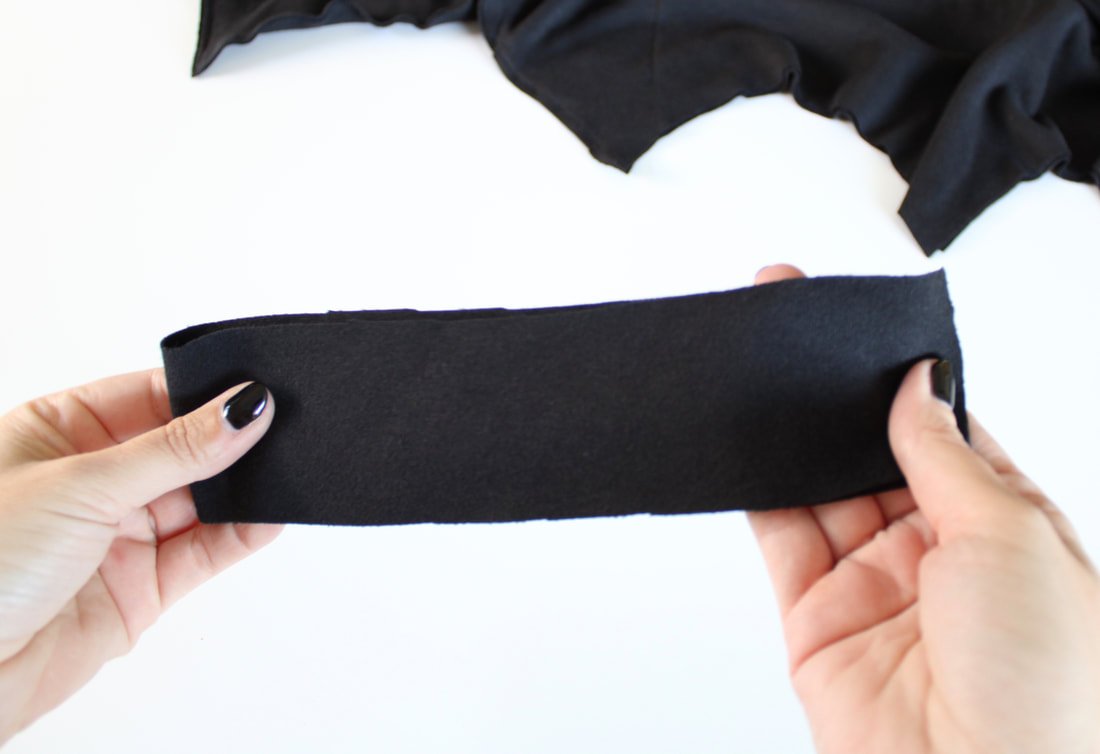
I don't remember reading the instructions anymore after this part. Oops! But, I went ahead and topstitched the neckband onto the top. I like the finish it gives. Use a regular zigzag stitch to do this if you'd like.

It had some rippling but, the iron took it out after a good press.
I had so much fun making this top. And way more fun taking my photos!! I had fun music playing and danced around in my batwing top. I think I'll live in this for the month of October! I love, love, love it!!! I was channeling my inner ghoul.
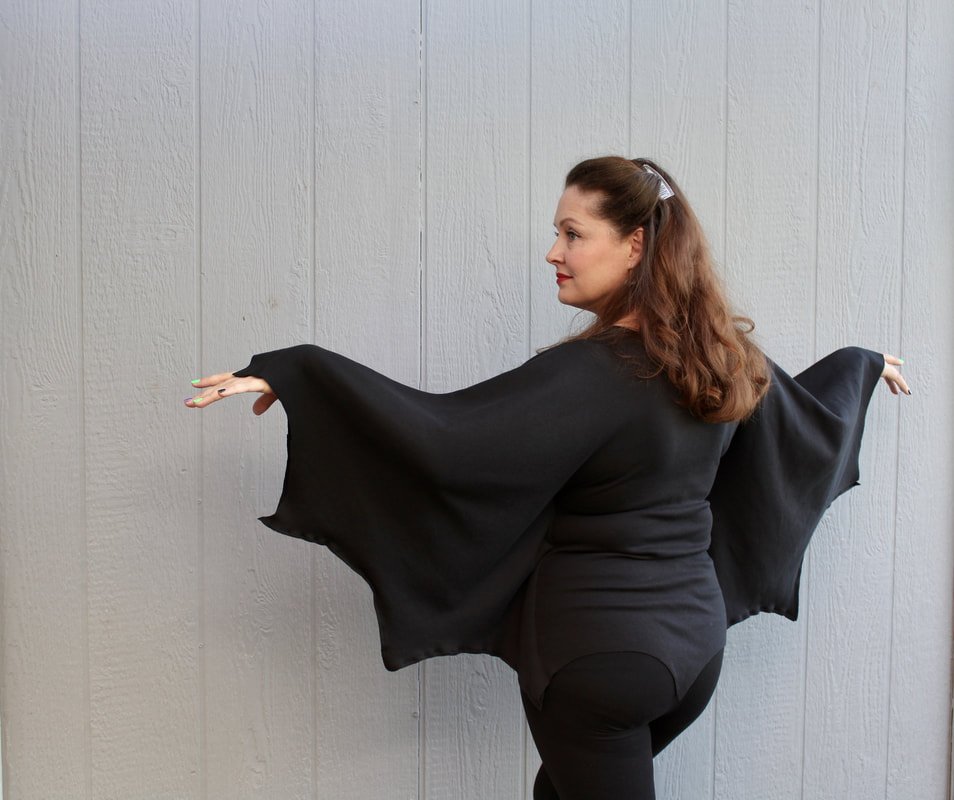


So, what do you think? Are you itching to make one?
If you need more Halloween sewing inspiration, make Trick or Treat bags or DIY your own Halloween home decor. I also made a Fall circle bag. It was a little fail, but cute nonetheless.
See ya later, I've gone Batty!!