Pattern Reviews, Sewing Hacks, Tips & Free Patterns
The Sewing Blog

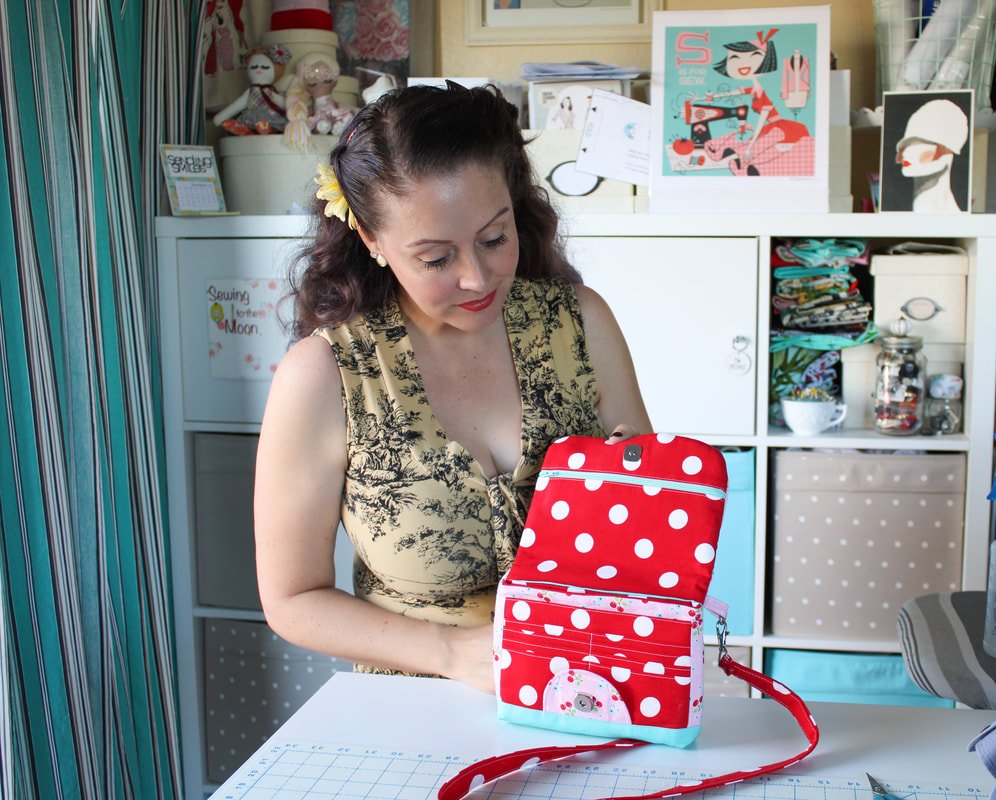
Crossbody Bag Review
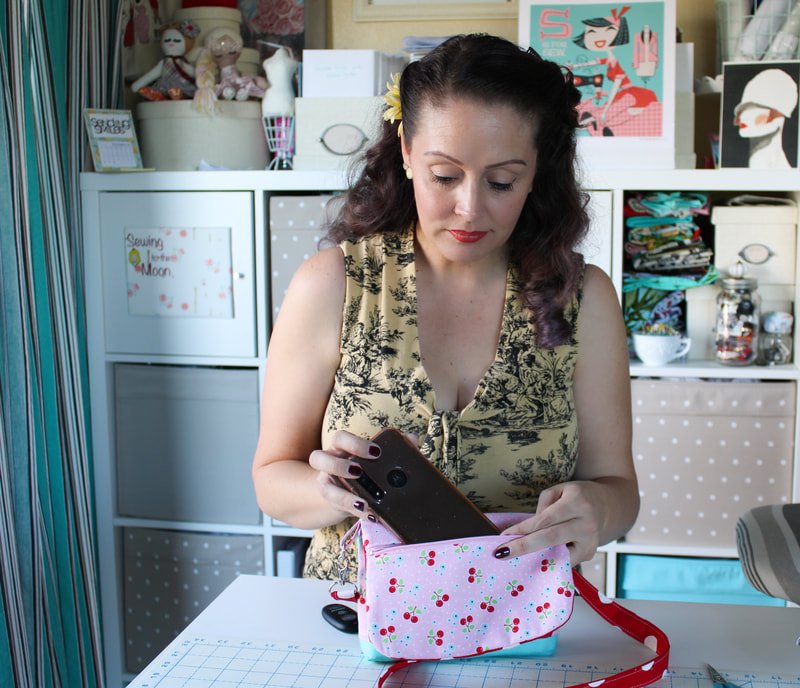
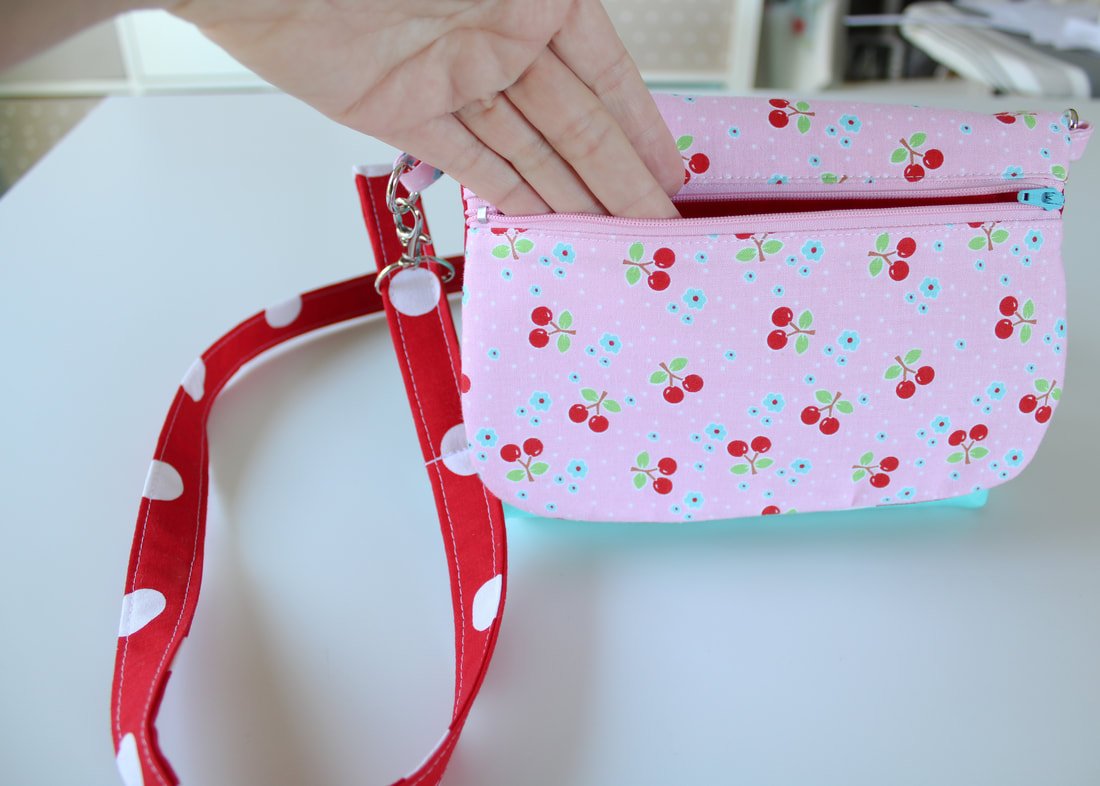
Sew the world’s best crossbody bag. It has tons of pockets, a long strap, it snaps closed, zippered pockets, and more pockets. You can fit everything you need for a full weekend getaway inside.

I have found the holy grail of crossbody bags and I'm shouting it out from the rooftop! Make this crossbody bag today, you won't regret it.
This bag is the biggest-little bag I've ever laid eyes on. It's a game-changer for sure and everyone needs to have one or two! It's honestly the best travel bag I've come across! You can fill it with everything except the kitchen sink. This day-use crossbody bag is perfect for walking around museums, theme parks, concerts, national parks, etc.
I'm not getting paid for this post, I am just in love! Haha!
I've always carried my regular handbag whenever we ventured out and after a few hours, my shoulder would hurt something fierce. I eventually bought a tiny crossbody bag from a big box store for $5 because it was $5! Oh, and it was in the shape of cherries. Super cute!!
Well, my newest phone is too big for the cherry purse. So, I searched Pinterest high and low for a crossbody sewing pattern and nothing came up. Is it me or is Pinterest extremely lackluster nowadays?
I wanted pockets and the bag shape to be more horizontal than vertical. My next stop was Etsy. Thank you Etsy, for coming through. I found the best pattern and I'm sharing it with you today. Hold on to your teacup because she's a doozy.
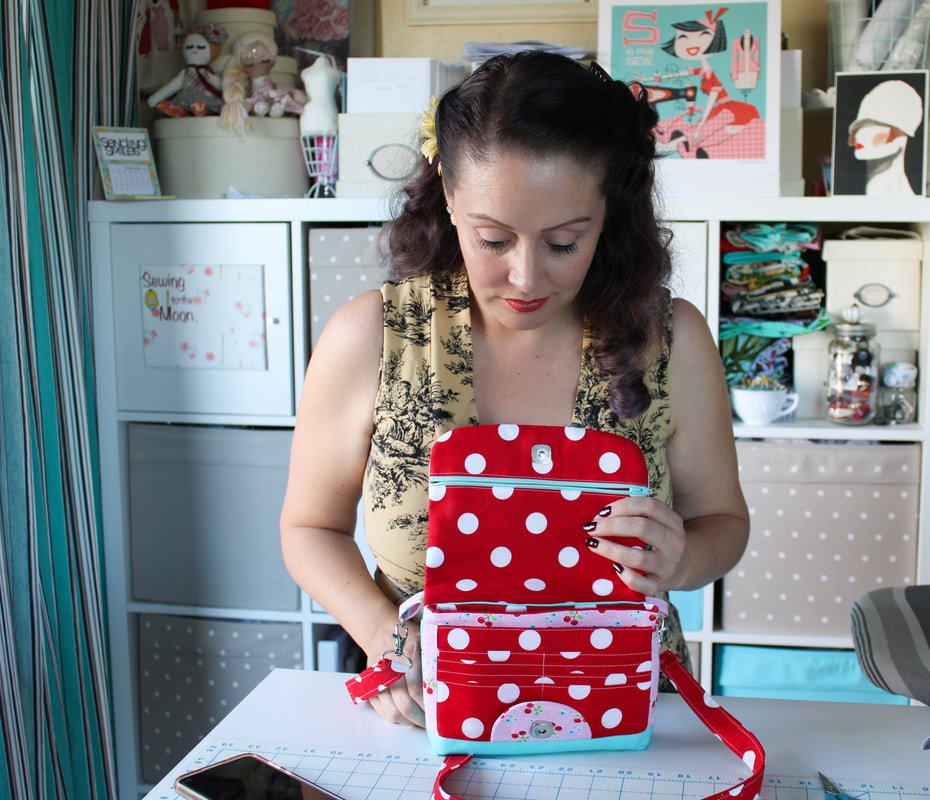
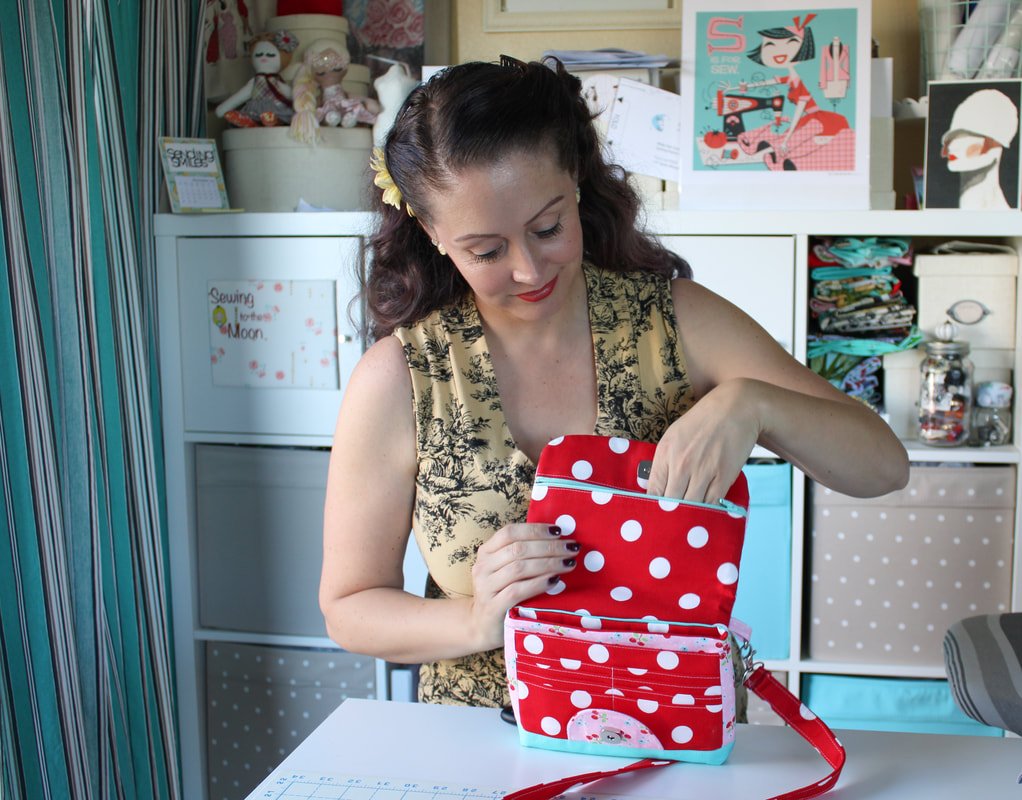
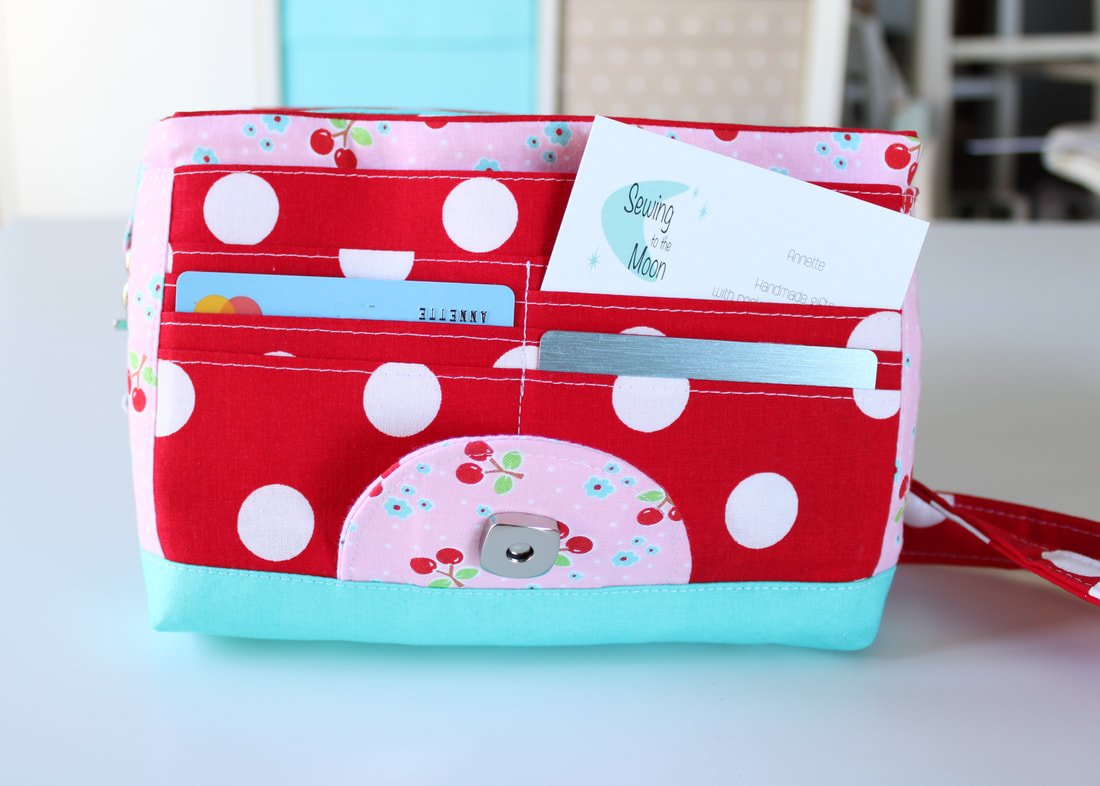
This bag has so. many. pockets! It's comfortable to wear (aren't all crossbody bags?) and will hold allllll of your things. I'm not sharing a step-by-step tutorial in this post because the bag creator has YouTube videos and an extremely detailed PDF that comes with the pattern. This post is more of a pattern review.
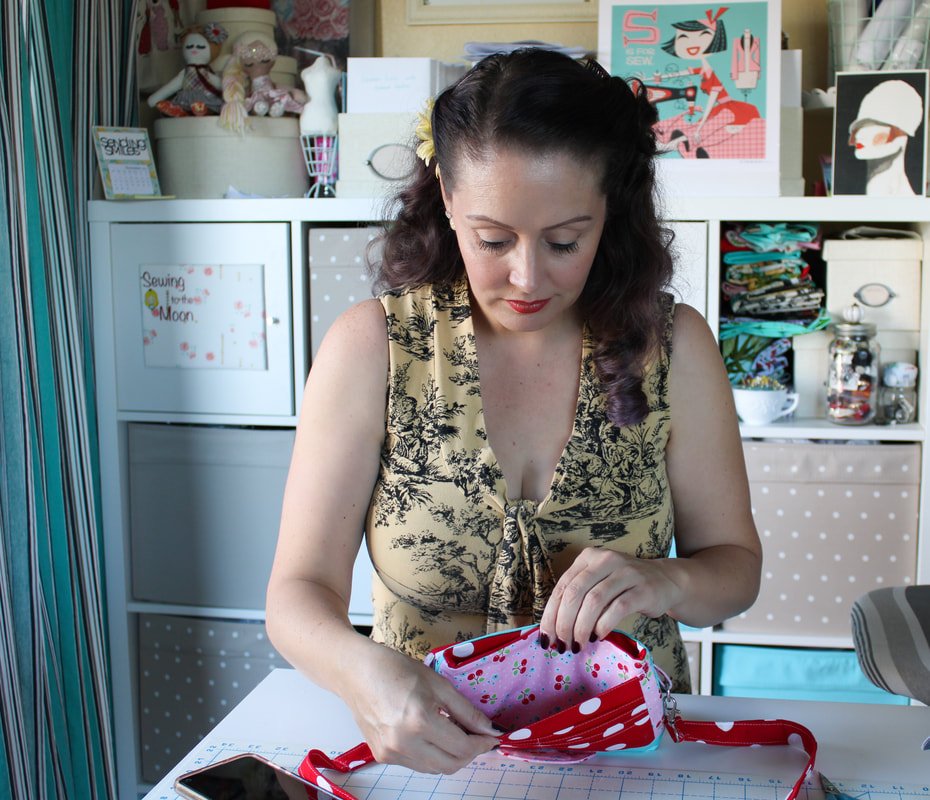
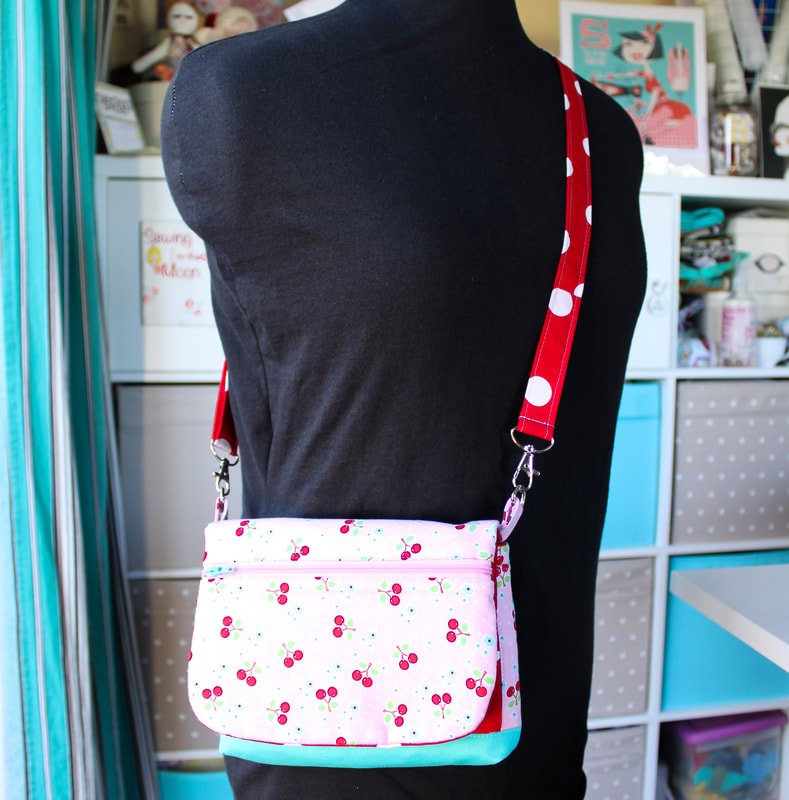
I made this one for myself so, it is full of bright colored fabrics. If you know me, I'm the opposite of a neutral person. Ha!
Clarendon Crossbody Wallet
by: Hold It Right There Bags

Grab the downloadable pattern here.
I want to start off by saying this bag is not great for scrap-busting. It takes a good amount of fabric. You'll also need a couple of yards of interfacing because everything needs to be interfaced. Don't skip the interfacings, bags really do need all the pieces to be reinforced.
After you print and cut out all the PDF pattern pieces, trace and cut the fabric pieces, and interface everything 'til the cows come home, you'll be ready to sew!
Whew!
Holy moly. This pattern has sooo many pieces. I suggest cutting and interfacing everything one day and saving the sewing for the next day. Like I said, she's a doozy.
The bag does come together quickly when you start sewing though. Yay for that!
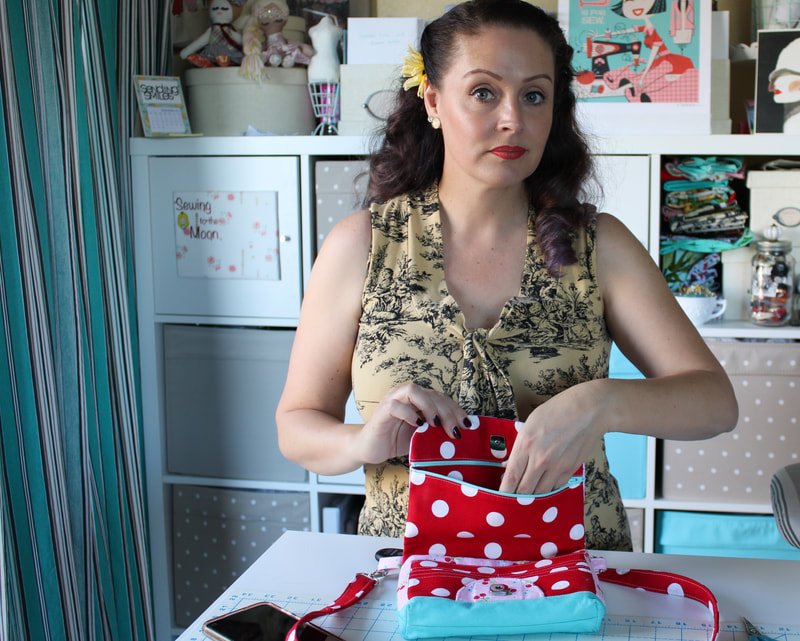
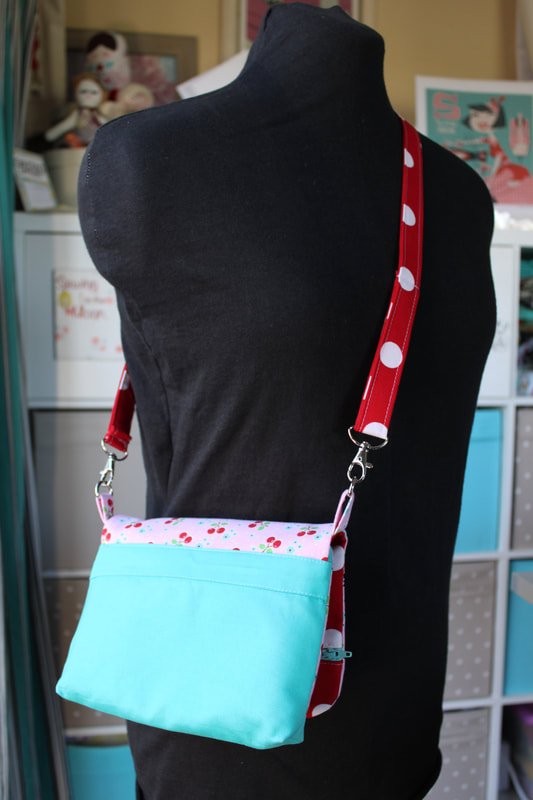
I wore the bag all day on a family adventure to an aircraft carrier. It was full of all my things and a few of my kid’s things. I walked up and down stairs and spent a lot time standing, reading signs, and listening to the volunteers talk. The weight would usually have hurt my shoulder and back but, I didn't have any pain. I could have worn this bag for 3 more days without batting an eyelash. Winner-winner!
It held everything I needed for the whole day and was comfy to use/wear.
The following weekend I was invited to go away on a girl’s trip. I left my regular purse at home and only took the crossbody bag. It was perfect. It held my money, masks, cards, and everything else I needed for a whole weekend.
I do like a full-size handbag for everyday use so, when I got home I emptied everything back into my bigger bag. But, this was perfect for a day out.


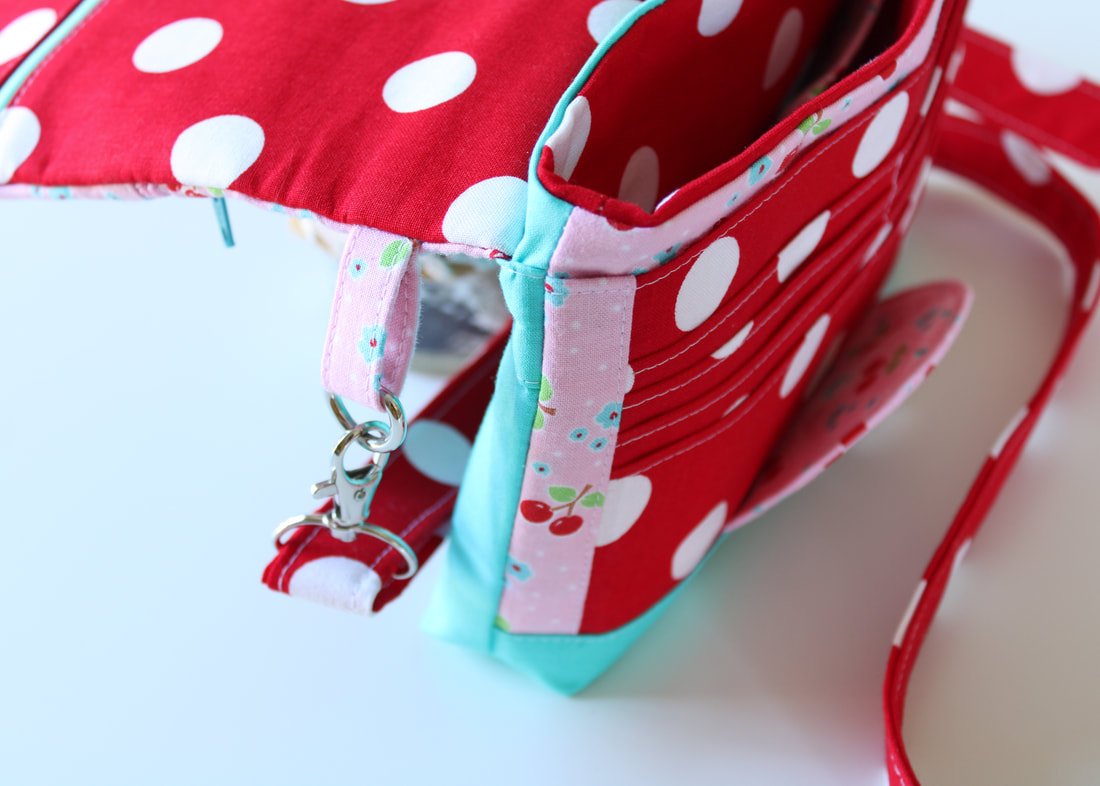
This bag has all the pockets! It’s the greatest bag pattern I’ve ever sewn.
Assembling the bag is fairly easy. Follow the PDF directions and/or YouTube videos. There are a few added steps to help with things like zipper installation, which is great for beginners.
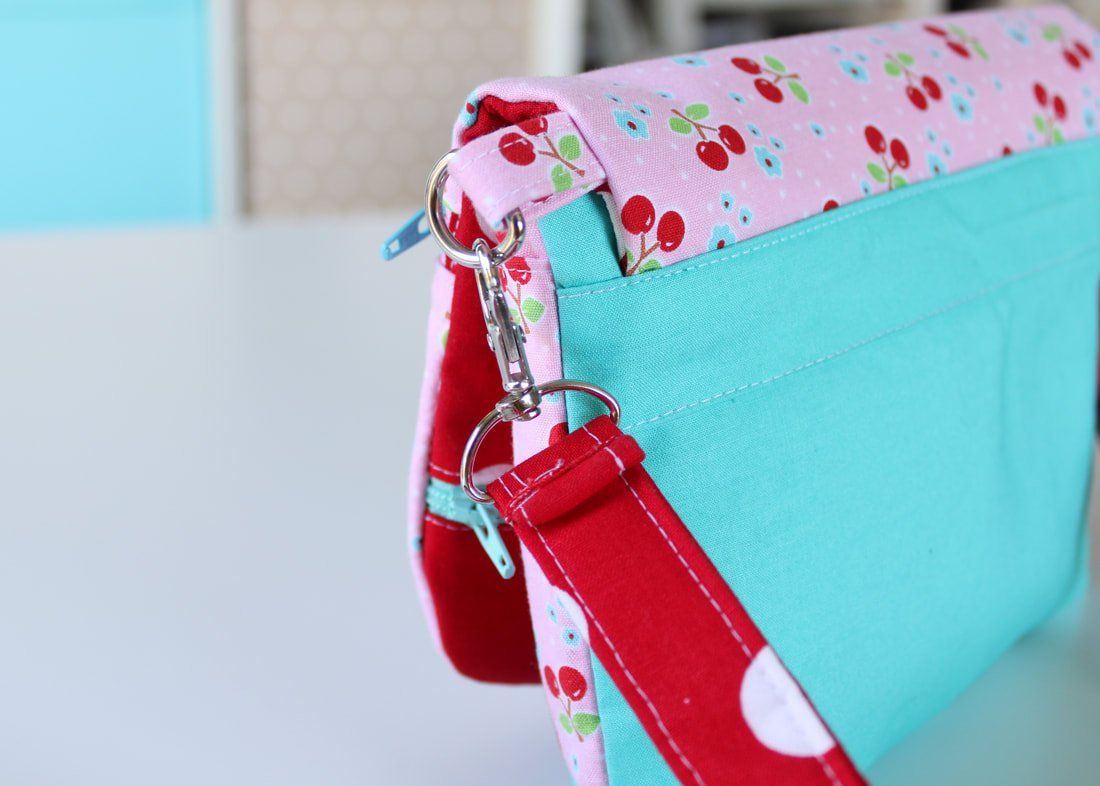
You don't need rivets to make this bag. You can sew across the seam easily enough. Heck, you don't even need the swivel hook or D ring. Sew one long purse strap into the bag seams.
Okay, here are a few changes I'd make:
Tips for Next Time
I wouldn't add the lining pocket. The bag is small and has a whole lot of pockets already. The main body portion is small enough and doesn't need the extra pocket (read: save your fabric).
I made the purse strap twice as thick. I always prefer a thicker strap so, if you're the same way, use a 1" swivel hook and double the width of the fabric strap. I still used a .5" D ring and didn't have any issues with the different hardware sizes.
Next time, I want to use vinyl for the back and bottom. I didn't use any this time because it's a cross body bag. I usually don't let my crossbody bags touch the floor, they stay on my body throughout the whole day. But, I might try it in the future.
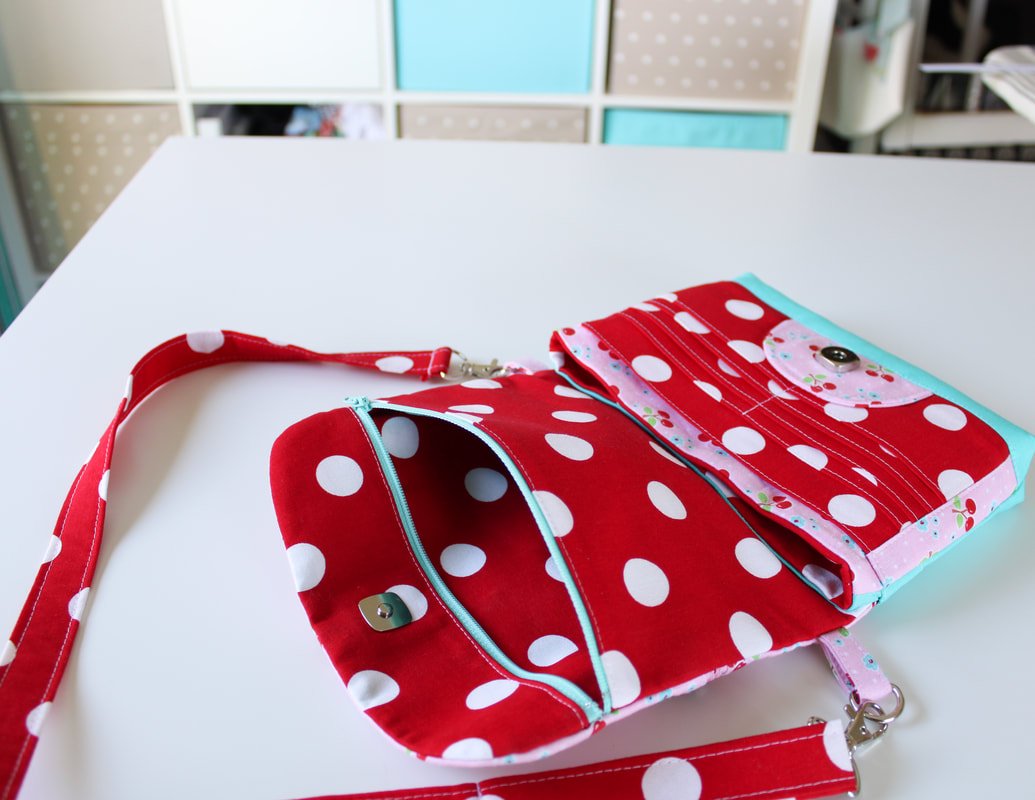
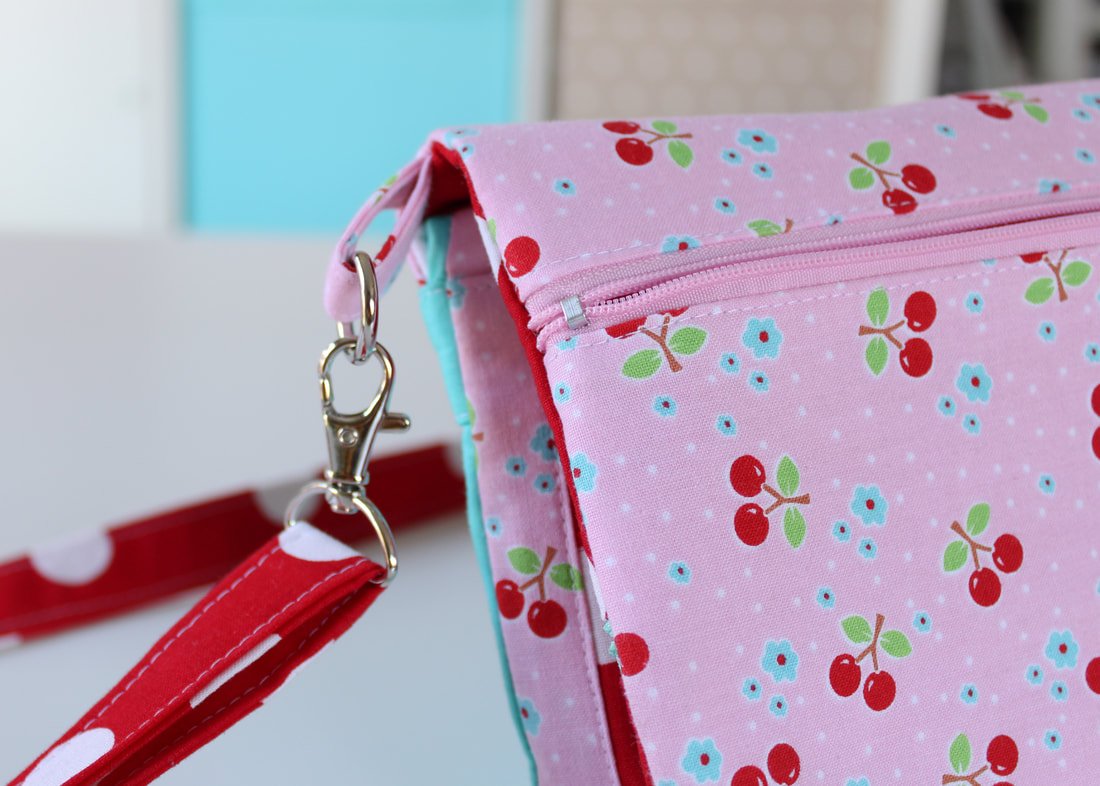
I would make zipper tabs next time. This will allow the front flap to lie flat and look nicer. Yes, adding zipper tabs adds extra time but, it'll be worth it.
Read through the pattern instructions first. The instructions are extremely detailed. Almost too detailed in my opinion. But, if you're brand new to bag sewing, extra details are a good thing. If you're more familiar with inserting a zipper, snap, etc.) some steps may feel a bit tedious.
I would topstitch the front flap and around the main opening. The instructions don't have you do this. I suggest you do it though. Topstitching holds all the layers in place and gives it extra reinforcement.

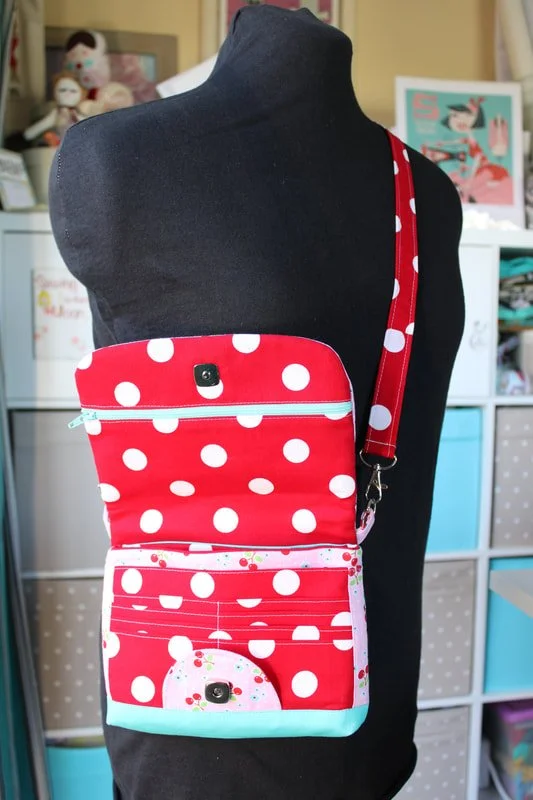
Back view of the bag.


So what do you think? Are you excited to make a Clarendon Crossbody Wallet? I highly recommend this pattern and bag. I plan on making a few for friends to give as Christmas gifts this year. But, shhh, don't tell them. ;)
Happy Sewing!
XO,
Annette


Simple Sewing Projects
Sew some simple projects. These make great gifts, stocking stuffers, or beginner sewing patterns. Beginner-friendly and great for teaching how to sew.
This list is chock full of simple sewing projects. Need to sew something that doesn't take a lot of fabric or pattern pieces? This is the list for you! I've compiled some sewing projects that are easy and great for beginners. These are great for scrap-busting and make wonderful gifts, too!

Projects to Sew:
Keychain
Headband
Zipper Bag
Apple Watchband Scrunchie
Fabric Basket
Pillow
Small Purse
Advent Calendar
Hair Scrunchie
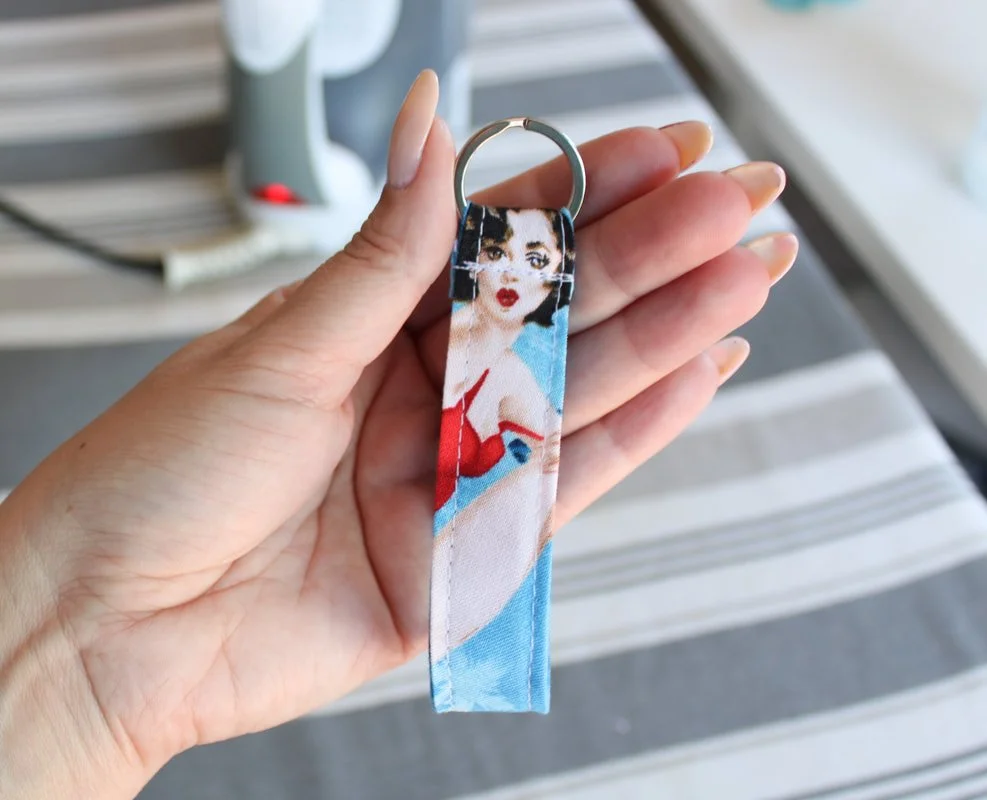
1. Keychain
We all need keychains for our keys or extra sets of keys. You can increase the length of this to make a wristlet or lanyard as well.
Supplies:
Fat Quarter or large strip of fabric
Lightweight interfacing
Matching thread
Metal key ring
Iron + ironing board
Sewing machine + notions
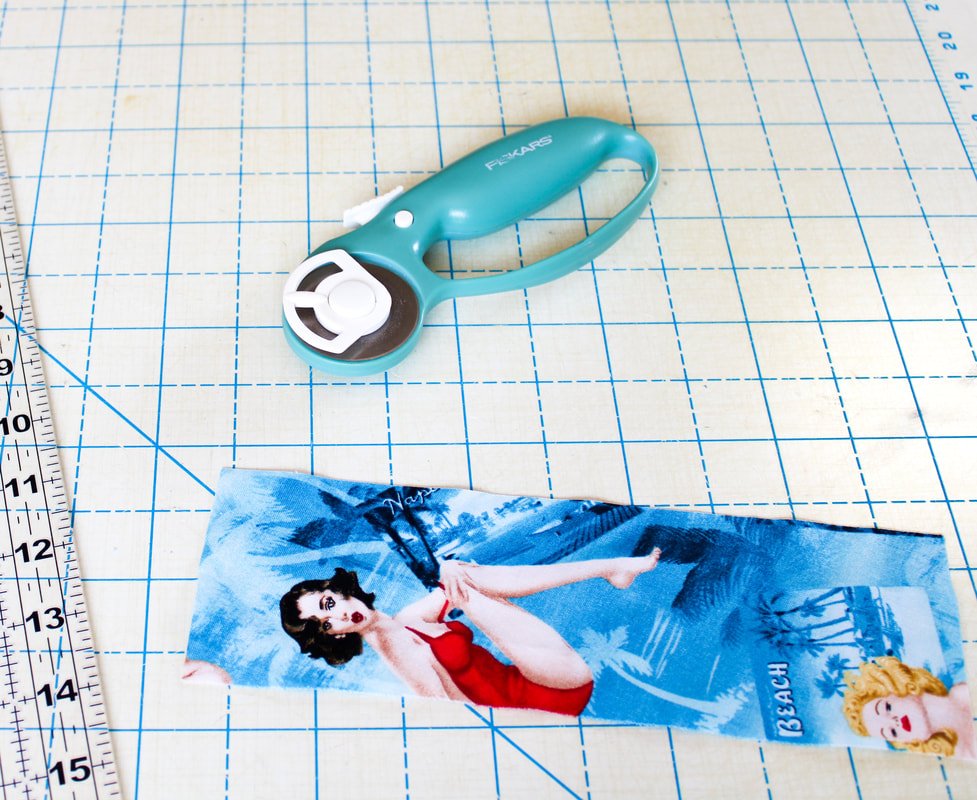
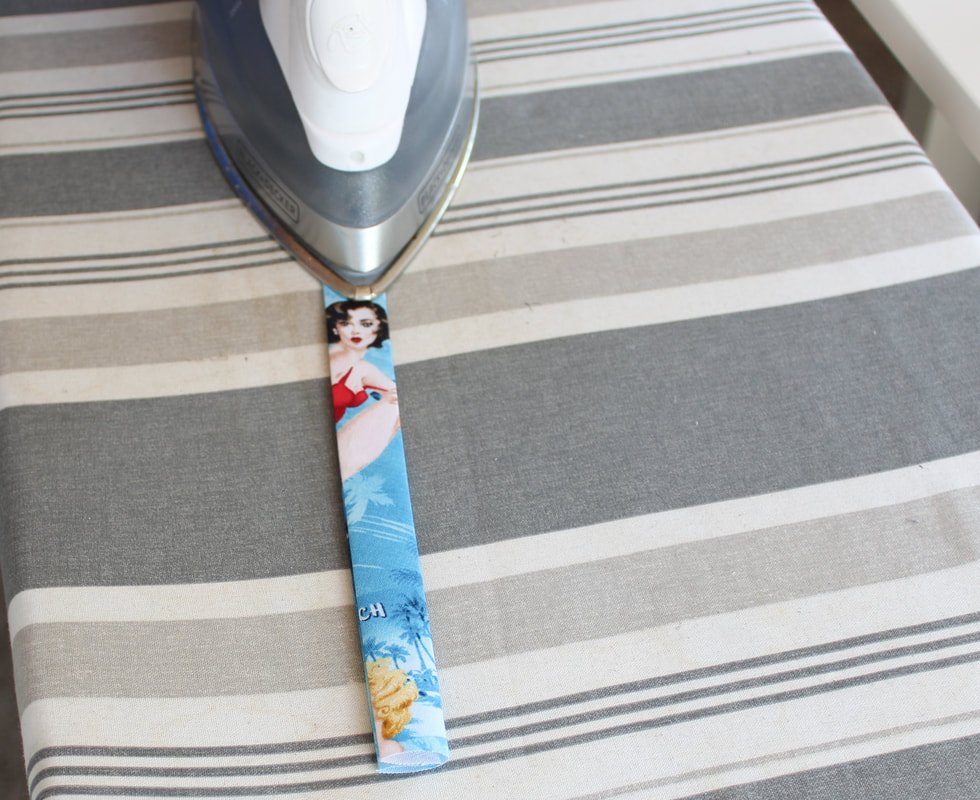
Cut a rectangular piece of fabric that measures 8" long by 4" wide. You can always cut this shorter if you'd like but, this is a good starting size for a pocket key fob..
Apply interfacing according to the manufacturer's instructions.
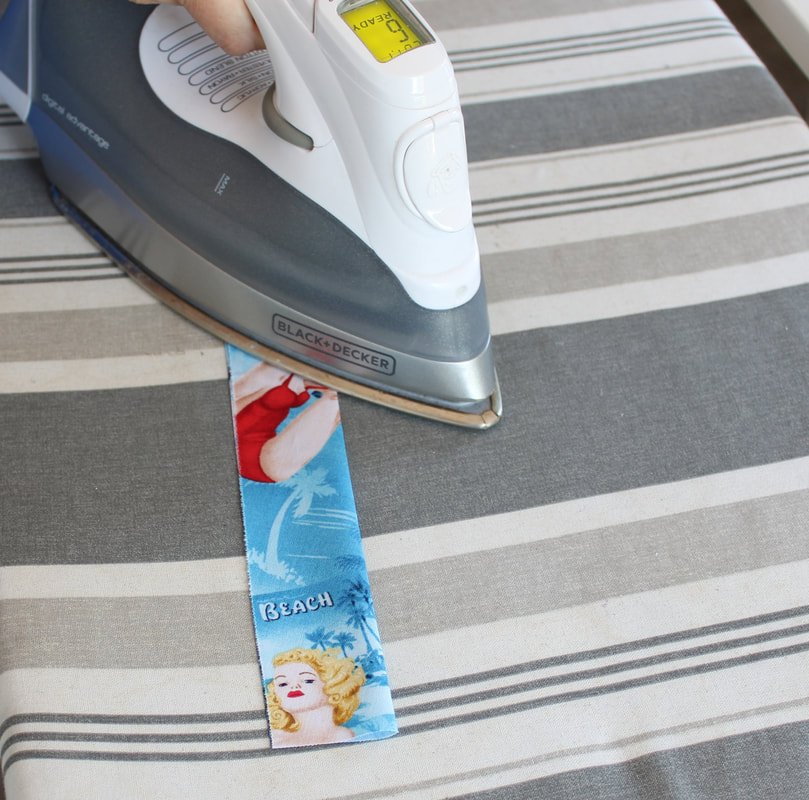
Fold the fabric in half, wrong sides together, lengthwise, and press.
Fold one long edge into the center crease you've previously made. Press.
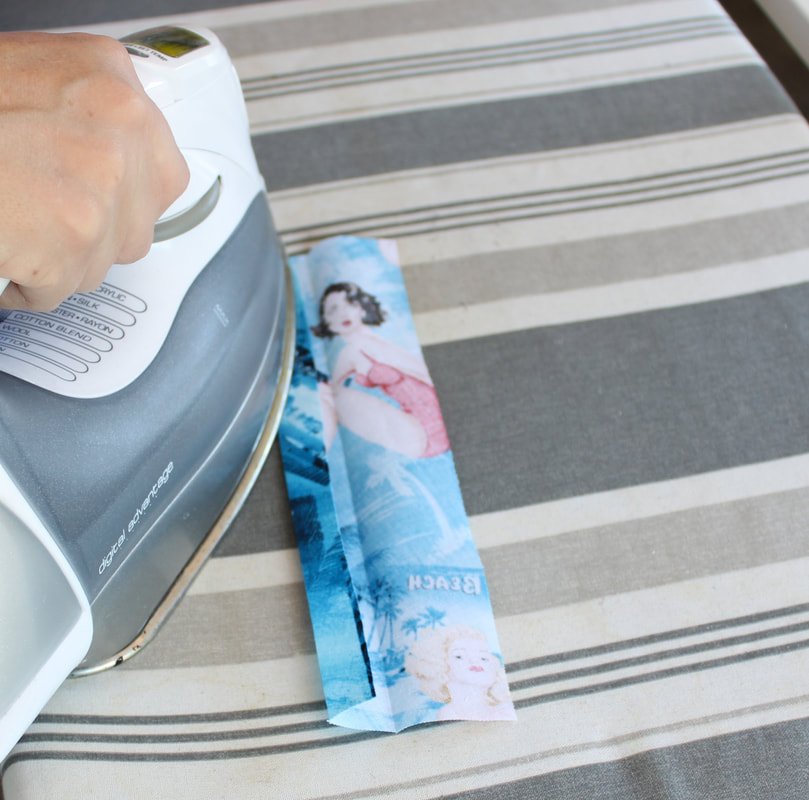
Do the same with the other side. Press. Fold the edges in again and you should now have one long strip. Give it a good press once again.
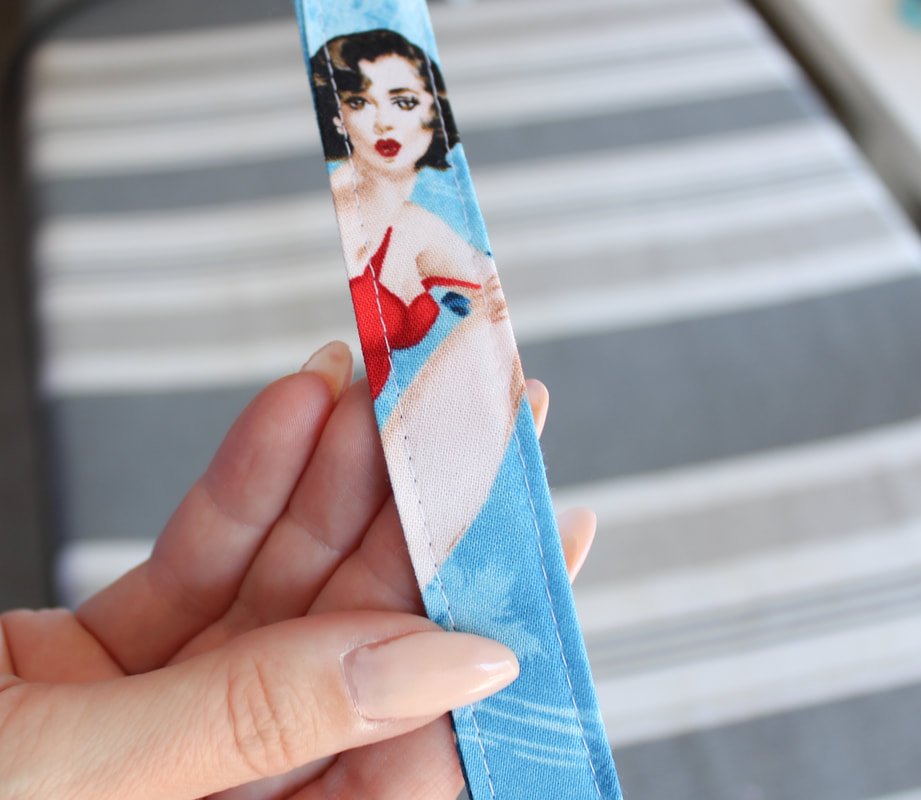
Top stitch 1/8" using 3mm-3.5mm stitch length, from the folded edge starting from the top. Repeat on the other side, starting at the top. (This will help with any puckering that may occur).


Grab the ring and slide it onto the fabric strip. Pick which side you want on the outside.

Fold one end over the ring about 1/2".
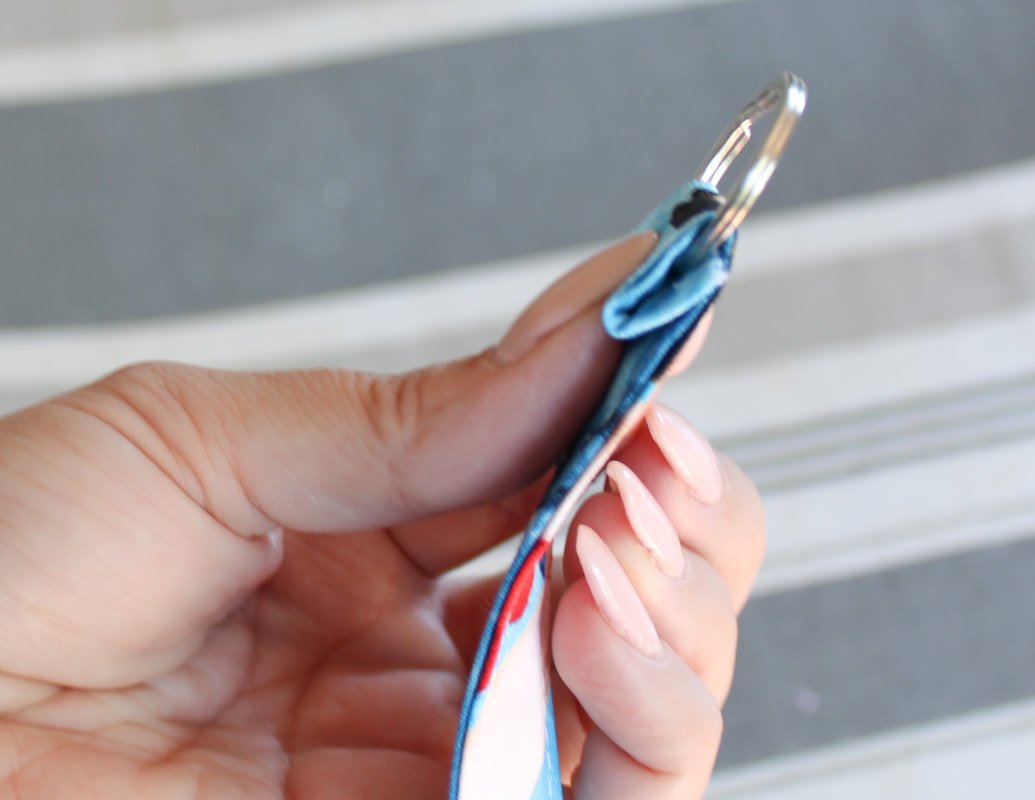

Add keys and go!
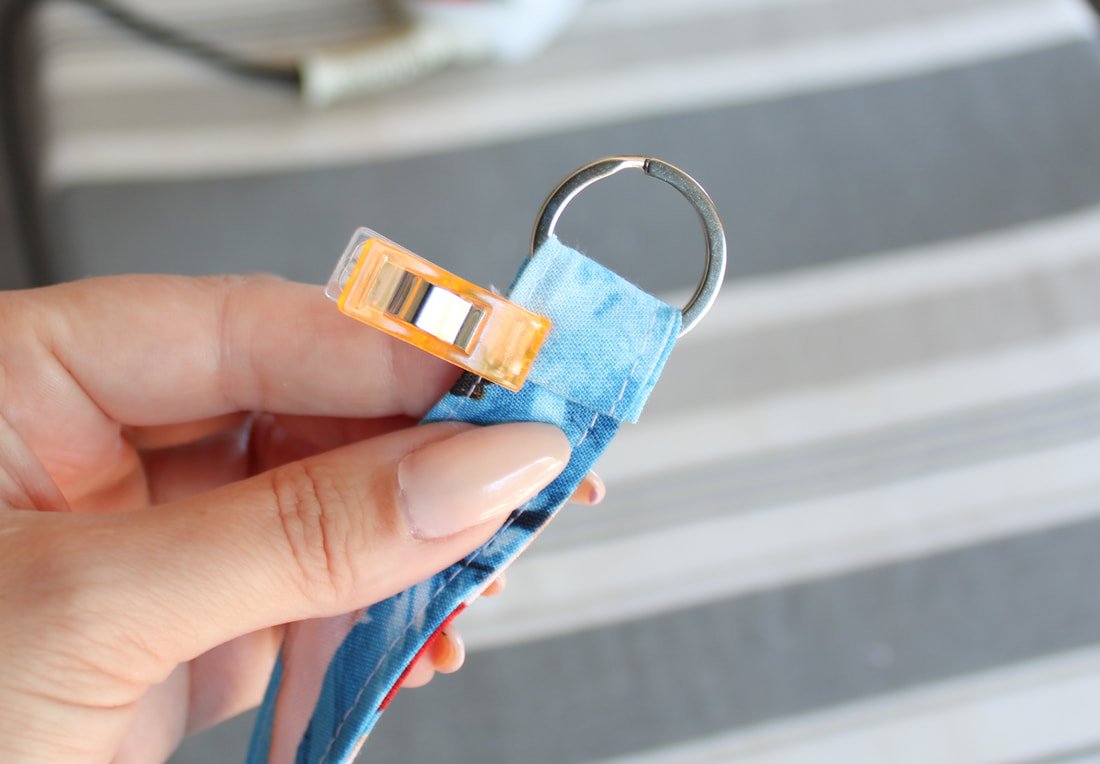
Bring the opposite edge up and under the folded edge. You'll hide the raw edge under the folded edge. Use a clip to keep them together.
Sew a few rows of stitching making sure to backstitch at the beginning and end. That's it! You're done!
Add your keys and show off your new keychain. Sew simple, right??
You can make this into a neck lanyard as well. Drape a measuring tape around the back of your neck and bring the end to the front to get your desired length. Add 2" for the folded edge.
You can also make this as a wristlet keychain.
2. Headband or Hair Scarf
Choose between a thin Rockabilly headband or a wide Pinup style headband to sew. Or, make them both. A gal needs options, right?
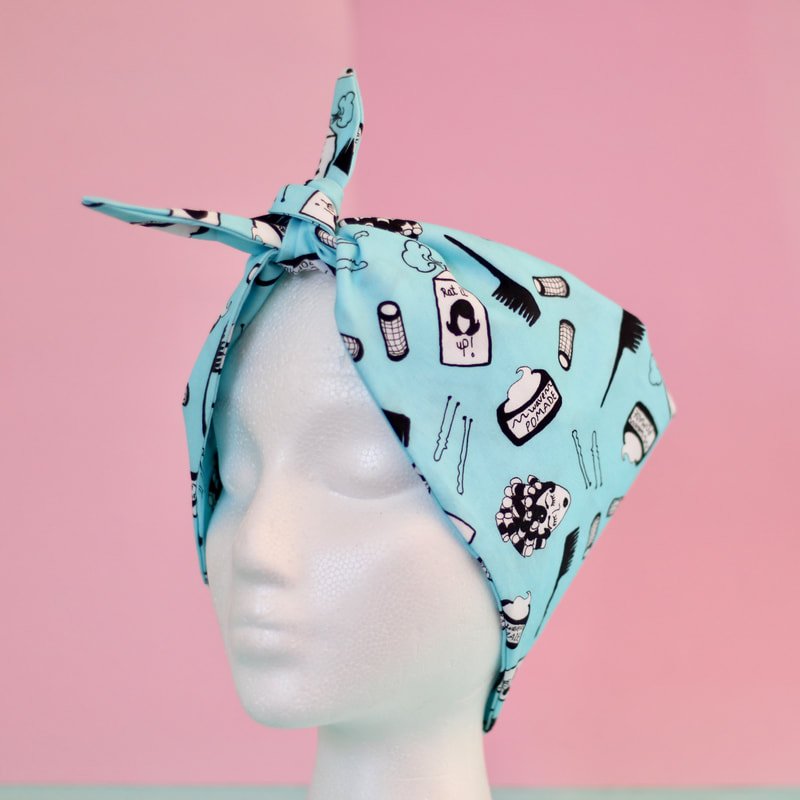
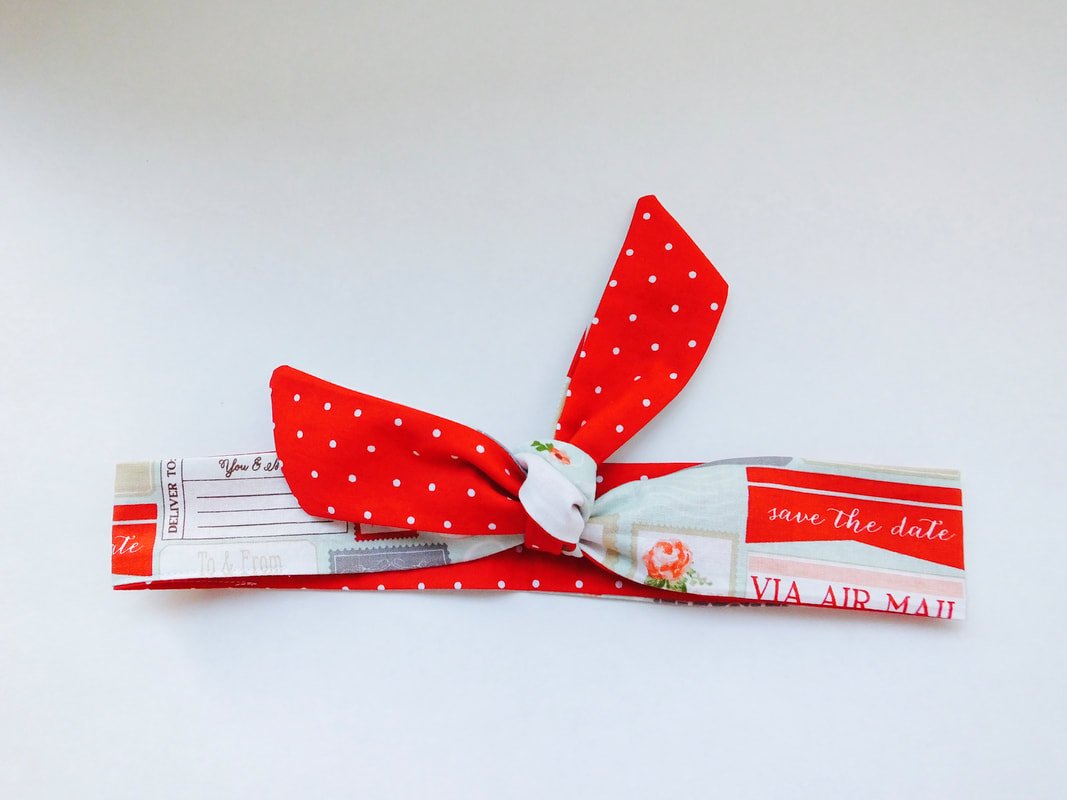
Click the link above to take you to a tutorial.
3. Zipper Pouch/ Makeup Bag
Follow this blog post for an easy zipper pouch. Increase the size and length to make it larger. These make great essential oil pouches, pencil cases, wet bags, etc.

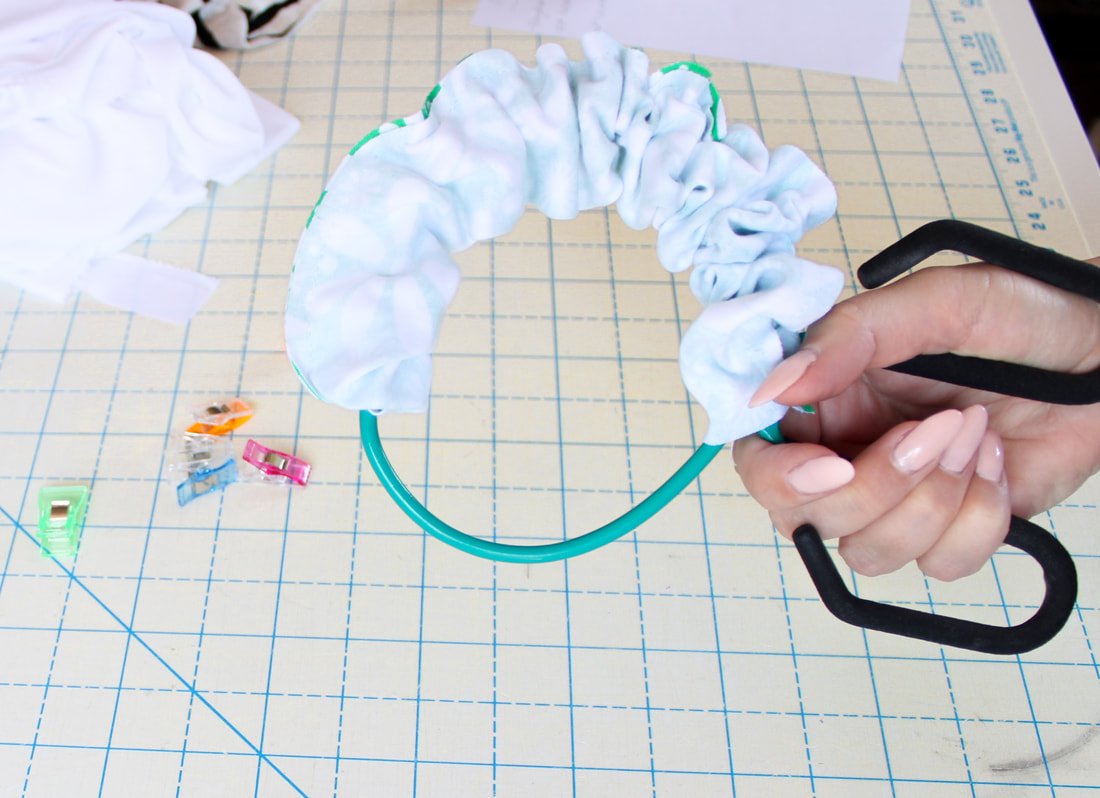
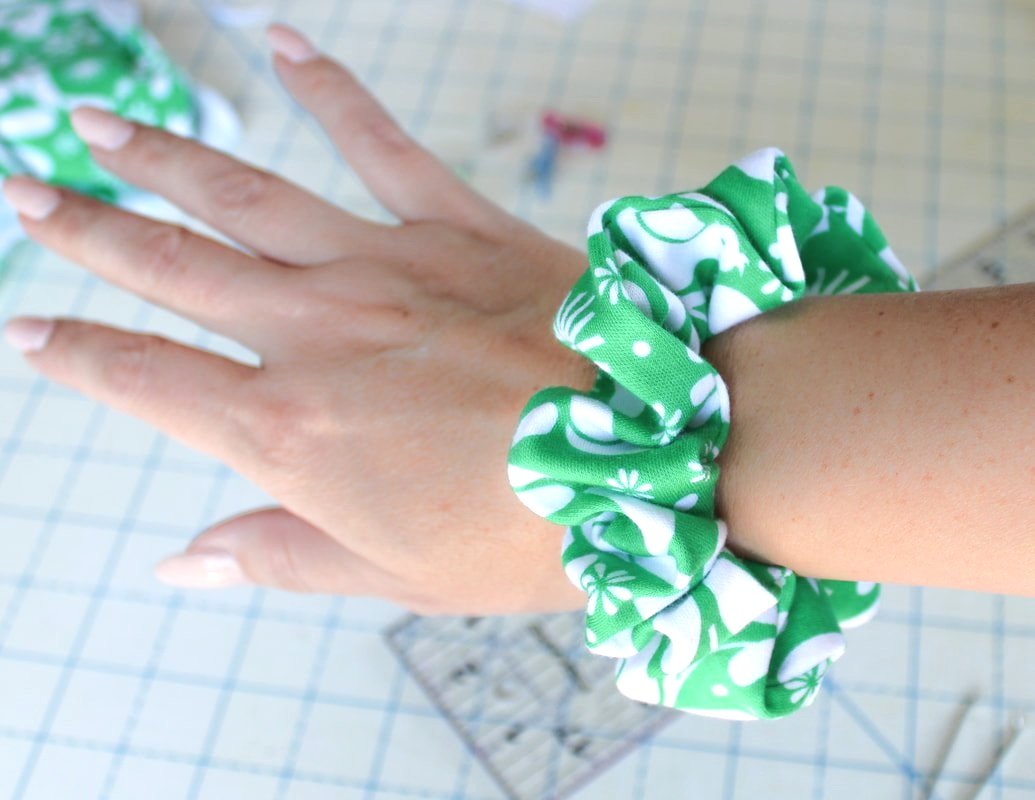
4. Apple Watchband Scrunchie

Click here for the blog post and directions to give your Apple Watch a little more personalization. You can find the watch magnets on Amazon. These are very easy to sew. Make one of these for yourself or as a gift along with a new Apple watch.
5. Storage Basket
We all have stuff. Too much stuff. And, all that stuff needs a home. Storage baskets and bins are perfect for small items that need some organization in their lives. You can customize these by increasing the size to accommodate larger items. Click here for a smaller size that's great for a beginner basket.


6. Pillows
Make a pillow for your bed or couch. Make some small pillows for kids to use too. Pillows are as easy as pie to sew. Follow this Blog post and make all the pillows your little heart desires.
These aren't great scrap busters because they do take larger pieces of fabric. However, you could use a different front and back piece to use up the scraps you have on hand.

7. Purse

Make a small or large handbag custom to your wants and needs. This tutorial will walk you along with a “choose your own adventure” style bag.
8. Advent Calendar

Countdown to Christmas
Get a head start on holiday sewing with this easy tutorial for making an Advent Calendar. It's a good scrap buster to use up those holiday fabric pieces. You could alter this to make a Birthday countdown calendar or countdown for a wedding, other holiday, etc. It will take a large piece of fabric for the front and back main panels but, you can use scraps for the smaller pieces.
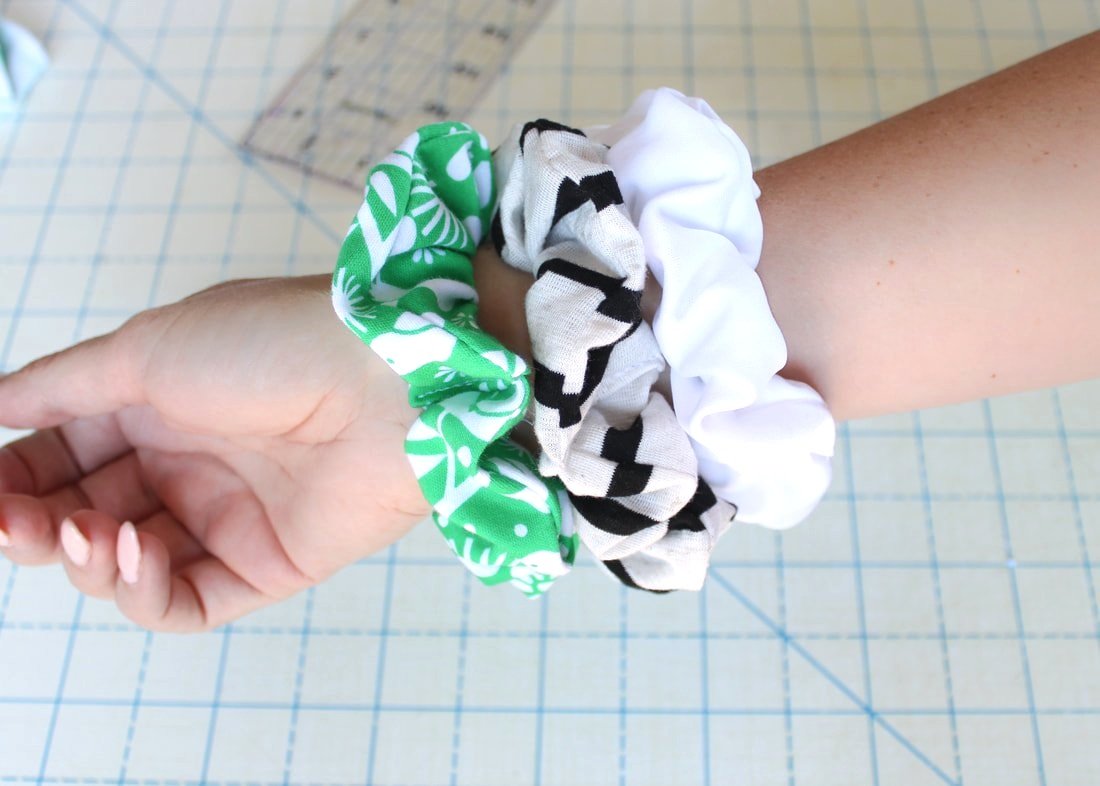
9. Hair Scrunchie
Is it scrunchie or scrunchy? My daughter even calls them a "scrunch". Either way, we all love them! They are comfortable to wear and claim to be healthier for your hair than rubber bands alone. A handmade scrunchie will accessorize your outfit and put a smile on your head. Not really, but just go with it. ;) They also keep the hair off your neck while sleeping, cleaning, or sewing. ;)
As with most things that are mentioned above, you can increase/decrease the length and width of the fabric strip to make these larger and fluffier or shorter and thinner.
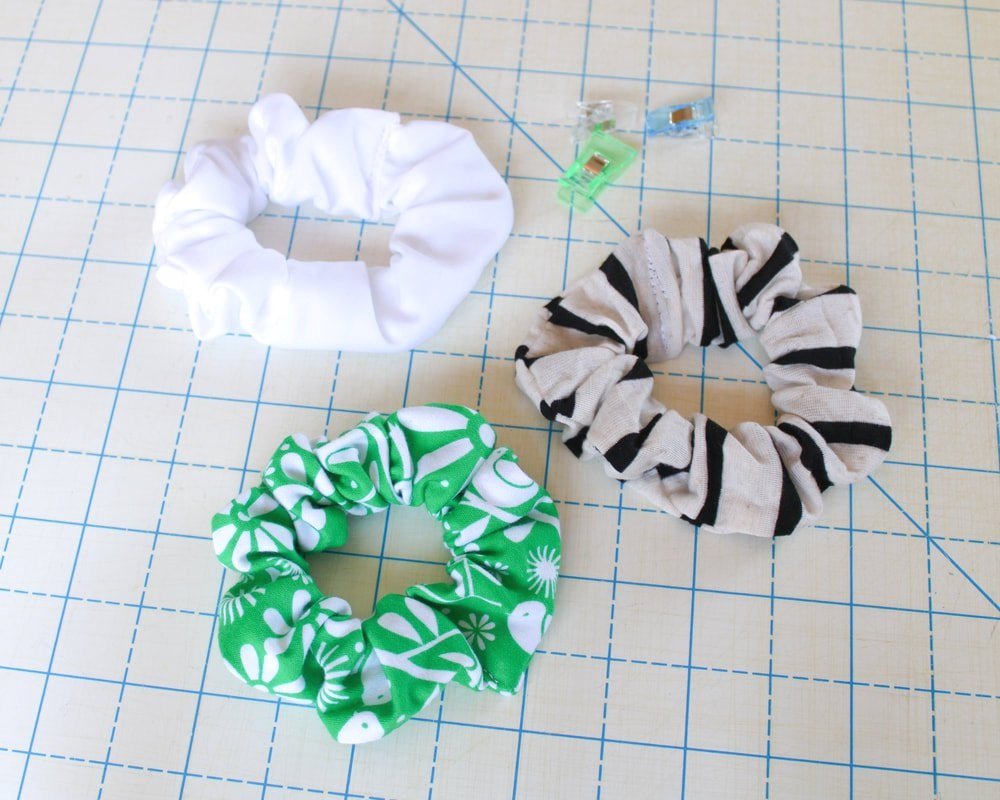
*I personally like this exact size. I've made a few in different lengths and widths for my daughters but, they love the fluffier size too.

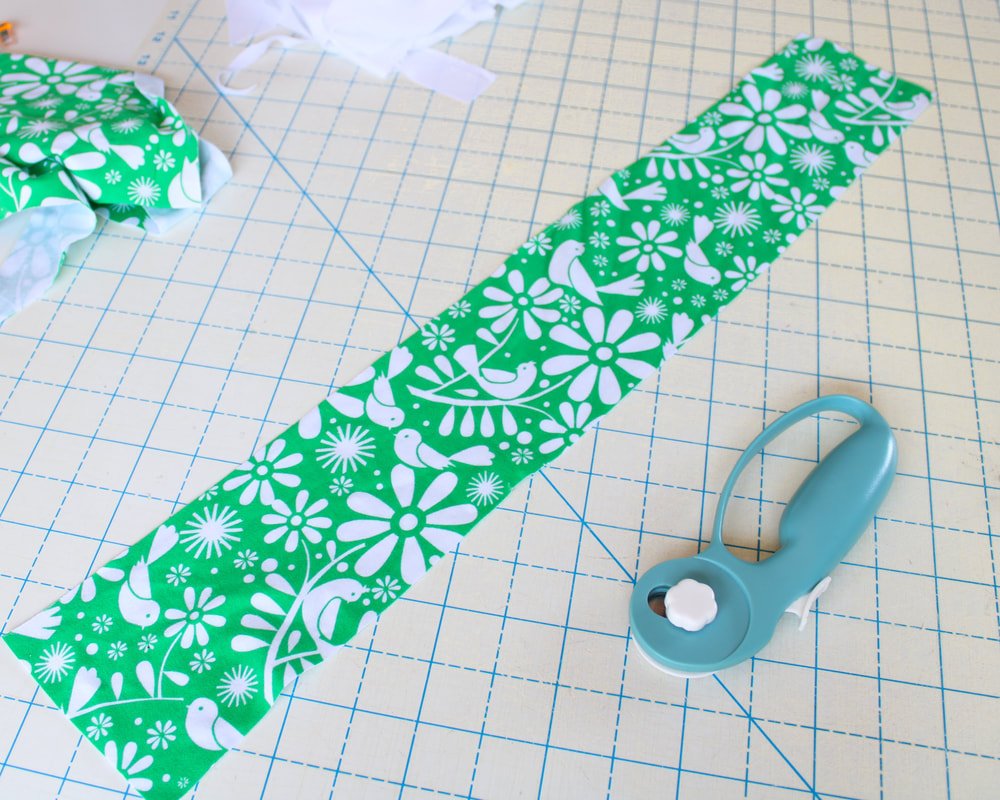
Fabric for the scrunchies.
Supplies
1/4" elastic
Fabric measuring at least 23" long
Sewing machine + notions
Safety pin
Cut a fabric strip measuring 4" by 23". You can use satin, cotton, viscose, rayon, or anything that is lightweight and has a drape. You wouldn't want to use canvas or something that is thick and stiff. You're basically creating a ruffle, so it needs to be able to... ruffle. :)
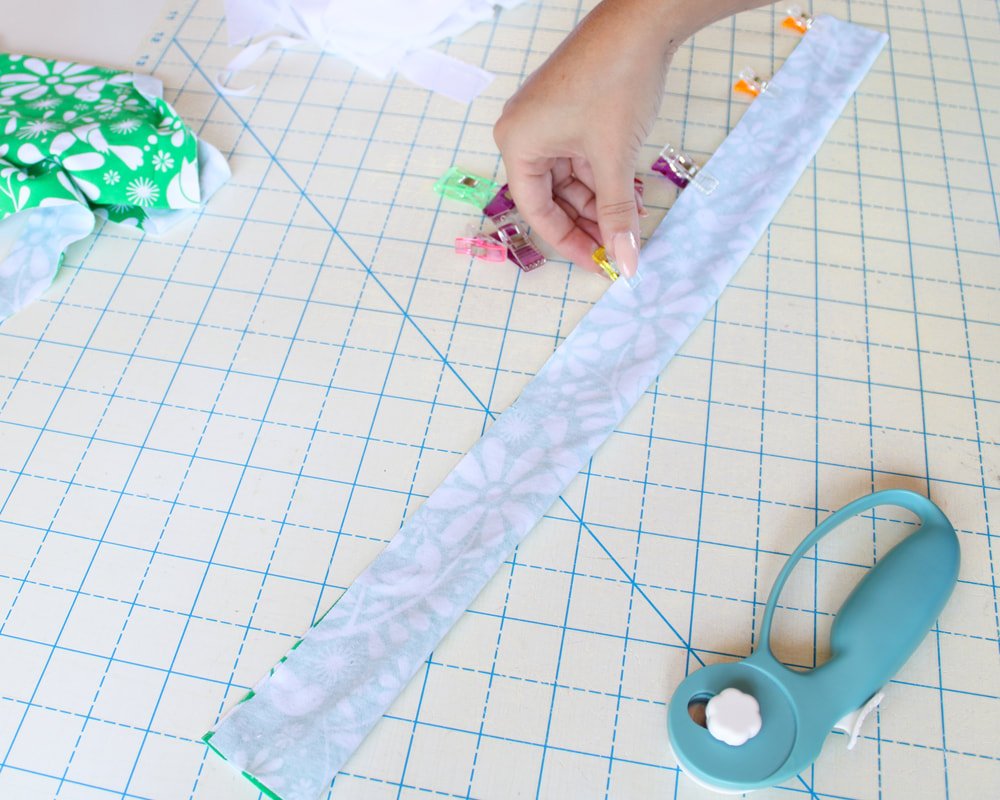
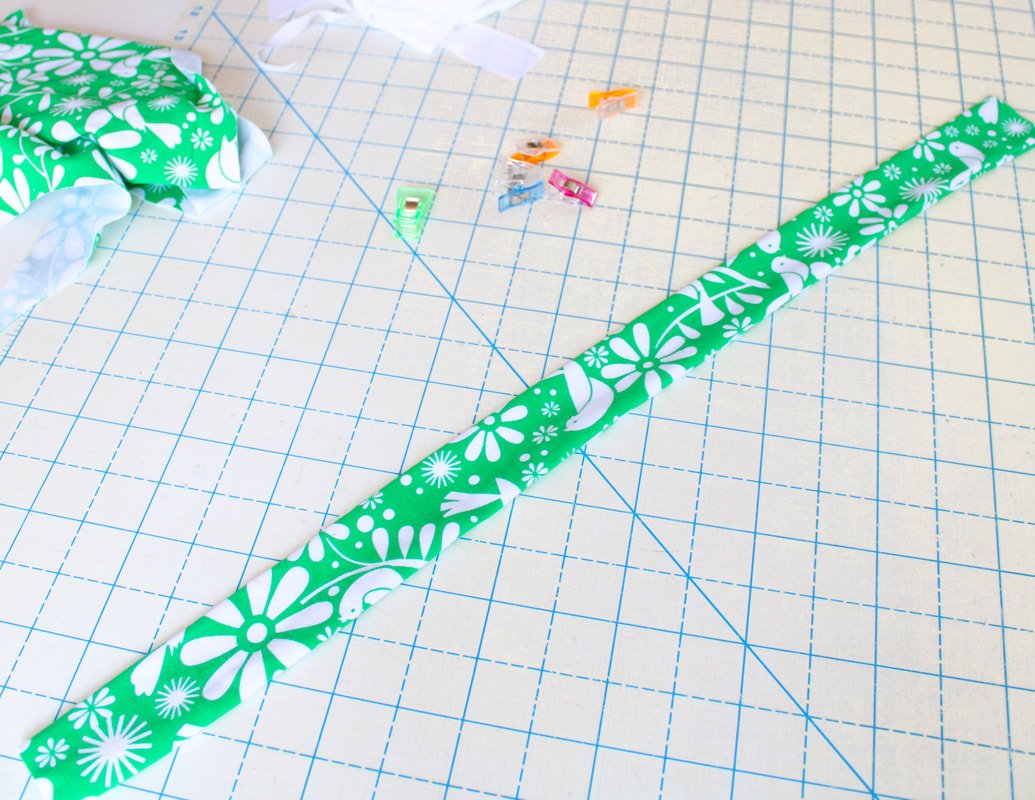
Fold the long strip in half, like a hot dog bun, RST (right sides together). Sew a seam down the long edge using a 1/4" seam allowance. Backstitch at the beginning and end. You now have a long skinny tube.
Turn the tube right side out using a turning tool or safety pin.
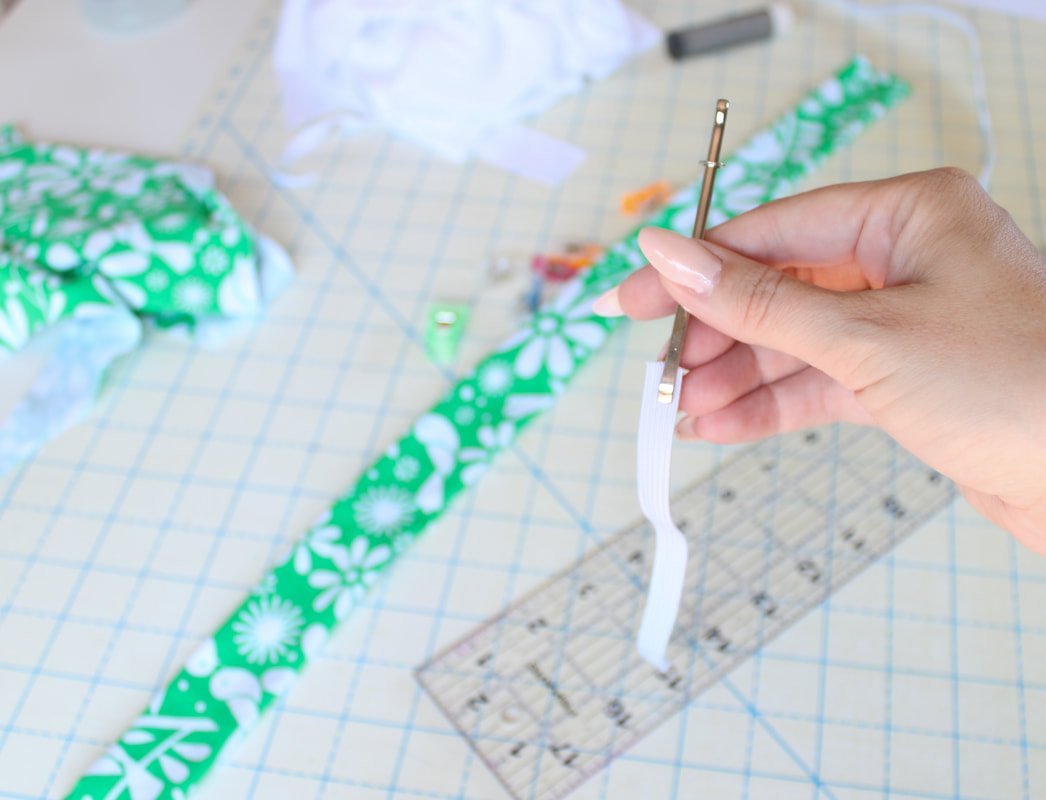
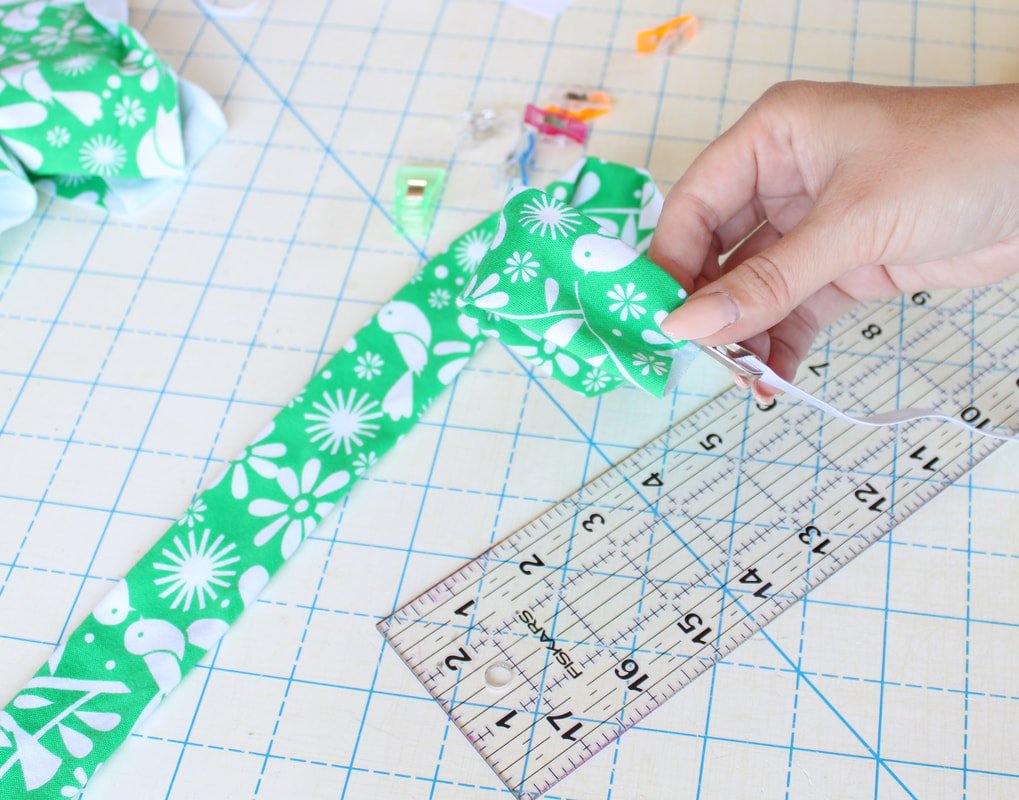
Cut your elastic piece 6-7" long. Feed the elastic through the tube using the safety pin.
Tie a simple knot in the elastic or sew the ends together by overlapping them.
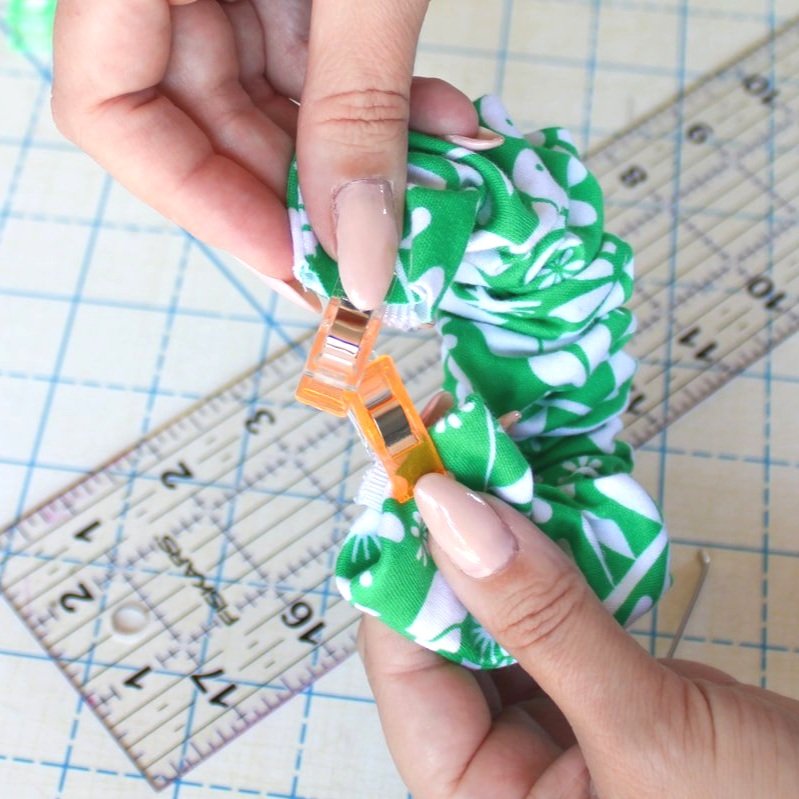
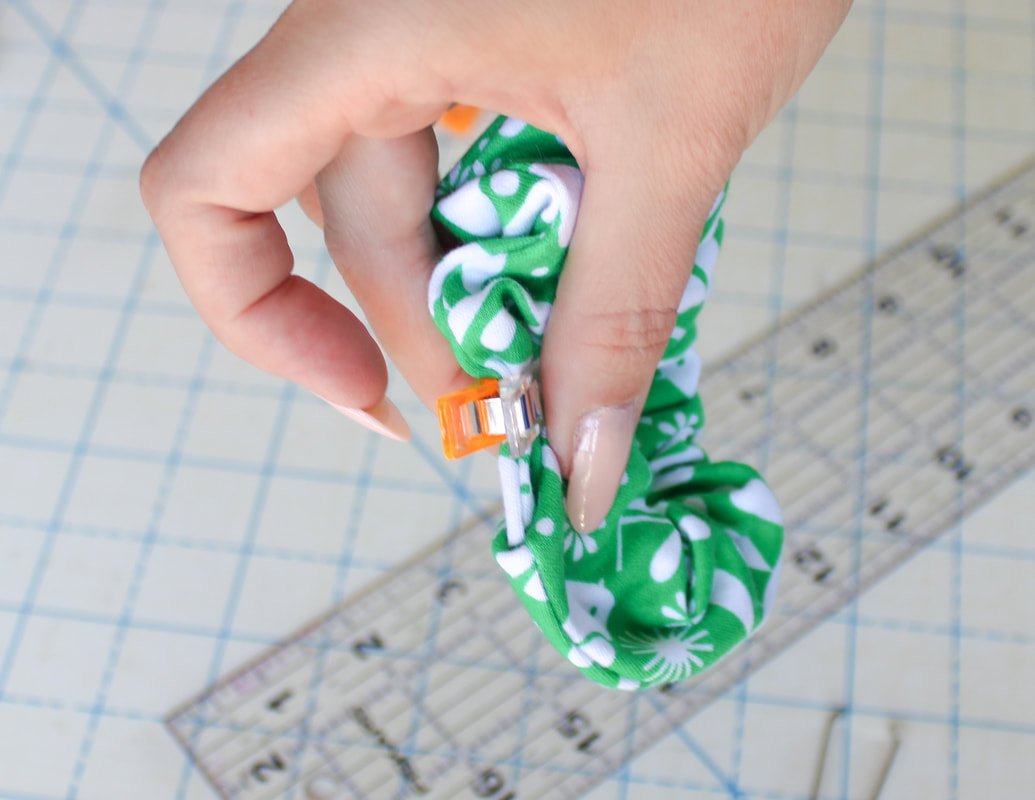
Fold one short end under. Tuck the other end inside the folded end and clip or pin.
Topstitch the opening closed with a 2.5mm or 3mm stitch. Make sure to backstitch.


Cut elastic 6-8” long depending on how thick your hair is.


Sew 2 rows of stitching across elastic ends. You could also tie in a knot too, but you’ll need a longer piece of elastic.
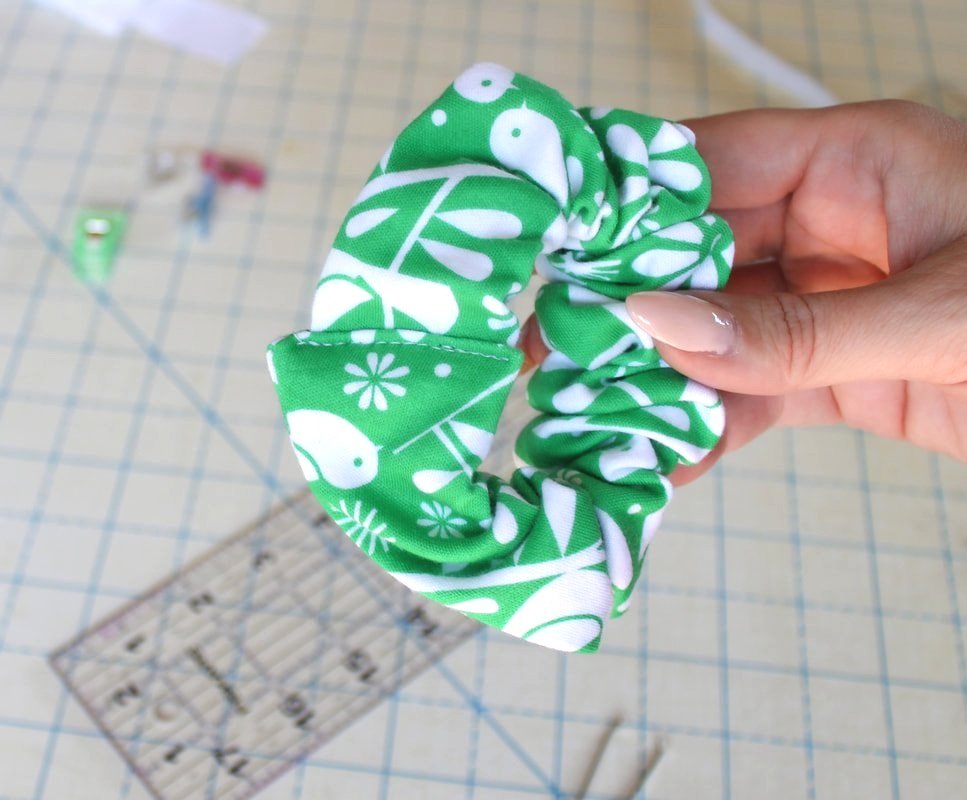

Hooray! Now you can make tons for yourself or as gifts for everyone you know. Yay for hair scrunchies!! The 80s and 90s knew what they were doing.
I hope you've enjoyed these Simple Sewing projects. Share this post with your other sewing friends. These are all pretty easy which makes them great beginner sewing projects.
Thanks for hanging out today. If you make one of these Simple Sewing projects, tag me on Instagram, @sewingtothemoon I'd love to see what you create.
Happy Sewing!
Annette

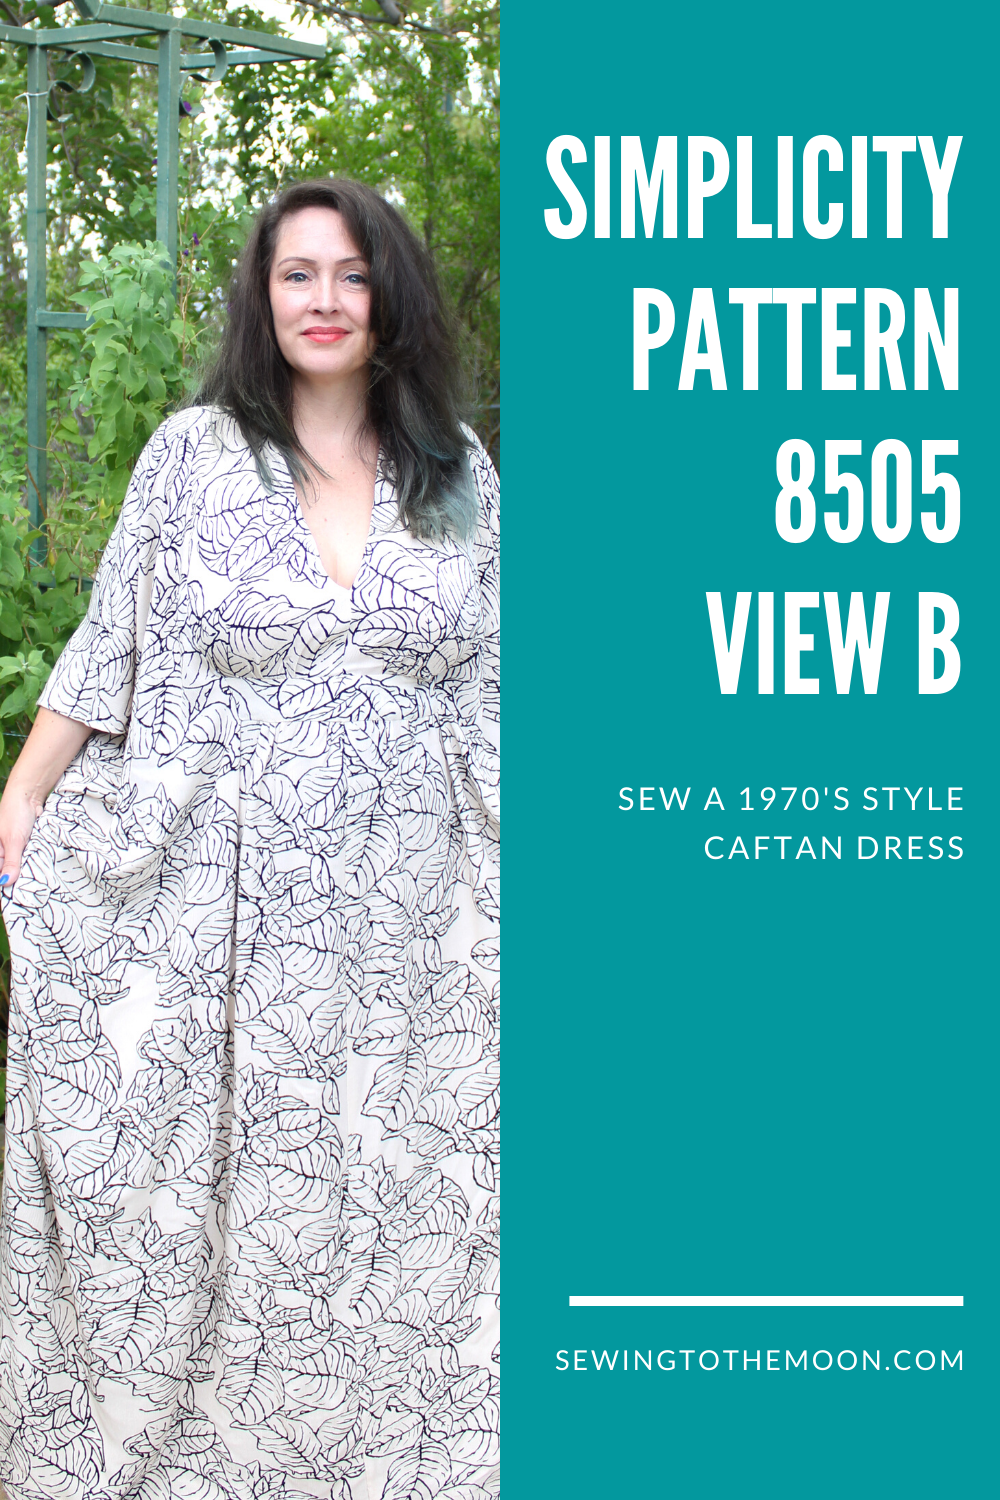
Simplicity 8505 Caftan Sewing Pattern
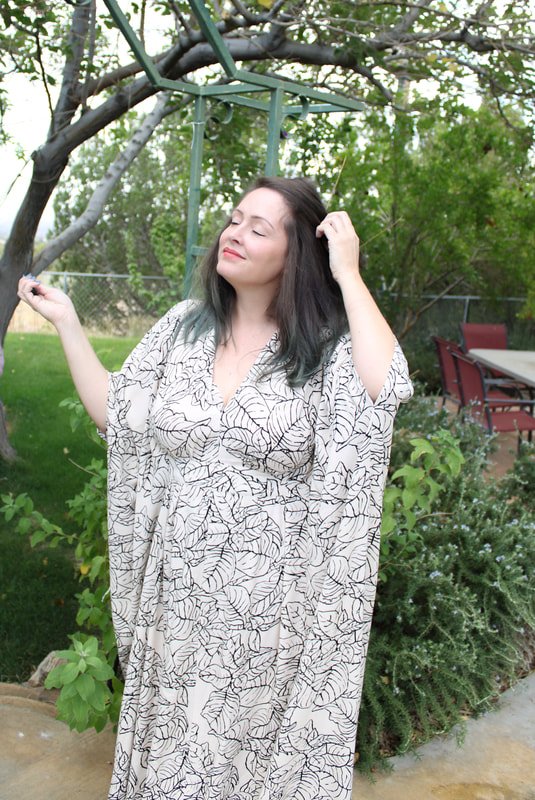
Have you ever dreamed of floating around the house in a vintage 70's caftan? What about in your beautiful backyard? I vote yes for both! This Caftan sewing pattern is the only one you need, it's vintage and authentic.
Way back in high school, I borrowed a caftan from my mom's friend to wear to a dance. The 70s wasn't the theme but, I wanted to wear it. It felt so silky and soft while I wore it and danced all night long, with friends.
When I saw this pattern via an Instagram friend, I knew I had to snag one for myself. She looked so fabulous in hers, and I knew I needed that pattern in my life. I hope you grab the vintage reproduction pattern and make a caftan, too.

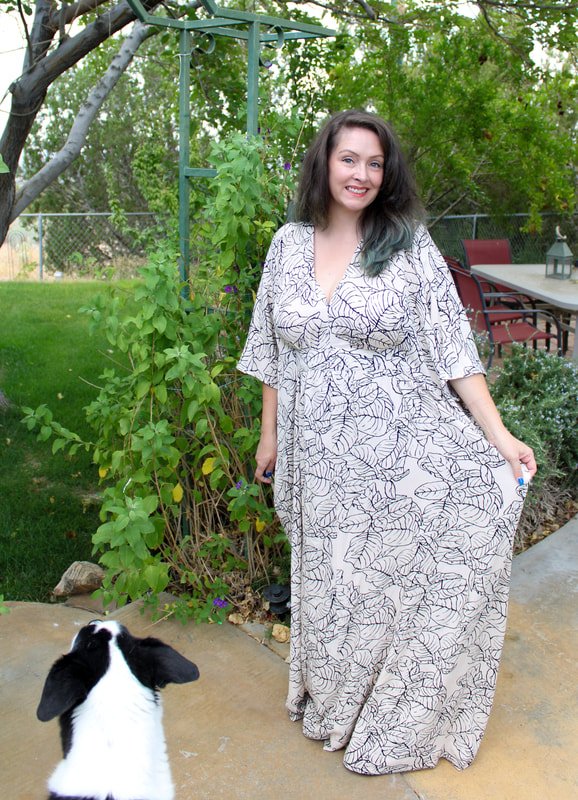
Oh hi there! I’m just over here living my best 70s life.
I ordered the Simplicity pattern 8505, a 1970s caftan pattern from an Etsy shop. After searching my local sewing shops for the perfect fabric, I decided to order that online too. If you make this, I recommend looking at fabric in person first, to give you ideas. It's fun to feel the drapey fabrics. Who doesn't love touching all the fabric? Are you ready to make the comfiest dress ever?
Let's get started.

Here's what you'll need. I also wanted to share a few tips and ideas for you to try, if you want.
Supply List for View B
Simplicity Pattern 8505
3.5-6 yards of fabric (depending on your size)
Interfacing Scrap
2 yards of twill tape or ribbon, 1/2" wide
1 1/2" button
Matching thread
Microtex or Sharps sewing needle
Sewing machine + all the notions (scissors, clips/pins, rulers, etc.)
*Optional: Fleetwood Mac playing in the background ;)
Tips for making this pattern:
This pattern doesn't have pockets, but I would add some. Use another in-seam pocket pattern from a pattern you already own. Try the dress on after you sew the shoulder seams to see where you'd like your pockets to be.
When you sew the front to the midriff, to the yoke piece, make sure to match the center seams. I didn't pay close enough attention and wished I had. Use a water-soluble marker, Frixion pen, or another writing tool that will disappear to mark the centers.
Measure, measure, measure! I measured myself and made a Large. It fit like a tent. I cut the side seams smaller, but it fits bigger than I'd like. You might need a smaller size than you'd think. ;)
Instructions:
Measure yourself and write your measurements down. Read the finished measurements on the pattern tissue to help decide the correct size for you. The big four pattern companies usually give a ton of ease in their patterns. You want a caftan, not a tent.
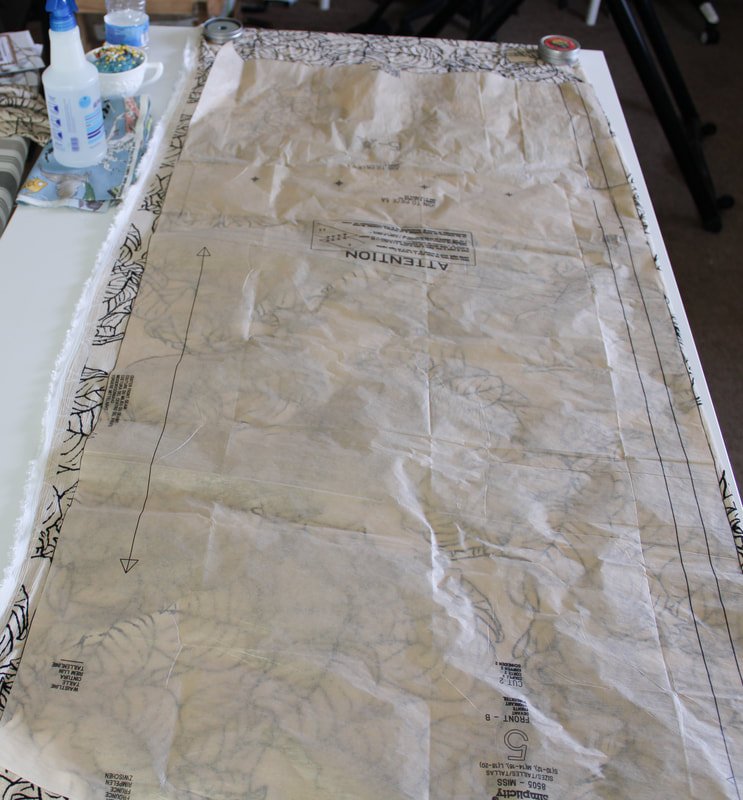
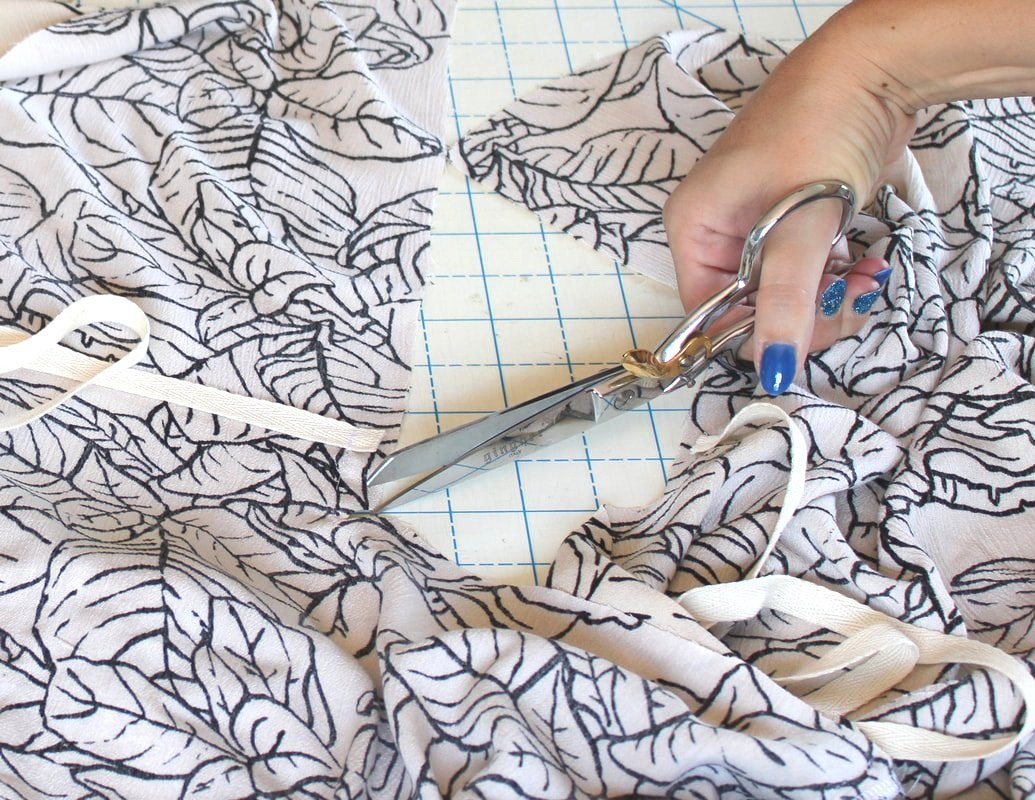
Cut out the pattern pieces. Trace the pieces onto the fabric and cut them out. It's a lot of fabric so, a nice big workplace such as the floor is great for this part.
I usually trace onto pattern paper but, this style is very loose and I knew I wouldn't need to make fitting alterations.
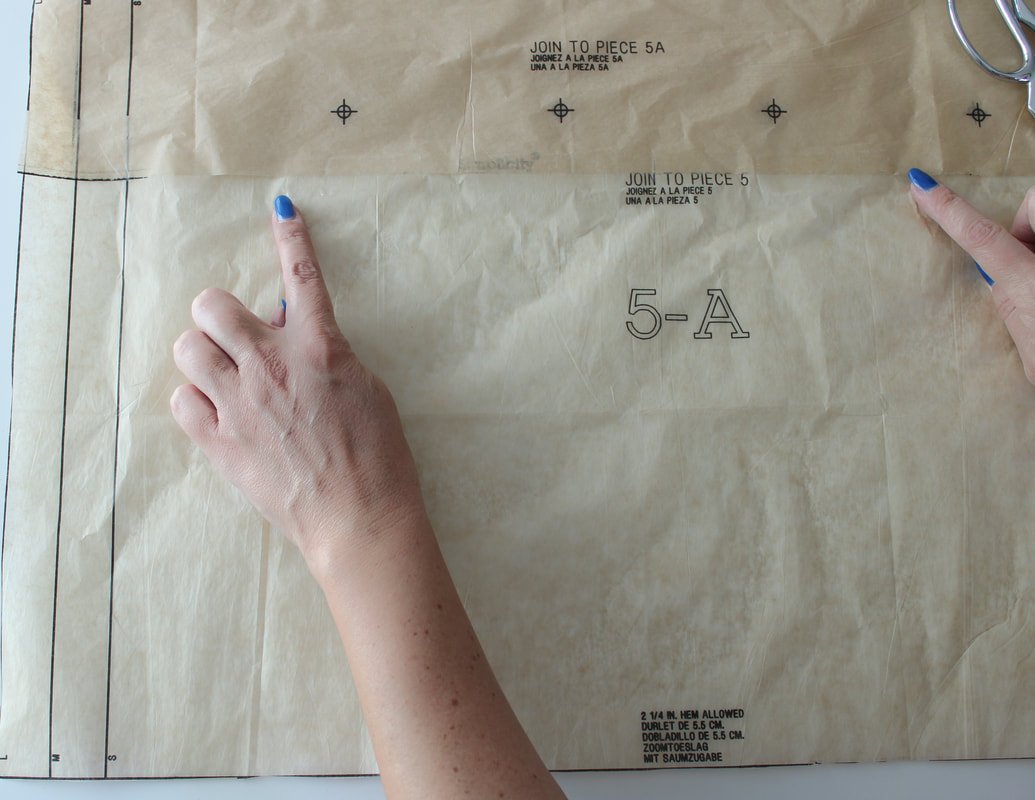
**You will have to tape the front (5 and 5A) piece to an extended piece. Match the stars and tape them together. You'll do the same for the back piece (8 and 8A).
The pieces were very large so, I used pattern weights and cut the fabric without tracing. Gasp, I know! Trace the neck-facing piece though.
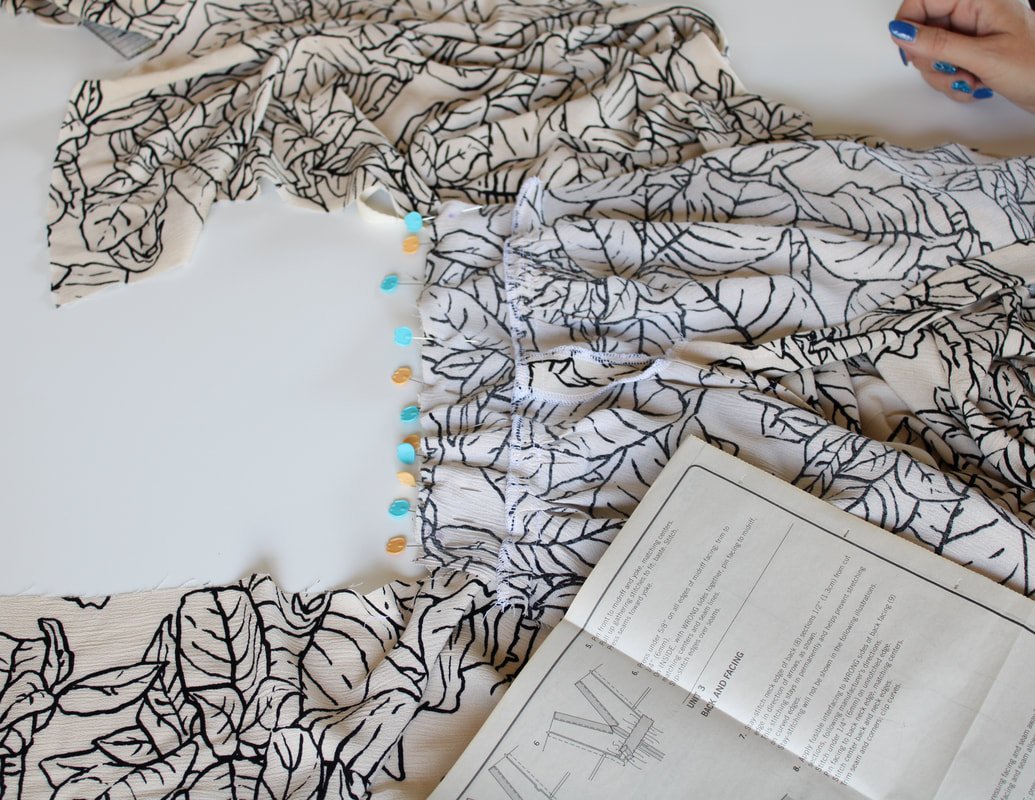
Time to sew.
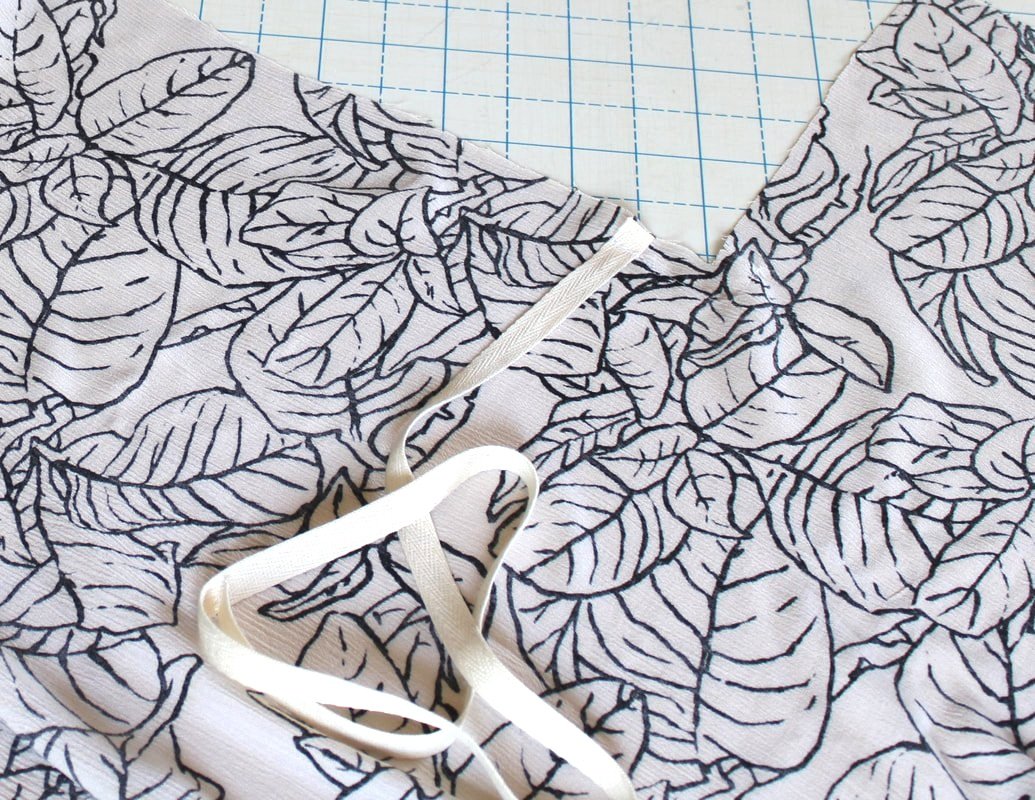
Attach twill tape ties and sew reinforcing stitches at the corners of the front pieces. Clip to the corner but, not through the stitching.
Sew the front center seam.

Sew the front center seam. I serged the seam after and pressed it to the side.
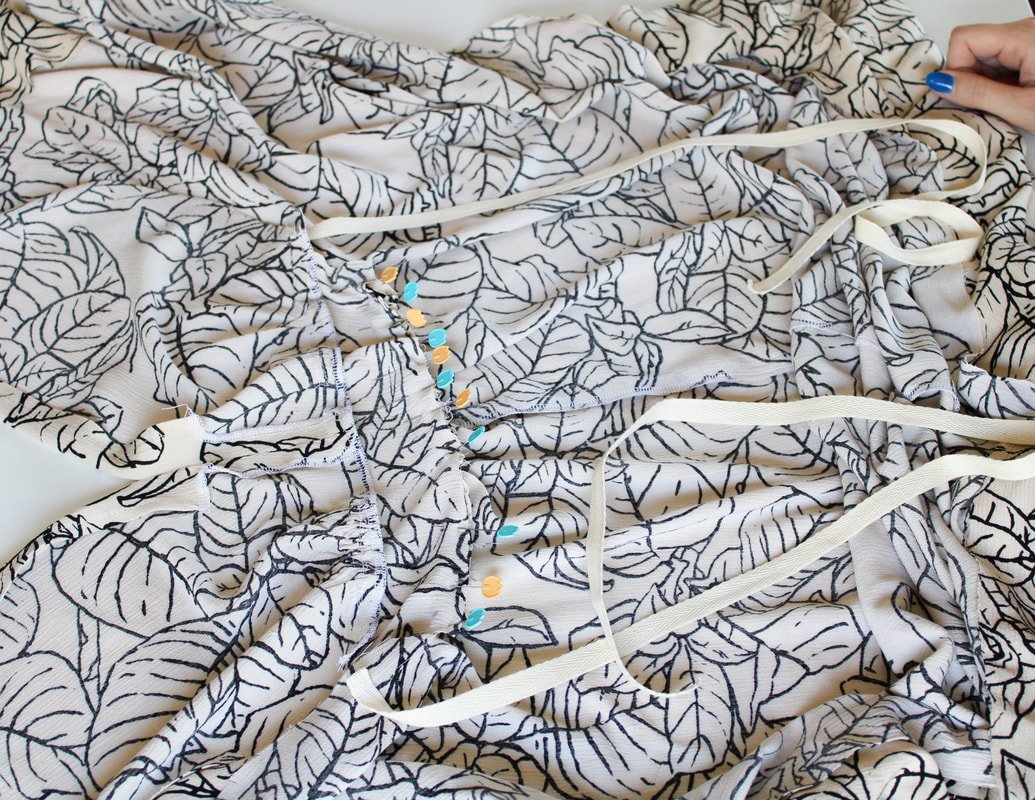
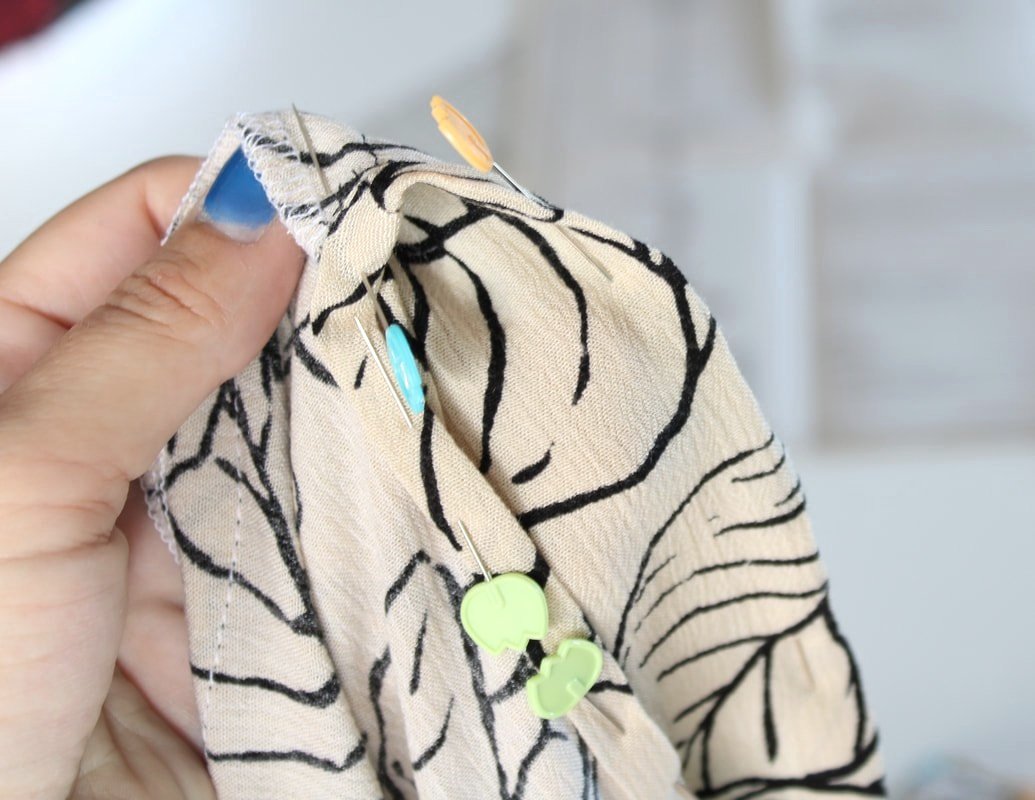
Gather those tiny ruffles.
Sew 2 rows of gathering stitches using a 4-5mm stitch length, between the notches across the front. Pull the bobbin thread to lightly gather the front. It helps to leave long thread tails to pull the gathers.
Press down along the fold line on the front. This will become your front V neckline.
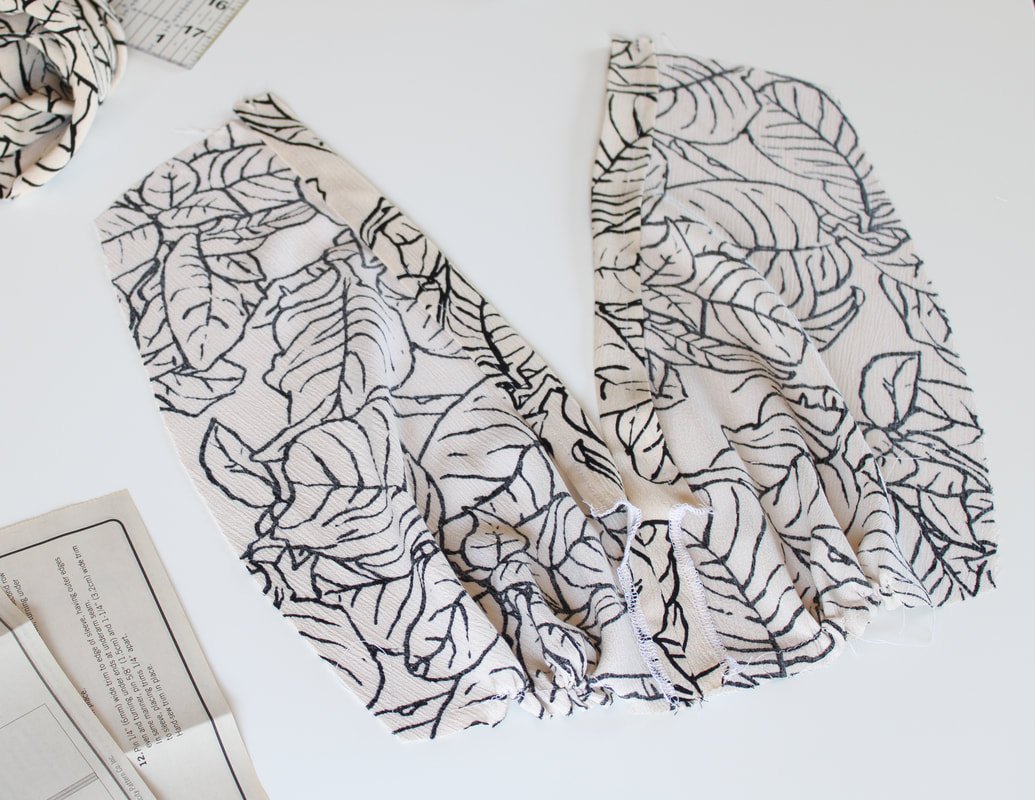
This is where I had the most difficulty. Gathers are easy but can be a pain in the you know what. So, go slowly, check twice, then sew.
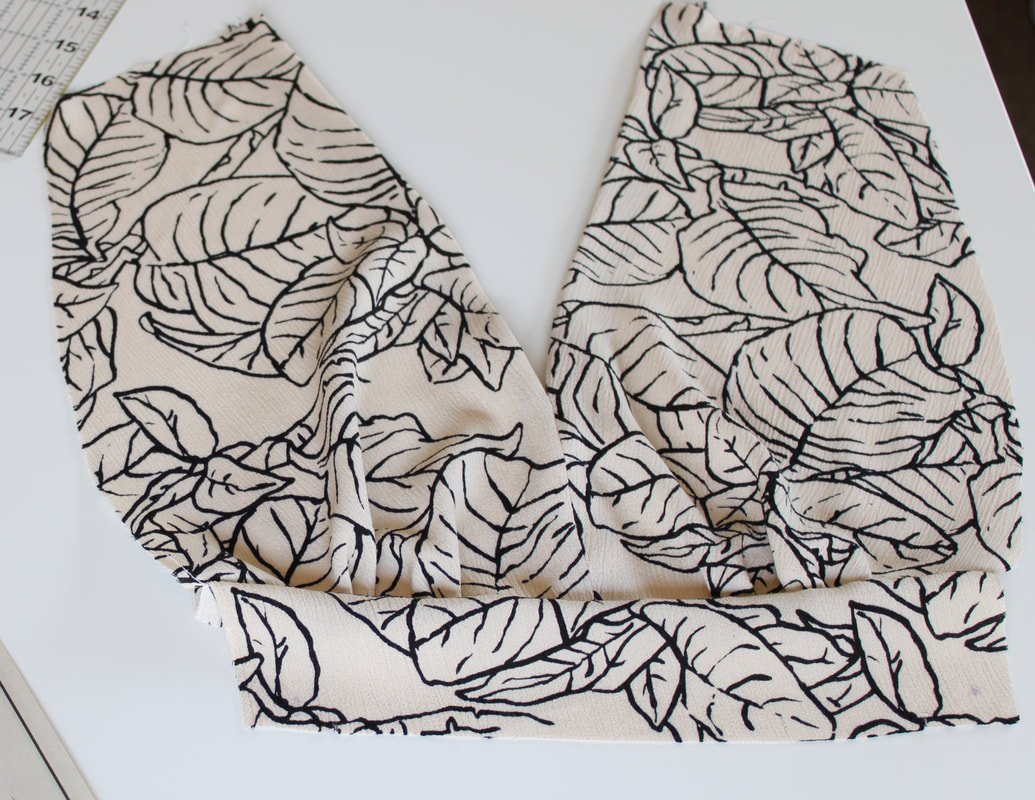
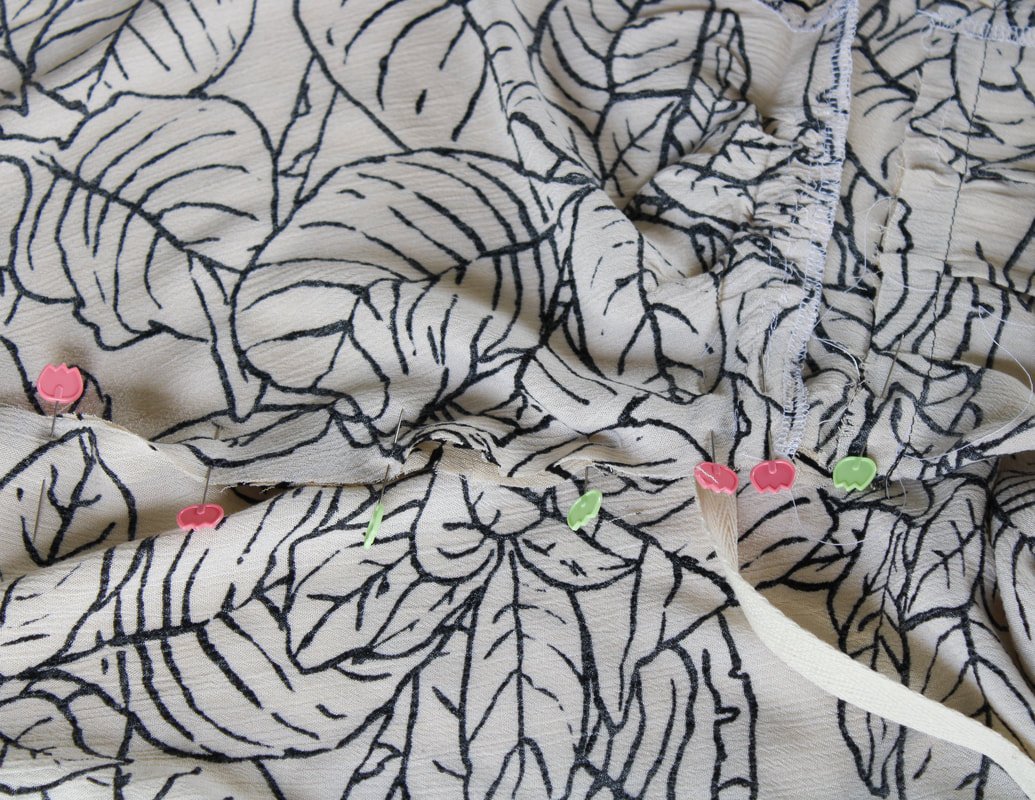
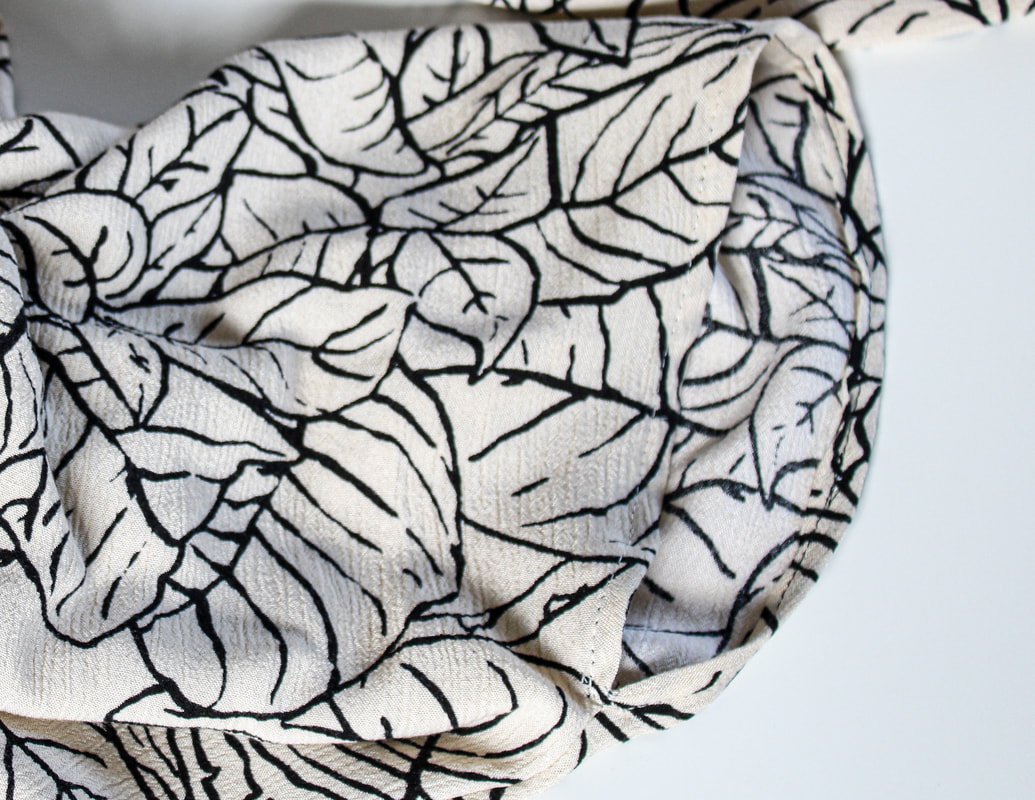
Pin the yoke to the front pieces matching all the notches together. Sew and press the seam downwards.
Serge or sew the edge 1/4" under the midriff pieces. Press along the fold line.
Pin the front midriff and yoke piece to the front pieces.
Make sure to match the center seams. Sew the bottom part of the yoke to the gathers first, then sew the sides. I didn't do this and found it a tad difficult to fit. Again, make sure you line up the center seams.
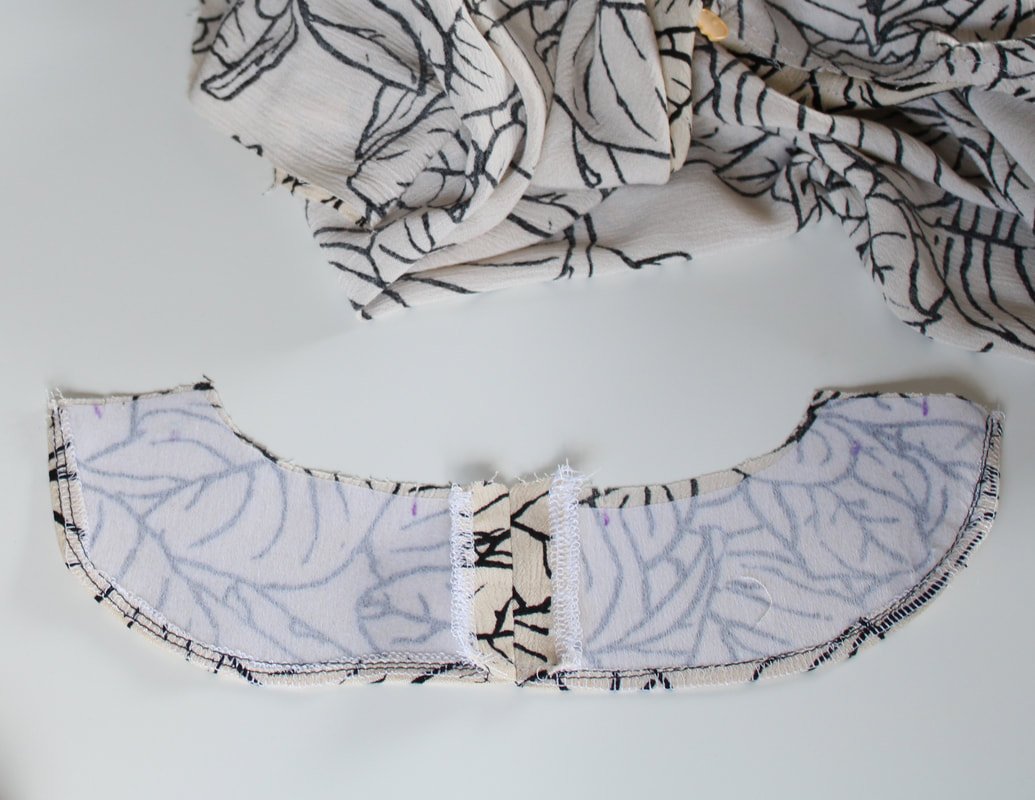
Grab the back pieces and neck-facing pieces.
Stay-stitch the back neck.
If you haven't already, apply your interfacing to the neck facing at this point.
** I left the button off and sewed a solid back seam. You can sew the button closure or not, it's your choice.
After the back seam is sewn, sew the neck facing onto the back matching the seams. Press open or to the side.
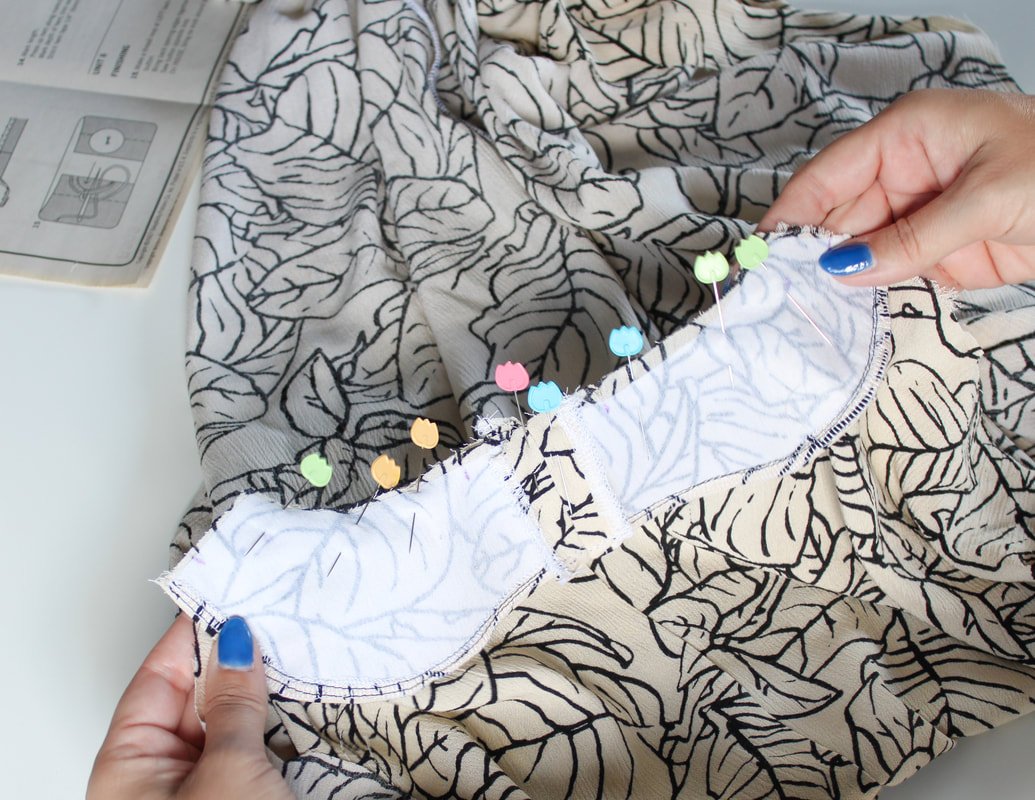
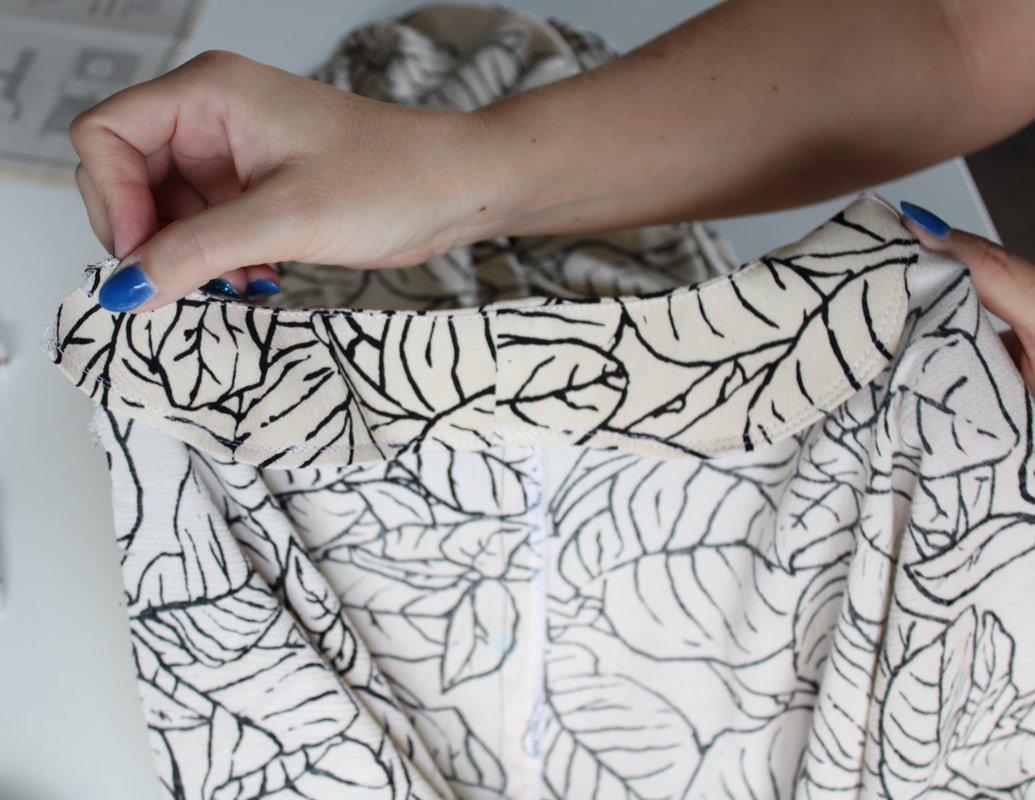
Yay, you're almost done!
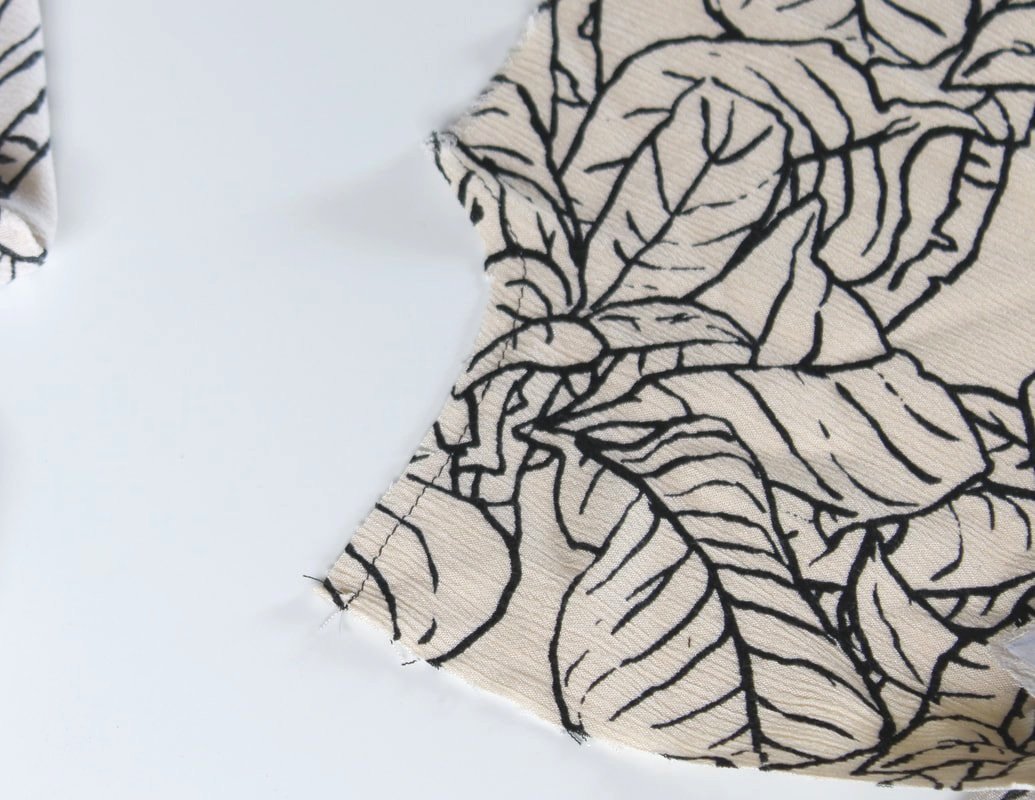
Sew the shoulder seams, and press.
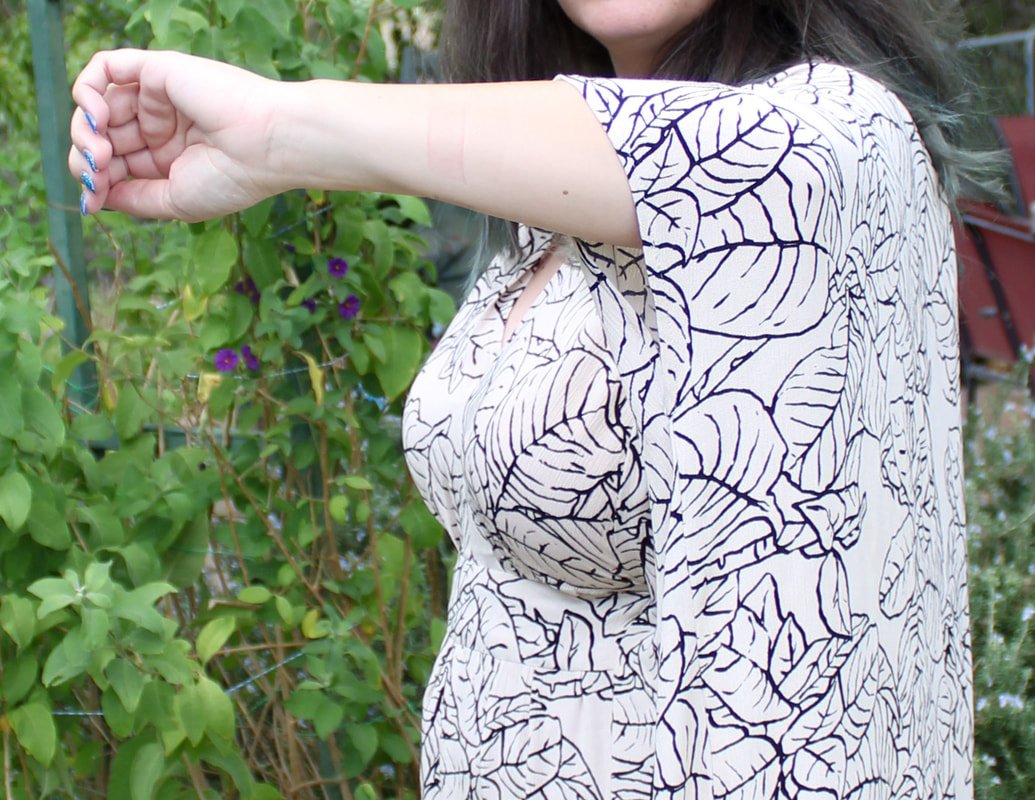
Then, sew up the side seams. Start from the hem and go up to the notch/dot.
Try it on at this point to see if you want your armholes smaller. I ended up sewing 7" from the top for my sleeve opening. This was a perfect amount for my arms.

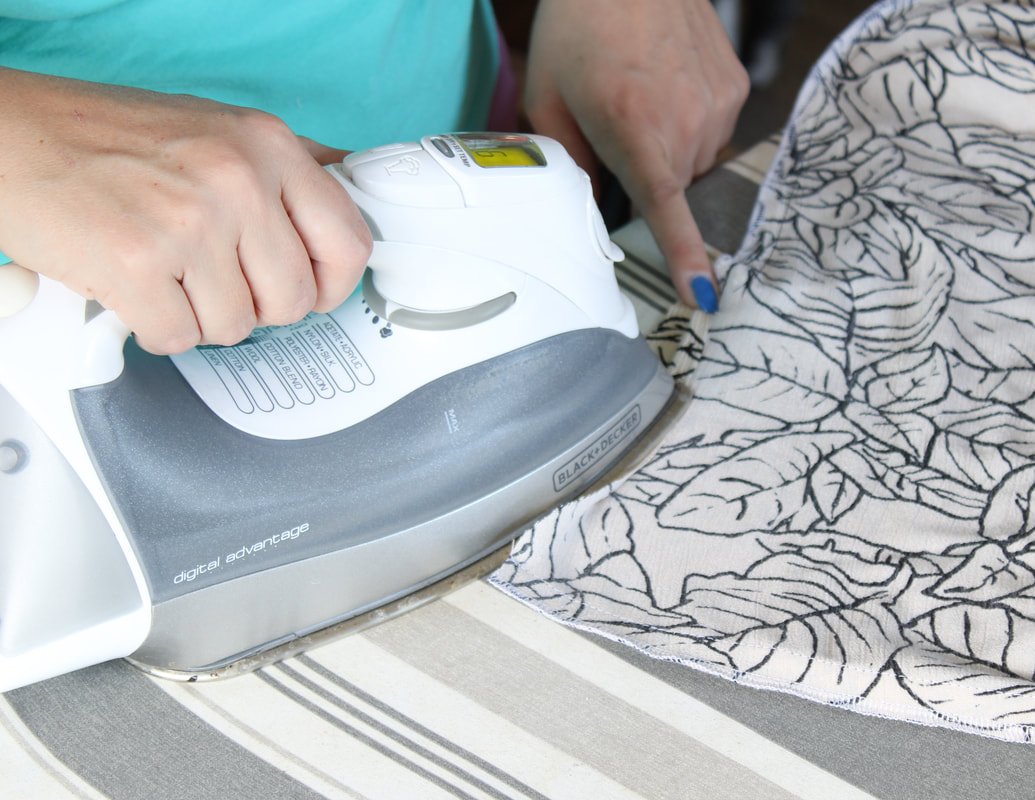
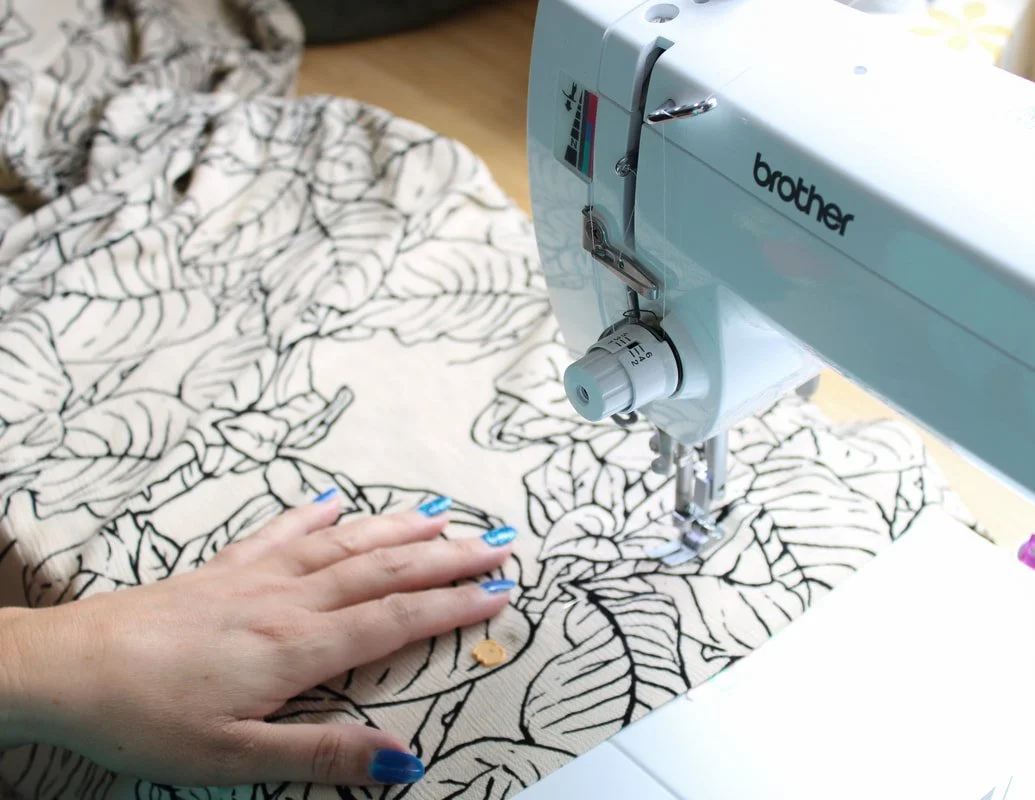
Hemming the caftan.
Last but not least, it's hemming time.
If you're on the shorter end, you'll need to whack off some serious length on the bottom.
Hem the sleeves. Fold and press 1/4" under, then 1/4" under again, and topstitch.
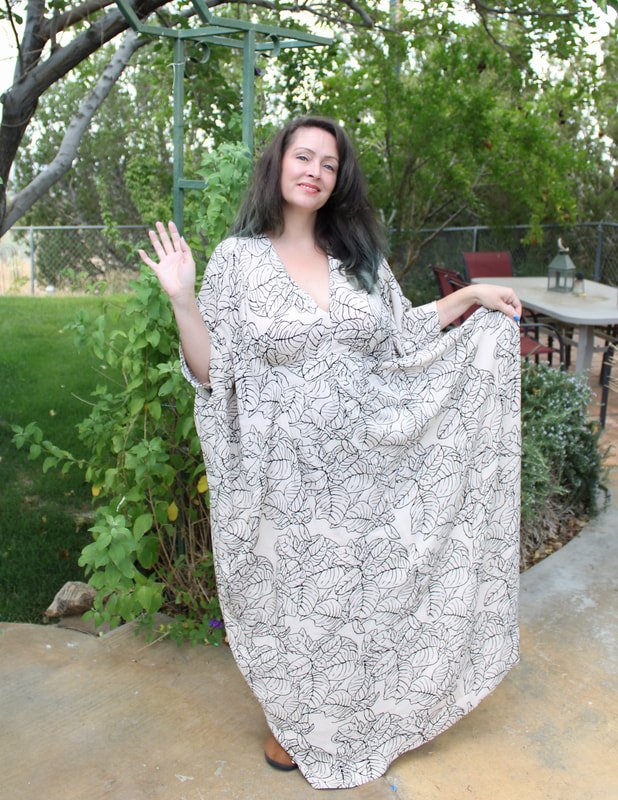
The bottom hem was an issue for me. I measured (I usually just eyeball it) and, it came out wonky. I don't have any magical words of advice for you on hemming. Sorry. :( I used my dress form to pin the hem and then sewed it. And it was perfect in the back but several inches too long in the front and sides still.
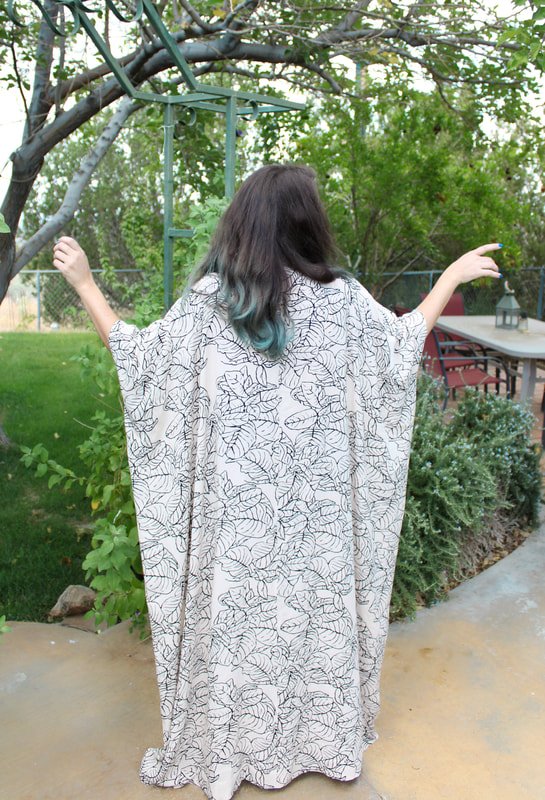
So, the caftan dress sits in the timeout corner for now. I could hold it up while I walk around but, that's frustrating and not very chic or glamorous. Some day I'll rip it out, cut it, and re-hem it. Maybe next spring when I get the itch to float around in the warm sun, in my backyard again.
Meanwhile, enjoy some photos of my too-long caftan. :)

Thanks for hanging out today! As always, if you make one, please tag me on Instagram @sewingtothemoon. I'd love to see your fabric choices.
Happy 70s sewing,
Annette