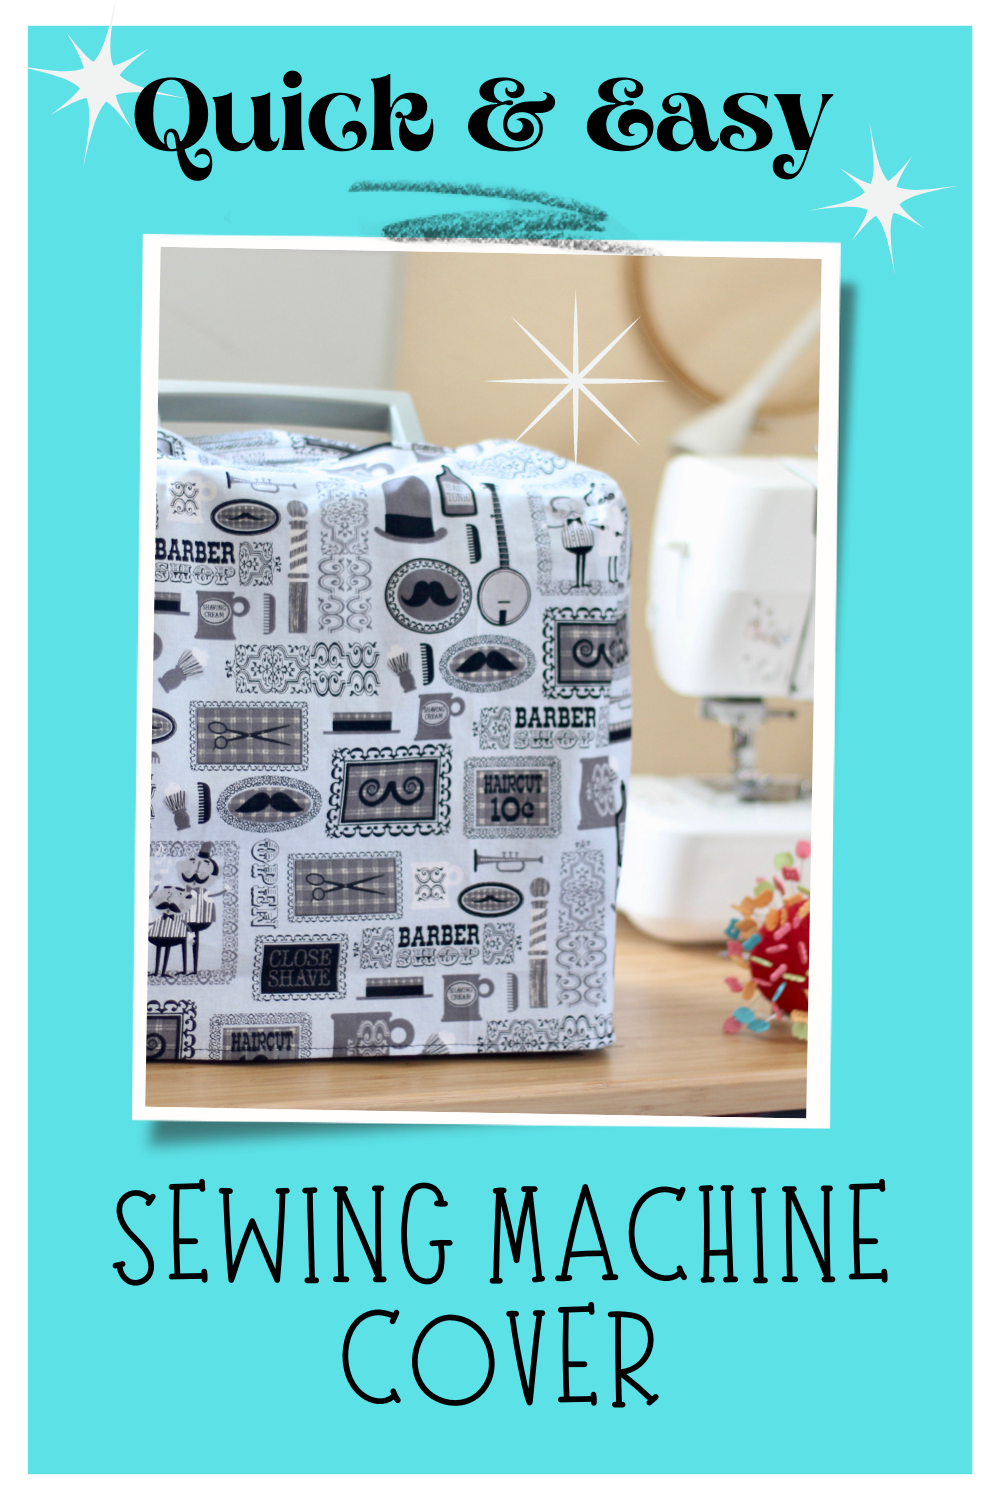
DIY Easy Sewing Machine Cover

Sew a cover for your sewing machine. Free pattern that’s easy and customizable. Sewing machine tutorial pattern on how to sew a cover.

DIY sewing machine cover free pattern and tutorial.

Is your sewing machine looking a tad boring? If it's a newer sewing machine, the answer is probably yes. The newer ones lack style and color. If it's a vintage machine, the answer is probably no. It's already gorgeous and full of vintage flair! Either way, let's add some new life to your machine with a dust cover. They're easy to sew and you can make one for all of your machines.

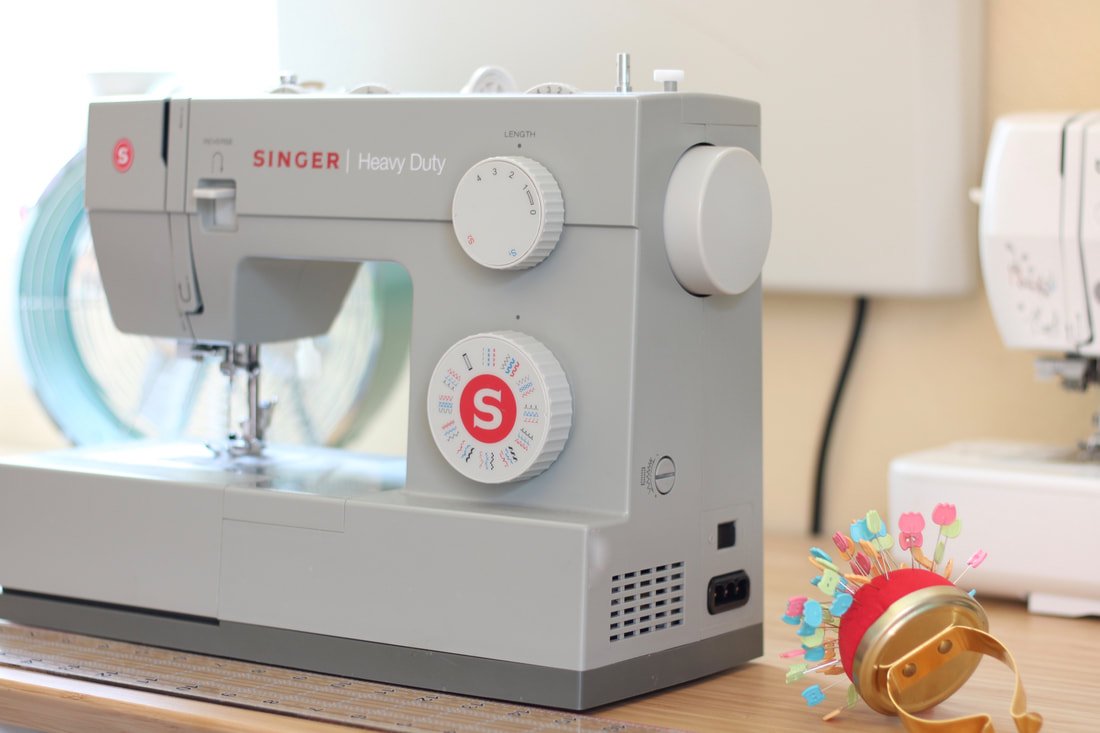
Back in the early pandemic days, mask-making was a big thing in this house and my husband bought himself a Singer machine. I'm a Brother fan through and through but, he liked the Singer's grey color. Of course, it's been sitting for over a year, untouched, and needs a little makeover. It's going to get a new fabric cover!

DIY sewing machine cover free pattern and tutorial.

Let's make an easy sewing machine cover. You'll learn how to get the measurements and sew one up in an hour. Covers add fun to your sewing space and they keep your machine protected as well. Dust be gone! Speaking of dust begone, we just changed our AC filters. YIKES! They were long overdue. This is a friendly reminder to change your filters if you have an AC. ;) Go now, I'll wait. 

Supply List

  • 1/2 yard of fabric. Cotton, vinyl, canvas, denim, use whatever you want here.

  • Matching thread

  • Sewing notions: scissors, a marking tool, pins, etc.

  • Ruler

  • Serger for raw edges, or use a zigzag stitch if your machine has it

  • Sewing machine

DIY sewing machine cover free pattern and tutorial.

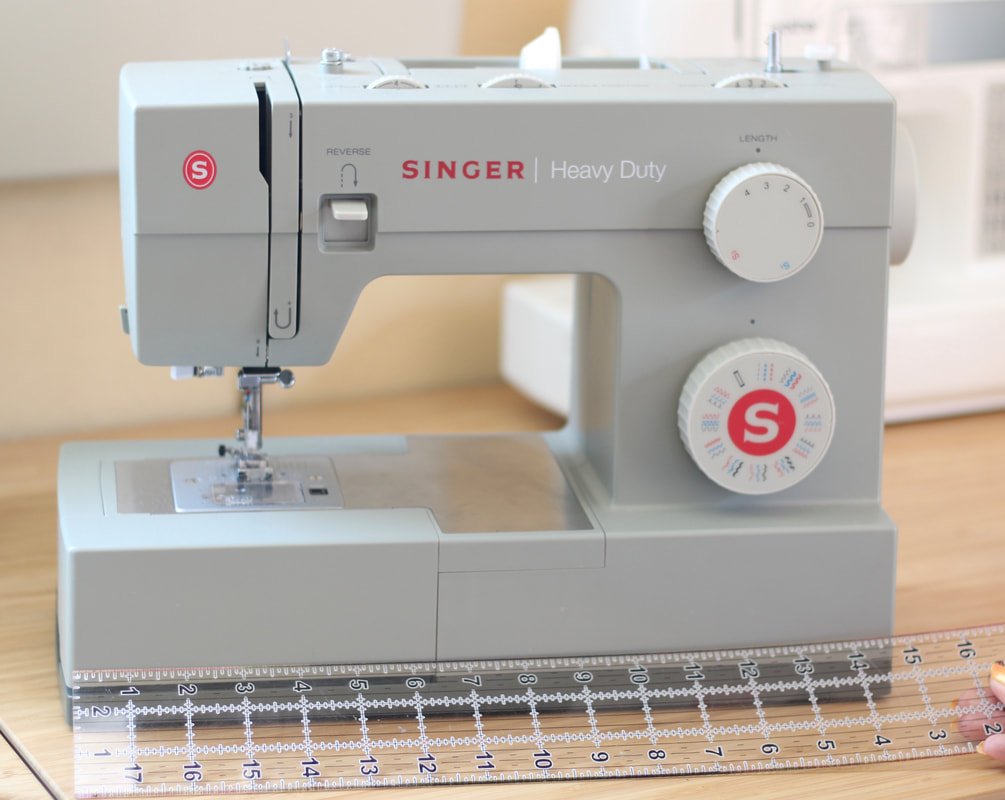
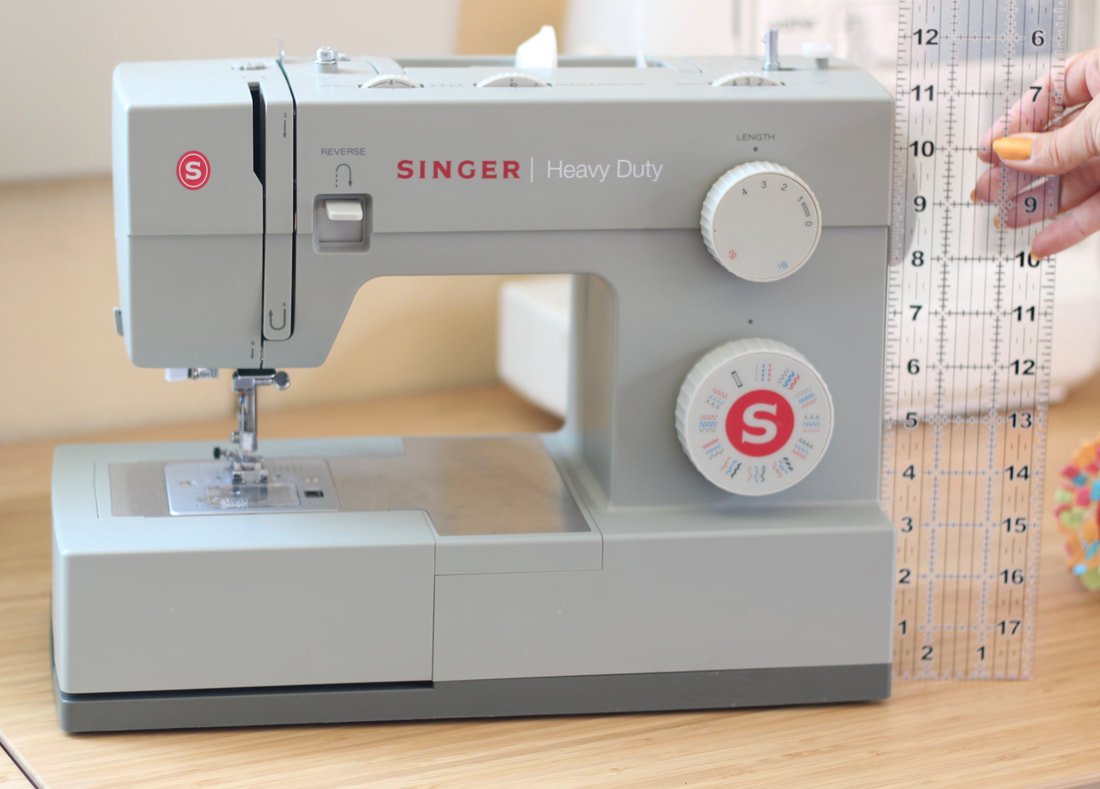
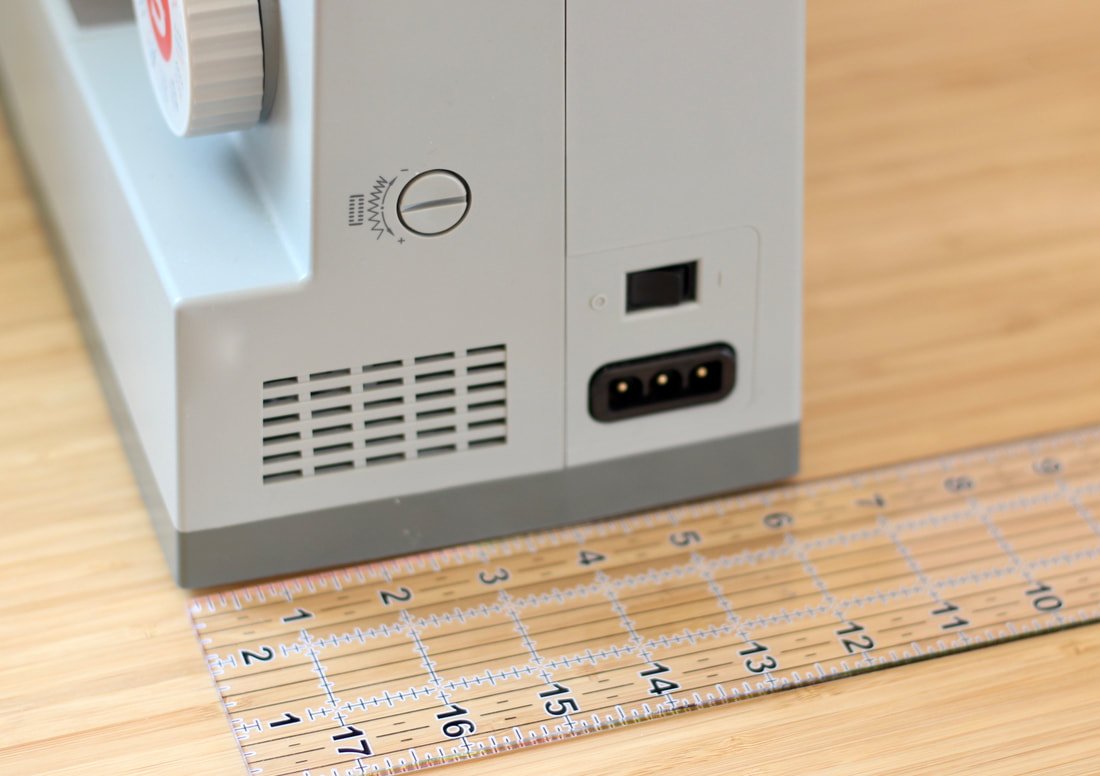
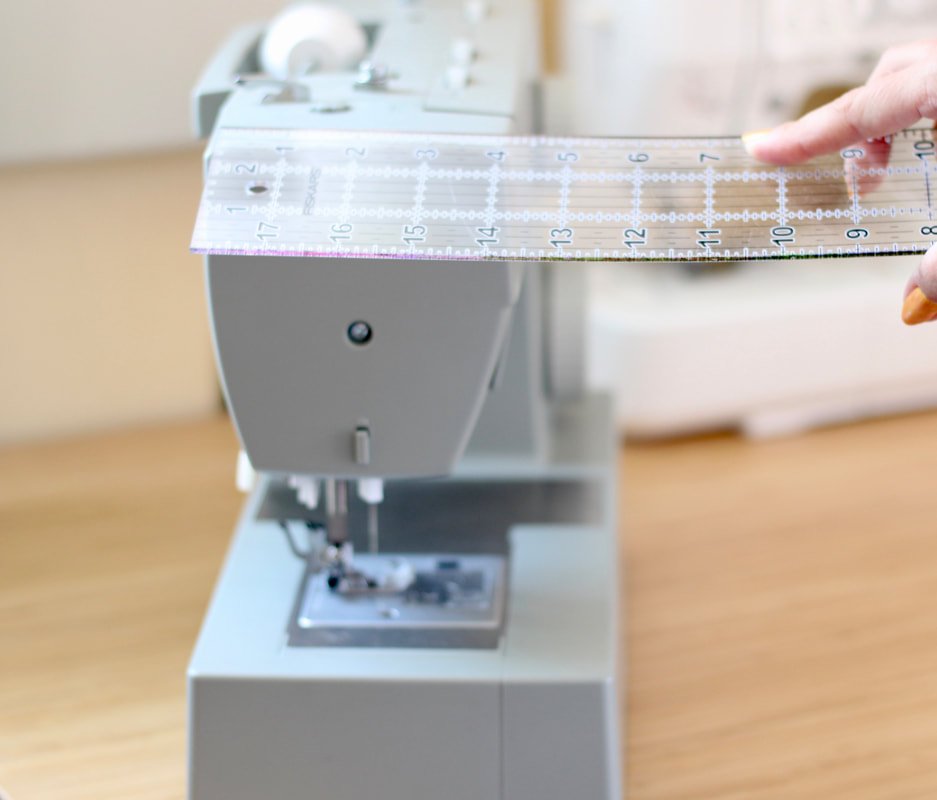
Grab some paper, a pen, and a ruler. You can use a tape measure but, the hard ruler makes it a little easier to get an exact measurement. 

​Measure all the sides of your machine. 

Time for Math, (insert tears here).

Now it's time for some math. I don't do math so, hopefully, I explain this correctly. 

You'll be using a 1/2" seam allowance. So, you'll add 1" to each measurement number. (Each seam takes half of that inch.)

My machine is 12" tall by 15" wide. So, I'll add 1" to both of the measurements. 
12 + 1 = 13.  15 + 1 = 16. So, my final rectangle will be 13x16. But, we're not done yet.

Next, you'll add 2" to your height. This will allow the front and back to "roll over" the top.
The new measurement will be 14x16. These will be my front and back pieces. Cut 2.
* If your machine is extra deep, you may need to add more than 2" to the top height. 

The sides will need 1" added to your measurements.
My side measurements are 6.5" by 4". Add 1" to each and they'll be 7.5" by 5". *If your top is narrower than your bottom, use your ruler to connect the top and bottom lines to form a trapezoid (a pyramid with the top cut off). Cut 2 mirrored. There might be a left and right side due to the angles. ;)

I hope I explained this correctly. Math is not my strong suit, so send me a message or leave a comment if you need help. I'll try my best to help, but no promises. ;) LOL Others might offer help in the comment section too. 


Bonus tip

Cut out your 4 fabric pieces. You should have 2 sides and 2 front/back pieces.
This is where you can have fun and make it your own. Cut out four different colored fabrics or use different fabrics for the sides. You could piece together different fabrics to make a quilted look, or add some embroidery to the front. The possibilities are endless. 

OPTIONAL:
If you do add embroidery or make a quilted one, you might want to line yours.
In this case, sew 2 covers the same size, pin right sides together, and sew along the bottom edge, leaving a 3" gap for turning out. Top stitch the bottom to close the gap and you'll have the embroidery stitches/quilting seams enclosed.

How to sew your own cover for your sewing machine. Embroidery machine cover. Serger cover pattern and tutorial.

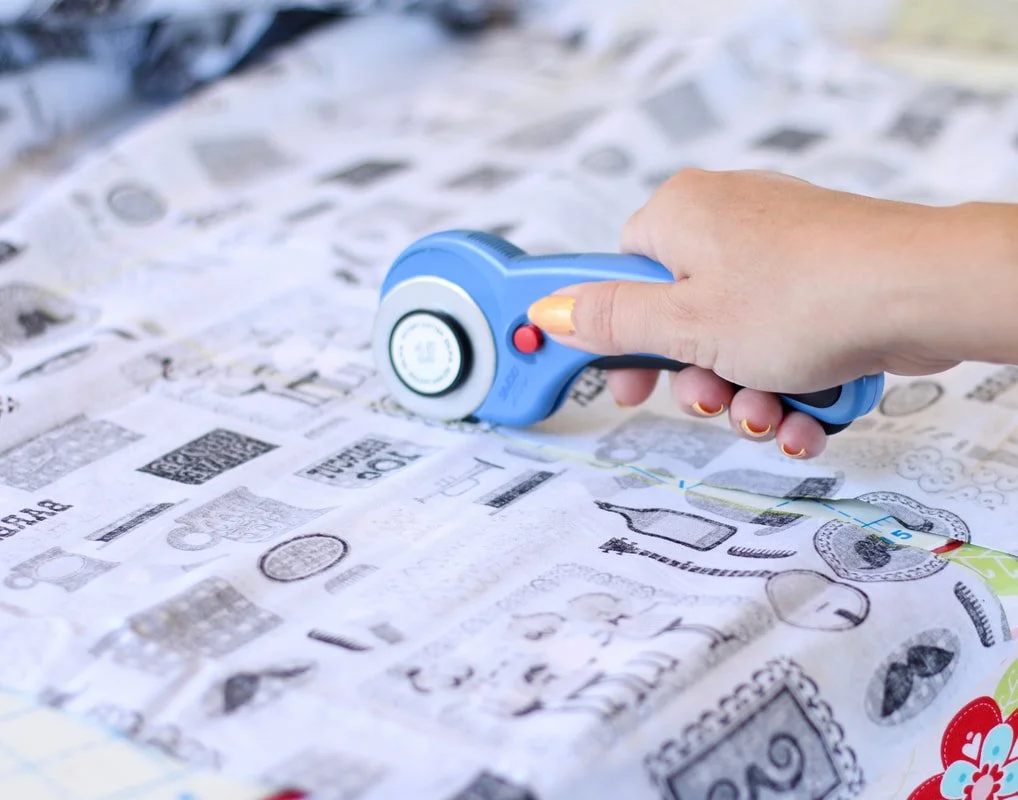
Using the rotary cutter and mat for the rectangles.

Sewing Time

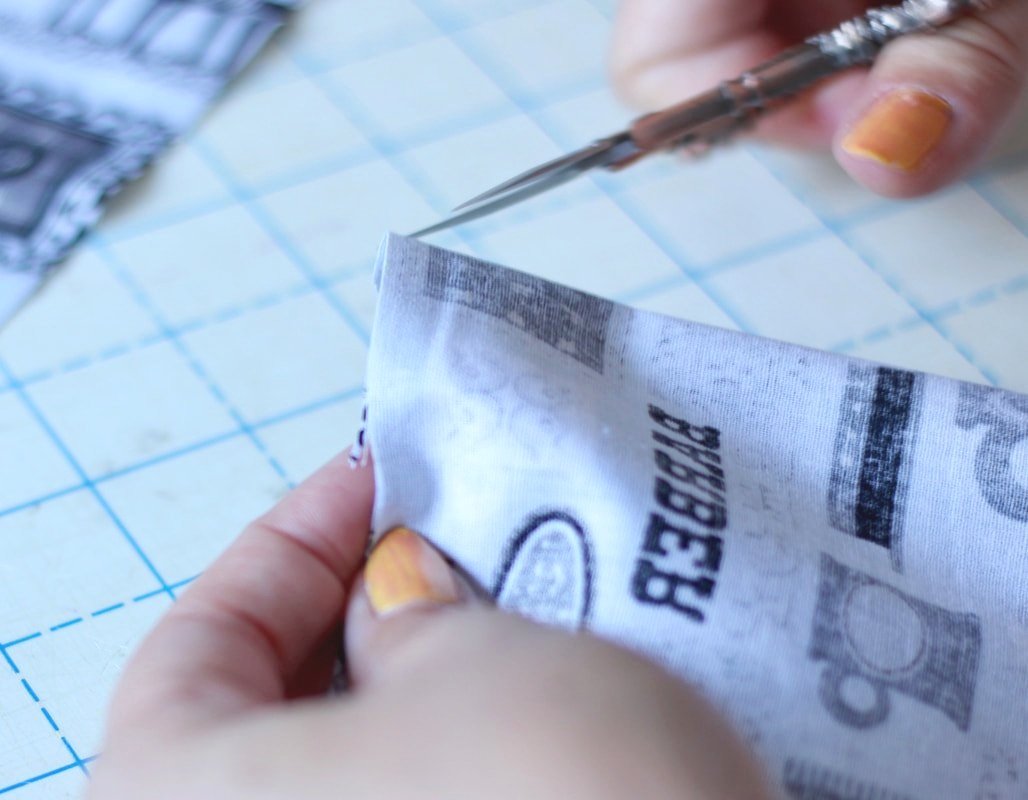
  • Start by serging or zigzagging along the top edge of the front and back pieces only.

  • Fold the serged edge down 1/2", then press. Topstitch 1/4" away from the edge. You're going to create a slit opening for your handle. *You can skip this part if you want. But, it's nice to have access to the handle when taking the machine to the repair shop or moving it to another spot in your sewing space. 


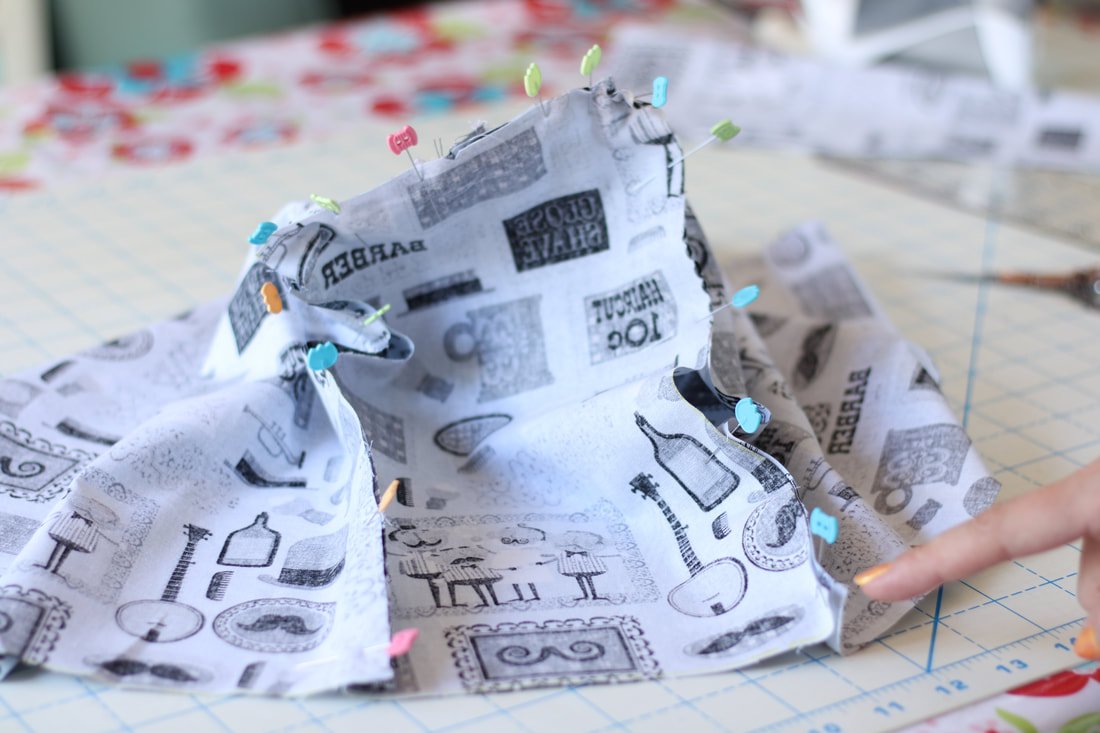
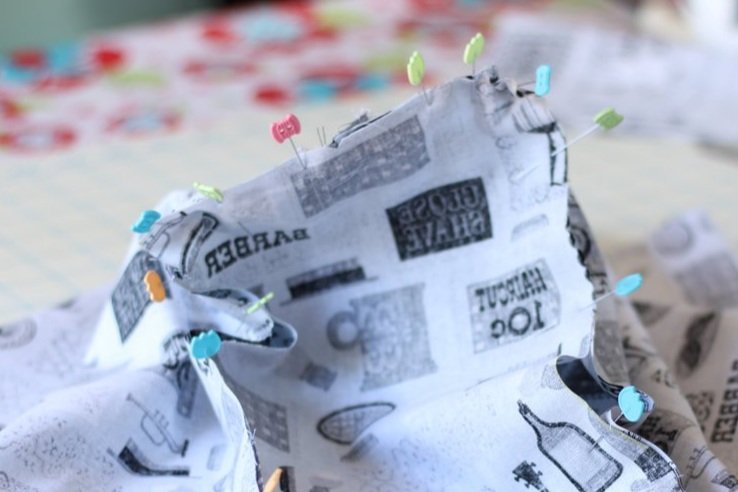
​Place both pieces RST (right sides together) and pin 2-3" from the sides, leaving the middle unpinned. You may need to adjust this measurement according to your machine. Sew from the side edge to the pins, only. Don't forget to backstitch.

The middle will be left open for the handle to pop out of.

Take a side piece, and fold it in half to find the center top. Make a little snip or mark with a pen. Do the same to the other side piece. 

Next, pin the side piece to one front/back Right sides together, by starting at the top. Put a few pins at the top, then go down to the bottom and start pinning upwards from there. This ensures your hem matches up. Next, you'll want to ease the curve of your corners. This may get wonky but, pin as well as you can. It doesn't need to be perfect.

​Sew, using a 1/2" seam allowance. 

It may be helpful to sew from one end upwards as far as you can go. Then, sew from the other end up and around the curve.  Puckers might happen, but this way felt easier to me. 

After one side is sewn, try it on the machine. Check the fit. Is it too long? Will the other side fit properly? Does it hang like a baggy bag? If there are any issues, fix them now.

  • If it's too big, make the seam allowance larger. (Use 3/4"-1")

  • If it's too small, unpick it and make the seam allowance smaller. (Use 1/4" instead)

  • If it's too long, trim away the excess or make a deeper hem. (Make a 1" hem)


​Luckily the sewing Gods were on my side and I was fortunate for mine to fit perfectly. Yay, math was on my side, for once. 

How to sew your own cover for your sewing machine. Embroidery machine cover. Serger cover pattern and tutorial.

If it fits perfectly, move on to pin and sew the other side piece. Go about it the same way you did with the last side piece. After it's sewn, give the seams a good press. Slip it over your machine and admire it for a few seconds. 

You're almost done. The hem is all that's left to do.

Serge or zigzag around the bottom edge. Fold up 1/2" and press. Topstitch and you're done. 


If the bottom is too short because math is hard, just add a strip of ribbon or pom pom trim. It'll look like you did it on purpose. ;)

How to sew your own cover for your sewing machine. Embroidery machine cover. Serger cover pattern and tutorial.

Easiest hem ever, serged edge and folded over once.

How to sew your own cover for your sewing machine. Embroidery machine cover. Serger cover pattern and tutorial.

My husbands sewing machine will be dust free now.

How to sew your own cover for your sewing machine. Embroidery machine cover. Serger cover pattern and tutorial.

Hole for the carrying handle.

How to sew your own cover for your sewing machine. Embroidery machine cover. Serger cover pattern and tutorial.

Ta-da! Now go give your sewing machine some flair and keep it dust-free. 

If you make one for your machine, tag me on Instagram @sewingtothemoon. I'd love to see what you create. Now, I am off to sew a new cover for my serger.

Happy sewing,
​Annette

Read More
garment sewing, vintage style Annette garment sewing, vintage style Annette

Butterick B6453: The Easiest Dress to Sew

Butterick B6453 dress sewing pattern. Beginner-friendly vintage style dress. Sew an easy dress with lots of vintage style.

Butterick 6453 dress sewing pattern. The easiest vintage style dress to make.

If you need a break from difficult sewing projects, I encourage you to grab the Butterick 6453 dress pattern. It was easy and fun to sew! The only timely adjustment I needed to make was an FBA. After that was sorted out, it was all downhill.

This dress is fluffy and full, no need for a crinoline underneath. The princess seams are flattering. The straps are perfectly positioned. And, the back zip is a cinch. What are you waiting for? Grab the pattern and let's get started! 

Butterick 6453 dress sewing pattern. The easiest vintage style dress to make.

Supply List

  1. A whole lotta fabric, this dress is a fabric hog. 4-5 yards is needed

  2. Interfacing

  3. Matching or contrasting thread

  4. Sewing machine and notions

  5. Serger, pinking shears, or a zigzag machine to finish the raw edges

  6. 16" or longer zipper

  7. Seam ripper because... sewing

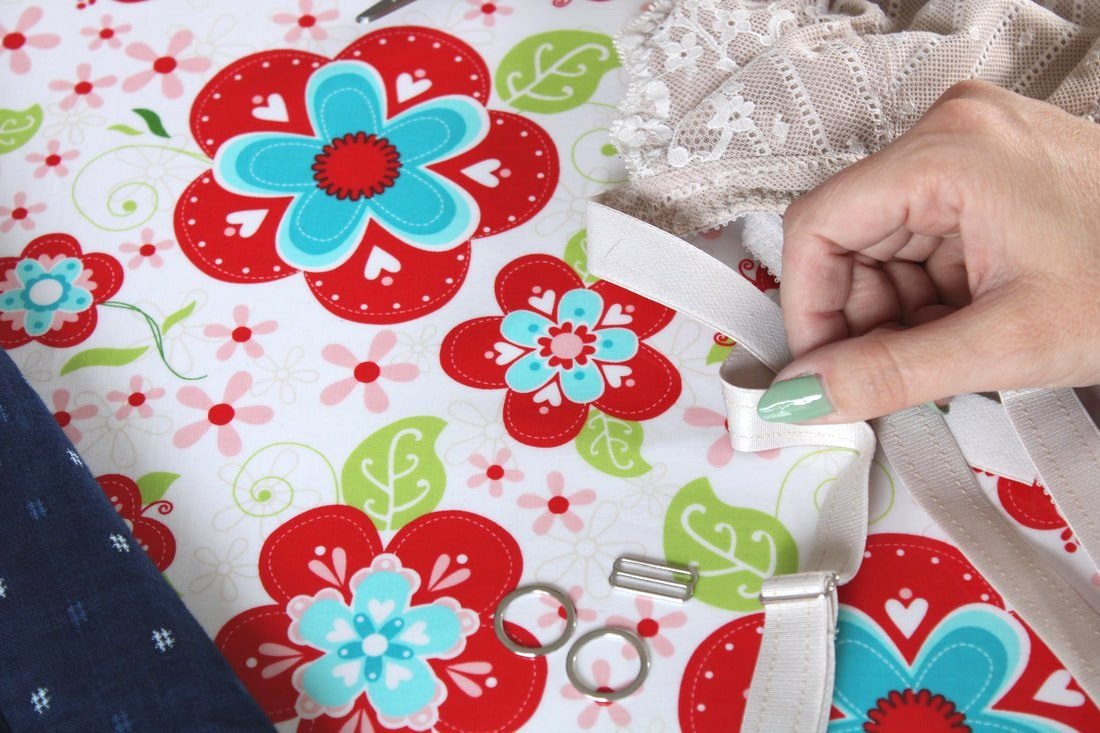
  8. Rings and sliders for adjustable straps

Sewing Notes

  • This dress is super easy and only has 10 pattern pieces! This was wonderful news because I made the Hooded Princess Coat before this dress and that was a beast. Read the post if you've always wanted to make your own raincoat. Gertie did a wonderful job with the pattern.

  • I chose double-faced linen. It was a little heavy for this exact dress but, I love it nonetheless. It'll be warm enough to wear in the fall paired with tights and a sweater. I suggest using regular linen, cotton, gingham, etc. Check the pattern envelope for fabric options.

  • Shorten or lengthen to fit your torso. I shortened the bodice pieces by 1.5" because I have a short torso. I could have gone a little shorter.

  • Size down 1-2 sizes at least. I sized down but, in the end, the dress was still too big. Four inches on each side, too big! I have to take in everything. Ugh. Honestly, I threw on a little belt and it was fine to wear. But, I plan on taking in the side seams, princess seams, waist, etc. Cue the tears.

  • Widen the straps if you wear larger bras. Us gals with bigger cup sizes know the wide bra strap game all too well. I made my dress straps 1" wide and they cover my bra straps perfectly.

Butterick B 6453 dress pattern review.


Trace and cut out all your pattern pieces. Make sure to transfer the markings and notches. I didn't trace the pocket or skirt pieces onto new paper. Sometimes I get lazy and use the actual pattern tissue. Please don't tell the sewing Gods on me.

BEginner friendly dress sewing pattern with vintage style.

Staystitch your neckline, don't skip this step.
Sew the darts.
​Then, sew the princess seams to the front bodice piece. I find it easiest to clip the front piece a little to help with the curve if needed. Also, it's easier to sew with the flat piece on the bottom. Go slow and adjust as needed; you'll have a pucker-free seam in the first go. 

BEginner friendly dress sewing pattern with vintage style.  Butterick 6453

After the princess seams are sewn, match the side seams with the back pieces. Sew from the waist up. 


Here's a Tip:
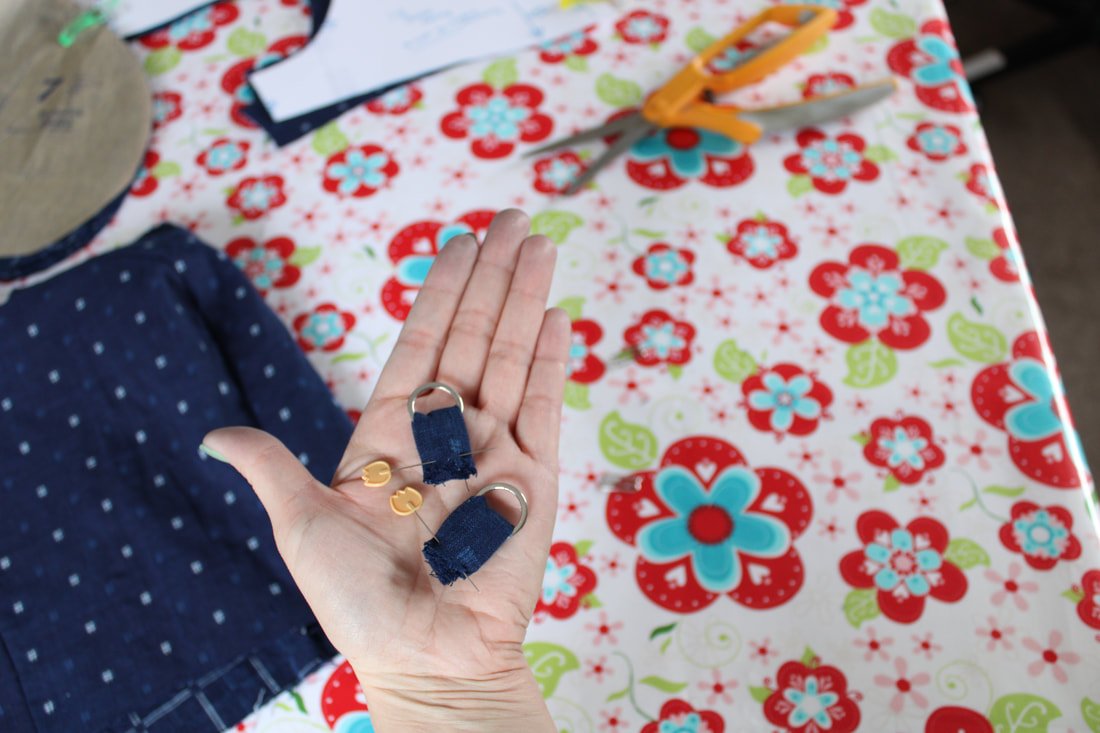
If you have an old bra lying around that no longer fits, cut it up. Use the metal hardware for your dress straps. I save all my metal hardware from old bras. 


Notice my blue fingers? I've washed this linen three times and it still makes my skin blue. Ack!

Pin your straps into place and try the bodice on before stitching the straps on. I waited until the dress was fully sewn before I did this. The linen weighs a ton and I knew the skirt would pull it down. Yay, gravity! My fabric was too thick to make adjustable straps so I ended up sewing the strap ends onto the bodice. But, I love adjustable straps, even though the dress will only get worn by me. :)

​Here's a bra hack post if you're interested in DIYing your bra. 

Gather and sew the skirt's front and back pieces together. I didn't take any photos of this because it's pretty easy.

BEginner friendly dress sewing pattern with vintage style. Butterick 6453

Zippity doo-dah! This pattern calls for a lapped zipper. I'm still on the fence about whether I like doing lapped zippers or not. 
Press the right side under 1/2" and press the left (lapped) side 5/8" under. 
Pin the right side and sew down from the top, using a zipper foot. Go slow to avoid any mother puckers. ;)

BEginner friendly dress sewing pattern with vintage style. Butterick 6453

Pin the left side starting at the waistband. You want that area to match up. Then, pin upwards and downwards making sure the raw edge will be hidden after it’s sewn. Go slowly starting from the top and sew down. Swivel and sew a few stitches across to seal the end of the zipper.

BEginner friendly dress sewing pattern with vintage style. Butterick 6453

Ta-da! Your zipper is complete. A white one was used because that's all I had on hand. I was doing a "no buy" sewing challenge. I normally would have used a navy blue one but, the white still matches. Sorta. Ha!

I eventually lost the challenge after a fabric cutting mistake though. Insert eye roll. 

Butterick 6453 dress pattern.

Butterick 6453

All that's left to do is sew the hem. Choose an easy hem, turn up the raw edge 2", and then turn it up again.

So, that's it. This is the easiest dress pattern I've ever come across. Are you going to make one? Do you know of an even easier vintage-style dress pattern? Heck, my caftan was more involved than this was. I assumed a caftan would be easy. Nay-nay! 

Thanks for hanging out today. If you are looking for a few other pattern reviews, click here for the Ginger Jeans review. Or, here for a Cheongsam sew-a-long. 

Happy sewing!
Annette

Read More

How to Sew an Ironing Board Cover

Want to spruce up your sewing space? Make your own ironing board cover. Pick out cute fabric that matches your aesthetic. This is an easy, beginner-friendly sewing project that will take less than one hour. Make laundry and ironing fun again, with a personalized ironing board.

How to re cover your own ironing board. DIY sewing room sewing projects.

Recover Your Ironing Board in About an Hour

Spruce up your dingy ironing board, it's simple and quick. There's one thing almost every sewist says, "I only iron when I sew." That rings true for me 95% of the time. I'm not a big fan of wrinkles so, I do iron the occasional laundry basket of clothes. However, my ironing board lives in my sewing space. Unless we have people over, it hangs out in sewing land.

There's nothing fun about pressing open seams on a musty crusty ironing board, am I right? I've bought countless pads for my board over the years. They've worked fine enough until they flatten and get ugly. It was time to make my own cover.

After going down the rabbit hole that is Google, I discovered people using felt blankets on their boards or Insul-Bright. You're going to use both for your new cover! No more wimpy covers that leave board indents on your project or, dare I say, laundry. 

Your new board will be thick and lofty, oh and it'll look cute too. Yay for pretty things. :D 
Are you ready to re-cover your ironing board? Let's do this.

How to sew an easy ironing board cover. Wool fabric and cotton. Eesy home sewing pattern.

Supply List:

  1. 2 yards of pretty cotton fabric, you may end up with some leftover 

  2. 2 1/2 yards of elastic, 1/2" wide at least 

  3. 1 wool blanket (buy it new, thrifted, from a military surplus store, or an old one in the closet)

  4. 2 yards Insul-Bright

  5. Thread

  6. Sewing Machine

  7. Pins or clips

  8. Iron and ironing board, of course 


Ironing boards come in all shapes and sizes. 2 yards for the fabrics should be more than enough. Measure your board length to be sure, don't forget you'll need extra for the seam allowances.

This whole project takes about an hour. You'll be pressing those seams open on a pretty new cover in no time. 

Easy DIY ironing board cover.

Let’s Get Started

Start by removing your old cover and after you've washed it, stuff it inside this floor pillow. ;)
​Use the thin foam piece as a cutting guide for the wool and Insul-Bright layers. If you don't have one, just eyeball it. This is an easy project, and it's all about winging it here.

  • Cut 2 layers from your wool blanket

  • Cut 1 layer of Insul-Bright batting

I cut the wool and Insul-Bright pieces one inch larger around. Set aside.

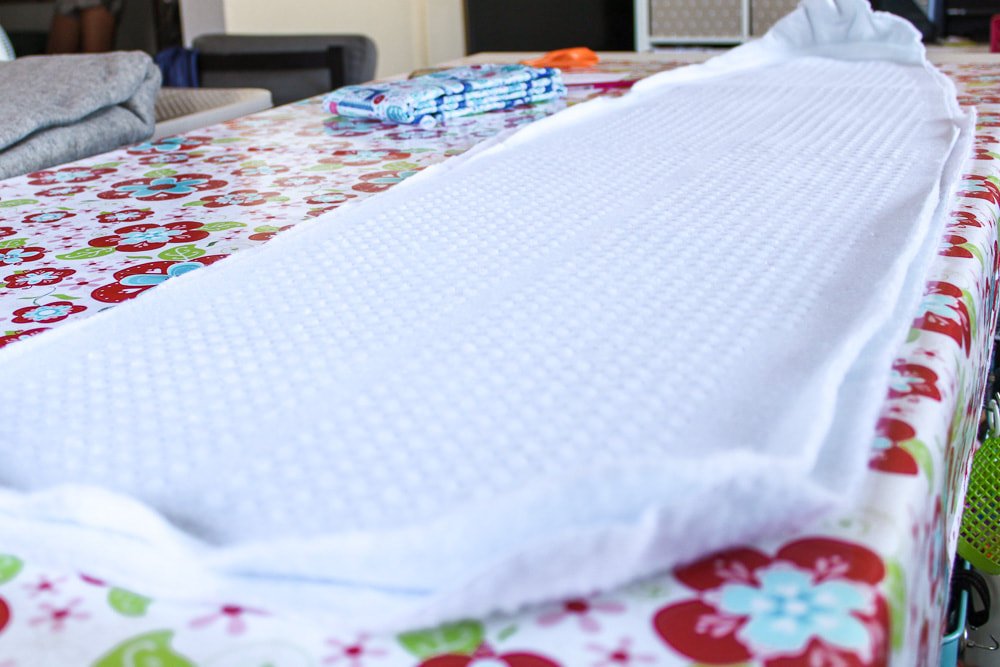
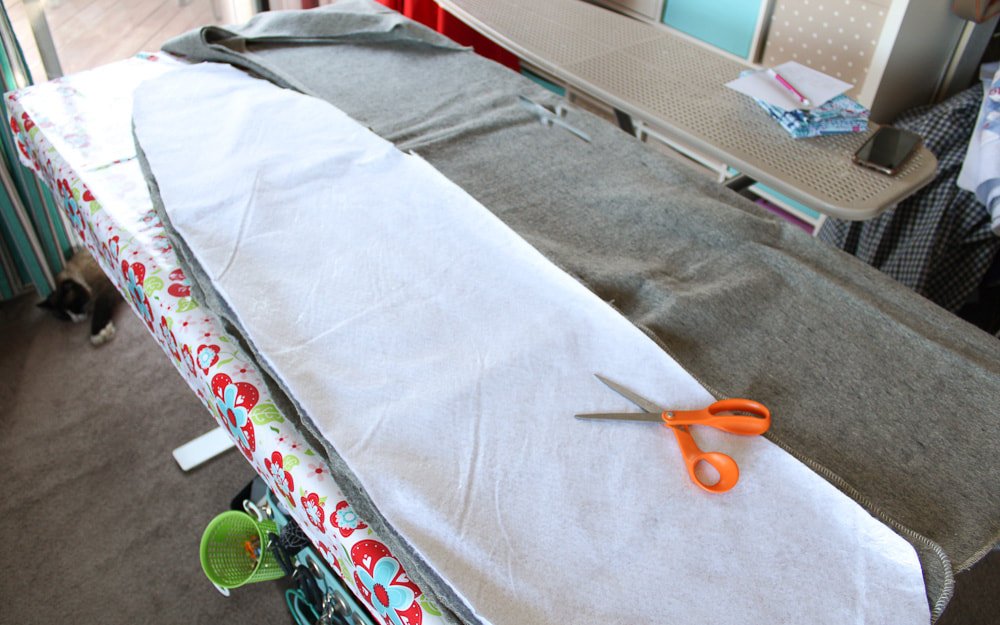
Place the 2 wool layers onto the board, then the Insul-Bright layer on top. Iron over the layers to smooth them out. Look at those wrinkles. Yikes!

How to make an ironing board cover. Easy home sewing pattern and tutorial.

Drape your cotton fabric over the board. You'll want it to hang 4" all around. Give everything a good press, sliding your iron back and forth over all the layers. 

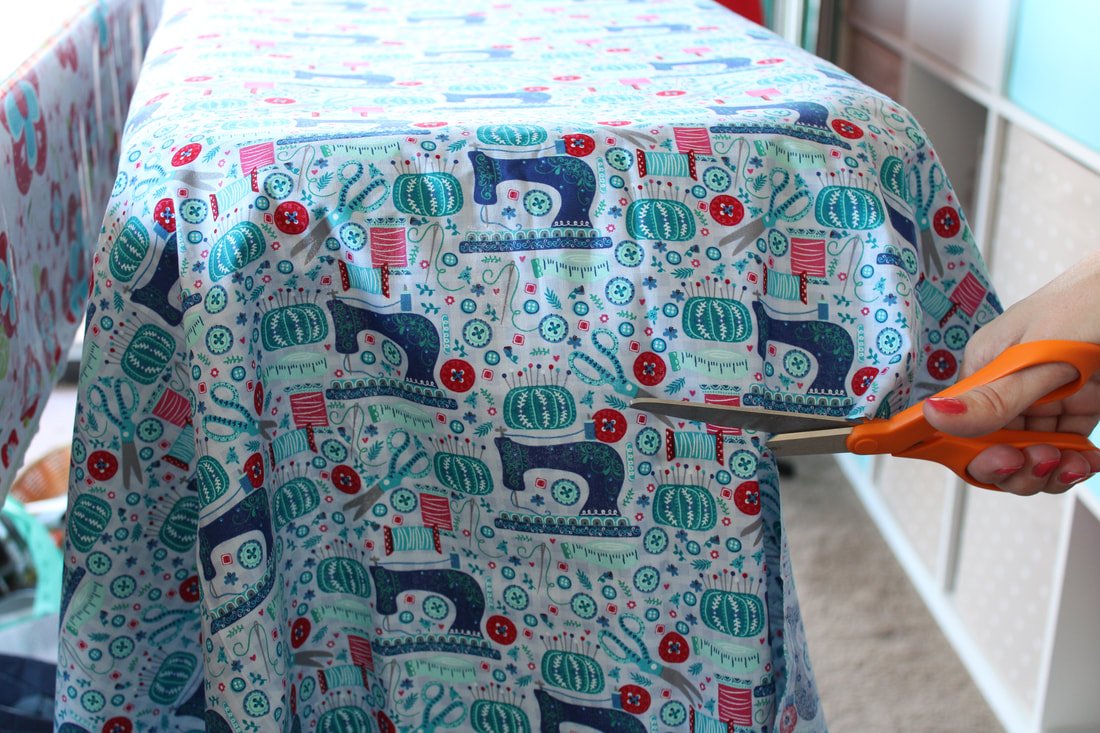
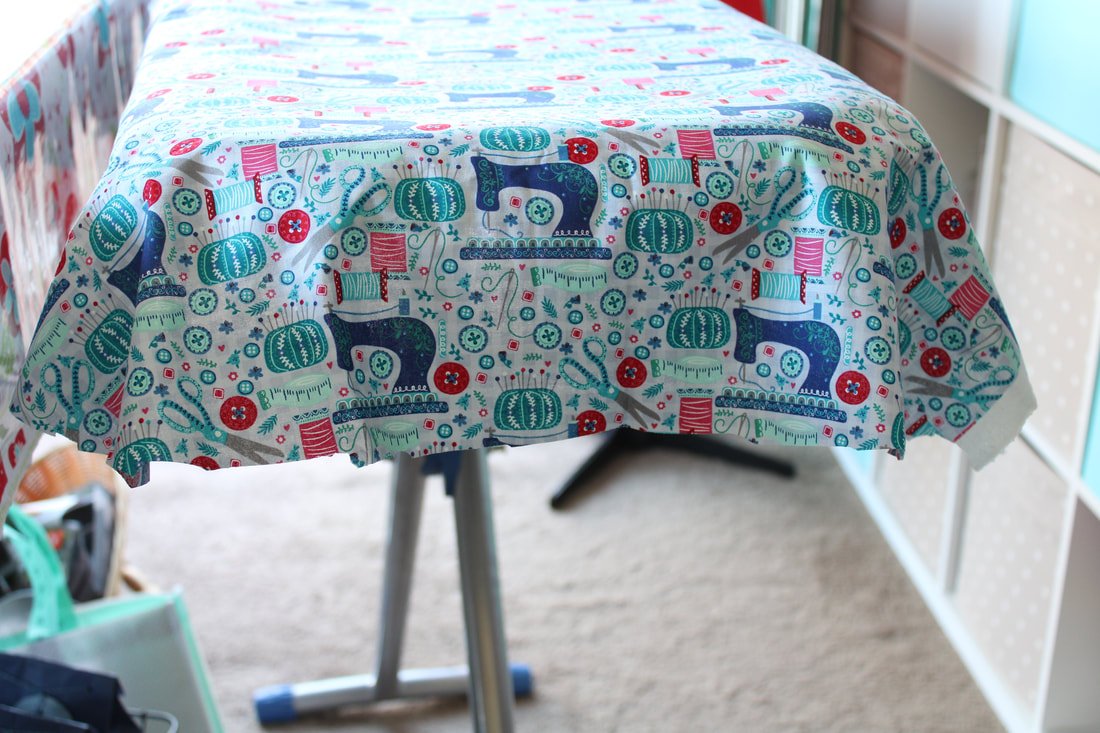
Cut your fabric, it doesn't have to be perfect but, make sure your edges are smooth and not jagged. I'm speaking from experience. ;)

Fold it in half and even out the shape.

Fold the fabric corners onto themselves to create curves. Pin. Do the same thing for the nose of the board as well. Then, pin the long edges 1/2" under.

DIY home decor sewing project. Make your own ironing board cover.

You could pin the whole cover under 1/2" or not. I found pinning helped but, it's up to you.

Sewing Time

Take your fabric cover to the machine. You're going to sew with a 1/2" seam allowance. Use a 2.5 or 3mm stitch length. It doesn't have to be perfect, the seam will get covered.

How to make an ironing board cover. Free easy sewing pattern for the home sewist.

Sew using 1/2” seam allowance.

Now, grab your elastic. You're going to sew a zigzag stitch over the seam you just sewed with the elastic on top. 
Pull the elastic taught with one hand while gently pulling the fabric behind the machine with the other hand. Use a zigzag stitch and sew. You want to pull the elastic tight enough so it will make the cover fit nicely and snug over your board.

Sewing your own ironing board cover. It's easy and quick.

Sew the elastic on with a Zigzag stitch. Place the elastic over your raw seam edge and sew, pulling the elastic as you go.


Sew your own ironing board cover. Great for customizing your sewing room or space. Fun gifts for sewists.

The zigzag stitching isn’t perfect, but nobody will see it except you. The elastic covers the raw edge of the folded seam.

You will have something that looks like mine up above. If not, grab that seam ripper, grab a cup of tea, and start ripping. 


If your fabric doesn't fit snugly enough, clip a piece of elastic and attach it on the underside along a long edge. Clip. Then, pull it toward the other side to get a snug fit. Clip or pin. Take it to the machine and zigzag over both ends. You may have to slide it on and off the board a few times to get a perfect fit.

My old cover came with elastic straps that fit like this, except they had a button. That's where I got the idea. I added two elastic strips under the cover. One at the nose and one at the bum. ;)


Yay!! You just made a cute ironing board cover and it will work much better than any store-bought one. 

How to customize your sewing room. Make a matching ironing board cover.

Add a crosswise piece of elastic to tighten the fit. This will sag over time due to the steam. Add a new piece every year or two.

Make your sewing space more you. Sew up some matching items like an ironing board cover.

Maybe I'll like doing laundry again with my new, pretty ironing board cover. Nah, probably not!


I've wanted to recover my ironing board for a while, and I'm so happy I finally did it. With the multiple layers, everything presses nicely and quickly too. 

Are you excited to make your ironing board cover? Or is it something you'd rather not make? I'm curious, so tell me in the comments below if it's something you're excited to make.


Thanks for hanging out with me today. Now go sew something fun. :D


Happy ironing,
Annette


Looking for something else? Click through the posts below.


Have a ton of fabric scraps? Want to use them up? Sew a floor cushion.

Are you new to sewing and want to jump right in? Read this Budget-Friendly sewing post here.

Is your machine not working properly? It might need a quick cleaning session, find out how here.

Do you love vintage style and want to incorporate it into your everyday wardrobe? Grab this easy free pattern for a vintage headscarf. 

Do you have chickens? Yes! Well, you need an egg apron. Grab the free pattern and tutorial here.

Read More

Hooded Princess Coat by Charm Patterns

Gertie’s hooded princess coat sewing pattern review and tips. I love the pattern and it sews together beautifully. With rain resistant fabric and the added hood expansion, it makes the cutest vintage style raincoat. It’s a little red raincoat. Not beginner friendly, but a seasoned sewist won’t have any problem making one.

Hooded princess coat by Gertie, sewing pattern review.

My Little Red Raincoat

This coat is a Patreon expansion pack of Gertie's Princess Coat sewing pattern. Sew your own raincoat to keep yourself dry and cute. It starts with the Princess coat, then you add the expansion pack for the hood.

Do you ever find yourself needing a garment, but you can't find one out there that suits your style? This is that garment. I have a few hooded coats but, they're wool or fleece. Not really a raincoat per se. And, I have two garment obsessions: coats and shoes. I need all the coats and I need all the shoes. Ha!

​I think coats and jackets are the best accessories because they add warmth- especially if you're always cold. And, they add fabulousness to your outfit. Imagine yourself wearing a T-shirt, jeans, flats, and red lipstick. A normal little everyday outfit, right? Then, add a black velvet coat and your outfit gets a major upgrade! 

That's what coats and jackets do for me. I guess they're my jewelry. So, when Gertie came out with her Princess Coat pattern, I had to grab it. A month later she rolled out her Patreon expansion pack to make a raincoat. I was sold! I needed a raincoat.


Fast forward 2 years and I still hadn't made my beloved raincoat. First of all, rainwear fabric was something I had zero clue about. And, second, I sew on a budget. I didn't have hundreds of dollars to drop on fabric for a coat I would wear maybe twice a year. Thanks, Southern California for never raining. Living in the desert, we don't get a lot of rain but, when it rains, it pours. Hello, flash floods. And, hello Little Red Raincoat.

It never rains in Southern California
— Albert Hammond
Hooded princess coat by Gertie, sewing pattern review.

Tracing and cutting the outer fabric. The kitchen table was the best place for this. It’s a lot of yardage.

This post isn't a How-to because it's an expansion pattern for Patreon only. Gertie is gracious enough to spoil her Patrons with all her marvelous patterns. If you're interested in making a vintage-style raincoat, Grab the pattern here. Then, join her Patreon here. It's definitely worth it. We get a new pattern each month and honestly, it's too many for me to keep up with. But, I choose which patterns are "need to sew now" and which are in the "someday" category. 

Anywho, I did have a few little areas I ran into trouble with so, I'll share my input on those. But, other than that, enjoy all the photos of my Little Red Raincoat. Yes, I named it. :D

Hooded princess coat by Gertie, sewing pattern review.

No rain, but it was a frigid February day.

Why did I start sewing the raincoat after 2 years you ask? Well, remember this post on January Jeans? My sewing friend on Instagram was still talking with her jeans sewing group. They decided to do a #JacketJanuary. I was invited and thank goodness for those ladies! They welcomed me and I made new sewing friends. Yay!! 

One gal finished her jacket on time and a few were waiting for the last touches by the end of January. We met every Monday for a fun Zoom call. the group kept me going and I was finally able to get my coat finished. It wasn't finished on time because I was undecided on whether to use buttons or snaps. In the end, I decided on snaps. Buttonholes and water don't go together so nicely

Snaps are usually easy but not this time. I put the first one in upside down. Cried (not really but, I wanted to). Then, put another one in wrong. Ha! I don't like snaps (anymore) or buttons. Face-Palm! 

How to sew your own raincoat. vintage style raincoat sewing pattern.

Isn’t my pink lining fun? My coat can double as a Valentines Day coat/outfit.

Let’s Talk Fabric

One of the ladies in the sewing group told me about trench coat fabric. We had a quick chat about that and I had an a-ha moment. It was mind-blowing, believe me. I ended up buying trench coat fabric and it was wallet friendly too. I found some beautiful red polyester twill from Mood Fabrics. They shipped quickly too. According to my measurements, I needed 8 yards. Well, technically I needed 7.5 but, when you order online, you can only order in whole amounts. Fun story, I ended up with almost 4 yards left over. So, now I have no clue what to do with all that leftover rain-resistant fabric. Ugh! I think camping table clothes and bench covers?


The fabric itself is nice. It was a dream to sew with but, it wrinkles very easily. When I'm running through a hurricane looking fabulous, I probably won't mind my wrinkled mess of a raincoat, though. 

The lining is poly china silk I bought online from Wholesale Fabric Direct. It's a blush pink color and I ordered 8 yards of that as well because... well measuring. I have tons left over, over 4 yards. The leftover lining fabric didn't bother me because I can use it to line wool pants or anything else in the future. Plus, it only costs $2 a yard. LOL! No tears were shed over that. The rainwear fabric was a different story though. ;)

Tracing the lining pieces. Again, at the kitchen table.

Notions and Potions

No potions except coffee. Lots of coffee.

​The thread and needles I used were simple and nothing fancy. 

  1. I bought 3 spools of all-purpose red polyester and 1 spool of all-purpose poly pink thread. I read other people’s comments about how much thread they used for the Princess Coat and I didn't want to run out. Well, I didn't even use a whole spool of the red. Ha! I always use red thread because it's the best color in the whole world, so no worries about that. 

  2. I sewed my outer coat with a regular 80/12 universal needle. It sewed through the rain-resistant fabric flawlessly. This fabric held onto the holes it was given so, I was cautious but, in the end, just went for it. Backstitching on every seam was fine, no issues there.

  3. For the lining, I knew better. I used a Microtex needle to sew all the pretty pink seams. When it came to sewing the outer and lining together in a few spots, I used red thread and the universal needle. No issues, no skipped stitches, and no bird nests. Yay for nice, cooperative needles. 

  4. I used a tracing wheel and wax paper for the outer and lining pieces and cut everything with scissors. It was nice to open the leaves on my kitchen table and lay out the fabric and pattern pieces. My cutting table in my sewing space was not quite long enough for this project. 

Sewing vintage style patterns and garments. How to sew your style wardrobe.


Adjustments

  1. After making my muslin, I decided I wanted a little more room in the tailored sleeves. I used a 1/2" seam allowance instead of the recommended 5/8". I graded it up when I got to the armpit area. This kept me from having to make other adjustments in the armscye area. 

  2. I measured at a size 8 for the coat but graded down at the side seams, to a size 10 at the waist. I love that Gertie gives us different cup-size pieces. The fit was exceptional. I love sewing for my own body. Talk about body positivity. :D

  3. I also adjusted the length as I cut out the skirt pieces. Instead of shortening the skirt length at the shorten lines, I simply cut the length at size 2. This was probably the incorrect way, but it worked for me. Sometimes I like shortcuts. 

  4. I added a hanging loop in the back. Cut a 2" wide by 4" long piece out of the outer fabric. Fold in half RS together and stitch with a 1/4" seam. Turn it inside out and baste it to the hood. A hanging loop for a raincoat is a must, right?  

  5. I topstitched all of my outer seams. I sewed the center back seams to the left and the other ones to the right or left, depending on each seam. I thought this would help with the rain seepage as well. 

Hooded princess coat by Gertie, sewing pattern review.

Pretty pink pockets.

Issues I Ran Into

  1. The Instructions were a little wonky in areas which isn't normal for Gertie. She's usually spot on. However, I did run into an issue with pattern piece #15, the skirt front facing. Her video says she skipped the hem facings, fine. But, she still had the front facing on her raincoat and it didn't say in the extension instructions how to add this. The booklet instructions were on page 44 but were different. So, I unpicked some of the waist area and attached it to the bodice lining unit, albeit the wrong way, but I got it done. 

  2. I had trouble figuring out how to add the neck facing because I hadn't had enough coffee or something. Below, is how it should look. The collar facing is cut with the outer fabric and sewn to the lining bodice at the back collar. It went on sorta upside down. Like I said, maybe I didn't have enough coffee. 

Hooded princess coat by Gertie, sewing pattern review.

Bodice lining.

How to sew your own raincoat. vintage style raincoat sewing pattern.

Neck facing is clipped and ready to sew.

How to sew your own raincoat. vintage style raincoat sewing pattern.

Neck facing and back bodice lining.

How to sew your own raincoat. vintage style raincoat sewing pattern.

I used muslin for the back and serged the edges.

Hemmer Time

Okay, when it's time to hem, be sure to let your outer and inner hang for 24 hours before you hem them. Fabric cut on the bias is no joke. My outer didn't stretch out but, the lining did need a little trimming and evening up. 

After hemming 4,000 yards of fabric and removing approximately 300 wonder clips, your hem will be done. Gertie preferred a narrow hem for the raincoat. The way she does it is nice too. Sew along the raw edge with a 1/4" seam allowance, flip it up and under, and sew again. Super easy. It is also nice for a circle skirt hem, you don't have to worry about any puckers. ;) I hemmed the outer and lining before I put them together. I liked hemming the outer and lining separately. Easy and no stress. 

I went back and shortened the lining hem length another 1/2" inch. I didn't want to get caught with my lining hem showing. Could you imagine?! Gasp!  If you read this before you make your coat, hem the lining 1" shorter to begin with. 


The sleeve hems were easy to do too. I didn't attach them as Gertie recommends. Hand sewing, no thanks, and on rainwear fabric especially. I prefer the bagged-out sleeve hem method. You take the sleeves and pull them inside out, fold over the lining cuff 1/2" or so, match seams up, and then sew. I didn't take photos but, here's a website that shows you how. It is my favorite way to sew sleeve cuffs and if you look at your RTW coats and jackets, they probably did it this way. 

How to sew your own raincoat. vintage style raincoat sewing pattern.

The pretty pink lining.

You can see ripples in the bodice in the photo below. The water-resistant fabric didn't take well to interfacing. I decided to leave it but, might rip it out later in life. We'll see.

I top stitched over all the seams in hopes to keep the rain out.

Let it hang for 24 hrs.

How to sew your own raincoat. vintage style raincoat sewing pattern.

Ooh la la, I love my lining.

Final Thoughts

I'm so happy with how my Little Red Raincoat turned out. It was such a fun sewing project. Thank you to the #JacketJanuary sewing group, you ladies rock! I can't wait to sew up a few more jackets and coats using The Princess Coat pattern from Charm Patterns. Gertie, you really outdid yourself with this beautiful pattern, as usual. If a hooded coat scares you, don't let it. The hood was the easiest part. It's a nice roomy size so my vintage-style hairdos will fit inside without getting messed up. Yay for that! 

She gives quite a few sleeve choices. I want to make a mustard yellow coat next. I need some fun tweed to make a cropped jacket with a dare I say, faux fur collar! Perhaps some light pink boiled wool with a black fur collar too. Hmm...

I have no clue what to do with almost 4 extra yards of red rainwear fabric. Any ideas? Share them in the comments below, please. I need ideas. LOL
Scroll down to see more photos of my glorious coat without rain. 


Thanks for following along with my coat journey. Now, if you could all send some rain my way so I can try it out, that'd be great. 

Happy sewing,
Annette

Read More

DIY Floor Cushion: Stuff Fabric Scraps Inside

Sew your own floor pillow, they are great for game rooms, kids rooms, or even the pets. Sew one and use fabric scraps as the stuffing. These are fun and easy. Floor poufs are the coolest scrap busting projects!

DIY floor pouf, large floor cushion sewing pattern.

Are you a fabric scrap saver? Do you have dreams of using them up for something? Yes, of course you are. Maybe you don't save them all but, you do save pieces big enough to use for something special. My rule is if its big enough to use for a pocket, it gets saved.

I've discovered the best fabric-busting project of all time. It uses all your fabric scraps up. Okay, it doesn't technically "use" them but, it does put them to use. You're going to sew a simple floor cushion and store all your scraps inside! ​

​You'll want to plow through that list of sewing projects so you can cut into fabric and have more scraps to fill the floor cushion. Whew! Trust me, I'm speaking from experience. ;)


Cozy Meets Functional

DIY a floor cushion. How to sew a pet pouf.

The floor cushion itself is not a good scrap buster. You might need to buy fabric to make it. But, it'll free up space in your sewing area, I promise. 

I was lucky enough to have leftover grey chenille from my pop-up trailer makeover, so I used that. You'll want to use an upholstery-weight fabric or something similar. This cushion is going to take a beating. 

If you have upholstery thread, you can use it here. If you don't, good ole polyester thread works fine. This whole project takes 2hrs give or take. It's a quick sew and gives a huge reward! 

Free ottoman sewing pattern. Foot rest DIY.

My son uses it as a foot rest while he plays videogames.

If you're still on the fence about making one, think ottoman, pet bed, kid's seat, etc.

My cat claims it as his bed when my son isn't using it for his feet. It gets carried from room to room and makes a great coffee table game chair as well. I'm surprised it hasn't been involved in a pillow fight yet.

what to do with fabric scraps. Sewing pattern.

All these scraps are going inside the poof.

Supply List:

  • 2.5 yards upholstery fabric or similar weight fabric (you'll have a little bit left over) 

  • Thread

  • Clips or pins

  • 14" Zipper 

  • That huge pile of fabric scraps

  • Sewing machine

  • Scissors, a ruler, a marking tool, etc. 

Sew a floor ottoman and stuff your fabric scraps inside.

Wash your fabric if you want. I didn't. When I need to wash it in the future, it'll shrink a little and be fine. 

You're going to sew a large cube and fill it with your fabric scraps. Hooray!

1. Cut ​2, 21" squares. Cut 4 rectangles measuring 15.5" by 21". Serge or zigzag over the raw edges. Upholstery fabric loves to fray. 

2. Clip or pin the rectangles together along the short sides, right sides together. You're making a loop. Sew up the short sides using 1/2" seam allowances, backstitching at the beginning and ends.

3. Lay one square right side up on your table. Clip one side of the loop you just made from the rectangles, onto the square, RST. It's easiest to clip the corners of the square to the side seams first. Then, ease the side seams in. Your upholstery fabric might have some stretch in it but, you tell it who's boss!

​If you don't want to insert a zipper, sew along the edge using 1/2" seam allowance.

4. Here's where you'll insert your zipper if you want one. This is a little different than inserting a zipper into a bag so, bear with me. 

Clip/pin one side of the zipper to a rectangle edge. Sew the zipper with a zipper foot. 
Open the zipper and clip the zipper tape to the square bottom edge. Sew using the zipper foot. You might have to sew one side of the zipper tape facing down which feels awkward but is totally fine.

Switch back to your regular sewing foot to sew around the whole square. Start at one end of the zipper and end at the other end of the zipper. Open and close the zipper to make sure it's lined up, if it isn't smooth, unpick one side and resew it. 

*It's easier to sew with the flat piece down and move the rectangles out of the way as you sew.

How to sew an easy floor pillow for pets or kids.

To get the seam and zipper area to match up nicely, sew an extra 1/8" inside the zipper seam allowance when you get to the zipper.

​It's a little trick that's used when inserting invisible zippers. 

5. Now that the hardest part is over, it's time to sew the top square on. Clip the top the same way you did with the bottom square. Start with the corners first, then clip the sides. Sew all around using a 1/2" seam allowance. 

This might look tricky but, take your time. Go slow and make sure you're only sewing over the 2 layers.

DIY floor pillow sewing pattern.

Sew around the top.

6. Turn the cushion right side out and pop out the corners. You don't have to worry about trimming the corners unless you want to. I left them alone. Press the seams open as well as you can. 

Sew an ottoman floor pillow for kids or pets. Use as an extra seat.

Pull it through the opened zipper. At first, I used this tiny 4” zipper. Ha! It was too small. I had to rip it out and use the purple one.


Ta-da! You've made a floor cushion, bean bag, floor pouf, or whatever you want to call it. You made one!


7. Stuff it with all those fabric scraps inside. It's very therapeutic. If it feels empty still, toss some extra yardage inside if you'd like. I had yards of fleece, minky, and faux fur from my baby gift making days and that really helped to fluff it up.

You can even fill it with those random pieces of interfacing you're probably saving.  ;) 

All that's left to do is use it. Who gets to use it first? The kids, your kitty, or you?

Sew a large cat bed floor pillow. free sewing pattern.


Read Below for Extra Tips:

  • Use a long enough zipper to get your hand in and out. Originally, I used a tiny 6" zipper thinking I'd never need the scraps again. Haha!! It was quickly ripped out and replaced with a longer 14" one. It's fun and easy to add more scraps. And, if you need a pocket or other scrap-sized piece of fabric in the future, you can look through them easily. Dump everything out onto a table and sift through them all.

  • If you have random pieces of heavy-weight fabrics, use them to make the cushion. Use a different piece for each side, top, and bottom. It'll give it an eclectic and lively look. Faux fur would be fun too!

Sew your own floor pillow for a kids room. Easy home decor sewing!

I used the sun faded piece for the bottom.

You can make a set if you have buckets and buckets of scraps lying around. Oh, a set would be great for a kid’s room or game room as well. 

Now I'm off to tackle that sewing to-do list. I need more scraps!! 

How to sew your own floor pouf. Floor pillows are comfy and are great for everywhere in the house.

It’s waiting for more scraps.

So, are you ready to put all those scraps to use? Well, store them in a fun way at least. If you do, tag me on Instagram @sewingtothemoon so I can see them all.


Happy stuffing!
​Annette

Read More