Making a Quilt, the Easy Way

Cooking is fun, messy, and can be very delicious. Gardening is quite rewarding because its fun to watch things grow. Sewing, however, is my main jam! I love making bags, gifts for others, clothes, and so much more. Sewing is definitely my most beloved hobby. However, I was never a fan of quilting. To me, quilting and sewing are two different hobbies. Are you team sewing or quilting?
I never loved making those strip pieced table runners, or small quilts. Too many rules to follow. Too many tiny pieces of fabric to cut. Cutting all of those small pieces to then sew them together again, is my absolute nightmare. But, something wild and crazy happened during this past Fall. A Halloween quilt came to life! I don't remember what planet I was visiting, but I decided to make a quilt. Spoiler alert, I made a Christmas one too. And, I loved every minute of it. It was so much fun! Why did I change my mind? Well, I didn't follow a pattern. I did my own thing entirely and loved the process and final result.
If you're not a quilt fan, I beg you to try making a quilt following your own rules. Read along for some easy tips to create your first (or next) quilt. Am I a quilter now? I don't think so. But, I did enjoy making both of the holiday lap throws. As you read, you'll notice more of the Halloween quilt. I took more process photos of that one but, there are some Christmas ones too.
Disclaimer: I am not a professional quilter. I probably do some cringe-worthy things here but, this is how I made my two quilts. The best part? I didn't want to set them on fire in the process. Sewing is supposed to be fun and not stressful. And, after all, it's just fabric and we all own a seam ripper or two. Let's get quilting!

Supply List:
Fabric. Lots and lots of fabric. 1-3 yards for the backing. 2-3 yards of various coordinating colors, patterns, and styles of fabric. It might be easier to start with 4-5 different fabrics first.
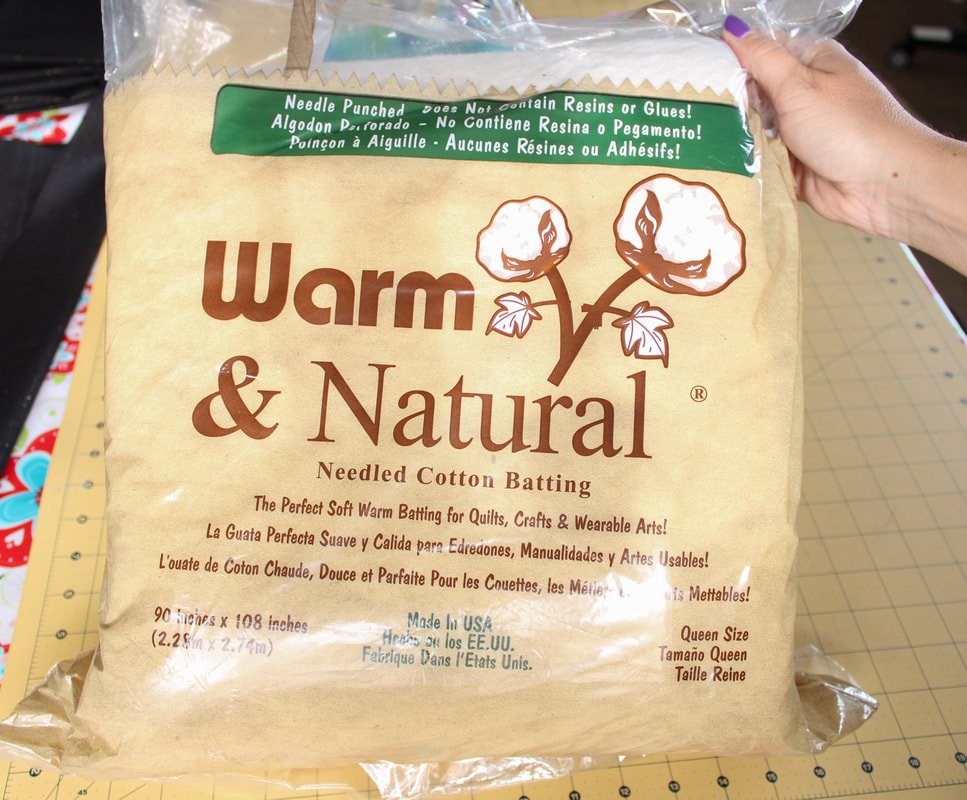
A package of batting
Quilting rulers
2-3 Spools of thread
3+ bobbins
Quilting Gloves (I use Grease Monkey auto ones)
KK-100 Spray adhesive
Free motion quilting foot
Patience and lots of snacks
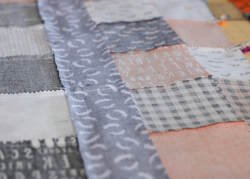
All the Fabric Pieces
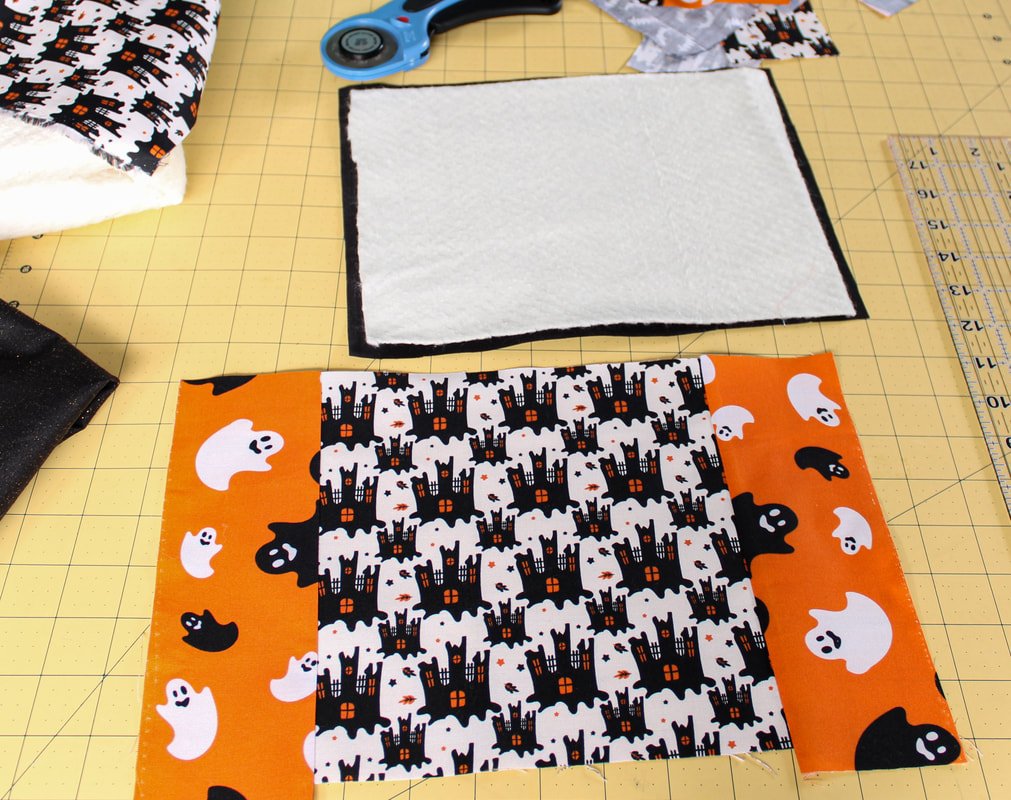
A quilt is a fabric sandwich, more or less. You have a top, which is all the pretty pieces. The middle is the batting layer. The bottom or backing is the fabric on the back. It is usually a solid or printed piece. If you make a larger quilt, you'll need to have a seam or two running along the back.
First, decide on the size. Are you making a table runner, or a lap quilt, or going for the gusto and making a Queen bed-sized one? You don't need to stick to this exact size but, a general idea is good. Keep in mind the size of your backing as well. Quilting cotton comes in 44" widths so unless you want a seam or two running down the backside, you might want to keep it smaller.
Next, you want to decide on shapes. Do you want rectangles, thin strips, squares, or more intricate shapes?
You'll need to also include border strips. These will frame your inner quilt pieces. Traditionally, you add these to the sides first, then the top, and then the bottom. However, it's your quilt. You have my permission to make it however you want. Go ham!
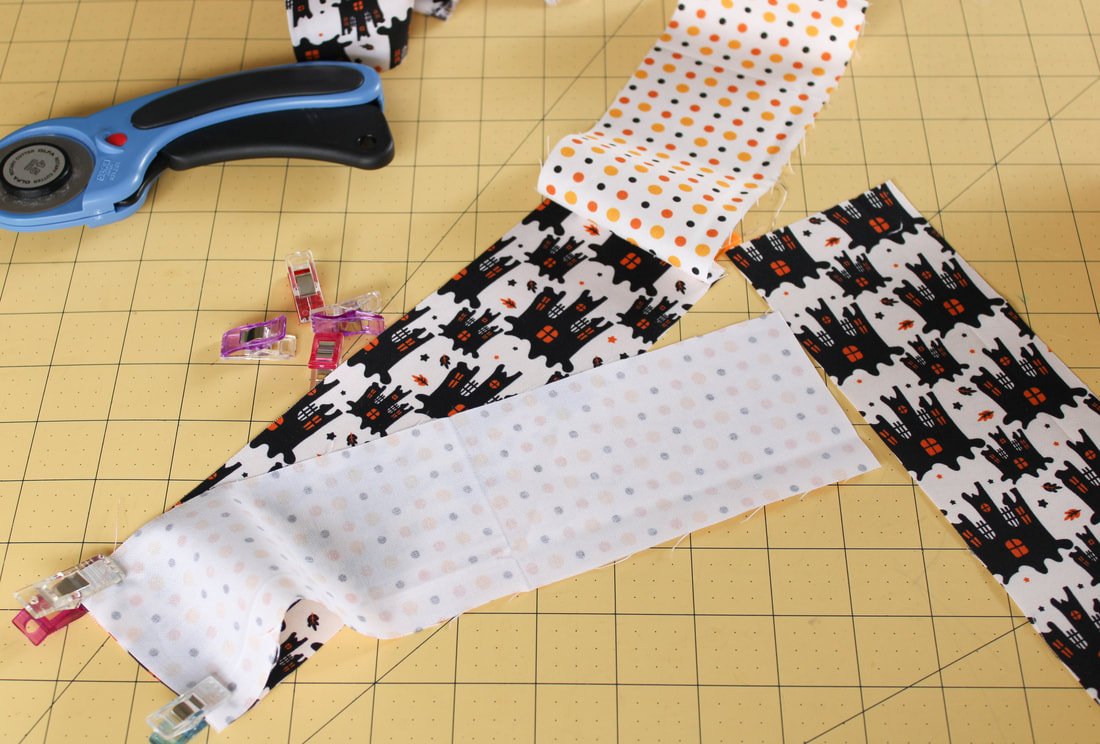
Be sure to choose similar colors or patterns. For a first quilt, it may be easiest to purchase fabric in the same design family. That's what I did for the Christmas one. The fabric was all made by Singer and I bought it from Michaels.
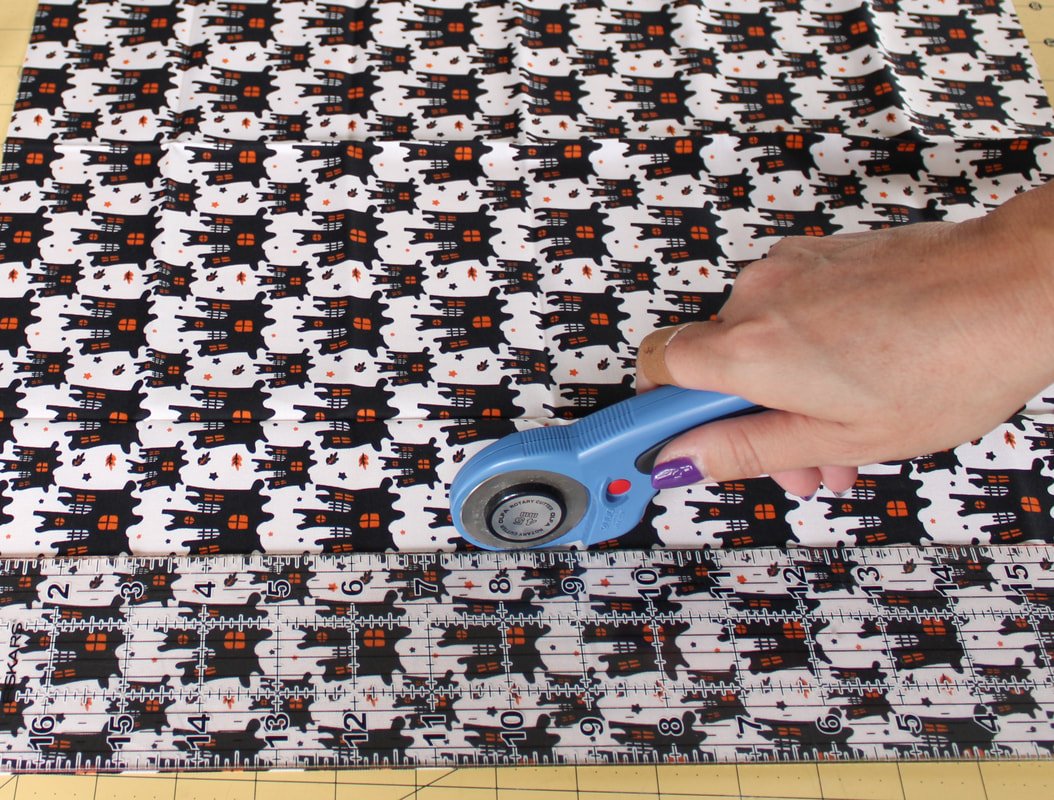
Decide on a rough layout, it doesn't need to be set in stone, it's just to get you started. Then cut the pieces using a rotary cutter, mat, and ruler. Example: You can start out by cutting 10 pieces of red, 10 of yellow, 10 of blue, 10 of checks, 10 of polka dots, etc. You can always add more or take it away. This just gets you started. You can also buy a set of pre-cut squares to make it even easier. Set each pile aside. You'll work from the piles.
*For reference, I'm going to use my own lap lap-sized quilts I made, which were roughly 4'x6'.

This Halloween one has squares and long strips.
The Magical Layout
This, in my opinion, is the most important part. Yes, crooked seams want to be avoided along with wonky stitching but, the fabrics need to look pretty. So, this step is very important.
Clean off a huge area on the floor and start laying out your pieces. You usually want it longer than wider but, again, your quilt.
Lay the squares down in a rough pattern. For my Halloween one, I did 6 across, and 7 down. I didn't want the same colors or patterns touching. This can be impossible sometimes. Switch them around until you get something you like. If you're losing your mind over this part, walk away and come back later. It can also help to have a second opinion. Ask a family member, text a photo to a friend, or DM an Instagram bestie to ask for their opinion. I even found that just taking a photo and looking at my quilt in the photo helped me fix a few snafus. Call me crazy, but the layout can make or break your quilt. I've seen some less desirable ones that could have been saved by a different layout.
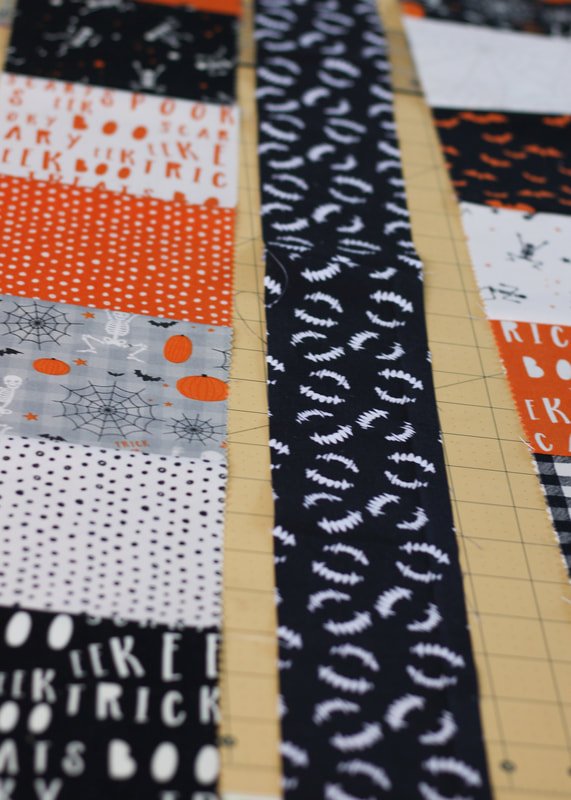
I decided to make my quilt larger than my original planned size. To do this, I cut 3" wide strips the length of my top piece, and sandwiched them vertically, between the squares. This is easy to do and it can make it longer or wider. After you stitch all the small pieces together, your quilt shrinks quite a bit. Who knew a 1/4" seam allowance was so big? Haha
Place your long border strips on the top and bottom. They frame your quilt and "seal the deal", so to speak.
Most machines come with a quarter-inch sewing foot, have marks on the machine plate, and some might even have a quilting guide bar. Make use of one or all of these.
Use a 1/4" seam allowance at all times, for all the pieces. It might seem small but, it creates less bulk. You don't trim the seam allowances like you would in garment sewing.
Use cotton or polyester thread. I used polyester. I've honestly never sewn with cotton thread. You'll have to do your own Google search on that if you're interested. (I think purists use cotton thread but, I could be wrong. Again, not a professional).
Start by sewing the first vertical row from left to right. You'll sew the squares to form a really long strip.
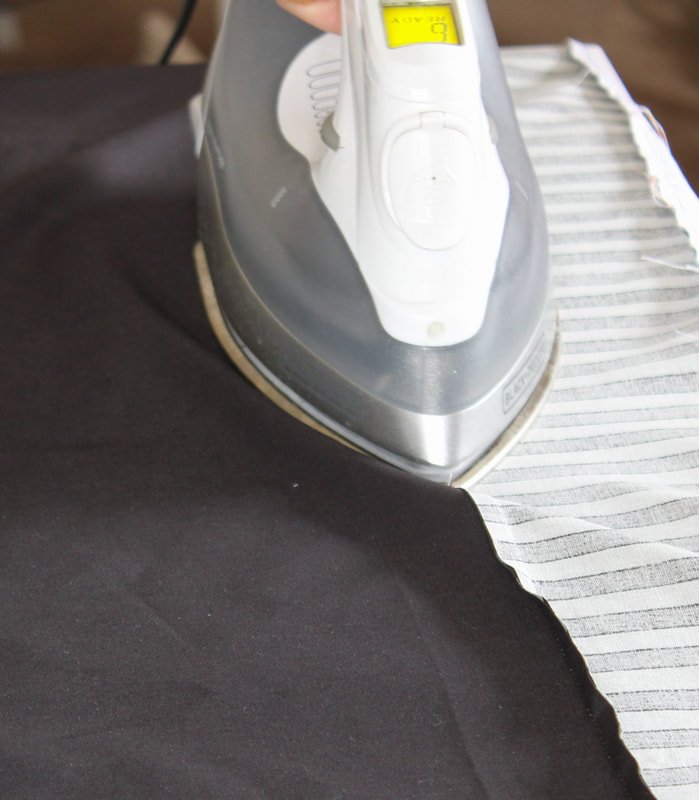
Press each seam to one side. Don't press open like you do with garment sewing. For example, press each seam to the left side in this row.
For the second row, sew all the squares (or strips) to each other the same way you did with the first row.
Press each seam to the right side. Give a quick press to the front side of the seams too.
Sew the second row to the first row making sure to line up the seams perfectly. Press seams to one side.
Repeat this until you're at the end of the length.
If your quilt is easier to sew the strips/squares across, do that and work your way down.
You could use a walking foot to sew your pieces if you'd like. It helps to "walk" both layers evenly at the same time. I used the quilting foot my machine came with for the Halloween one. For the Christmas one, I didn't. Both turned out beautifully without issues.
After the middle portion is completed and you're standing in shock and awe at the small sized quilt, you might want to make it bigger. I know I did! Ha! I still can't believe how much it shrinks after sewing all the pieces together.
If you'd like to make it bigger, you can sew a few extra strips to add to the sides, top, and bottom. In that order. My Halloween quilt shrank after I sewed the middle area together. I didn't realize how much a tiny 1/4" seam allowance would eat the fabric.

Sewing the Pieces Together (in photos)

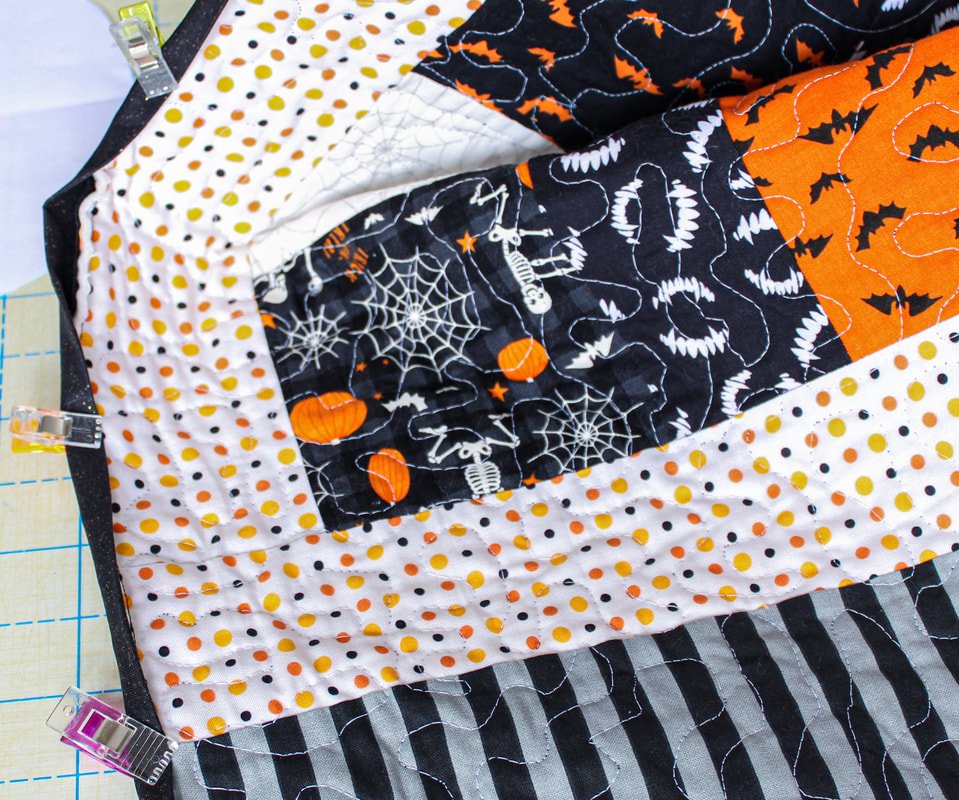
Halloween Quilt
This is the finished top. You can see where I added length with wide strips at the top and bottom. I created a thin strip border to add width as well.

Christmas Quilt
This is the Christmas quilt top. I love the red and aqua color combo. I used thin strips on the sides, top and bottom. I love how this one turned out.
Batting (the middle layer)
Batting is the layer that gets sandwiched between the quilt top and the quilt backing. This is not the fluffy layer your grandma or great-grandma made your baby quilt with. This is a thin layer that has some weight to it. It's easy to sew through and adds heft to your quilt.
**You want to cut your batting piece a few inches bigger than your top and backing pieces because it can shift during quilting.
There are lots of different types of batting, including that fluffy layer Grammy made your baby quilt with. Use it if you'd like but, I wanted to share some other options.
The old stuff is 100% polyester and is on the thicker side. It has a habit of falling apart and clumping after a few washes. It's very inexpensive and it shows. Use at your own risk. Can you tell I'm not a fan? Haha
100% Cotton batting. This is my preferred batting. I only buy this kind of batting. It comes in different sizes, colors, and weights.
Cotton/Poly blend. It can be the best of both worlds. Or, the worst. ;)
Here's an in-depth blog post all about battings. It has the pros and cons of the different types. You can make your own decision on what type you want to use.
Bonus tip: buy a larger size than you think you need. You can get a couple of smaller quilts out of one package. And, use the large scraps for bag making.
Last Layer
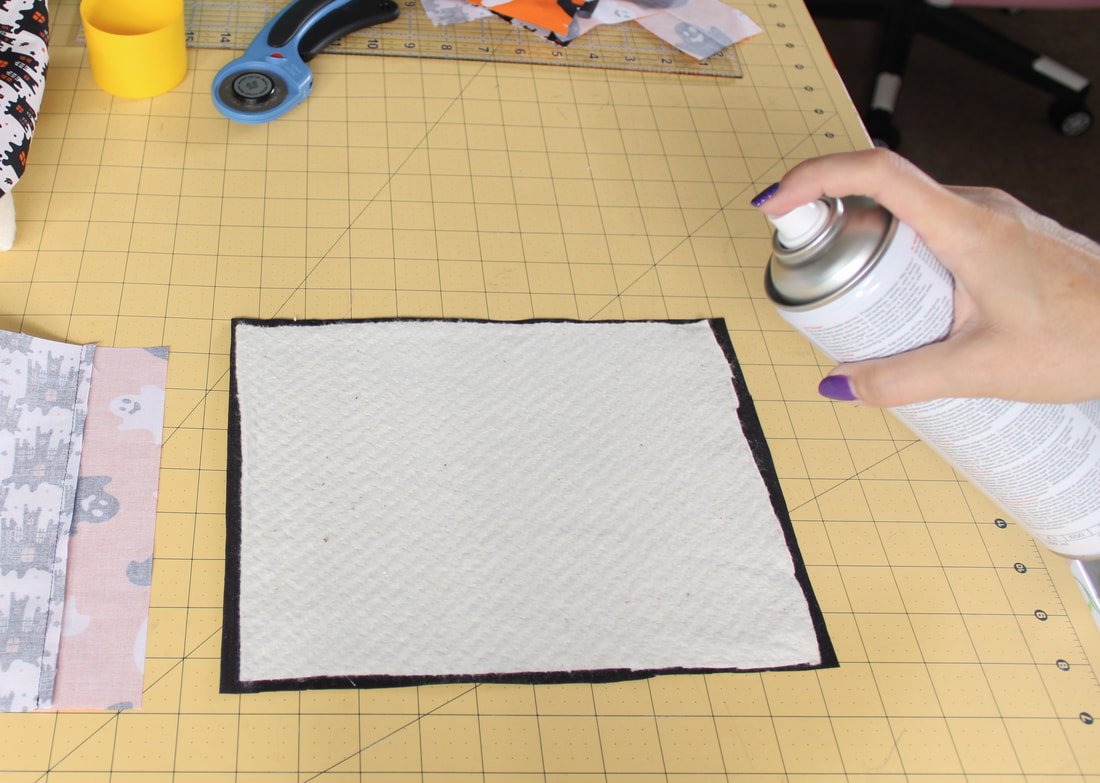
Now that you're ready to add the last layer, you'll want to grab your spray adhesive. I prefer KK-100.
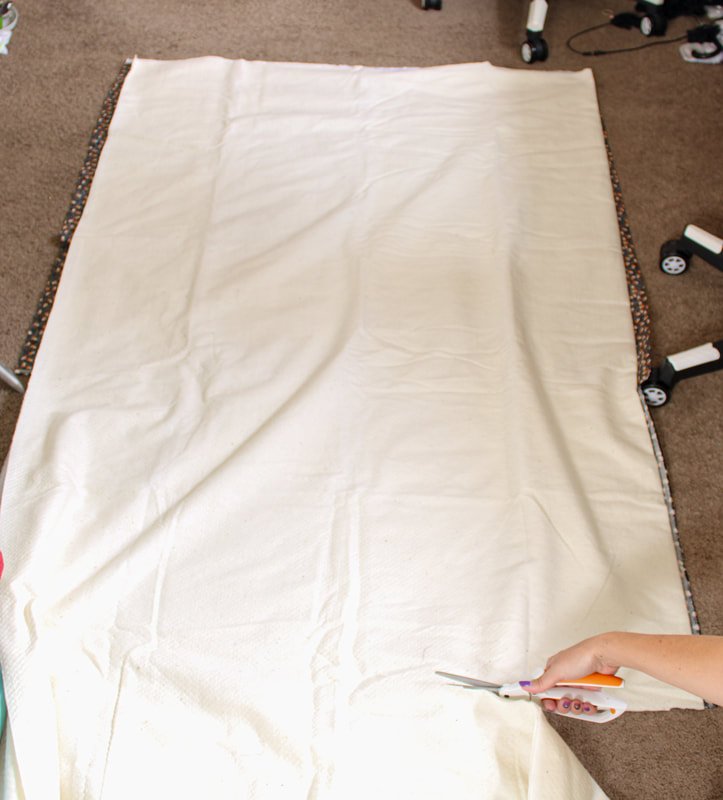
Lay your backing down on the floor, wrong side up.
Then, add the batting on top. If you use the cotton type, the seedy-looking side goes up.
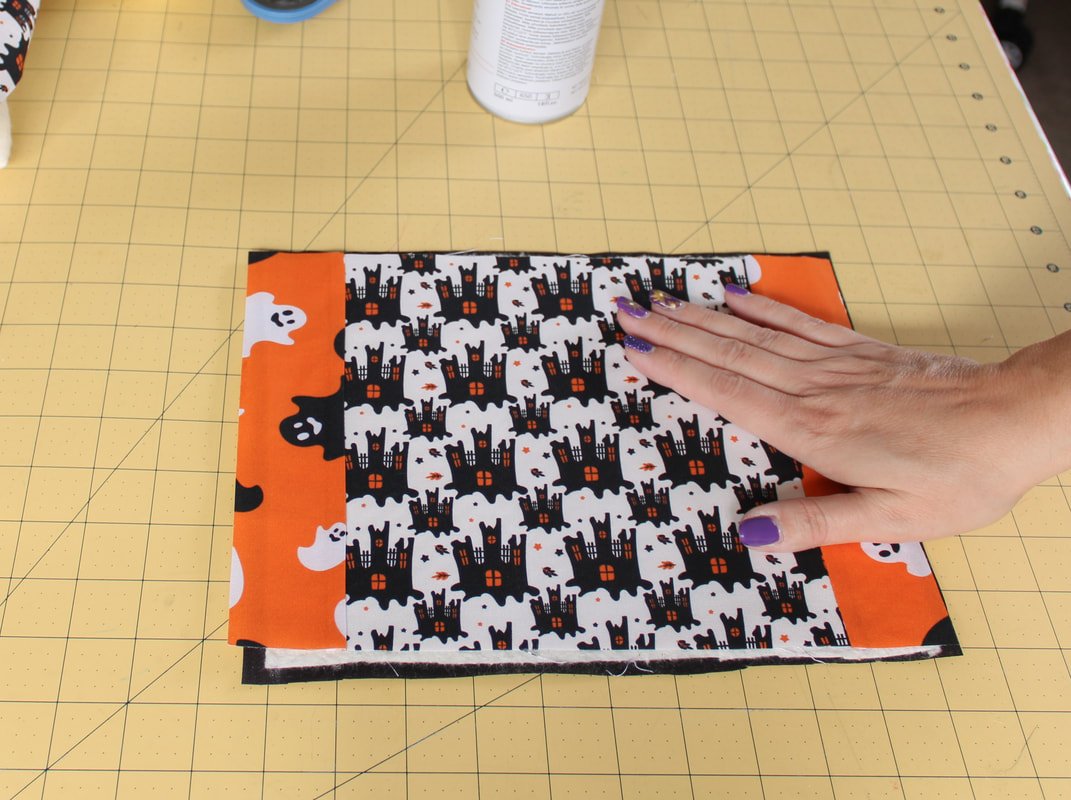
Then place your beautiful top onto the batting, right side up. It's a quilt sandwich.
Now, there are different ways to go about this next step. Some people prefer to use safety pins to hold the layers together. I found that spraying each layer with KK-100 spray adhesive worked perfectly. It held the layers together and I was able to quilt over everything without any issues. I have a video of how I did this on my TikTok and Instagram reels. @Sewingtothemoon
I started by spraying the bottom layer while having the top layers rolled up. I'd spray about 6" down, across the whole top, and then roll the top layers down. I proceeded until I got to the bottom. Then, did it again for the top layer. Smoothing everything down as I went. It helps to watch the video to get a better idea. This whole process takes about 15 minutes or so.
You can use safety pins instead if you'd like. You just pin every so often through all the layers. I don't use this method, but a quick Google will show you how to use the pins.

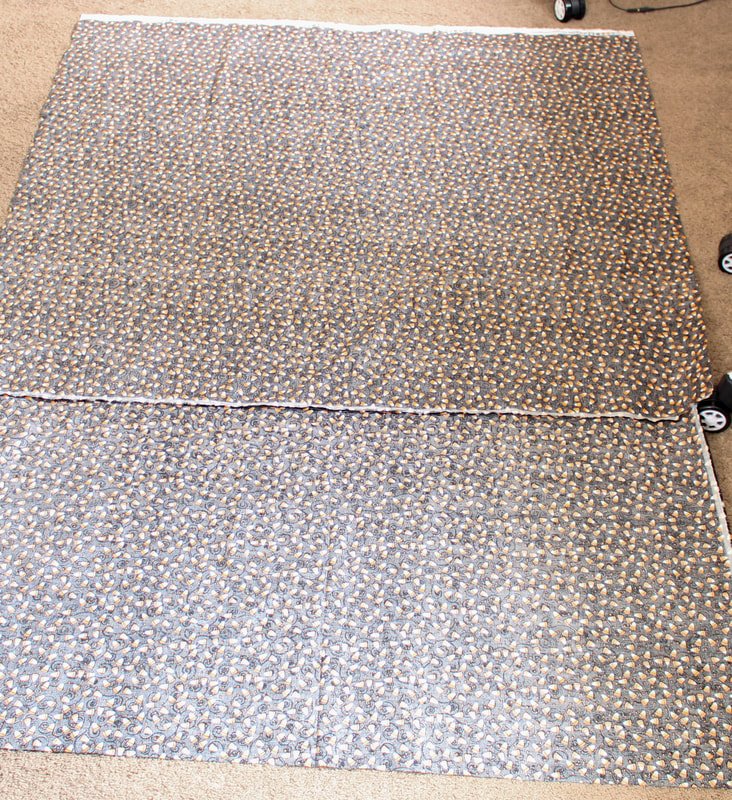
The fabric didn’t fit, so I ended up sewing 2 pieces together.

Peanut Butter Quilting Time
I couldn't help it, I have the song Peanut Butter Jelly Time stuck in my head.
Do not use peanut butter for quilting! Haha. Could you imagine? Ack!
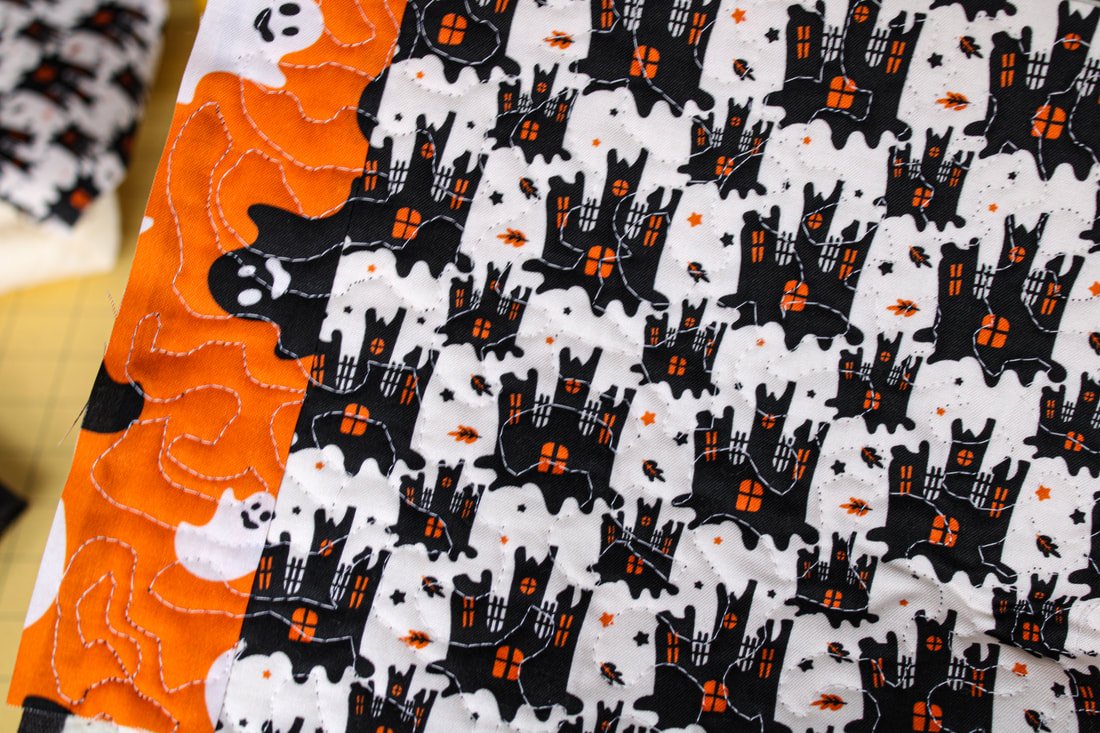
Now that your layers are securely together, it's time to actually quilt. There are so many different ways to go about this. Quilting is the top stitching that keeps all those layers together. And, after you wash it the quilt puffs up between the stitching creating a beautiful heirloom piece. It gives life to it.
You can drop your quilt off or mail it to a quilt shop/company. They quilt it for you for a fee and then send it back to you. This can be expensive. However, they have quite a few stitching designs to choose from, and it will give your quilt a professional look and feel.
You can sew straight stitches on each side of the seams. This is a simple and painless way to quilt. You could also stitch in the ditch.
Free-motion quilting is another option. Your machine may or may not be able to do this. If your machine can do free-motion, it will have a special foot for doing so. You will need to set your feed dogs to the lowest setting. Check your manual for all the settings, every machine is different. My sewing machine can do free motion, I did a short simple review of it here.
I chose to free motion my quilts and it was such a fun experience! If you choose this route, make a small tester quilt first. A mug rug is a good starter size.
Here are some tips:
Go slow at first, then go faster. It's a learning curve to combine the perfect foot pedal speed with the speed of your hands, to move the fabric around.
Try sitting or standing.
Keep both hands on the fabric, guiding it around and around. Stitch to the edges.
Sew in random swirls or another design and make sure to not cross over any previous stitching lines.
It's easiest to start in the middle and work in quadrants. Divide the quilt into fourths and free motion one-quarter at a time. Use a pin to mark the center.
Preload a few bobbins, it takes a lot of thread!
Use a coordinating thread color if you want to hide the stitches. You can use a different color on top and the bottom.
They sell quilting gloves for a reason. Gloves help grip the fabric as you handle it. It seems silly but, believe me, you're going to want some gloves. I used a new pair of Grease Monkey gloves that the auto shop sells, for my Halloween quilt. They worked wonderfully. I purchased actual quilting gloves and they were useless! I have a latex allergy and I bought the latex-free ones. Perhaps the latex-full ones work better? I'll never know. ;)
Some stitches will be longer and some will be shorter, don't stress over this. It's a handmade quilt after all. If you want absolute perfection, then send it to a quilting shop.
All in all my quilts aren't perfect. But, I enjoyed the process of making them and didn't stress too much. I whipped each one out in about 3-4 days. I spent one day cutting and laying out everything. One day sewing the top together. Another day spraying and quilting everything together. The last day was for finishing the free motion quilting and sewing the binding on.
Make a tester piece with some scraps before you attempt to free-motion your quilt.

Expert Tip
After you finish the free-motion quilting, go get a massage, facial, manicure, or anything to pamper yourself. It's a killer for the neck, shoulders, and back.
Binding the Edges
Last but definitely not least, it's binding time. It's the fun part! Yay! Your hard work is almost done. Soon, you'll be gifting your new handmade quilt or curling up, underneath it. The binding is pretty easy. And, unlike garment binding, it does not need to be cut on the bias. Woohoo!
Cut long strips the width you want the binding to be. There's probably an exact measurement the quilting Gods go by but, I found that I preferred a 2.5"-3" wide strip.
Measure around the quilt to figure out the length you need and add a couple of inches for overlapping.
Cut the strips the width of your fabric selvage to selvage. You may need to cut and sew a few strips together matching the short ends.
Fold in half and press.
Now, decide which side you want the binding to fold towards. I'm sure there's a right and wrong way but, I had mine folded to the back. I wanted to machine sew it on and figured if there were issues, I'd have the ugly be on the back. Ha!
To do it this way, pin the raw edges of the binding to the raw edges of the quilt top. Sew and do your best to create nicely mitered corners.
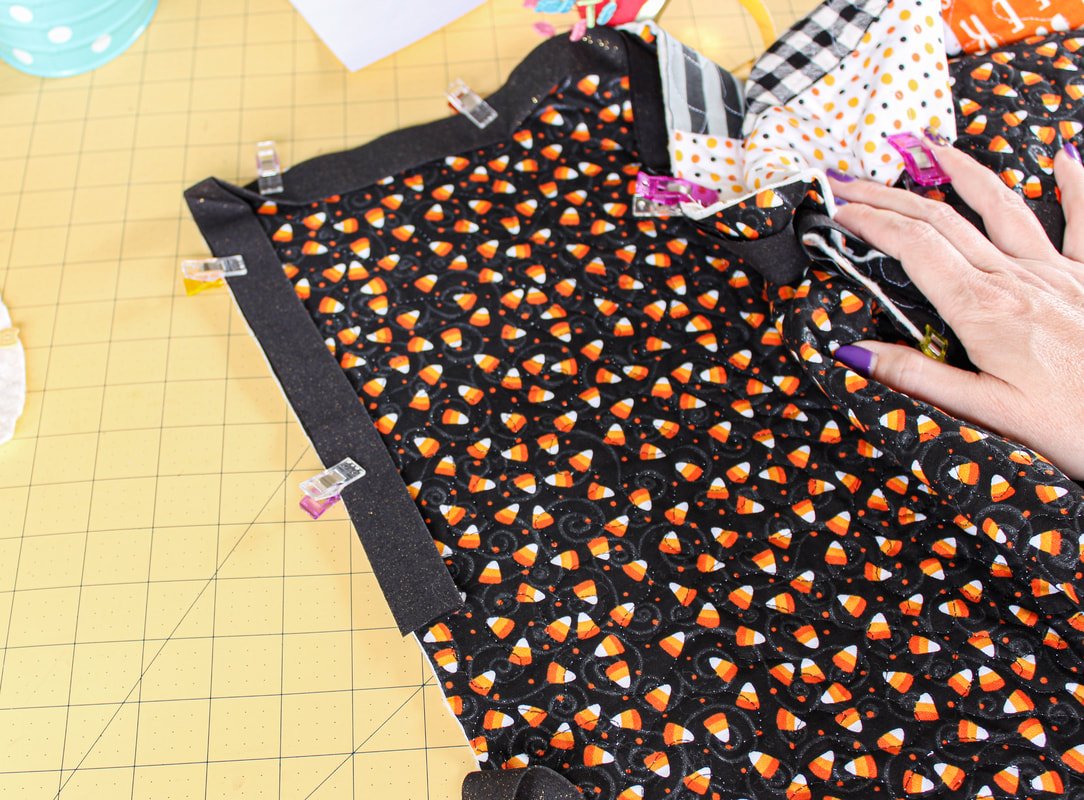
Then, flip the folded edge of the binding to the backing. Pin/clip it all down while creating nice corners.
Hand-sew the other side or run it through the sewing machine.
And... holy moly, chips, and guacamole, you're done!

The back looks like this. Sew the other side “stitch in the ditch”. Use coordinating thread. You can also hand sew instead.

My finished Halloween quilt in all her glory. I love how it turned out and I’m extremely proud.
Can you believe how easy it can be to make a quilt? Are you excited to start one now? Do you dislike quilting as much as I used to? Share in the comments below! Also, if you have useful quilting tips to share, please do so.
Happy quilting!
Annette