
Pattern Reviews, Sewing Hacks, Tips & Free Patterns
The Sewing Blog

DIY Easy Sewing Machine Cover
Sew a cover for your sewing machine. Free pattern that’s easy and customizable. Sewing machine tutorial pattern on how to sew a cover.
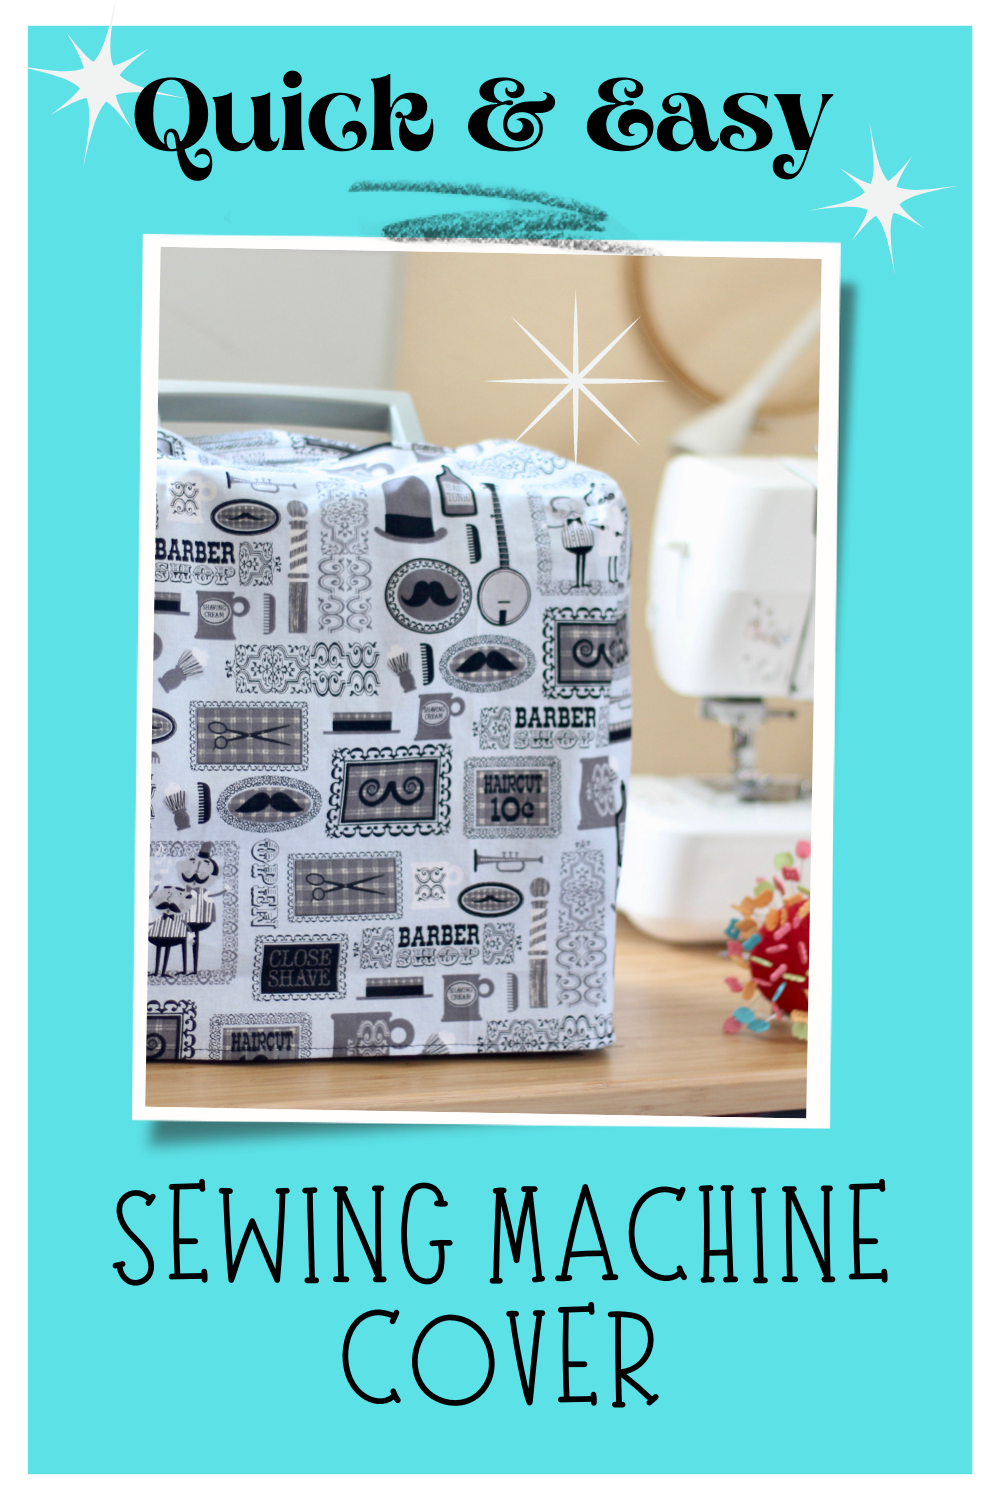
Is your sewing machine looking a tad boring? If it's a newer sewing machine, the answer is probably yes. The newer ones lack style and color. If it's a vintage machine, the answer is probably no. It's already gorgeous and full of vintage flair! Either way, let's add some new life to your machine with a dust cover. This is easy to sew, and you can make one for all of your machines.
We’re sewists, of course, we have more than one machine.
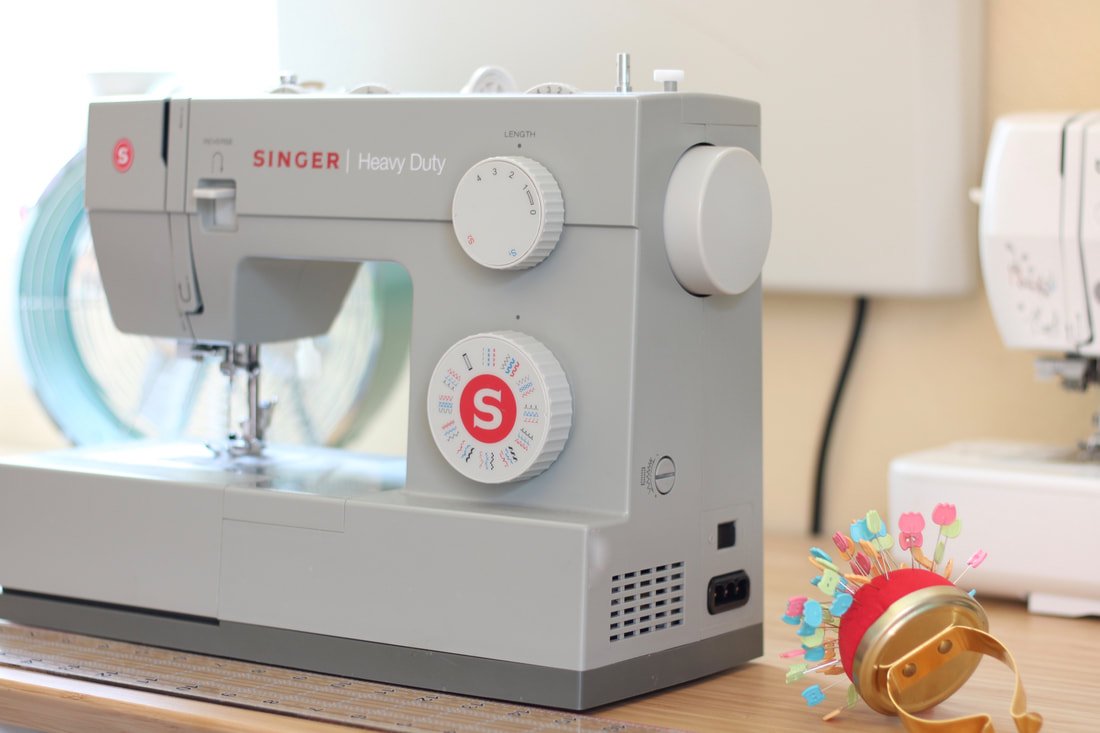
Back in the early pandemic days, mask-making was a big thing in this house and my husband bought himself a Singer machine. I'm a Brother fan through and through but, he liked the Singer's grey color. Of course, it's been sitting for over a year, untouched, and needs a little makeover. It's going to get a new fabric cover!
* Before we get started, a lot of sewists have shown confusion about this cover:
You will cut 1 front, 1 back, and 2 side panels. The front and back will be sewn along the top. The 2 sides are inserted like a gusset.
Okay, let’s get sewing!

Let's make an easy sewing machine cover. You'll learn how to get the measurements and sew one up in an hour. Covers add fun to your sewing space and they keep your machine protected as well. Dust be gone! Speaking of dust begone, we just changed our AC filters. YIKES! They were long overdue. This is a friendly reminder to change your filters if you have an AC. ;) Go now, I'll wait.
Supply List
1/2 yard of fabric. Cotton, vinyl, canvas, denim, use whatever you want here.
Matching thread
Sewing notions: scissors, a marking tool, pins, etc.
Ruler
Serger for raw edges, or use a zigzag stitch if your machine has it
Sewing machine
A little patience when it comes time to insert the side panels ;)
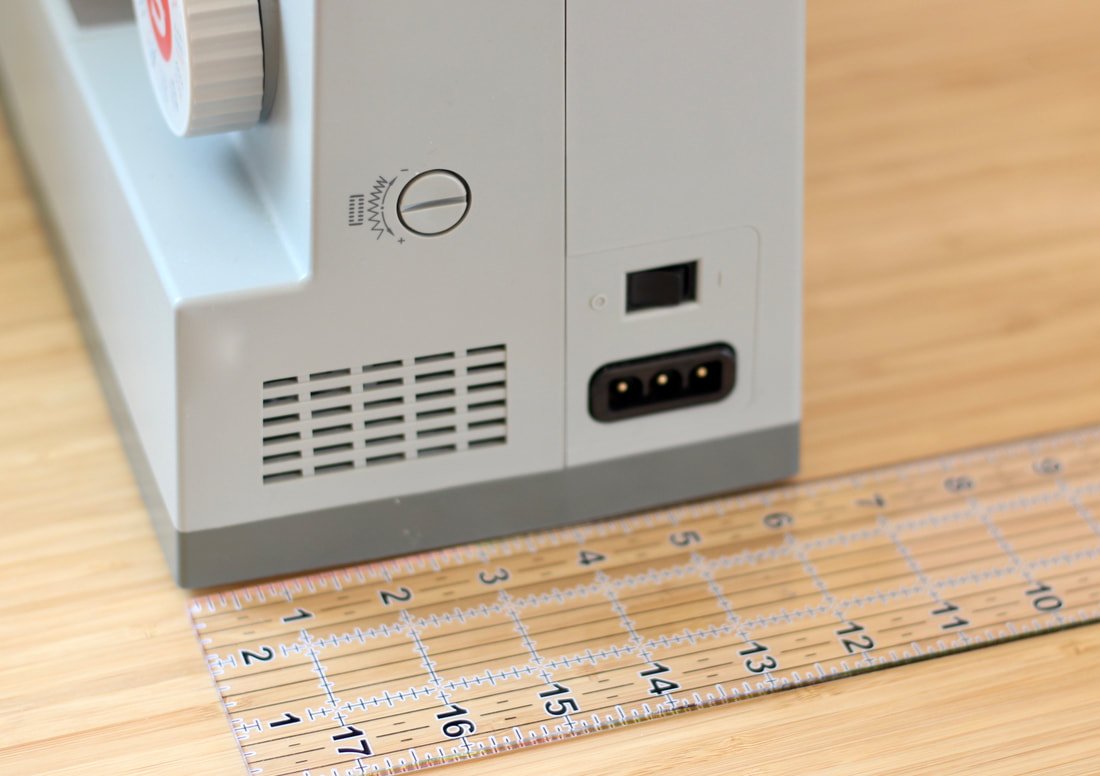
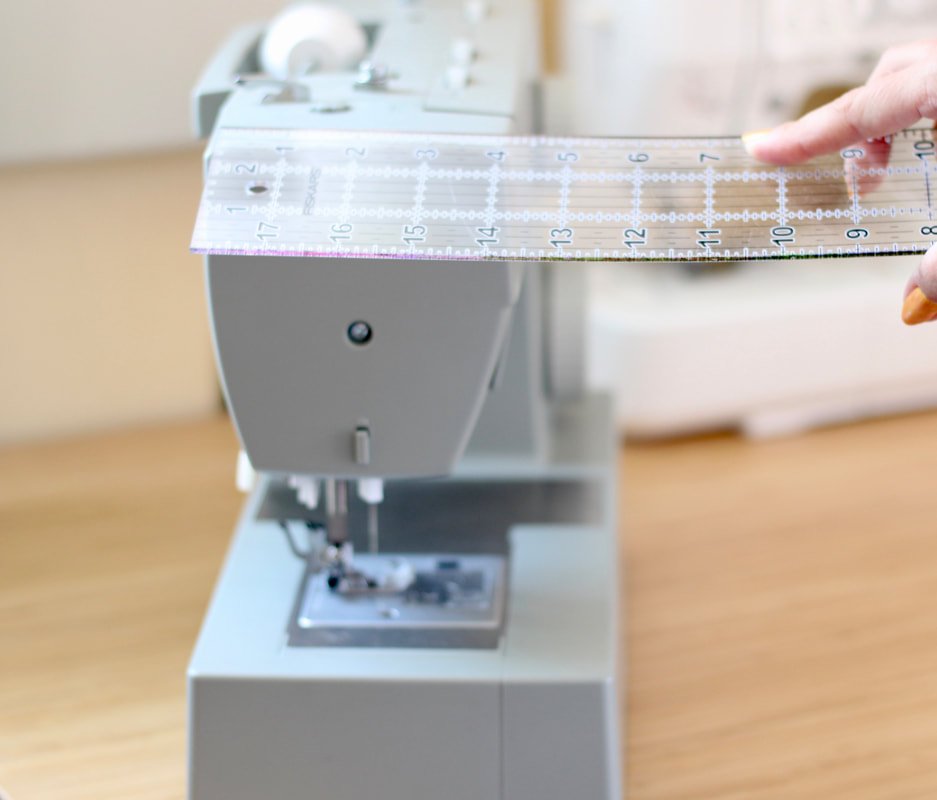
Grab some paper, a pen, and a ruler. You can use a tape measure but, the hard ruler makes it a little easier to get an exact measurement.
Measure all the sides of your machine.
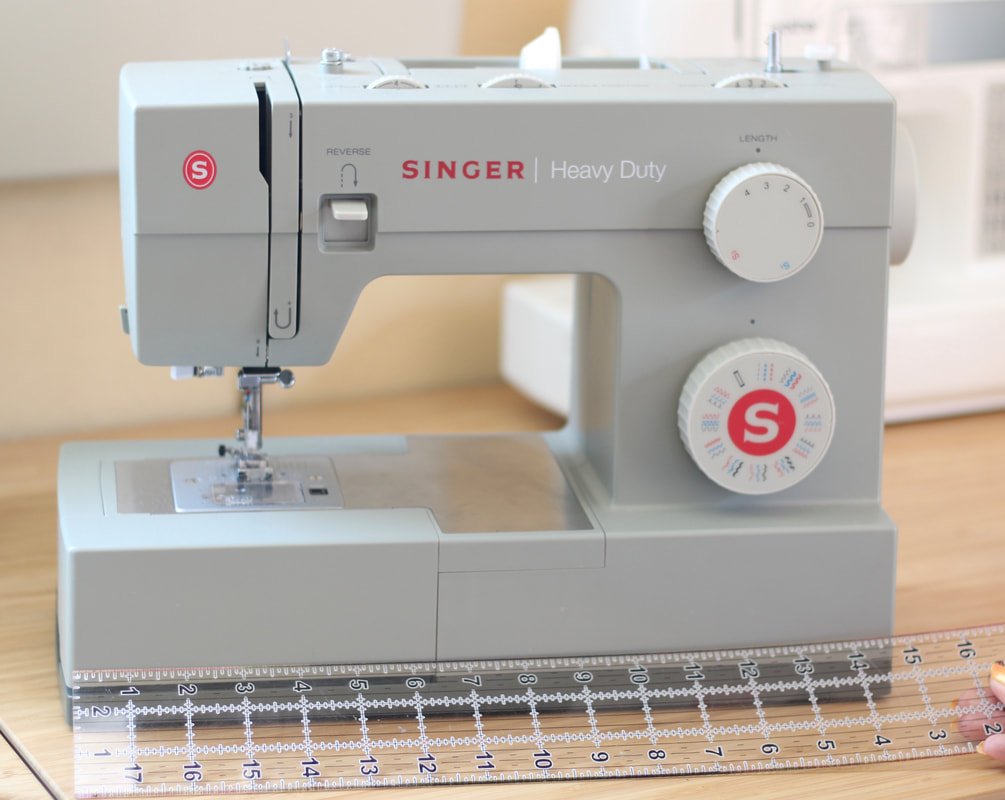
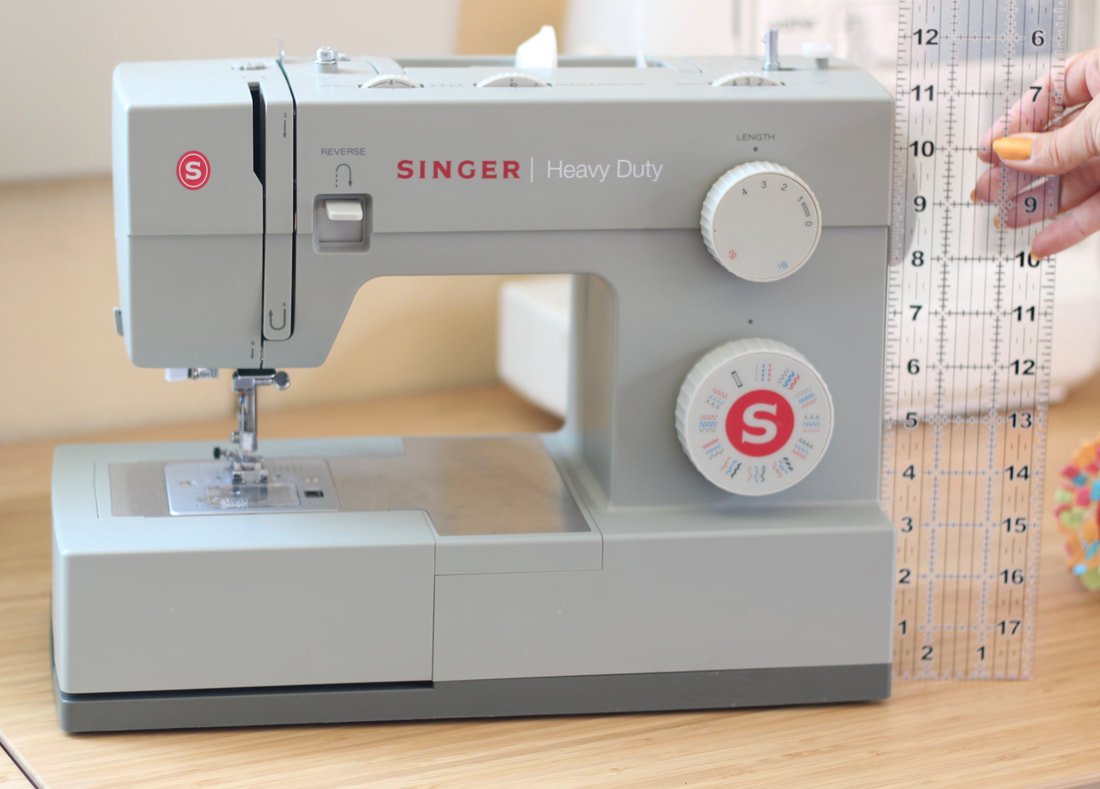
Time for Math, (insert tears here).
Now it's time for some math. I don't do math so, hopefully, I explain this correctly.
You'll be using a 1/2" seam allowance. So, you'll add 1" to each measurement number. (Each seam takes half of that inch.)
My machine is 12" tall by 15" wide. So, I'll add 1" to both of the measurements.
12 + 1 = 13. 15 + 1 = 16. So, my final rectangle will be 13x16. But, we're not done yet.
Next, you'll add 1" extra to your height for the front and back piece. This will allow the front and back to "roll over" the top.
The new measurement will be 14x16. These will for the front and back pieces. Cut 2.
* If your machine is extra deep, you may need to add more than 1" extra to the top height.
The sides will need 1" added to your measurements.
My side measurements are 6.5" by 4". Add 1" to each and they'll be 7.5" by 5". *If your top is narrower than your bottom, use your ruler to connect the top and bottom lines to form a trapezoid (a pyramid with the top cut off). Cut 2 mirrored. There might be a left and right side due to the angles. ;)
I hope I explained this correctly. Math is not my strong suit, so send me a message or leave a comment if you need help. I'll try my best to help, but no promises. ;) LOL Others might offer help in the comment section too.
Bonus tip
Cut out your 4 fabric pieces. You should have 2 sides and 2 front/back pieces.
This is where you can have fun and make it your own. Cut out four different colored fabrics or use different fabrics for the sides. You could piece together different fabrics to make a quilted look, or add some embroidery to the front. The possibilities are endless.
OPTIONAL:
If you do add embroidery or make a quilted one, you might want to line yours.
In this case, sew 2 covers the same size, pin right sides together, and sew along the bottom edge, leaving a 3" gap for turning out. Top stitch the bottom to close the gap and you'll have the embroidery stitches/quilting seams enclosed.
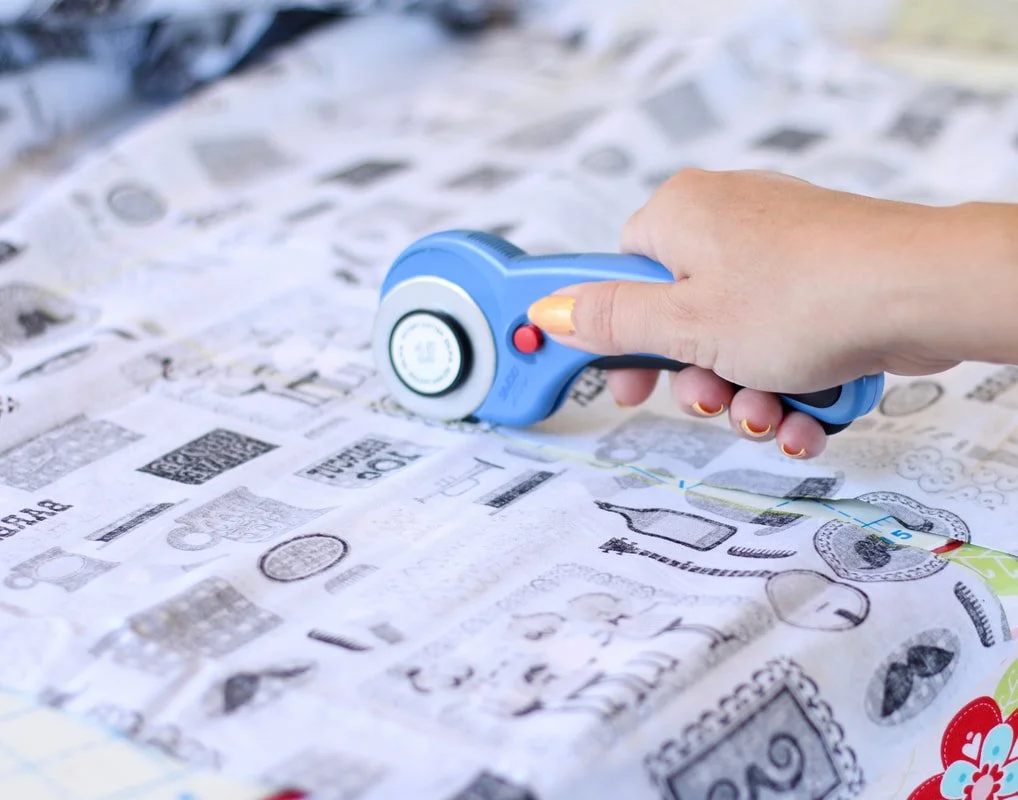
Using the rotary cutter and mat for the rectangles.
Sewing Time
Start by serging or zigzagging along the top edge of the front and back pieces only.
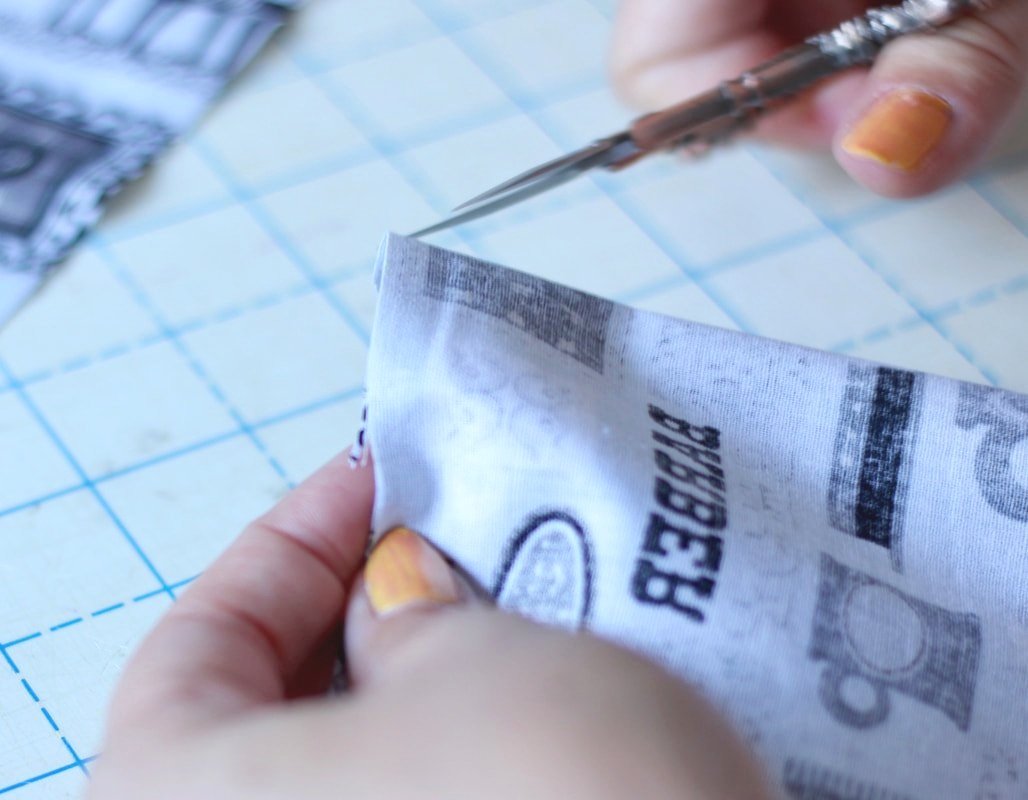
Fold the serged edge down 1/2", then press. Topstitch 1/4" away from the edge. You're going to create a slit opening for your handle. *You can skip this part if you want. But, it's nice to have access to the handle when taking the machine to the repair shop or moving it to another spot in your sewing space.
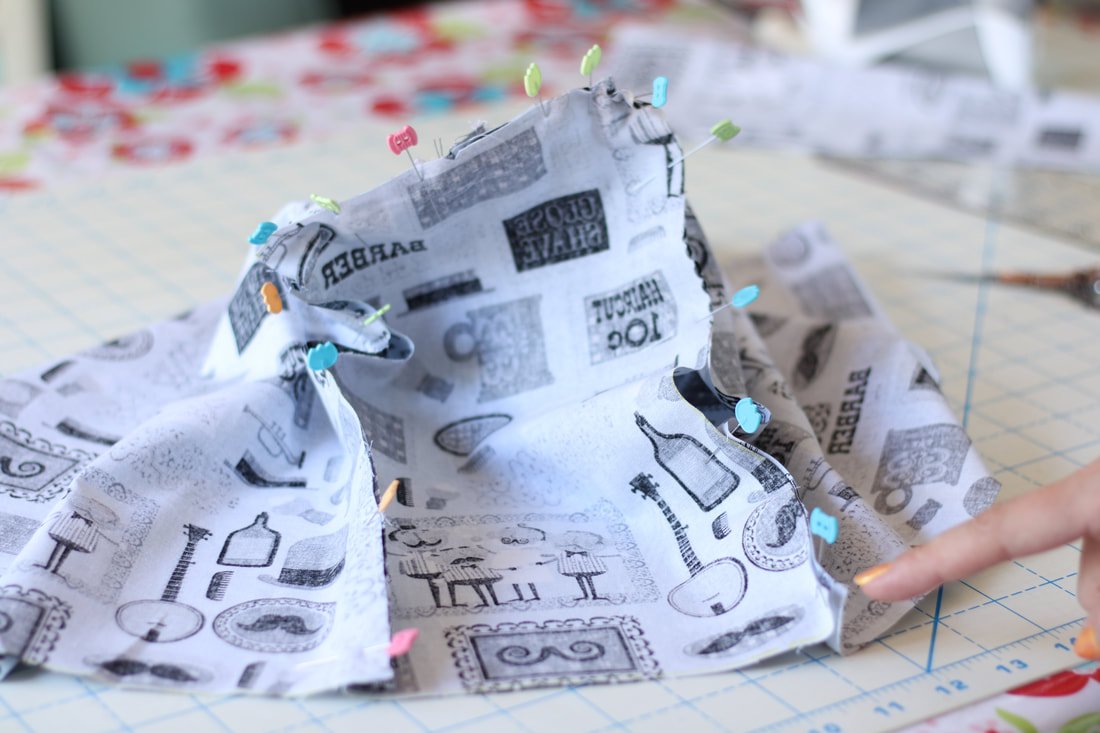
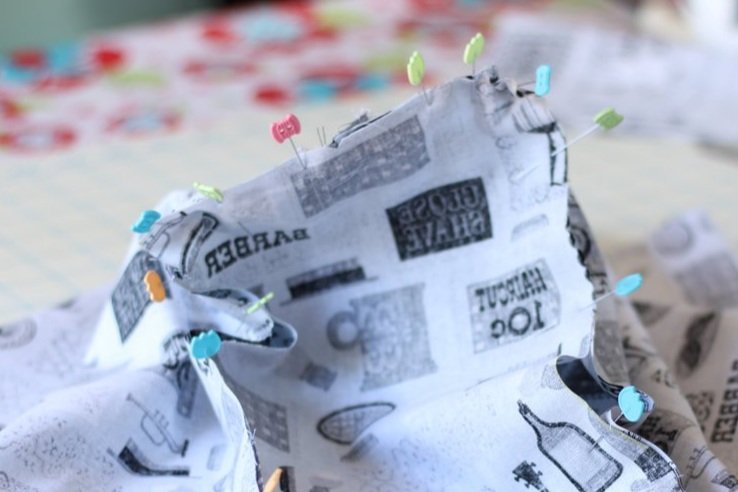
Place both pieces RST (right sides together) and pin 2-3" from the sides, leaving the middle unpinned. You may need to adjust this measurement according to your machine. Sew from the side edge to the pins, only. Don't forget to backstitch.
The middle will be left open for the handle to pop out of.


Take a side piece, and fold it in half to find the center top. Make a little snip or mark with a pen. Do the same to the other side piece.
Next, pin the side piece to one front/back Right sides together, by starting at the top. Put a few pins at the top, then go down to the bottom and start pinning upwards from there. This ensures your hem matches up. Next, you'll want to ease the curve of your corners. This may get wonky but, pin as well as you can. It doesn't need to be perfect.
Sew, using a 1/2" seam allowance.
It may be helpful to sew from one end upwards as far as you can go. Then, sew from the other end up and around the curve. Puckers might happen, but this way felt easier to me.

After one side is sewn, try it on the machine. Check the fit. Is it too long? Will the other side fit properly? Does it hang like a baggy bag? If there are any issues, fix them now.
If it's too big, make the seam allowance larger. (Use 3/4"-1")
If it's too small, unpick it and make the seam allowance smaller. (Use 1/4" instead)
If it's too long, trim away the excess or make a deeper hem. (Make a 1" hem)
Luckily the sewing Gods were on my side and I was fortunate for mine to fit perfectly. Yay, math was on my side, for once.

If it fits perfectly, move on to pin and sew the other side piece. Go about it the same way you did with the last side piece. After it's sewn, give the seams a good press. Slip it over your machine and admire it for a few seconds.
You're almost done. The hem is all that's left to do.
Serge or zigzag around the bottom edge. Fold up 1/2" and press. Topstitch and you're done.
If the bottom is too short because math is hard, just add a strip of ribbon or pom pom trim. It'll look like you did it on purpose. ;)

Easiest hem ever, serged edge and folded over once.

My husbands sewing machine will be dust free now.

Hole for the carrying handle.
Ta-da! Now go give your sewing machine some flair and keep it dust-free.
If you make one for your machine, tag me on Instagram @sewingtothemoon. I'd love to see what you create. Now, I am off to sew a new cover for my serger.
Happy sewing,
Annette

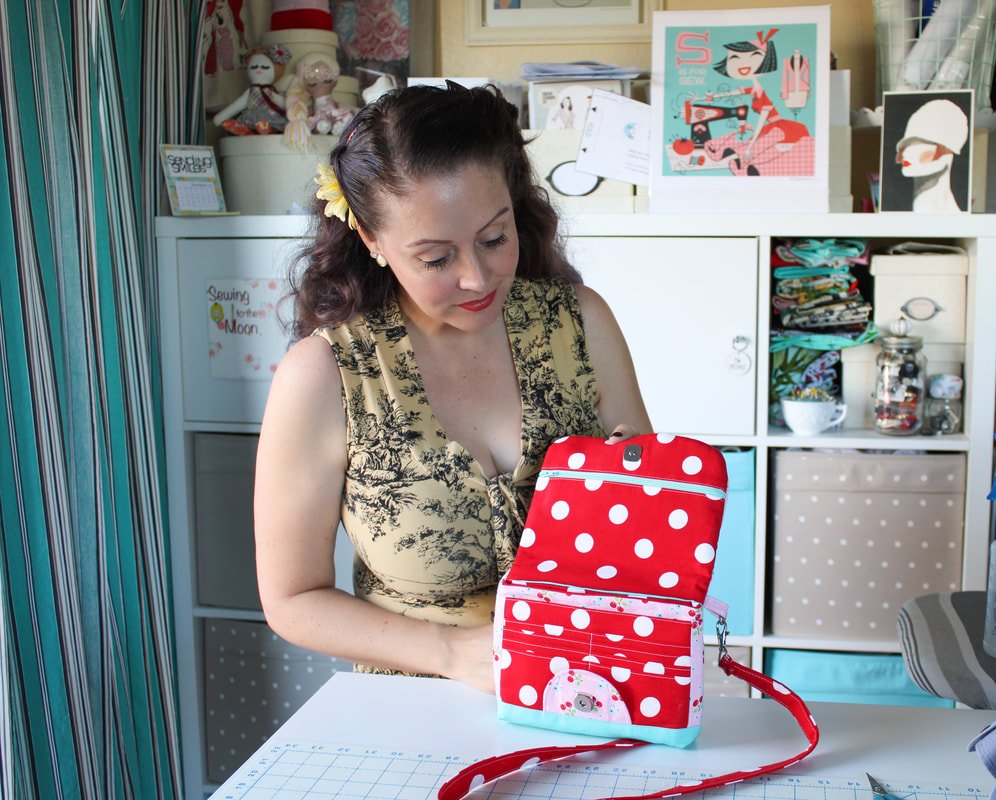
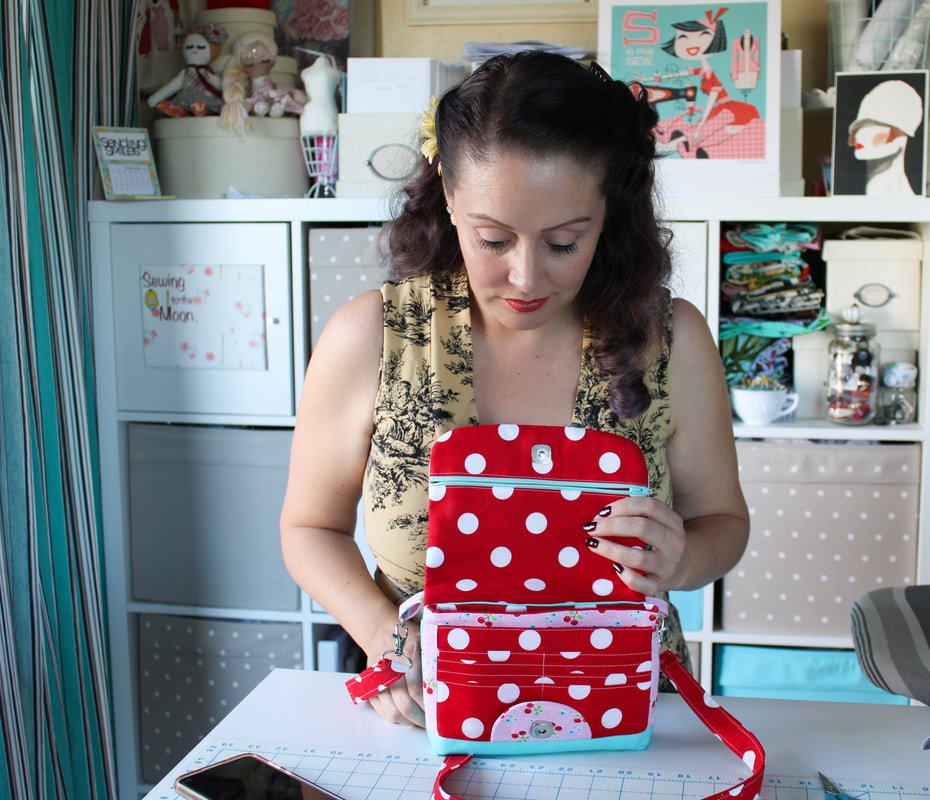
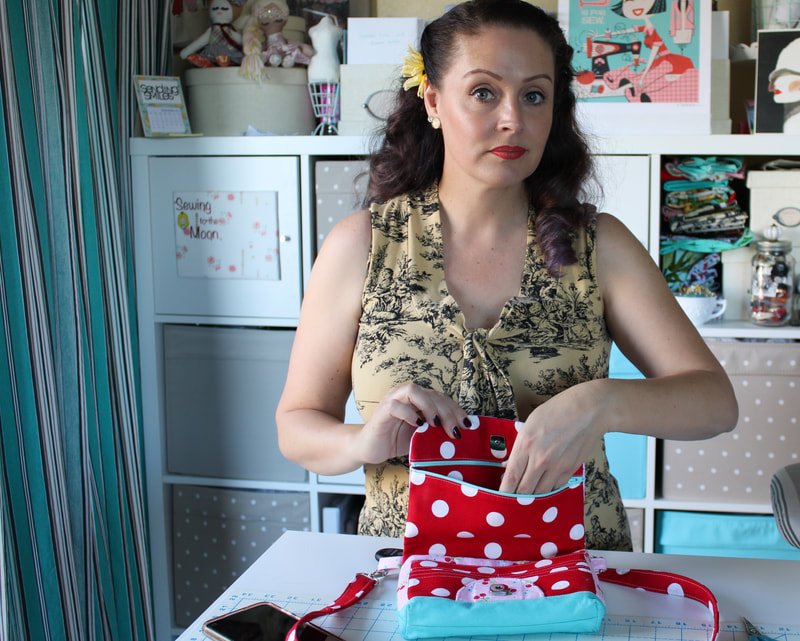
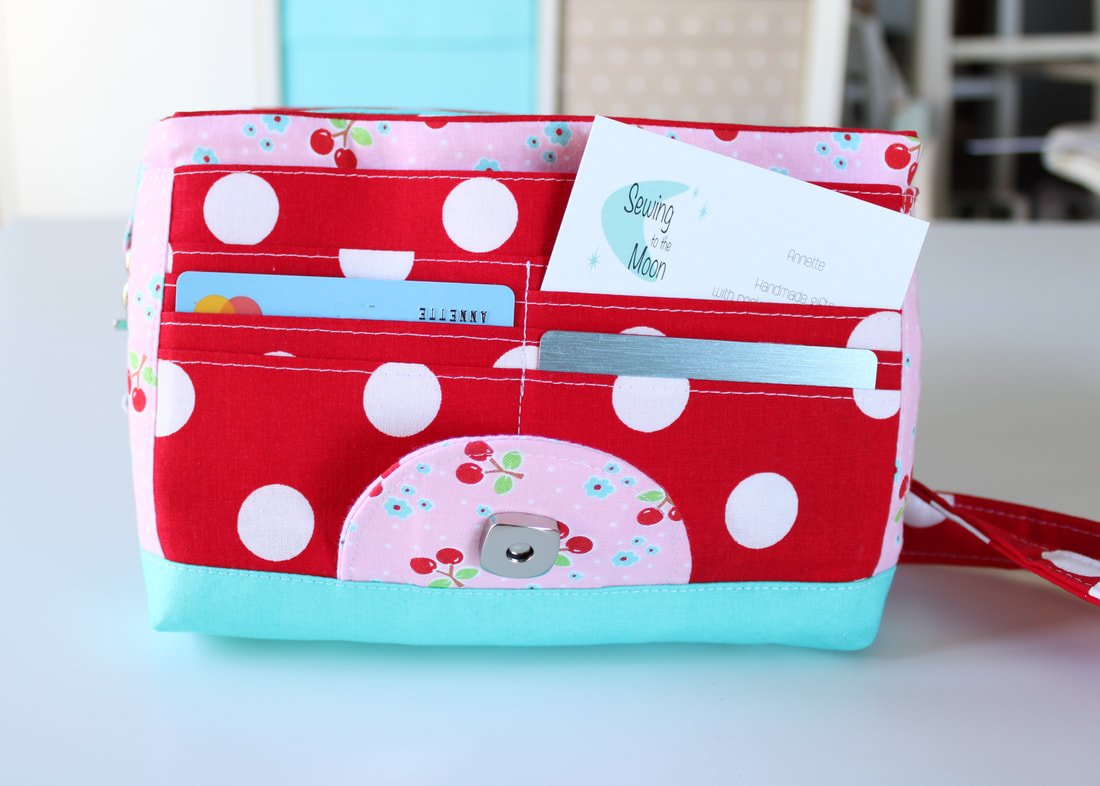
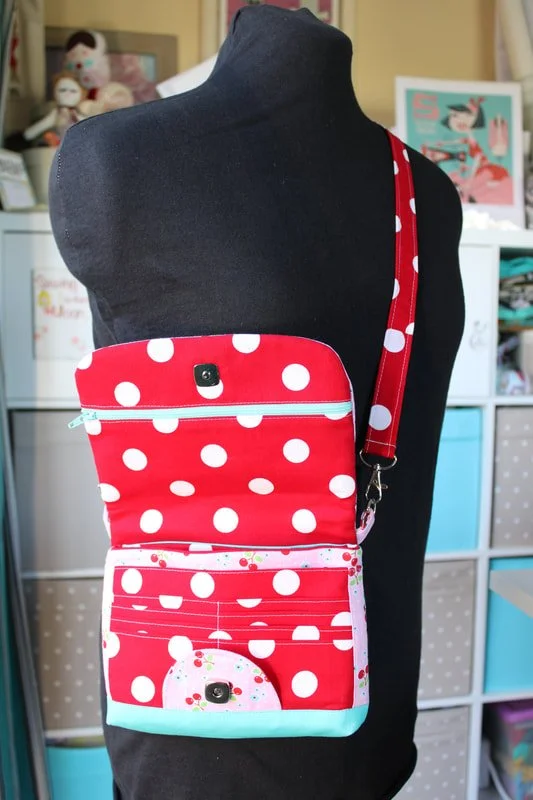
Crossbody Bag Review
Sew the world’s best crossbody bag. It has tons of pockets, a long strap, it snaps closed, zippered pockets, and more pockets. You can fit everything you need for a full weekend getaway inside.

I have found the holy grail of crossbody bags and I'm shouting it out from the rooftop! Make this crossbody bag today, you won't regret it.
This bag is the biggest-little bag I've ever laid eyes on. It's a game-changer for sure and everyone needs to have one or two! It's honestly the best travel bag I've come across! You can fill it with everything except the kitchen sink. This day-use crossbody bag is perfect for walking around museums, theme parks, concerts, national parks, etc.
I'm not getting paid for this post, I am just in love! Haha!
I've always carried my regular handbag whenever we ventured out and after a few hours, my shoulder would hurt something fierce. I eventually bought a tiny crossbody bag from a big box store for $5 because it was $5! Oh, and it was in the shape of cherries. Super cute!!
Well, my newest phone is too big for the cherry purse. So, I searched Pinterest high and low for a crossbody sewing pattern and nothing came up. Is it me or is Pinterest extremely lackluster nowadays?
I wanted pockets and the bag shape to be more horizontal than vertical. My next stop was Etsy. Thank you Etsy, for coming through. I found the best pattern and I'm sharing it with you today. Hold on to your teacup because she's a doozy.
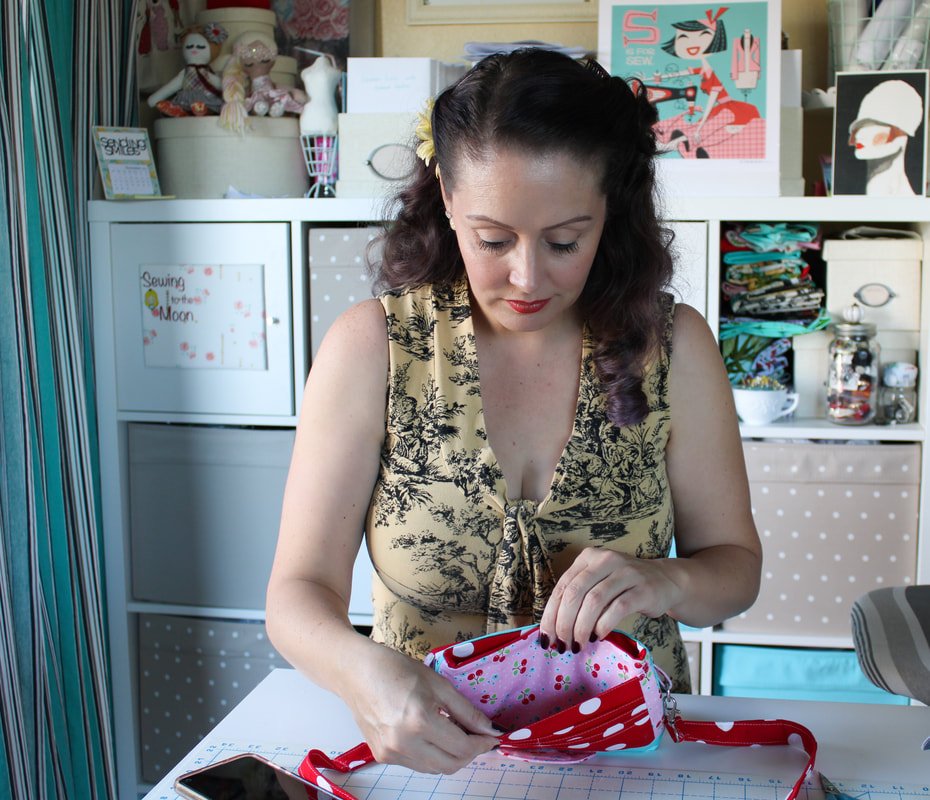
This bag has so. many. pockets! It's comfortable to wear (aren't all crossbody bags?) and will hold allllll of your things. I'm not sharing a step-by-step tutorial in this post because the bag creator has YouTube videos and an extremely detailed PDF that comes with the pattern. This post is more of a pattern review.
I made this one for myself so, it is full of bright colored fabrics. If you know me, I'm the opposite of a neutral person. Ha!
Clarendon Crossbody Wallet
by: Hold It Right There Bags

Grab the downloadable pattern here.
I want to start off by saying this bag is not great for scrap-busting. It takes a good amount of fabric. You'll also need a couple of yards of interfacing because everything needs to be interfaced. Don't skip the interfacings, bags really do need all the pieces to be reinforced.
After you print and cut out all the PDF pattern pieces, trace and cut the fabric pieces, and interface everything 'til the cows come home, you'll be ready to sew!
Whew!
Holy moly. This pattern has sooo many pieces. I suggest cutting and interfacing everything one day and saving the sewing for the next day. Like I said, she's a doozy.
The bag does come together quickly when you start sewing though. Yay for that!
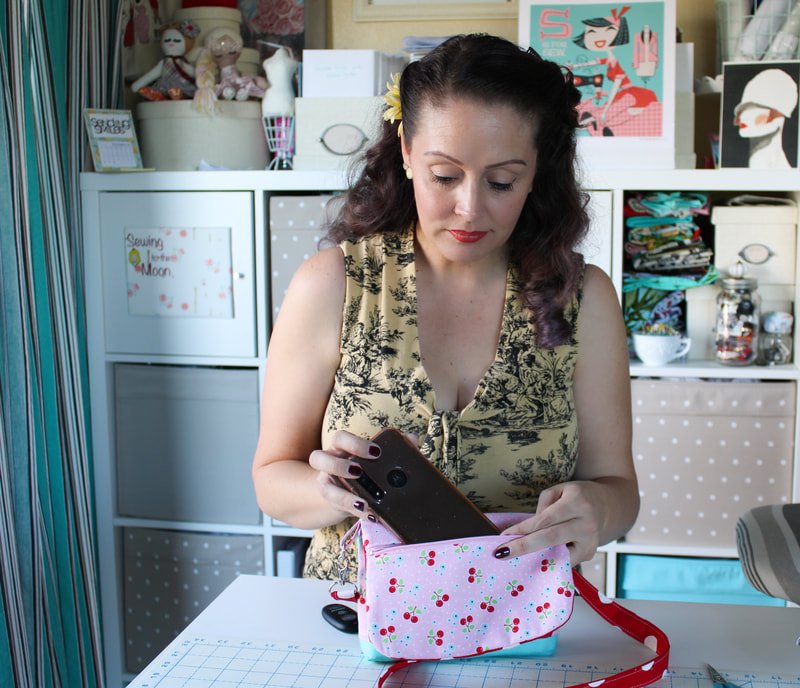
I wore the bag all day on a family adventure to an aircraft carrier. It was full of all my things and a few of my kid’s things. I walked up and down stairs and spent a lot time standing, reading signs, and listening to the volunteers talk. The weight would usually have hurt my shoulder and back but, I didn't have any pain. I could have worn this bag for 3 more days without batting an eyelash. Winner-winner!
It held everything I needed for the whole day and was comfy to use/wear.
The following weekend I was invited to go away on a girl’s trip. I left my regular purse at home and only took the crossbody bag. It was perfect. It held my money, masks, cards, and everything else I needed for a whole weekend.
I do like a full-size handbag for everyday use so, when I got home I emptied everything back into my bigger bag. But, this was perfect for a day out.

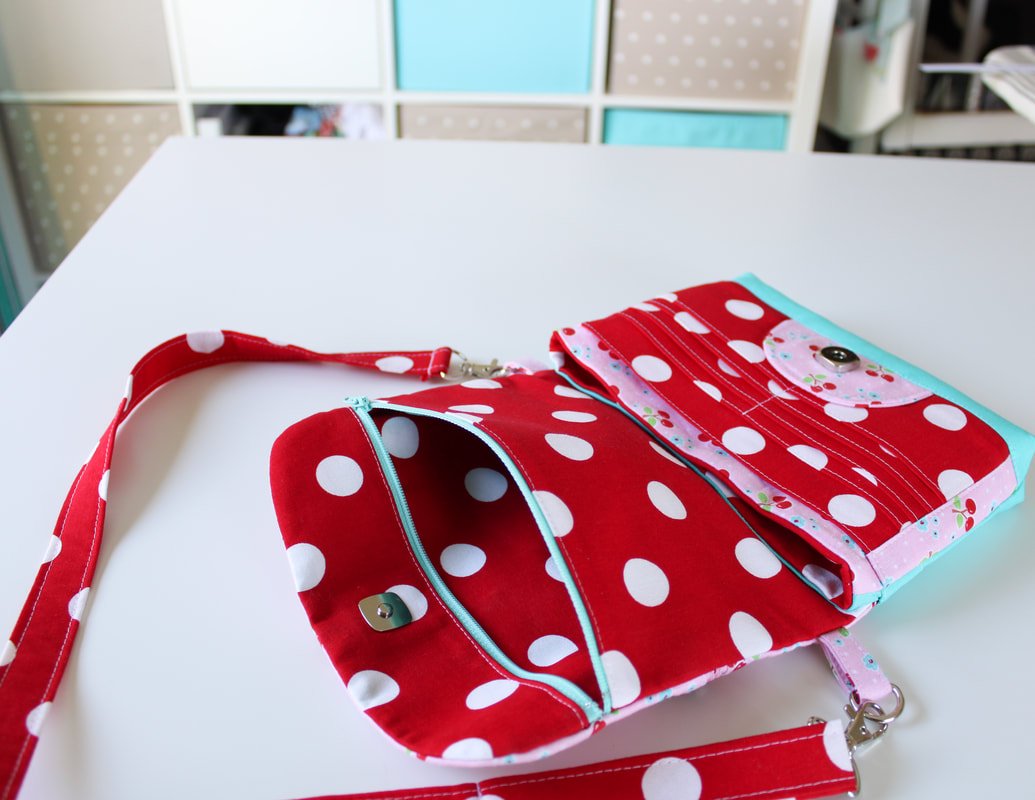

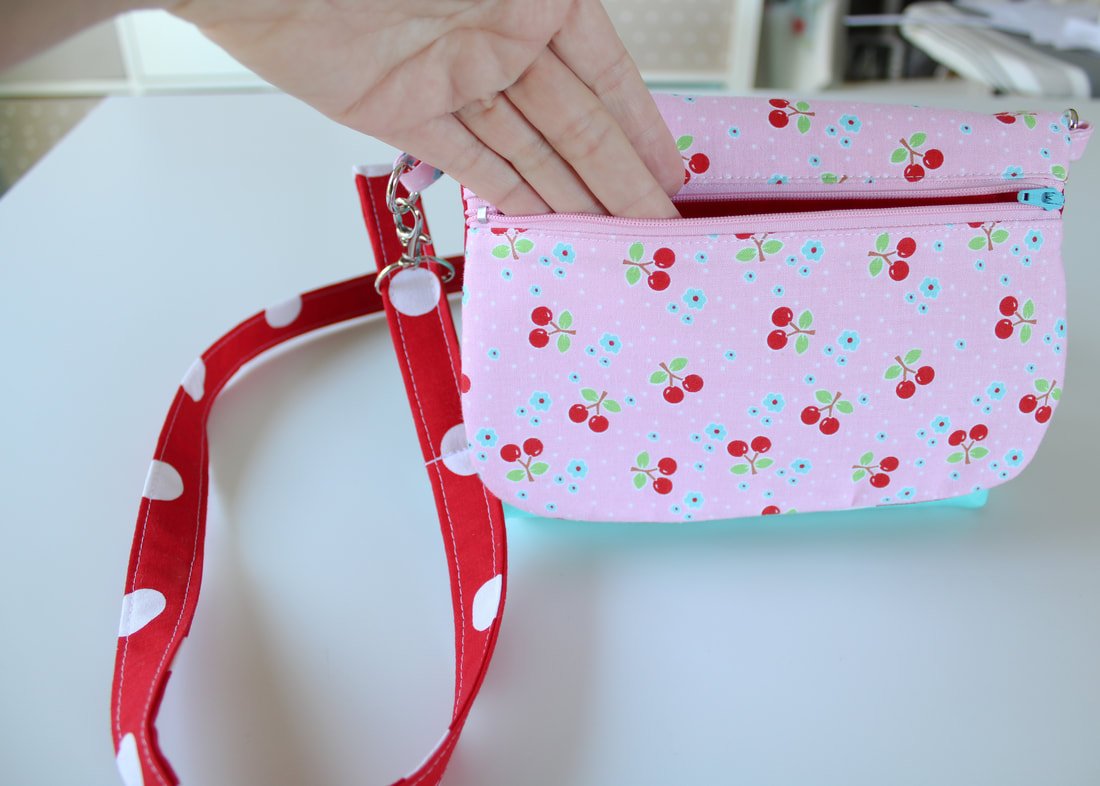
This bag has all the pockets! It’s the greatest bag pattern I’ve ever sewn.
Assembling the bag is fairly easy. Follow the PDF directions and/or YouTube videos. There are a few added steps to help with things like zipper installation, which is great for beginners.
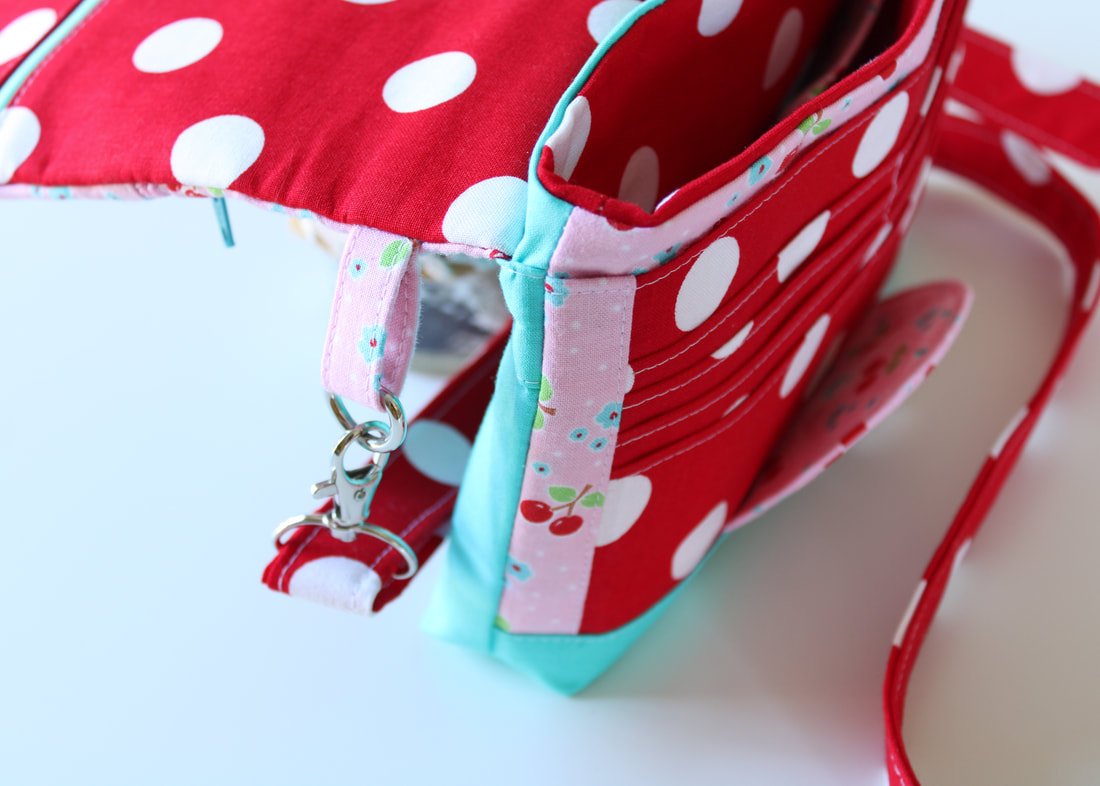
You don't need rivets to make this bag. You can sew across the seam easily enough. Heck, you don't even need the swivel hook or D ring. Sew one long purse strap into the bag seams.
Okay, here are a few changes I'd make:
Tips for Next Time
I wouldn't add the lining pocket. The bag is small and has a whole lot of pockets already. The main body portion is small enough and doesn't need the extra pocket (read: save your fabric).
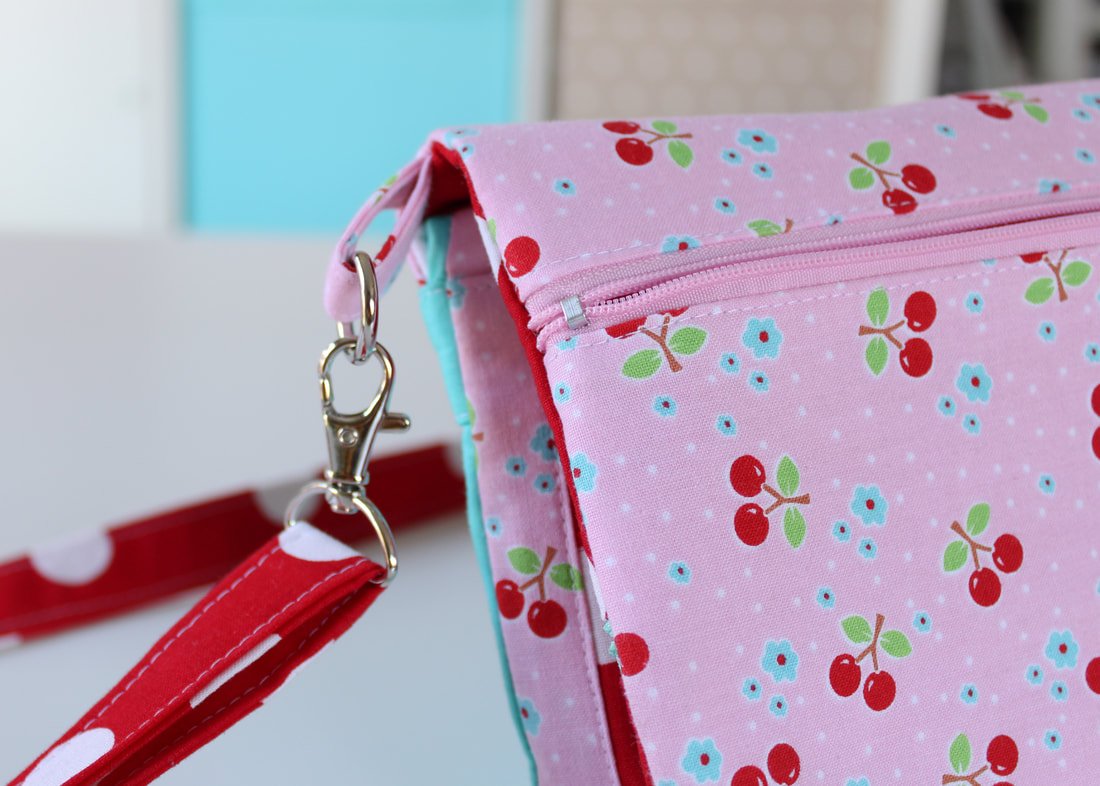
I made the purse strap twice as thick. I always prefer a thicker strap so, if you're the same way, use a 1" swivel hook and double the width of the fabric strap. I still used a .5" D ring and didn't have any issues with the different hardware sizes.
Next time, I want to use vinyl for the back and bottom. I didn't use any this time because it's a cross body bag. I usually don't let my crossbody bags touch the floor, they stay on my body throughout the whole day. But, I might try it in the future.
I would make zipper tabs next time. This will allow the front flap to lie flat and look nicer. Yes, adding zipper tabs adds extra time but, it'll be worth it.
Read through the pattern instructions first. The instructions are extremely detailed. Almost too detailed in my opinion. But, if you're brand new to bag sewing, extra details are a good thing. If you're more familiar with inserting a zipper, snap, etc.) some steps may feel a bit tedious.
I would topstitch the front flap and around the main opening. The instructions don't have you do this. I suggest you do it though. Topstitching holds all the layers in place and gives it extra reinforcement.
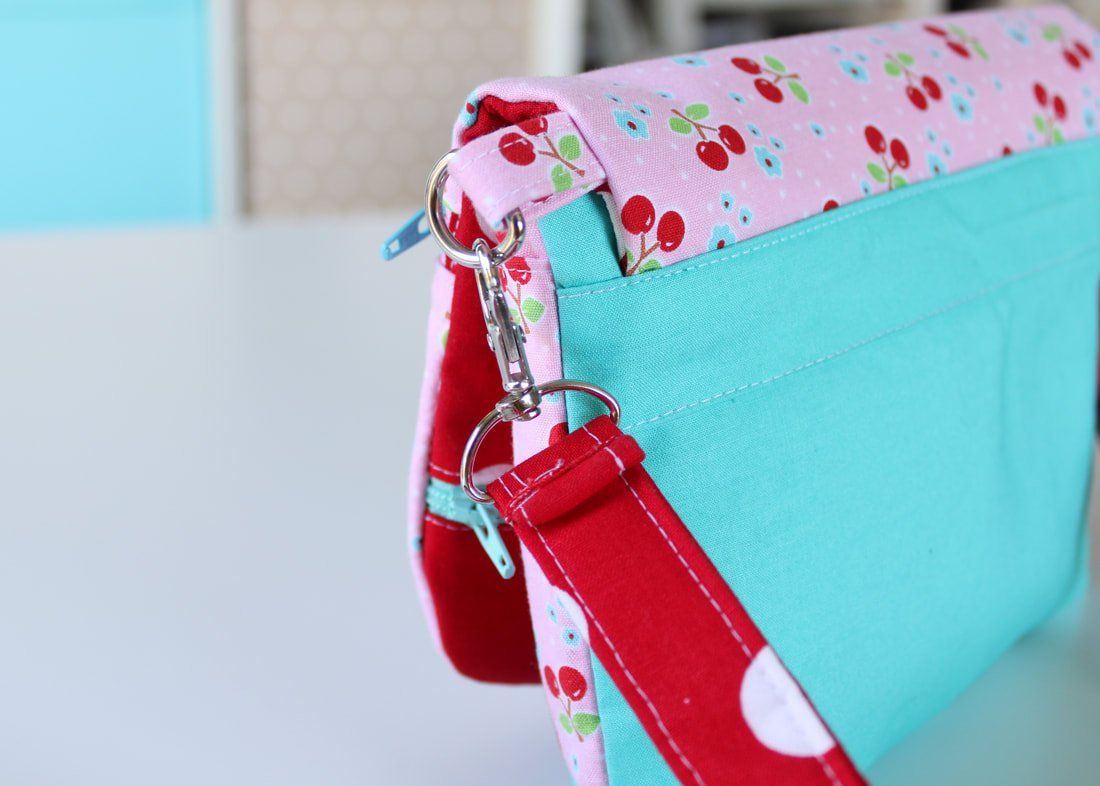

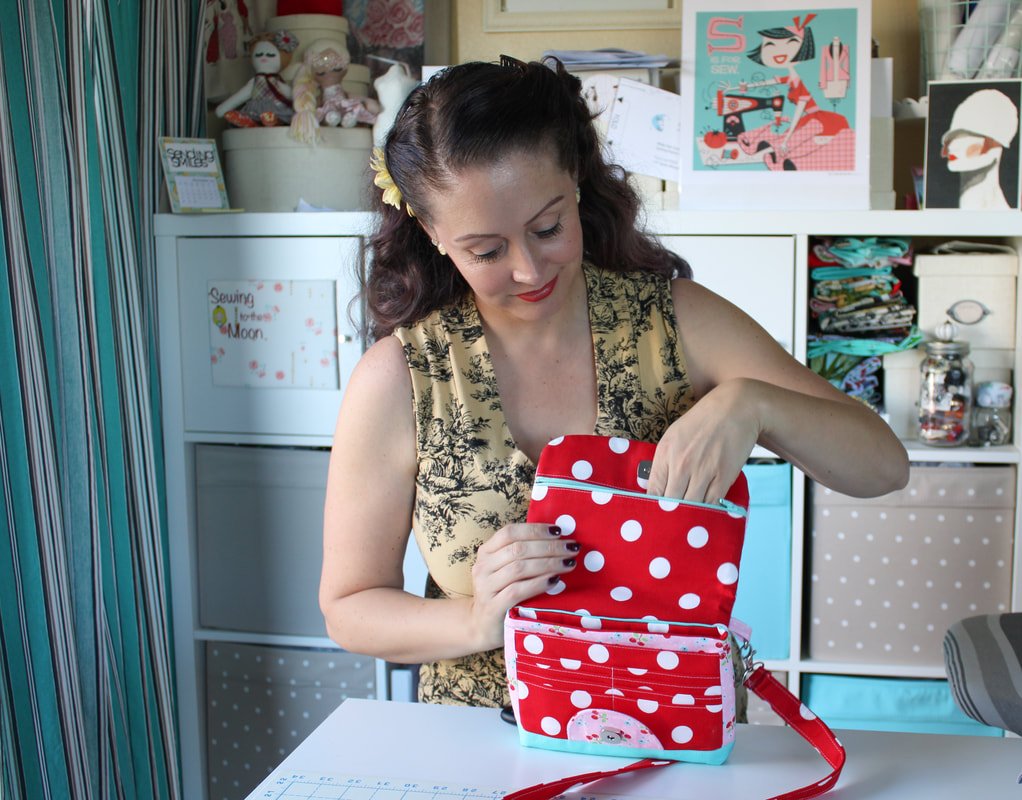
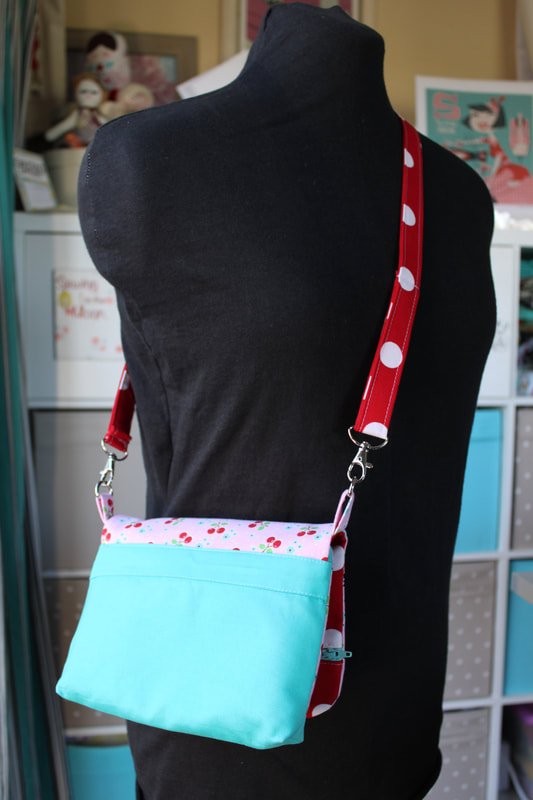
Back view of the bag.

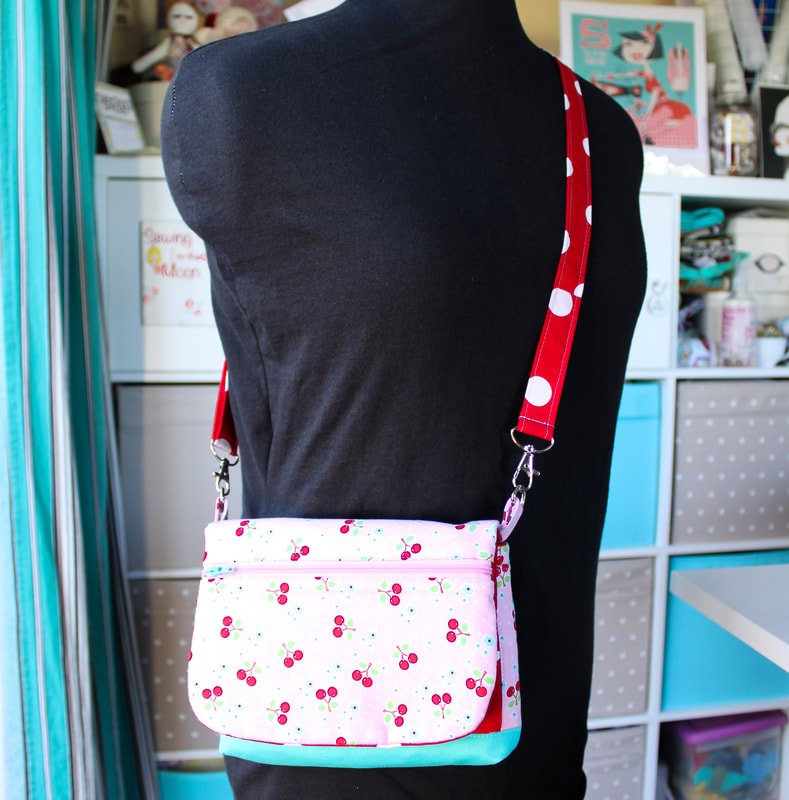

So what do you think? Are you excited to make a Clarendon Crossbody Wallet? I highly recommend this pattern and bag. I plan on making a few for friends to give as Christmas gifts this year. But, shhh, don't tell them. ;)
Happy Sewing!
XO,
Annette


Ultimate Guide to Sewing on a Budget
How to sew with a budget. Grab patterns, notions, fabric, sewing machines, lessons, and more following this list of ideas. Tips and tricks for the seamstress on a tight budget. New to sewing? Here’s how to do it on the cheap.
Sewing your own dress or bag usually costs more than buying one. But, it doesn't always have to be that way. Sewing can be budget friendly and I've compiled this big guide to help you sew on the cheap.
Hobbies are good to have. They give our hands and minds something to do. Some hobbies can empty your wallet, while others only cost pennies. Sewing is one that can be expensive. There are so many gadgets, fabrics, and machines, Oh my! But, it can be inexpensive too. I'm here to tell you, that you don't need to empty your bank account to sew or advance your skills. You won't need an expensive sewing machine that sings to you either. Let's take a deep dive into the world of sewing on a budget.
When I first started sewing, the craft stores weren't even close to what they are now. They offered one style of a rotary cutter, one box of pins, and had a 1/3 of the fabric selection they have now. Times have changed and the variety has grown tremendously! You can get everything you need to create your masterpieces, without breaking the bank! Do you really need 6 different pairs of scissors? Not really. Think needs vs. wants when you start sewing. Ask yourself what a minimalist would do, and you'll be good. ;)
Grab some coffee or tea and a snack, this is a long one.

What You'll Learn
Where to find fabric
Patterns on the cheap
Learn how to sew on the cheap and for free
Shopping for inexpensive notions (threads, scissors, pins, buttons, zippers)
Where to find a sewing machine
Finding Fabric for Less
Garage Sales
Get up early, grab some coffee, and hit those garage sales. Friday and Saturday mornings are your best bet. Oftentimes yard sales are a sewist's goldmine. They can have boxes of fabric that someone gave them from who knows where and when. If you're a vintage fan, this is where to shop! They'll usually have sheets too. Sheets yield a lot of yardage in sewing terms. Garage sales are also the best places to "wheel and deal". If you show interest, they may even pull out more stuff that's hiding in the back of the garage.
Thrift Stores
People start hobbies and realize it's not their cup of tea. They donate everything and we reap the rewards! Thrift shops get bags of fabric and sheets (again, yardage) donated every week. Take note of where your local thrift stores are, because they are mentioned a lot throughout this post. They usually have formal dresses that you can use fabric and appliqués from, too. Want to make a pair of PJ pants? Thrift stores have fleece blankets that you can make Pajamas out of. Use a vintage sheet to make a summer dress. Think outside the box and the sky is the limit.
*Check the fabric for holes, stains, and such before purchasing.

3. Friends & Family
There's always a family member who used to sew and lost interest, just ask. Chances are they have a box or a few bags of fabric stored away somewhere. They planned on making little Suzie's whole wardrobe but, now little Suzie is 23. Free fabric for you!! Will it be dated? Probably but, chances are they have some stuff you could use. Then, you can pay it forward and donate what you don't want.
Ask around, there's always fabric being stored somewhere waiting to get used. If you're learning to sew and are on a tight budget, free is the best kind of fabric. You can also use those fugly fabrics for linings, mock-ups, and to practice on. ;)
4. eBay, Etsy, Amazon, & other Online Shops
Look online for clearance fabrics. The sky is the limit here but, it'll take some legwork or finger work. Ha! Check eBay for fabrics sold by the yard. Etsy has tons of hard to find fabric as well. I have found some really good fabric prices on Etsy. Lingerie fabrics, specialty elastics, and swimsuit fabrics are easier to find online. If you need knit fabric, I love Girl Charlee. Amazon has been hit or miss for me on fabric. But, they do sell interfacing, zippers, and other notions.
There are online shops that specialize in fabrics but, I've not found spectacular prices at any. But, if you're interested, just do a quick Google search.
5. Big Box Stores
Check your local craft stores for deals and coupons. Walmart has a whole sewing section including fabric. Hobby Lobby, Joann, Hancock's, etc. are all great options. Sign up for coupons and go when they offer sales, you'll get great deals. You can walk out with $3 a yard of fabric. Check the remnant bins and clearance sections, too. Sign up for emails and mailers to get all the discounts.
6. Fabric Swaps
This one is a hidden treasure. Join online fabric swaps through social media. Search for them with hashtags. Call local churches and ask if they ever have fabric swaps as well. You can look for groups on Facebook, I don't personally have FB but, I know of a lot of sewing swaps on there.
I went to a Sewcial and they offered a pattern and fabric swap. Such a fun idea! I have done fabric swaps online through Instagram and have made sewing friends through those. Need to figure out how to store all that fabric you just found? Read this post on storing fabric.
7. Wholesale Stores
If you live near a big city, there usually have garment districts. These shops have the best selection for the price. Or, if you're like me and live in the boonies, you'll have to drive to find them. Wholesale fabric stores are full of fabric and notions on the cheap. You have to dig to get a deal but, it can be worth it. I have bought many novelty fabrics for $1-2 a yard. They also sell a variety of home decor fabrics. Looking for faux fur? They sell it by the pound and it can cost 1/3 of what you'd find it for in your local craft store. So, grab a friend and take a road trip to find these fabric shops. They're my favorite places to shop, you never know what you'll find.
Patterns with Small Price Tags
If you're searching for PDF, DIY, or inexpensive commercial patterns, this list gives you a good start. Whether you're on a micro-budget or need all the freebies you can get, there's something everyone.
1. Pinterest
This was once my favorite pattern search engine. It's changed over the years, but you can still find a needle in the haystack. Think of Pinterest as a crafter's Google. Scroll past the ads and it can be a goldmine. Need to find a child's dress pattern? Search there. Looking for some handmade apron options, check Pinterest. I have a few sewing-themed boards with tons of patterns, how-to's, tutorials, and more. Follow me over there, I can almost always find a free pattern for what I'm looking for.
If you want a 50's vintage-style headband pattern, I made a PDF. Grab it here.
2. Garage Sales & Thrift Shops
You're going to see these two options mentioned often. You can find patterns galore at garage sales along with fabrics. Thrift stores have them too. They can have vintage patterns that are coveted in the vintage sewing community. The recent surge in sewing interest may make it harder to find patterns as easily. But, these are both great places to start. Garage sale prices will usually be cheaper than thrift shops. Sometimes you can get lucky if a seller wants to unload their family member’s whole pattern stash. The downside of buying used patterns is missing pieces. Open them up to make sure all the pieces are there.
3. Online Search
A quick Google search will give you free and inexpensive patterns. Sewing bloggers usually have a few free patterns and some for a few dollars. I offer free patterns here, here, and here. Some bloggers give you access to their whole pattern library if you sign up for their newsletter. Melly Sews has a large sewing library. Sign up for her email list and you get access to all of her free patterns. Craft stores have free tutorials on their websites too. This takes a little legwork on your part, but if you want it for free, it's probably out there. ;)
I do like to purchase patterns from makers as well, as it helps support them. I'm learning pattern drafting now and WOW, it's a lot of work!
**Disclaimer: free patterns might not be 100% foolproof. So, if you're making a gift or special dress, start the project early. You may need to get more fabric or find a different pattern. ;)
4. Borrow from a Friend
Borrowing patterns from friends is perfectly fine. If a friend is very particular about their pattern collection, ask them to trace a copy for you. You could even ask to trace and copy the instructions at their home. I've done this. I've even mailed a pattern to a friend here and there for them to copy off. They mail it back and usually include a little gift as a thank you. :)
5. Joann Store Sale
This one is huge! I repeat, HUGE!!! This is my most favorite way to get new patterns on a budget. Every so often, Joann Fabrics runs pattern sales. They sell patterns for $0.99 or $1.99 ea, depending on the brand. This little piece of information could save you hundreds of dollars. First, you must sign up for their mailers. They share when and what patterns will be on sale inside the mailer. I never know when this happens until I get my mailer, in the mail. It's usually a couple of times a year. There's a whole method to the madness and I'm sharing my secret tips with you below. You're welcome!
Take note of the sale dates and mark your calendar. It might be within the next few days or 2 weeks away.
Visit the pattern brand website i.e. Simplicity, Burda, New Look, etc.
Grab a cup of tea, this will take an hour or so. Search through their patterns, each site is pretty well organized. Look for dresses, pillows, bags, pants, etc.
Write down the brand, pattern #, and size you want. Make sure your writing is legible! (Face-palm, ask me how I know this).
Take that piece of paper to the store and walk to the back where the pattern drawers are.
Find the pattern brand drawer and look for the pattern number range that is marked on each drawer.
Grab the available patterns. Wheeee!!!
*Hot Tip: Some patterns may be out of print. Many might not be available in the size you want. Write down at least 10 pattern numbers because chances are, you'll only find 4 or 5 in the drawers. I have built up my pattern stash this way. It takes a little work on your end but, it is totally worth it.

6. Books
This sounds silly but, if you buy a sewing book, they usually have patterns inside them. You can buy new and used sewing books online, at thrift shops, garage sales, or borrow from a friend/family member. I have a list of my favorite sewing books here. They all have patterns inside. Books make nice gifts too. If you have a birthday coming up, ask for a sewing book. They walk you through their patterns and you may learn something new from the book.
If you order online, read the reviews and comments. I've bought a book or two in the past that were complete bombs, unfortunately.

Learning to Sew
We all start somewhere and each of us learns differently. I learned to sew from a sweet little old lady, above a vacuum and sewing shop over 20 years ago. I signed up and paid $60 for a month-long weekly sewing lesson. Nobody else showed up so, I was lucky enough to get 4 one-on-one sessions. I borrowed my mom's sewing machine and learned all the basics. She taught me everything about the machine. How to make and sew bias binding, insert elastic, read a commercial pattern, make a skirt, a potholder that turned into a scissor holder, and tips on choosing fabric. She also told me to always wash my fabric before you sew with it. Although, I don't always follow that rule. LOL
I had a binder where I kept all the info and still have those papers today. I'd like to say I'm self-taught but, I had a great start from a great teacher who taught me the beginner basics.
1. Family Member or Friend
I keep mentioning this option because it's a good one and usually free. Ask an aunt, cousin, neighbor, or friend to teach you to sew. They don't need to teach you how to make a wedding dress, just the basics. They can show you how the machine works, how to read a pattern, basic seam, and fabric construction, and why you need to "sew with your iron". You only need an afternoon or evening. I've taught quite a few friends to sew within a few hours. In fact, a couple of friends and I used to get together once a week and sew. We'd make a whole thing out of it. Wine, snacks, and sewing. I really miss those evenings and summer afternoons.
If you're a hands-on learner, this is the best option.
2. Sewing Blogs
Blogs are great for teaching sewing. They teach different things as well. I share easy patterns and sew-a-longs. Some bloggers teach the very basics and others offer more advanced techniques. Two great blogs that come to mind are Made by Dana and Sweet Red Poppy. I love both of their sites. They're fun and bright. They both share beginner-friendly patterns and have YouTube channels as well. There are hundreds and hundreds of sewing blogs out there, and there's something for everyone.
3. Online Sewing School
The sewing queen, Mimi G has recently launched her sewing school. I am not sure about the price or levels (if there are levels) because I haven't joined. Although, I'm sure it's worth every penny. She was the first sewing blog I came across back in the day so, I had to include her. She has opened the world for home sewers and I'm thankful for her.
Craftsy is a great place for learning to sew. I have taken classes on Craftsy for sewing and other things. It has changed over the years but, I still prefer it for online teaching. It isn't free, but you can catch a yearly membership at a decent price at certain times of the year.
If you have followed me for any amount of time, you know I'm a huge Gertie fan. Her Patreon membership includes free patterns each month and she usually has a how-to video. She is all about the vintage sewist and focuses on couture sewing. If you want to up your game, she's your gal.
YouTube. The whole sewing world is at your fingertips with YouTube. Make sure you look through a few videos before you decide on one for the project or lesson you're seeking. It's full of great sewers, but there are quite a few lemons out there too. Some of my favorites are Professor Pincushion, Brittany J Jones, The Stitch Sisters, and The Crafty Gemini, just to name a few. I've been a fan of all of them for many years, so check them out if you need a place to start.

4. Podcasts
This is a different option because it's a listen-only type of lesson. Not everyone loves podcasts and that's okay. But, for those who do love them, I want to share with you my faves. I've learned quite a few things from sewing podcasts. And, if I'm not learning, it feels like I'm sewing with friends.
Love to Sew- Helen and Caroline are in Canada and they have such an enjoyable podcast. They share tons of tips, have fabulous guests, and more. They have an online fabric store and pattern company too. So, go check them out.
Threads- This is the podcast from Threads magazine. It's a pleasure to listen to and has a calm vibe. I've only listened to a few episodes but, they have guests and great tips as well. Of course, their magazine is full of wonderful tips.
Sew & Tell- This is a fun podcast to listen to while sewing. The three hosts have different backgrounds and personalities. They share recent makes and tell us the trial and error. When I listen to them, I feel like I'm having coffee with friends.
Sewing Out Loud- This is a mother/daughter duo. They crack you up once you get to know their personalities. Not gonna lie, they weren't my cup of tea at first but, I've grown to love them. They have years and years of sewing experience under their belts and that's what keeps bringing me back. If you have questions about anything sewing, they'll have the answer you're looking for.
There are other sewing podcasts out there. But, these are the ones I love and listen to the most.
5. Craftsy and National Sewing Circle
I'm mentioning Craftsy again but in more depth.
The paid membership sites are great for beginners or those who want to learn new skills. If you don't have access to a friend, you can pay an annual fee and take classes online. Craftsy has tons of videos and you can choose what works for you. I took the bra-making class and love making my own bras. I started pattern drafting for my own body through one of their classes as well. They run sales occasionally so, look for those as a budget-friendly option.
I'm not familiar with the National Sewing Circle, but I'm sure they're great too.

Frugal Notions
Stocking up on notions can be pricey. If you follow these tips and check the places listed below, you'll save money. If you decide sewing is your jam and want to buy all things 10 years down the road then, by all means, do it. But, for now, let's get the biggest bang for our buck!
1. Garage Sales & Thrift Stores
I know, I know, you're tired of hearing me repeat these two places. But, they really do have a lot to offer for the sewer on a shoestring budget.
Look for these used items:
Buttons
Rulers, seam gauges, and tape measures if they look new. (They can stretch out over time.)
Ironing board. If the thought of this grosses you out, an ironing board is fine. Take off the fabric and recover it. I have a blog post on recovering your ironing board, here.
Pin cushion
Clips (these work like pins but, are better for certain projects)
Carbon paper and tracing wheels (this is for tracing patterns and transferring markings)
Sewing box or baskets, even clear bins are nice
Bias tape maker
Zippers, although I don't love vintage ones.
Dressform (this is by no means necessary to sew with, but if you see one and the price is right, snatch it up )
Lace and bias tape packages
Do NOT look for these used items:
Scissors- you don't know what they were used for. They might have been used for cutting wires. Buy yourself a brand new pair.
Thread- you don't want old thread. It will break easily and create more lint in your machine. It gets old and loses strength over time. Splurge for the new spools.
Elastic- do not buy elastic from a used place. It could be a few years old. Elastic dries out and loses stretch. Think about that old pair of underwear in your drawer. The pair that has stretched out elastic...Yikes!
Pins- they can dull over time and will tear into your fabric instead of poking through. Buy a new pack from the store. They're very inexpensive.
Seam ripper- you want a nice sharp one and they don't cost a lot either.
Needles. These are inexpensive, just buy a new pack.
2. Big Box Store
This is where you'll want to splurge on a new pair of scissors, a pack of pins, threads, and elastics. You don't have to break the bank for these items either. Walmart has a great sewing section in most stores. They sell everything your craft store sells at a fraction of the cost. It's best to have 2 pairs of scissors. One large for cutting fabric and one small for snipping threads. You can even find a pack of both. They sell limited thread colors but when you're starting out, just buy a spool of black and a spool of white and grab a pack of new pins.
A spool or two of thread, a pack of pins, a seam ripper, and scissors should total out to $30 +/-. If that's too much, hit the .99-cent store for scissors. Yep, they sell full-sized scissors that will work just as well as scissors from the craft store. Heck, they might even have a pack of fabric pins and a measuring tape too.
3. Online
You can purchase new notions online as well. Amazon is a great place but, the prices aren't as low as a big box store. I do prefer to order hardware online. It's less expensive than buying inside the store. If you're learning how to sew, you might not need hardware just yet. But, keep it in mind for down the road.
I love to buy zippers online. I can order from other small stores and get them in large quantities. I usually buy longer lengths because I can cut them shorter.
4. Sewing Swap
This is an unusual place to get notions but, it happens. Every sewing swap and fabric swap I've ever joined is filled with sweet, thoughtful women. They send fun notions with their packages. I do the same as well. One time, I sent someone something and she sent me the same thing. Ha! Great minds think alike. :) As a reminder, you can find these through Instagram hashtags and Facebook sewing groups. You will need the stuff to swap first, so maybe this is a "down-the-road idea" for beginners.

5. Friends & Family
Same as boxes and bags of fabric, Grandma might have all her notions still. And, she may be willing to part with them. It never hurts to ask. Go back and read number 1 for items you don't want. No offense Grandma. ;)
Ask friends who sew if they have fabric they're willing to part with. The worst that can happen is they say no. But, most sewists have fabric we're willing to unload. LOL
6. Random Shops
In Southern California, we have a store called Daiso. It's a Japanese store and it's filled with kitchen items, snacks, crafty things, and much more. It's a fun place to visit and you never know what trinkets you'll take home. They have a cute little craft section and everything is budget-friendly. I've bought scissors, pin cushions, hand-sewing needle packs, and other fun things from there. Think Hello Kitty on an adult level, sorta. Maybe your area doesn't have this same store, but it gets you to think outside the box. A lot of places will sell random craft items in them, you just have to look.
You don't need to buy everything for top dollar at your local craft store.
Sewing Machines

1. Local Marketplace
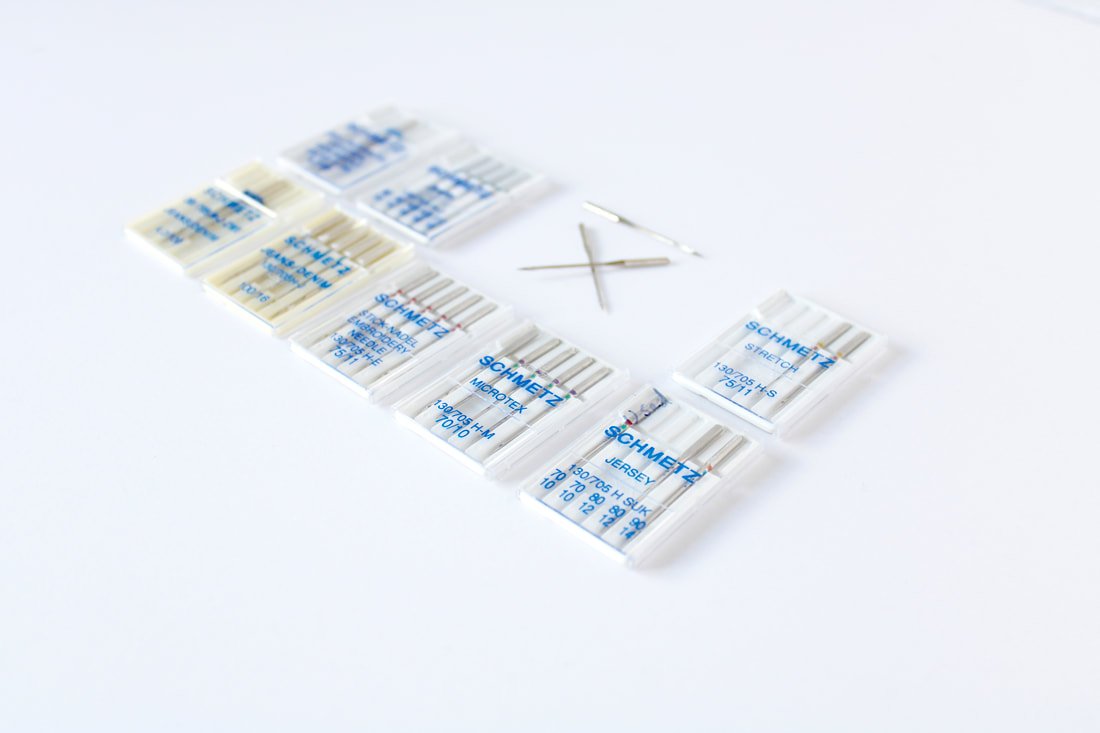
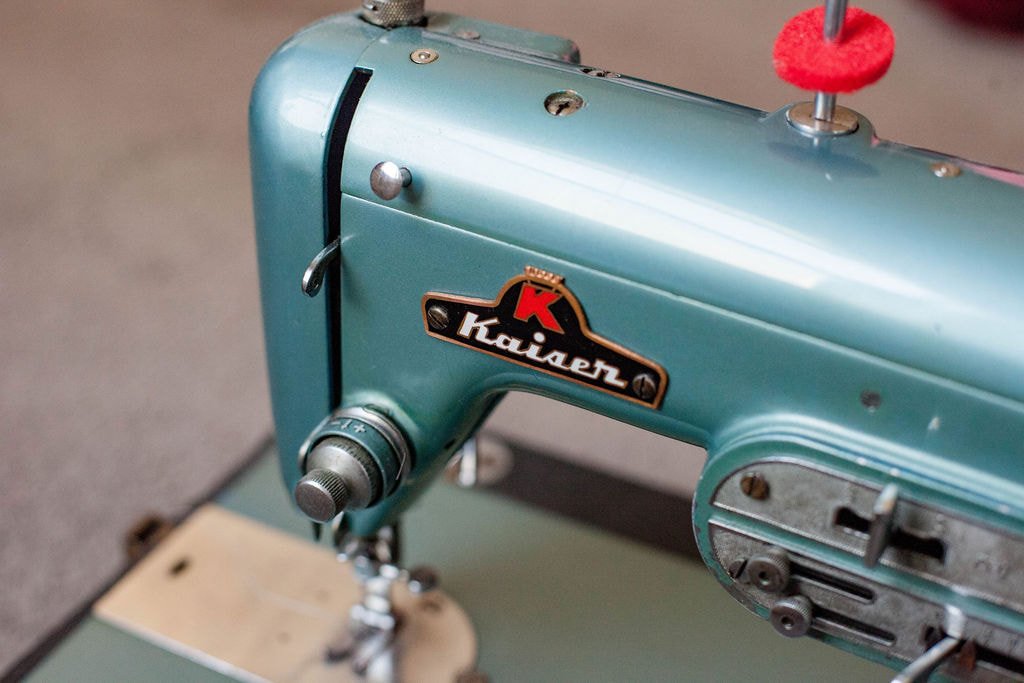
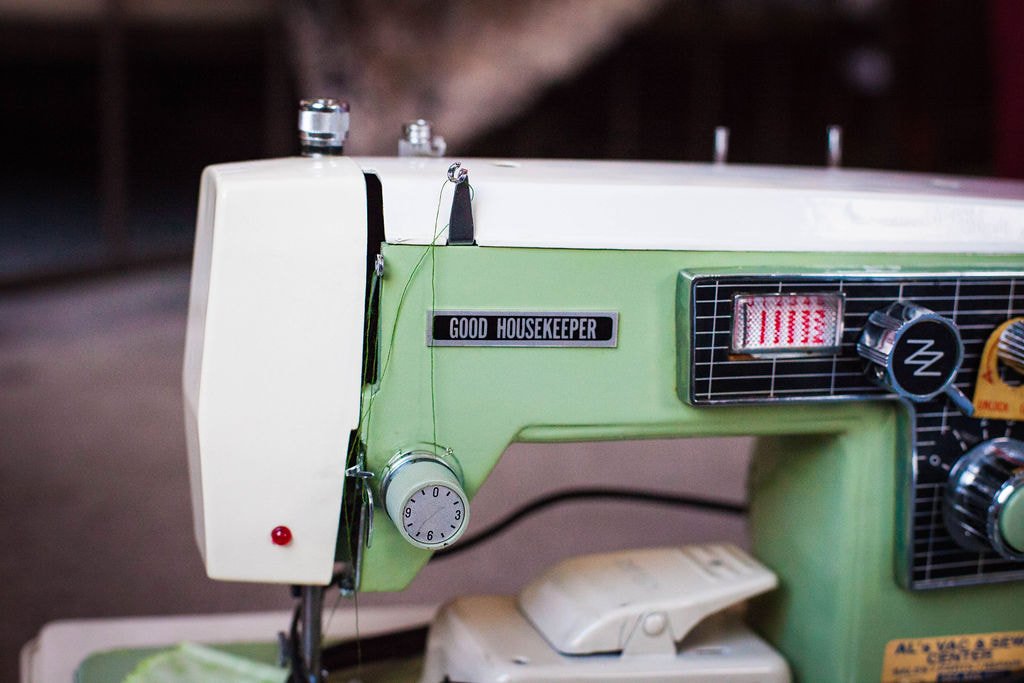
I bought all 3 sewing machines in the photos above on Offer Up. Yep! The Facebook marketplace has folks selling sewing machines too. Some are new but, most will be used. I have quite a few sewing machines that I've bought going that route. All of my vintage machines have been purchased through people I found on Offer Up. I purchased a newer machine through there too. Grab the apps and start looking.
Now, that being said, I don't recommend buying a used machine if it's your first machine. This sounds crazy, I know. But, here me out. If you buy a new machine, it will come with an owner’s manual and will be in mint condition. You won't or shouldn't have to take it to get serviced.
If you buy a used machine, it may not have the owner’s manual. It may have broken gears and will most likely need to be serviced. Who knows when the timing belt was replaced on that beautiful 1950s vintage machine? Service can cost $60-$200 and up. For that, you're better off buying a brand-new beginner-level machine.

2. Black Friday Sales
Ever since I can remember, I've seen sewing machines for around $99 on Black Friday Ads. If you are willing to get in line to grab one of these bad boys, do it! They are usually base level machines but, you can't beat that price. It'll be brand new and should work for almost anything you plan on making.
3. Sewing Shops
Sewing shops will have all the fancy machines. You can buy top dollar if your budget allows and they may have payment plans if that works for you. They will show you how the machine works and may have a number of hours for lessons. They'll usually have sewing classes as well.
Vacuum and sewing repair shops usually have a dozen sewing machines for sale. They will be newer models and older. They're used, but will be in perfect working condition. They will show you how to use the machine. And, a lot of time, these places have sewing lessons and classes too.
Hot Tip: Vac and Sew shops offer machine maintenance and repairs at more affordable prices than sewing shops do.

4. Garage Sales & Thrift Stores
Yes, these places are mentioned again because they have sewing machines. A lot of times they'll let you plug one in to see if it works as well. Just be cautious because it may have underlying issues and need service. Someone did donate it after all. But, it's no different than buying one from Offer Up.
Buyer beware, you'll most likely need to get it serviced which can cost more than a beginner level new one.
5. Friends and Family
And, last but not least, ask a friend if you can borrow one. I learned to sew on a borrowed machine and found that I loved sewing. I ordered one online for around $150 after borrowing my mom's for 6 months. If you know someone who sews and has been sewing for years, chances are they have an extra machine lying around. Bonus, they can show you how to use it and perhaps teach you a few things. And, maybe they'll even have some extra fabric they're willing to part with. Win-win-win!!
I hope you can walk away from this list with a new outlook on Sewing, and how you can do it on a budget. Ask around, check garage sales and thrift shops, and get a start on your new sewing journey.
Want to read more sewing stuff? Check out these 7 common sewing myths.
Share in the comments below, a budget-friendly tip that you find useful.
Happy sewing!
Annette
