DIY Advent Calendar

Are you itching to do some holiday sewing? This advent calendar is a quick-ish sew if you want to whip up a fun Christmas item now! Get some stash-busting done too.
Tools needed:
rotary cutter or scissors
ruler
1/4 yard of a few different fabrics or scraps
1/2-3/4 yard of sturdy solid fabric for the front and back. (duck cloth, canvas, denim, etc.)
Matching thread
Iron on numbers, cutting machine with HTV vinyl, or template for sewing them on, if you don't embroider them.
All the sewing notions and a machine
A piece of 1/2" wooden doweling and twine for hanging.

Machine embroidered numbers on pockets
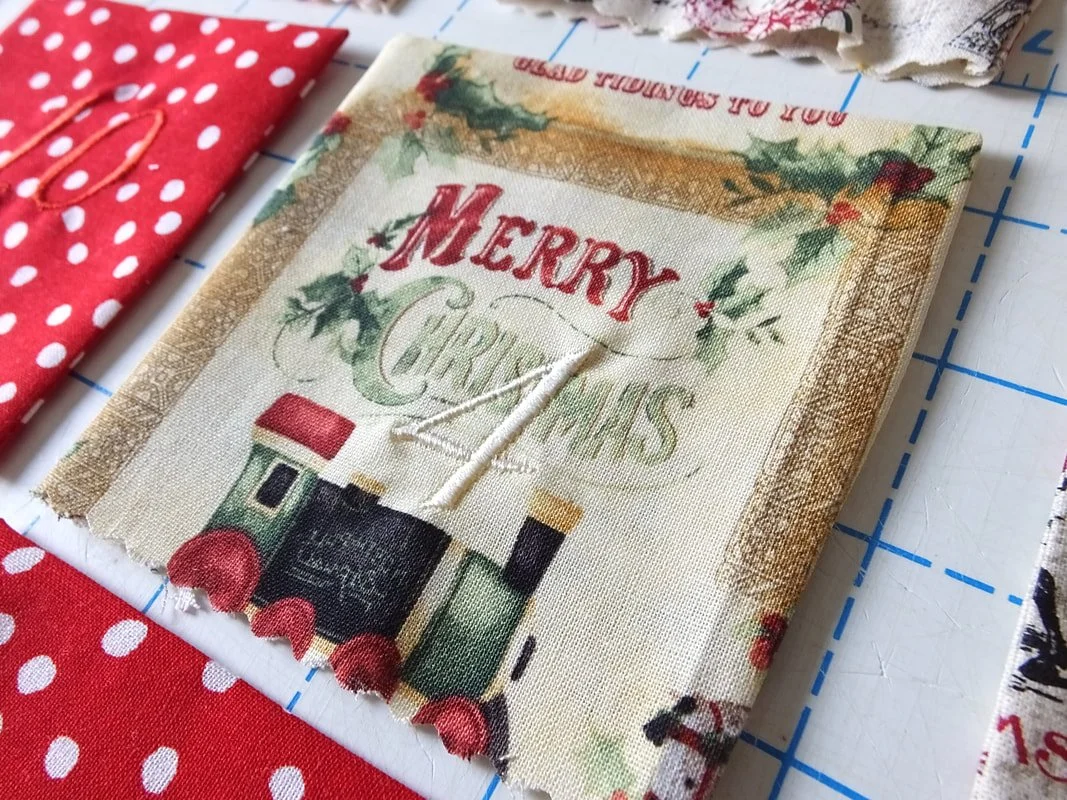
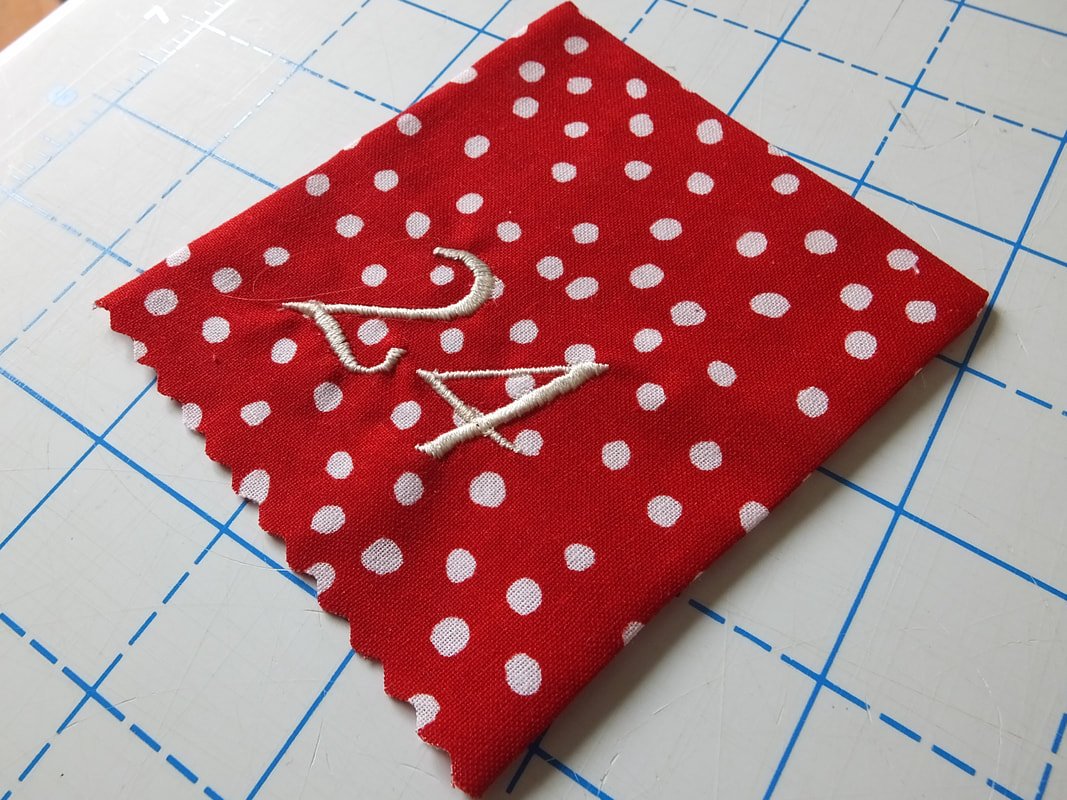
I chose Christmas fabrics similar in color, grabbed them, and started cutting. I liked the size of my phone, so I used it as a pattern. Find something around the house that is the size you want, and use that as a pattern template.

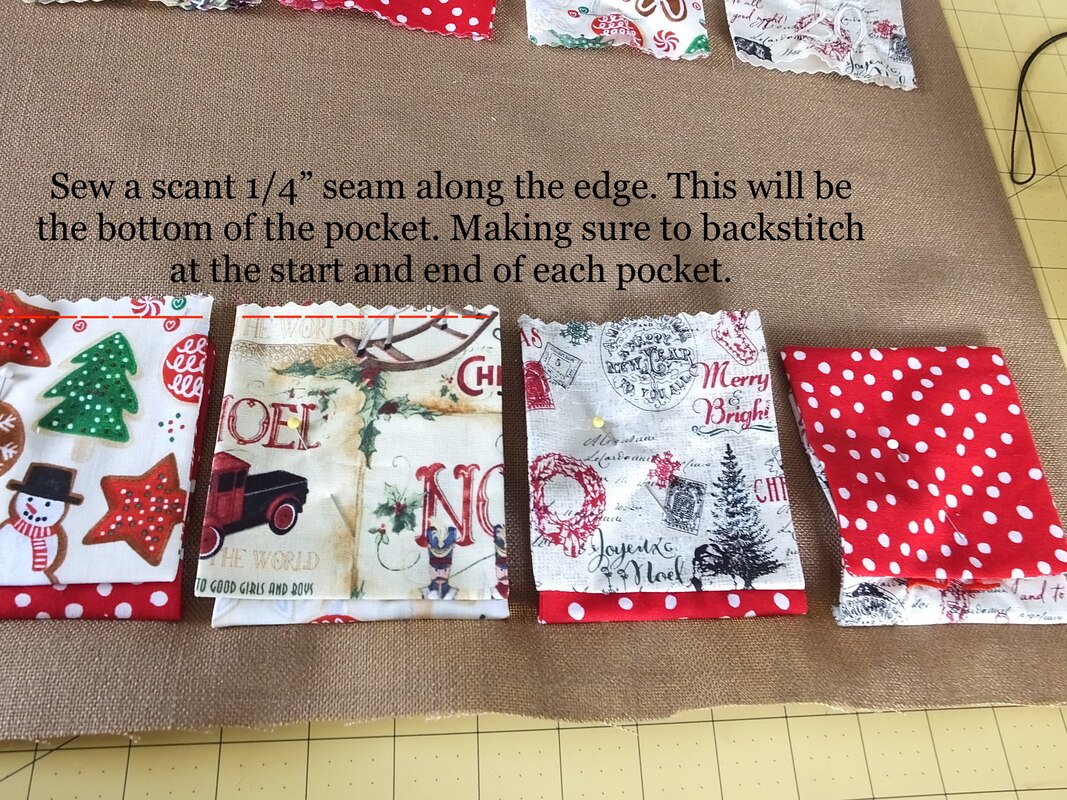
My phone roughly measured 6.5" by 3". I added 1 inch to the width and length for seam allowances to make rectangles. Fold them in half RST (right sides together) and stitch with a 1/2" seam allowance. Sew the sides only. Leave the bottom open, clip corners, turn out, and press flat.
**If you decide to sew or embroider the numbers on, do this before sewing the pocket together. If you use vinyl or iron-on numbers, you can add the numbers after the pockets are sewn and turned.
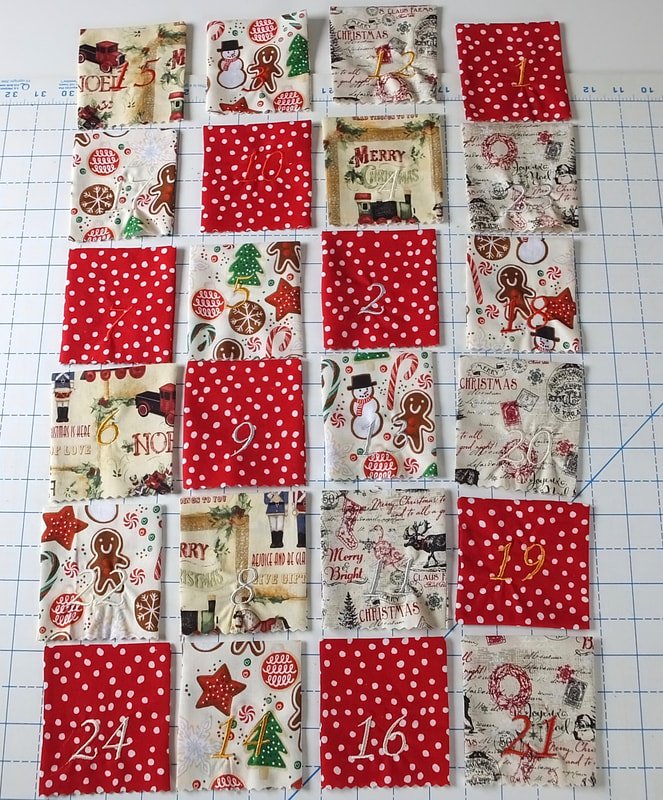
Organize them vertically if you’d like.
After you have your pockets made, lay them out and switch around until you decide which assortment you love the best or go crazy. I liked the taller version better.
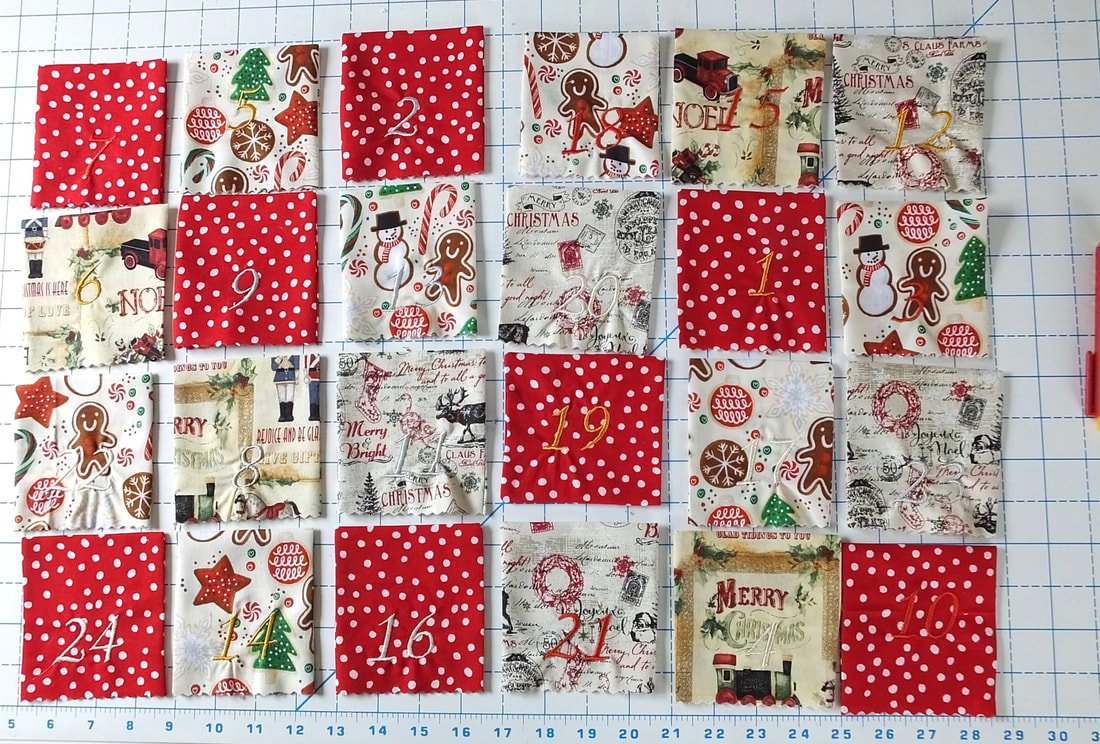
Arrange them in a horizontal way if you like that better.
I did this part backward, sorta. After laying the pockets out, I cut my fabric for them to be sewn onto. I measured the size of all the pockets and added 2" on each side. 5" to the top and 2" to the bottom. This allowed extra room for seams and the top to get turned down and stitched to create a loop for the wooden doweling.

I added length and width to the solid piece of fabric to sew the pockets onto.
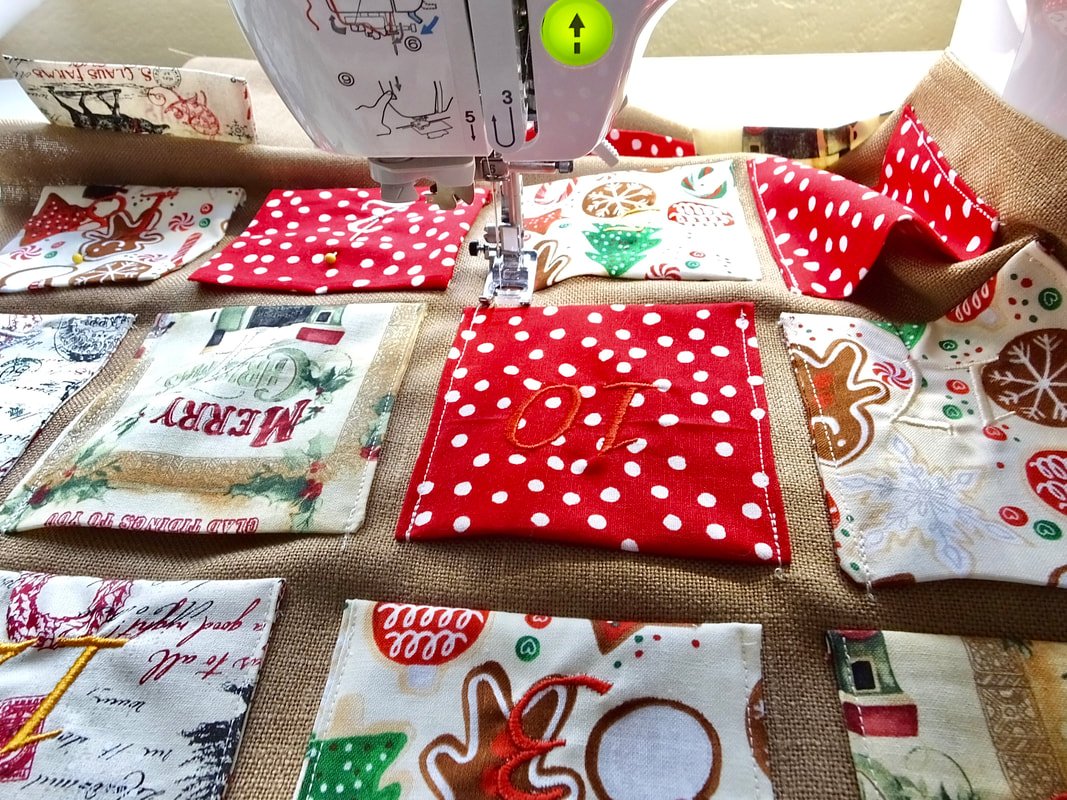
I worked from the bottom up, sewing the bottom row of pockets first. You do what works best for you. :)

Measure from the bottom row of the pockets to see how much room you want.

Flip pockets the wrong side up and stitch along the open edge.
I sewed the second row 1/2" above from the top of the first row. You decide on your own spacing.
I decided to sew the bottoms of all the pockets on first. Then, I flipped them up to sew the sides. As you can see, I used pinking shears to keep the edges from unraveling. This whole project was on the fly and meant to be fun, without overthinking. Sometimes you just gotta sew something! LOL

Sewing the sides. Start from the bottom and go up, backstitch at the beginning and end.
Be sure to backstitch at the start and end of each pocket side. I also added extra stitching at the top where little hands will reach in and out to discover the treasures inside.
After you have all the pockets sewn on, it’s time to put it together.
Grab the backing fabric and pocket piece, and lay the pocket side RST on top of the backing fabric.
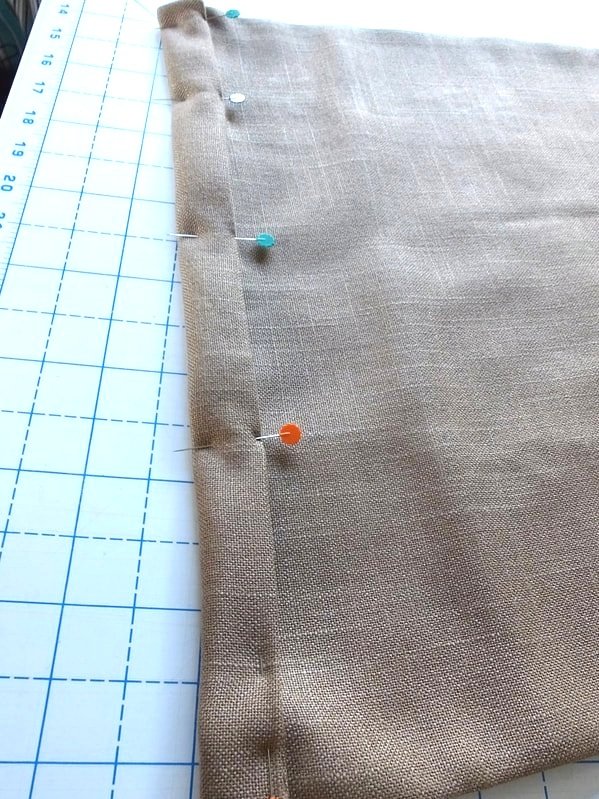
Pin or clip the pieces together, and sew a 1/2" seam allowance. Leave a 4"-5" gap at the top for turning. It’s a lot of fabric and layers so, you’ll want a nice size gap for turning out.

It’s starting to come together and look like an Advent calendar now.

Leave an opening for turning.
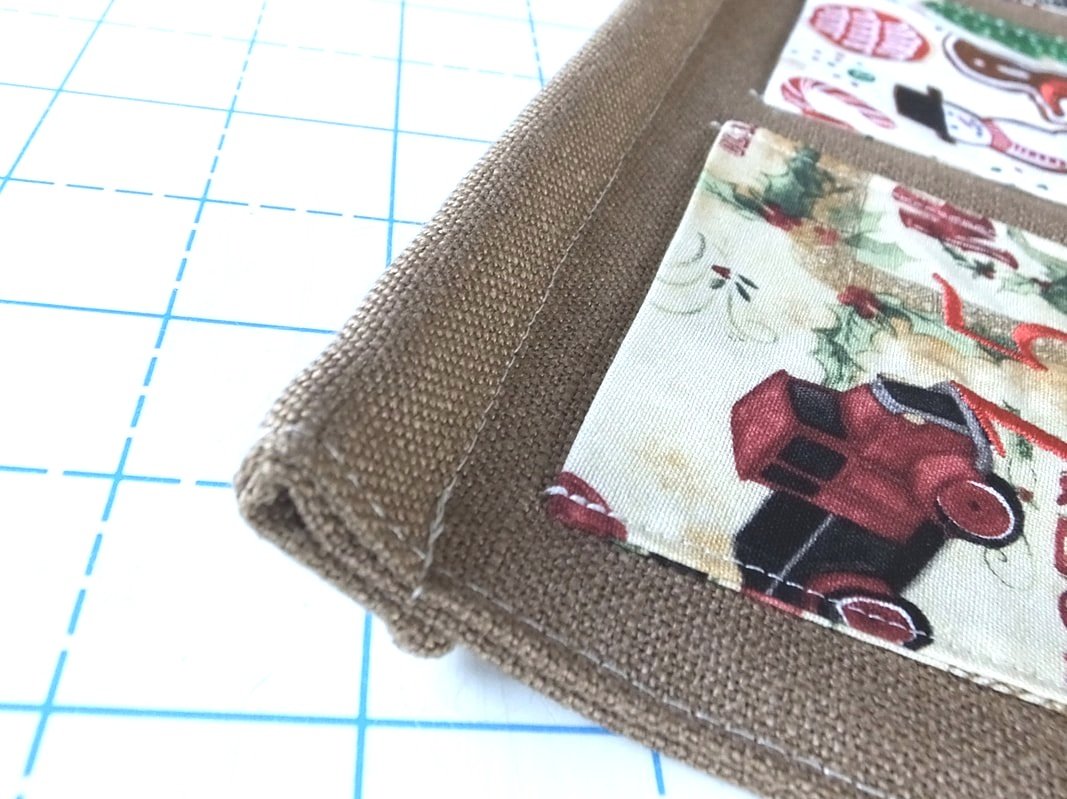
Clip the corners and trim thread tails. Turn out and top stitch around the whole calendar.
Decide how big of a loop you need for your wood doweling to slide through, pin, and stitch to create the loop.
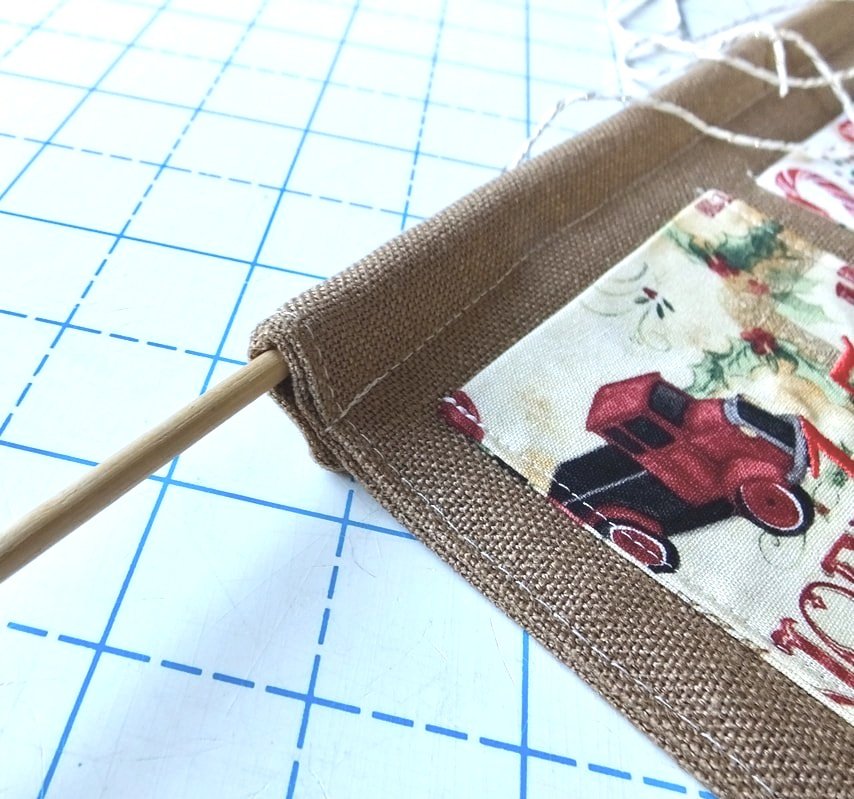
Slide the dowel through. Tie string or twine on each end with a double knot. Hang up and fill it with lots of little treasures.
You're done! Yay!!! Now, what do you fill it up with?
Filling it up
What are you going to fill the pockets with? Who is going to use the advent calendar? Little ones or big ones? I've listed some ideas below of what to put inside for all ages. Wrapping each item would make it extra fun and keep wandering eyes from peaking.
Chapstick or lipgloss
Fruit snacks
Small fruits, a tiny orange
Movie theater ticket
Handmade coupons
Small packs of beef jerky
Cash
$5 gift card
Hair elastics or barrettes
Small lego sets
Candy
Toy cars
Earbuds
USB stick
SD card
Crayons
Package of nuts
Hot cocoa packet
Socks
Soft gloves
Squishy toys
Stress ball
These are just a few ideas, the sky is the limit on fun little treasures. Just think of anything that will fit in the palm of a hand.
Well, I'm off to buy some items to fill our calendar with. If you think of other ideas, please share those in the comments below. The more ideas, the merrier! Are you going to make an advent calendar? Or make one as a gift? Let me know in the comments below.
Merry Christmas,
Annette