
Pattern Reviews, Sewing Hacks, Tips & Free Patterns
The Sewing Blog

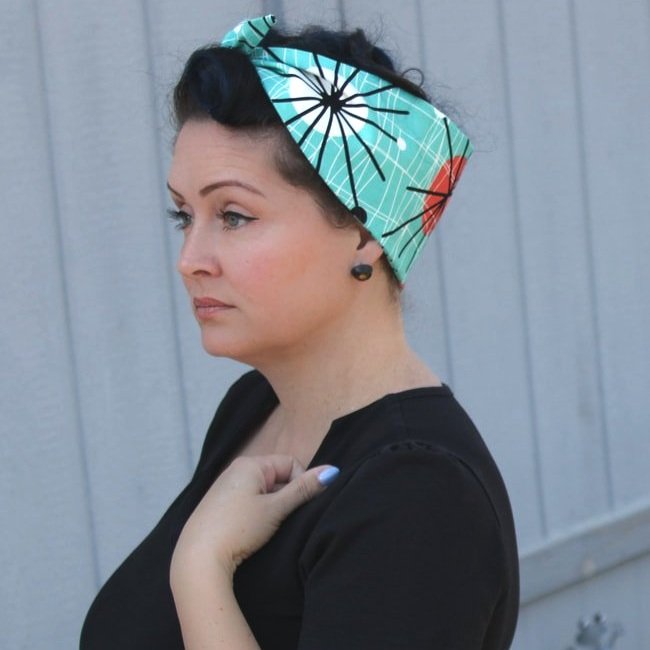
Easy Vintage Hair Scarf Sewing Pattern
Sew a quick and easy 1950s rockabilly hair scarf. Vintage style pinup scarf to elevate your style. Beginner-friendly sewing pattern to wear at your next car show.

Do you love the vintage pinup look but don't know where to start? Grab some pedal pushers, a black fitted top, and this sewing pattern! You're about to get your vintage style on.
This pattern is the straw that broke the camel's back- in a good way.
I have quite a few patterns I want to share, but I lack the technical know-how to get them to you. This is the pattern that made me search the interwebs, far and wide on how to create a PDF. And, here it is! Finally, a downloadable pattern that was made just for you!
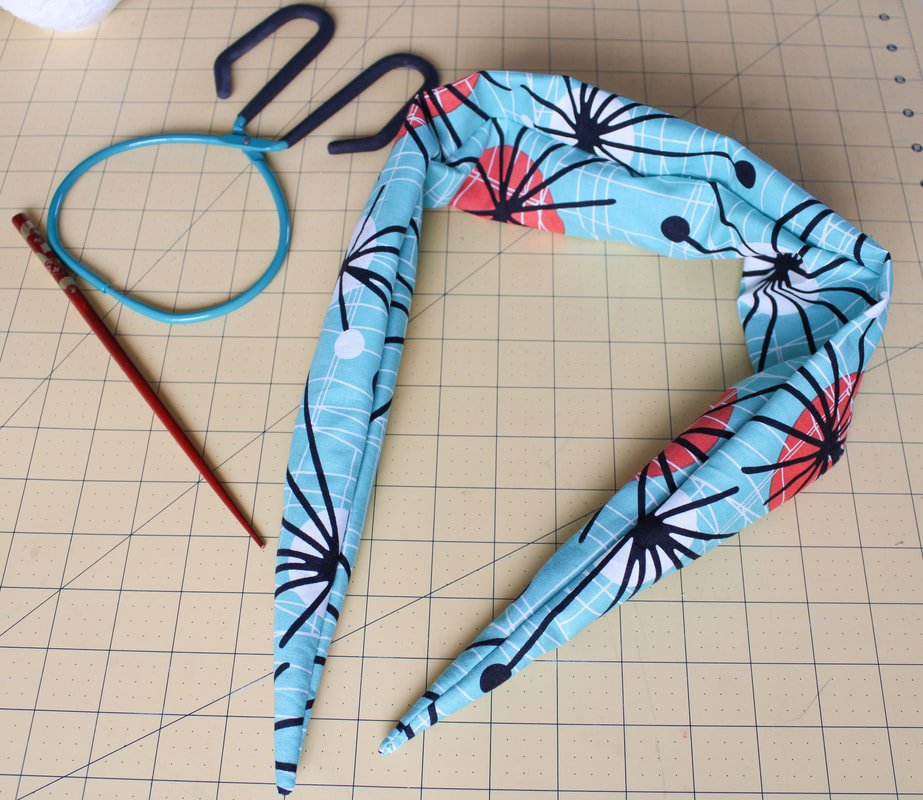
This wide hair scarf is made for good hair days, bad hair days, and for curly-haired gals, too! I see you (I am a curly girl). Toss your hair up in a messy bun, and you'll be cute as a button when you wear this retro-inspired hair-scarf. This isn't a lifesaver, but it's definitely a hair saver. Ha!
If this thicker style headband isn't your cup of tea, I have a post on a narrower one, over here. It can be worn with your hair up or down. You can tie it around your neck, or wrist, or use it as a purse accent when tied in a bow. The size is completely customizable too, lengthen or shorten it to your desired size
Okay, let’s get started on the Wide Hair Scarf Pattern.
*UPDATE: I have given 1500+ free patterns, and to help pay for my website, I’ve added the pattern to my Etsy shop. It’s the same cost as a coffee. If you still want to sew it and can’t afford a coffee, send me an email. ;) I’m not heartless.
What You'll Need:
1/2 yard of cotton fabric
Sewing machine
Matching or contrasting thread
Chopstick or other turning tool
A smile, because you're making something cute :)
Let's get sewing!
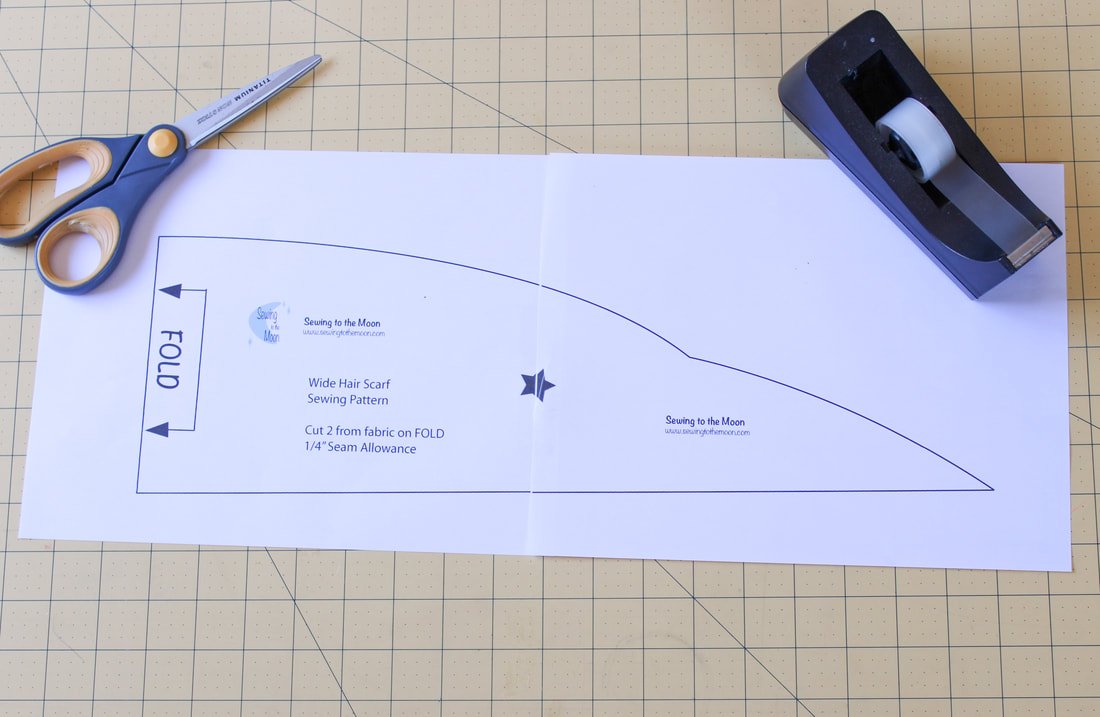
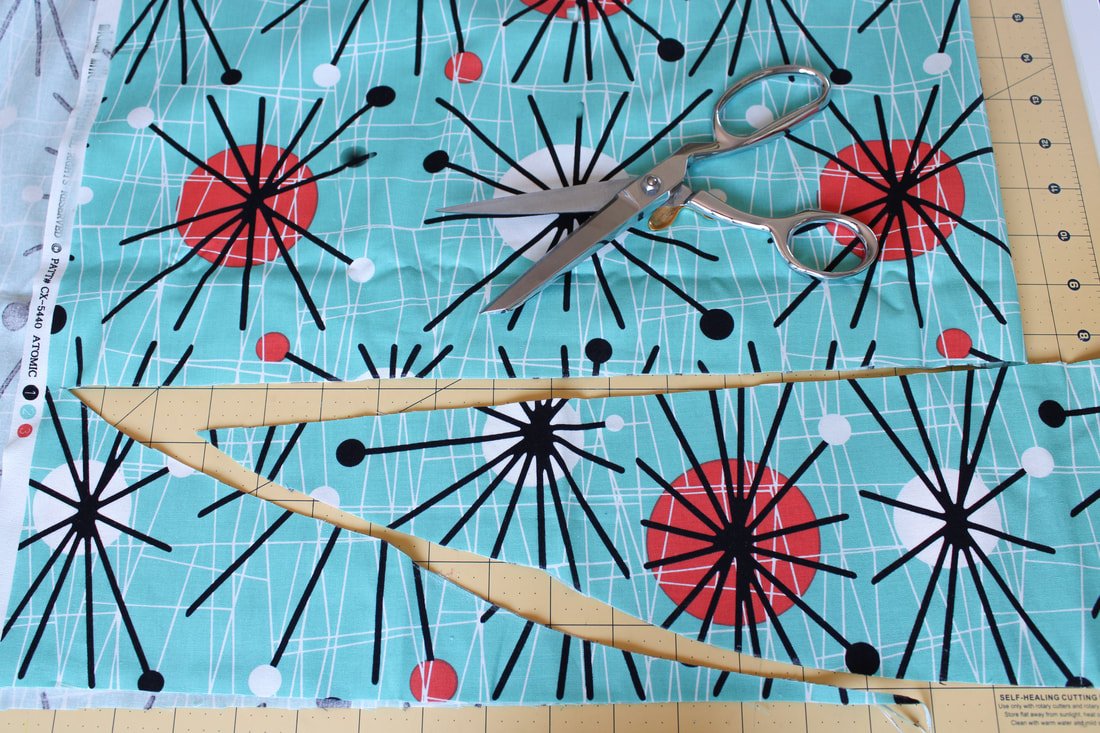
Download the PDF pattern, print it out (*do not scale or resize), and tape it together.
This will now be your pattern piece. Make sure to match up the star points.
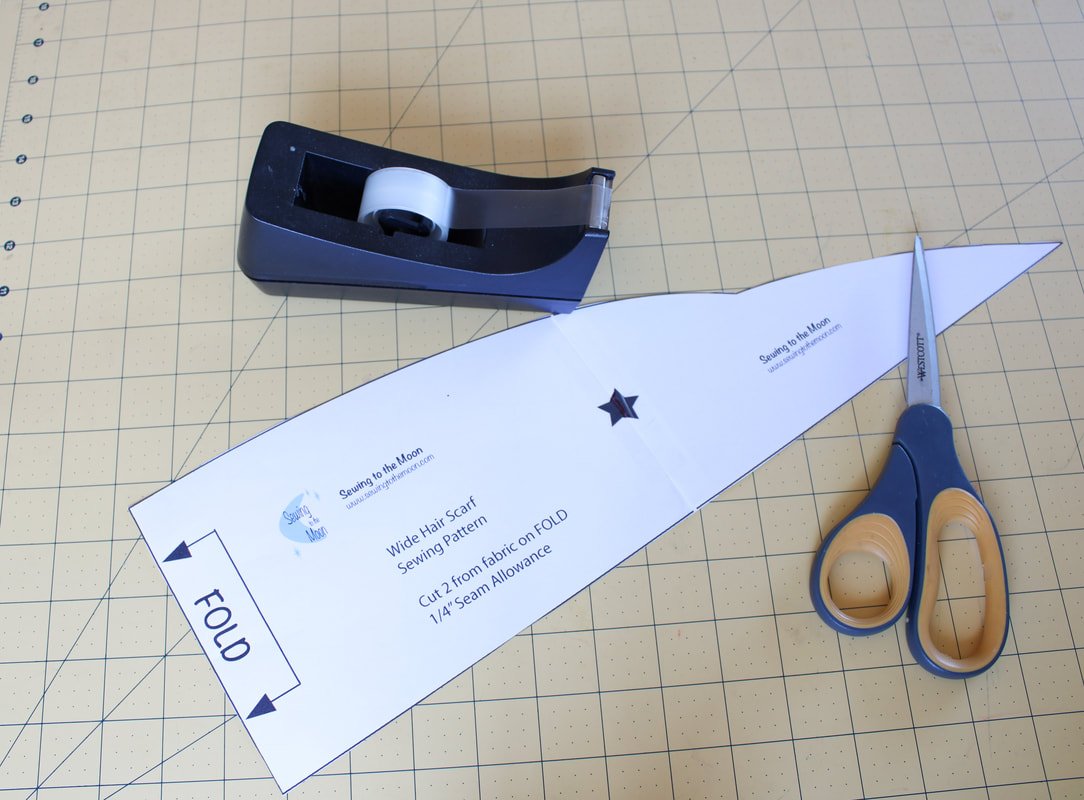
Cut out the pattern along the lines and set it aside. It will resemble a plague mask. Haha ;)
*The pattern will print out on 2 horizontal pages. They are made to overlap a bit to create the pattern. Match the star and you'll be good to go. No scaling or anything is necessary. If you'd like to trim off a thin sliver of paper to match the star up perfectly, you can. That's what I did.
Like I said above, I’m brand new to PDF pattern making.

PDF Stuff
You might have to trim a thin slice of paper for the star to fit perfectly.
Cut along the line.
Once it’s cut, it’ll resemble a plague mask.

Fabric Stuff
Next, wash, dry, and iron your fabric if you haven't already. This is totally optional.
What fabric(s) did you choose? Did you go with a solid color or a fun novelty print?
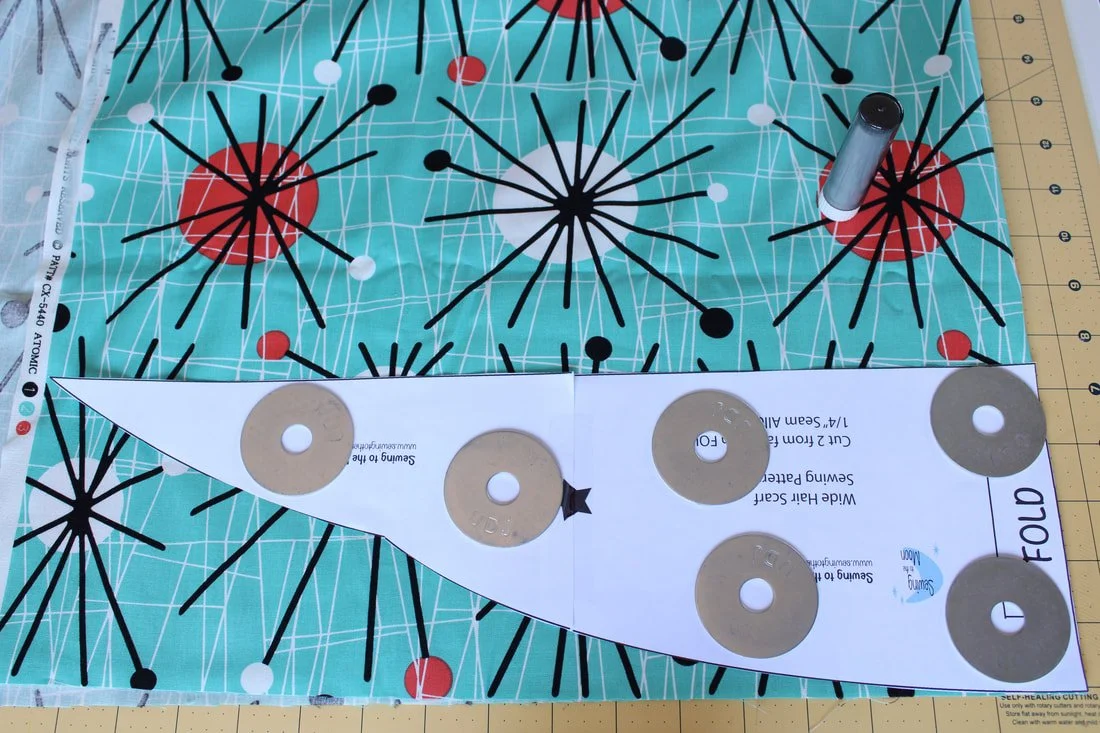
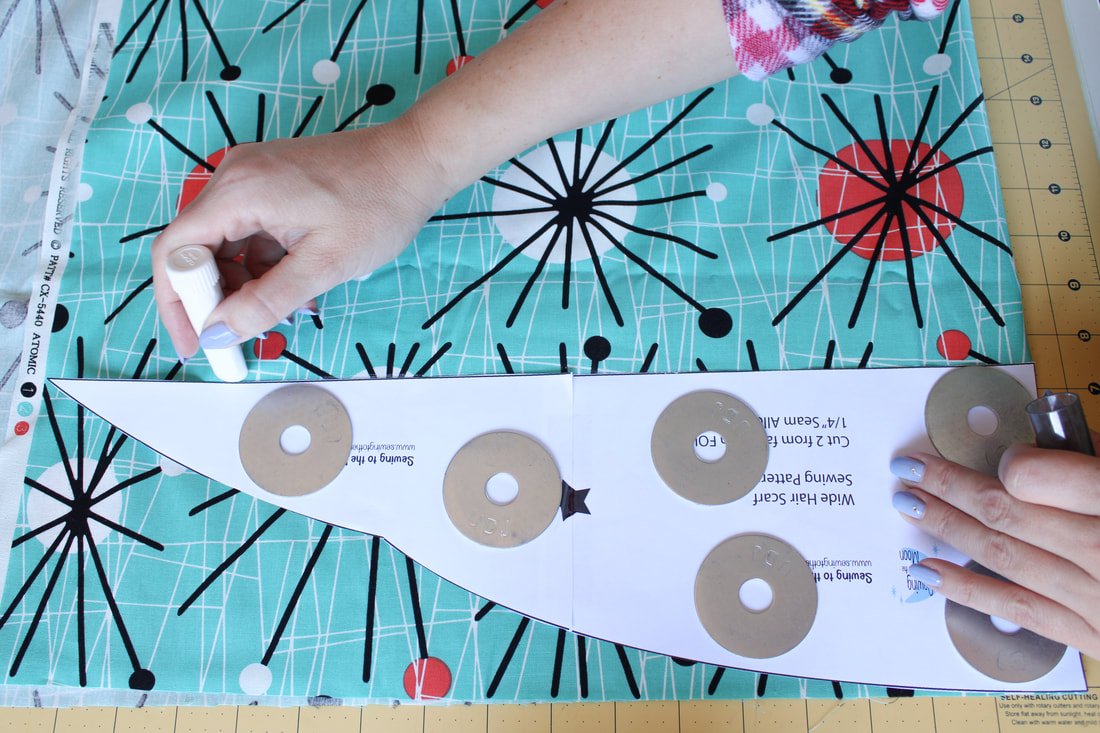
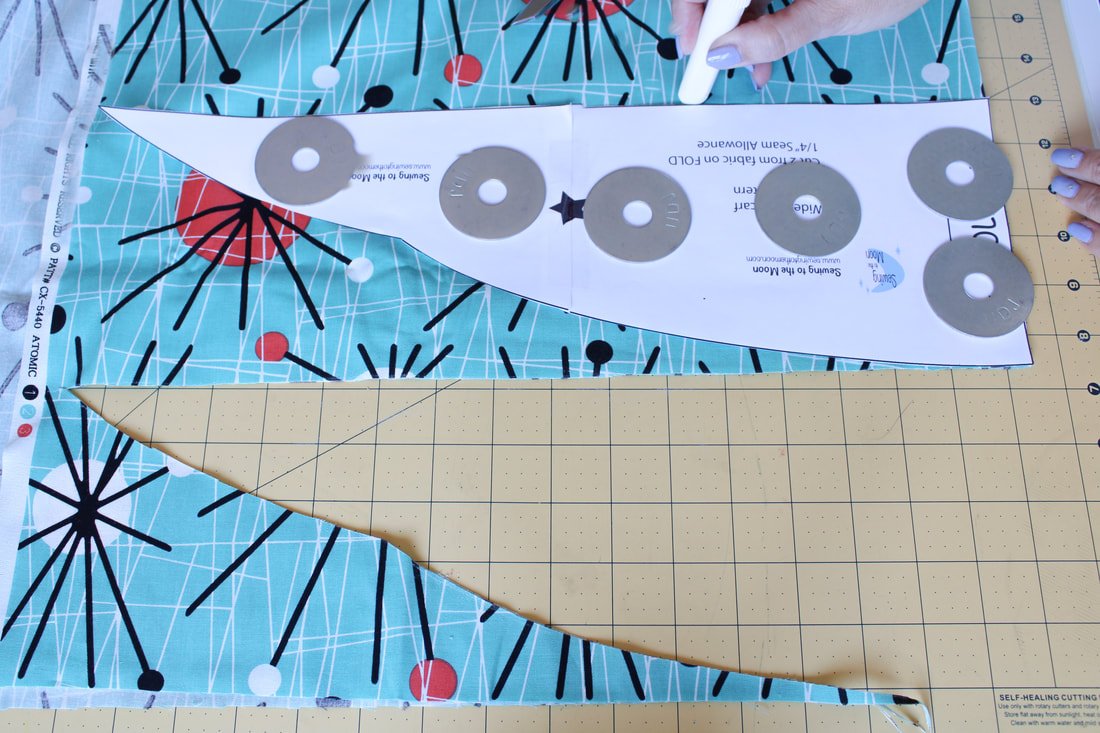
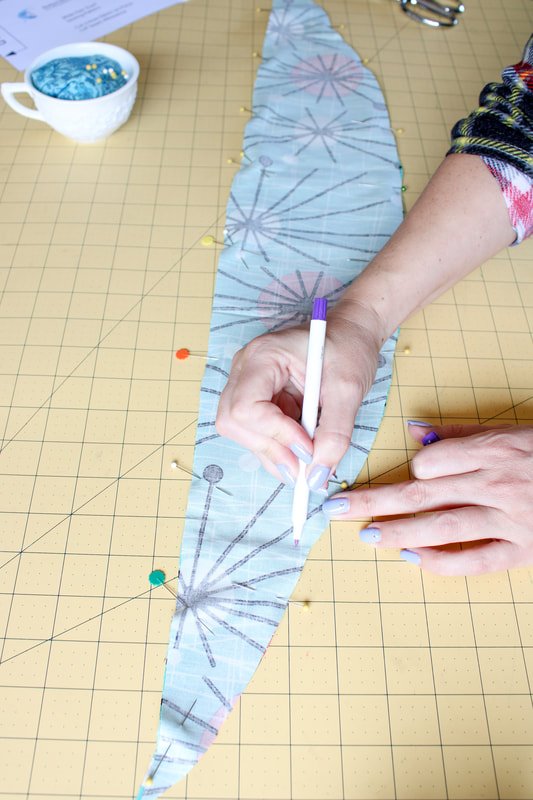
Use pattern weights to hold the pattern down. Trace around, then cut it out.
Grab your scarf pattern piece and lay it on top of your folded fabric. Line up the folded edge of the fabric with the pattern side that says FOLD. You can do this with RST or WST; it won't make a difference for this pattern.
Use pattern weights to hold the piece down while you trace out the shape. Use an air-soluble pen or a chalk pen to trace. Cut along the lines.
Repeat the steps for the other side. You are tracing an outer and inner piece of fabric for your hair scarf. Cut.
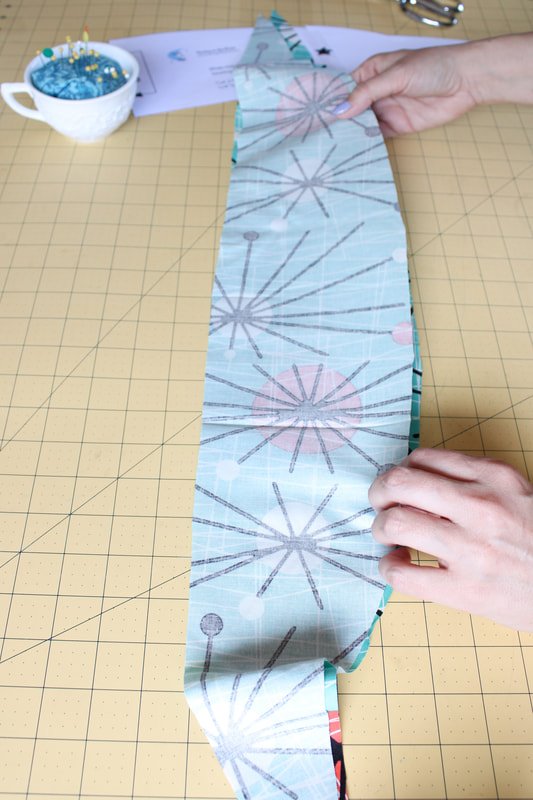
You should now have 2 pieces of fabric cut out.

Weird plague mask fabric pieces.
Now take the pieces and place them right sides together. Use pins or clips to hold them together.
Mark a 3" gap where the pattern piece indicates. This area will not be sewn so, you can turn the scarf out afterward.
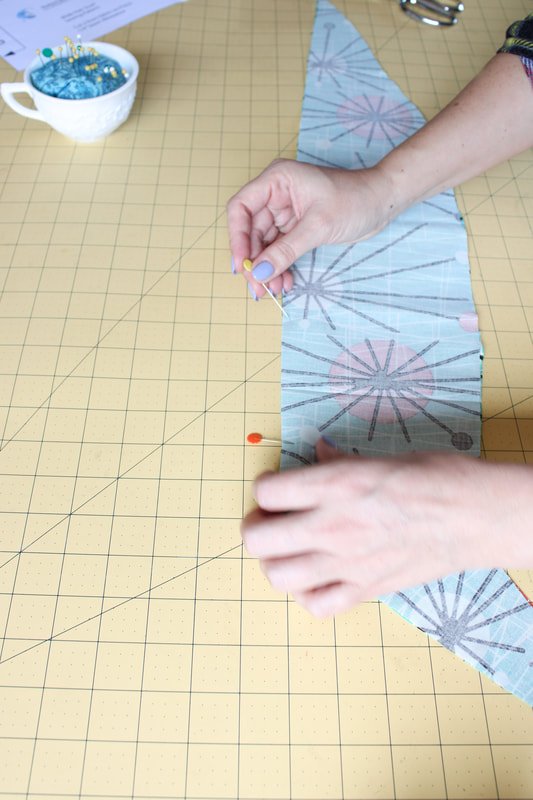
I took an air soluble pen to mark the pivot point on the scarf. This isn't necessary, but it helped. The pivot point is where the scarf gets narrower.
Time to sew! Use a 2.5 or 3mm stitch length.
Seam allowance is 1/4"
Go slow, this gets tricky at the pointy ends
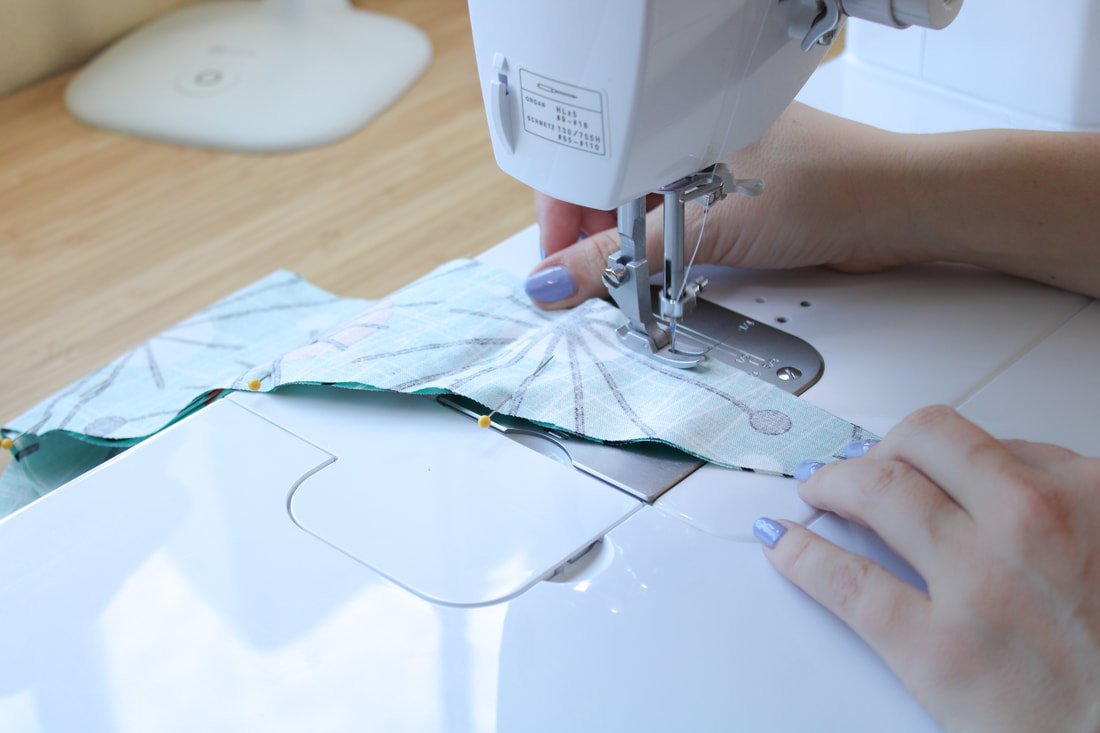
When you get to the pointy corners, leave the needle down, lift the pressure foot, and turn your fabric. If it's not quite at 1/4" mark, go back and hand crank a stitch or two. Continue sewing all the way around until you come to the 3-inch gap. Backstitch.
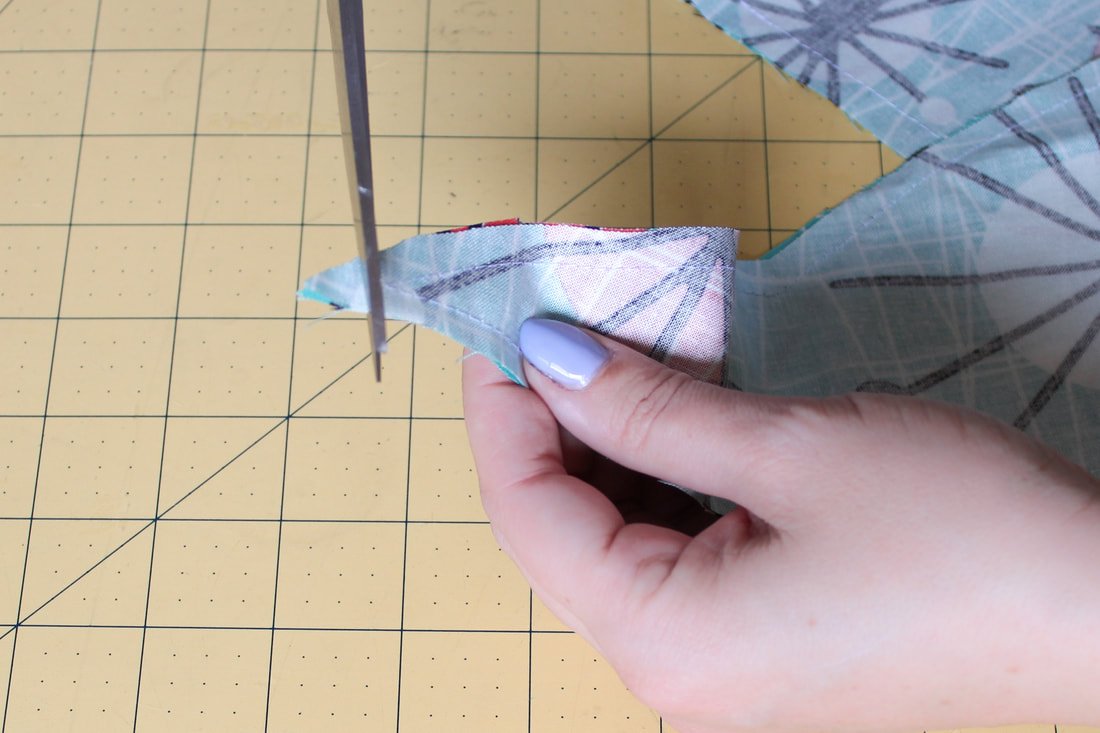
Clip your corners, carefully!

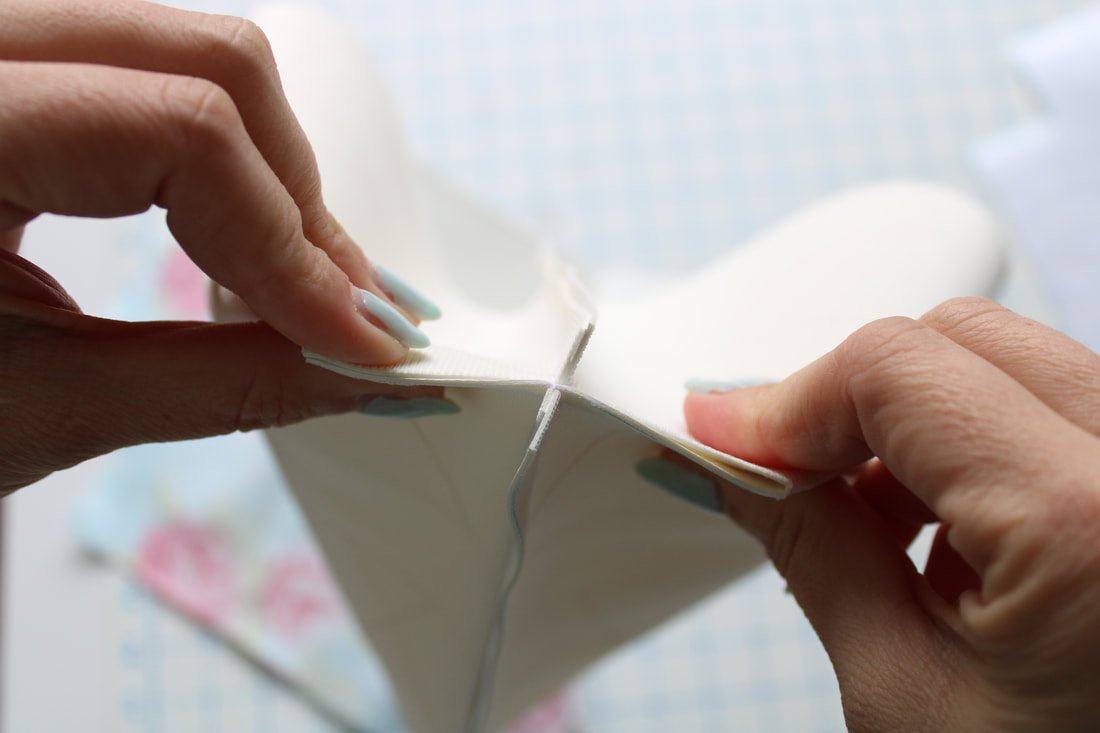
Time to turn the scarf out. Grab a chopstick or any other turning tool.
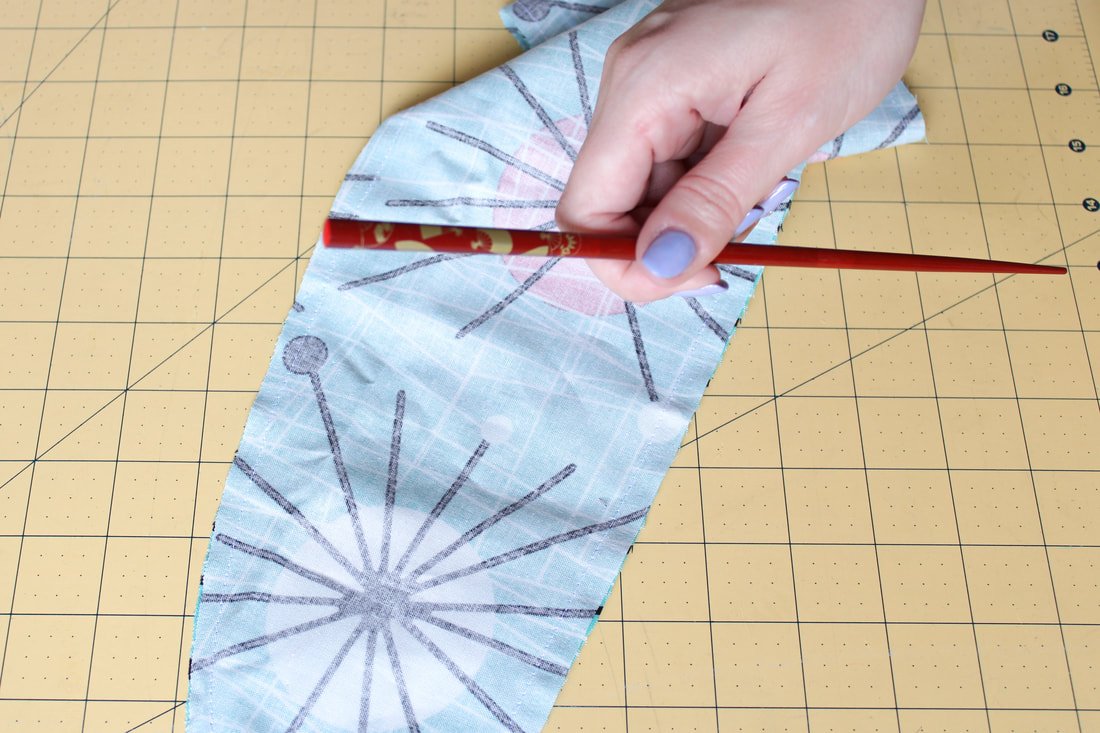
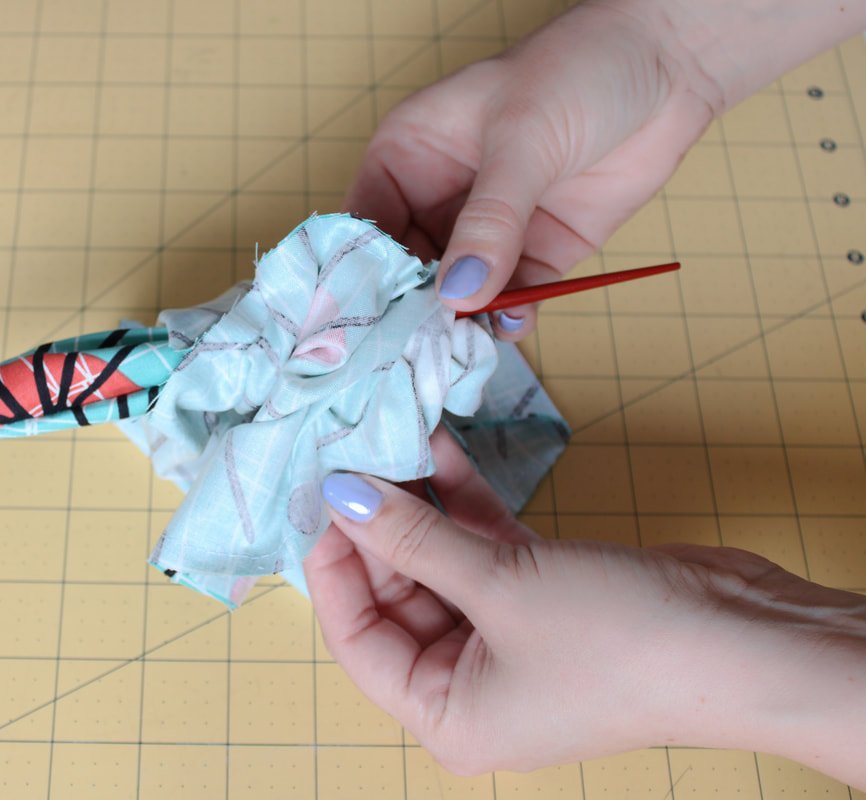
If you're using a chopstick or pencil, poke the blunt end into the pointed fabric corner. Slowly pull the fabric down around the chopstick until you can easily push it through to the gap opening. Repeat for the other side.
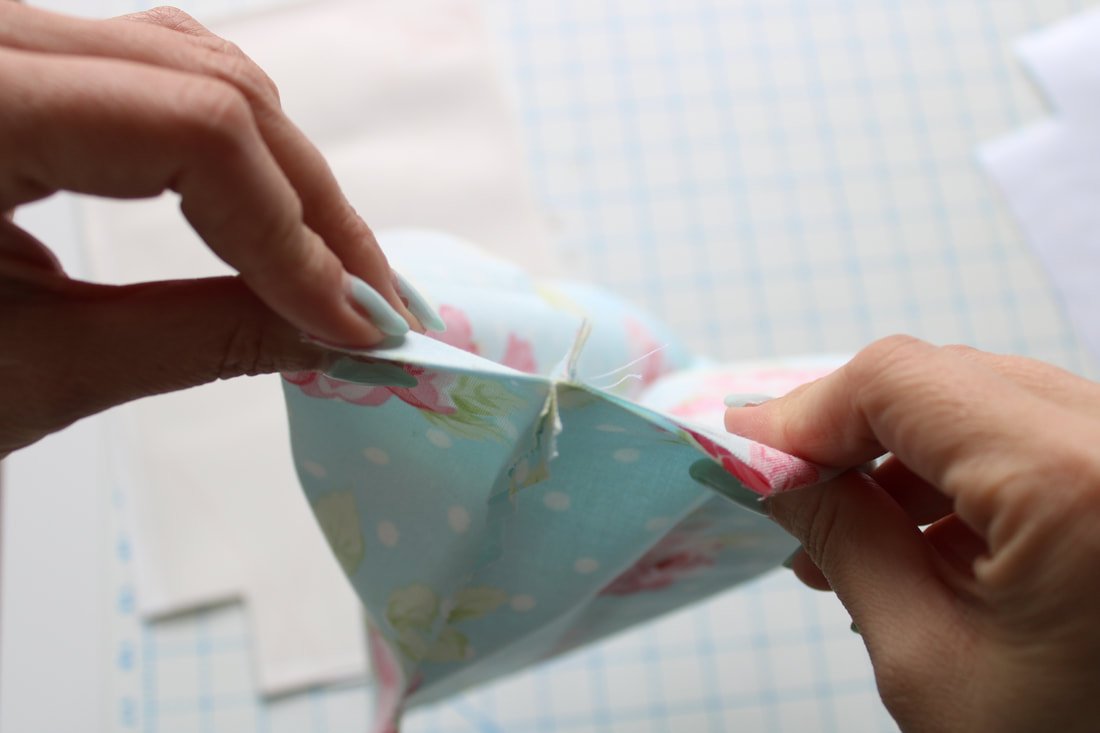
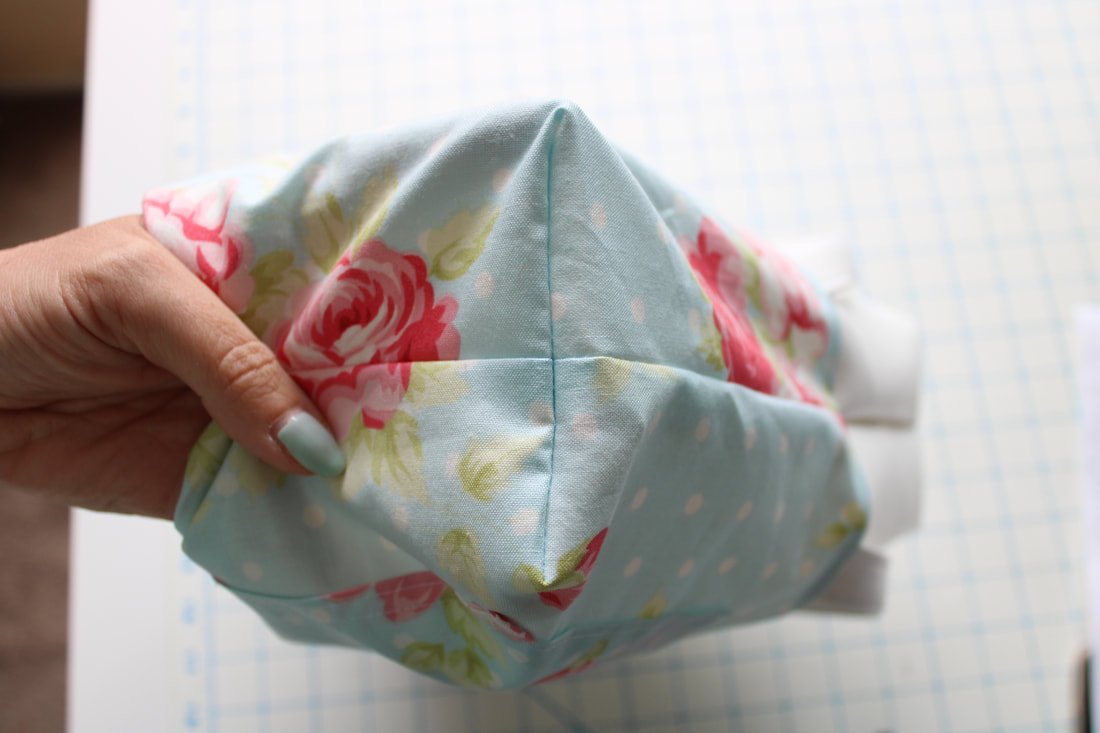
It should look like the last photo above, once it's turned out! Huzzah! The rest is downhill from here.
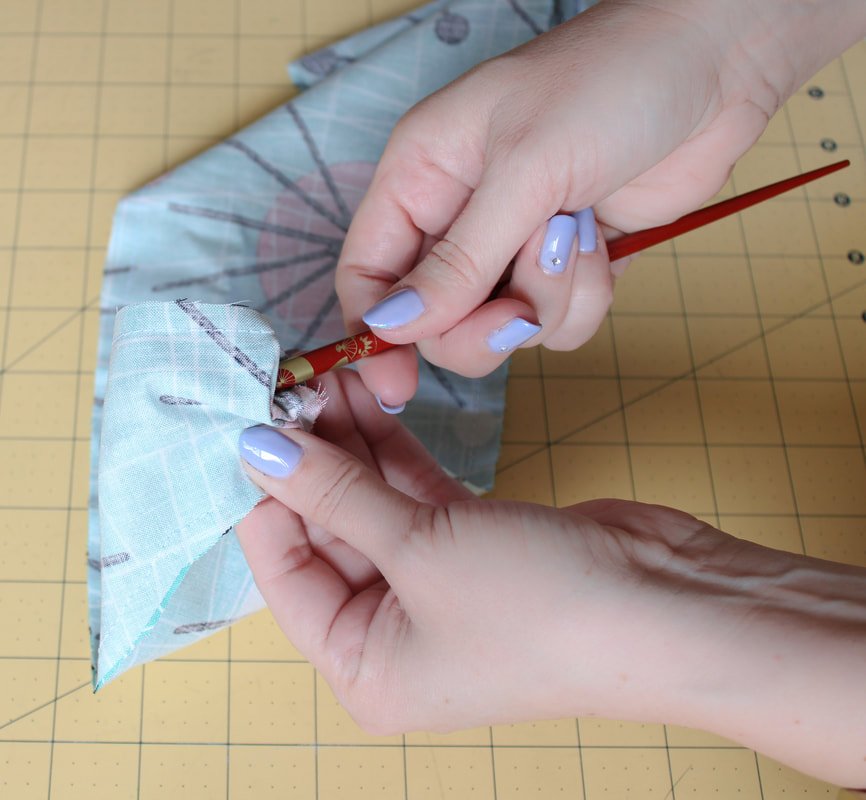
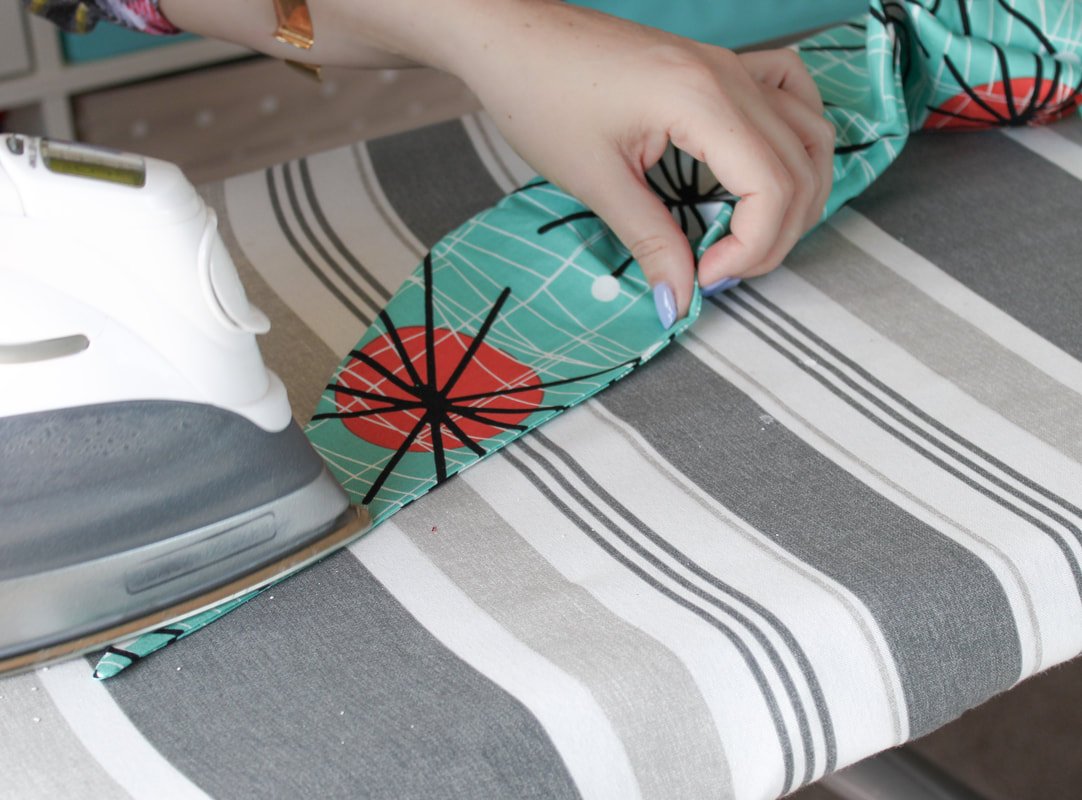
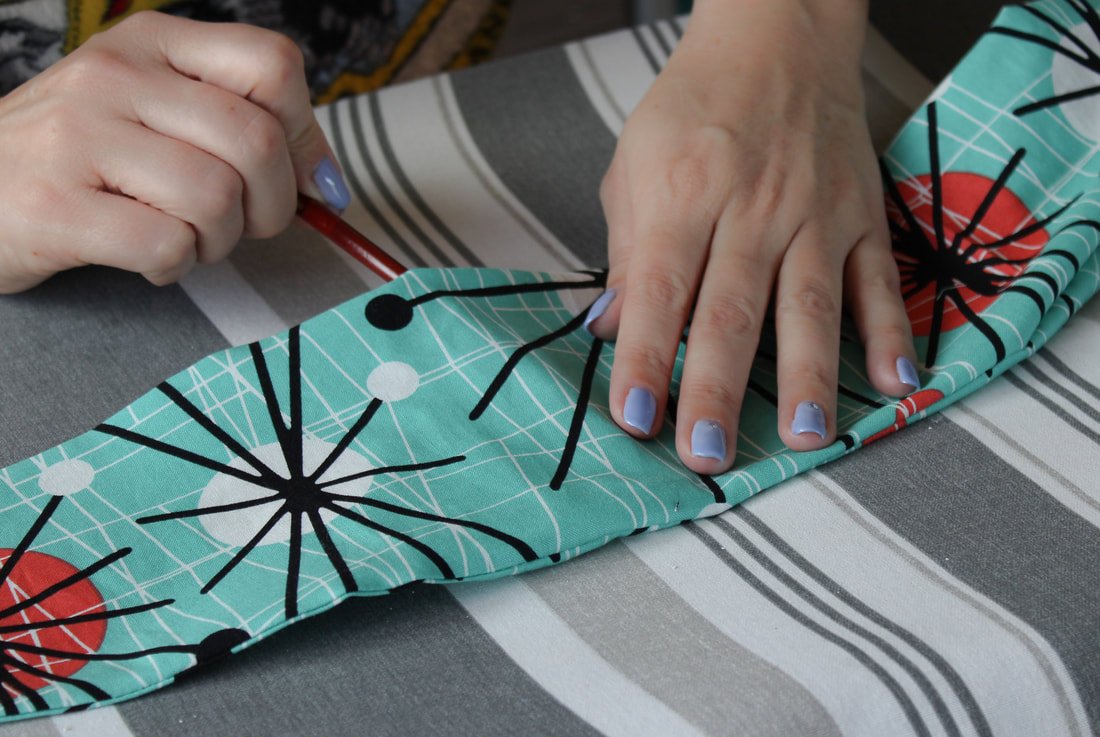
Iron time!
Roll the seam out. Using your fingernail helps this process. You can also take the chopstick and slide it under the seams while pushing the seam out and open as well. It'll take some finagling, but it's well worth it in the end. This is the hardest part of making this 1950s vintage-style hair scarf.
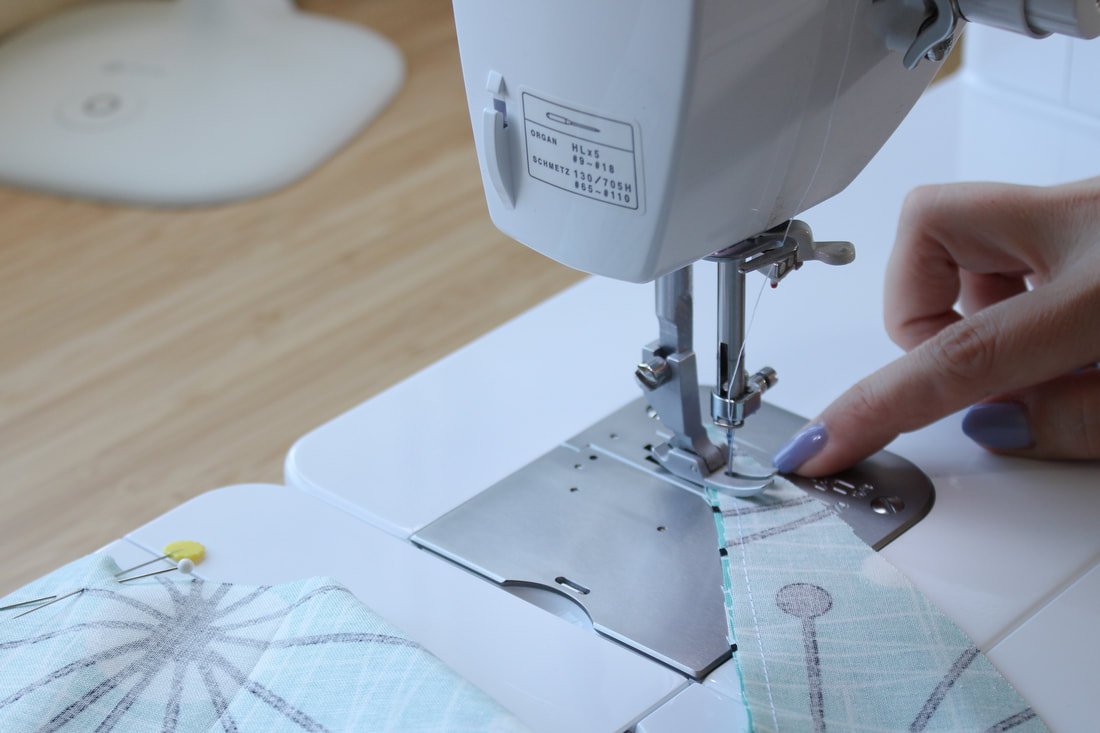
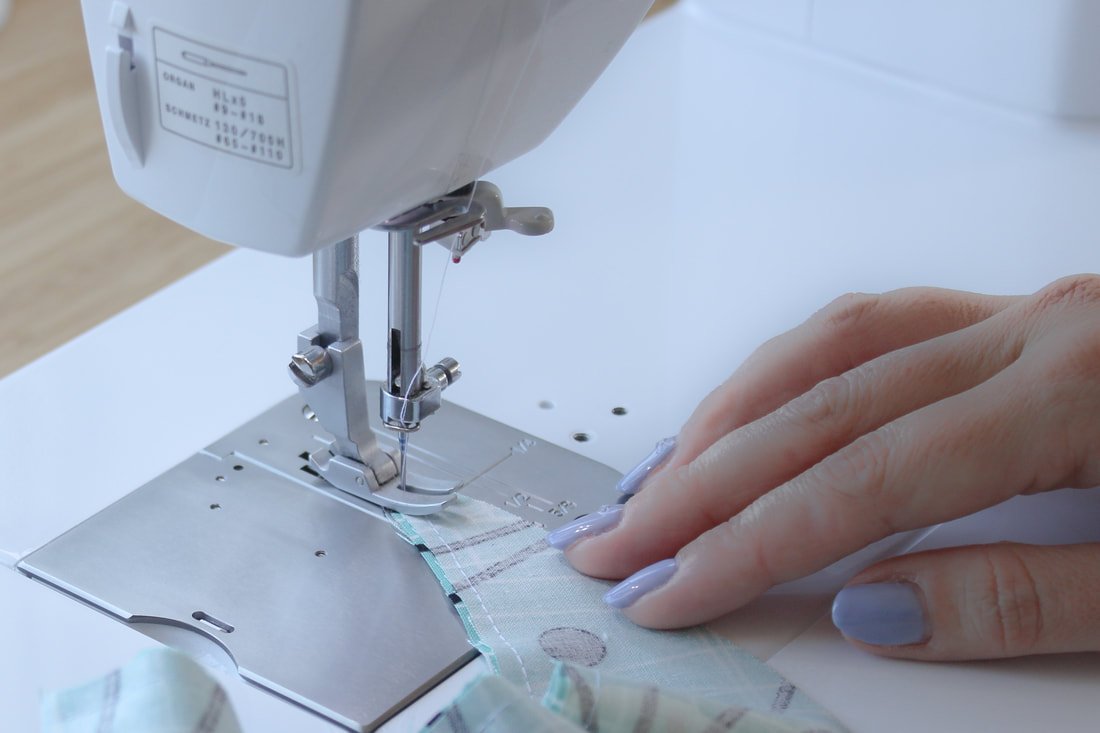
Back to the sewing machine to topstitch the gap closed.
Topstitch 1/8" from the edge, backstitching at the beginning and end. If you'd like to topstitch around the whole hairscarf, you can.
Clip any loose threads.
Press the scarf again. And, you're done!

Topstitch the opening closed.

Clip those little threads.

Ta-da! It’s finished and ready to be worn.
To wear the scarf:
Place the wide part at the back of your head just covering your hairline. The curved side will frame your face.
Pull the pointy ends upwards, covering the tops of your ears, and tie in a knot on top of your head.
This is perfect for messy hair days and curly-haired girls too.
To create a cute car show look, pin large curls on top of your head, tie this scarf up, and wear it with a pretty dress.
If you're going for a 40s style, you can pair the scarf with wide-legged trousers and a boxy button-up top. This hair scarf is for anyone looking for a quick and easy retro hairstyle!


So, what do you think of the pattern? It was easy, right? Do you plan on making as many as you can for the summer? I wear my hair up most summer days and this thicker style is what I've been yearning for! Easy & cute hair... yes, please!!!
If you make one or ten, please tag me on Instagram. I want to see them aallll! Use the hashtag #sewingtothemoonScarf
Let me know in the comments below if you've made this or plan to. I seriously can't tell you how overly excited this whole process made me. :D
Thanks for all the love and support on social media and on here! Sewing people are the best people.
Happy sewing,
Annette


DIY Advent Calendar
Sew up your own Advent Calendar this year. It’s an easy DIY Christmas project that will bring smiles for years to come.

Are you itching to do some holiday sewing? This advent calendar is a quick-ish sew if you want to whip up a fun Christmas item now! Get some stash-busting done too.
Tools needed:
rotary cutter or scissors
ruler
1/4 yard of a few different fabrics or scraps
1/2-3/4 yard of sturdy solid fabric for the front and back. (duck cloth, canvas, denim, etc.)
Matching thread
Iron on numbers, cutting machine with HTV vinyl, or template for sewing them on, if you don't embroider them.
All the sewing notions and a machine
A piece of 1/2" wooden doweling and twine for hanging.

Machine embroidered numbers on pockets
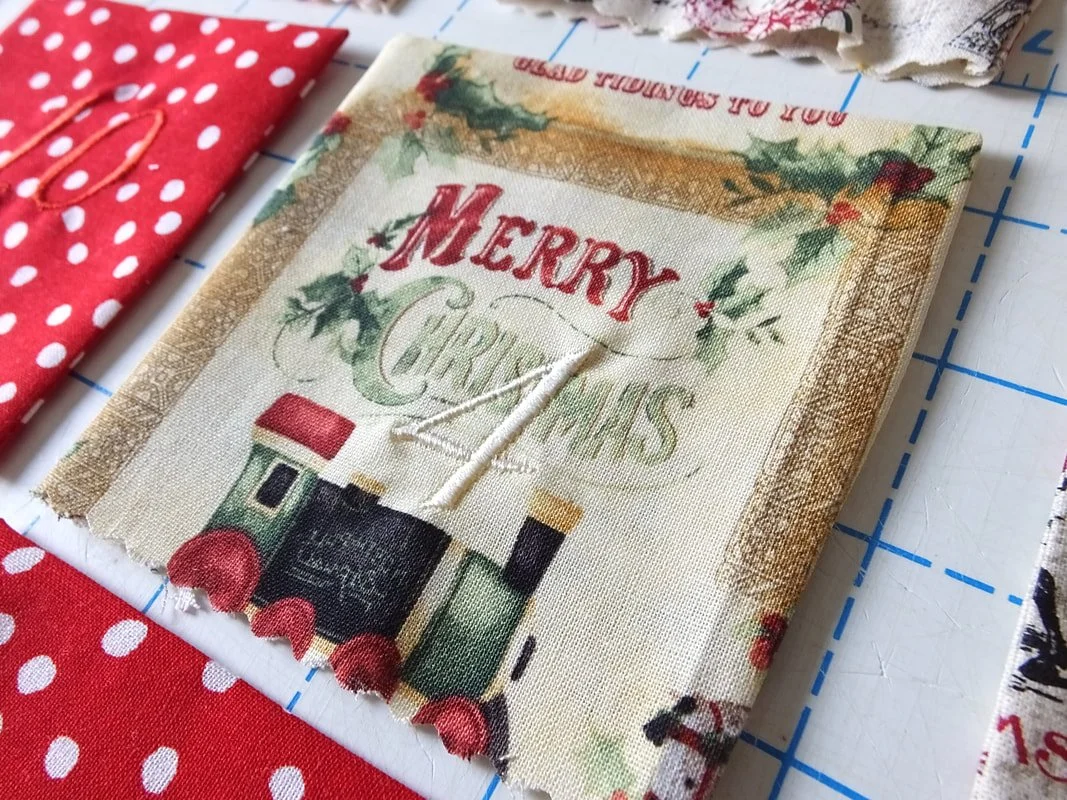
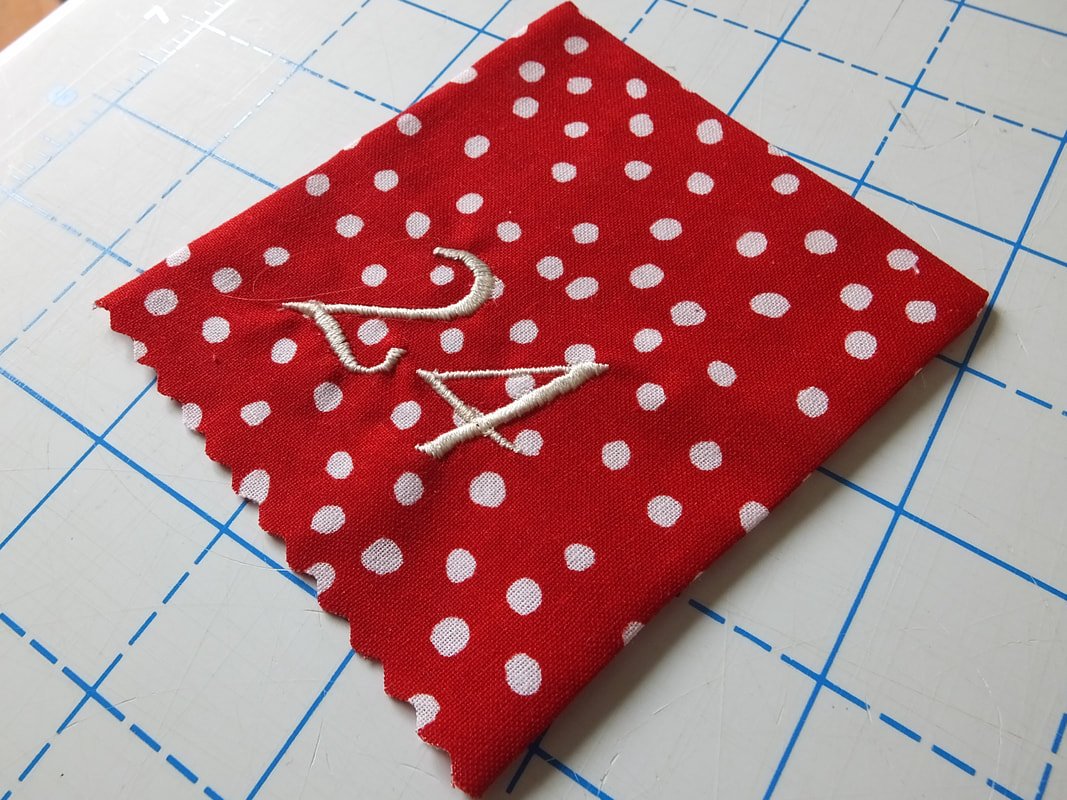
I chose Christmas fabrics similar in color, grabbed them, and started cutting. I liked the size of my phone, so I used it as a pattern. Find something around the house that is the size you want, and use that as a pattern template.

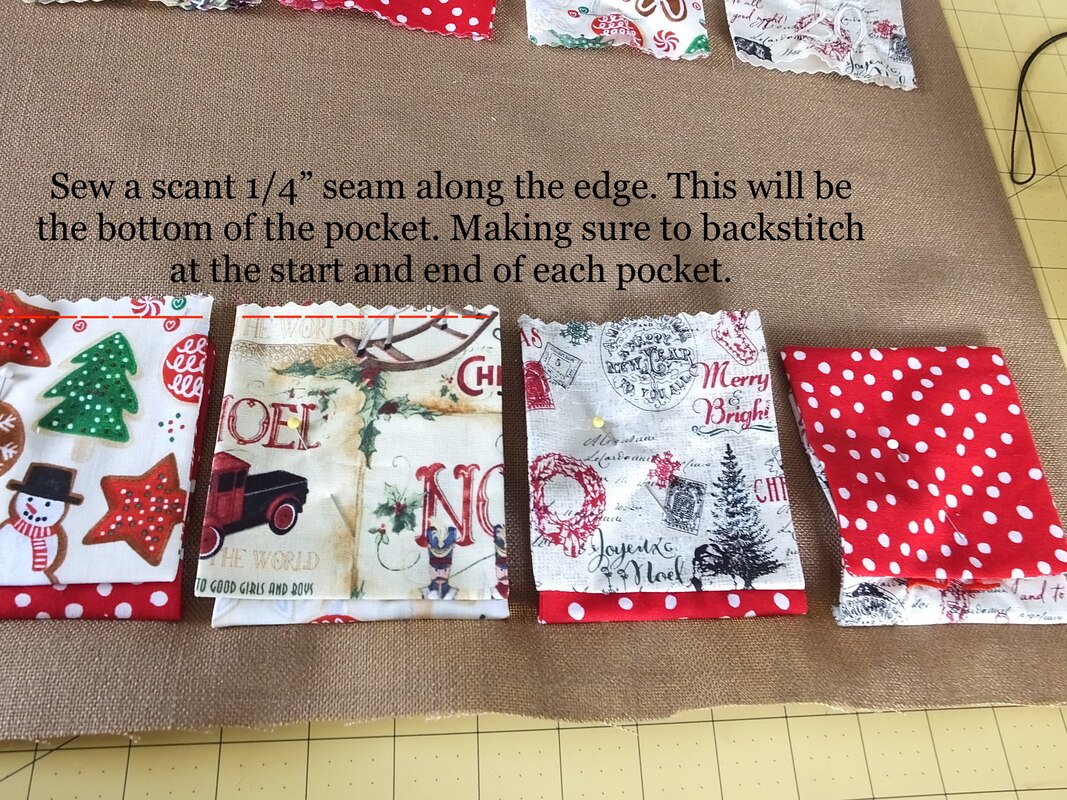
My phone roughly measured 6.5" by 3". I added 1 inch to the width and length for seam allowances to make rectangles. Fold them in half RST (right sides together) and stitch with a 1/2" seam allowance. Sew the sides only. Leave the bottom open, clip corners, turn out, and press flat.
**If you decide to sew or embroider the numbers on, do this before sewing the pocket together. If you use vinyl or iron-on numbers, you can add the numbers after the pockets are sewn and turned.
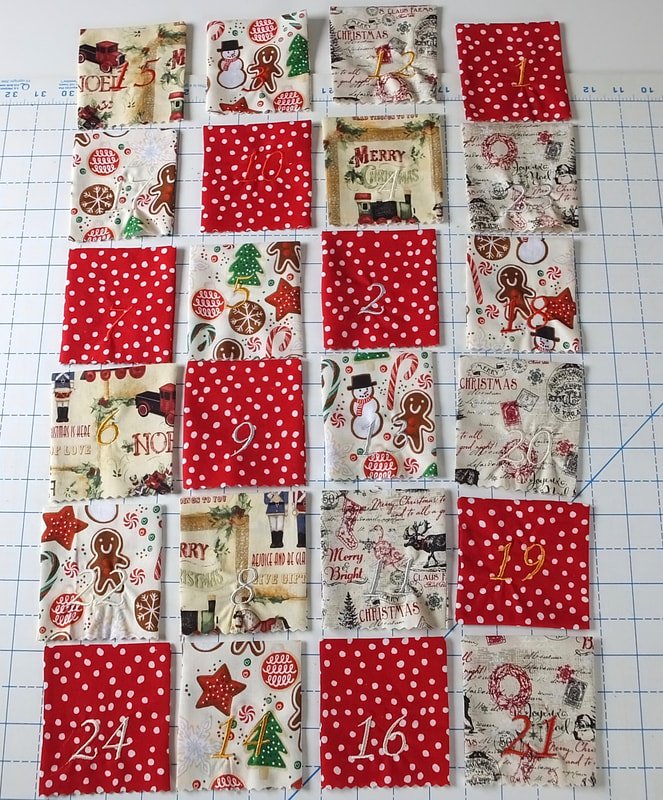
Organize them vertically if you’d like.
After you have your pockets made, lay them out and switch around until you decide which assortment you love the best or go crazy. I liked the taller version better.
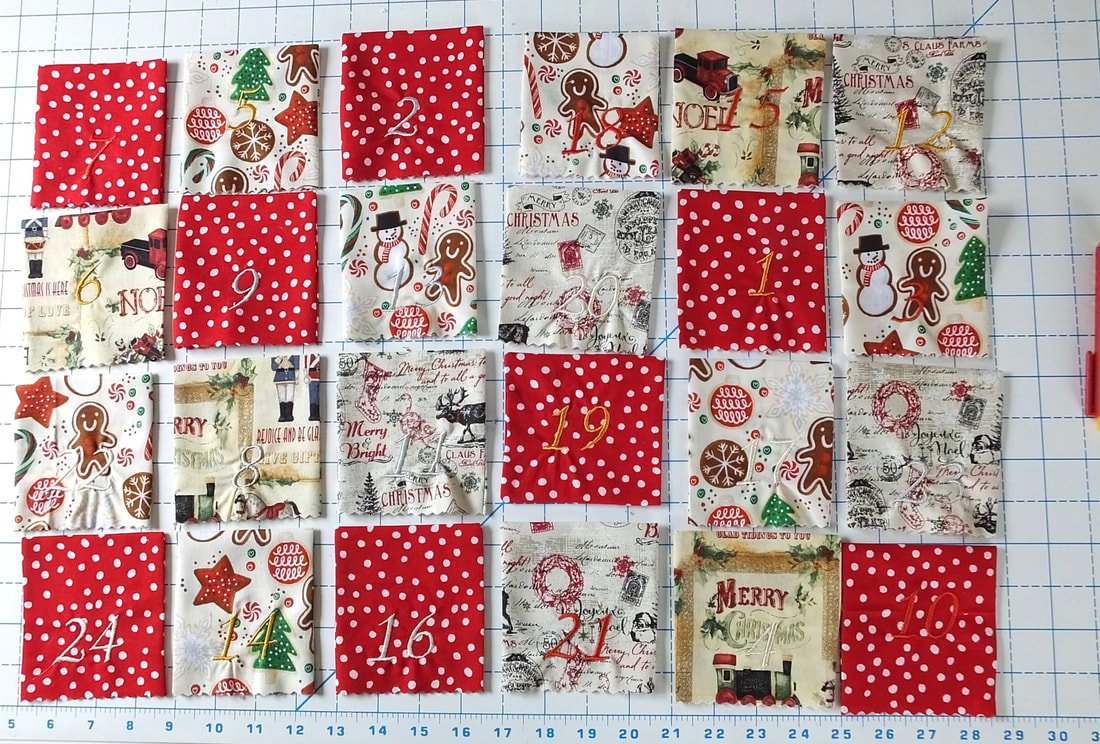
Arrange them in a horizontal way if you like that better.
I did this part backward, sorta. After laying the pockets out, I cut my fabric for them to be sewn onto. I measured the size of all the pockets and added 2" on each side. 5" to the top and 2" to the bottom. This allowed extra room for seams and the top to get turned down and stitched to create a loop for the wooden doweling.

I added length and width to the solid piece of fabric to sew the pockets onto.
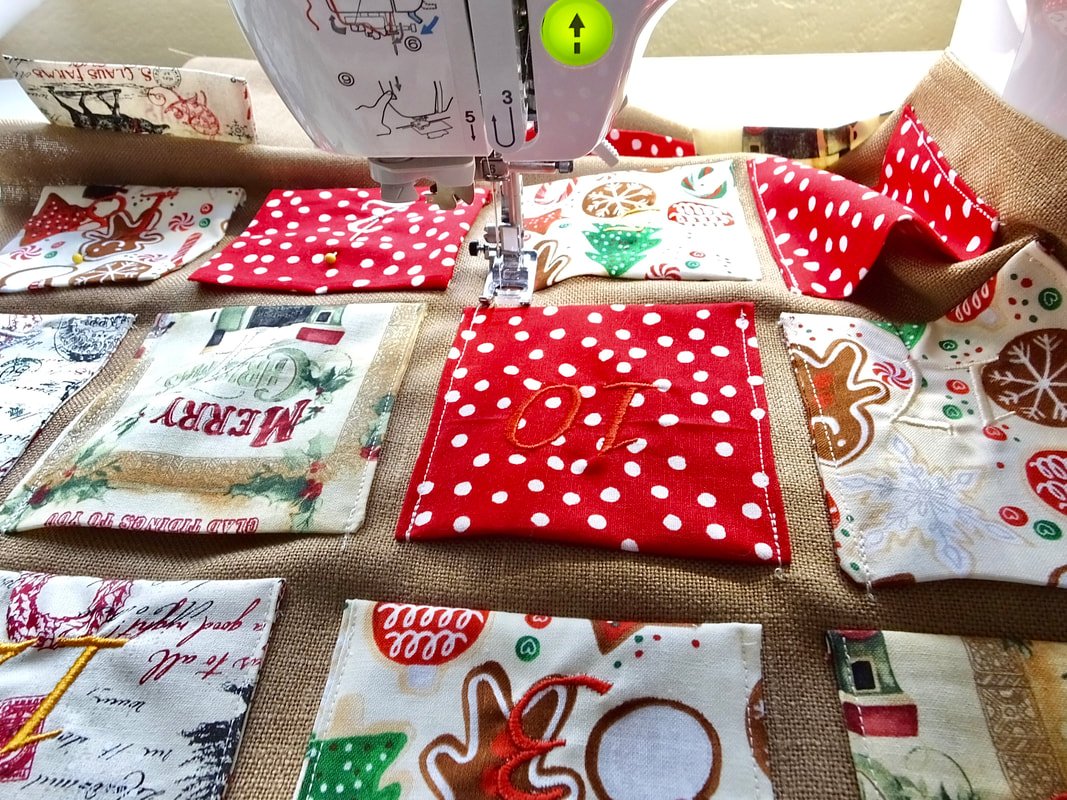
I worked from the bottom up, sewing the bottom row of pockets first. You do what works best for you. :)

Measure from the bottom row of the pockets to see how much room you want.

Flip pockets the wrong side up and stitch along the open edge.
I sewed the second row 1/2" above from the top of the first row. You decide on your own spacing.
I decided to sew the bottoms of all the pockets on first. Then, I flipped them up to sew the sides. As you can see, I used pinking shears to keep the edges from unraveling. This whole project was on the fly and meant to be fun, without overthinking. Sometimes you just gotta sew something! LOL

Sewing the sides. Start from the bottom and go up, backstitch at the beginning and end.
Be sure to backstitch at the start and end of each pocket side. I also added extra stitching at the top where little hands will reach in and out to discover the treasures inside.
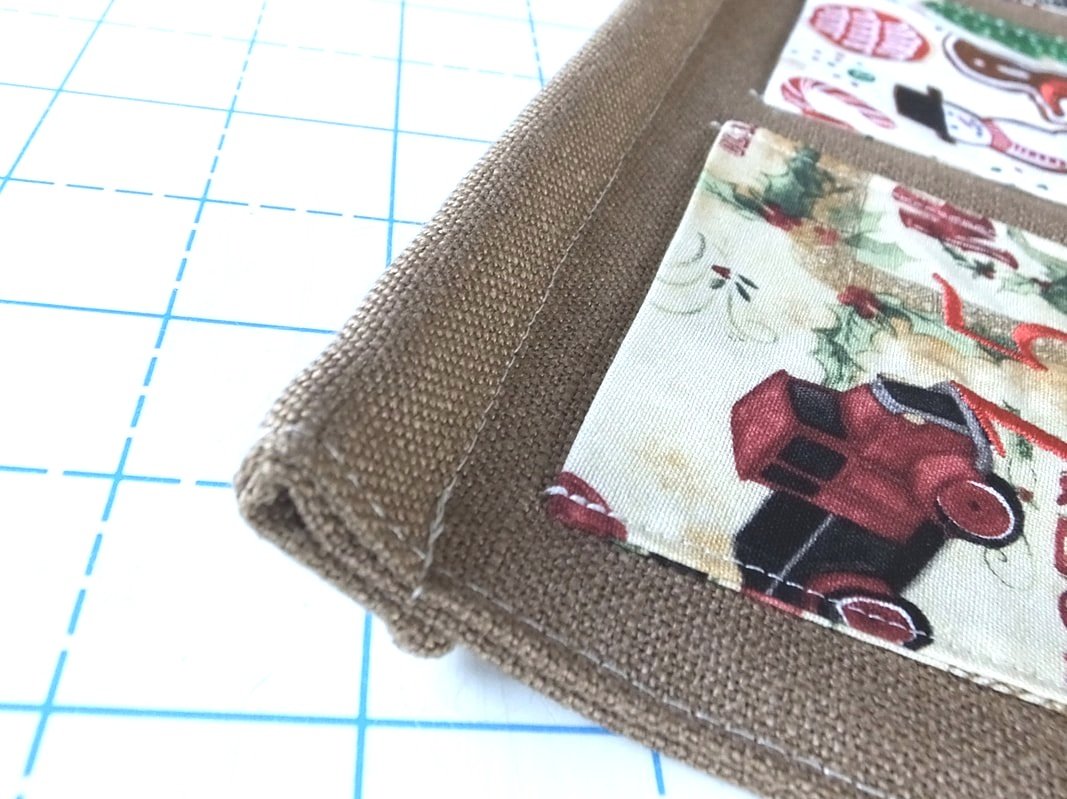
After you have all the pockets sewn on, it’s time to put it together.
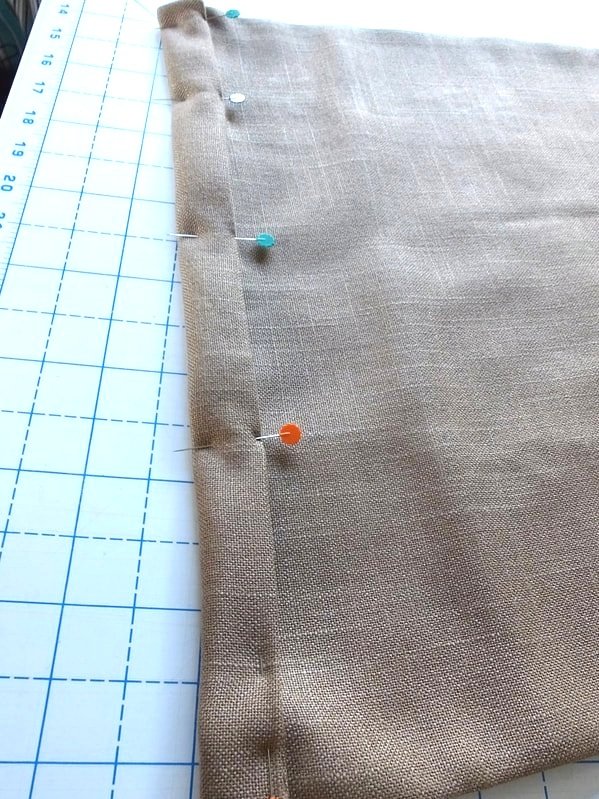
Grab the backing fabric and pocket piece, and lay the pocket side RST on top of the backing fabric.
Pin or clip the pieces together, and sew a 1/2" seam allowance. Leave a 4"-5" gap at the top for turning. It’s a lot of fabric and layers so, you’ll want a nice size gap for turning out.

It’s starting to come together and look like an Advent calendar now.

Leave an opening for turning.
Clip the corners and trim thread tails. Turn out and top stitch around the whole calendar.
Decide how big of a loop you need for your wood doweling to slide through, pin, and stitch to create the loop.
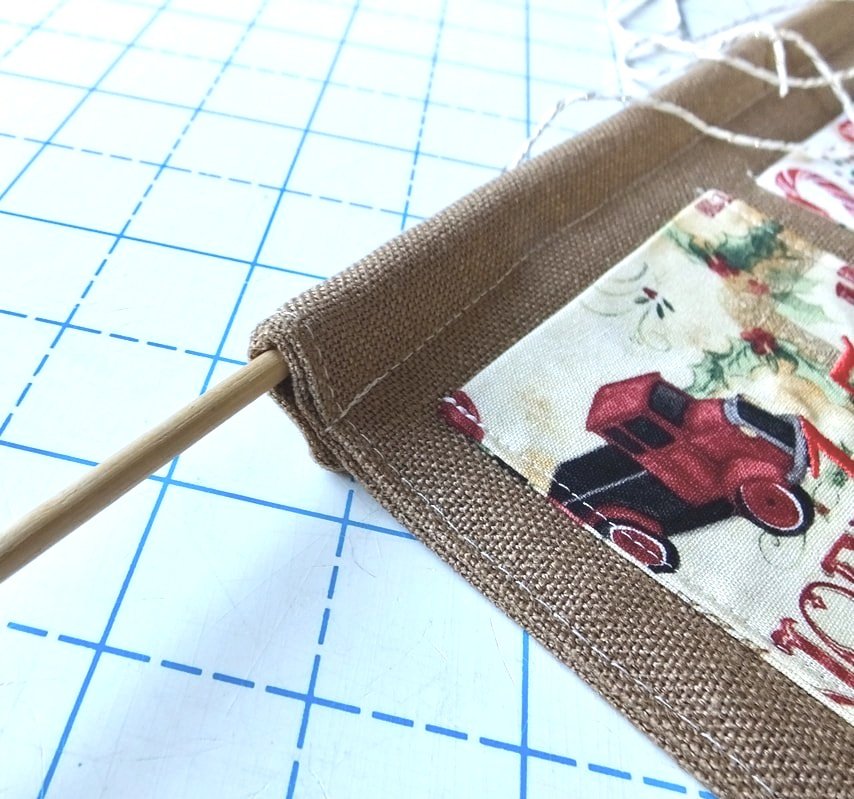
Slide the dowel through. Tie string or twine on each end with a double knot. Hang up and fill it with lots of little treasures.
You're done! Yay!!! Now, what do you fill it up with?
Filling it up
What are you going to fill the pockets with? Who is going to use the advent calendar? Little ones or big ones? I've listed some ideas below of what to put inside for all ages. Wrapping each item would make it extra fun and keep wandering eyes from peaking.
Chapstick or lipgloss
Fruit snacks
Small fruits, a tiny orange
Movie theater ticket
Handmade coupons
Small packs of beef jerky
Cash
$5 gift card
Hair elastics or barrettes
Small lego sets
Candy
Toy cars
Earbuds
USB stick
SD card
Crayons
Package of nuts
Hot cocoa packet
Socks
Soft gloves
Squishy toys
Stress ball
These are just a few ideas, the sky is the limit on fun little treasures. Just think of anything that will fit in the palm of a hand.
Well, I'm off to buy some items to fill our calendar with. If you think of other ideas, please share those in the comments below. The more ideas, the merrier! Are you going to make an advent calendar? Or make one as a gift? Let me know in the comments below.
Merry Christmas,
Annette

How to Sew a Custom Handbag
Sew a custom sized bag using your own dimensions. It’s sew easy!

I made this cute handbag as a fun little distraction during quarantine. I planned on using it sooner than later, but we all know how that turned out. Ha! Days turned into weeks and it's all a blur from there.
I had some marine vinyl leftover from another project and I came up with this little purse.
Want to make a cute little handbag for your next shopping trip?
Here's what you need:
1/2 yard of marine vinyl or other faux leather-type fabric
1/2 yard of cotton fabric for lining
Thread
Sewing machine and notions
Microtex needle
Scrap paper for making a pattern
Ruler and pencil
Interfacing if needed ( I didn't use any. Gasp, I know)
Purse feet (optional)

Cut 2 outer, 2 inner, 2 interfacing pieces.
Decide on your sizing
Start out by ironing any wrinkles in your lining fabric.
Grab some paper or cardstock, freezer paper is my go-to because it's inexpensive and wide.
Figure out how big you want your bag to be.
My pattern size is 9" tall x 14" wide.
Mark 2" square cutouts on the bottom of the pattern. Cut out the paper pattern.

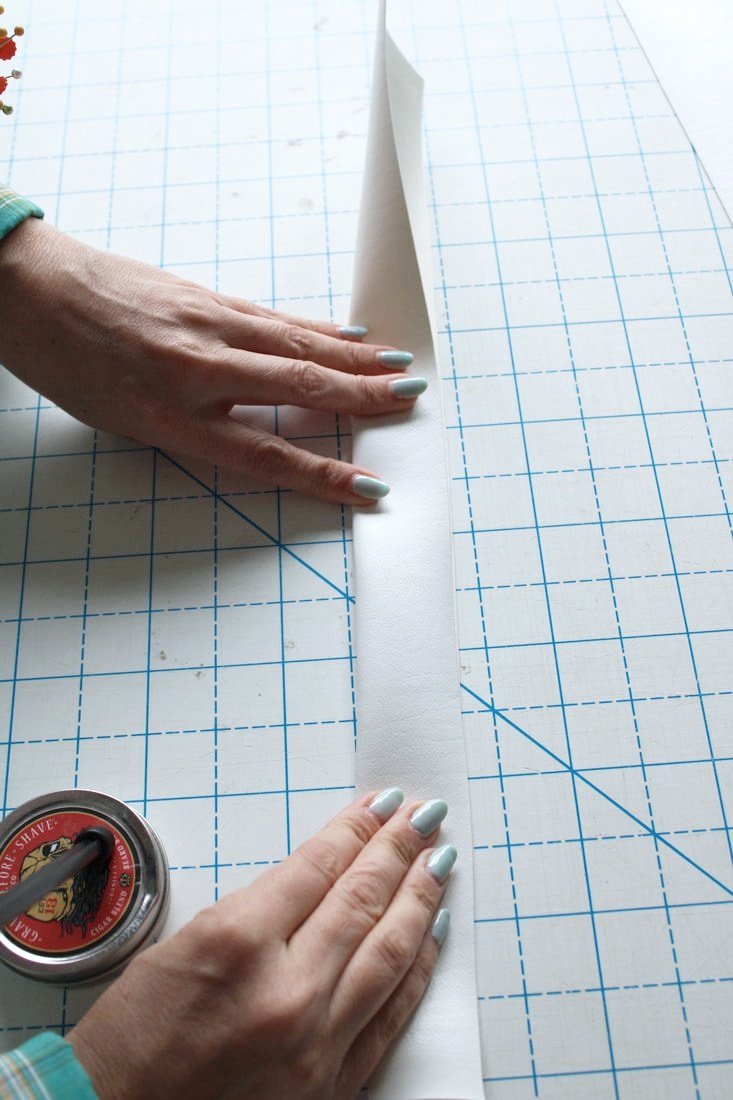
Once your pattern is made and cut out, it's time to trace onto the fabric. Cut out 2 pieces of vinyl and 2 pieces of lining fabric. Iron on or sew in the interfacing to the lining.
Next, cut 2 strips of the marine vinyl 3" wide by 18" long. These will be your purse straps.
If you'd like to add a pocket, make that now. Decide on the size you want and cut a piece of fabric twice as long. You will fold the fabric in half RTS (right sides together) and sew all around leaving a 3" gap for turning out.

Press the pocket flat after you turn it out. I stuck my phone on top to figure out how wide I wanted my pocket widths to be. They aren't exactly the same width. Draw a line where you want the pockets to separate with chalk or a water-soluble pen.
Pin in place and stitch onto one lining piece. Sew in a "U" shape, do not sew the top you want it to stay open so your items can go inside. Reinforce the openings by backstitching a few times. Press.

Pin sides and bottoms together. Leaving tops open.
Using clips, clip the vinyl pieces, right sides together and pin the lining pieces RST. Sew the sides and bottoms using 1/2" seam allowance. Be sure to leave a 3" gap in the lining for turning out. Press the lining seams open. You shouldn't iron the vinyl, it may melt. Just finger-press those seams. Set both pieces aside.
Let's make the handles
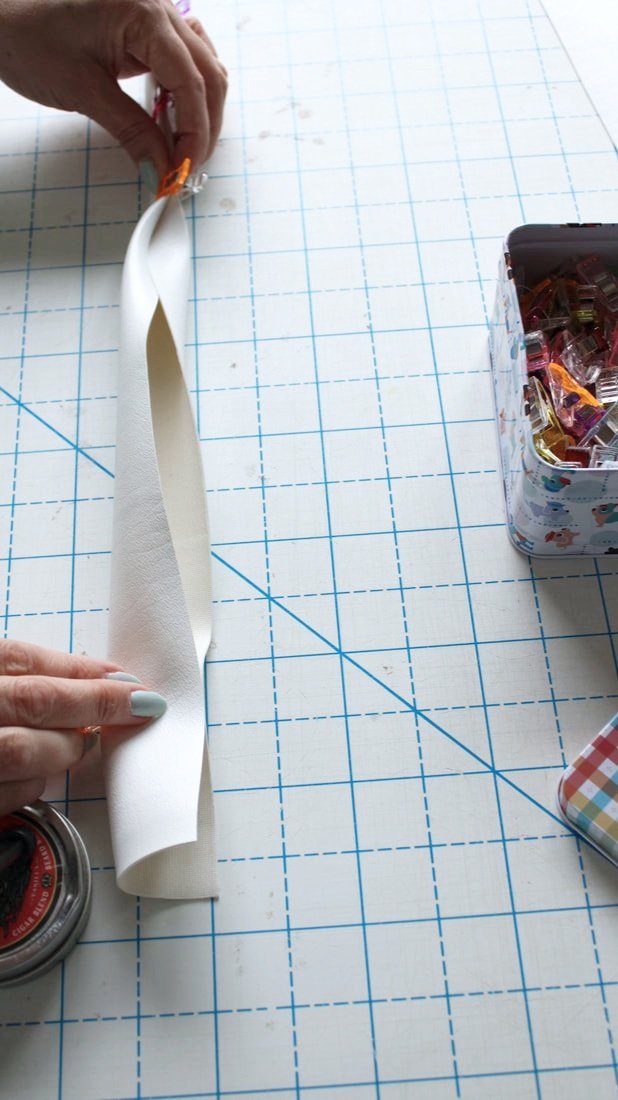
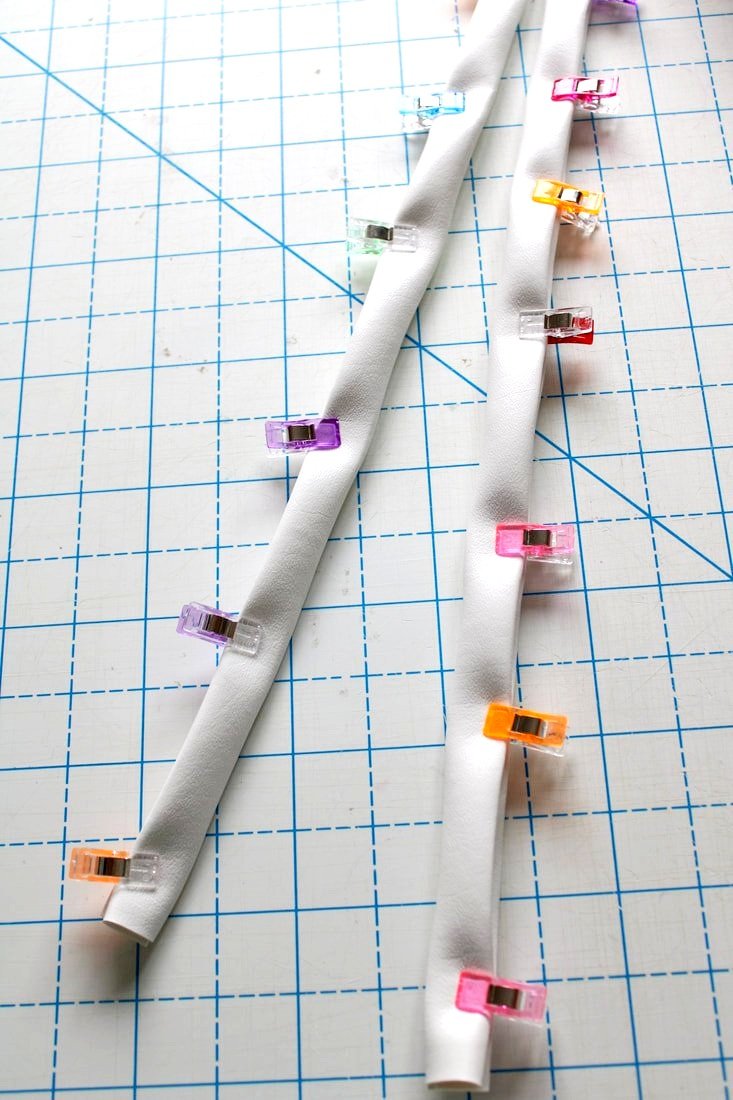
Grab the 2 long strips of vinyl and all your clips. You do not want to use pins because they create permanent holes. Yikes!!
If you don't have fabric clips, use double-sided tape, chip clips, hair clips, your child’s teeth, or anything you think that will be strong enough.
Fold in half and carefully fold those sides into the middle. It takes some finagling, but you got this! Don't let the vinyl beat you. LOL!!
Clip along the end once you have it molded into place.
Sew the open edge first, then the folded edge.
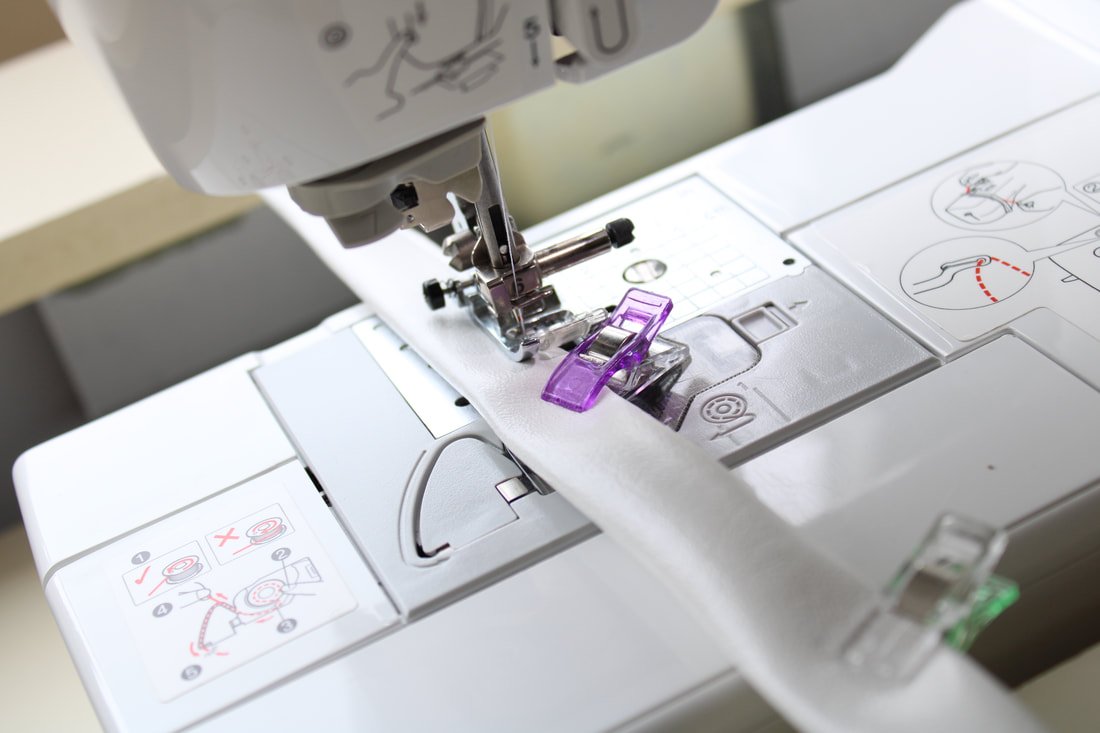
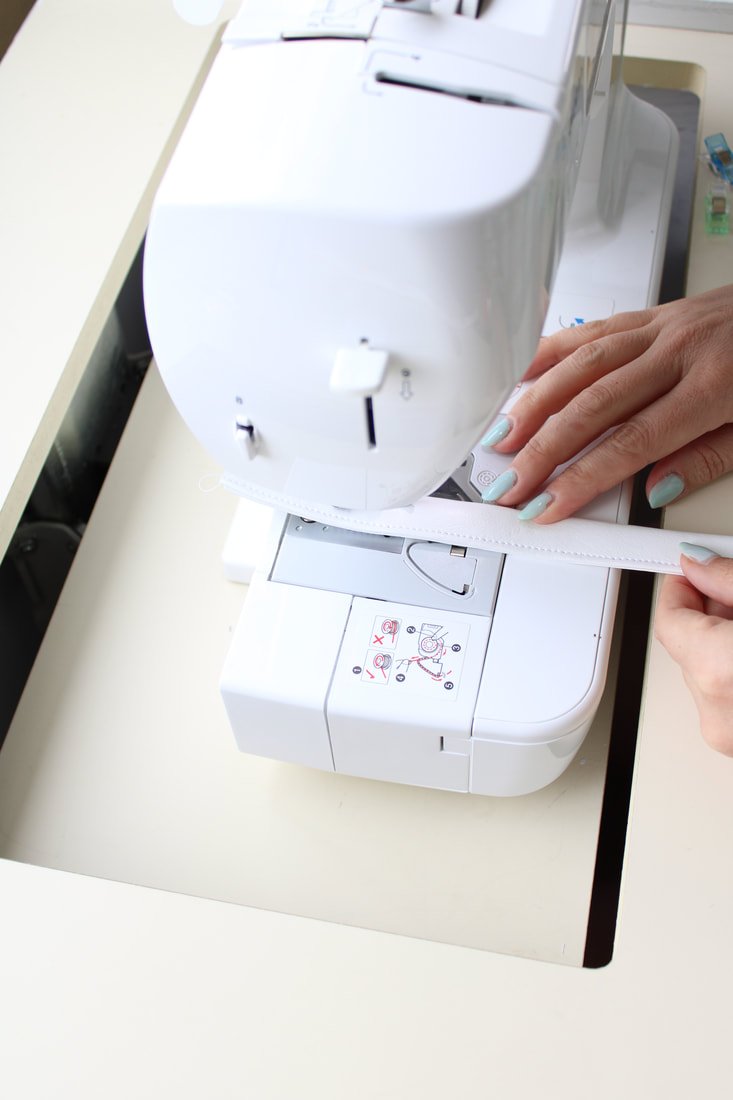

Scroll through the photos to see how to create your handles. I use this method for all of my purse handles.
Grab the purse's outer and inner pieces, you're going to box the corners before sewing everything together.

Boxing the corners is easy, pinch the seams together and sew 1/2" away from the edge. Do this with both lining and outer bag corners.
Your seams and corners should match nicely like the photos above. If they don't match perfectly, no biggie. You'll be the only one who knows and I'm not telling anyone. ;)
*If you have a set of purse feet lying around, you can add those following the feet instructions. I didn't have any, so I didn’t add feet to this purse. They do make a nice addition though. Next time.
Next, you're going to stitch the handles to the bag to keep them in place. Mark how far you want them from the edge. I positioned mine about 2" from the side seams. Make sure they are flipped the correct way and not twisted.
Base stitch them to the bag with a 1/4" seam. This is just to keep them from moving while you sew the bag pieces together.

After the handles are stitched in place, grab the lining piece. Keep the outer bag piece flipped inside out. Turn the lining inside out as well. Both pieces should be facing right sides together. This is important, check twice. ;) You should see the ugly sides of the fabric for both pieces.
Using clips, attach the lining to the outer matching the side seams.
Sew around the top with 1/2" seam.

After you sew the lining to the outer, reach inside and flip the bag out. This takes a little more patience because the vinyl doesn't want to give. Just tell it who's boss and that it'll be happier once it comes to the bright side. It works, I promise!!


Bagging Out
Find the lining hole.
Reach through the hole and pull the bag through the lining.
Pull. Yank, lightly. Pull some more to get the vinyl out.
After you pull out the lining, push it back in and make sure everything fits nicely. Poke out all the corners.
Look over the handbag and nothing is wonky, and there aren’t any seams with holes, pull the lining out and sew the opening closed. You can do this by hand or machine.

Sew the opening closed.
Stuff the lining back into the bag, topstitch around the whole top, and you're done! Yay!!

I decided to keep the lining showing for an added pop. However, the lining doesn't sit in the bag perfectly after doing this. If you decide you like this look, add 1" in length to your lining pieces. This was a spur-of-the-moment sewing project which are my favorite because I can experiment. I like the bag size for a day out. However, I would make it 2-3" deeper if I used it as an everyday purse.
Oh, and I also added a little tie to the bag as well. If you have enough extra fabric, you can make one too. The white vinyl was just too plain and boring for my taste.

Cut a strip about 14" long by 5" wide. Fold in half and cut the short ends at an angle, if you'd like. Stitch the open ends, leaving a 2" gap for turning.
Clip your corners, turn out, and press. Stitch the opening closed and tie it onto your bag handle. Now you have a cute accent piece on your purse.

Where are you going to strut your new bag first? The mailbox? The grocery store? The living room? The possibilities are endless. Haha!
Oh, quarantine...
I think I want to try making this bag again but with darker vinyl. The white is fine because it'll wipe clean. But, I'm thinking bright yellow or blue for summer would be fun. Let me know if you make this bag. Remember, you can alter the sizing to your liking- make it taller, wider, shorter, etc. Sewing is the best, isn't it?
Thanks for sticking around for this tutorial!
Virtual high fives and hugs,
Annette
