DIY: Sweatshirt Into Tote Bag

When I was coming up with a title for this post, I kept thinking of the word Upcycle. But, I don't see it used as much anymore. Do you still use the word upcycle? I opted for the DIY term instead. Anywho, onto the post.
Have your kids outgrown some of their favorite clothes? They can't stay little forever, right? Maybe they have something they used to love that no longer fits. You might have a bin of clothing that you don't want to donate or don't know how to put to use.
A friend asked me if I'd make a bag from her daughter’s old hoodie. It was a rare occasion and I said yes! I was in a rut with my sewing and thought creating something new would pull me out of it. It worked! The result is super cute and useful, too. That's a win in my book!

If you have an old hoodie packed away that you don't want to get rid of, I have the perfect project for you!
I scoured the interwebs looking for a hoodie up-cycle project and found nothing. I was pretty surprised nothing showed up. There were tons of T-shirt projects, but nothing for sweatshirts. So, I went head first into this challenge. After reading this, I hope you'll pull out those beloved hoodies and put them to use.
Supply List
Old Hoodie without a zipper
Ruler
Rotary cutter and scissors
Chalk marker or disappearing ink pen
Sewing machine
Serger (nice but, not necessary)
Clips (pins work but, it's a struggle because the fabric is thick)
The usual sewing notions
A little creativity ;)

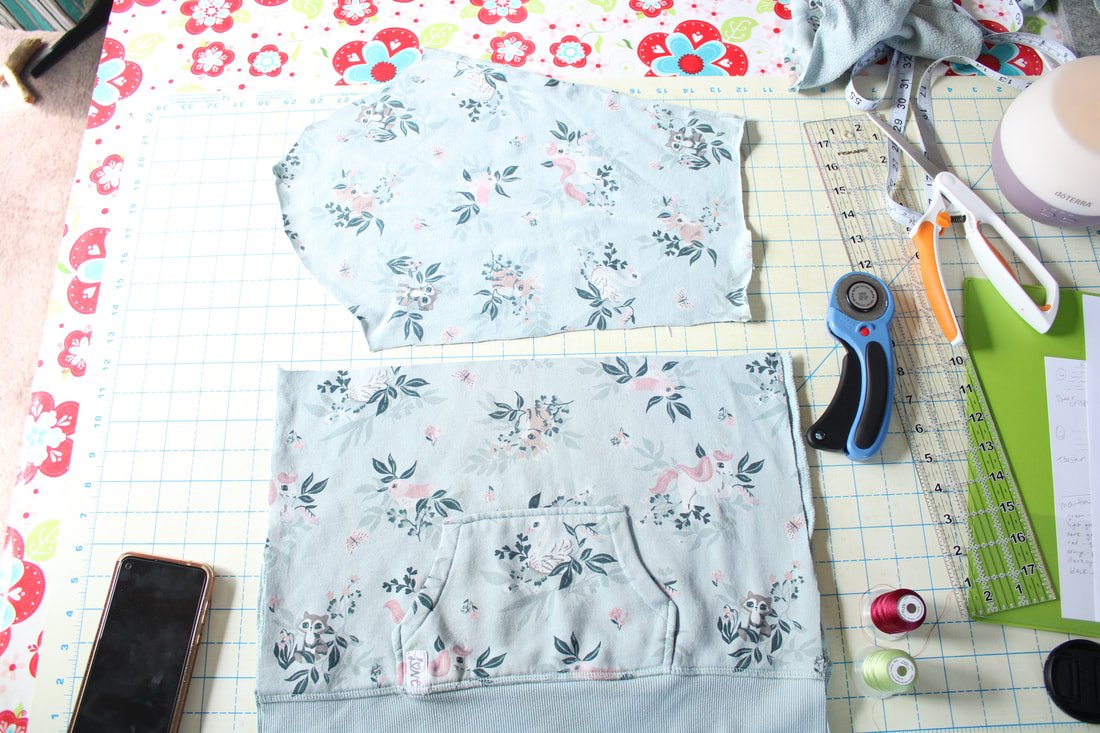
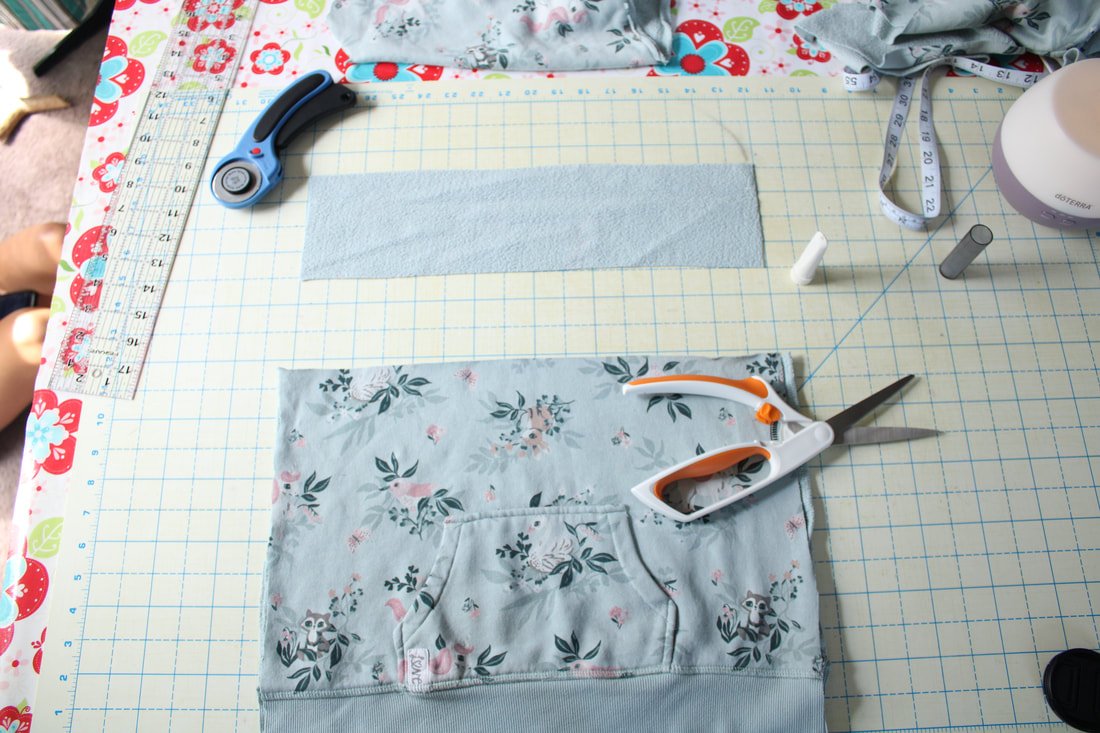
First, you'll want to measure the front. You need to figure out the size of the square or rectangle your bag will be. Use chalk or pen to mark it, and cut. I used as much of the sweatshirt as I could because it was a child's hoodie. I decided to leave the bottom ribbing on the sweatshirt to act as the bottom base for the bag.
Next, cut off the side seam allowances to remove bulk. Cut apart the hood, cuffs, and sleeves and set them aside.
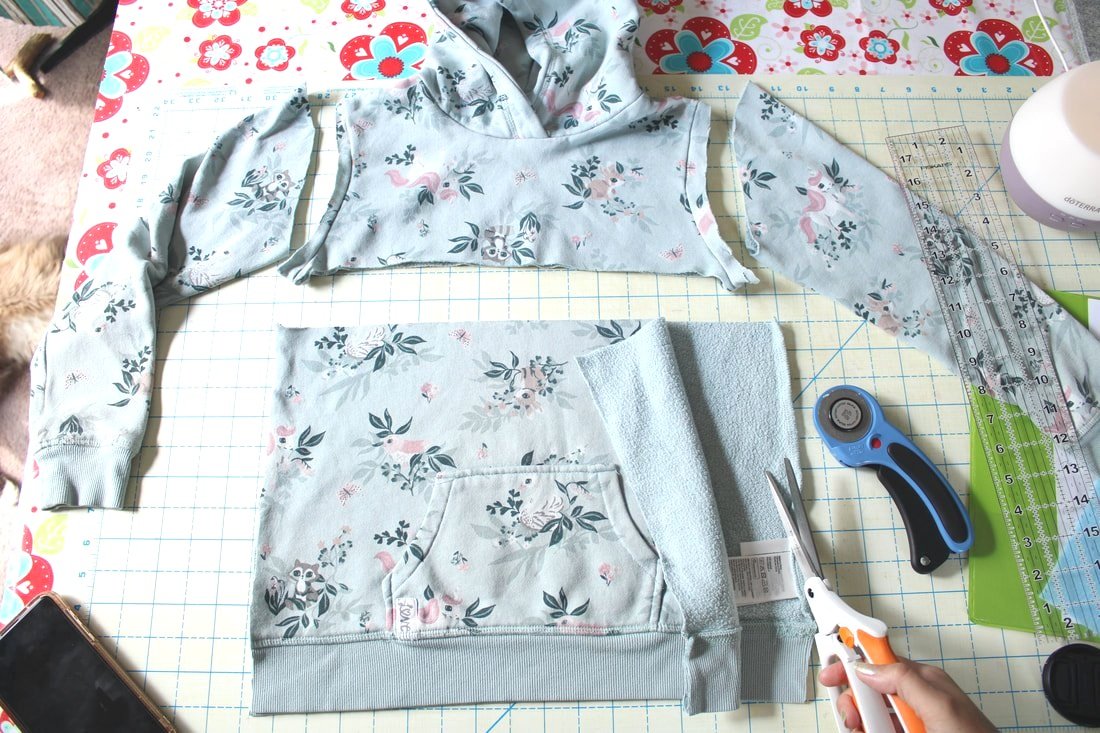
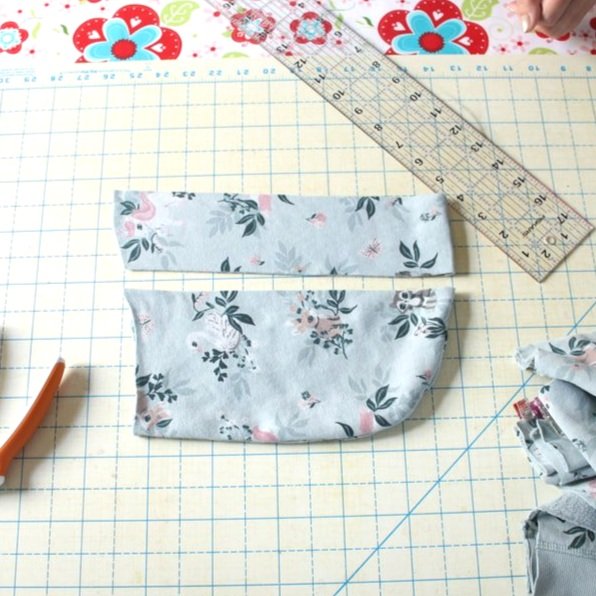
Measure your sleeve length, you'll want to use as much of this as possible for bag detailing. Cut from the shoulder to the wrist, it has the least amount of stretch. I used as much width as I could get away with.
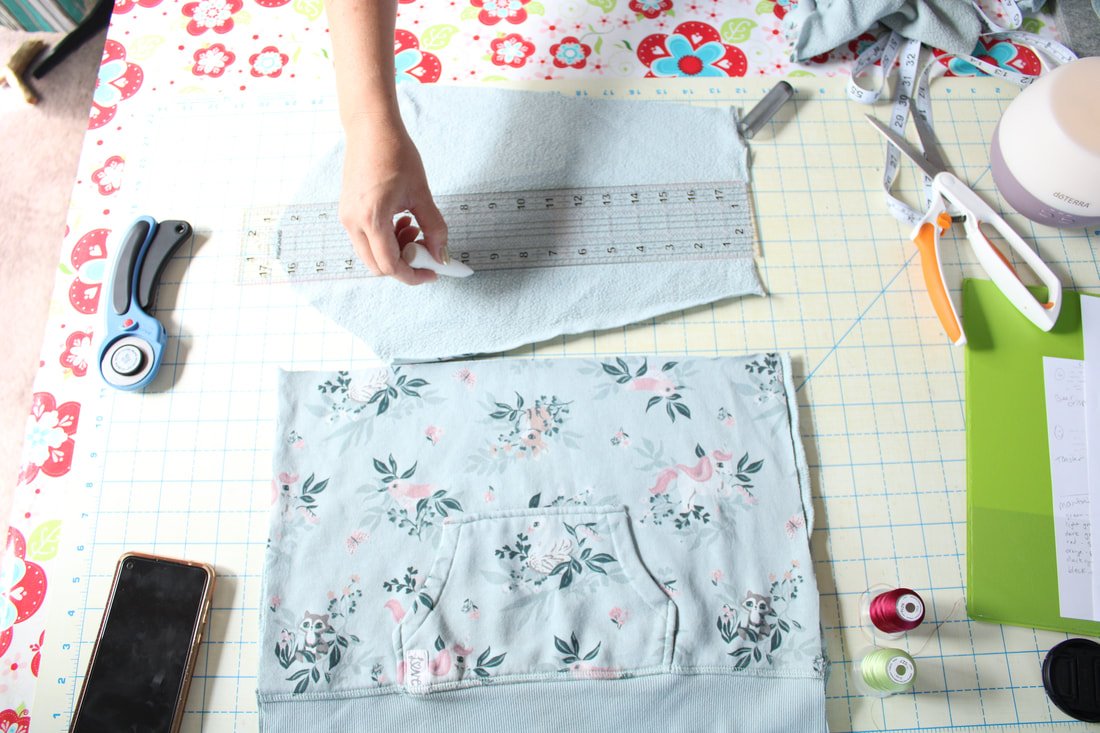

Cut each sleeve strip the same length and width. Pin together, wrong sides together. These will get sewn to the bag top, to add height and some detail. You can baste the edges together before sewing if you'd like but, it's not necessary.

Pin/clip the strips to the top of the bag front and back. Don't sew these on yet.
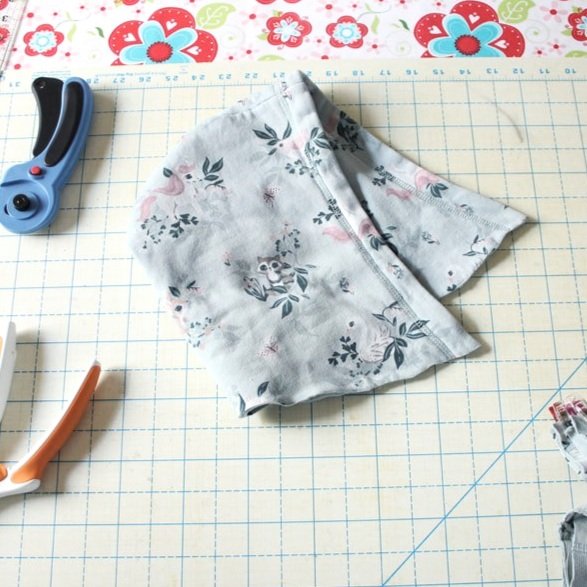
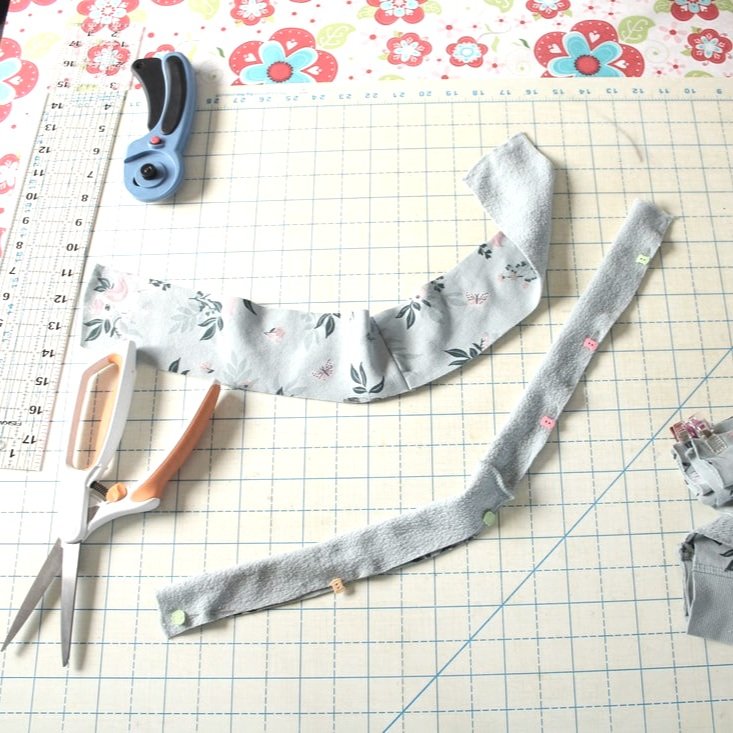
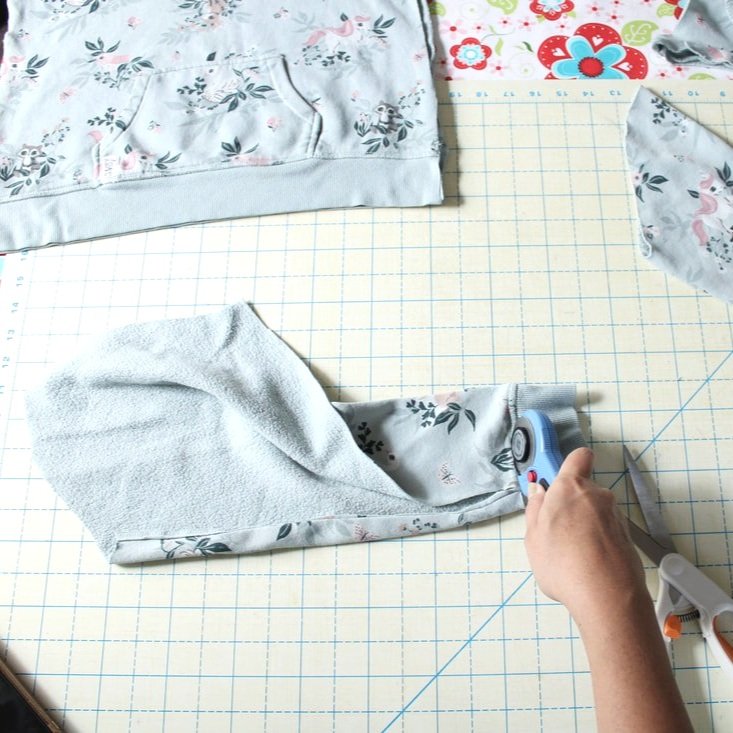
Take the hood and cut off the seam around the face opening. Both layers should separate and you'll have 2 hood pieces. Take one and measure and cut a 3" wide piece using the whole length. Do this with the second hood. These will be your bag handles.

Clip the handles inwards 2-3" from the sides. Sew with a 1/2" seam allowance. Do this on the front and back pieces.
There wasn’t a method to my madness. I didn't make this bag in any particular order.

I used a 1/4" seam but, you should use a 1/2" if you can. I was working with a small hoodie and decided to use a small seam allowance where I could.
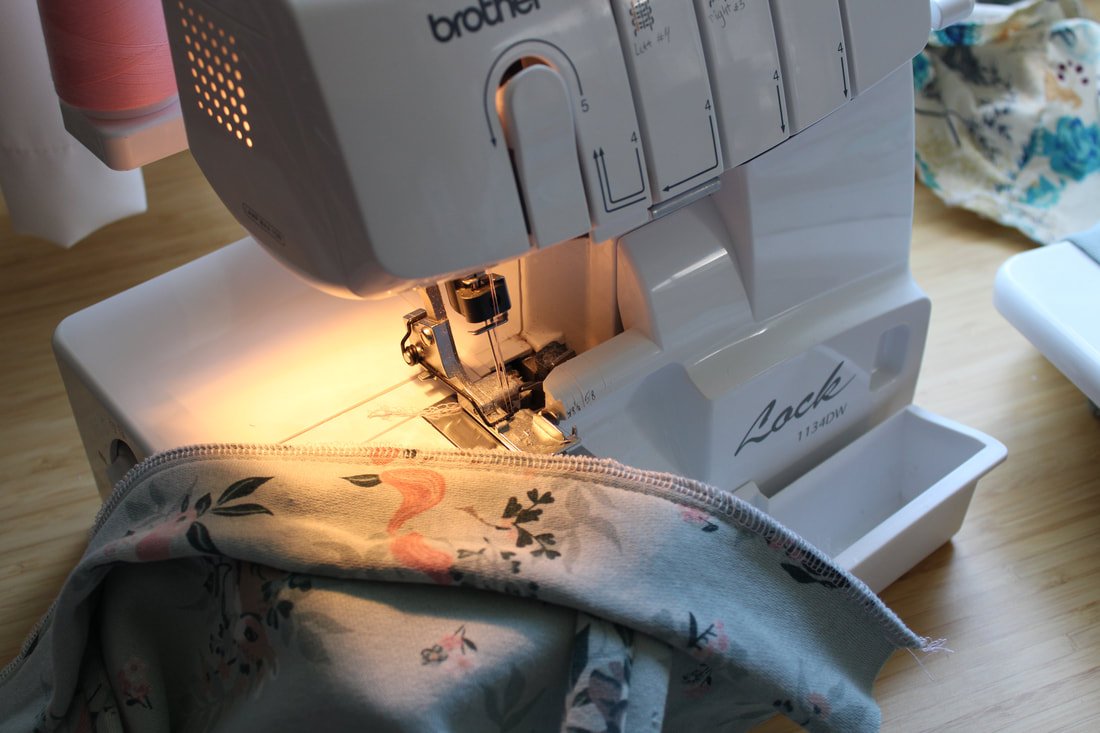
If you have a serger, serge the edges to make it nice and clean. You don't need to do this, the fabric won't fray. I made this for something else, so I really wanted it to look nice inside.

Topstitch with seam allowance pointed down. Move handles out of the way.
Move the handles out of the way and topstitch the seam allowance down with 1/8". This will give the layers extra support.
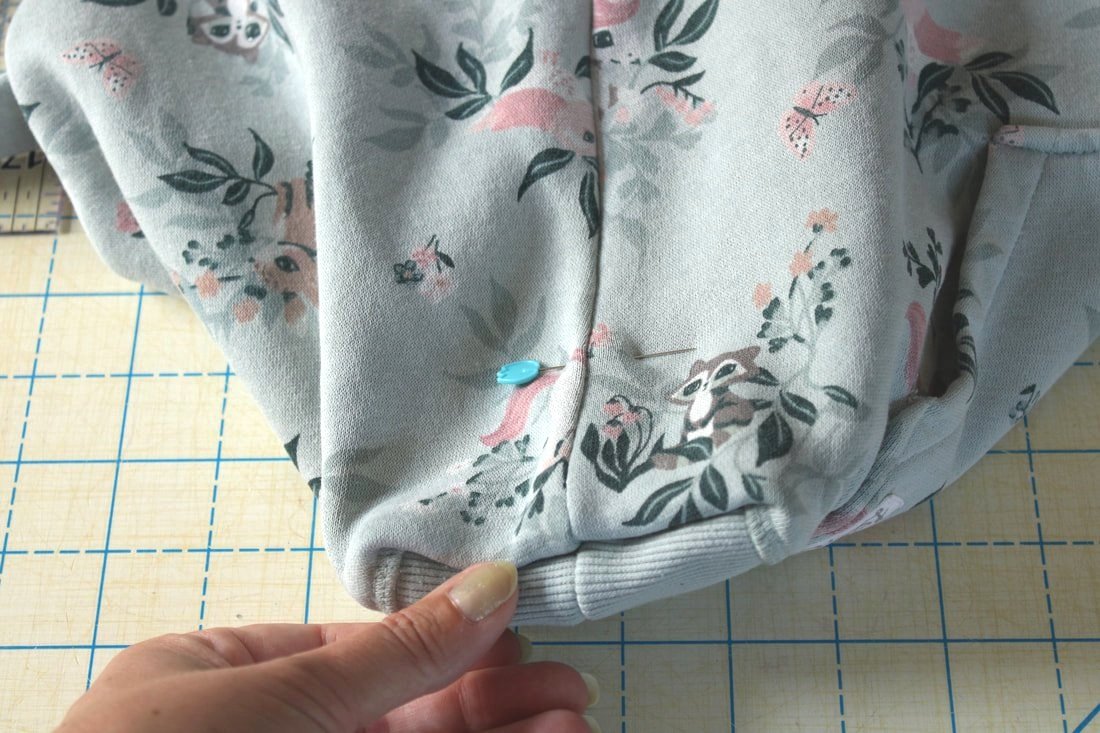
Next, you're going to clip the sides and bottom together. Sew from one opening, down, and around to the next top. Make sure to backstitch at the beginning and end. Don't sew the top.

If you want to leave your bag like this, you're done! Ta-da! Super easy and it used up a hoodie that has probably been in a drawer or bin, unloved for a long time.
If you'd like to box the corners, keep following along.

Pinch bottom corner and match it the seam. Sew across.
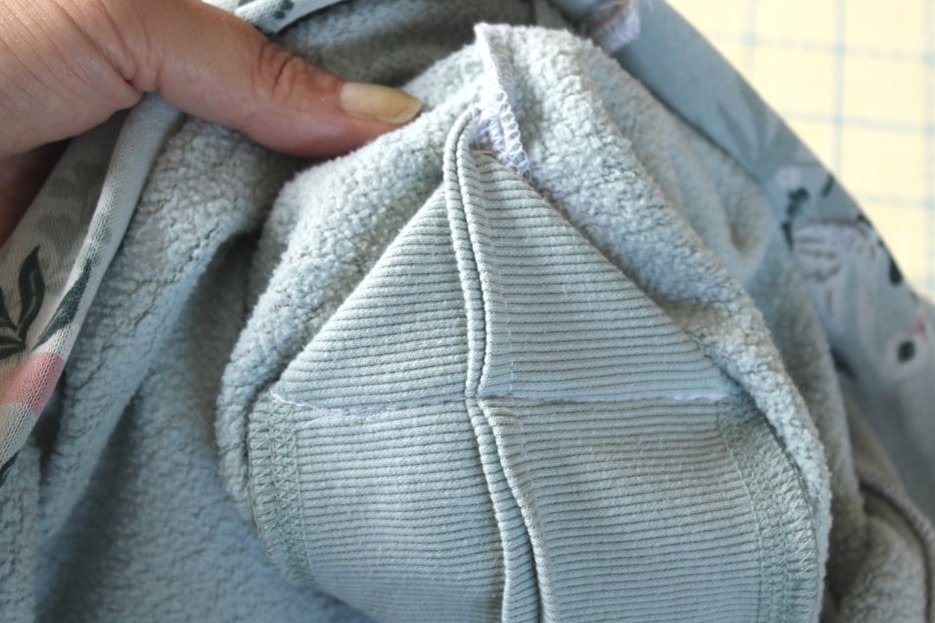
I usually cut the triangles off but, decided to leave it on this time. The extra weight helps hold heavy books, tablets, etc. I stitched in the ditch to keep the triangle from flapping around inside. Just fold the triangle up and pin it in place, then stitch in the ditch (seam in the seam).
Or, simply cut off the excess triangle.
Ta-da! You're all finished. This would make a great gift for a child or anyone with a beloved hoodie lying around.

All finished!
The bag is a good size and will be loved and used for years, I'm sure.
I loved leaving the front pocket on so, others would know if was from a hoodie. Such a cute turnout.

This was the fabric that was left over. Not too bad.
There wasn't too much leftover fabric. I'm sure you could make another cute bag or add pockets inside.
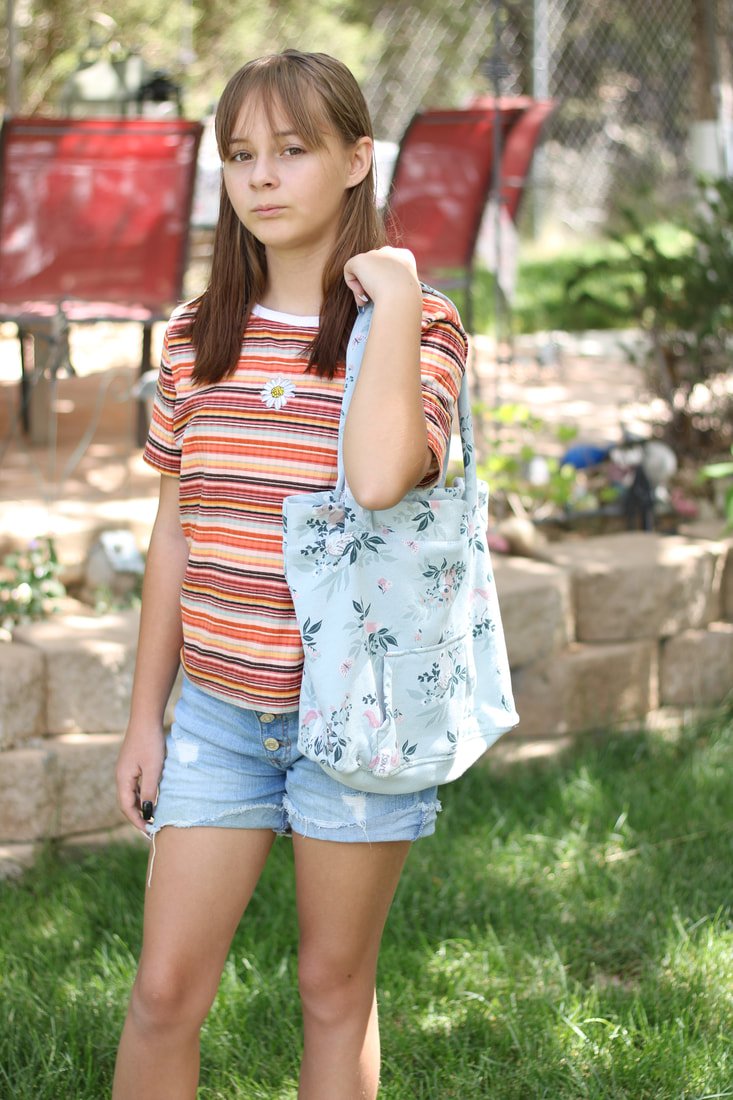
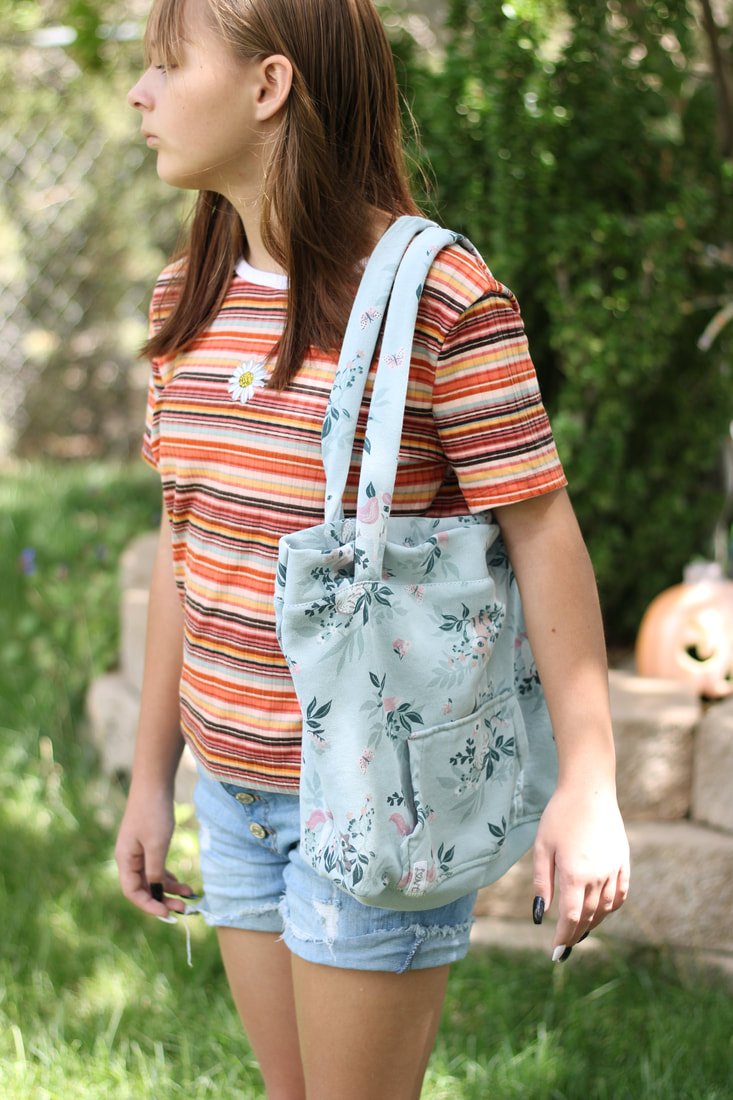
I had my daughter model the bag so you could see the size reference. It's a good size!
Thanks for reading along!
Happy hunting and happier sewing,
Annette