
Pattern Reviews, Sewing Hacks, Tips & Free Patterns
Sewing Blog Besties

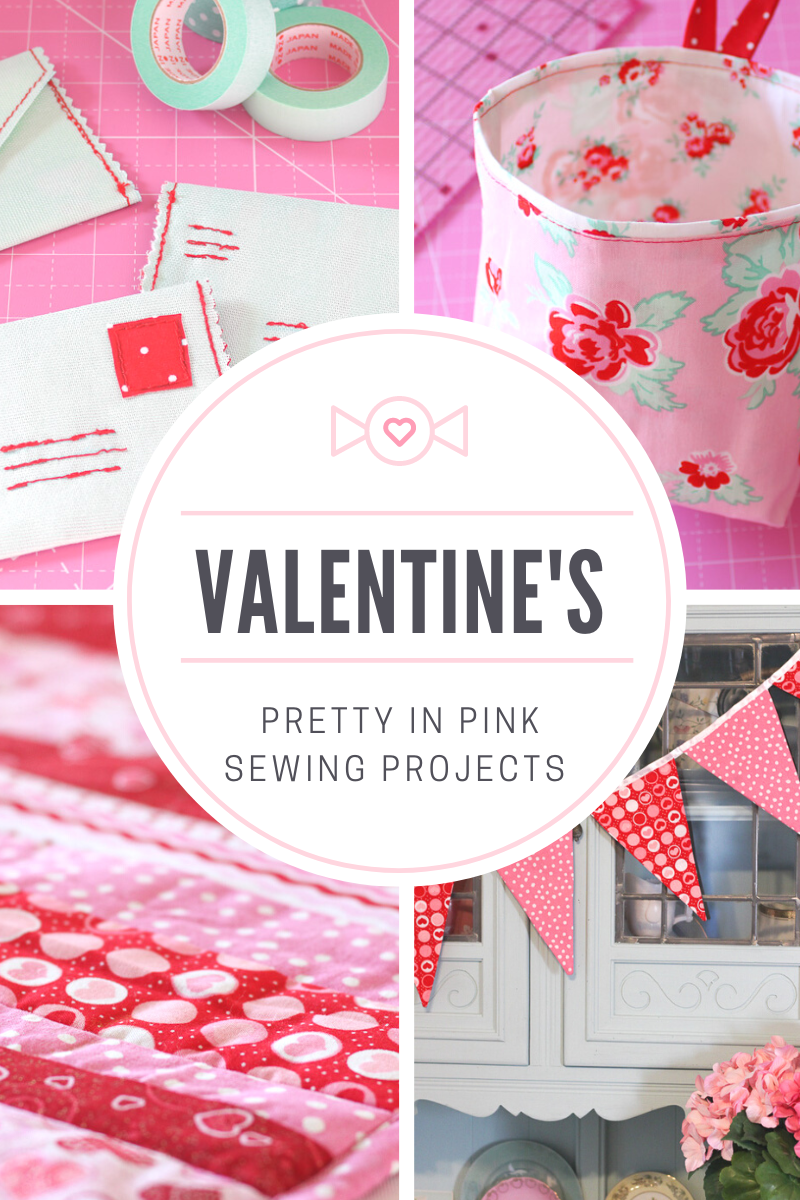
Valentine’s Gifts to Sew
Sew valentines, home decor, and gifts with these free sewing patterns. Table runners, pennant banners, gift card holders, fabric baskets, and other sewing ideas. DIY your holiday home this year with handmade gifts.

Love is in the air. I can feel it, and I can smell the chocolate. Now, I know Valentine's Day isn't for everyone. But it's for me! Is it for you, too? Pulling out the pink and red decorations is the highlight of my February. Or, sometimes late January. I love DIYing the next few holidays that are coming up too. I'm excited for Easter, St. Paddy's Day, and even the 4th of July.
Valentine's Day is all about hearts, hearts, hearts. But, you don't necessarily need heart themed fabric to sew Valentine's projects. You'll see some heart fabrics were used in these projects, but anything red or pink will do just fine. Sift through your stash and scrap bin to give those red and pink fabrics some new life.
If you have little ones, they can help with decorating the house and making their Valentine's gifts too. I wanted to share some quick and easy things that you can sew for Valentine's Day, that shouldn't take a whole day. A few of these were made in previous years, and some were made this year.
Let's get our love on!

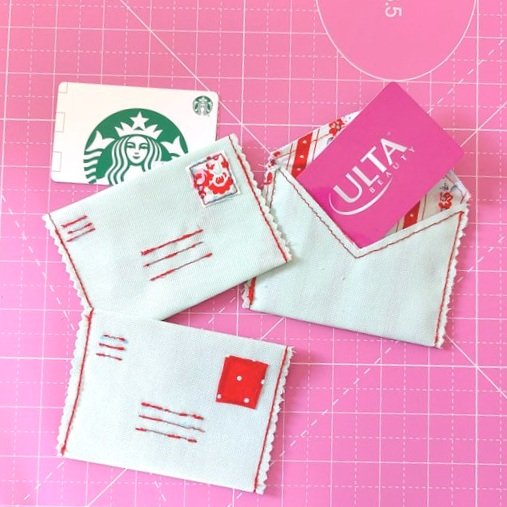
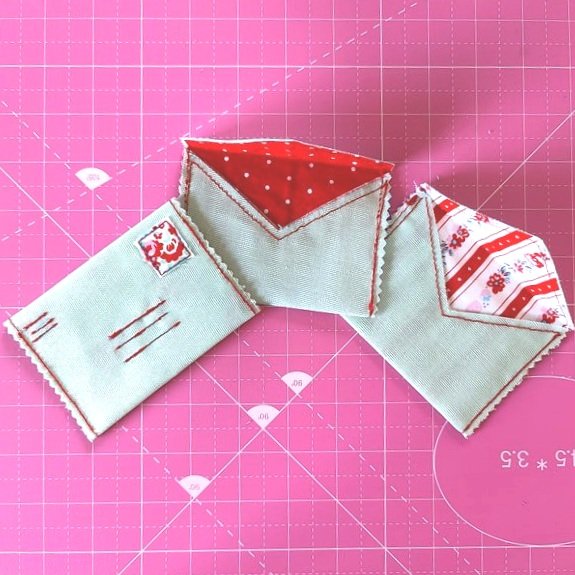
Gift Card Holder
Sew up some cute gift card holders for teachers, neighbors, or friends. We know everyone could use a little extra love these days. Grab a $10 coffee, fast food, or bookstore gift card and slip one inside.
If you have kids, stick a fro-yo, makeup store, online gaming, or other gift card inside.

The gift card holder isn't my pattern. It's by Anne at OrangeBettie.com, and I found it here. Print the free sewing pattern and follow her directions on how to make your own. I skipped the snaps because I was lazy. But, add the snaps or a button or not. Make it your own.
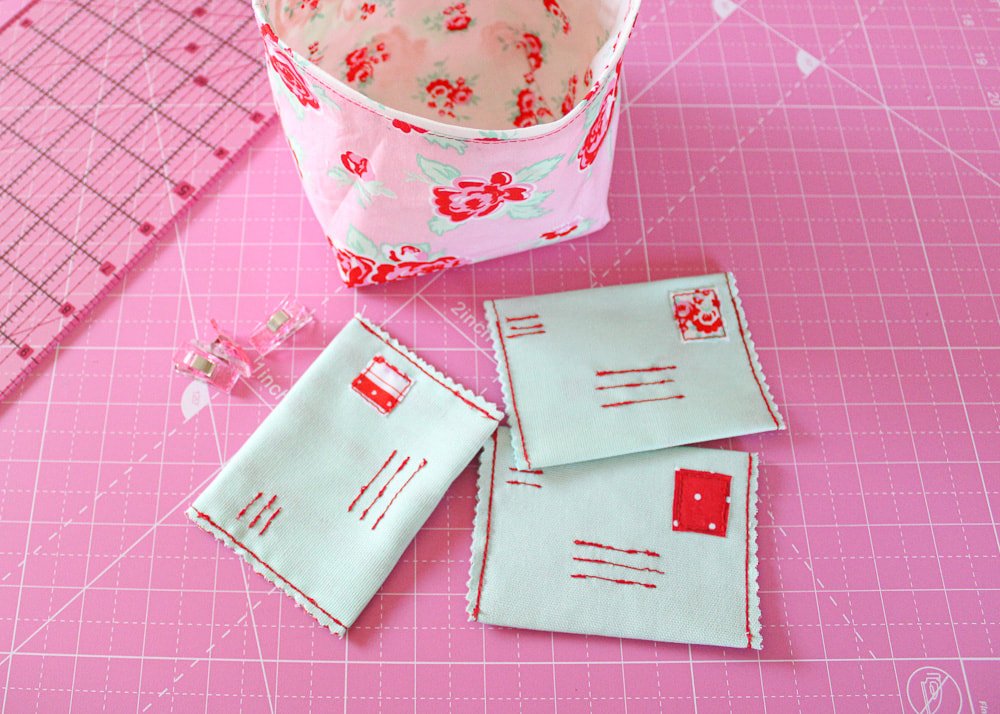
Easy Fabric Basket
Make a simple fabric basket as part of the gift. Fill it with candy, bath salts, a candle, toy cars, a small Lego set, some tiny dolls, a plant, or something else. These really make your gift extra special when paired with something.
This fabric basket is super simple. It doesn't require interfacing, only two layers of fabric. If you'd like something a little more stable, grab my tutorial here. But, if you just want a quick basket, keep reading.

Instructions:
The basket takes about 30 min from start to finish. Less if you're a speedy sewer. Gather your pink and red fabrics.
2 Fat Quarters of non-directional fabric
Ruler and air/water soluble marker
Thread and other sewing notions
Sewing machine
Cut your fabric into one long rectangle, the length, and width you want. I folded a piece of fabric I had in half and trued up the sides. Don't overthink this, it's supposed to be quick and easy. Read: last minute gift ;)
For example, I cut mine about 16" long by 9" wide.

Fold in half to make it squatty, then even up the edges with a rotary cutter, if needed. Cut your lining fabric the same size.

Mark your squares for the boxed corners.
Take your ruler and mark a square in the bottom corners. You can measure 1.5" by 1.5" or 2" by 2", etc. It's up to you. Play with different sizes if you're making a few of these.
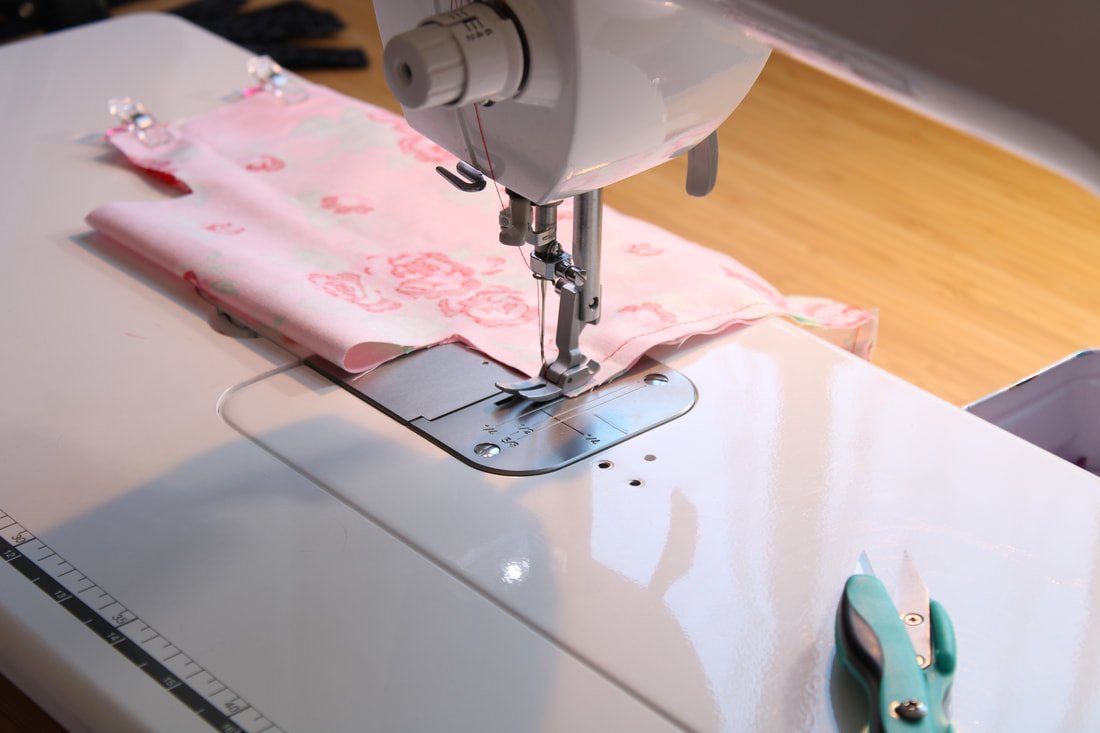
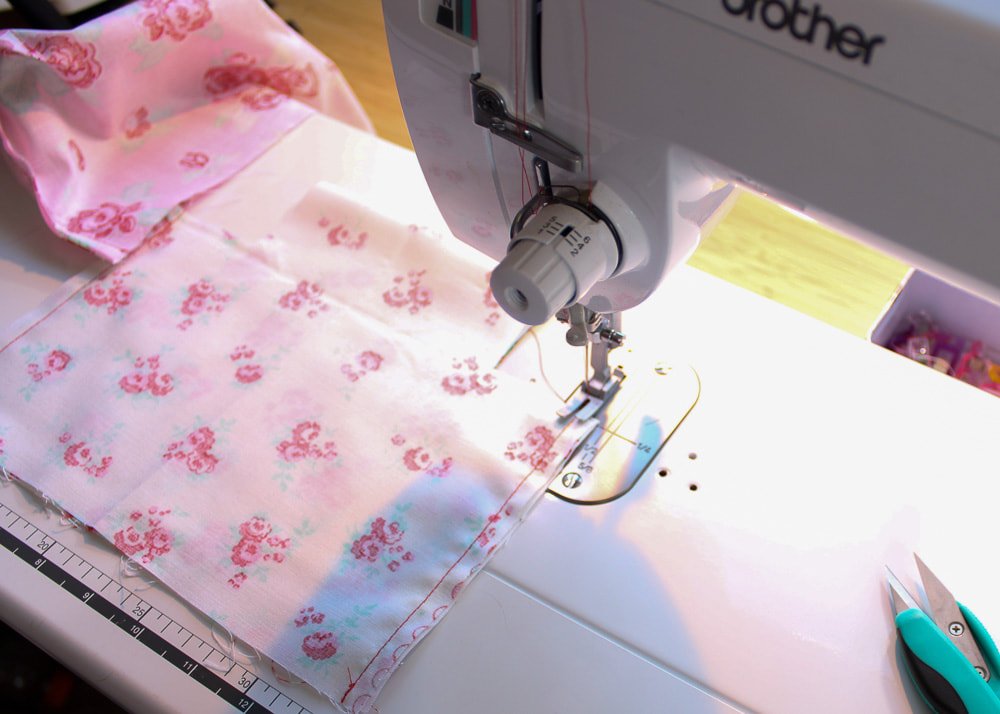
With right sides facing, pin or clip the open sides together (not pictured). Sew, making sure to backstitch at the beginning and end. I used a 1/4" seam allowance. You can use 1/2" if you'd like.
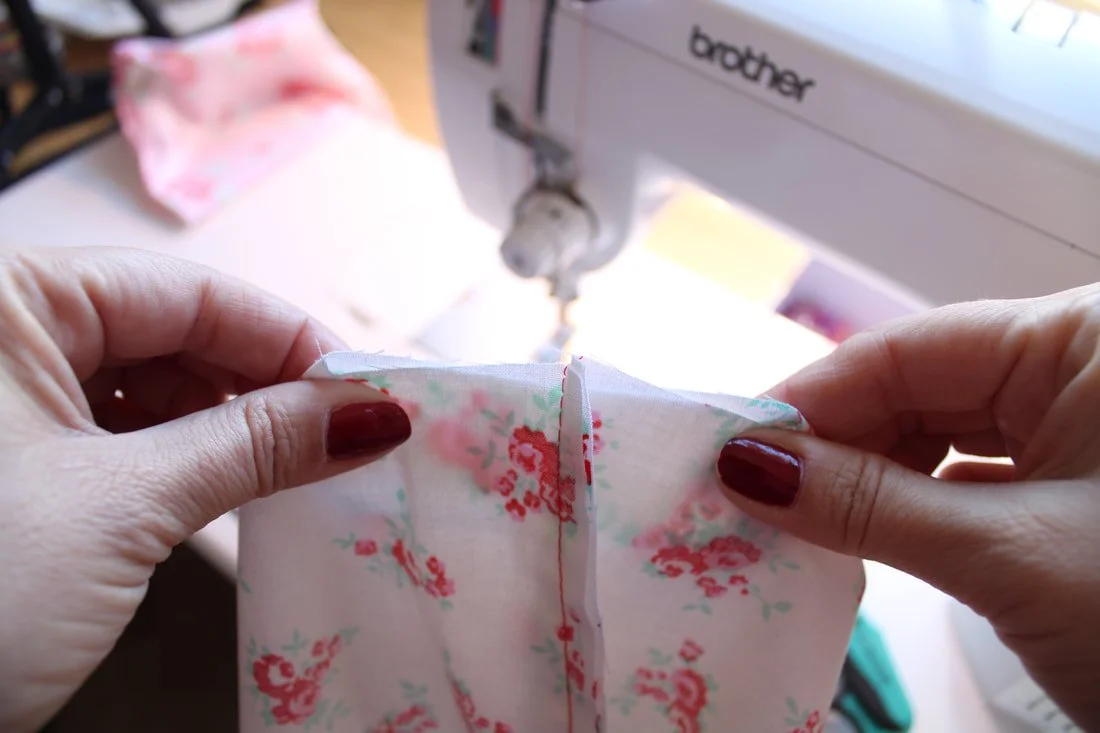
Open out the corners with your fingertips. Then, pinch back together so the seam matches the center of the bottom.
Pin or clip the edges together and sew, backstitching at the beginning and end. Do this for both corners.

Sew the corner seams.

Your corner should look like this. This is the side view of the fabric basket. It forms an upside down T.
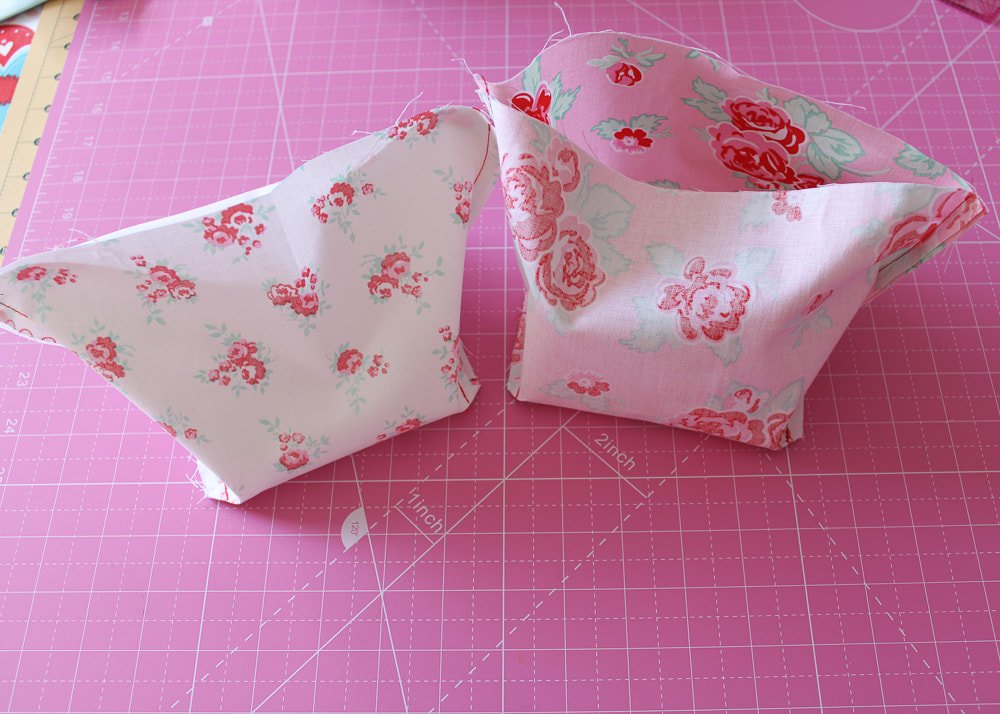
After it's sewn, it should look like the photo above. Do the same thing for the lining fabric.
Now take your lining and turn it right side out. You're going to stuff this inside the other fabric bucket. Pin or clip, matching seams. Make sure to leave a 2-3" gap for turning out. Sew.
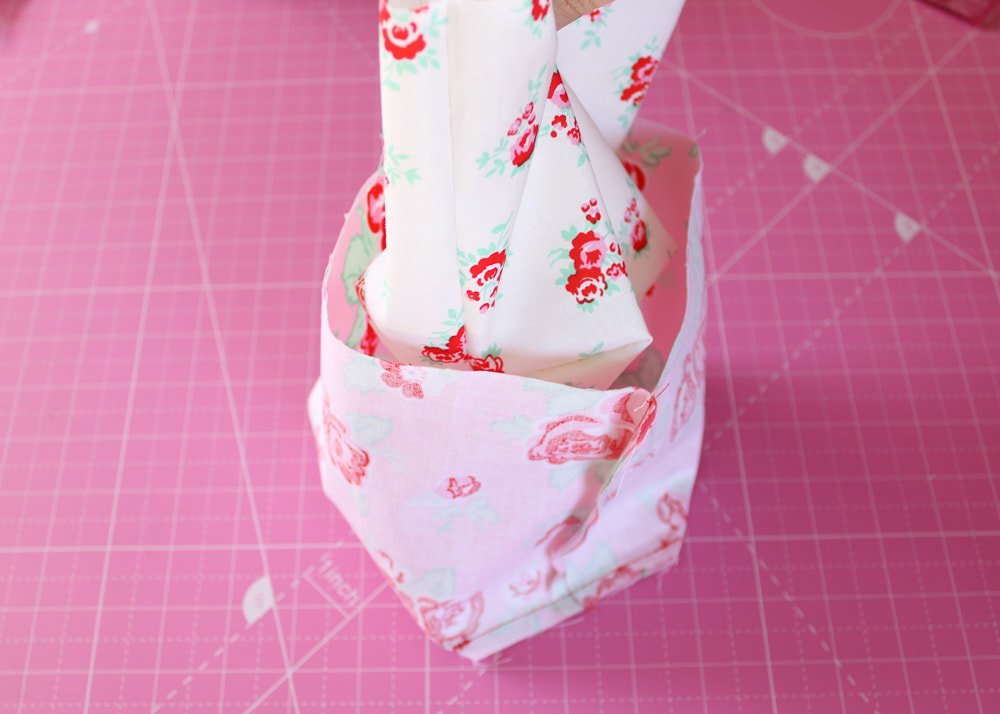
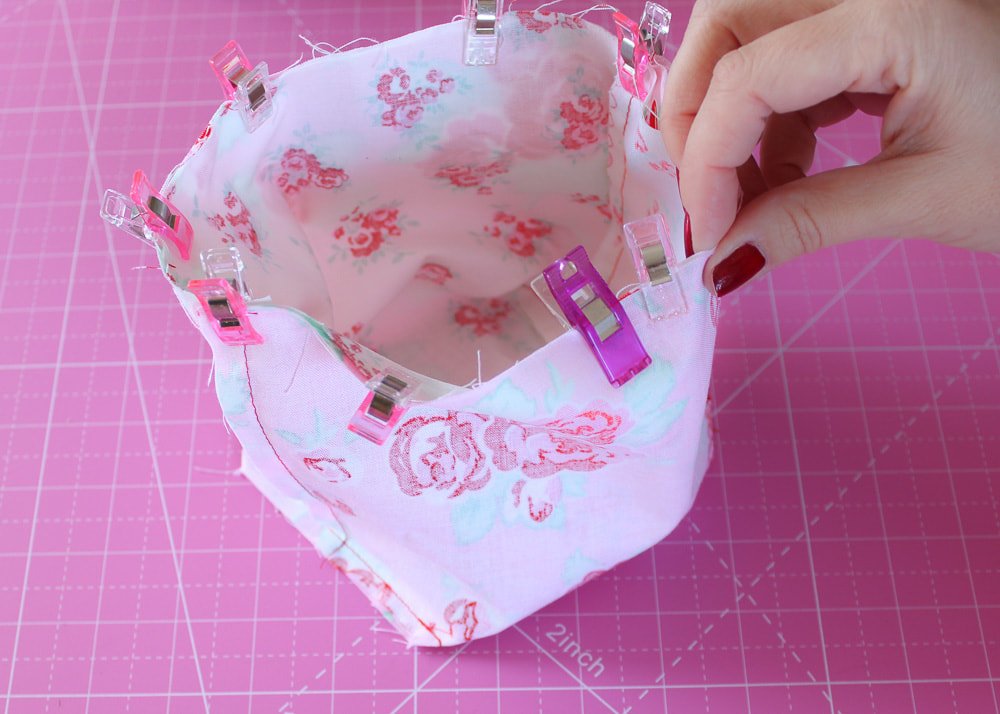
Now it's time to bag out the basket. Start pulling the fabric through the gap you left, gently. It takes a little patience if you have a smaller hole. Be careful not to tug, or you'll rip open a seam or worse, your fabric!

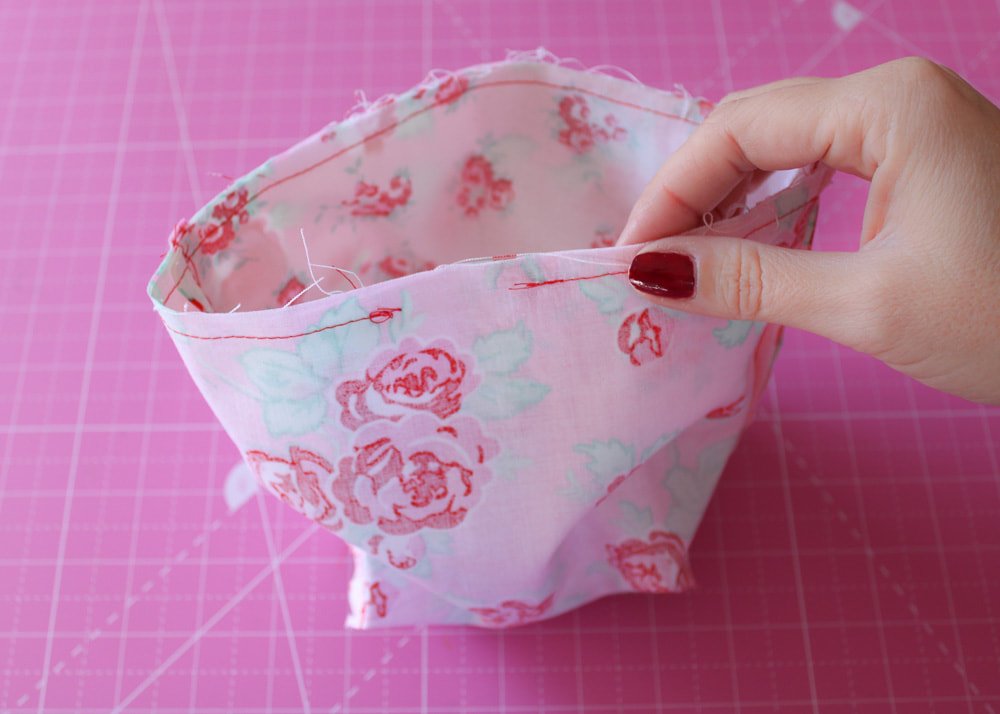
Once it's opened out, your fabric will look like a wrinkly hot mess-express. This is fine. Poke out the corners with a chopstick.

Stuff the lining inside the outer piece. I decided to use the pink fabric for my outer after completing my basket. To change it later on, I just have to flip the basket inside out. It's reversible!

Give it a nice good press. Topstitch around the top, closing your opening.
If you want to add something extra at this point, add a short loop for hanging. Grab a piece of ribbon or make one from a fabric scrap as I did. Pin in place, then sew.
Having a loop gives you more usage options for the fabric basket.

Add a ribbon or fabric loop for hanging. They work great as car trash bins, or makeup brush holders.

Basket Filler Ideas
Fill them with little gifts, candy, and small toys, and give them to teachers, a friend, or a child. I filled mine with fabric clips. Happy Valentine’s Day to me. Haha
I usually use interfacing for these, but for a quick gift, they are fine without it. Of course, you can make a few of these to decorate your house too. Place them on the coffee table, console table, kitchen counter, etc. Make them bigger or smaller. The sky is the limit!
Pennant Banner

I made these years ago and still put them up every year. Pennant banners are my favorite type of decoration. They are simple yet make a big statement. You can make yours with two layers of fabric sewn and turned out, or a single layer one. Nobody will see the back if it's displayed on a wall or cabinet.
There are tons of free pennant banner templates online. Do a quick Pinterest search, and hundreds will come up.
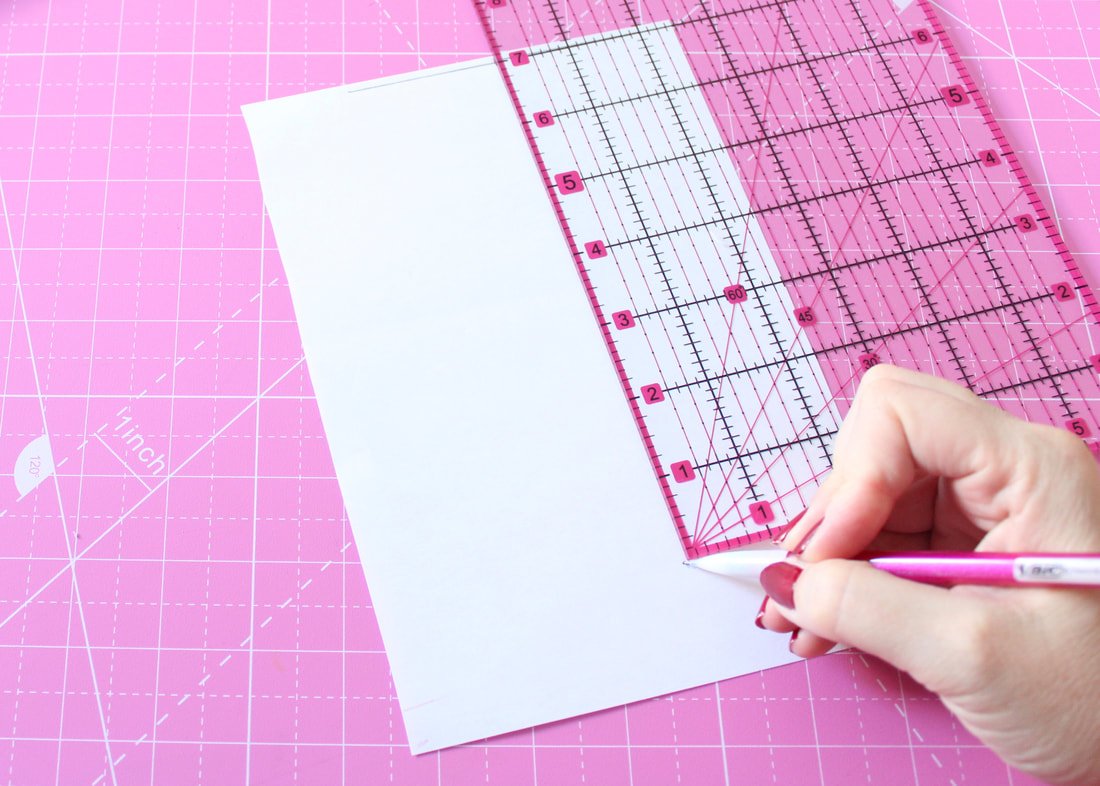
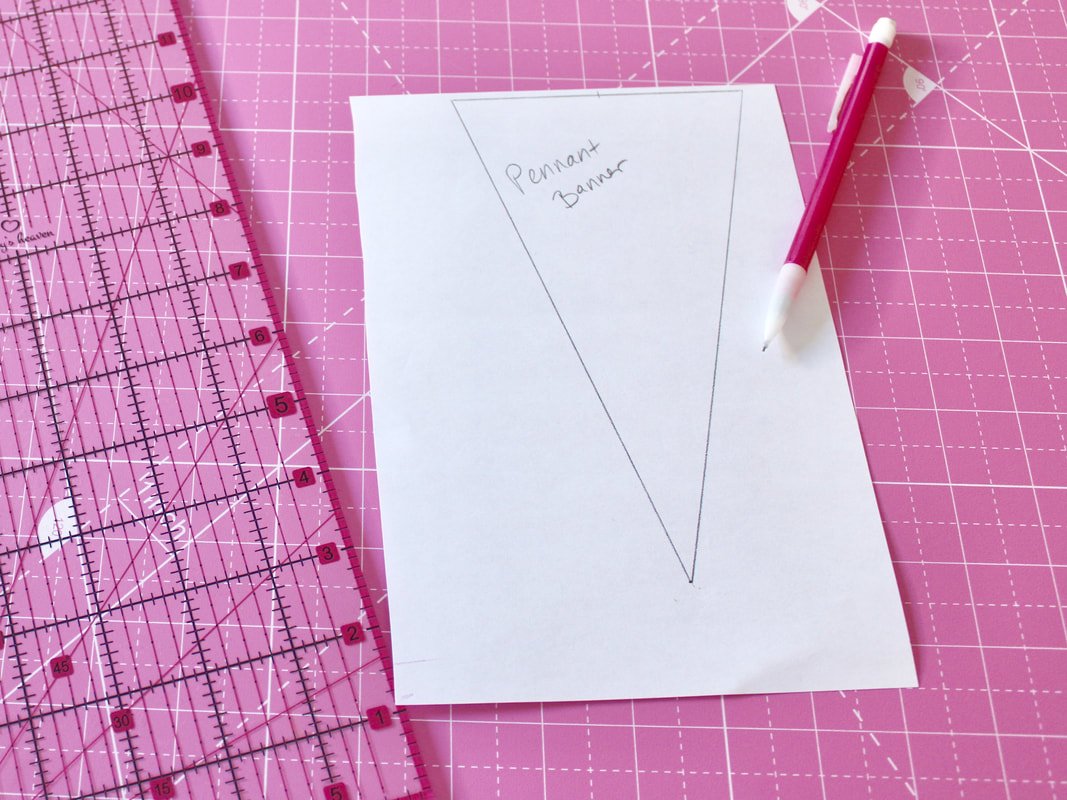
However, to make your own pennant, grab a ruler, some paper, and a pencil.
My triangle one is 5" wide at the top and 8" long. We'll use those measurements for this example.
Draw a 5" long line at the top of your paper.
Mark the 2.5" spot.
Draw an 8" line straight down from the 2.5" spot.
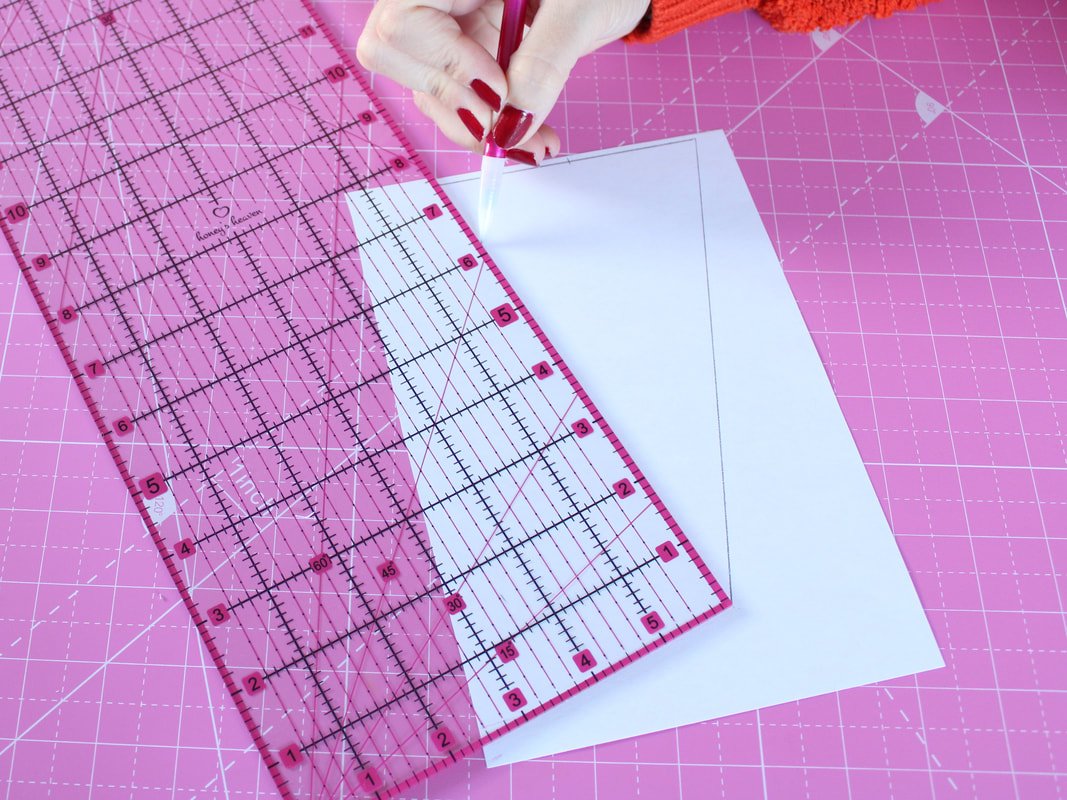
Connect the end of the long line to each end of the short line, forming a triangle.
That will be your template. It's easy, right?
Make an odd number of them. For some reason, an odd amount looks better than an even amount of pennants.
Use your own measurements to make it longer, wider, shorter, etc. Trace onto your fabric scraps. Sew a ribbon or bias binding on top to connect the pennants. Leave long tails at each end for tying onto something.

Ways to change up the look:
Pink the edges for a fun retro look
Leave the edges raw and let them fray a little bit. (They won't fray much because they are cut on the bias).
Sew different style fabrics together to make it reversible.
Sew multiple sizes on top of each other to create a layered look
Use embellishments, ribbons, tassels, etc.
Make one for every holiday.
Below is another one I made out of felt. I added buttons and other embellishments to add some pizazz.
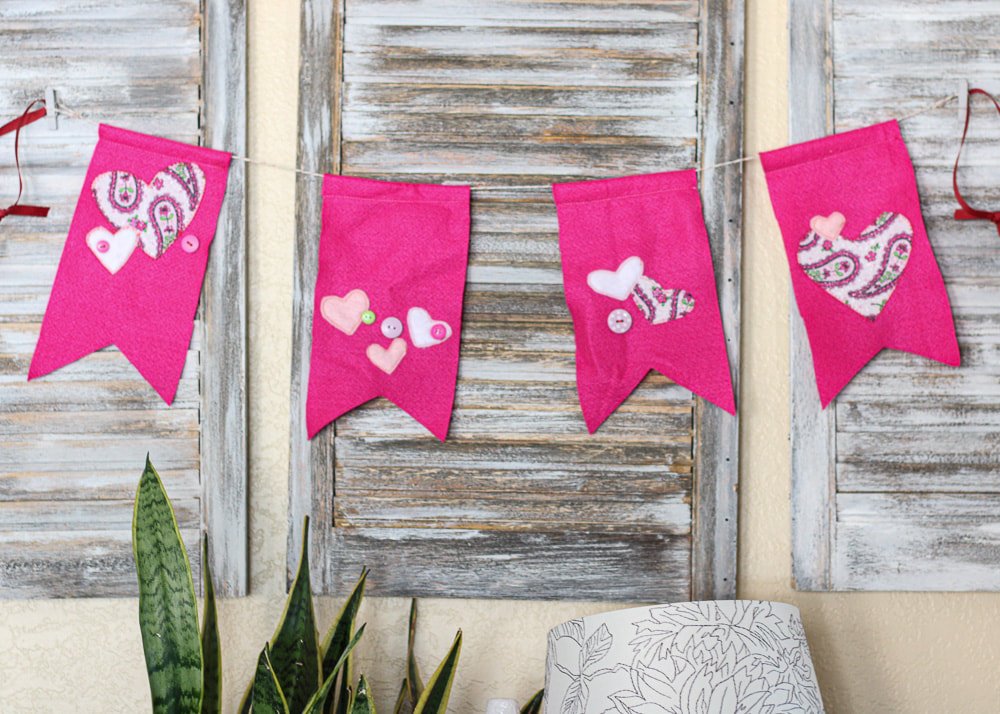
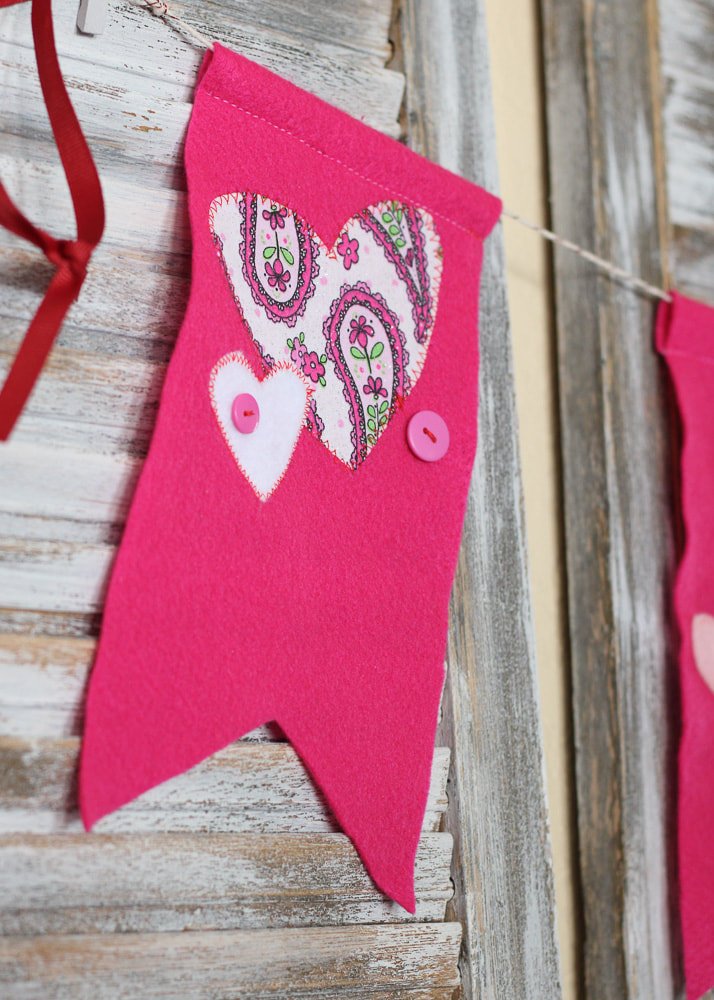
Table Runner

I made this simple table runner many moons ago. It's an easy strip quilt design that was pieced together using fabric scraps I had on hand. The whole thing took around 2-3 hours from start to finish.
I sewed the long edges together.
Used spray adhesive to temporarily attach the backing (ugly scrap fabric)
Stitched in the ditch along the seam lines.
Attached the binding by machine.
Wah-la! Quick and painless table runner.
Measure the table you want to add some Valentine's Day decor to and make it for that size. Table runners are usually a little bit shorter than the length of the table. I don't know the exact math, but Google probably does.
Easy peasy! It goes on my coffee or kitchen table, depending on my mood.

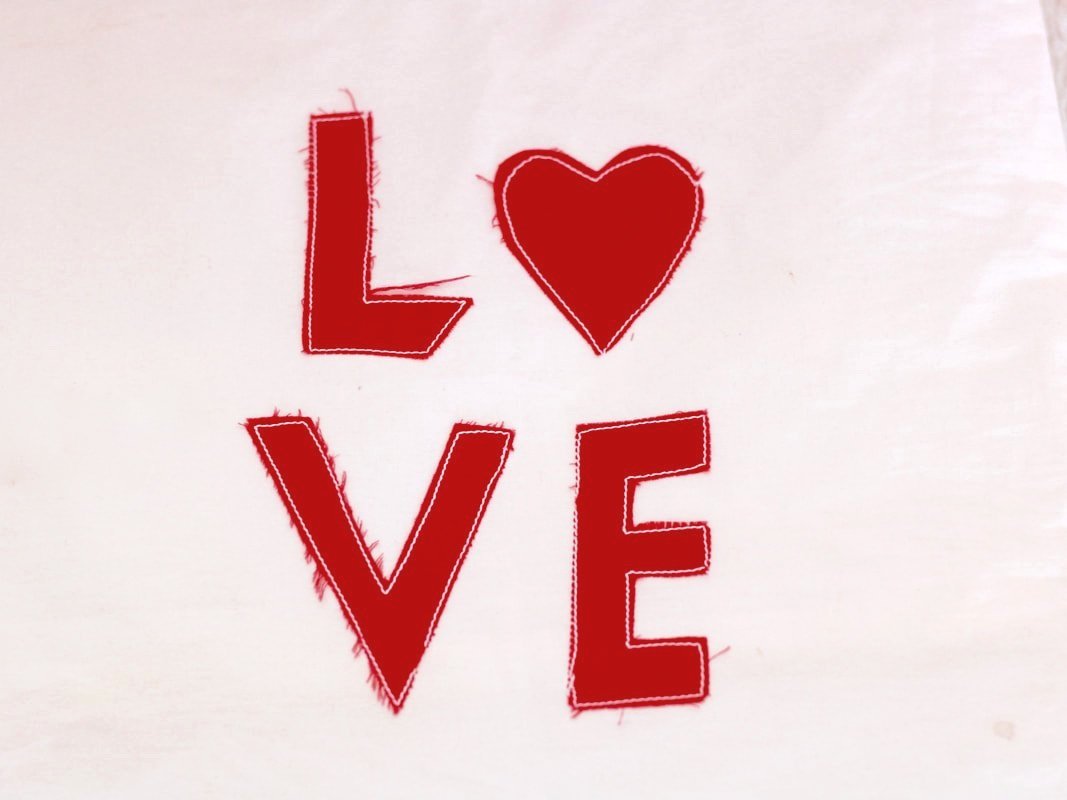
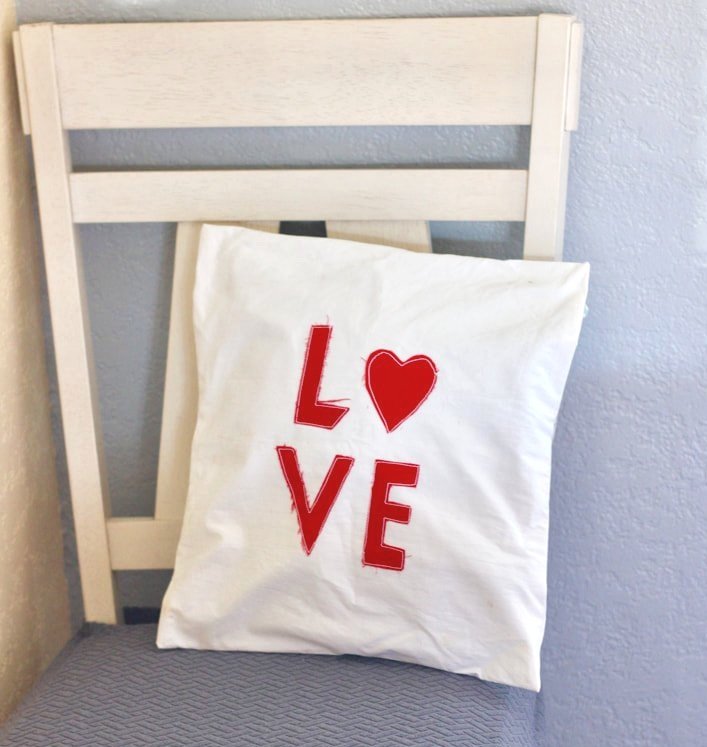
Pillow Cover
Last but not least is a pillow cover.
They are fun to make, and you can use different fabrics to cover your already existing throw pillows. Again, adding embellishments, embroidery, or other trims will make it extra fun.
Below, I cut out letters from fabric and sewed them on. Nothing fancy, but it was quick and easy. This pillow cover is over a decade old, and the style is a bit dated, but I still use it. As I was taking photos, I realized how worn the letters have become and my stitching is subpar. Sometimes, it's fun to go back and look at old sewing projects. It's nice to know my skills have improved over the years.
If you've never made a pillow cover and don't know where to start, head to this blog post. I share some Halloween pillows I made and how to use an invisible zipper.
I hope I've inspired you to decorate for Valentine's Day and create some handmade love-themed items. Remember, sewing for a holiday should be quick and painless. Take a shortcut here and there when you can. All in all, just have fun with it.
Happy St. Valentine's Day and Happy Sewing!
XOXO,
Annette

Gardner Top by Gertie
Sew the GArdner top by Gertie at Charm Patterns. It’s one of her Patreon exclusives and it’s a beautiful top. It uses knit fabric, sheer fabric, and a single button. It’s easy and could be for an adventurous beginner. It is casual yet elegant.

The holidays call for fancy fabrics and sequins. Don't you agree? There's just something fun about wearing sparkle during the festive month of December, isn't there? Add soft velvet and, I'm in! If sewing velvet scares you, read this post. I share my sewing machine and tips for tackling tricky fabric.
These Gardner tops fulfilled my fancy holiday fabric needs. The fabric was originally for vintage-style turbans. I've wanted to make velvet ones for quite some time. I only had 1 yard of each and was lucky that the one yard worked out. Whew! I changed direction at some point and decided to make Gardner tops instead. The matching sequin fabric went with the red one, and the sheer floral went with the green one.
As usual, I don't go into depth with Gertie's Patreon patterns because I value her as a creator. However, I like to share tips and photos that show you my process along the way. If you're interested in this pattern, join her Patreon membership. She shares new patterns each month and so much more!
I made one Gardner top following the exact directions and another collar-hacked version. This post is full of photos. Let's go!
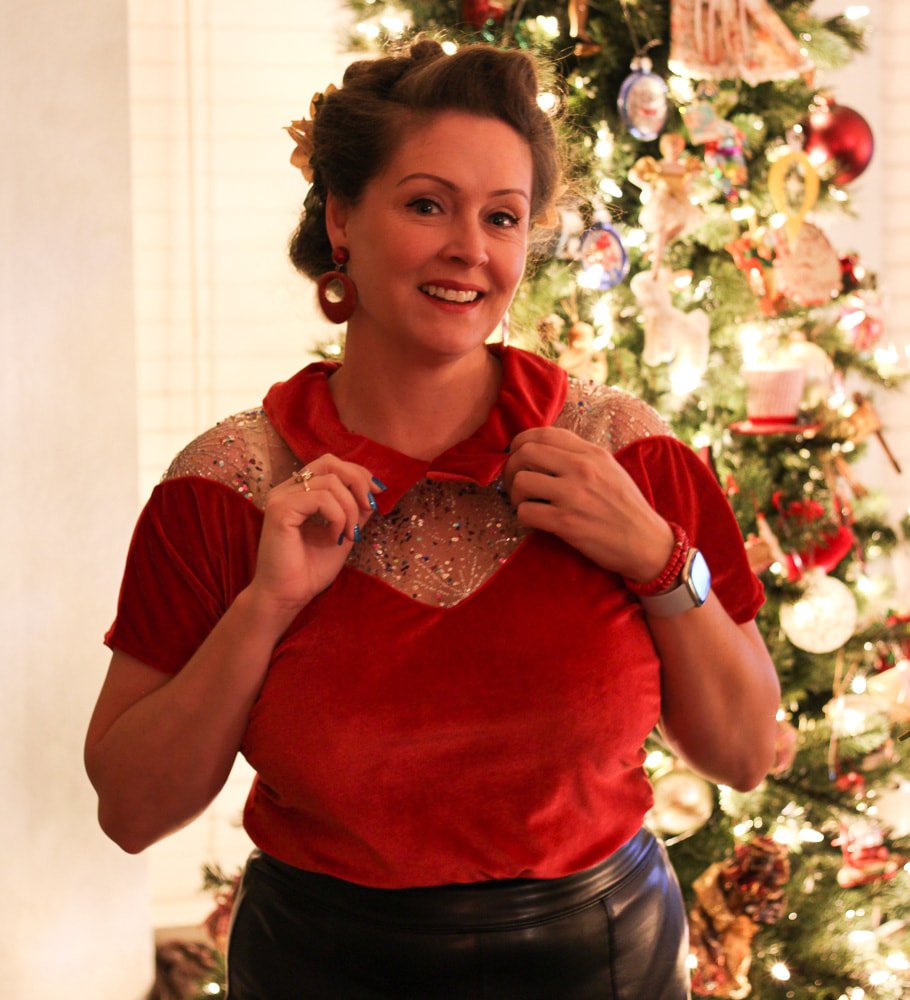
Red Gardner Top (Original Pattern Version)

Red Garner Top
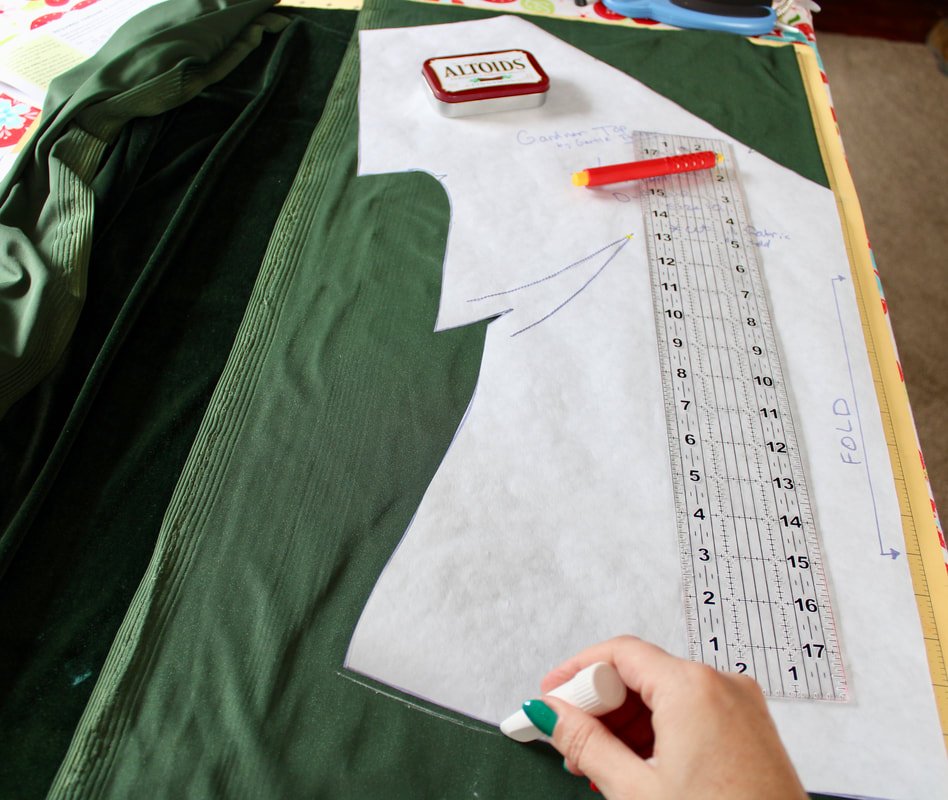
Start your top by tracing the darts onto the front. I prefer old-school wax paper and a tracing wheel system for this part.
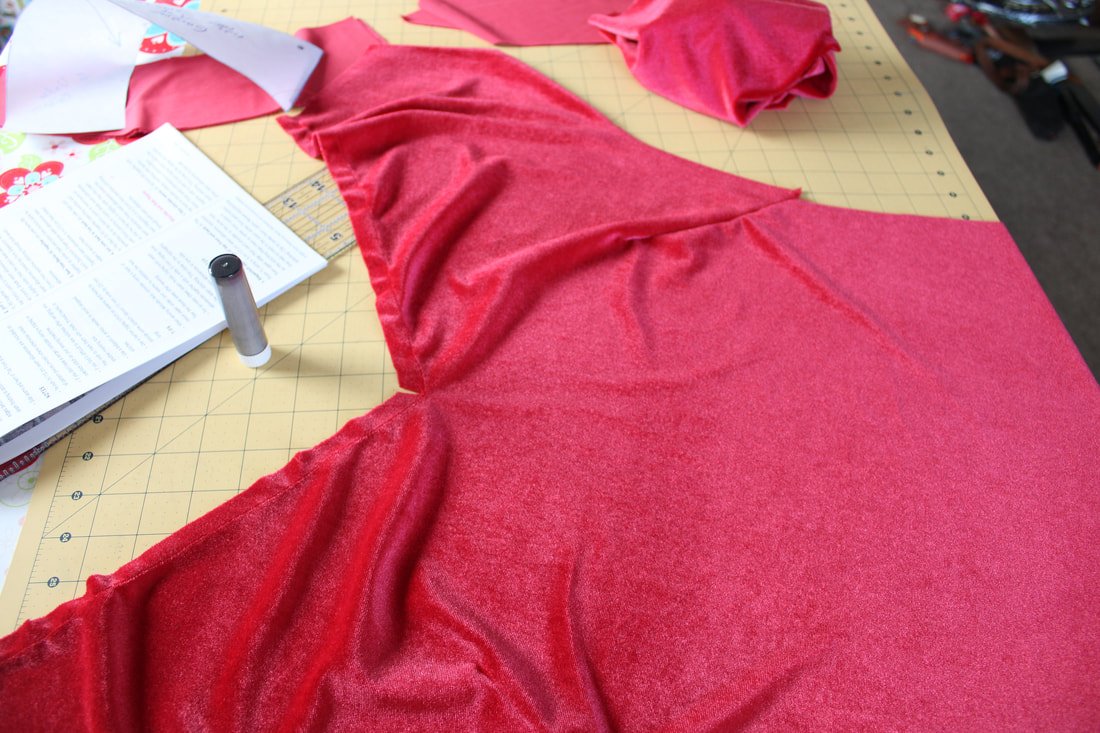
Staystitch the front and back necklines. Sewing from the shoulder towards the center prevents the neckline from stretching out. Never skip this step.
After you sew up the darts, cut them open. If sewing your top with velvet, don't press the seam open.

Cut dart open.
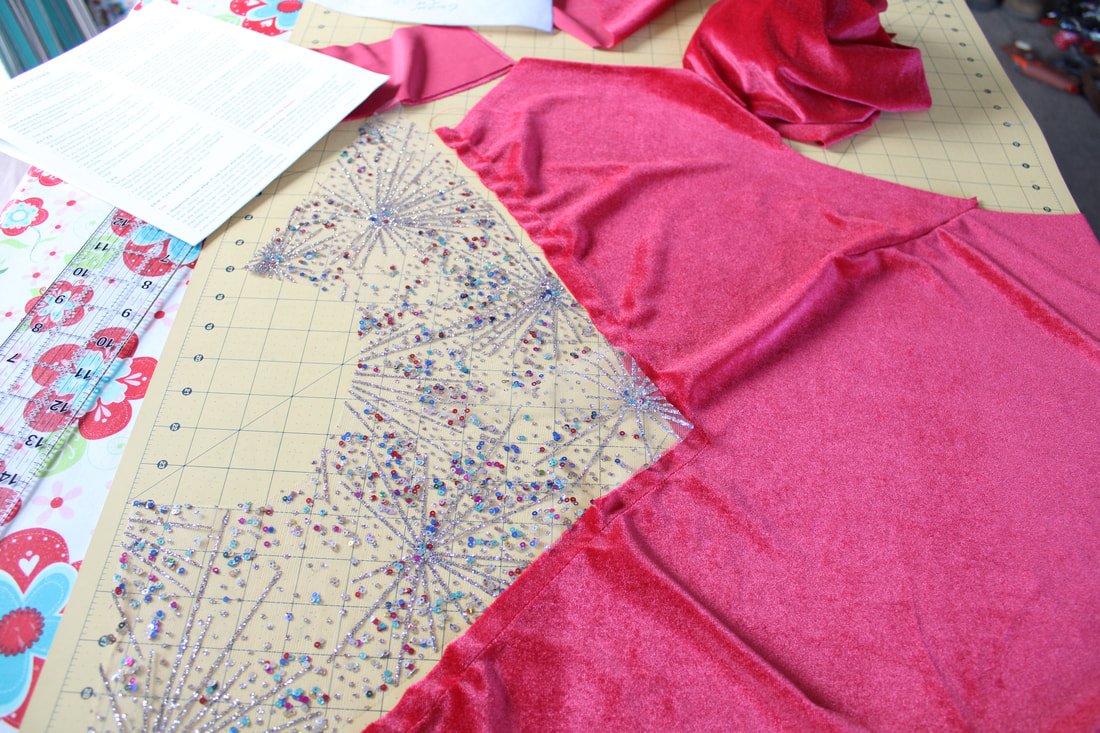
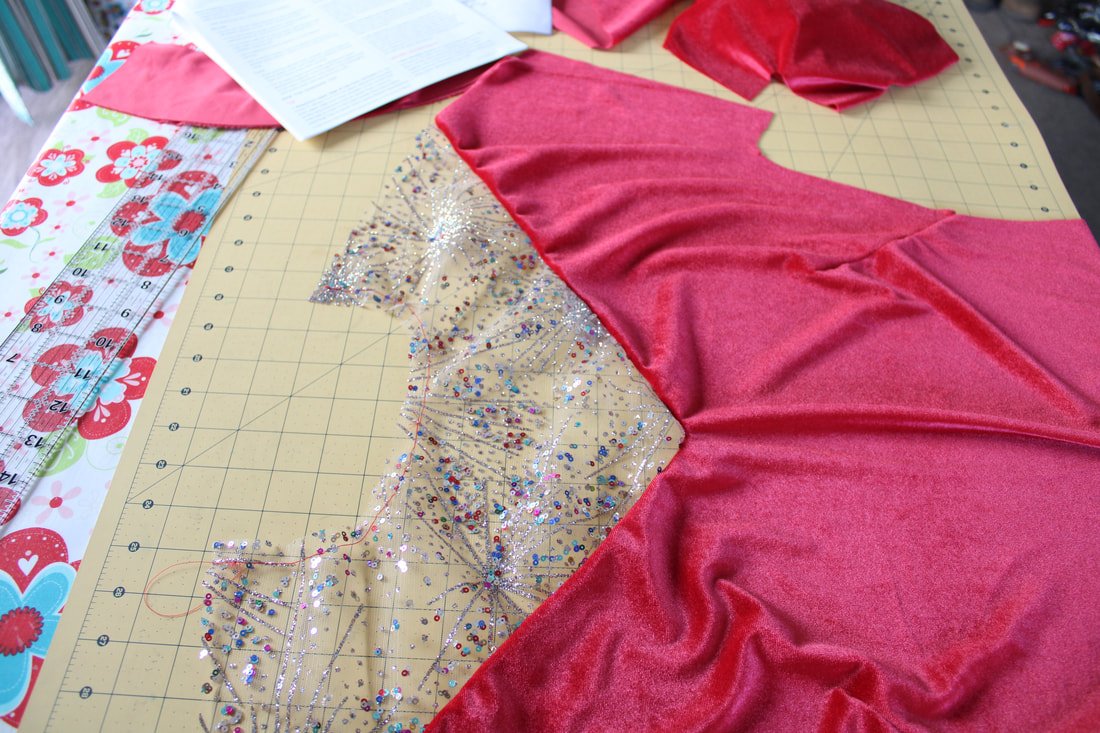
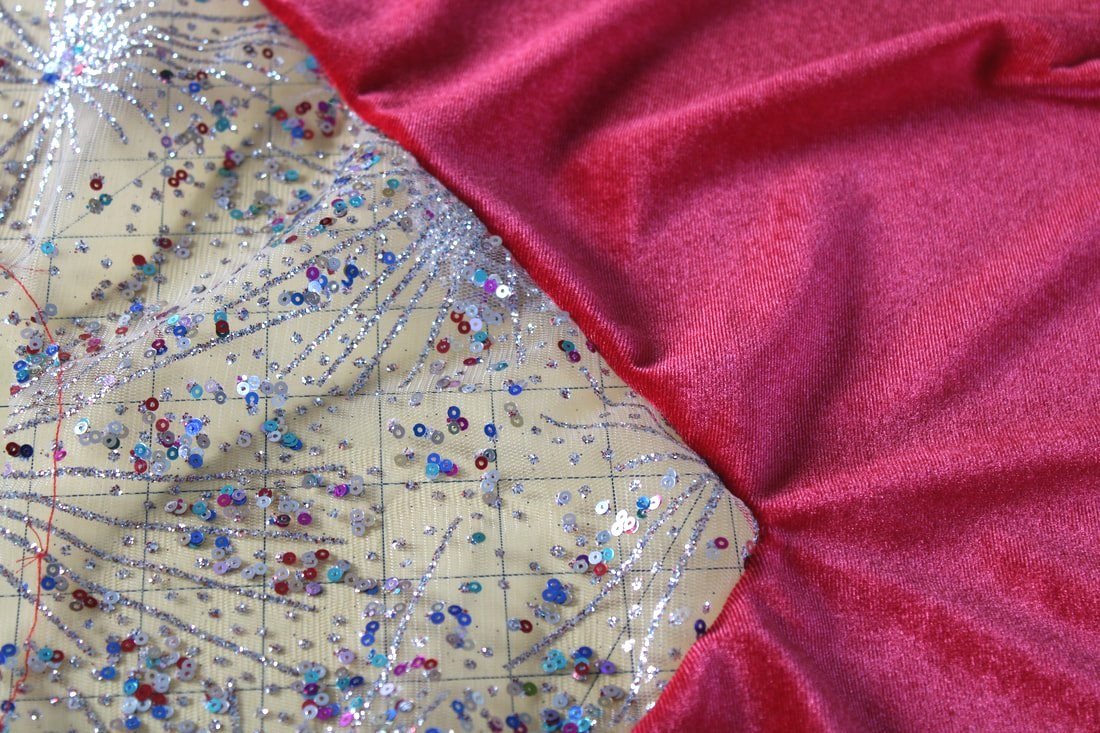
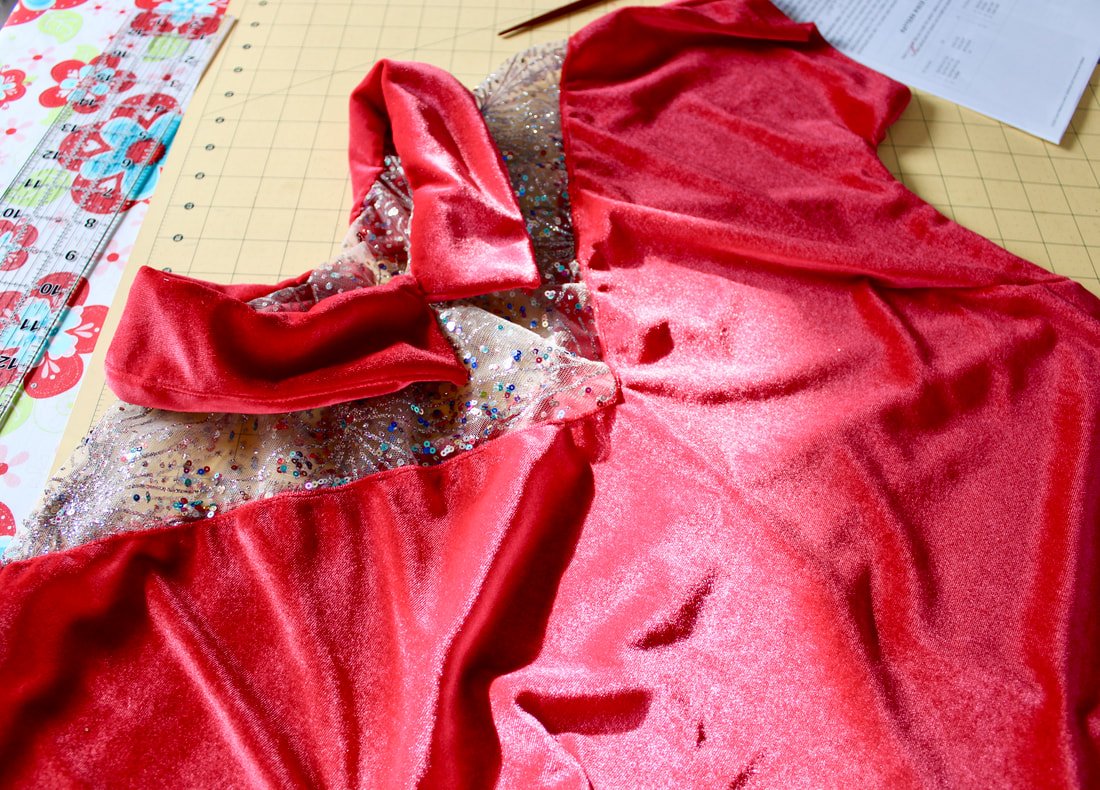
The sheer fabric is full of glitter, sequins, and all the sparkles. Perfect for holiday festivities.
Yay, no puckers!
If you go slow while sewing and make sure your seams are clipped, you shouldn't get any puckers in the V-shaped front. If you do get puckers, unpick that section and re-sew.
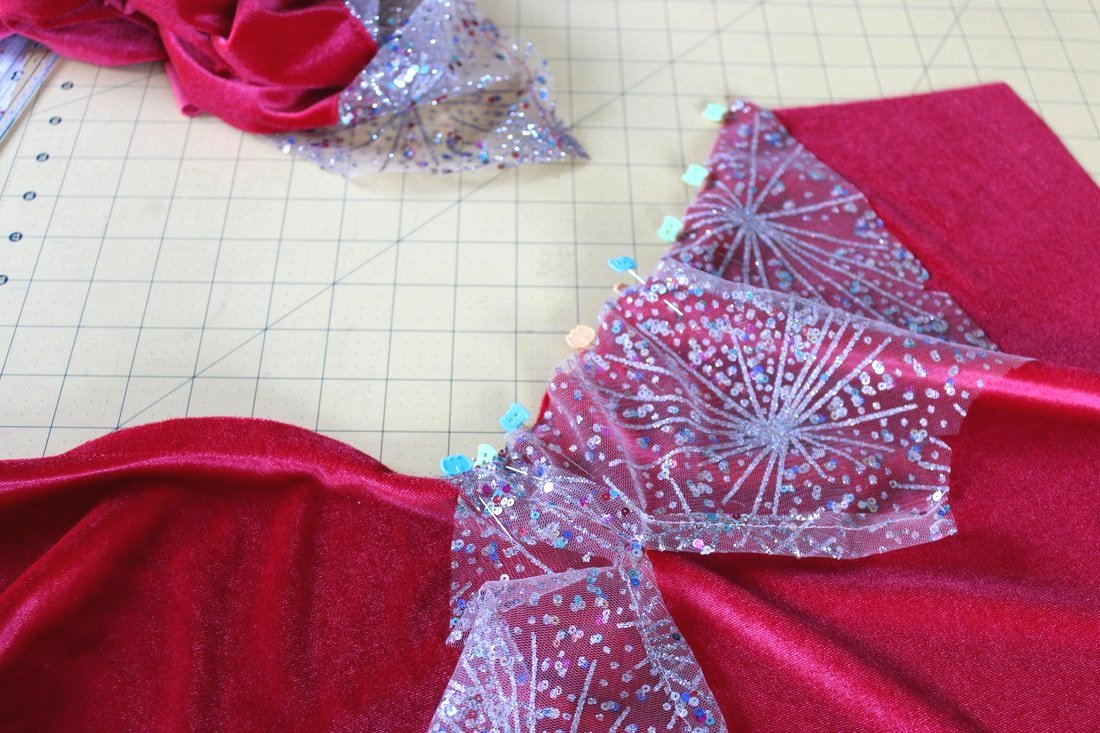
Sew up the back sheer keyhole area. Use thread that blends in with your fabric or skin tone.

Attaching the back sheer piece onto the back bodice went smoothly. It felt easier to sew than the front. But, follow the same process.
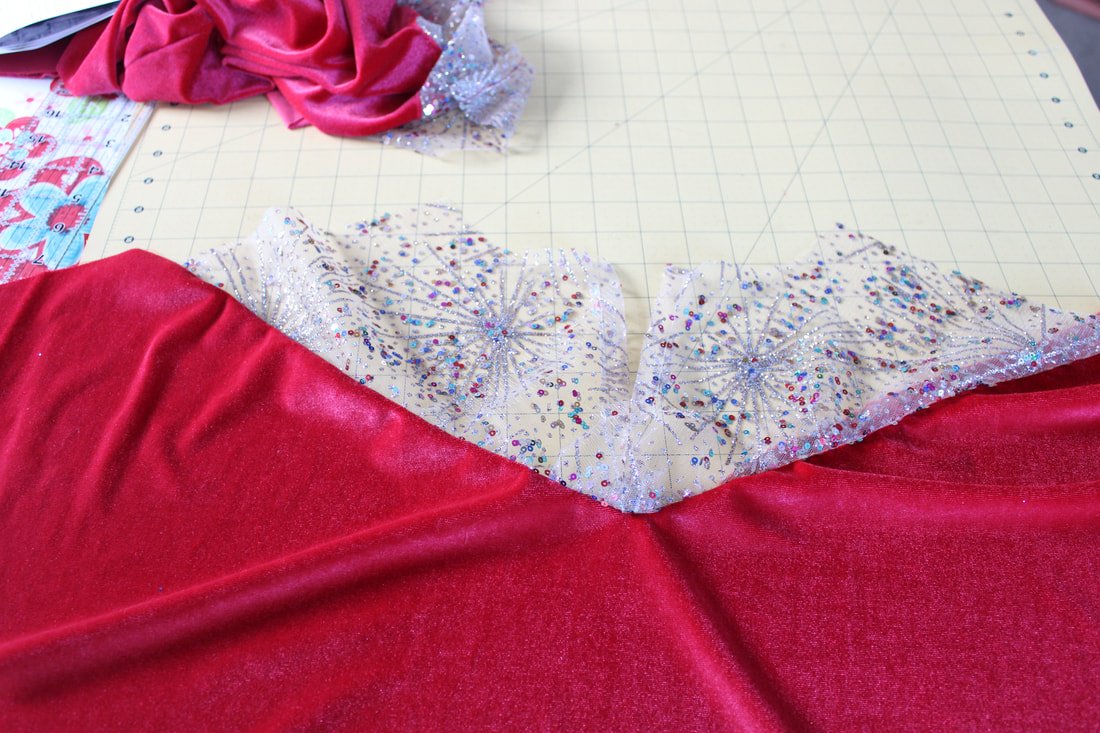
Wah-la! I love how the sequin fabric looks with this red velvet. So festive and fun. Don't you agree?

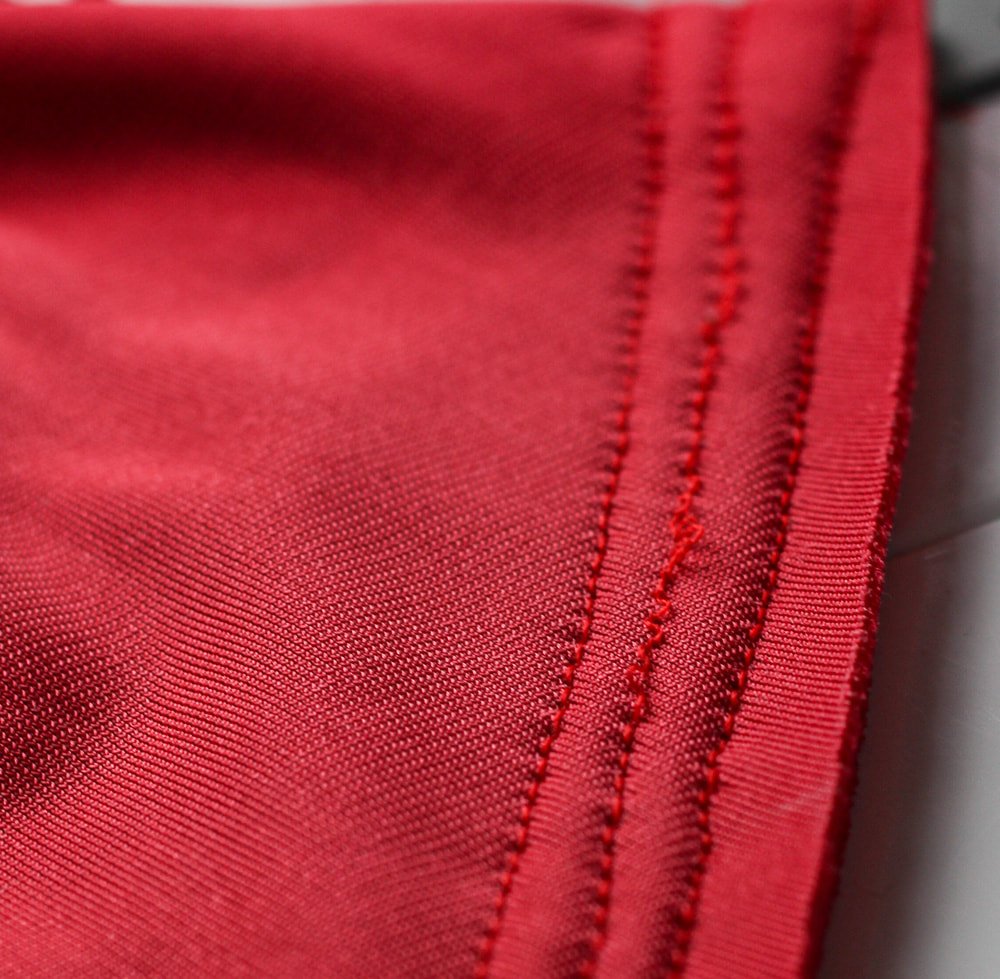
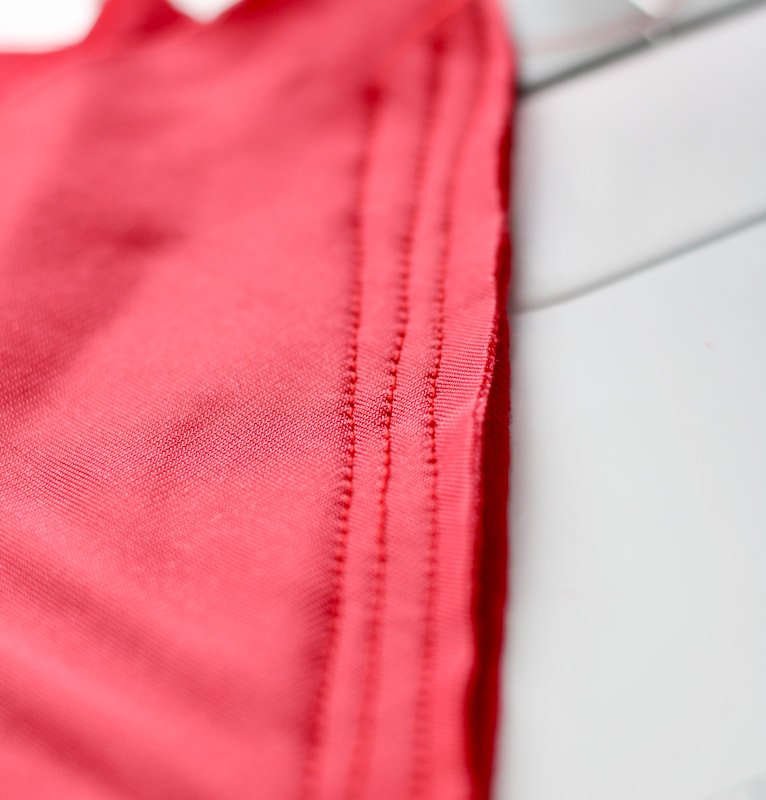
Make sure you top stitch to keep all the layers flattened on the front and back.

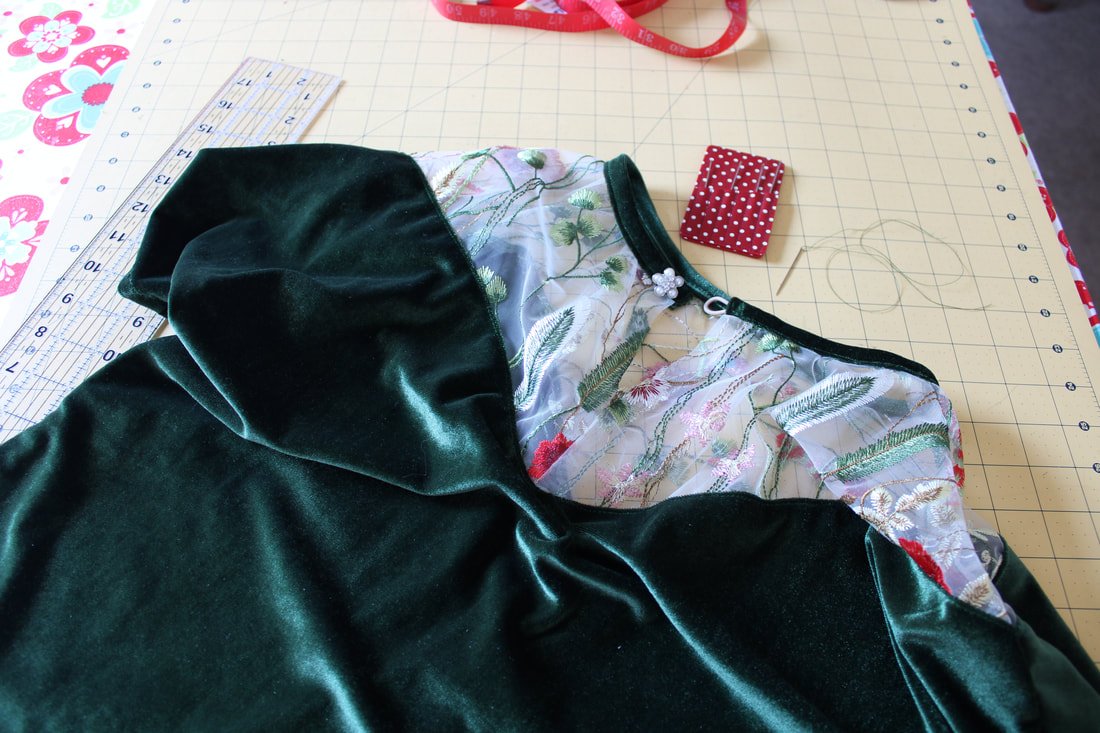
The Collar
The collar was easy to sew, but it was tricky with velvet. I used sew-in interfacing that worked nicely. It went in smoothly, but I had a hiccup when I made the green top. You'll see below how I went in another direction with it.

I did a few hand stitches to keep the collar together. All in all, it worked, but I wouldn’t want to sew another velvet collar in the future.
The sleeves and hem were easy to finish. I love this pattern and see many more Gardner Tops in my future.

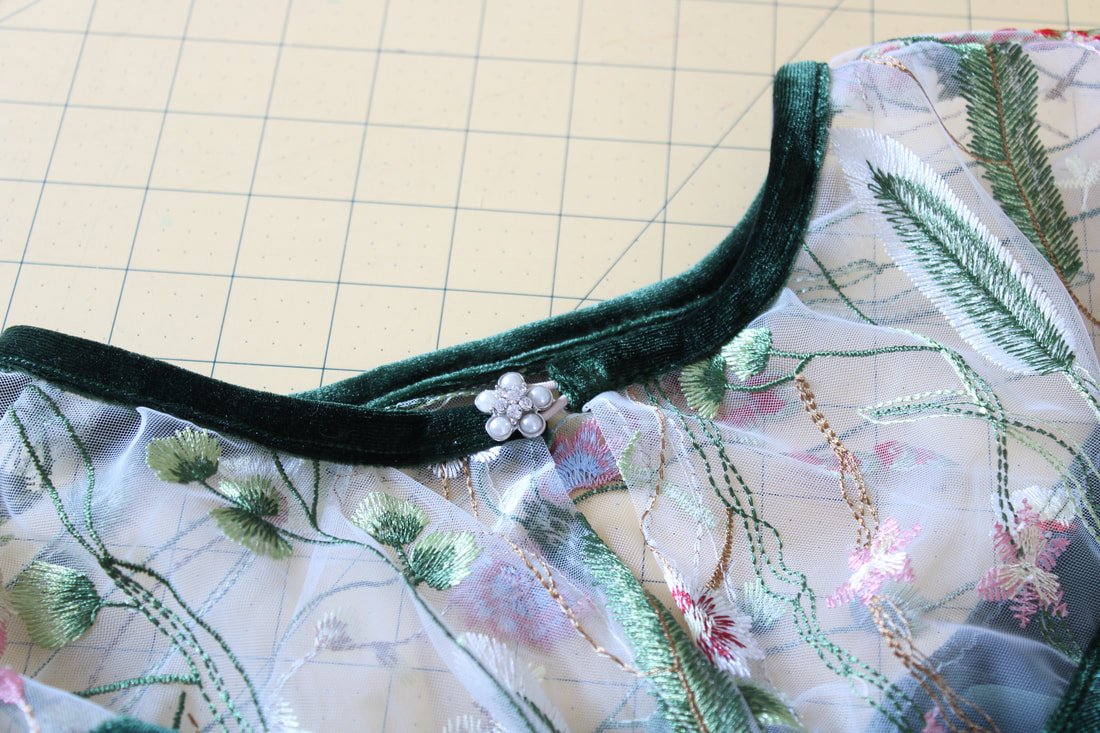
All that's left is to sew on the hook and eye at the keyhole.
I love the fit. I could have gone down a size, but I didn't want it to be too tight. This was a wearable muslin, and you never know until you make it. I love it despite the semi-itchy sequin fabric. Haha

I wore the red one to ring in the New Year. It had just enough sparkle to make me me feel festive.
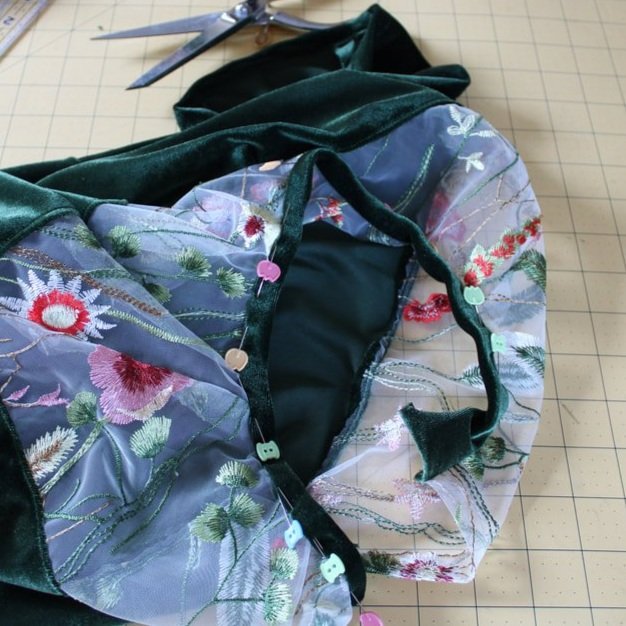
Green Velvet Top (Hacked Collar Version)
I didn't intend this Gardner top to be different, but I tried to fuse interfacing strips on the collar, and it didn't work in the end. So, after ripping out the collar, I ended up with a collar band and button. I wanted to show up in case you had a collar issue or just wanted to do a collar band instead.
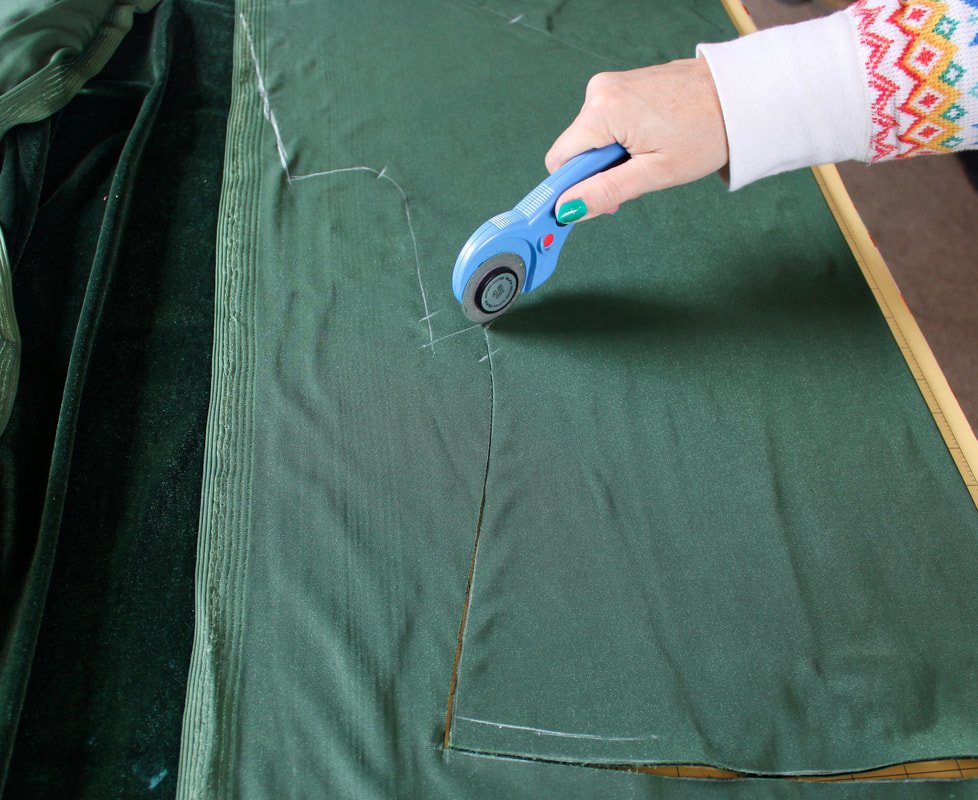
I traced both tops with my favorite chalk pen by Clover.
Cut both tops with my rotary cutter and mat. This keeps the velvet from stretching out.

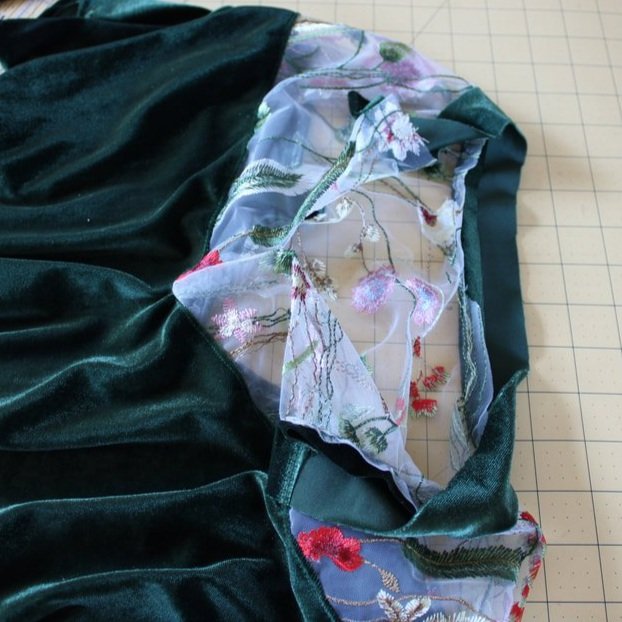
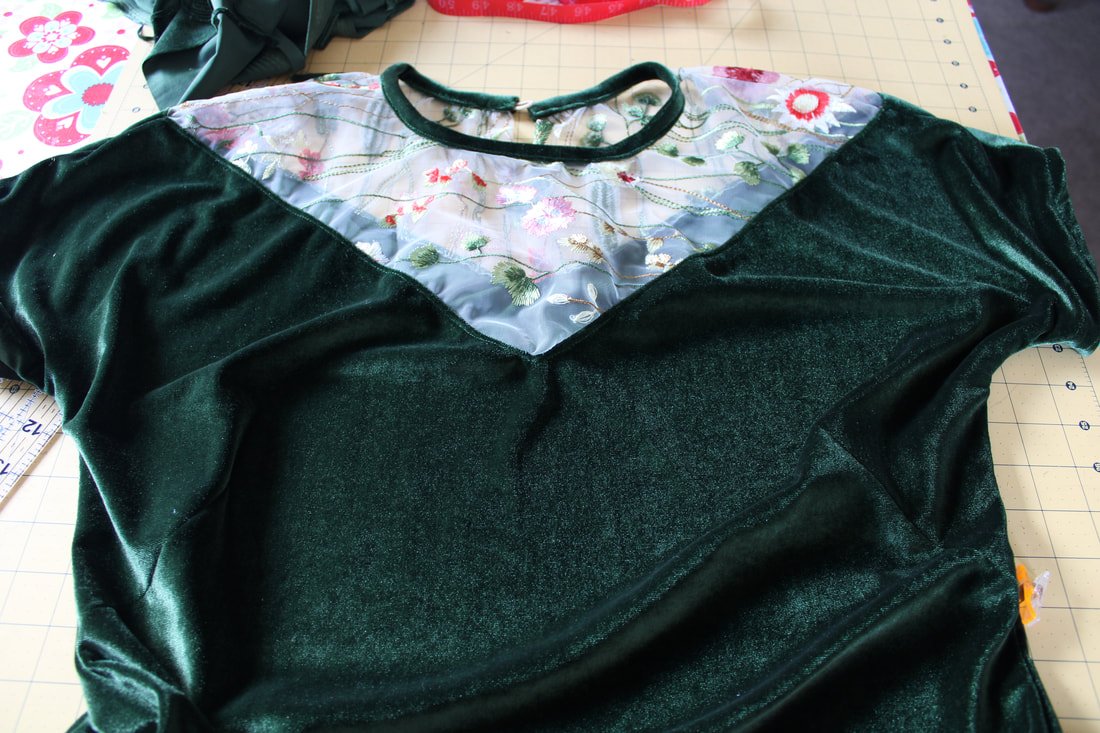
Green Velvet Gardner
I only had 1/2 yard of the sheer fabric, so I had to change the direction of the print to fit this top. The front has the vines running horizontally while the back is going vertically. Nobody will notice unless I point it out. I wanted to show you just in case you run into this issue, too. ;)
Collar Band Hack

I shared on Instagram my collar flub but didn't take any photos with my camera. So, instead, you're only seeing the band option.
I measured around the collar opening and cut a strip that same length plus 1" by 3" wide.

I folded the raw short edge under, pinned the long raw edge to the sheer fabric, and sewed with a 1/4" seam allowance.
Fold the other long edge over and under, then pin and stitch on top. Stitch from one end to the next, making sure to close up the folded side. I stuck a small hair elastic in one end, for the button loop.
Hem the sleeves and bottom hem using a zigzag stitch after turning up once.
I picked the sparkliest button I had in my big button jar. I wish it was gold but, it works well enough.
What do you think? Do you like the original collar version or the hacked band version better?


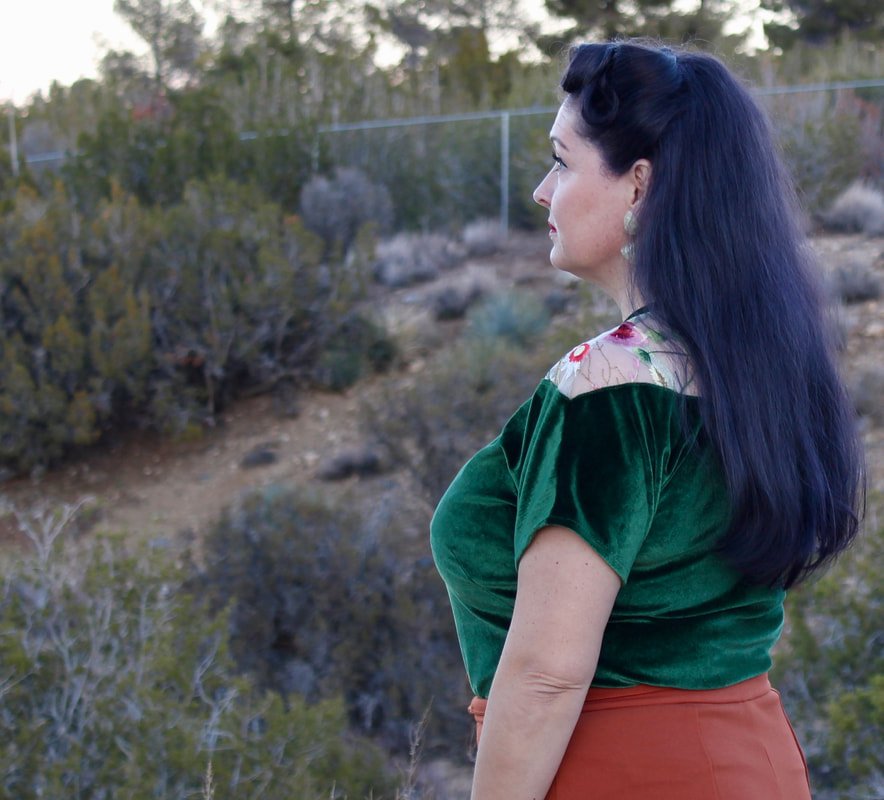

I can't decide if I love the sparkles and red velvet or the florals and green velvet better. They're both so beautiful and fun!
Don't you just love this top? My favorite part is how the sheer sits on the shoulder. It's flawless and so feminine. It's also fancy and comfy to wear. I love how quickly the band came together, where as the collar took a little more time. But, I do love both versions.
Thanks for hanging with me today. Go join her Pattern and get this beautiful pattern along with tons of others.
Happy sewing and happier pattern hacking,
Annette

How to Sew Velvet Fabric
How to sew velvet fabric using the Brother PQ1500SL sewing machine. A pin feed system is the best method to sew velvet fabric. Follow this tutorial on how to set up the machine and sew. A pin feed system isn’t hard or scary. It will help walk the delicate fabric through the feed dogs easily.

Have you always wanted to sew velvet but have been too nervous that you'd ruin the fabric? It's finicky with an iron, let alone a sewing machine right? Wrong. It's easier than you think to sew with. Imagine velvet capes, dresses, and pants!
In the past, velvet has always been a Halloween costume staple around this house. The serger would do all the work for those themed capes and dresses. However, this year, I wanted to dip my toe into something more, dare I say, scary!?
Gertie rolled out her Gardner top on her Patreon, so if you're not a member yet and love vintage fashion sewing, join now! I cannot keep up with all the content and patterns she gives us. No, I'm not sponsored, I just love everything she does for us.
Anywho, back to the Gardner top. The pattern uses knit fabric for the bodice and collar, and sheer or lace for the cutout. I wanted to use some stretch velvet to bump it up a holiday notch. Sequin and velvet scream holiday festivities, so I picked red and green velvet with matching sheer fabrics.
But, before we get into sewing the fabric, let's get your machine set up.
Sewing Machine Tips

These part of my pin feed system. These accessories came with my machine.
I have a Brother PQ1500SL sewing machine. You can read all about it here.
It has a pin feed system that is made for sewing tricky fabrics like velvet. I'm going to show you how to get that set up. If you have a different machine with a pin feed system, refer to your manual to learn how to set yours up.
If you don't have a pin feed system, I suggest reading your manual, as well. But, in a pinch, lower your feed dogs and it might be okay to sew the velvet. I'm just sharing how to do it on my machine because the internet lacked what I was looking for.

See the pin sticking up near the feed dogs? That pin moves the velvet from underneath, similar to how the feed dogs work, but it is more gentle. No velvet will be harmed during sewing.
Use a stretch or sharp needle. This will gently pierce the fabric instead of tearing through it.

Turn the feed dogs to the red position. This lowers them almost fully and engages the pin feed mechanism at the same time.

Raise the presser foot to the red position. This keeps the velvet from being crushed while getting sewn together.

Now that the settings are changed, you have a brand new needle in, and the correct presser foot on, it's time to sew on some scrap fabric.
Grab some scraps of your velvet and practice sewing on them. Sew 2 and 3 layers together using different stitch lengths. I found 2.5mm worked best for my velvet. You might need a longer or shorter stitch length. When I increased the length, my stitches got wonky. Once you get the stitch length sorted out, you should be good to go.
I sewed a few rows just to be sure the stitching was the correct length.
Extra Tips
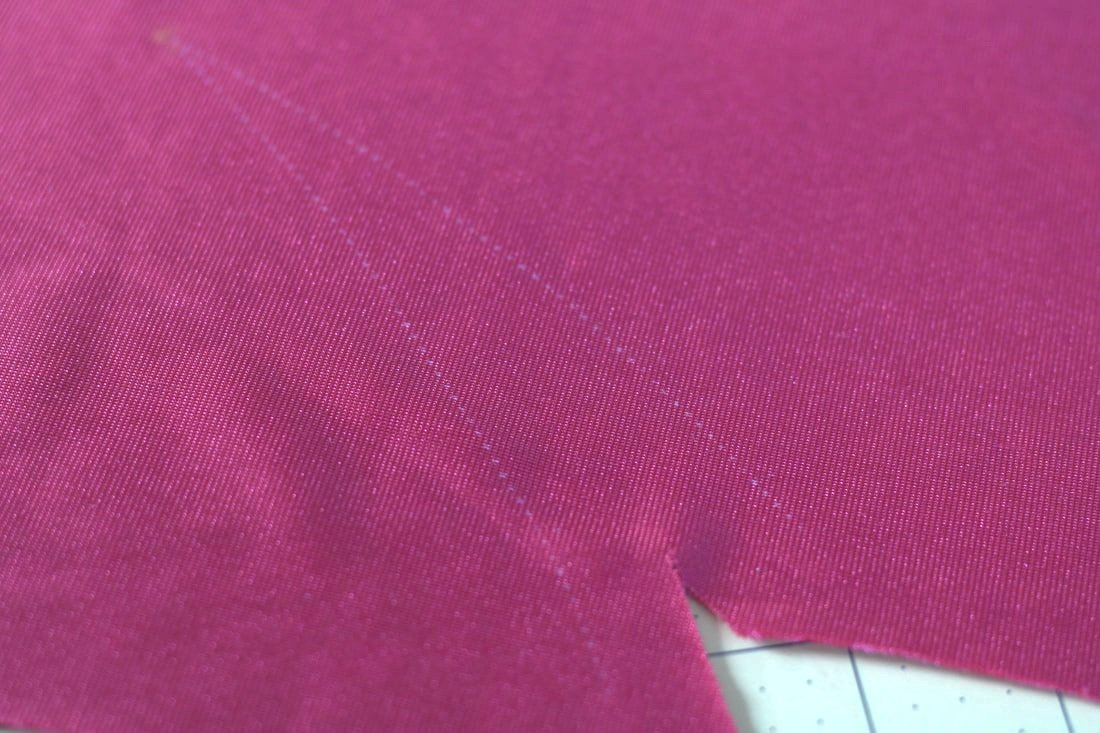
When cutting velvet, make sure the nap is going down. You can test this by running your hand up and down to find the smooth direction.
Use a rotary cutter when possible to cut out your pattern. You can use sharp scissors, but a rotary cutter and mat make it easy and painless. ;)
Trace and cut with the fuzzy side down. It's easier to mark the back of the fabric with a chalk pen.
Use a walking foot if you don't have a pin-feed foot system. It will keep the fabrics from shifting.
NEVER iron velvet. If the 80s taught us anything, it’s to never iron velvet. Haha
Velvet patterns require sew-in interfacings only. You can't use fusibles.
Your hems need to be zigzag stitched. Velvet has a natural stretch so, you want to avoid using a straight stitch for the hem.
Use a stretch, ballpoint, or microtex needle. I mentioned it above, but, thought it was worth mentioning again.
If you'd like to see the process for my Gardner tops, read that post, here. I finished them just in time for NYE. I wore the red one for New Year's Eve. The green one is perfect for wearing during fall through the chilly spring days.
Good luck sewing all of your upcoming velvet patterns. I hope these tips helped you out and made it look less intimidating.
Happy velveting,
Annette

Trying to decide what to ew next.